Zombies Mode Guide and Walkthrough (Season 5 Updated)
★ S6 New Guns: DTIR 30-06 | Kastov LSW
☆ S5 Reloaded Dark Aether Keys and Locations
★ Mr. Peeks | Drum | Locked Diary | Giraffe Toy
☆ Final MWZ Story Mission: Ascension Walkthrough
★ Zombies Map | Dark Aether Interactive Map
☆ Rarity vs Pack-a-Punch Damage Chart
This is a guide to Modern Warfare Zombies Mode (MWZ) in Call of Duty: Modern Warfare 3 (MW3). Read on for a beginners guide and walkthrough of Zombies, Zombies map and secrets, a list of perks, ammo mods, and enemies, and to learn the best Zombies tips and tricks!
Zombies Season 5 Guide
MWZ Season 5 Reloaded Guide and Walkthrough
| MWZ Season 5 Reloaded Walkthrough | |
|---|---|
| 1 | 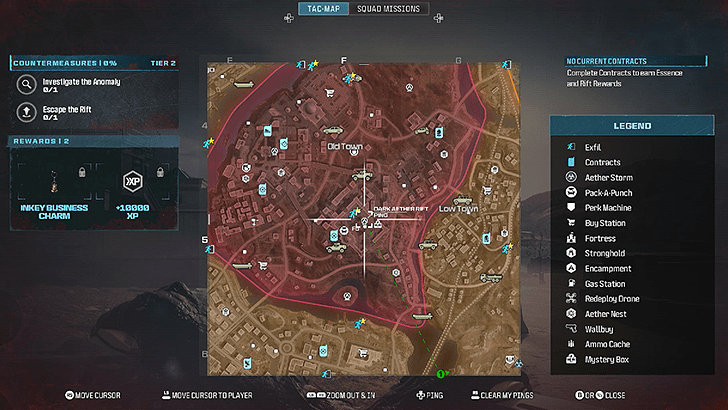 Complete the Ascension Story Mission in Tile F5 to unlock the 4th Dark Aether. All players can access the Ascension story mission in Act 4, regardless of Zombies mission progression. ▶︎ Ascension Story Mission Walkthrough |
| 2 |  You'll obtain the Mr. Peeks as a reward at the end of the story mission. It's one of the 4 new keys to enter the 4th Dark Aether Rift. |
| 3 | The other keys are the Echo of Drum, Echo of Giraffe Toy, and Echo of Locked Diary. They're all found in Urzikstan with various conditions to unlock each. ▶︎ Dark Aether Easter Egg Guide: How to Get All Keys |
| 4 | After obtaining all 4 keys and turning them to Gold Rarity, head to the 4th Dark Aether Rift in Tile F5 of Urzisktan (in the Palace Fountain). Place the keys on the pedestals to activate the 4th Dark Aether Rift. ▶︎ Dark Aether Rift Locations |
| 5 | Once the 4th Dark Aether Rift has been activated, a Mega Abomination will spawn in. Defeat it to get a Sigil that you can use to activate the new Dark Aether Rift. |
| 6 | In the new Dark Aether Map, complete the 3 Dark Aether Contracts, which all have the possibility to drop Elder Sigils.
In a new match, use the Elder Sigils to enter the 4th Dark Aether Rift again. In the Elder version of the 4th Dark Aether Rift, you can get the new Season 5 Reloaded schematics for the Grenade Bandolier, Disciple Bottle, and Stash Increase. ▶︎ Dark Aether Interactive Map |
Zombies Beginners Guide and Walkthrough
Getting Started in Zombies
| What to Do First in Zombies Mode | |
|---|---|
| 1 | Farm Essence (main currency): If you just want to farm essence, do it in low-threat zones. The Essence rewards remain the same. |
| 2 | ▼ Focus on completing Contracts early on to get Essence and raise Containment Level |
| 3 | If you don't have Legendary Aether Tools, purchase a Legendary rarity weapon in the Red Zone. It's better to stack Pack-a-Punch upgrades on a Legendary rarity weapon to deal 32x damage. ▶︎ Rarity vs Pack-a-Punch Damage Chart |
| 4 | Pack-a-Punch your main weapon (the weapon you're most comfortable with) as soon as possible |
| 5 | You can spend Essence on Perk Machines too if you have extra. (Perks are only limited to 1 match, though.) |
| 6 | Complete Aether Nests to obtain lots of Ammo Mods, which you can exfil to future missions. |
| 7 | Always craft items using Schematics you obtain. There's no cost in crafting though they do have a cooldown. |
| ▼ Recommended and Valuable Items | |
2. Focus on Completing Contracts Early On
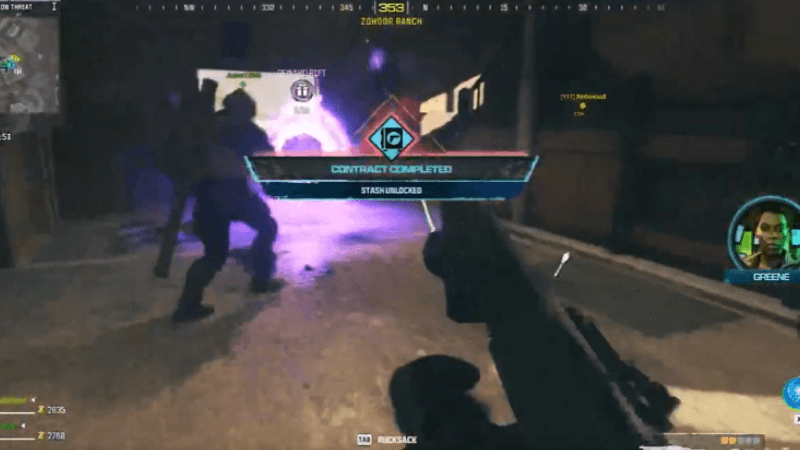
Completing Contracts are the best way to gain Essence during the early phases of the game. The quickest Contracts to complete are Eliminate the Bounty and Delivery Cargo. Avoid contracts where you have to fight Mercenaries, such as Aether Extractors and Defend Ground Station. Mercenaries are tougher to deal with than zombies, as they shoot back at you.
Doing Contracts and succesfully exfiling also raises your Containment Level, dependent on the amount of Contracts you do. Reaching higher Containment Level gives you permanent buffs such as starting each match with 5,000 Essence and 20% off Pack-a-Punch cost.
Recommended and Valuable Items for Zombies
| Item | Usage | How to Get |
|---|---|---|
| Self-Revives | Allows you to revive yourself when knocked | Contract Rewards or Loot Caches |
| 3-Plate Armor Vest | Allows you to wear up to three armor plates | Purchased from Buy Stations in Medium Threat zones |
| Large Rucksacks | Increases backpack inventory space | Found in Hidden Caches and Contract Rewards |
| Schematics | Craft consumables and weapons in the lobby for no cost | Contract Rewards |
| Gas Masks | Let's you breath poisonous air/gas | Loot from Mercenaries |
| Chunks of Flesh | Get a Pet Dog or Dog Collar Key | Kill zombies with explosive damage or let ACV in escort missions crush them |
Zombies Tips and Tricks
| Zombies Mode Useful Tips |
|---|
Better to Level 3 Pack-a-Punch an Epic Rarity Gun Than Level 2 Pack-a-Punch a Legendary Gun
| Rarity + PaP | Damage Multiplier | Overall Cost |
|---|---|---|
| Legendary + Level 3 PaP |
32x | 34,500 |
| Epic + Level 3 PaP |
24x | 33,750 |
| Legendary + Level 2 PaP |
16x | 19,500 |
Legendary (Gold) guns at Level 3 Pack-a-Punch deal the most damage out of all gun rarities, at 32x damage multiplier. At second best, Epic (Purple) Rarity guns at Level 3 Pack-a-Punch deal 24x damage. Third best is Legendary (Gold) guns at Level 2 Pack-a-Punch only, at 16x damage dealt.
Rarity vs Pack-a-Punch Damage Chart
Warlords are Guaranteed Wonder Weapon Drops
Defeating Warlord is guaranteed to give you a Wonder Weapon, so it's definitely worth trying out each match, especially if you're going to head into the Dark Aether. Wonder Weapons have the same damage multiplier as Legendary Guns.
Don't Bring All Your Good Weapons and Items Into Single Match
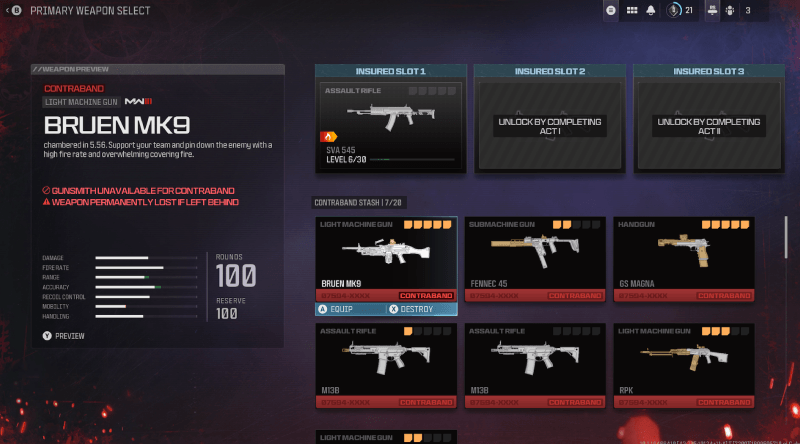
Don’t bring all your good items into a single match. You'll lose them all if your squad gets eliminated. Just bring enough good items to get started. If you only have 2-3 guns total, stick to just bringing 1 gun, so that you’ll still have a gun next time, even if you get eliminated and lose the initial gun.
You only start with a pistol if you lose all your weapons
When you get eliminated and lose all your weapons, you start the next match with just a Handgun. At this point, it'd be best to just stay in the Low Threat Zone and get a vehicle fast to easily secure early kills.
You Can Team Up With Players Outside Your Squad

You can actually see other players as blue circles on the map. Try to get to their location so that you can try to party up with them. Having 6 members will significantly raise your chances of survival in higher threat zones.
Join other squads when you can, especially if you have less than 3 people. The more people in the squad, the more chances you have to be rescued if you die
Zombies Squad Size and Squads Explained
Utilize Tac Stance for Spatial Awareness
Tac Stance doesn't zoom you all the way in when you aim, giving you a much needed spatial awareness, making it very suited to surviving in the Zombies game mode.
Still Think Strategically Regarding Positioning
Enemies hit hard in this game mode. You can't always force your way out so learn to reposition yourself out of harm's way and use the terrain to your advantage.
Crouching and Proning Helps Avoid AI Enemy Attacks
Crouch and lay down to avoid enemy attacks. This is simple yet extremely effective! You can also revive teammates while in this position.
Zombies Past Seasons Content
MWZ Season 4 Content
| Season 4 Guides | |
|---|---|
| Unstable Rift Guide | - |
MWZ Season 3 Content
| Season 3 Guides | |
|---|---|
| Union Walkthrough | Rainmaker Fortress |
| Free Flawless Crystal and Legendary Tool | - |
| Dark Aether Keys | |
| Laptop with Stickers | Science Journal |
| Imaginary Friend Drawing | Giraffe Toy |
| Season 3 Schematics | |
| Sergeant's Beret | Dead Wire Detonators |
| Golden Mask Filter | - |
MWZ Season 2 Content
| Season 2 Guides | |
|---|---|
| Countermeasures Mission | Keres Fortress |
| Containment Levels | - |
| Dark Aether Keys | |
| The Drum | Tattered MMA Gloves |
| Perforated Target | Pristine Mirror |
| Season 2 Schematics | |
| Mags of Holding | Blood Burner Key |
| V-R11 Schematic | - |
Zombies Season 2 Guide and All Content
MWZ Season 1 Content
| Season 1 Reloaded Guides | |
|---|---|
| Dokkaebi Fortress Location | - |
| Dark Aether Rift Guides | |
| Act 4 Story Mission: Bad Signal | How to Enter the Dark Aether Rift |
| How to Beat Gorm'gant | How to Get All Keys |
| Locked Diary | Pill Bottle |
| Surveillance Camera | Dog Collar |
| How to Get Sigils | How to Get Elder Sigils |
| New Schematics and Weapons | |
| Golden Armor Plate | Dog Bone |
| Aether Blade | Legendary Aether Tool |
| The Scorcher | Flawless Aetherium Crystal |
| V-R11 Wonder Weapon | - |
| Greylorm Boss Guides | |
| How to Beat Greylorm | Calibration Data USB Locations |
| Refractor Locations | - |
| Dark Aether Guides | |
| Dark Aether Interactive Map | Dark Aether Contract Locations |
| Dark Aether Exfil Locations | Dark Aether Key Locations |
| Al Bagra Officers Quarters | ABF Antiquities Office |
| Al Bagra Munitions Storeroom | Al Bagra Barrack |
| Zombies Prestige Challenges | |
| 10 Throwing Knife Kills in 30 Seconds | - |
Zombies Season 1 Guide and All Content
Zombies Map
Urzikstan - Operation Deadbolt

There are 3 major Threat Zones in the Zombies map. The grey zone is the largest and has the easiest Zombies and enemies to kill. You'll find all the common loot and activities in the grey zone. The middle orange zone has tougher enemies but better weapons and loot, while the center red zone has the most difficult enemies and the best rewards.
The Zombies Game Mode uses the Urzikstan Warzone map as the playing area. It is the first open-world Zombies mode from Call of Duty.
Zombies Story Missions
All Zombies Acts 1 to 4 Missions
Zombies Acts and Mission Rewards
Zombies Schematics
All Crafting Schematics
| Schematic | Loot Location |
|---|---|
 Refined Aetherium Diagram Refined Aetherium Diagram |
High Threat Zone (Red) only |
 Epic Aether Tool Plans Epic Aether Tool Plans |
High Threat Zone (Red) only |
 Ray Gun Plans Ray Gun Plans |
High Threat Zone (Red) only |
 Elemental Pop Recipe Elemental Pop Recipe |
High Threat Zone (Red) only |
 Tombstone Soda Recipe Tombstone Soda Recipe |
High Threat Zone (Red) only |
 Raw Aetherium Diagram Raw Aetherium Diagram |
Medium Threat Zone (Yellow) only |
 Jugger-Nog Recipe Jugger-Nog Recipe |
Medium Threat Zone (Yellow) only |
 Shatter Blast Formula Shatter Blast Formula |
Medium Threat Zone (Yellow) only |
 Dead Wire Formula Dead Wire Formula |
Medium Threat Zone (Yellow) only |
 PHD Flopper Recipe PHD Flopper Recipe |
Medium Threat Zone (Yellow) only |
 Stamin-Up Recipe Stamin-Up Recipe |
Low Threat Zone (Grey) only |
 Speed Cola Recipe Speed Cola Recipe |
Low Threat Zone (Grey) only |
 Brain Rot Formula Brain Rot Formula |
Low Threat Zone (Grey) only |
 Napalm Burst Formula Napalm Burst Formula |
Low Threat Zone (Yellow) only |
 Deadshot Daiquiri Recipe Deadshot Daiquiri Recipe |
Low Threat Zone (Grey) only |
How to Get All Crafting Schematics
Zombies Perks
All Perk-a-Cola's
| Perk-a-Cola | Effect |
|---|---|
 Deadshot Daiquiri Deadshot Daiquiri
|
Aiming down sight moves to enemy critical location. Increase enemy critical damage. |
 Death Perception Death Perception
|
Obscured enemies, chests, resources, and item drops are more easily spotted. |
 Elemental Pop Elemental Pop
|
Every bullet you fire has a small chance to apply a random Ammo Mod effect. |
 Jugger-Nog Jugger-Nog
|
Increases maximum health. |
 PHD Flopper PHD Flopper
|
Diving to prone triggers an explosion. The explosion increases the higher you fall. Immunity from fall damage while diving. Immunity from area-of-effect damage from weapons you are using. |
 Quick Revive Quick Revive
|
Reduce the health regeneration delay time by 50%. Reduce the time it takes to revive an ally by 50%. |
 Speed Cola Speed Cola
|
Drink to reload and replate armor faster. |
 Stamin-Up Stamin-Up
|
Increases run and sprint speed. |
 Tombstone Soda Tombstone Soda
|
On death, you create a tombstone stash at that location, containing your backpack inventory in the next game. |
Aside from completing Missions, make sure to also go for Perk Machines in order to activate Perks during your deployments in Zombies. You can stack multiple Perks on top of each other.
Zombies Ammo Mods
All Ammo Mods
| Ammo Mods | Effect |
|---|---|
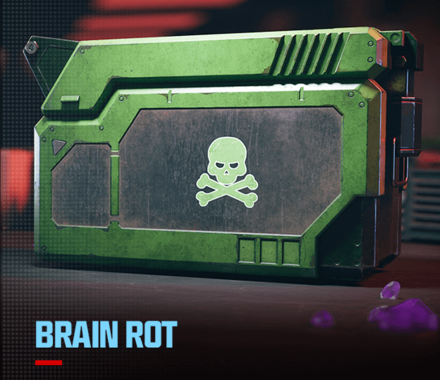 |
Consume to apply Brain Rot to your weapon |
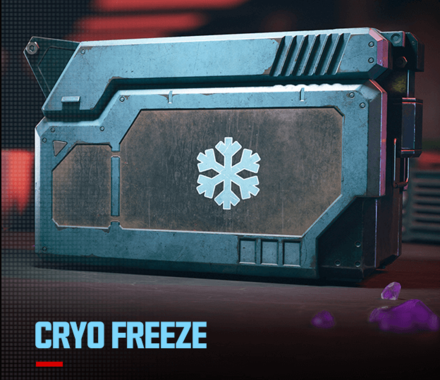 |
Consume to apply Freeze Damage to your weapon |
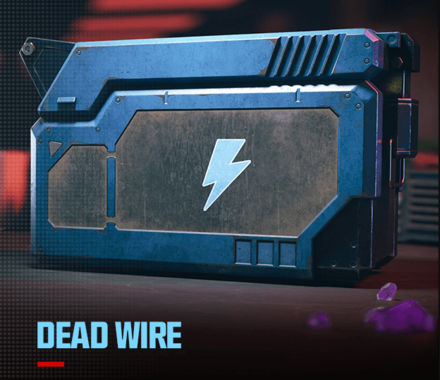 |
Consume to apply Electric Damage to your weapon |
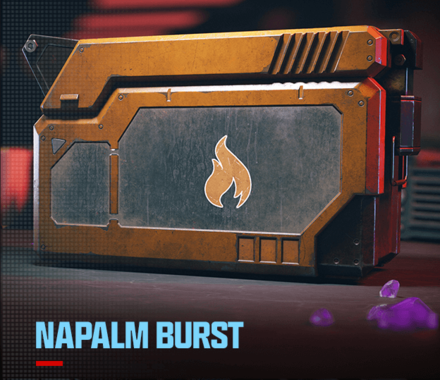 |
Consume to apply Fire Damage to your weapon |
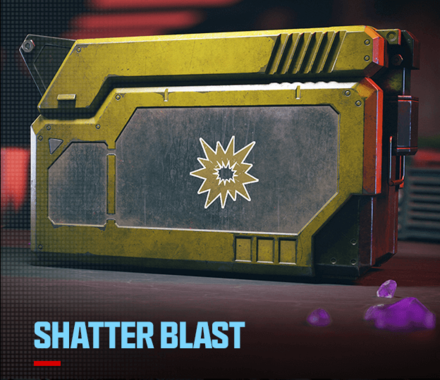 |
Consume to apply explosive damage to your weapon |
Ammo Mods upgrade your ammunition and allow your weapon to deal unique effects on Zombies. These effects vary from applying damage effect to even making Zombies behave irregularly.
Zombies Weapons Guides
All Zombies Guns and Weapons
Zombies Aetherium
All Aetherium
| All Aetherium Crystals and Aether Tools | |
|---|---|
| Legendary Aether Tool | Flawless Aetherium Crystal |
| Epic Aether Tool | Refined Aetherium Crystal |
| Rare Aether Tool | Raw Aetherium Crystal |
| Uncommon Aether Tool | - |
List of Aetherium and Aether Tools
Zombies Field Upgrades
| Field Upgrade | Effect | Unlock Level |
|---|---|---|
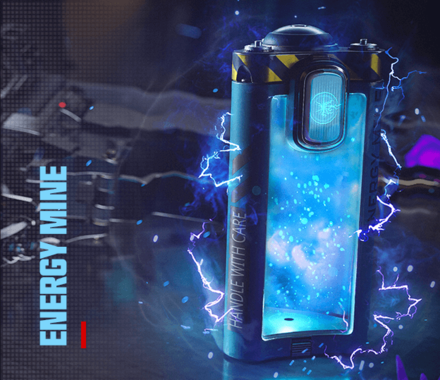 |
Recharge: Medium
Effect: Spawn an explosive, dealing massive damage to enemies who set it off. |
Level 1 |
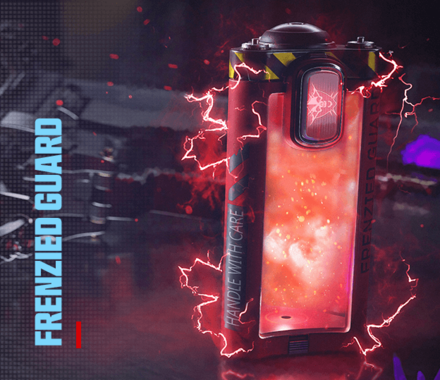 |
Recharge: Slow
Effect: Repair armor to full and force all enemies in the area to target you for 10 seconds. Enemy kills repair armor during this time. |
Level 9 |
 |
Recharge: Slow
Effect: Heal all players immediately. |
Level 19 |
 |
Recharge: Medium
Effect: Damage enemies with the initial blast and slow those that enter. |
Level 29 |
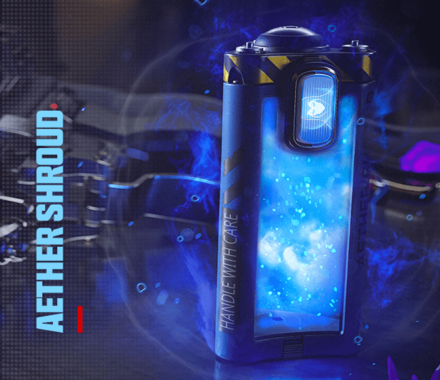 |
Recharge: Medium
Effect: Become invisible to zombies. |
Level 39 |
 |
Recharge: Slow
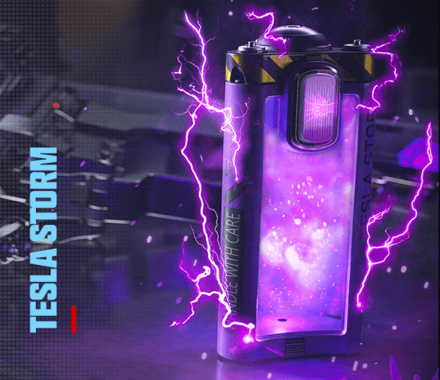
Effect: For 10 seconds lightning connects to other players, stunning and damaging normal enemies. |
Level 50 |
Best Zombies Field Upgrades Tier List
Zombies Contracts
All Contract Types
| Contract | Overview |
 Aether Extractors Aether Extractors
|
Objectives: • Locate Aether Extractor LZ • Disable the Aether Extractors Enemies: • Mercenaries |
 Defend Ground Station Defend Ground Station
|
Objectives: • Collect data from seismic refractors • Activate Server to Start Upload • Protect the Server from Mercs. Enemies: • Mercenaries |
 Deliver Cargo Deliver Cargo
|
Objectives: • Deliver the cargo to the HLZ.
Enemies: • Mercenaries |
 Eliminate the Bounty Eliminate the Bounty
|
Objectives: • Locate the Elite Zombie and eliminate it.
Enemies: • Elite Zombies |
 Escort Escort
|
Objectives: • Escort the ACV.
Enemies: • Normal Zombies • Special Zombies • Hellhounds |
 Outlast Outlast
|
Objectives: • Activate the PND • Remain in the environment. Enemies: • Normal Zombies • Hellhounds |
 Raid Weapon Stash Raid Weapon Stash
|
Objectives: • Locate the stash • Secure the stash. Enemies: • Normal Zombies • Special Zombies • Hellhounds |
 Spore Control Spore Control
|
Objectives: • Locate the Inhibitor devices • Use Inhibitors to help destroy Spores Enemies: • Normal Zombies |
|---|
Zombies Challenges and Enemies
| Enemy Type / Challenge | Challenge Type |
|---|---|
| Special and Elite Zombie Kills | Camo Challenge (Serpentinite) |
| Hellhounds | Daily Challenge |
| Kill Mimics | Daily Challenge |
| Kill Disciples | Daily Challenge |
| Kill Manglers | Daily Challenge |
| Toxic Damage Kills | Daily Challenge |
| Electric Damage Kills | Daily Challenge |
| Fire Damage Kills | Daily Challenge |
| Frost Damage Kills | Daily Challenge |
| Armored Zombies | Daily Challenge |
| PHD Flopper Explosions | Weekly Challenge (Season 0 Week 1) |
Zombies Challenges and Enemy Types
Zombies Powerups
All Power Ups
| Power Up | Effect |
|---|---|
 Full Power Full Power |
Instantly refreshes your Field Upgrade. |
 Insta Kill Insta Kill |
Allows you to one-shot enemies. (This does not include Special and Elite Zombies) |
 Nuke Nuke |
Kills all nearby enemies. |
 Full Armor Full Armor |
Refills your Armor Plates back to full |
 Max Ammo Max Ammo |
Refills your Ammo Supply |
 Bonus Points Bonus Points |
Gives you additional points for killing enemies. |
 Double Points Double Points |
Gives you x2 bonus points for killing enemies. |
 Random Perk Random Perk |
Gives you a random Perk |
You can also pick up power-ups that are randomly dropped by killing zombies to gain bonus effects for a short period of time. The effects of these power-ups apply to all members of your squad, regardless of who picks up the power-up or how far away they are.
Zombies Secrets
Locked Vault in Shahin Manor
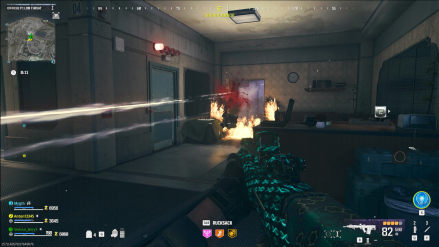
The Locked Vault contains Aether and Loot Caches that contain higher rarity weapons and items. It's found in the bottom right region of the map, Shahin Manor, but you'll need to collect Transmission from 4 Chess Piece Bosses found across the map.
There Are Fast Travel Points on the Map
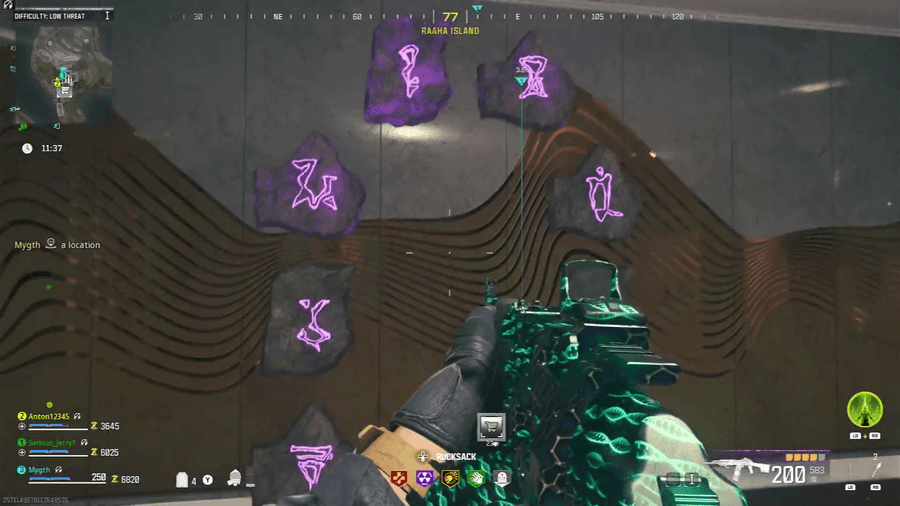
Zombies mode has fast travel points called Zero-Point Interdimensional Portals. These portals appear in set locations throughout the map and you can use them by spending Essence. The catch is that you need to input a pattern of 3 symbols to determine which exit point the portal will bring you to.
Portal Locations and Symbol Solutions
Other Zombies Guides
Other Zombies Guides
Is Zombies Game Mode Free-to-Play?
Zombies Game Mode is Part of the Base Game
Zombies Game Mode is part of the base game of Modern Warfare 3, meaning there is no additional payment to unlock this game mode but it's not a free-to-play game mode that you can get separate from the base game purchase like Warzone was for Modern Warfare 2.
What is the Zombies Game Mode?
PvE Extraction Game Mode
The Modern Warfare Zombies Game Mode is a PvE Extraction similar to Warzone DMZ. The only twist here is that there will be Zombie Hordes and other human enemies on the map that will come after you and your team!
The main objectives are to complete missions to get rewards and other items and extract within the time limit to win!
Features Open World and More Cooperative Gameplay
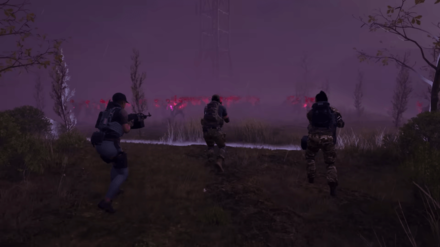
Zombies Game Mode is an open world, meaning the map is extremely spacious and there will be a lot of areas to explore. You can also request other players outside your team to work with them to complete missions and increase the chances of surviving!
Modern Warfare 3 (MW3) Related Guides

Modern Warfare 3 Guides
Comment
Author
Call of Duty Modern Warfare 3 (MW3) Walkthrough & Guides Wiki
Zombies Mode Guide and Walkthrough (Season 5 Updated)
improvement survey
03/2026
improving Game8's site?

Your answers will help us to improve our website.
Note: Please be sure not to enter any kind of personal information into your response.

We hope you continue to make use of Game8.
Rankings
- We could not find the message board you were looking for.
Gaming News
Popular Games

Genshin Impact Walkthrough & Guides Wiki

Honkai: Star Rail Walkthrough & Guides Wiki

Umamusume: Pretty Derby Walkthrough & Guides Wiki

Pokemon Pokopia Walkthrough & Guides Wiki

Resident Evil Requiem (RE9) Walkthrough & Guides Wiki

Monster Hunter Wilds Walkthrough & Guides Wiki

Wuthering Waves Walkthrough & Guides Wiki

Arknights: Endfield Walkthrough & Guides Wiki

Pokemon FireRed and LeafGreen (FRLG) Walkthrough & Guides Wiki

Pokemon TCG Pocket (PTCGP) Strategies & Guides Wiki
Recommended Games

Diablo 4: Vessel of Hatred Walkthrough & Guides Wiki

Cyberpunk 2077: Ultimate Edition Walkthrough & Guides Wiki

Fire Emblem Heroes (FEH) Walkthrough & Guides Wiki

Yu-Gi-Oh! Master Duel Walkthrough & Guides Wiki

Super Smash Bros. Ultimate Walkthrough & Guides Wiki

Pokemon Brilliant Diamond and Shining Pearl (BDSP) Walkthrough & Guides Wiki

Elden Ring Shadow of the Erdtree Walkthrough & Guides Wiki

Monster Hunter World Walkthrough & Guides Wiki

The Legend of Zelda: Tears of the Kingdom Walkthrough & Guides Wiki

Persona 3 Reload Walkthrough & Guides Wiki
All rights reserved
© 2023 Activision Publishing, Inc. ACTIVISION, CALL OF DUTY, MODERN WARFARE, and CALL OF DUTY WARZONE are trademarks of Activision Publishing, Inc. All other trademarks and trade names are the property of their respective owners.
The copyrights of videos of games used in our content and other intellectual property rights belong to the provider of the game.
The contents we provide on this site were created personally by members of the Game8 editorial department.
We refuse the right to reuse or repost content taken without our permission such as data or images to other sites.
 Campaign
 Zombies Mode
 Camos
Camos Guns and Weapons
 Tips and Tricks
 News and Game Info
 Operators
 Attachments
 Calling Cards
 Blueprints
 Seasons
 Battle Pass
 Store Bundles
 Trophies and Achievements
 Equipment
 Perks
Perks Maps
Maps Multiplayer Modes
 Emblems
 Charms
 Characters
 Loading Screens
 Stickers and Large Decals
 Bugs and Errors





![Monster Hunter Stories 3 Review [First Impressions] | Simply Rejuvenating](https://img.game8.co/4438641/2a31b7702bd70e78ec8efd24661dacda.jpeg/thumb)


