All Zombies Perks and Best Perks Tier List
★ S6 New Guns: DTIR 30-06 | Kastov LSW
☆ S5 Reloaded Dark Aether Keys and Locations
★ Mr. Peeks | Drum | Locked Diary | Giraffe Toy
☆ Final MWZ Story Mission: Ascension Walkthrough
★ Zombies Map | Dark Aether Interactive Map
☆ Rarity vs Pack-a-Punch Damage Chart
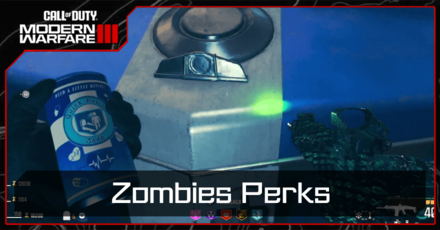
Zombies Perks are consumable items that will give you buffs that last in a single playthrough or until you die in Call of Duty: Modern Warfare 3 (MW3) Zombies Mode. Read on to learn more about all the available Zombies Perks, the best Zombie Perks tier list, and Perk-a-Cola Machine locations.
List of Contents
List of All Zombies Perks
All Zombie Perk Symbols and Effects
| Perk-a-Cola | Effect |
|---|---|
 Deadshot Daiquiri Deadshot Daiquiri
|
Aiming down sight moves to enemy critical location. Increase enemy critical damage. |
 Death Perception Death Perception
|
Obscured enemies, chests, resources, and item drops are more easily spotted. |
 Elemental Pop Elemental Pop
|
Every bullet you fire has a small chance to apply a random Ammo Mod effect. |
 Jugger-Nog Jugger-Nog
|
Increases maximum health. |
 PHD Flopper PHD Flopper
|
Diving to prone triggers an explosion. The explosion increases the higher you fall. Immunity from fall damage while diving. Immunity from area-of-effect damage from weapons you are using. |
 Quick Revive Quick Revive
|
Reduce the health regeneration delay time by 50%. Reduce the time it takes to revive an ally by 50%. |
 Speed Cola Speed Cola
|
Drink to reload and replate armor faster. |
 Stamin-Up Stamin-Up
|
Increases run and sprint speed. |
 Tombstone Soda Tombstone Soda
|
On death, you create a tombstone stash at that location, containing your backpack inventory in the next game. |
Best Zombies Perks Tier List
| Rank | Perk |
|---|---|
| • Stamin-Up
• Quick Revive • Speed Cola |
|
| • Jugger-Nog
• Deadshot Daiquiri |
|
| • PHD Flopper
• Death Perception • Elemental Pop |
|
| |
• Tombstone Soda |
| These perks are the most necessary buffs you need to survive Operation Deadbolt. They offer game-changing perks that are a must in all your runs. | |
| These perks are great to have, and you should always consider acquiring them. They can remarkably increase your combat prowess in most situations. | |
| These perks are considerably good to have. They can be notably valuable in certain scenarios, but they fall short outside of those situations. | |
| These perks have minimal effects to offer. They definitely still have their uses, but they are usually unreliable and can be set aside for the most part. |
Stamin-Up
| Perk-a-Cola | Effect |
|---|---|
 Stamin-Up Stamin-Up
|
Increases run and sprint speed. |
Proper positioning is crucial in Operation Deadbolt, and with Stamin-Up, you'll be able to swiftly reposition yourself to avoid being cornered by zombies and mercenaries alike. This effect will increase both your defensive and offensive capabilties in combat.
Quick Revive
| Perk-a-Cola | Effect |
|---|---|
 Quick Revive Quick Revive
|
Reduce the health regeneration delay time by 50%. Reduce the time it takes to revive an ally by 50%. |
Quick Revive is the best for the overall survival of your team. Having faster recovery and revive times will allow you to get out of sticky situations more easily.
Speed Cola
| Perk-a-Cola | Effect |
|---|---|
 Speed Cola Speed Cola
|
Drink to reload and replate armor faster. |
Having an empty clip or vest at the wrong time can be the difference between life and death, which is why reloading and replating speed is remarkably important. Speed Cola is an excellent perk that can boost your overall damage output by lessening reload downtime.
Jugger-Nog
| Perk-a-Cola | Effect |
|---|---|
 Jugger-Nog Jugger-Nog
|
Increases maximum health. |
A classic favorite, Jugger-Nog will notably increase the amount of damage you can take before going down. This is definitely recommended if you're finding yourself often in need of a revive.
Deadshot Daiquiri
| Perk-a-Cola | Effect |
|---|---|
 Deadshot Daiquiri Deadshot Daiquiri
|
Aiming down sight moves to enemy critical location. Increase enemy critical damage. |
Deadshot Daiquiri will help you land more critical shots, which will significantly boost your overall damage. This perk acts like an aim guide that will point your cursor immediately to an enemy's weakspot and help it stay there by removing scope spray.
PHD Flopper
| Perk-a-Cola | Effect |
|---|---|
 PHD Flopper PHD Flopper
|
Diving to prone triggers an explosion. The explosion increases the higher you fall. Immunity from fall damage while diving. Immunity from area-of-effect damage from weapons you are using. |
Aside from being a fun perk to play around with, PHD Flopper is particularly helpful since it can prevent you from receiving continuous damage when you're inside Aether Nests or Infested Strongholds and when stepping on fire.
Death Perception
| Perk-a-Cola | Effect |
|---|---|
 Death Perception Death Perception
|
Obscured enemies, chests, resources, and item drops are more easily spotted. |
Death Perception is a niche perk that only becomes significant in certain situations, such as locating cysts in an Aether Nest or loot caches in dimmed areas. This perk is definitely something good to have, but it is situational and arguably not a priority to acquire.
Elemental Pop
| Perk-a-Cola | Effect |
|---|---|
 Elemental Pop Elemental Pop
|
Every bullet you fire has a small chance to apply a random Ammo Mod effect. |
Elemental Pop is good to have if you want to proc additional effects every now and then, but its randomness makes it a bit unreliable. However, it's good to note that the activation frequency of your equipped Ammo Mod increases if you have Elemental Pop on.
Tombstone Soda
| Perk-a-Cola | Effect |
|---|---|
 Tombstone Soda Tombstone Soda
|
On death, you create a tombstone stash at that location, containing your backpack inventory in the next game. |
Tombstone Soda acts like insurance that allows you to retrieve your loadout in case you die. This is particularly useful when you're about to enter higher-threat zones while carrying high-quality items and weapons.
The only downsides are that you have to pick your items back up in the same exact dangerous location and you can only acquire items in your rucksack.
How to Get Perks in Zombies
Perk-a-Cola Machines
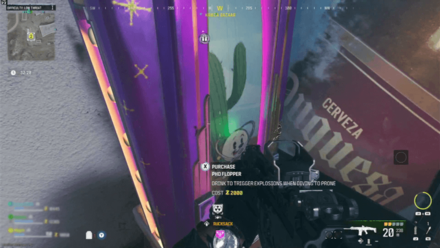
You can get purchase Perks from their respective Perk-a-Cola machine. Perk-a-Cola machines are available in a set pool of locations, but the machine is not guaranteed to spawn in every match, and the perk found at the specific machine is randomized every match.
Purchase All Perks from Der Wunderfizz Machines
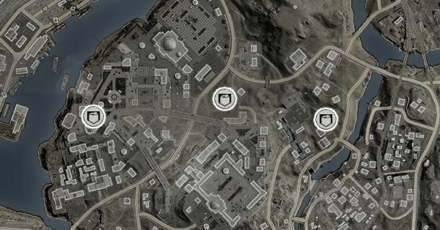
Der Wunderfizz machines, which allow you to purchase all perks, can be found in the center of the map, at the High-Threat level zone.
Sometimes Rewards for Completing Tasks and Missions
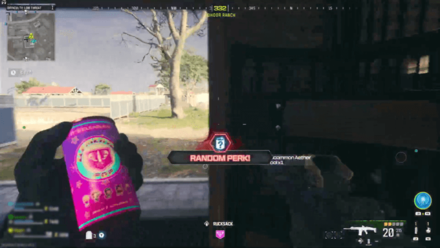
You sometimes instaneously obtain a perk by completing tasks or missions. The perk is immediately added to your operator and will last until you die or exfil.
What are Zombies Perks?
Buffs from Consuming Perk-a-Cola
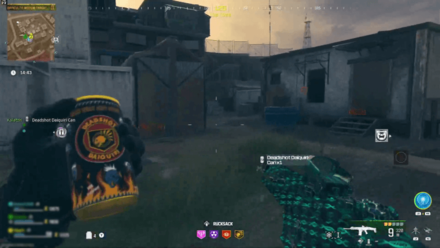
Zombies Perks are buffs that remarkably boost your character's stats or give unique effects that will aid you in combat. You can acquire these buffs by obtaining Perk-a-Colas through loot, mission rewards, and Perk Machines.
Note that Perk Machines do have set locations, but the Perk-a-Cola you can obtain changes randomly each playthrough. You can have all 9 of the buffs active at the same time, but they only last for the duration of one whole playthrough or until you die.
Call of Duty Modern Warfare 3 (MW3) Related Guides

Zombies Mode Walkthrough and Guide
All Zombies Guides
| Zombies Guides and Lists | |
|---|---|
| Zombies Missions | Zombies Season 2 |
| Zombies Season 1 | Zombies Map |
| Zombies Weapons | Crafting Schematics |
| Aetherium | Challenges and Enemies |
| Zombies Perks | Zombies Ammo Mods |
| Zombies Field Upgrades | Zombies Gear |
| Contracts | Zombies Power-Ups |
Comment
Author
Call of Duty Modern Warfare 3 (MW3) Walkthrough & Guides Wiki
All Zombies Perks and Best Perks Tier List
improvement survey
03/2026
improving Game8's site?

Your answers will help us to improve our website.
Note: Please be sure not to enter any kind of personal information into your response.

We hope you continue to make use of Game8.
Rankings
- We could not find the message board you were looking for.
Gaming News
Popular Games

Genshin Impact Walkthrough & Guides Wiki

Honkai: Star Rail Walkthrough & Guides Wiki

Umamusume: Pretty Derby Walkthrough & Guides Wiki

Pokemon Pokopia Walkthrough & Guides Wiki

Resident Evil Requiem (RE9) Walkthrough & Guides Wiki

Monster Hunter Wilds Walkthrough & Guides Wiki

Wuthering Waves Walkthrough & Guides Wiki

Arknights: Endfield Walkthrough & Guides Wiki

Pokemon FireRed and LeafGreen (FRLG) Walkthrough & Guides Wiki

Pokemon TCG Pocket (PTCGP) Strategies & Guides Wiki
Recommended Games

Diablo 4: Vessel of Hatred Walkthrough & Guides Wiki

Fire Emblem Heroes (FEH) Walkthrough & Guides Wiki

Yu-Gi-Oh! Master Duel Walkthrough & Guides Wiki

Super Smash Bros. Ultimate Walkthrough & Guides Wiki

Pokemon Brilliant Diamond and Shining Pearl (BDSP) Walkthrough & Guides Wiki

Elden Ring Shadow of the Erdtree Walkthrough & Guides Wiki

Monster Hunter World Walkthrough & Guides Wiki

The Legend of Zelda: Tears of the Kingdom Walkthrough & Guides Wiki

Persona 3 Reload Walkthrough & Guides Wiki

Cyberpunk 2077: Ultimate Edition Walkthrough & Guides Wiki
All rights reserved
© 2023 Activision Publishing, Inc. ACTIVISION, CALL OF DUTY, MODERN WARFARE, and CALL OF DUTY WARZONE are trademarks of Activision Publishing, Inc. All other trademarks and trade names are the property of their respective owners.
The copyrights of videos of games used in our content and other intellectual property rights belong to the provider of the game.
The contents we provide on this site were created personally by members of the Game8 editorial department.
We refuse the right to reuse or repost content taken without our permission such as data or images to other sites.


