This survey will take about 1 minute.
Your answers will help us to improve our website.
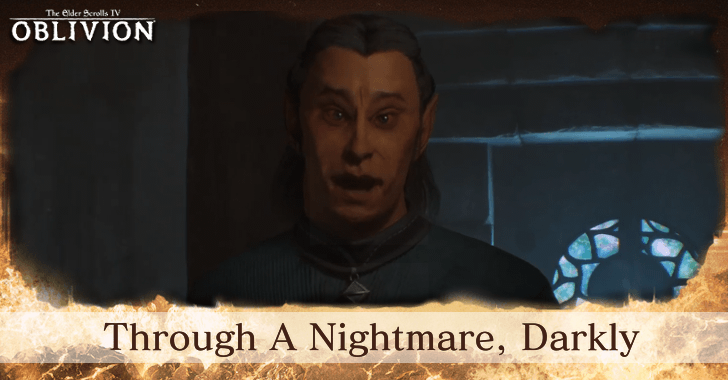
The Elder Scrolls IV Oblivion Remastered
Through A Nightmare, Darkly Walkthrough and Rewards
This is a Through A Nightmare, Darkly walkthrough for The Elder Scrolls IV Oblivion Remastered. Learn Through A Nightmare, Darkly's starting location, rewards, and how to start the quest.
List of Contents
Through A Nightmare, Darkly Location
Bravil
Through A Nightmare, Darkly is located in Bravil. Speak with Kud-Ei to start the quest.
Through A Nightmare, Darkly Walkthrough
Speak with Kud-Ei at the Bravil Mages Guild
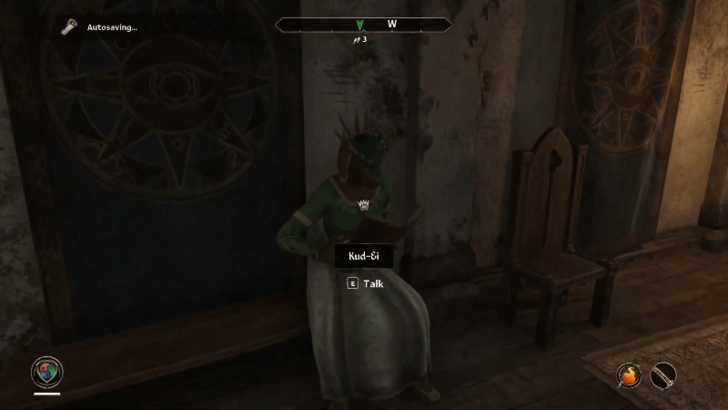
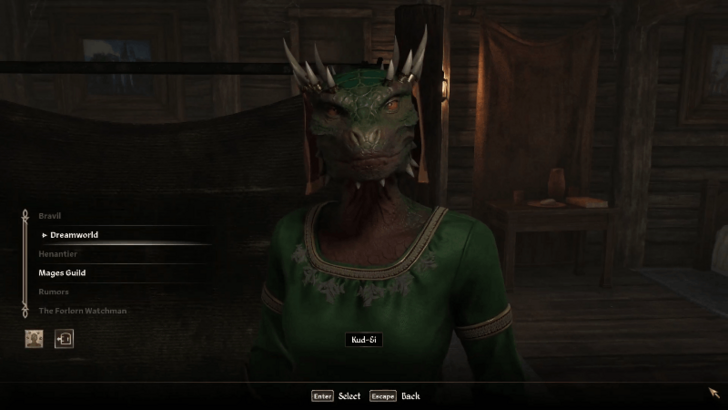
Speak with Kud-Ei at the Bravil Mages Guild and choose to help her find her missing friend, Henantier.
Follow Kud-Ei to Henantier's House
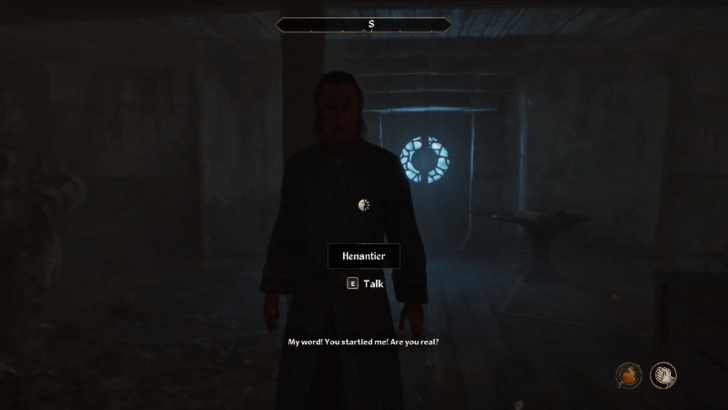
Follow Kud-Ei as she leads you to Henantier's House. Speak with her to learn that Henantier has created an amulet that lets him explore his dreams. Speak with her again to receive the amulet.
Equip the Dreamworld Amulet and Go to Sleep

Open the Inventory screen and equip the Dreamworld Amulet. Sleep on the nearby bed to enter Henantier's Dreamworld.
Speak with Henantier
Speak with Henantier once you arrive in the Dreamworld. Check the furniture inside the room and take the armor, spells, and health potions as you will likely need them later.
Complete the Four Tests
| Test | Location |
|---|---|
| Test of Perception | Upper floor |
| Test of Resolve | |
| Test of Courage | Lower floor |
| Test of Patience |
To escape Henantier's Dreamworld, you need to complete four tests. The Test of Perception and Test of Patience are on the upper floor while the Test of Courage and Test of Resolve are on the lower floor.
Completing each test will have you teleported back to Henantier.
Test of Perception
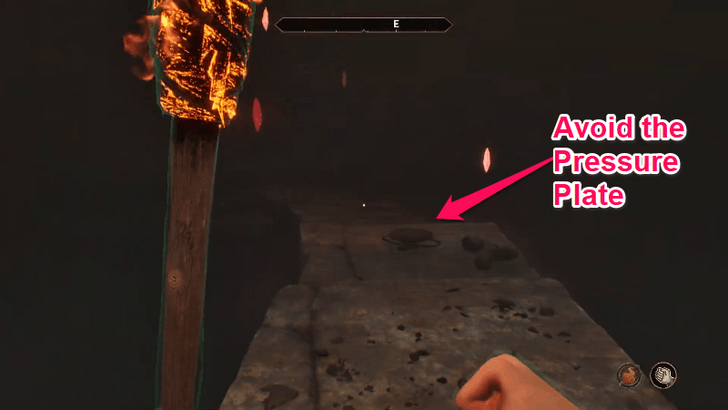
The Test of Perception requires you to navigate a path the contains traps, particularly pressure tiles and pressure plates that cause a rockslide to fall in front of you. The second path contains poison mist that you need to run through to avoid it.
The end of the path contains the Element of Perception. Activate it to complete the test.
Test of Resolve
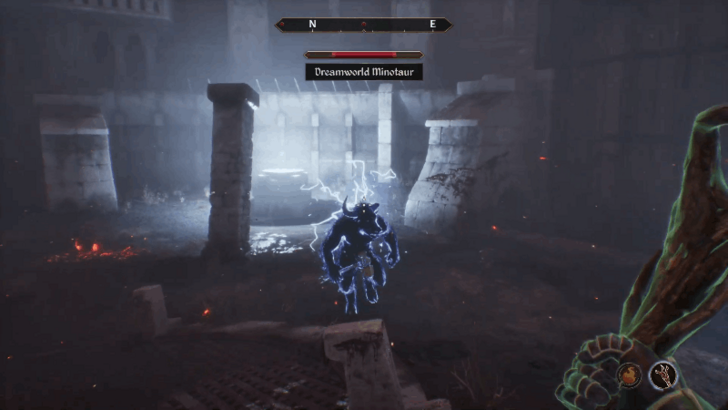
The Test of Resolve requires you to kill two Minotaurs. Check the treasure chest on the left upon entering to find several armor and weapons. It is recommended to use the lightning staff to attack the Minotaurs from afar and to avoid getting hurt.
After killing the two Minotaurs, a staircase will emerge from the ground allowing you to reach the upper floor that contains the Element of Resolve.
Test of Courage

The Test of Courage requires you to swim through an underwater tunnel to reach the end that contains the Element of Courage. Before diving, get the Weak Potion of the Sea from the treasure chest on the right side of the tunnel.
Wade in the water first before diving so you have time to swim towards the bottom of the tunnel that contains a chest with a Weak Potion of the Sea.
From there, swim further down until you reach a wooden door that leads to the Grotto of Courage. Inside the room is the Element of Courage that you need to activate to complete the test.
Test of Patience
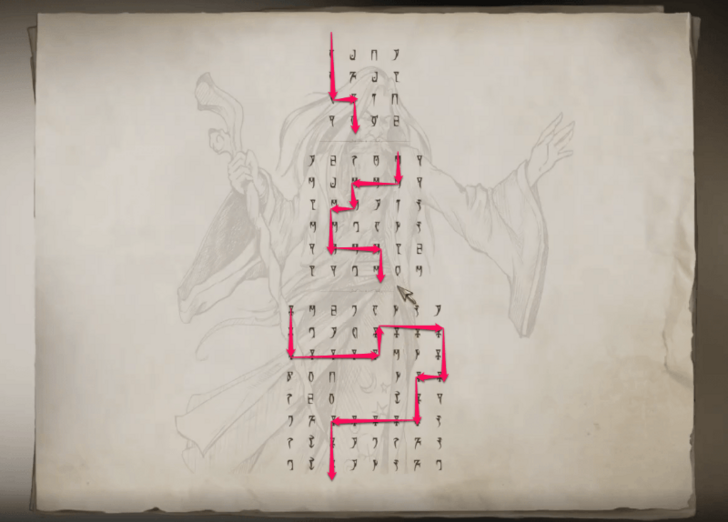
Open the treasure chest and retrieve the Mysterious Scroll. The scroll contains instructions on how to walk on the steps without activating the traps. Look for the identical symbols on each square and follow that path to reach the Element of Patience.
Speak with Henantier
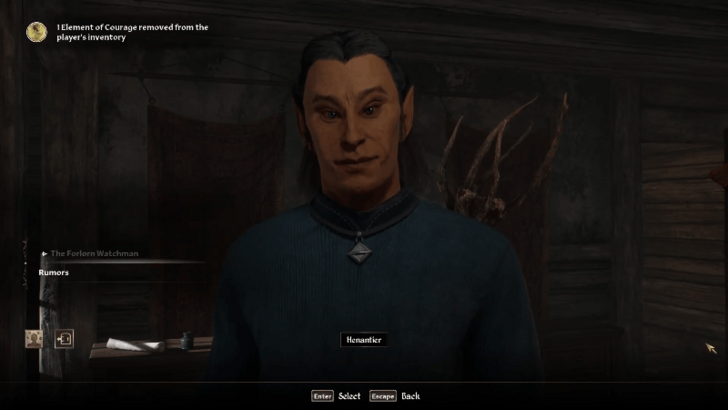
After completing all tests, speak with Henantier to be transported back to the real world. He will speak with you again in the real world to reward you with 6 scrolls, completing the quest.
Through A Nightmare, Darkly Rewards
Six Scrolls
You will receive 6 random scrolls upon completing this quest.
One Fame Point
You will also receive 1 Fame point after completing the quest.
The Elder Scrolls IV Oblivion Remastered Related Guides

List of All Side Quests and Rewards
All Side Quests
Comment
Author
Through A Nightmare, Darkly Walkthrough and Rewards
Please participate in our site
improvement survey
03/2026
improvement survey
03/2026
Would you assist in
improving Game8's site?
improving Game8's site?

×
We are listening to our users' valuable opinions and discussing how to act on them.
The information collected through this survey will be used for the purpose of improving our services. In addition, the information will only be disclosed a part of a statistic in a format that will not allow identification of personal information.
Begin Survey
Not Now
×
Please rate each item regarding Game8.co's Advertisements.
Amount of Ads
Very Dissatisfied
Somewhat Dissatisfied
Fine
Somewhat Satisfied
Highly Satisfied
Placement of Ads
Timing of Ad Display
Ad Loading Speed
Safeness of Ads
Content of Ads
×
Please rate each item regarding Game8.co's Quality of Articles.
Amount of information
Very Dissatisfied
Somewhat Dissatisfied
Fine
Somewhat Satisfied
Highly Satisfied
Frequency of updates
Speed of new information
Accuracy of articles
Understandibility of articles
Readability of sentences
×
Please rate each item regarding Game8.co's Usability of the Site.
Ease of finding information
Very Dissatisfied
Somewhat Dissatisfied
Fine
Somewhat Satisfied
Highly Satisfied
Loading Speed
Use of Color
Font Size
Visibility of Images
Easy to Understand Layout
×
Please rate each item regarding Game8.co's Message Boards, Comments.
Ease of Writing
Very Dissatisfied
Somewhat Dissatisfied
Fine
Somewhat Satisfied
Highly Satisfied
Readability
Ease in Finding Information
Comment Quality
Comment Quantity
Admin Response
×
Please rate each item regarding Game8.co's Site's new design.
Please rate our site's new design
Very Dissatisfied
Somewhat Dissatisfied
Fine
Somewhat Satisfied
Highly Satisfied
Do you think that the website's design change makes the site easier to use?
Has the new design made it easier for you to find information on the site?
Has the new design improved the overall visual appeal of the site?
How would you rate your overall satisfaction with the new design of the site?
×
How likely are you to recommend Game8 to someone you know?
Very Unlikely
0
1
2
3
4
5
6
7
8
9
10
Very Likely
If you have other opinions regarding potential improvement to the website, please share them with us. We would appreciate your honest opinion.
Note: This is a free response section, so you can proceed without entering anything.
Note: Please be sure not to enter any kind of personal information into your response.
Note: Please be sure not to enter any kind of personal information into your response.
×
Thank You
×
Thank you for participating in our survey! Your answers will help us to improve the quality of our website and services.
We hope you continue to make use of Game8.
We hope you continue to make use of Game8.
Close
Rankings
- We could not find the message board you were looking for.
Gaming News


![Slay the Spire 2 Review [Early Access] | Still the Deckbuilder to Beat](https://img.game8.co/4433115/44e19e1fb0b4755466b9e516ec7ffb1e.png/thumb)

![Resident Evil Village Review [Switch 2] | Almost Flawless Port](https://img.game8.co/4432790/e1859f64830960ce4248d898f8cd38d9.jpeg/thumb)
Popular Games

Genshin Impact Walkthrough & Guides Wiki
Honkai: Star Rail Walkthrough & Guides Wiki
Umamusume: Pretty Derby Walkthrough & Guides Wiki
Pokemon Pokopia Walkthrough & Guides Wiki
Resident Evil Requiem (RE9) Walkthrough & Guides Wiki
Monster Hunter Wilds Walkthrough & Guides Wiki
Wuthering Waves Walkthrough & Guides Wiki
Arknights: Endfield Walkthrough & Guides Wiki
Pokemon FireRed and LeafGreen (FRLG) Walkthrough & Guides Wiki
Pokemon TCG Pocket (PTCGP) Strategies & Guides Wiki


Recommended Games
Fire Emblem Heroes (FEH) Walkthrough & Guides Wiki
Diablo 4: Vessel of Hatred Walkthrough & Guides Wiki
Yu-Gi-Oh! Master Duel Walkthrough & Guides Wiki
Super Smash Bros. Ultimate Walkthrough & Guides Wiki
Pokemon Brilliant Diamond and Shining Pearl (BDSP) Walkthrough & Guides Wiki
Elden Ring Shadow of the Erdtree Walkthrough & Guides Wiki
Monster Hunter World Walkthrough & Guides Wiki
The Legend of Zelda: Tears of the Kingdom Walkthrough & Guides Wiki
Persona 3 Reload Walkthrough & Guides Wiki
Cyberpunk 2077: Ultimate Edition Walkthrough & Guides Wiki


All rights reserved
© 2025 ZeniMax Media Inc. All Rights Reserved.
The copyrights of videos of games used in our content and other intellectual property rights belong to the provider of the game.
The contents we provide on this site were created personally by members of the Game8 editorial department.
We refuse the right to reuse or repost content taken without our permission such as data or images to other sites.