Wisdom of the Ages Walkthrough and Puzzle Solution
This is a Wisdom of the Ages walkthrough for The Elder Scrolls IV Oblivion Remastered. Learn Wisdom of the Ages's Puzzle solution, starting location, rewards, and how to start the quest.
List of Contents
Wisdom of the Ages Location
Located at Fort Bulwark
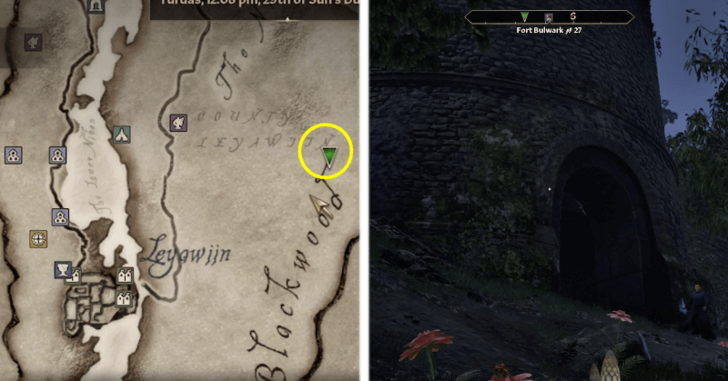
Wisdom of the Ages is located in Fort Bulwark, situated in the northeastern region of Blackwood, just east of Leyawiin. To unlock this quest, you must first finish the Priory of the Nine quest.
Wisdom of the Ages Walkthrough
Solve Three Puzzles
| # | Step-by-step Walkthrough |
|---|---|
| 1 |  Head to Fort Bulwark, be prepared to face a few conjurers before you enter. |
| 2 | 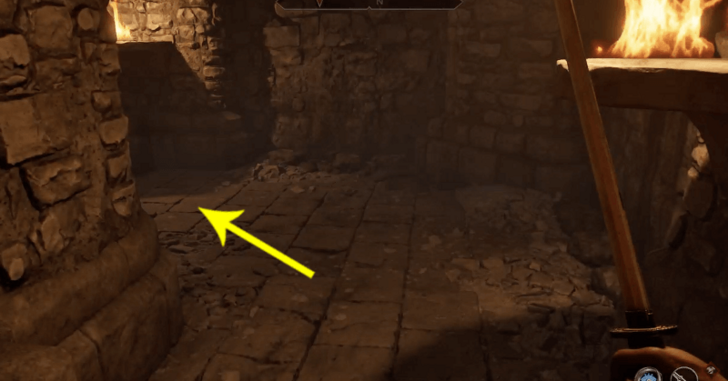 Once inside Fort Bulwark, take the left path. |
| 3 | 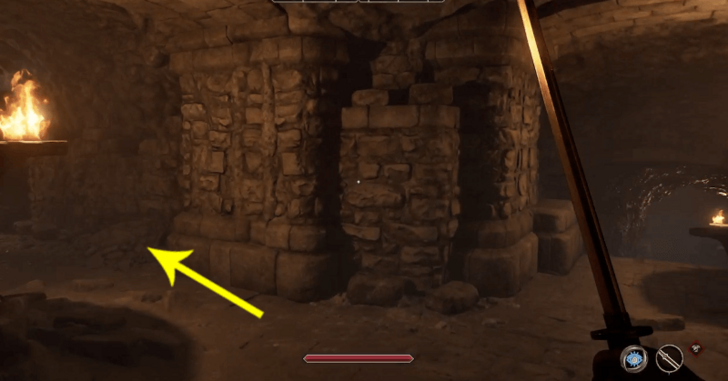 At the next intersection, turn left again to continue onward. |
| 4 | 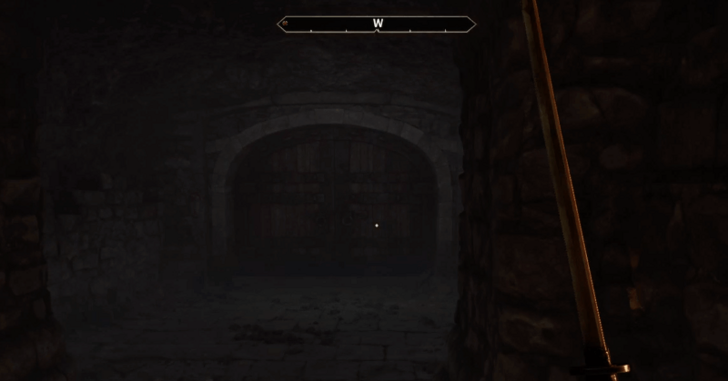 Next, turn right and look for a wooden door straight ahead. |
| 5 | 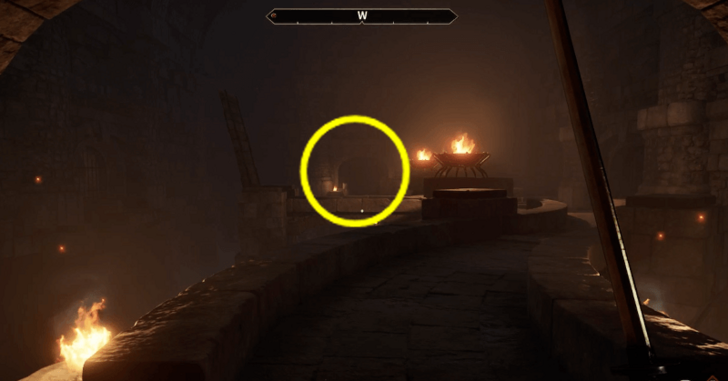 Make your way to the wooden door across the room. Watch out, a few enemies await here, and there’s a risk of falling, so proceed with caution. |
| 6 | 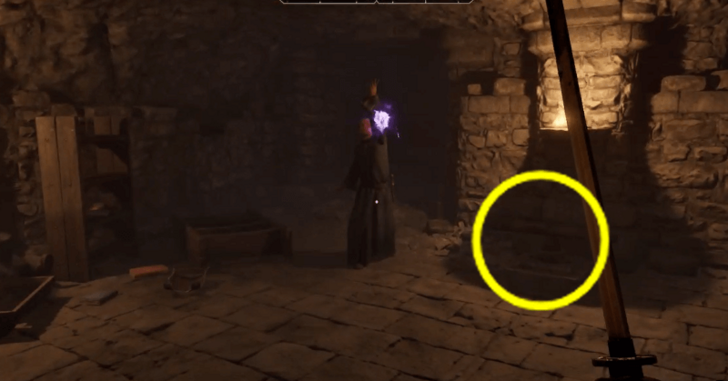 Head straight and you'll see a room with another set of enemies, activate the Turn Handle below the light. |
| 7 | 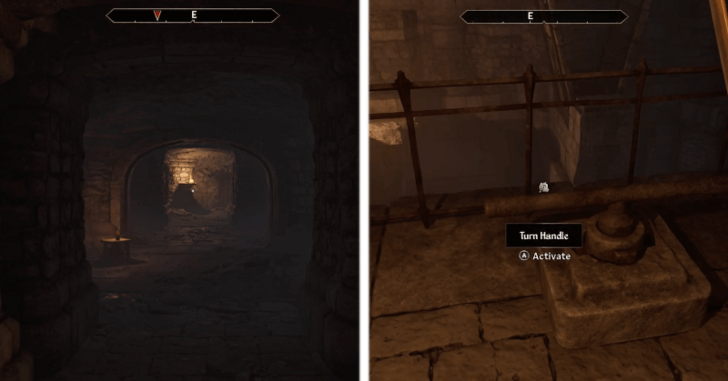 On the right side of the room, you’ll see an opening. Head straight through it and activate the Turn Handle located on the balcony. |
| 8 | 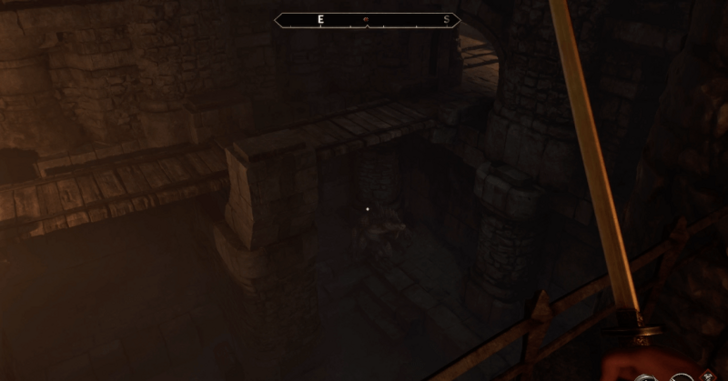 Jump down from the balcony behind the Turn Handle. Be warned, you’ll take fall damage, so ensure you have enough health before proceeding. |
| 9 | 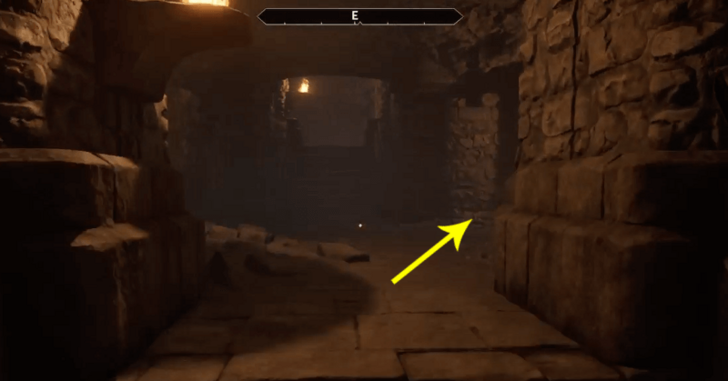 You’ll come across an opening; head straight, then turn right. |
| 10 | 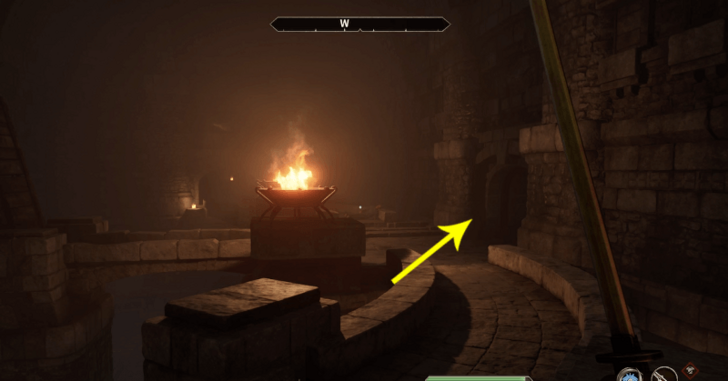 Upon returning to the room you entered earlier, turn right. The gate should now be open, thanks to the Turn Handle you activated earlier. |
| 11 | 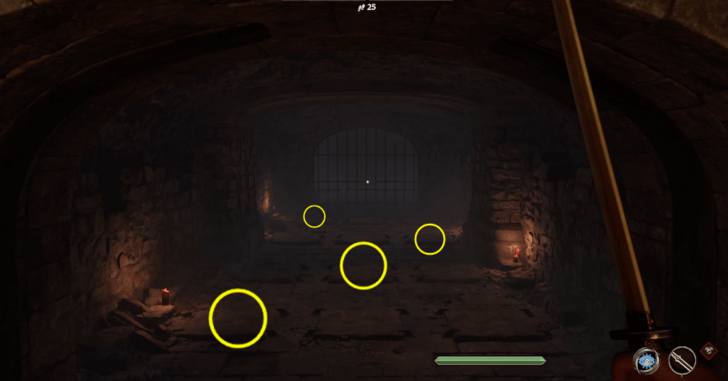 For the first puzzle, you must step on the correct tiles to open the gate. For the first set, step on the leftmost tile. In the second set, step on the middle tile. For the third set, step on the rightmost tile. Finally, for the last set, step on the leftmost tile once more. |
| 12 | 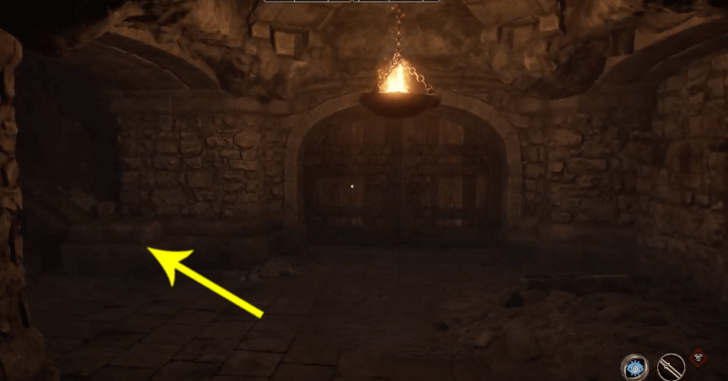 After passing through the wooden door, you’ll encounter another wooden door. Head left and ascend the stairs. |
| 13 | 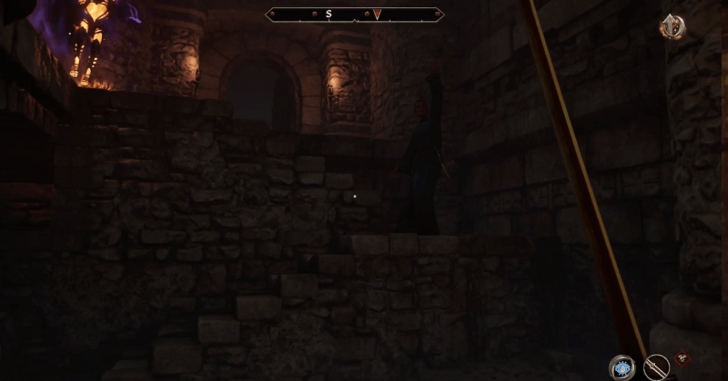 Head left, where you'll find the stairs. Be prepared — you'll encounter a few enemies along the way. |
| 14 | 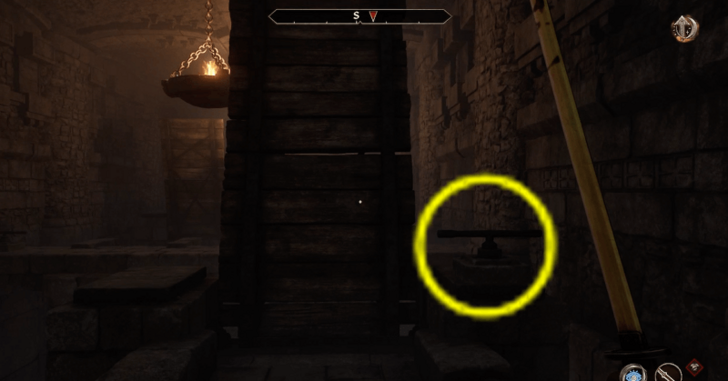 When you reach the wooden bridge, activate the Turn Handle. |
| 15 | 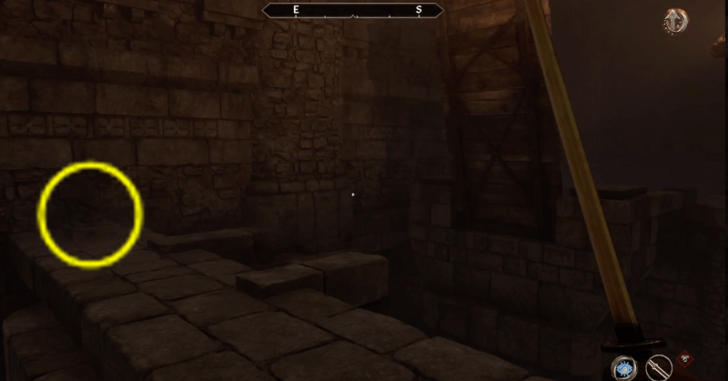 Move forward and activate the next Turn Handle. Be wary of the arrows falling from the ceiling — time your steps carefully to avoid taking damage. |
| 16 | 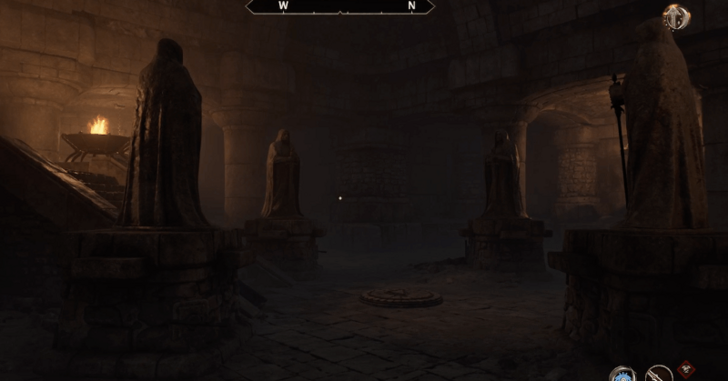 Next, you’ll encounter the second puzzle. Activate the Turn Handle on each statue, ensuring they face the center. Once the statues are looking at each other, the light will turn off, signaling that you’ve completed the puzzle. |
| 17 | 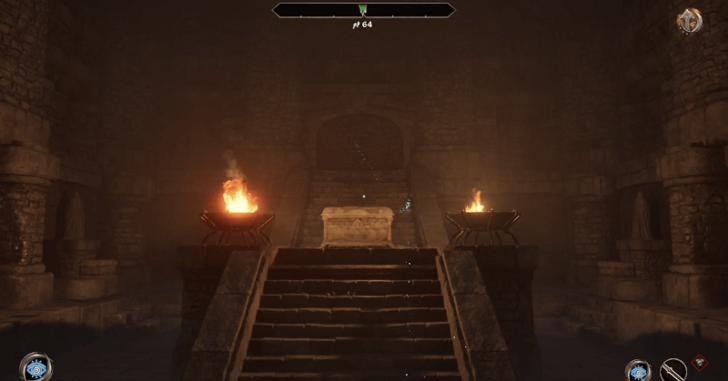 Next, you’ll face the third and final puzzle. First, loot the item from the chest at the top of the stairs. The items will spawn one by one and at random, so be prepared to search. Once you have the item, place it in one of the chests in front of the respective statues. Each statue requires a specific item to turn around, a key detail for solving the Wisdom of the Ages puzzle. |
| 18 | 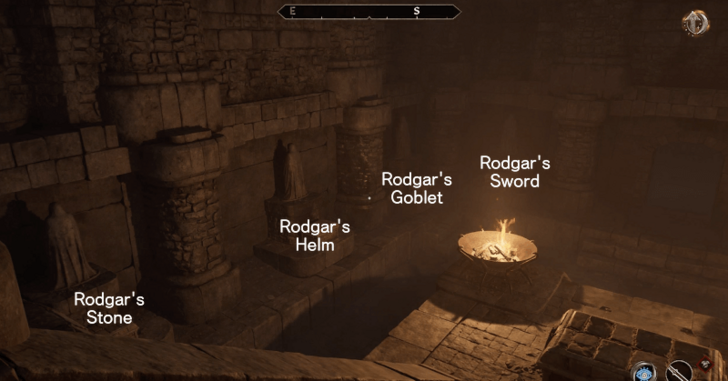 While having the view on top of the stairs the order on your left would be Rodgar's Stone, Rodgar's Helm, Rodgar's Goblet, Rodgar's Sword. |
| 19 | 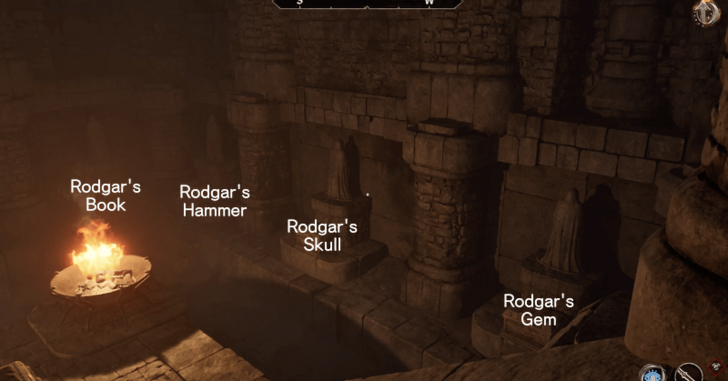 While having the view on top of the stairs the order on your right would be, Rodgar's Gem, Rodgar's Skull, Rodgar's Hammer, Rodgar's Book. |
| 20 | 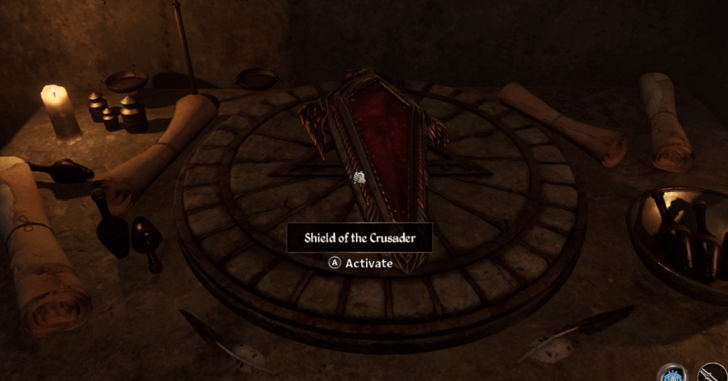 Once you’ve placed Rodgar’s items in their correct chests, the door behind the main chest will open. Inside, you’ll find a pedestal with the Shield of the Crusader resting on top. |
Wisdom of the Ages Rewards
Shield of the Crusader
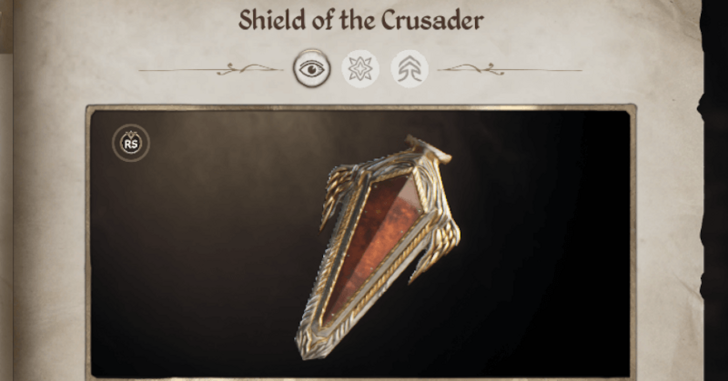
As a reward for completing the quest Wisdom of the Ages and solving its puzzles, you will be given the Shield of the Crusader, a heavy armor which grants grants a chance to reflect a spell back at the caster.
The Elder Scrolls IV Oblivion Remastered Related Guides

List of All Knights of the Nine Quests
All Knights of the Nine Quests
Author
Wisdom of the Ages Walkthrough and Puzzle Solution
improvement survey
03/2026
improving Game8's site?

Your answers will help us to improve our website.
Note: Please be sure not to enter any kind of personal information into your response.

We hope you continue to make use of Game8.
Rankings
- We could not find the message board you were looking for.
Gaming News
Popular Games

Genshin Impact Walkthrough & Guides Wiki

Honkai: Star Rail Walkthrough & Guides Wiki

Umamusume: Pretty Derby Walkthrough & Guides Wiki

Pokemon Pokopia Walkthrough & Guides Wiki

Resident Evil Requiem (RE9) Walkthrough & Guides Wiki

Monster Hunter Wilds Walkthrough & Guides Wiki

Wuthering Waves Walkthrough & Guides Wiki

Arknights: Endfield Walkthrough & Guides Wiki

Pokemon FireRed and LeafGreen (FRLG) Walkthrough & Guides Wiki

Pokemon TCG Pocket (PTCGP) Strategies & Guides Wiki
Recommended Games

Diablo 4: Vessel of Hatred Walkthrough & Guides Wiki

Cyberpunk 2077: Ultimate Edition Walkthrough & Guides Wiki

Fire Emblem Heroes (FEH) Walkthrough & Guides Wiki

Yu-Gi-Oh! Master Duel Walkthrough & Guides Wiki

Super Smash Bros. Ultimate Walkthrough & Guides Wiki

Pokemon Brilliant Diamond and Shining Pearl (BDSP) Walkthrough & Guides Wiki

Elden Ring Shadow of the Erdtree Walkthrough & Guides Wiki

Monster Hunter World Walkthrough & Guides Wiki

The Legend of Zelda: Tears of the Kingdom Walkthrough & Guides Wiki

Persona 3 Reload Walkthrough & Guides Wiki
All rights reserved
© 2025 ZeniMax Media Inc. All Rights Reserved.
The copyrights of videos of games used in our content and other intellectual property rights belong to the provider of the game.
The contents we provide on this site were created personally by members of the Game8 editorial department.
We refuse the right to reuse or repost content taken without our permission such as data or images to other sites.




![Monster Hunter Stories 3 Review [First Impressions] | Simply Rejuvenating](https://img.game8.co/4438641/2a31b7702bd70e78ec8efd24661dacda.jpeg/thumb)


Tom L I am lock in at the last puzzle and can't get to the shield. It is telling I am not high enough to place the Gem where it is supposed to go and the door is locked and I can't back out. ??