This survey will take about 1 minute.
Your answers will help us to improve our website.
The Elder Scrolls IV Oblivion Remastered
Shivering Isles Walkthrough
This is a list of all Shivering Isles main quests in The Elder Scrolls IV Oblivion Remastered. Read on for a complete story walkthrough, including detailed guides for each main quest in the Shivering Isles expansion!
| Shattered Space Walkthrough | |
|---|---|
| Shivering Isles Full Walkthrough | Shivering Isles Quest List (Main and Side) |
List of All Shivering Isles Main Quests
All 18 Main Quests
Shivering Isles has a total of 18 Main Quests. Select a main quest below to view its full guide and walkthrough:
- A Door in Niben Bay
- Through the Fringe of Madness
- A Better Mousetrap
- Baiting the Trap
- Undertanding Madness
- Addiction
- The Lady of Paranoia
- The Cold Flame of Agnon
- Ritual of Accession
- Ritual of Mania
- Ritual of Dementia
- Retaking the Fringe
- Rebuilding the Gatekeeper
- The Helpless Army
- Symbols of Office
- The Roots of Madness
- The End of Order
- The Prince of Madness
Shivering Isles Location and How to Start
Shivering Isles Story Walkthrough
1. A Door in Niben Bay

A Door in Niben Bay Walkthrough
| 1 | Travel to the Island West of Fort Grief |
|---|---|
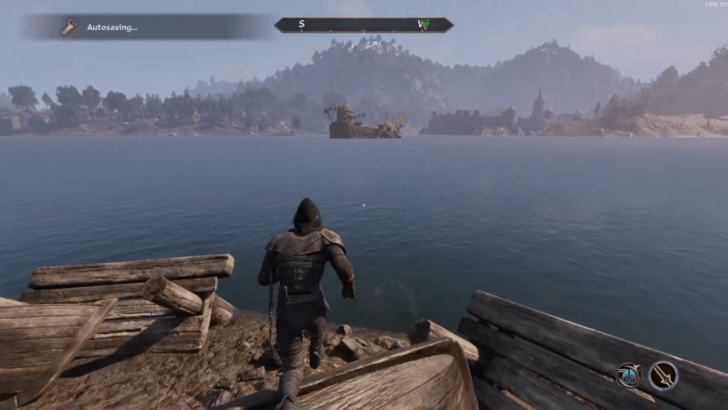 Travel to Niben Bay and swim towards the island west of Fort Grief. |
|
| 2 | Talk to Gaius Prentus |
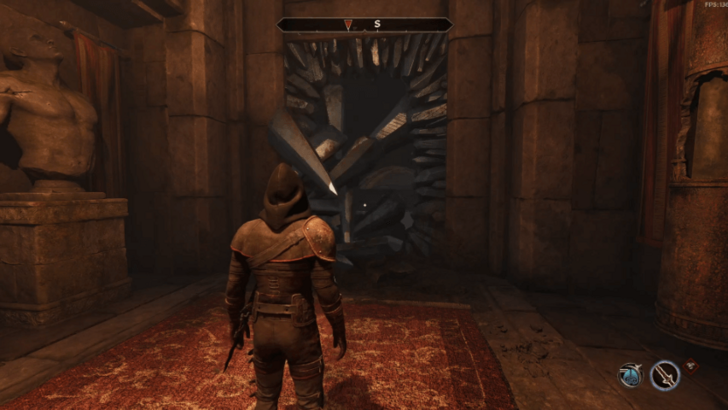
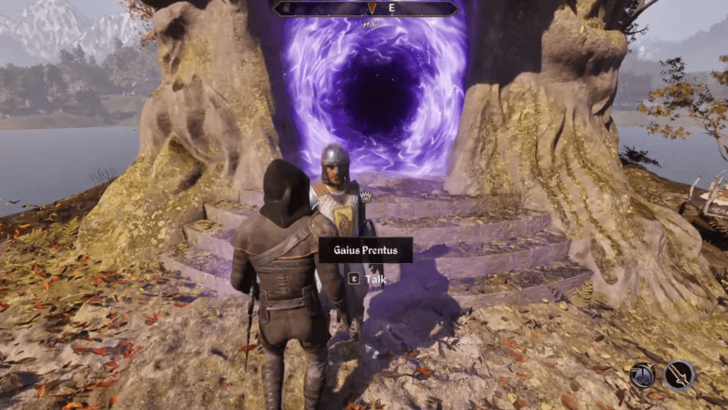 Upon arriving on the island, talk to Gaius Prentus, who standing in front of a strange purple door. This will trigger a scenario where Belmyne Dreleth spawns from the door and does a short monologue. After the monologue, Belmyne Dreleth becomes hostile and attacks. Defeat him to move to the next step. |
|
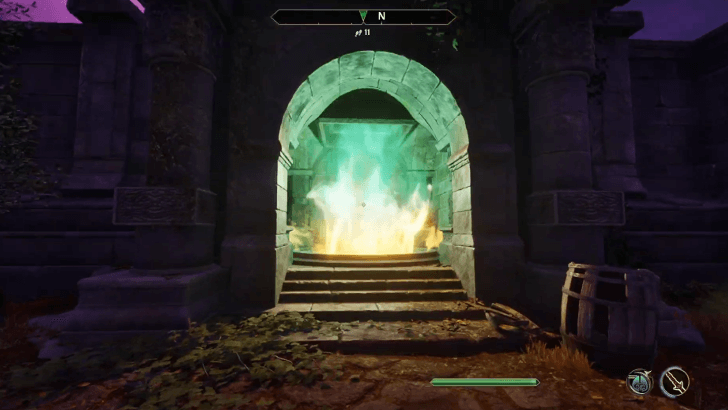
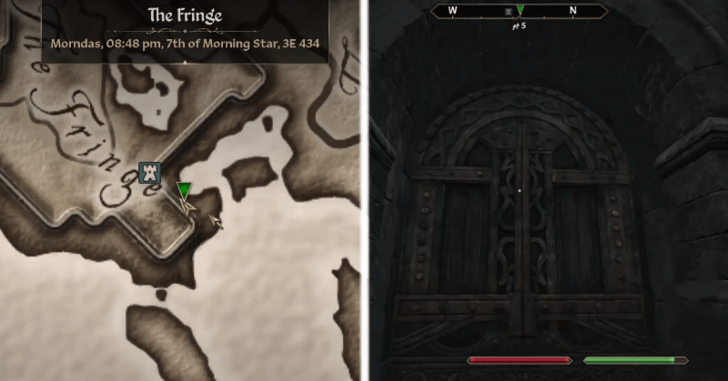
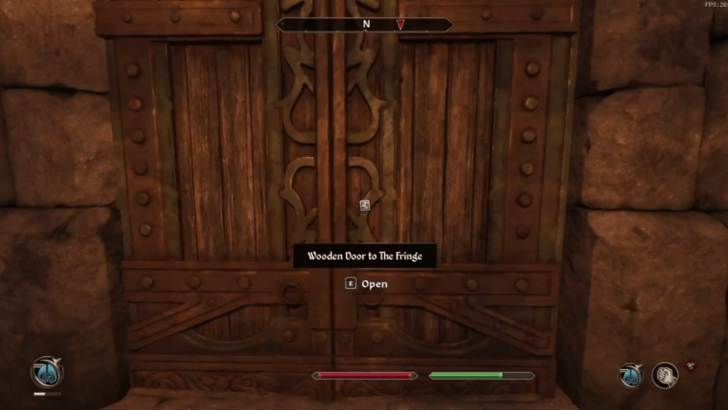
| 3 | Enter the Door to the Fringe |
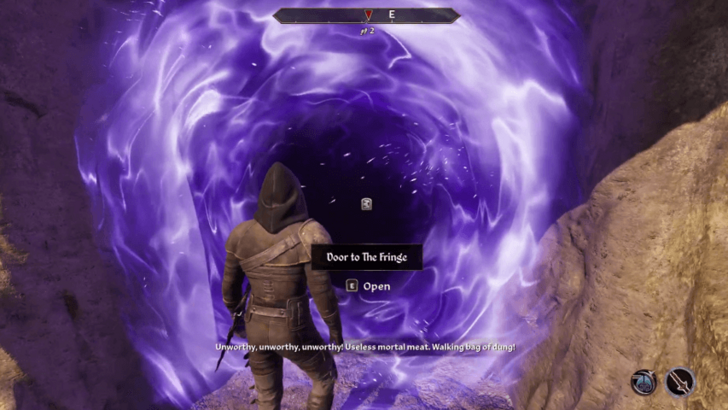 After defeating Belmyne Dreleth, enter the Door to the Fringe. Players will need to wait for a while before they can enter the door. A short monologue from an unknown character will play out first. Afterward, players can now enter throught the door. |
|
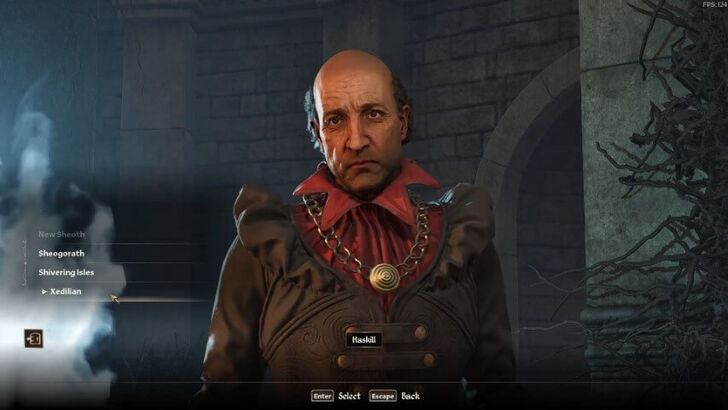
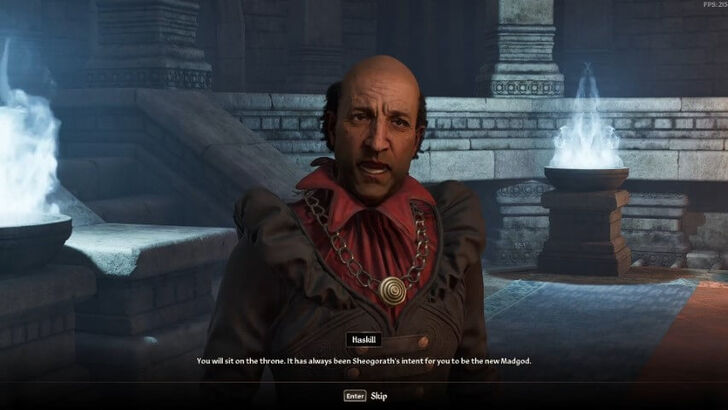
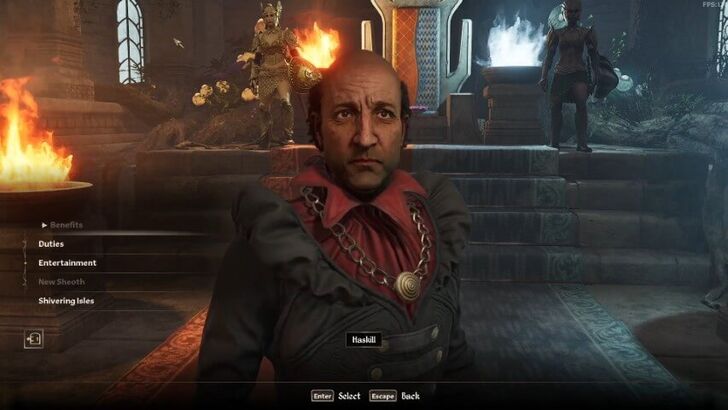
| 4 | Talk to Haskill and Accept the Request |
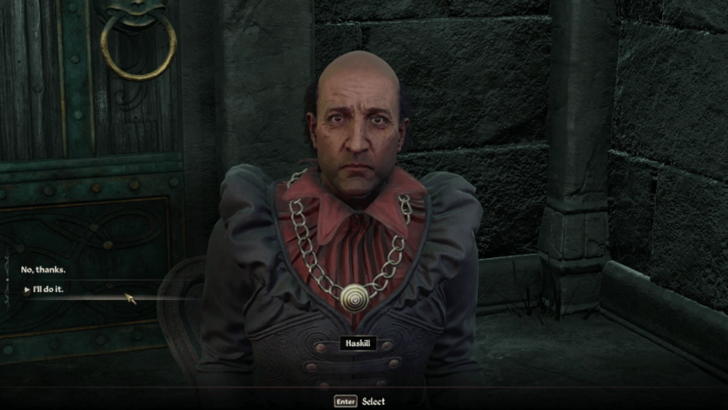 Upon entering the door, players will find themselves inside a small room with an NPC named Haskill. Talk to Haskill before moving on. Players will need to accept Haskill's request of becoming the champion for Lord Sheogorath to complete the quest. |
2. Through the Fringe of Madness

Through the Fringe of Madness Walkthrough
| 1 | Complete A Door in Niben Bay |
|---|---|
|
Players need to complete the A Door in Niben Bay quest first in order to start Through the Fringe of Madness since the two quests are linked. |
|
| Find the Gatekeeper | |
 Travel northeast and find the Gatekeeper that's fighting a group of soldiers. The creature will easily defeat the soldiers, and then the next quest info will pop up. |
|
| 2 | Talk to a Citizen |
 After the soilders are defeated, talk to any citizen in the area to find out how to defeat the Gatekeeper. |
|
| 3 | Talk to Jayred Ice-Veins |
 The name Jayred Ice-Veins will be mentioned by the citizens when they are asked about the Gatekeeper. Talk to Jayred Ice-Veins who is located in the second room in the second floor of the Wastrel's Purse in Passwall to proceed to the next task. |
|
| 4 | Go to the Gardens of Flesh and Bone |
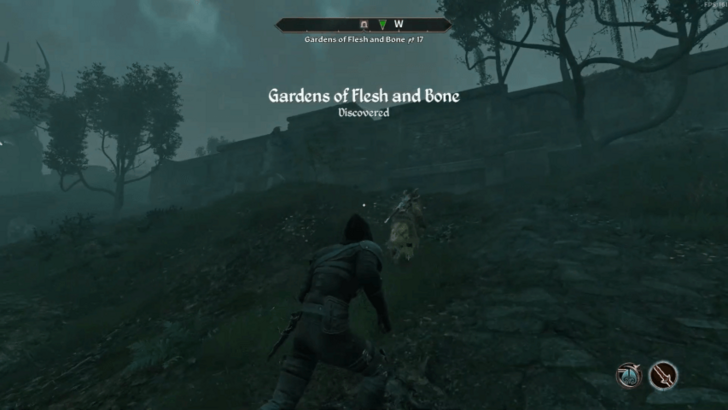 After talking to Jayred Ice-Veins about the Gatekeeper, he will travel to the Gardens of Flesh and Bone. Just folllow Jayred Ice-Veins to the destination, then upon arriving there, pick the lock of the gate to enter the area. Once inside, a group of skeletons will appear. Defeat the enemies, then talk to Jayred Ice-Veins again afterwards where he will say that he has what he needs to make the bone arrows and that players should find him in a couple of hours. |
|
 Use the in-game timer function to fast forward to a couple of hours, then find Jayred Ice-Veins and talk to him. He will most likely be at his house. After speaking to him about the bone arrows, equip a Bow and the Bone Arrows, then head over to the Gatekeepers location earlier. |
|
| 5 | Defeat the Gatekeeper |
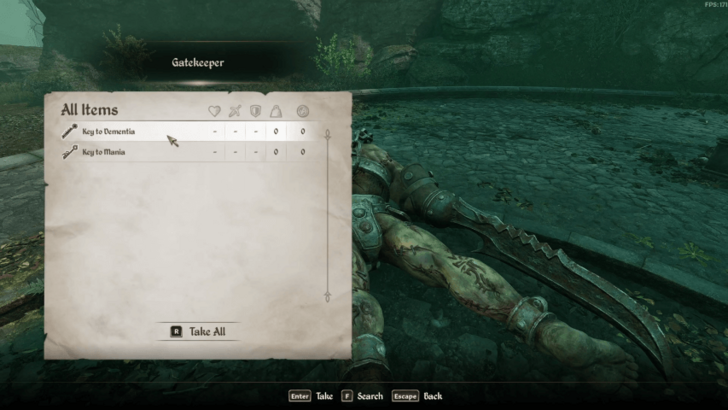 Use a bow and the Bone Arrows to defeat the Gatekeeper with the help of Jayred Ice-Veins. After defeating the Gatekeeper, obtain the Key to Mania and Key to Dementia from its corpse, then talk to Haskill, who will appear in the area, before entering one of the doors of the Gates of Madness. Note: Whichever door players choose to enter, the path will lead to the same destination. However, the reward will be different. |
|
| ▼ Which Door to Enter? ▼ | |
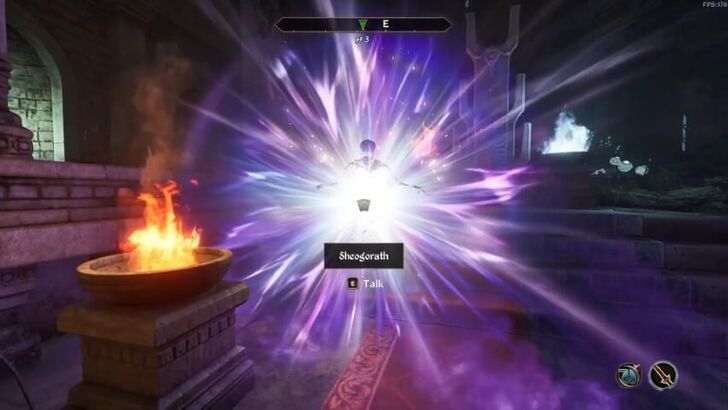
| 6 | Find and Talk to Sheogorath |
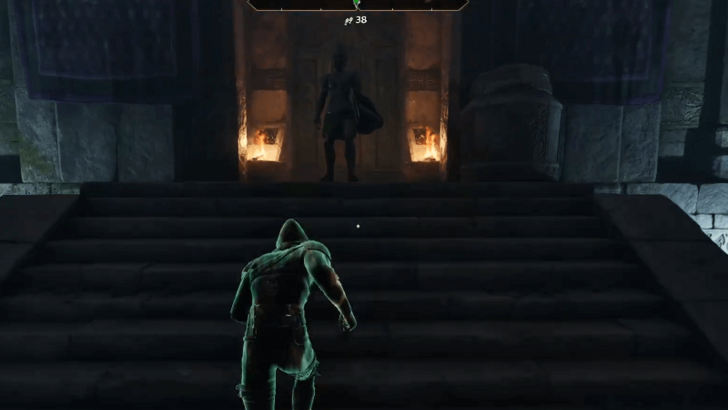
 Upon entering through one of the doors, just follow The Low Road path towards New Shoeth. The path leads to the city named Bliss. Upon entering the city, go through the Palace Grounds, enter the door to Sheogorath's Palace, then talk to Sheogorath there. |
3. A Better Mousetrap

A Better Mousetrap Walkthrough
| 1 | Talk to Haskill |
|---|---|
 At the Palace of Sheogorath, talk to Haskill and ask about Xedilian. He will task you with finding three Focus Crystals and placing them in a Judgment Nexus. |
|
| 2 | Travel to Xedilian |
 Travel to Xedilian. You can fast travel from the Gates of Madness and head southeast until you see a large glowing tree with a wooden door beneath it. |
|
| 3 | Find the First Focus Crystal |
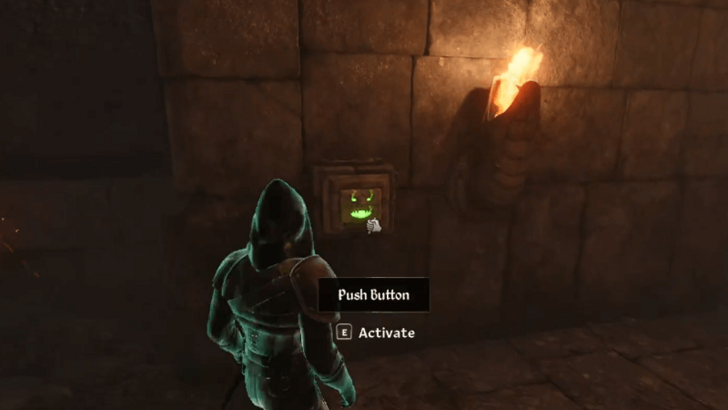
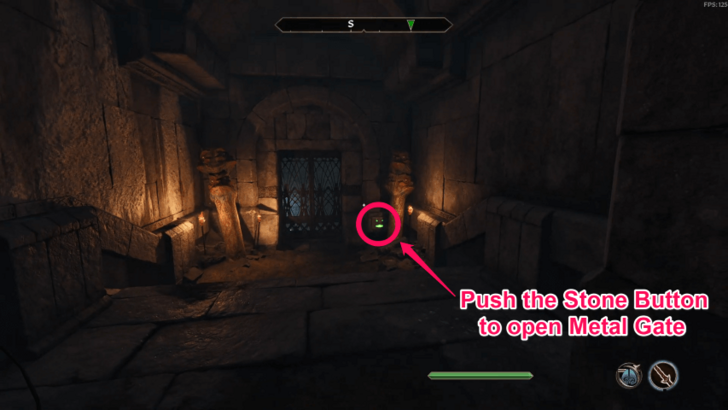 Once inside, search for the three Focus Crystals. The rooms are separated by metal gates that can only be opened by pressing nearby stone buttons with glowing faces. Be prepared to fight enemies along the way! |
|
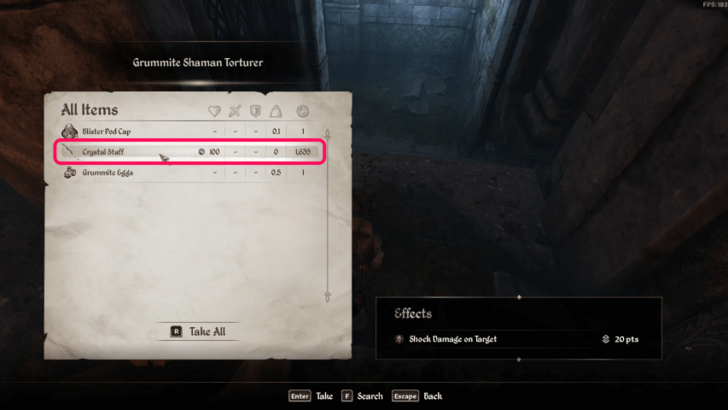 Make your way south through the ruins. Near the Judgment Nexus, defeat the Grummite Shaman Torturer and loot the Crystal Staff from its corpse. This is the first Focus Crystal. |
|
 Place the Focus Crystal on the Judgment Nexus to open the door to the next area. |
|
| 4 | Find the Second Focus Crystal |
 From the Nexus, head south and open the metal door on the left to access the next area of the ruin. |
|
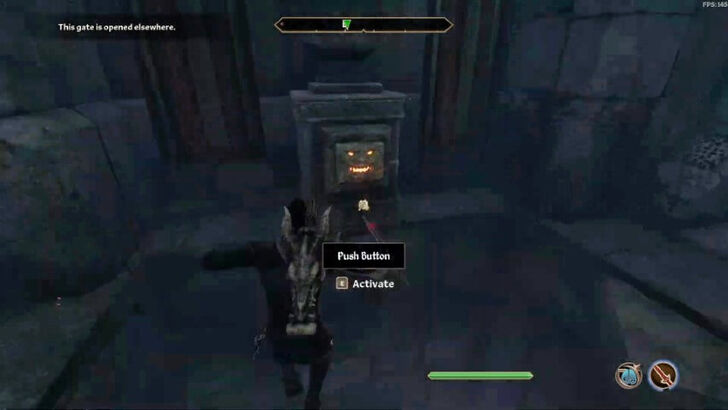 Continue east through the halls until you reach a stone button between two metal gates. Push the button to trigger a trap door, dropping you down to a lower level. |
|
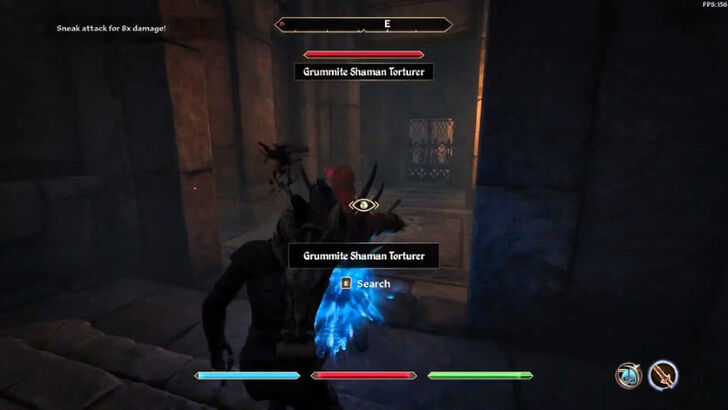 Proceed forward to find another Judgment Nexus. Kill the nearby Grummite Shaman Torturer and loot the Crystal Staff. Place the second Focus Crystal on the Nexus to open the gate opposite it. |
|
| 5 | Find the Third Focus Crystal |
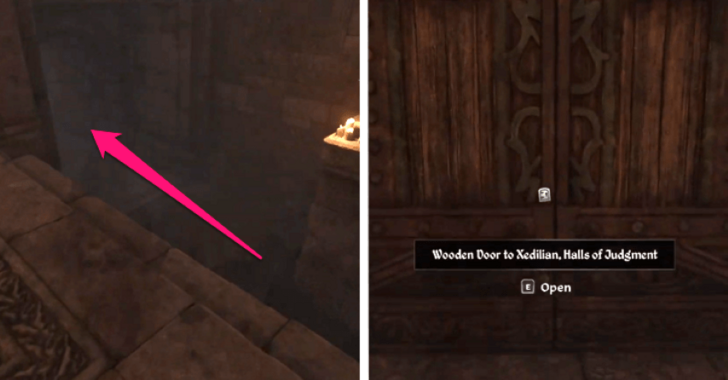 Enter the gate to the east and follow the hallway to the right side of the stairs. Continue forward and enter the door to the Halls of Judgment. |
|
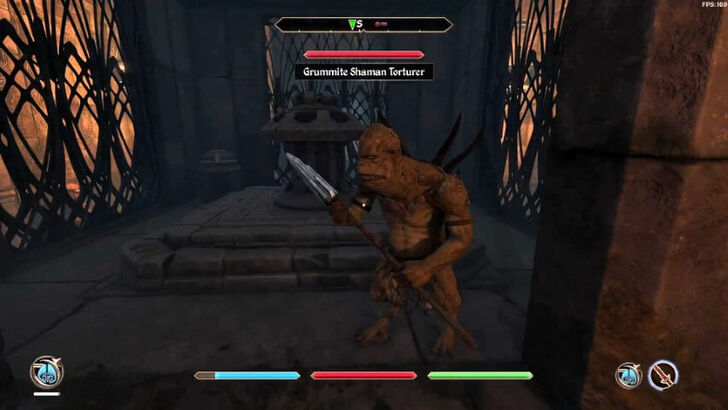 Make your way north until you reach another Judgment Nexus. Defeat the Grummite Shaman Torturer and loot the Crystal Staff. Place the third Focus Crystal on the Nexus to open the gate up north. |
|
| 6 | Activate the Resonator of Judgment |
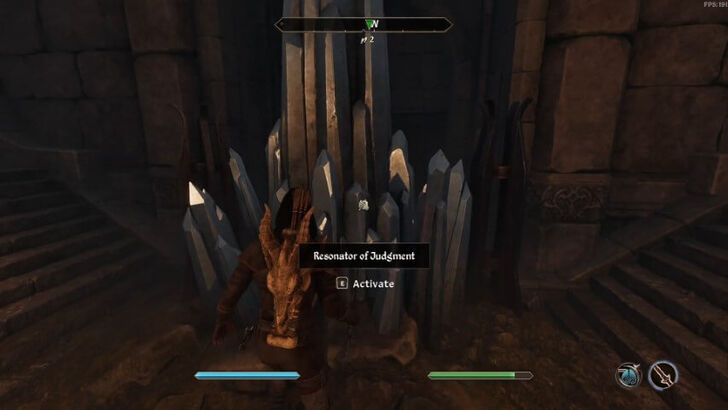 Go through the newly opened gate and proceed down the hall until you reach the Resonator of Judgment. Activate the Resonator to immediately start the next quest, Baiting the Trap. |
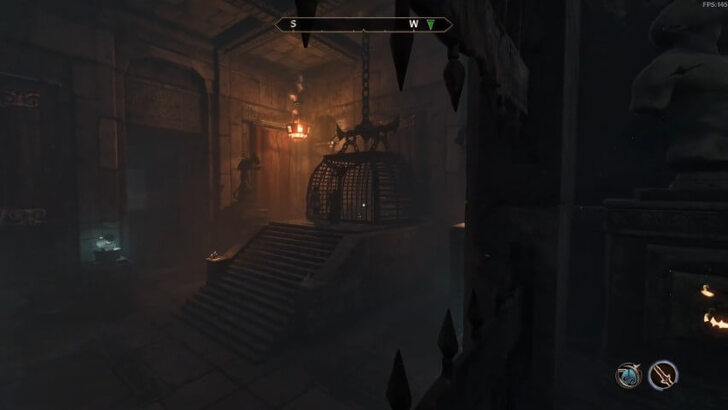
4. Baiting the Trap

| 1 | Talk to Kiliban |
|---|---|
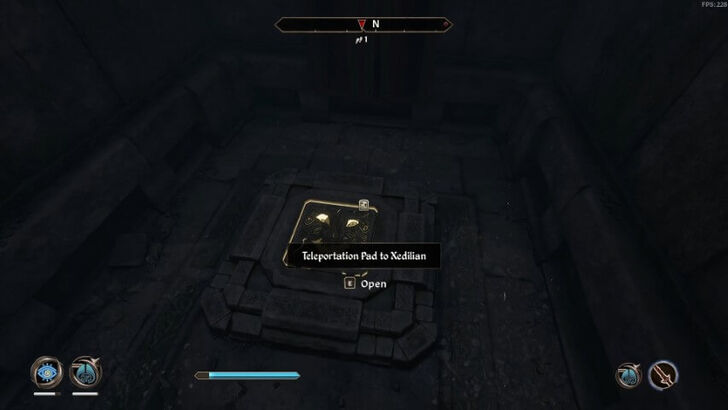 After activating the Resonator of Judgment during A Better Mousetrap, enter the room on the right and use the Teleportation Pad to leave the area. |
|
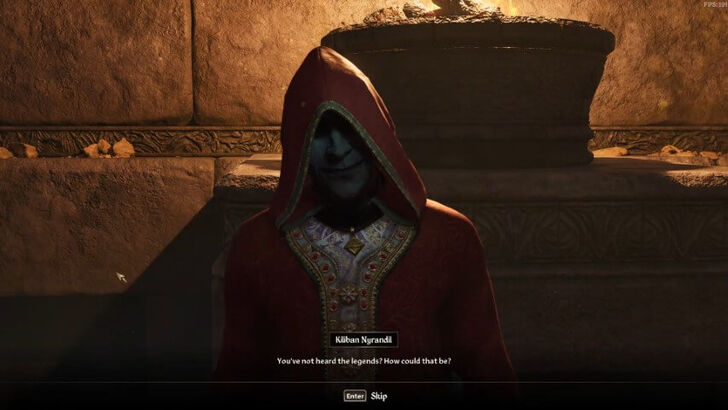
 Upon teleporting, Kiliban Nyrandil will speak to you and thank you for repairing the Resonator. |
|
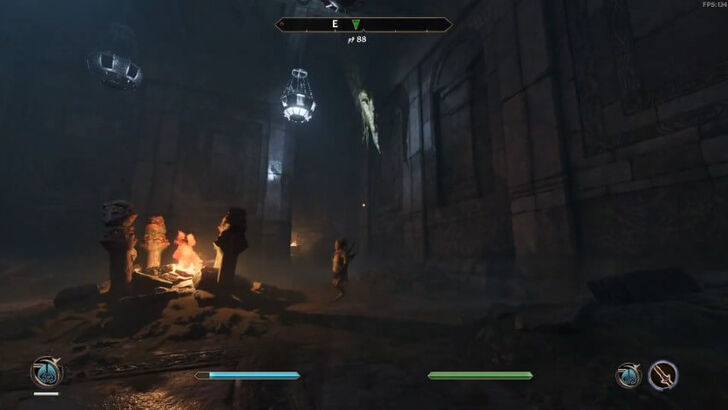
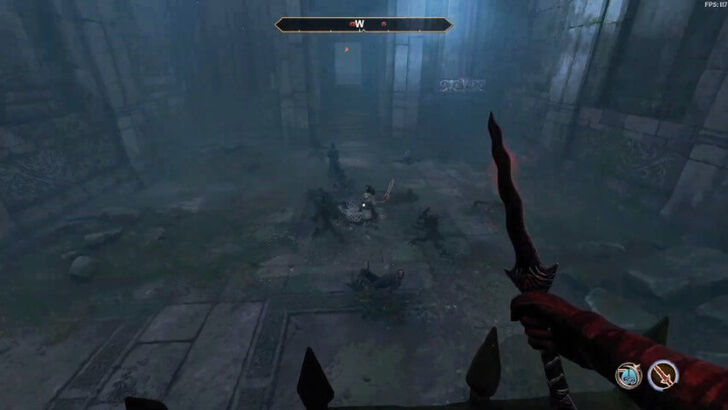
| 2 | Torture the Adventurers |
 Kiliban will then task you with torturing a group of three adventurers entering Xedilian. You can choose between inflicting Mania (insanity) or Dementia (death), using the nearby stone buttons in each chambers. Choose freely, but take note that any survivor will become a permanent resident of the Shivering Isles. |
|
 To start, enter the room on the left and wait for the adventurers to arrive. Use the stone buttons to choose between Gnarl Swarm (death) or Giant Gnarl (insanity). Watch the torture play out through the bars. |
|
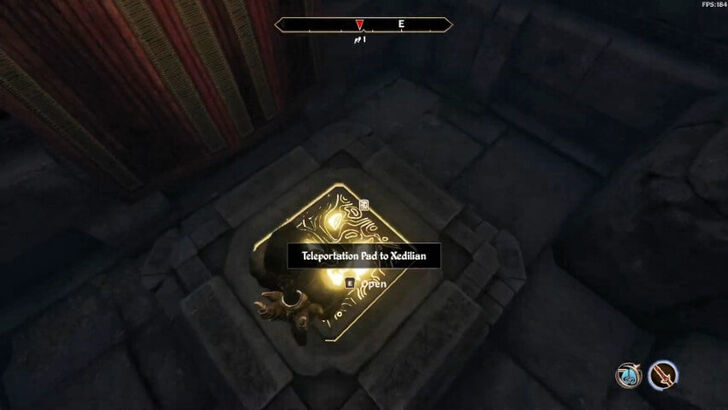 After making your selection, exit the room, turn left, and take the Teleportation Pad to the next chamber. |
|
 In the chamber down south, wait for the adventurers to arrive and choose between Fire Trap (death) or Drop Keys (insanity) to torment them. Watch the scene, leave the chamber, then use the Teleportation Pad to reach the last chamber. |
|
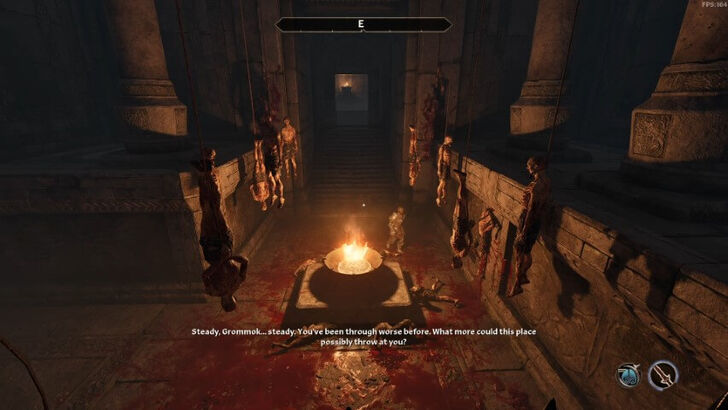 Enter the last chamber. Wait for the adventurers (or adventurer if only one is left) and choose between Raise the Dead (death) or Ghost Illusion (insanity). |
|
| 3 | Return to Kiliban |
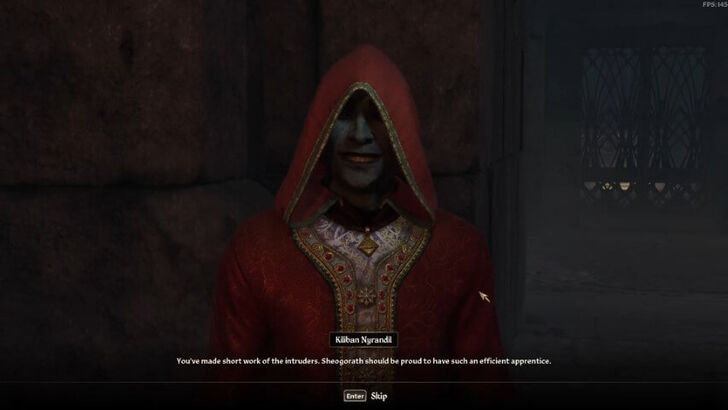 Regardless of what becomes of the adventurers, return to Kiliban. Use the nearby Teleportation Pad to exit the area. |
|
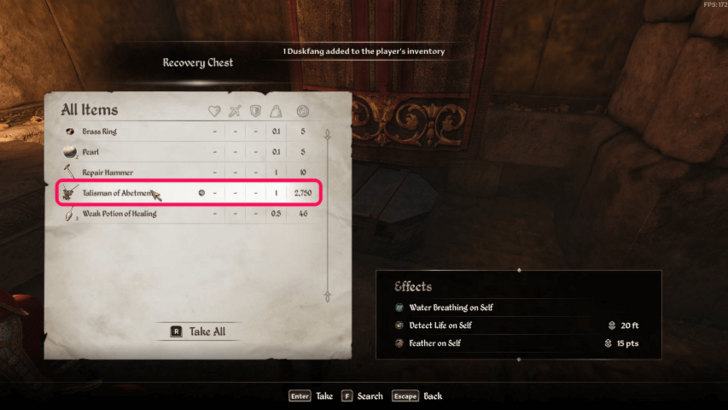 Before leaving, loot the Recovery Chest nearby to obtain the Talisman of Abetment. |
|
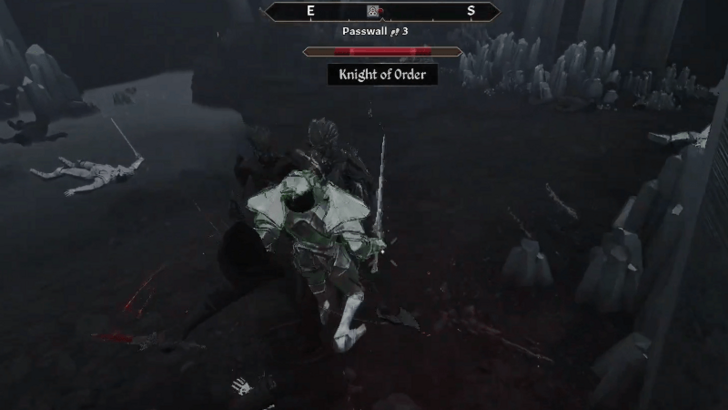
| 4 | Fight the Knights of Order |
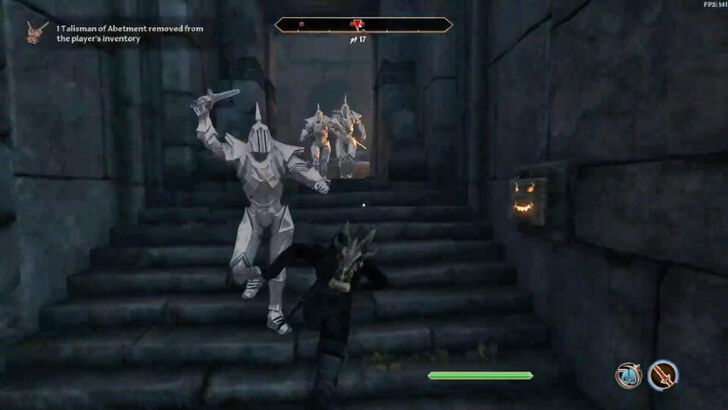 As you exit Xedilian, you’ll be attacked by Knights of Order. Defeat them to continue! |
|
 After defeating them, speak with Kiliban again to ask about the Knights of Order. This will complete the quest and immediately start the next one, Understanding the Madness. |
5. Understanding Madness

Understanding Madness Walkthrough
| 1 | Report to Sheogorath |
|---|---|
 Report the results of the previous quest, Baiting the Trap, to Sheogorath and he will be elated with your message. He will give you a new spell to summon his Chamberlain, Haskill, that will aid you in your journey. |
|
| 2 | Summon Haskill |
 Use your newfound spell and summon Haskill. He will tell you that when he is summoned he will offer advice on your current endeavor. Talk to Sheogorath and he will tell you to summon Haskill again. After summoning again, talk to Sheogorath for the third time and he will tell you to summon Haskill again. |
|
| 3 | Talk to Sheogorath to Learn About Jyggalag |
 Talk to Sheogorath and he will tell you about needing to defeat Jyggalag and stop the Greymarchs. Talking to him will unlock the quests Addiction and The Lady of Paranoia. After exhausting all the dialogue options, you must first do the two new quests that you've unlocked and then talk again to Sheogorath to finish Understanding Madness. |
6. Addiction

| 1 | Head to House of Mania |
|---|---|
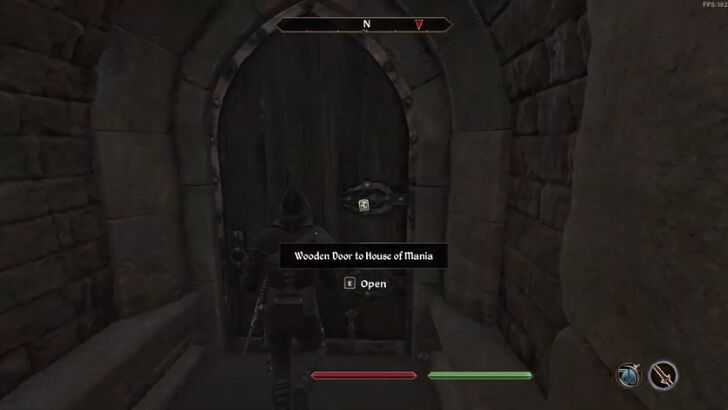 Go through the wooden door that will lead you to the House of Mania from Sheogorath's room. |
|
| 2 | Talk to Thadon |
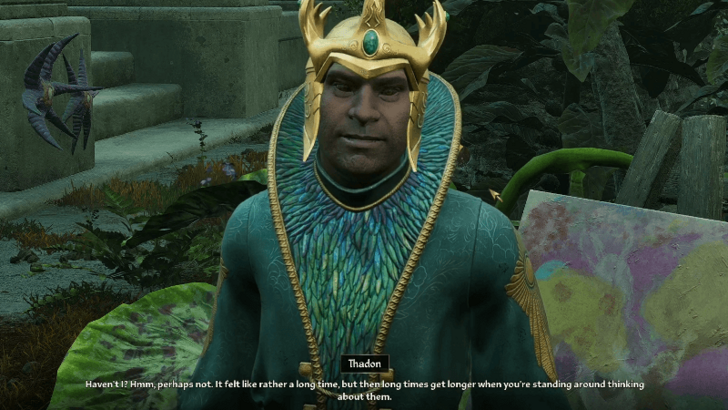 Go to the Halcyon Conservatory where Thadon is and he will tell you to retrieve his Chalice of Reversal. Note that Thadon can also be found in his throne during this quest. Just follow the objective marker to get to where he is. |
|
| 3 | Talk to Wide-Eye |
 Talk to Thadon's steward Wide-Eye whom can be seen near Thadon (or in the throne room). She will tell you of the Dunroot Burrow where you can find the Chalice of Reversal. |
|
| 4 | Go to Dunroot Burrow and Use the Felldew |
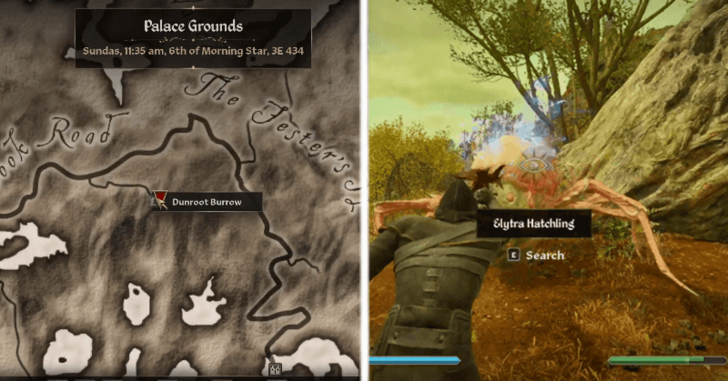 Fast travel to Bliss and then go outside the city to travel into Dunroot Burrow. It is a long walk so there will be enemies on the way. Once you've reached the burrow, kill the Elytra Hatchling and loot the Felldew from its body. You need to consume the Felldew to get inside the Dunroot Burrow. |
|
| 5 | Follow the Path and Kill Elytra Hatchlings |
 Inside the burrow, follow the linear path to the north while killing the Elytra Hatchlings on your way. Loot their Felldew as you will need to keep it while exploring the burrow. |
|
| 6 | Go to the Kelp Fen |
 You will eventually reach a cavern-like area and see a giant climbable root that will lead you up. Take the south path and then cross the root bridge at the end of the caver-like area. Take the path that leads downwards to the north. You will see another cavern-like area with another root bridge that leads upwards. Go through this bridge and follow the path to the west to get to the Kelp Fen. |
|
| 7 | Get to the Drone Tunnels |
 Inside the Kelp Fen, there will be water with lots of kelps and roots. Go to the southwest section of the water and jump on the root to get to the top. Go to the west then keep following the south to get into the Drone Tunnels. |
|
| 8 | Get to the Bramble Halls |
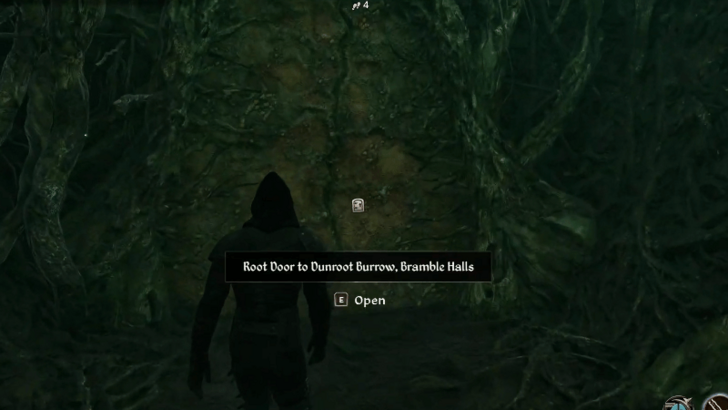 Move forward and take the left path. Just keep following the marker on your compass until it eventually leads you to the door of Bramble Halls. |
|
| 9 | Navigate Your Way to Sanctum of Decadence |
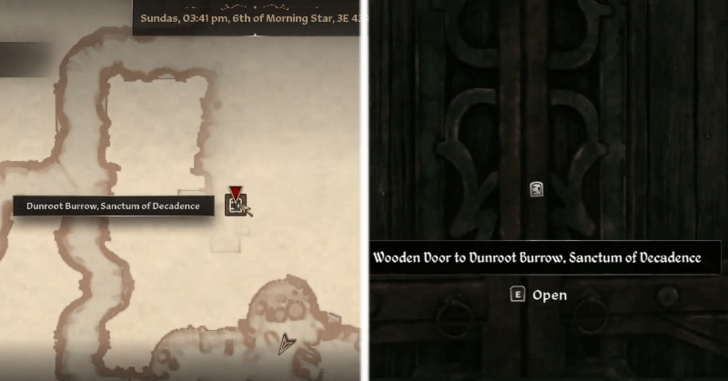 Inside the Bramble Halls, go to the right path since the straight path is blocked. Move forward and take the south path until you eventually see a bridge that leads downwards. Take this bridge and you will see another root bridge that leads to the top. You will see another root bridge to the top but instead of taking it, go to the right and go to the north. Eventually, the arrow in your compass will lead you into a west path that will lead you to the Sanctum of Decadence. |
|
| 10 | Take the Chalice of Reversal |
 Retrieve the Chalice of Reversal inside the sanctum and defend yourself against the enemies inside. Return the chalice to Thadon to complete the quest. |
7. The Lady of Paranoia

The Lady of Paranoia Walkthrough
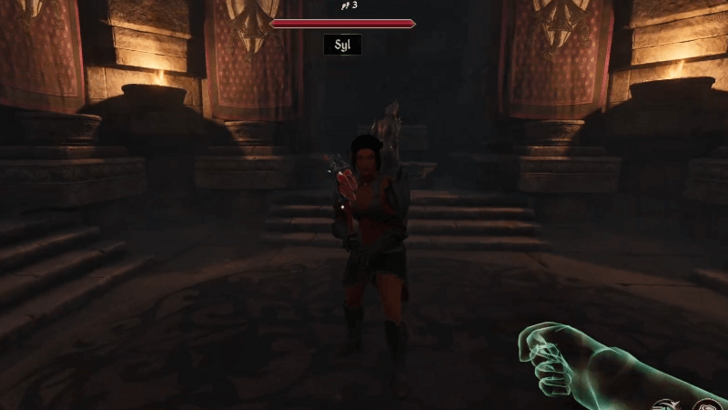
| 1 | Talk to Syl |
|---|---|
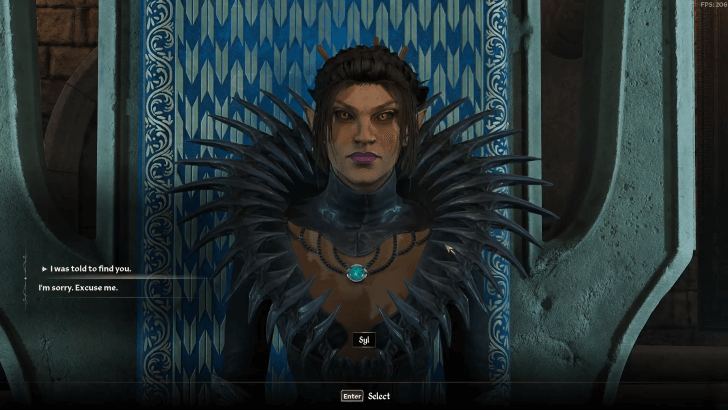 Talk to Syl to in the House of Dementia to learn about a conspiracy against her. She will grant you the title of Grand Inquisitor and ask you to investigate the matter. |
|
| 2 | Talk to Herdir |
 Syl will tell you to talk to Herdir to help with the investigation. Find him at the torture chamber and he'll join you after you tell him you're the Grand Inquisitor. |
|
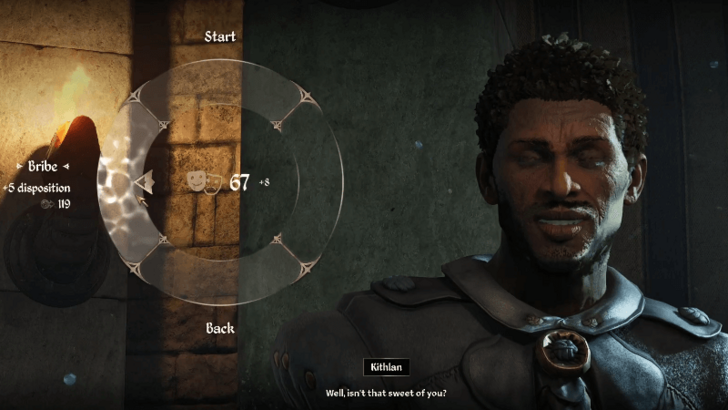
| 3 | Torture Kithlan for Information |
 Start the investigation by talking to Kithlan who can be found just sitting right next to Lady Syl. Ask him about the conspiracy and let Herdir torture him twice to get information. |
|
| 4 | Talk to Anya |
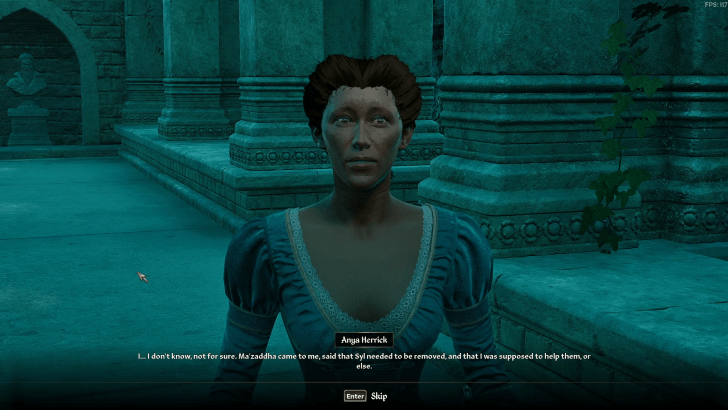 Find Anya around the palace courtyard and talk to her regarding the conspiracy. She will give you the information once Herdir tortures her the first time. |
|
| 5 | Find Ma'zaddha |
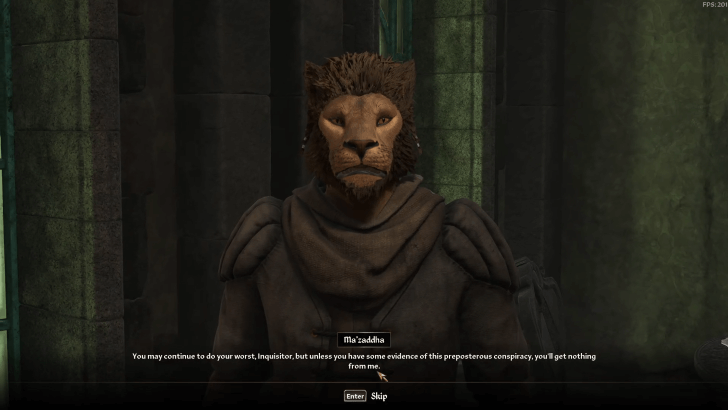 Look for Ma'zaddha in his house outside the palace. Ma'zaddha will not tell you anything about the conspiracy even after how many times you let Herdir torture him. You'll have to find evidence from other sources. |
|
| 6 | Gather Information from Citizens |
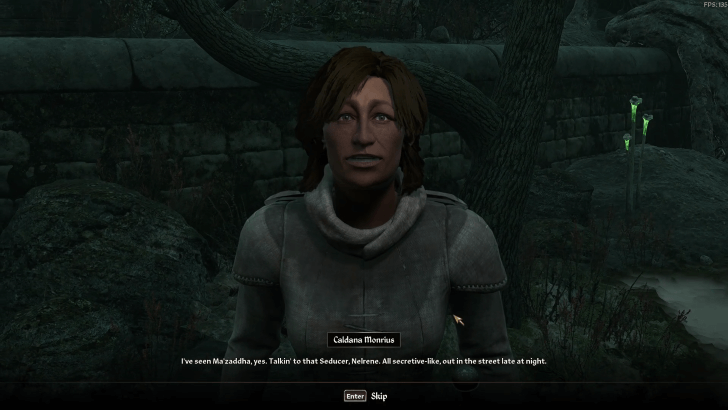 Talk to citizens around town to gather more information about Ma'zaddha's involvement. Use Herdir to torture people for information during this step. One citizen you can talk to is Caldana Monrius roaming around town. After torturing her once, she will inform you that Ma'zaddha has been meeting with Nelrene at midnight. |
|
| 7 | Follow Ma'zaddha at Midnight |
 Wait until midnight to find Ma'zaddha meeting with Nelrene by the sewer gate in town. Be sure to stay hidden as they are talking about the conspiracy. |
|
| 8 | Confront Ma'zaddha |
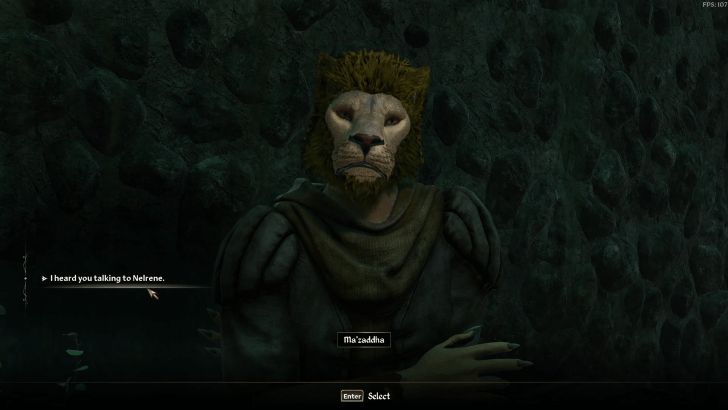 After Ma'zaddha and Nelrene finish talking, confront Ma'zaddha and he will confess to the plot. He will be forced to gather information for you and ask you to meet him at his house the next night. Alternate Route: You may also confront Nelrene about the conspiracy after you finish talking to Ma'zaddha. She will deny any involvement until you get Herdir to torture her three times. |
|
| 9 | Visit Ma'zaddha's House the Next Day |
 When you visit Ma'zaddha at his house the next night, you'll find him lying in a pool of his own blood. Loot his body and grab the keys to the cupboard in his house. |
|
| 10 | Find Evidence in Ma'zaddha's House |
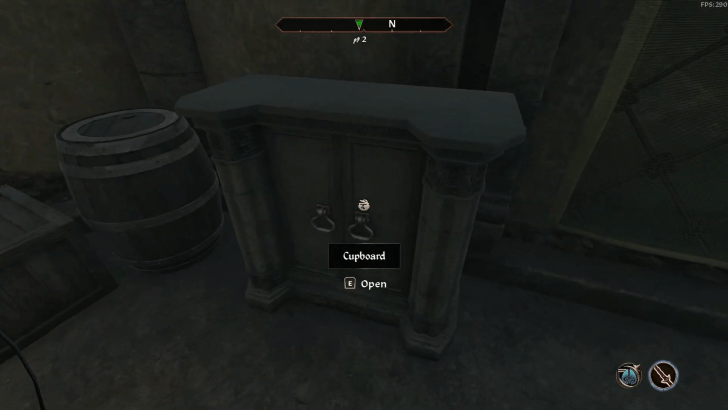 Head to the 2nd floor of Ma'zaddha's house and open the cupboard to find a note and shortsword to be used as evidence against Nelrene. |
|
| 11 | Confront Nelrene with Evidence |
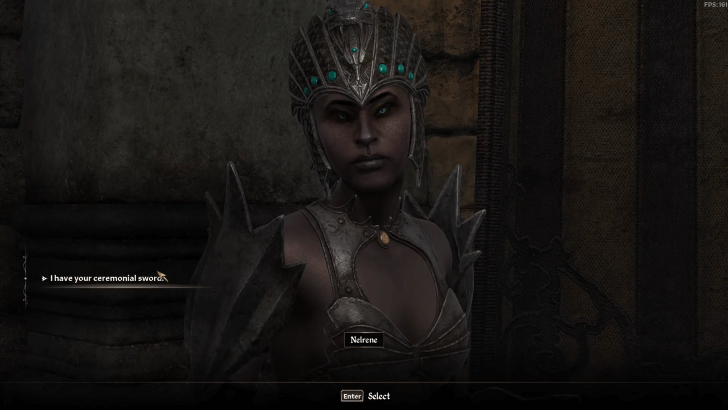 Confront Nelrene who can be found at the House of Dementia with the evidence, she will tell you that Muurine is behind the entire plot. |
|
| 12 | Confront Muurine |
 Find Muurine at her house in town and confront her. She will admit that she's the one behind the plot to assassinate Lady Syl. |
|
| 13 | Report to Syl |
 Report to Syl and tell her everything you know. She will then ask you to meet her at the torture chamber to witness the punishment for Muurine. |
|
| 14 | Head to the Torture Chamber |
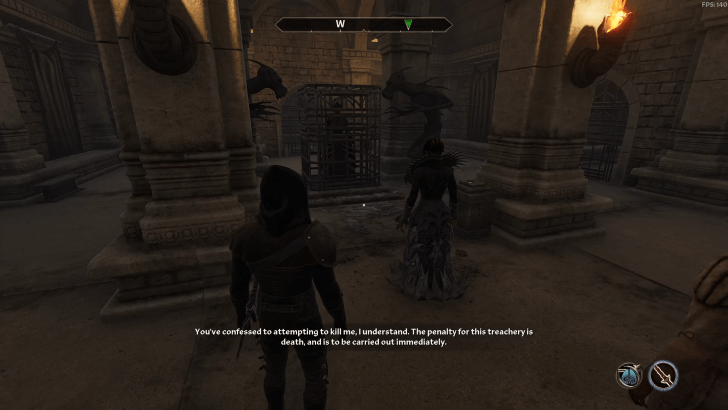 At the torture chamber, Muurine will be placed in a cage before being electrocuted to death. Talk to Syl to complete the quest and receive the Ruin's Edge bow and the title, Courtier of Dementia. |
8. The Cold Flame of Agnon

The Cold Flame of Agnon Walkthrough
| 1 | Head to Cylarne |
|---|---|
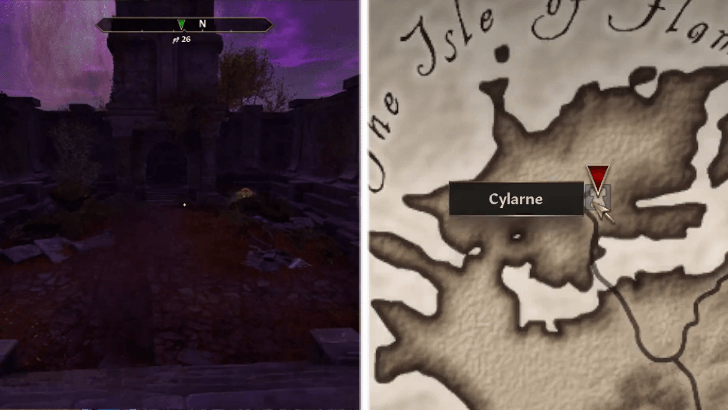 Travel to Cylarne to learn more about how to obtain the Flame of Agnon. Once you arrive there, you'll be met with two opposing sides; the Dark Seducers and the Golden Saints, fighting for the flame. You may speak to the guards at each gate and tell them that Sheogorath sent you to pass through to each encampment. |
|
| 2 | Choose a Side |
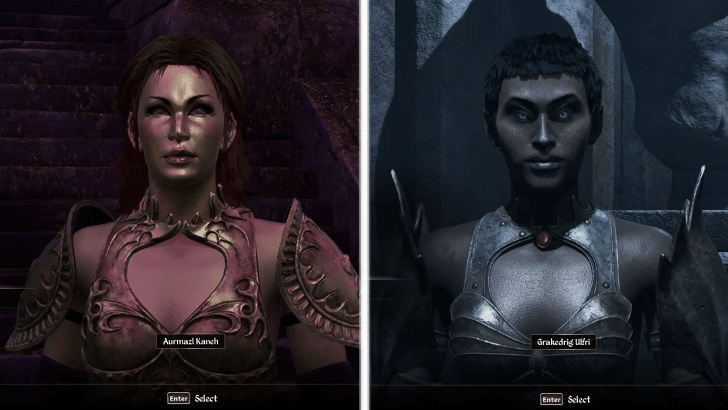 You must now choose to help either the Dark Seducers or the Golden Saints in claiming the altars. Talk to Ulfri for the Dark Seducers or Kaneh for the Golden Saints and tell them you'll help them defeat the opposing side. You may speak to both of them before making your decision. This also goes into play when preparing for the battle in the next step. |
|
| 3 | Prepare Battle Plans |
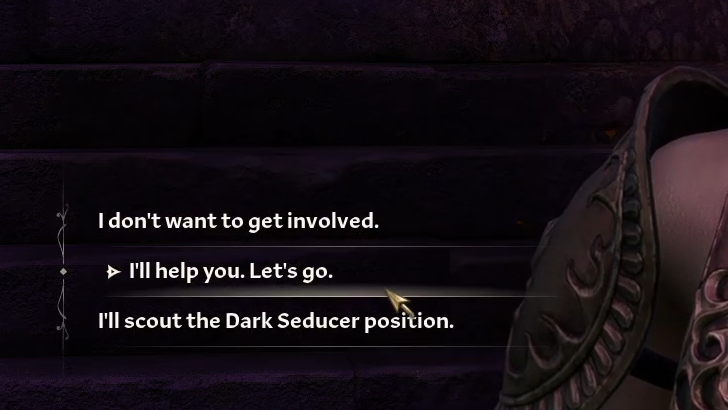 Now that you have chosen a side, you can talk to the respective commander to prepare battle plans. The battle can happen in a number of ways and in two different locations depending on what you do during this step. No matter the scenario, the Dark Seducers will always be the one defending against the Golden Saints Scenario 1: You let both commanders carry out their original plans and fight at the entrance without any suggestion or deception from you. Scenario 2: You can tell the Golden Saints to attack through the Underdeep which will have weak defenses according to a scouting report. Scenario 3: You can deceive the Dark Seducers to defend the Underdeep and attack through the front gates with the Golden Saints. Scenario 4: You can deceive the Golden Saints to attack through the Underdeep and plan an ambush with the Dark Seducers there. Before the battle, you'll be able to freely talk to each commander. You can use this time to scout and/or deceive each side to achieve the victory you want. |
|
| 4 | Defeat the Opposing Army |
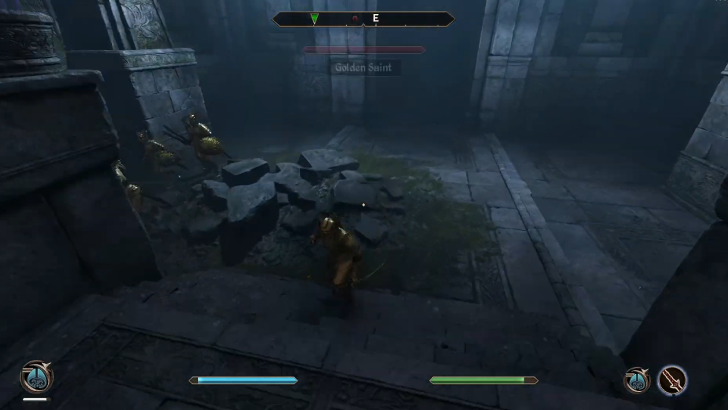 You can start the battle by talking to the commander you want to help and selecting the option to help them. This immediately starts the fight with the Golden Saints attacking the Dark Seducers base. Defeat the enemy commander along with the soldiers to complete this step. |
|
| 5 | Head to the Altar of Despair |
 After the battle, the commander you helped will ask you to go with her to the Altar of Despair where she will sacrifice herself to ignite the altar. Head to the altar and witness the event. |
|
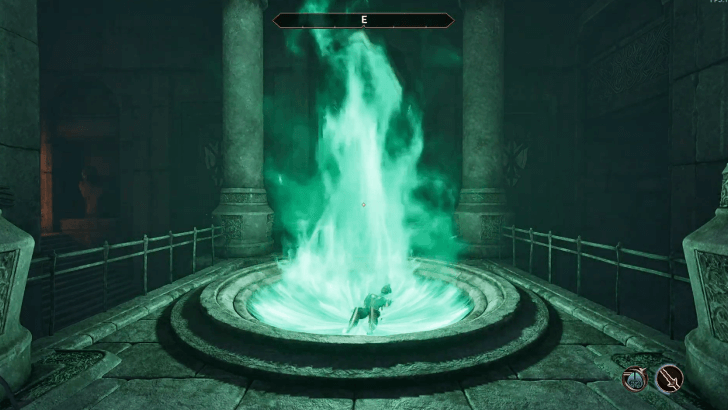
| 6 | Claim the Flame of Agnon |
 After the commander sacrifices herself, head back to the entrance of Cylarne and you'll find the Flame of Agnon burning in its chamber. Step into the flame to claim the Flame of Agnon for yourself. |
|
| 7 | Light the Torch for Mania or Dementia |
 Your character will be glowing green after stepping into the flame, head back to New Sheoth and visit the Sacellum Arden-Sul. You'll be met by two priests who will give you the option to light either the torch for Mania or for Dementia. Lighting the torch for Mania will reward you with the Raiment of Arden-Sul while lighting the torch for Dementia will reward you with the Raiment of Intrigue. |
9. Ritual of Accession

Ritual of Accession Walkthrough
| 1 | Talk to Sheogorath |
|---|---|
 At the Palace of Sheogorath, talk to Sheogorath. He will ask you to become the sovereign of either Mania or Dementia. |
|
| 2 | Speak with the High Priests |
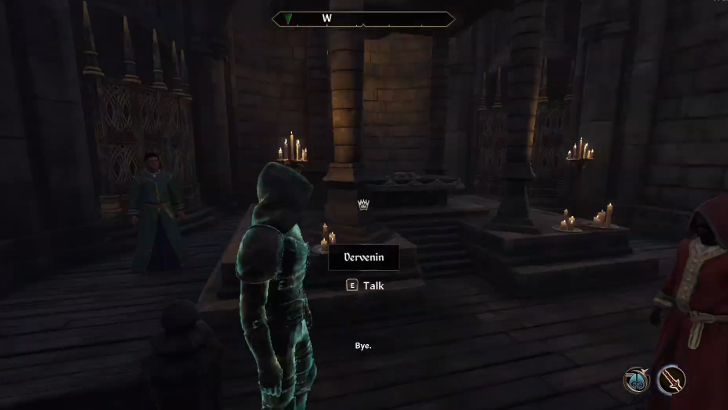
 You will then have to choose between two quests: Ritual of Mania or Ritual of Dementia. Before you decide, speak with the duchy's High Priest—Dervenin for Mania and Arctus for Dementia. |
|
| 3 | Tell Sheogorath Your Decision |
 After speaking with both High Priests, make your decision by telling Sheogorath which duchy you plan to rule. This will immediately begin the corresponding quest. Note that you can only choose one duchy, as choosing locks out the other. |
10. Ritual of Mania

| 1 | Talk to Wide-Eye |
|---|---|
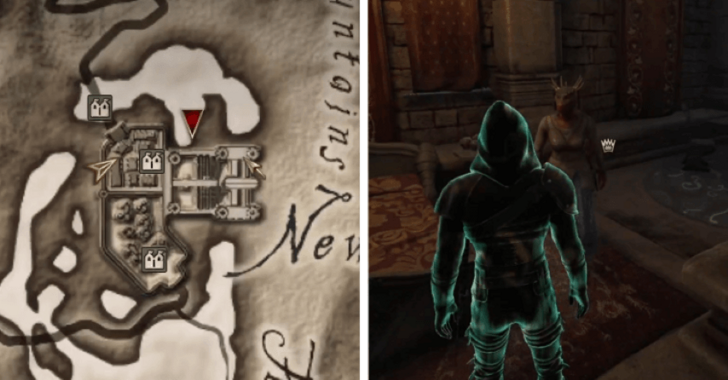 To start the quest, ask around to find Thadon’s whereabouts. Locals will direct you to his servant, Wide-Eye. Head to the House of Mania, north of the New Sheoth Palace, and ask Wide-Eye about her daily routine. |
|
| 2 | Follow Wide-Eye |
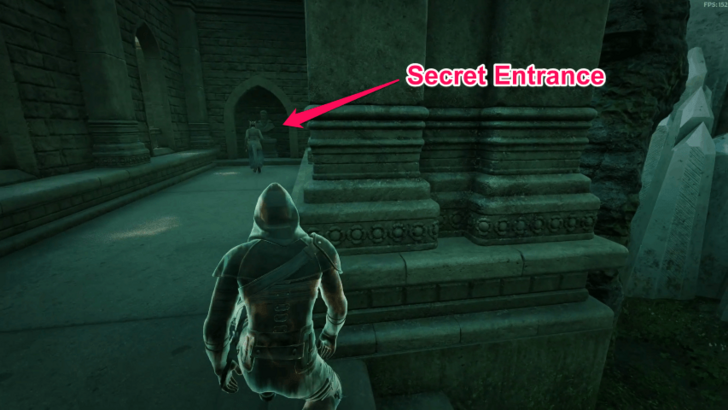 Around noon, you'll find Wide-Eye roaming the Palace Grounds. Sneakily follow her to lead you to the secret entrance to the Greenmote Silo. |
|
 Enter the Greenmote Silo through the ladder to enter. Watch out for Golden Saint Guards patrolling the area. |
|
| 3 | Gather Greenmote |
 Make your way east to the Greenmote Pile and interact with the pile to collect two doses of Greenmote. You can use the Clairvoyance spell to guide you to the objective's location. |
|
| 4 | Poison Thadon’s Meal |
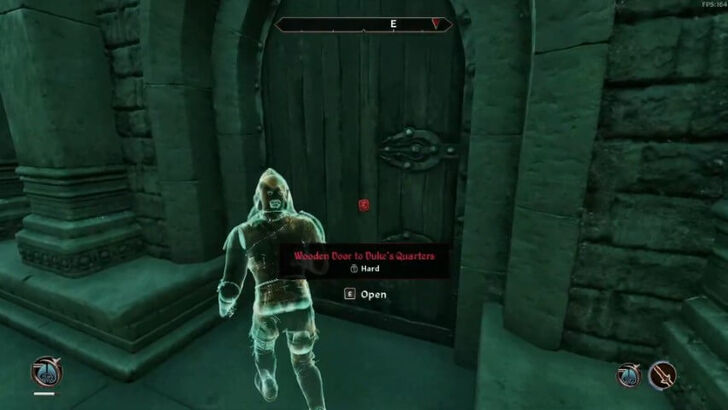 You will then have to spike Thadon’s evening meal and wine with the Greenmote without being seen. Go to the Duke’s Quarters, east of the palace. You may need to lockpick the door to enter. You can only do this between noon and 8 p.m., when the food is being prepared. If you miss the window or get caught, you can try again the next day. ▶ Where to Get Lockpicks |
|
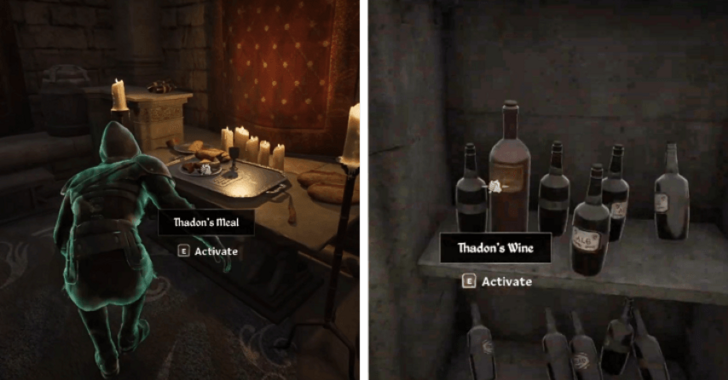 Once inside, head upstairs to the kitchen. Poison Thadon’s Meal on the table and Thadon’s Wine on the nearby shelf. |
|
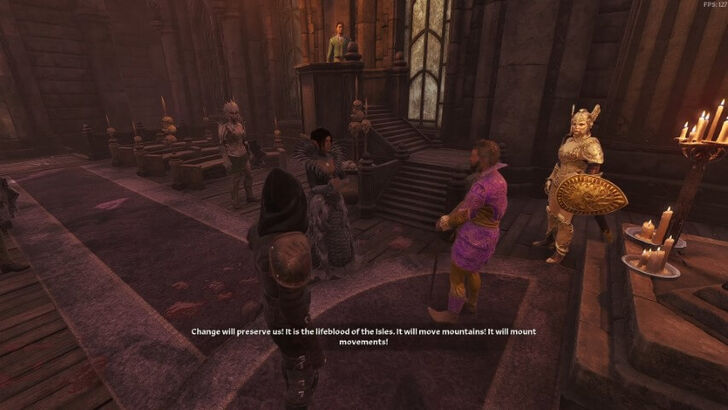
| 5 | Watch the Feast |
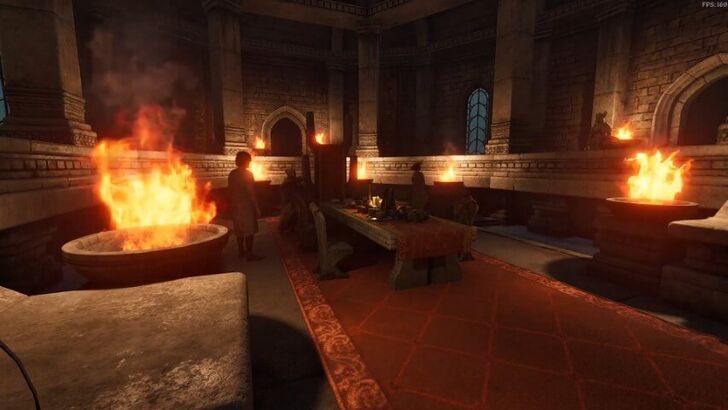 Proceed to the dining area at 8 p.m. and watch Thadon overdose on Greenmote. Reminder that you can use the Wait feature to speed up time. |
|
| 6 | Obtain Thadon’s Blood |
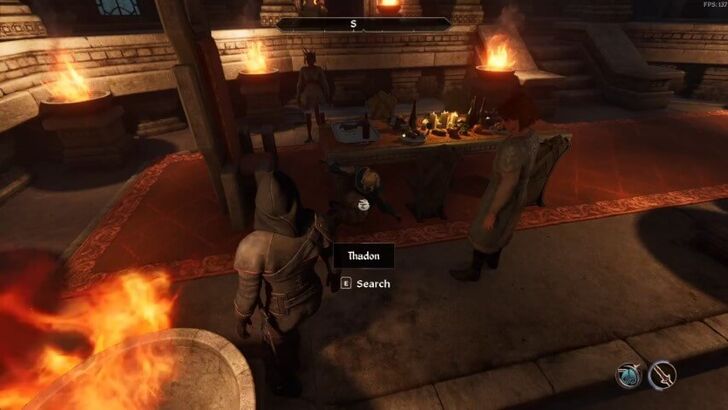 After Thadon dies from the Greenmote, interact with his body to obtain his drug-tainted blood. |
|
| 7 | Activate the Altar of Arden-Sul |
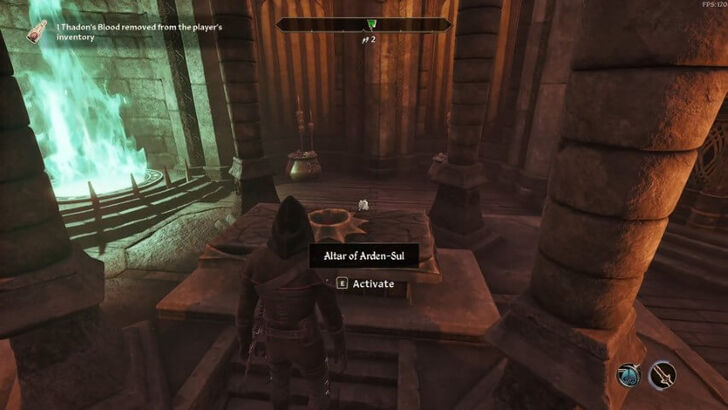 Return to the Palace of Sheogorath and interact with the Altar of Arden-Sul to complete the ritual. Dervenin will then speak to you and declare you the new Duke/Duchess of Mania. |
|
| 8 | Talk to Sheogorath |
 Talk to Sheogorath to trigger a cutscene where he argues with Syl. Speak with him again afterward to complete the quest. |
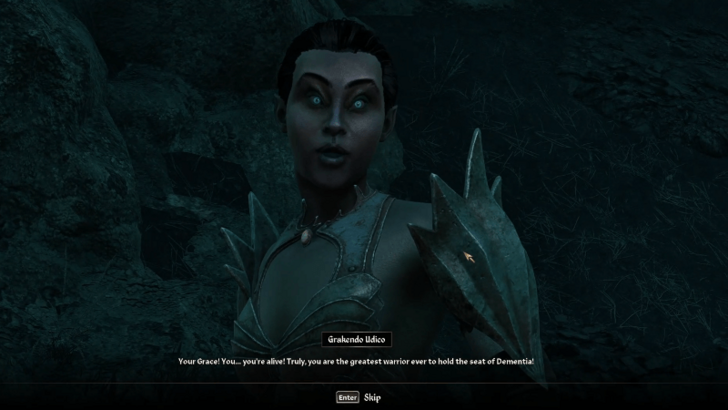
11. Ritual of Dementia

Ritual of Dementia Walkthrough
| 1 | Choose Syl |
|---|---|
 During the Ritual of Accession, you will have to choose between replacing Syl or Thadon by killing them. Choose Syl to do the Ritual of Dementia quest which will lock you out of Ritual of Mania. |
|
| 2 | Talk to Kithlan |
 Go to the New Sheoth Palace and go inside. Go inside the House of Dementia and speak with Kithlan. Persuade him and raise his disposition to atleast 80 points so he'll agree to help. He should give you a key that will let you enter any door within Dementia Wing of the Palace. Note that if Kithlan isn't in the room, wait for hours until it is morning so that he will spawn. |
|
| 3 | Talk to Anya |
 Talk to Anya who is in the same room as Kithlan and raise her point by at least 80 points by persuading her so she will be eager to help. She will distract the Seducer guards inside the Dementia Wing. |
|
| 4 | Get into Syl's Quarters |
 Use the key to enter the Private Gardens. Follow Anya and get into the Duchess' Quarters. Once inside you will see Syl's body on the bed and Kithlan will tell you that the body is an impersonator. You will learn that Syl has used her escape tunnel to flee from her quarters. |
|
| 5 | Activate the Bust of Sheogorath |
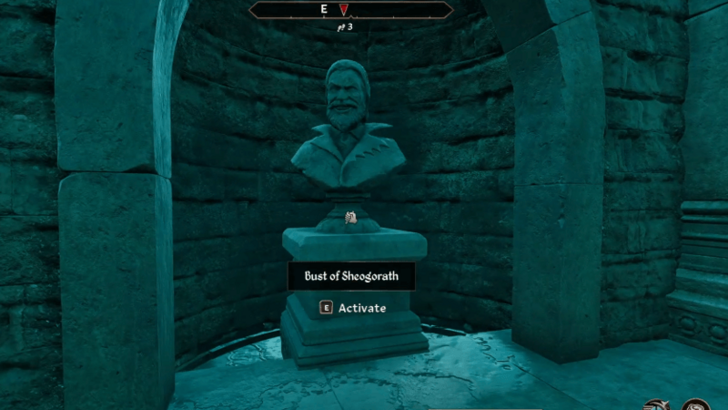 Exit the Duchess Quarters and defeat the guards outside. After defeating them, interact with the Bust of Sheogorath at the right side of the quarters door which will give you access to the escape tunnel Syl used. |
|
| 6 | Navigate through the Projectile Room |
 Inside the chamber, open the Metal Door then go straight then go to the east path then to the south then immediately to the east again and then north to see a button on the wall that will shut down the projectiles. You can also check your map to see the path. Proceed forward to see another Metal Door that will lead you to the next room. |
|
| 7 | Go to the Depths |
 In the next room, there will be three Dark Seducers waiting so either defeat them or go invisible to get past them. Go straight and then to the right to get into another room. You will be ambushed by Dark Seducers and you need to defeat them. After defeating them, just follow the path until you see the door to the Depths. |
|
| 8 | Locate Syl |
 Follow the path forward to get into a room with Dark Seducers. There will be a button to the left of the room in order to proceed. Follow the path forward again to see another button that will open the door. Keep following the path, go through the hall with the gargoyles and defeat the Dark Seducers on the way. You will eventually get to a big hall with many pillars with a room to the right where Syl is located. |
|
| 9 | Kill Syl and Take Her Heart |
 Defeat Syl and her guards inside the room and loot her heart from her body. |
|
| 10 | Go to the Altar of Arden-Sul at Sacellum |
 Backtrack to where you came from and go outside the New Sheoth Palace. Follow the objective marker on your compass which will lead you to Sacellum Arden-Sul. |
|
| 11 | Place Syl's Heart on the Altar |
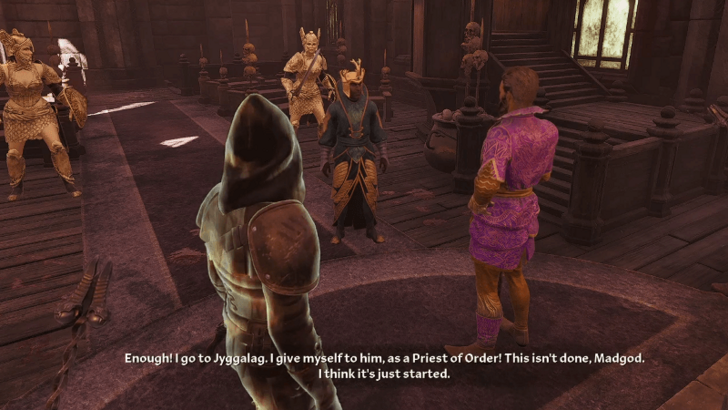 Activate the Altar of Arden-Sul to place Syl's Heart in it. You will become the Duke or Duchess of Dementia and Sheogorath will congratulate you when you talk to him. However, Thadon will come to the altar and will confront you and Sheogorath about Syl's passing. Thadon will resign from his position and will instead work for Jyggalag as the Priest of Order. |
|
| 12 | Talk to Sheogorath Again |
 Talk to Sheogorath again and he will tell you why he let Thadon go. He will tell you that you can now summon Dark Seducers and he will also grant you the Ring of Lordship as a symbol of your new position. He will also tell you that the Fringe has been attacked and you will need to retake it. This will finish the quest and start the next quest, Retaking the Fringe. |
12. Retaking the Fringe

Retaking the Fringe Walkthrough
| 1 | Go to the Fringe |
|---|---|
 After completing either the Ritual of Mania or Ritual of Dementia, fast travel to the Gates of Madness and open the door to the Fringe. |
|
| 2 | Check the Passwall |
 Go to the Passwall indicated by the quest marker and you will see Knights of Order attacking your soldiers. Help your soldiers defeat these knights. |
|
| 3 | Talk to Your Lieutenant |
 Talk to your Lieutenant (depends on who it is based on the previous ritual quest you did) and they will tell you that they are having a hard time defending the town. You can then choose to entrust your Lieutenant to lead your troops or you yourself to lead them. Either way, choose to begin once you are ready to defend the Passwall. |
|
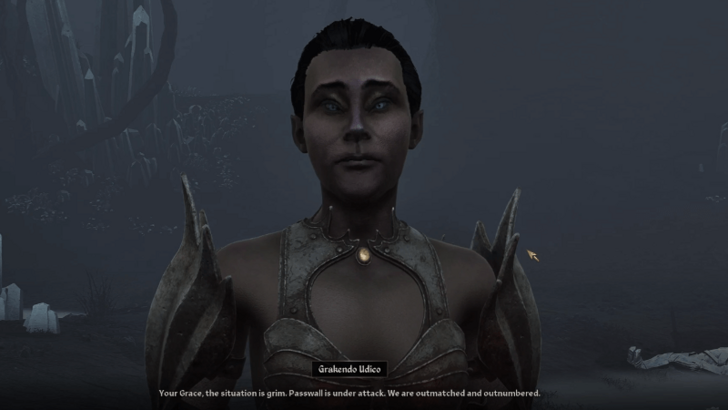
| 4 | Defend the Passwall |
 Defend the Passwall with your troops from incoming Knights. Once you defeat all the knights, talk to your Lieutenant once again and you will learn that you might have a chance to stop the attack if you find the enemies' source of power in the ruins of Xeddefen. |
|
| 5 | Go Inside the Xeddefen Ruins |
 Move towards where the ruins of Xeddefen is while battling the Knights wandering around. Follow the quest marker as it is foggy until you reach a huge wooder door. Go inside the door to explore Xeddefen. |
|
| 6 | Kill the Priest of Order |
 Inside the Xeddefen, go take the stairs to the left and follow the path until you see the Priest of Order near an altar. Kill the priest and loot the Xeddefen Key from him. You should also deal with the Knights within the ruins and loot their Heart of Order. |
|
| 7 | Get Inside the Fane |
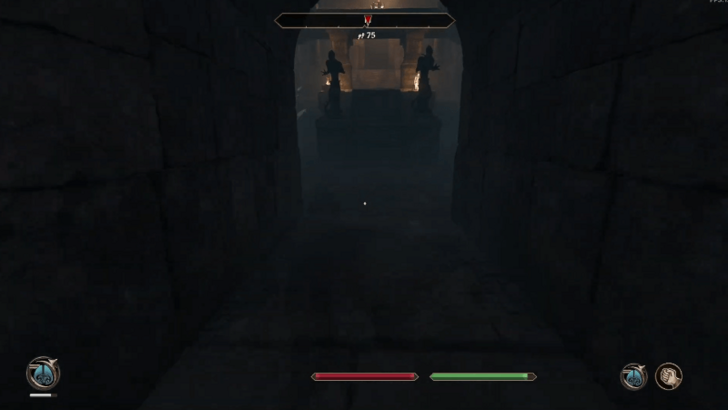
 Go to the north and open any of the Metal Doors to proceed. Proceed forward while killing more Knights and looting Heart of Order from their bodies. Eventually, you will be in a chamber that has two Knights and a Priest. You can either deal with them or sneak past them by being invisible. Proceed forward and get inside the Fane. |
|
| 8 | Go to the Great Chamber |
 Inside the Fane, go to the room to the right and kill the enemies there and loot more Heart of Order. Go back to where you came from and take the left path instead. You will see a room to the right that will lead you to the Great Chamber. |
|
| 9 | Talk to Shelden |
 Inside the Great Chamber, you will meet Shelden, the self-proclaimed mayor of Passwall and he will ask you to help him escape. |
|
| 10 | Shut Down the Obelisk of Order |
 Go to where the Obelisk of Order is and shut it down by putting 3 Heart of Orders into it. The Xeddefen will slowly crumble around you so make your escape with Shelden. |
|
| 11 | Go Inside the Felles |
 Follow the quest marker until you reach a dead end. Opposite of the dead end is a new root door that leads to the Felles. |
|
| 12 | Press the Green Button |
 Keep following the quest marker while avoiding the rubble falling down and fighting the Knights. You will eventually reach a root-covered passageway. Proceed through and get to the chamber. Go to the south and press the green button to open the gate to the west. Go through the gate and you will be separated from Shelden. |
|
| 13 | Escape the Xeddefen |
 Go follow the stairs which will lead you to the exit. Talk to your Lieutenant at the Passwall and they will commend you for a job well done. |
|
| 14 | Report to Sheogorath |
 Exit the Fringe and then fast travel to New Sheoth Palace. Go to the throne room and talk to Sheogorath. He will then task you to rebuild the Gatekeeper by seeking the assistance of Relmyna Verenim. This conversation will end the current quest and will lead to the next quest, Rebuilding the Gatekeeper. |
13. Rebuilding the Gatekeeper

Rebuilding the Gatekeeper Walkthrough
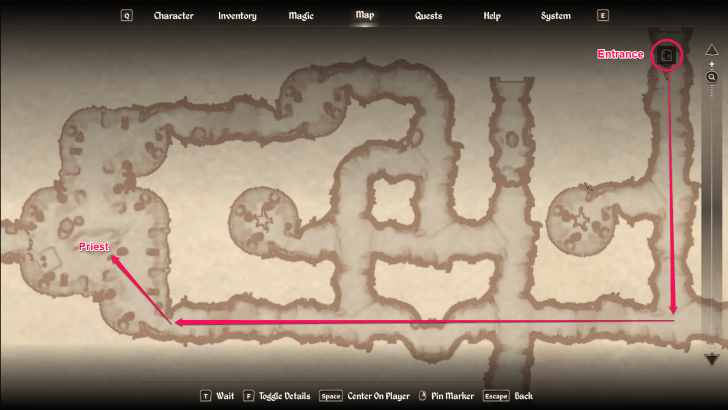
Travel to and Enter Xalsem
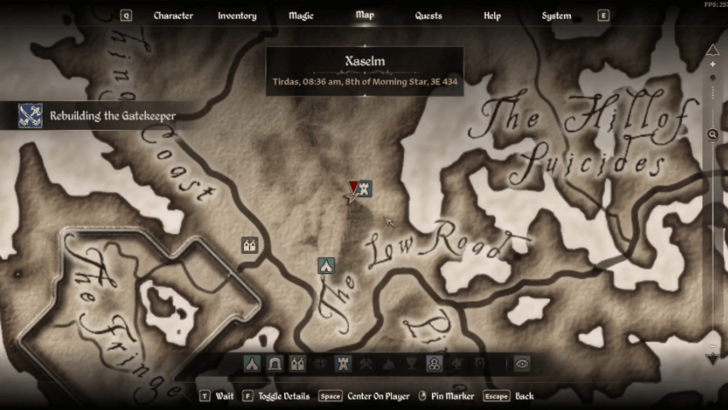
Starting from the Gates of Madness, players need to travel northeast to Xaselm and enter the dungeon. They may encounter a few enemies along the way, but they're easy to defeat.
Cross the Bridge
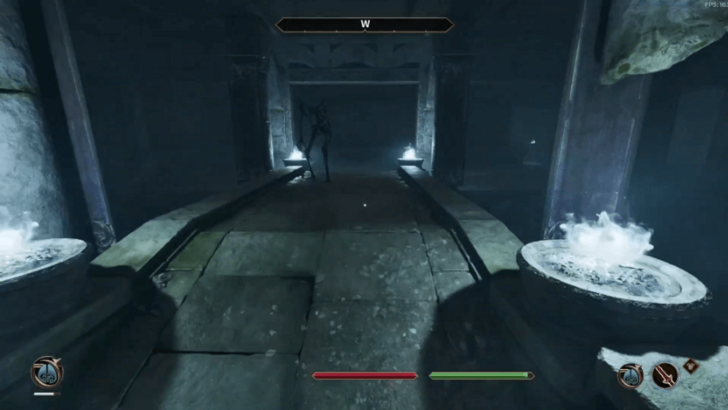
Once inside Xalsem, players need to head down the stairs and enter the Metal Door. From there, they just have to go straight towards the statue at the end of the room and follow the path up the stairs to the right to cross the bridge to the next section. There are a few enemies along this path, but they're easy to take out.
Open the Metal Gate
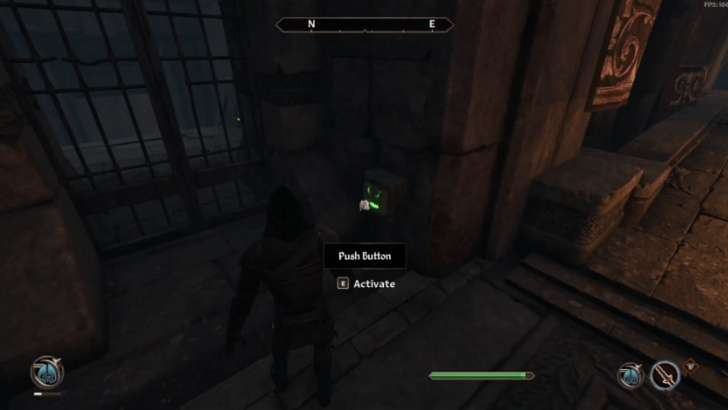
After crossing the bridge, players need to go right, then head down the stairs there. Once on the ground floor, they just need to follow the path to the left towards the narrow corridors until they arrive in a darkly-light room.
Upon arriving in the room, they need to head up the stairs and press the green button near the Metal Gate located on the corner of the room to open it and proceed to the next section.
Players will encounter some enemies along the way, but they should be easy to take out.
Enter the Experiment Chambers

Upon entering the Metal Gate, players just need to follow the path ahead and enter the door to Experiment Chambers located on the right side of the room at the end of the path.
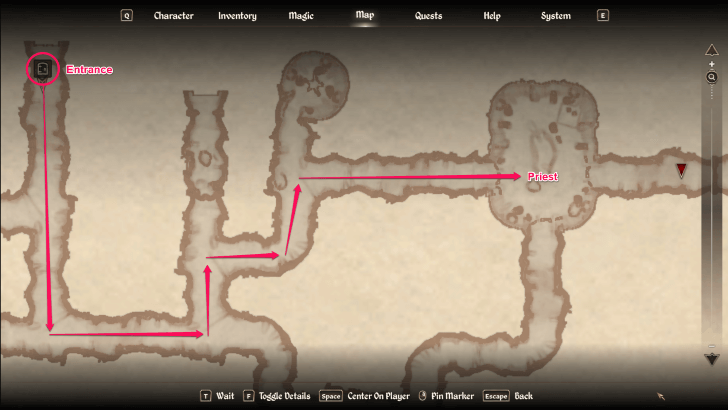
Enter the Sanctum of Vivisection
Once inside the Experiment Chambers, players should head straight and take the path down the stairs that's on the left side of the Metal Gate guarded by a Torn Flesh Atronach. While taking the path, players will need to cross the bridge and follow the path until they enter the room where they will face two (2) Skinned Hounds.
In that room, players will then need to head down to the bottom level. Once at the bottom level, they need to go up the stairs that's on the opposite side of the stairs they used to get to the bottom level and enter through the Metal Door.
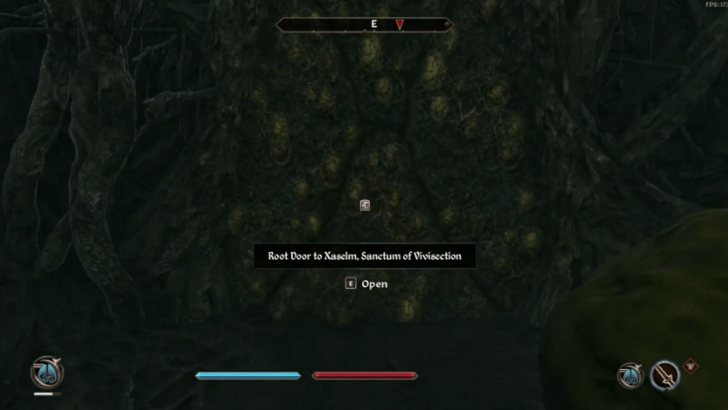
Once inside the room, they just need to enter the large opening on the left wall of the room and take the first right turn until they reach the root door to the Sanctum of Vivisection.
Find and Speak to Relmyna Verenim

Once inside the Sanctum of Vivisection, players need to follow the path leading to a room, then take the right path up to the part where there is a small stairs with two statues and two firepits. From there, they need to enter through the Metal Door on the right side, which leads them to a room where they will find Relmyna Verenim.
Exit the Chambers
After speaking to Relmyna Verenim and learning about the required items to make a Gatekeeper, she will give a key that opens a door leading to the Gardens directly from her sanctum.
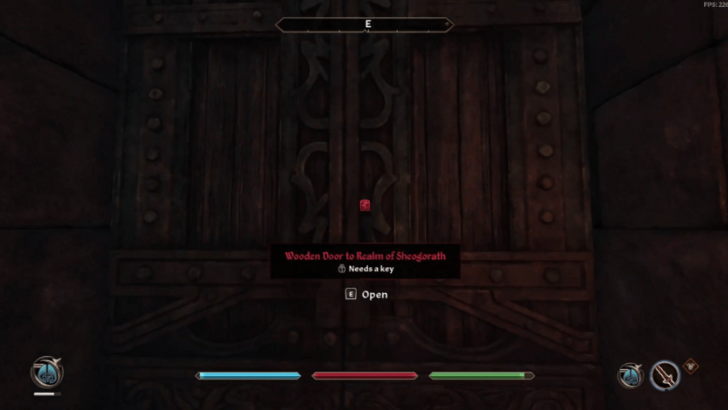
Starting from Relmyna Verenim's room, players just need to exit through the room's door, head straight towards the other room on the opposite side, and follow the left path leading to a large wodden door to the Realm of Sheogorath.
Travel to the Gardens of Flesh and Bone
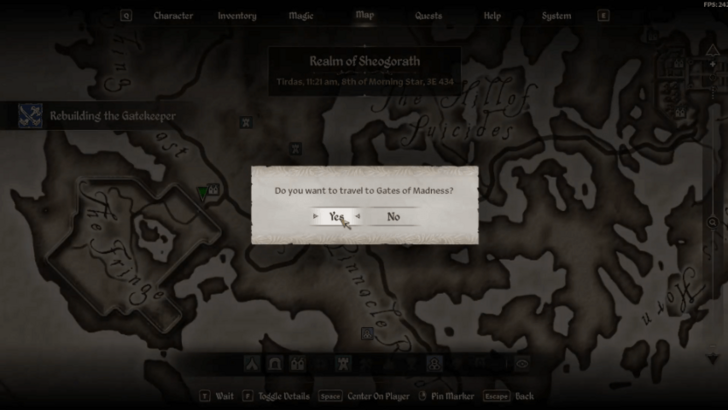
After exiting to the Realm of Sheogorath, players need travel to the Gardens of Flesh and Bone via one of the Gates of Madness. Upon entering the wooden door to the Gardens of Flesh and Bone, quest markers will appear on the compass bar that indicates the location of each ingredient.
Players can simply follow each quest markers to collect the ingredients. The ingredients can be collected in any order.
Head Up the Rooted Path

Starting from the entrance of the Gardens, players just need to head straight and enter through the Metal Door. Once inside the room, they need to sprint towards the Metal Door on the right side of the stairs in the room to avoid getting crushed by the falling rocks. Inside that room, they then need to go up through the opening on the wall on the left side of the room.
Head to the Tree Bridge

From the rooted path, players need to follow the path lit by torches up until they enter through the metal door to the Conservatorium Corpusculum.
Once inside, they need to head down the stairs and enter the metal door on the right side. Then, they need to go straight and enter through another metal door into another room.
Once inside the room, they have to go down the stairs, head left, and move up to the opening on the wall with a rooted path.
Inside the path, they will encounter a tree bridge. Below that bridge is an open space. From here, players can follow the different paths to collect the items.
Dermis Membrane

The Dermis Membrane is located on the left side of the space below the tree bridge. It's the flower that glows orange. To collect it, players just need to interact with the flower.
Osseous Marrow
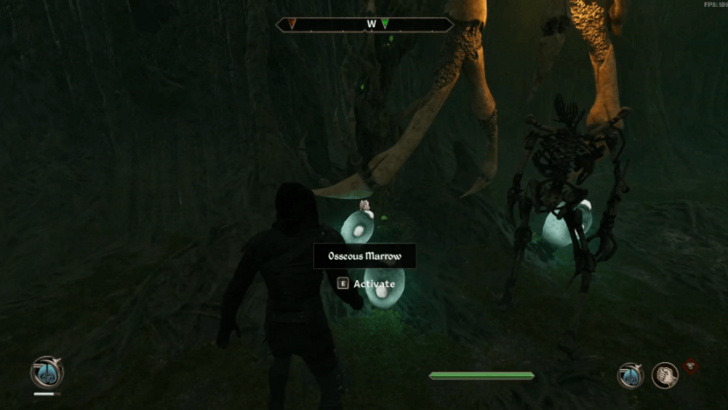
For the Osseous Marrow, players need to follow the path on the right side of the open space below the tree bridge. The path leads to another room.
Upon exiting the path into the room, they need to go up the opening on the wall into another rooted path. They then need to take the left path that leads to an open space.
Once in the open space, they need to climb the log where they will find the Osseous Marrow. To collect the Osseous Marrow, players just need to interact with the skeletal structure.
Essence of Breath

For the Essence of Breath, instead of taking the left path that leads to the open space where the Osseous Marrow is located, they have to take the one beside it or the middle path, which leads to the Caverns of Susurration.
Upon entering the Caverns, players will notice floating green lights as they go deeper into the area. They just need to follow the green lights to reach the room where the Essence of Breath can be obtained. To collect the Essence of Breath, players just need to interact with the object containing it.
Blood Liqueur
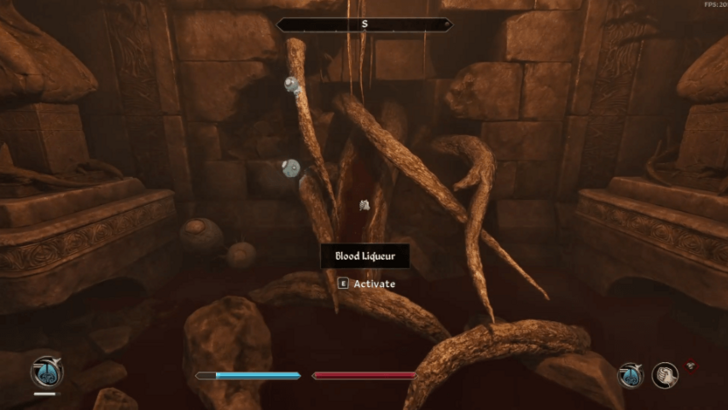
For the Blood Liqueur, instead of going straight to the open space where the Essence of Breath is located, they have to head to the right path just before the open space. This path leads to the Natatorium of Wound Bled Tears.
Upon entering the Natatorium of Wound Bled Tears, players need to follow the path ahead until they encounter an intersection. In the intersection, they need to take the path that's lit by torches. They then just have to follow the path ahead until they reach a metal door that's guarded by a Stitched Flesh Atronach, which is where the Blood Liqueur is located.
To enter through the metal door, players need to push the green button that's on the side facing the metal door of the small platform in the middle of the room. To collect the Blood Liqueur, players just need to interact with the roots.
Exit to The Fringe
After collecting the Blood Liquer, players need to go back through the metal door, go up the stairs, and enter the hallway into a stone room. From there, they need to go through the opening on the wall into a rooted path, then head to the path lit by a torch, and enter through the door to the Gardens of Flesh and Bones.
Once inside the Gardens of Flesh and Bones, player just need to follow the path ahead while opening the branch gates along the path. The path leads to the room where the falling rocks happened earlier. From there, players have to exit through the door they entered at the start into The Fringe.
Return to Relmyna Verenim
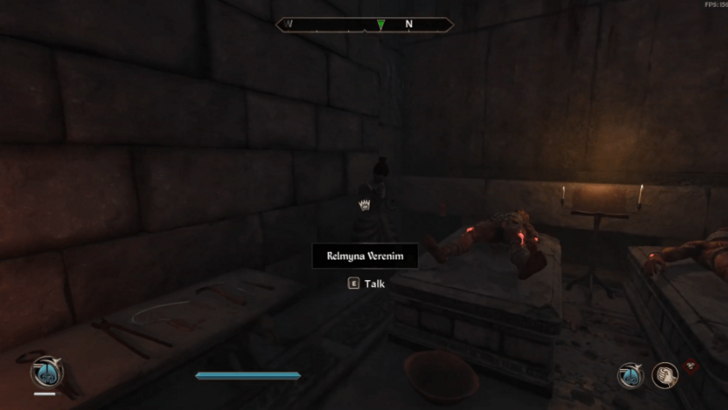
Upon exiting the Gardens of Flesh and Bones, players need to return to Relmyna Verenim in Xalsem via the secret entrance and talk to her. Relmyna Verenim should be somewhere in the Sanctum of Vivisection.
Rebuild the Gatekeeper

After talking to Relmyna Verenim, players will have to choose the body parts to use for the Gatekeeper. Each body part has a trait attached to it, so it's best for players to select the ones they prefer for the Gatekeeper.
Once players have chosen the body parts, they have to go talk to Relmyna again to begin the ritual. After talking, players just need to follow her to the destination where the ritual will take place, which is in the Gates of Madness where the Gatekeeper was first encountered.
Once there, they need to talk to Relmyna for the last time to start the actual ritual. At this point, player just need to follow Relmyna's instructions, which is simply placing each ingredient into the magic pool on her command.
Talk to Sheogorath

Once the ritual is complete, players will now have to go to Sheogorath to report the new Gatekeeper, which completes the quest.
14. The Helpless Army

| 1 | Talk to the Messenger |
|---|---|
 During the last part of the Rebuilding the Gatekeeper where players are tasked to report to Sheogorath about the newly-made Gatekeeper, a messenger will arrive in Sheogorath's Palace asking for help. To start the quest, players just need to talk to the messenger and offer help. |
|
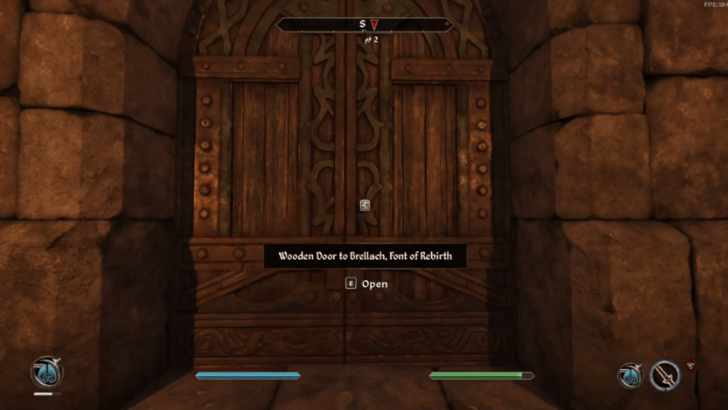
| 2 | Travel to Brellach or Pinnacle Rock |
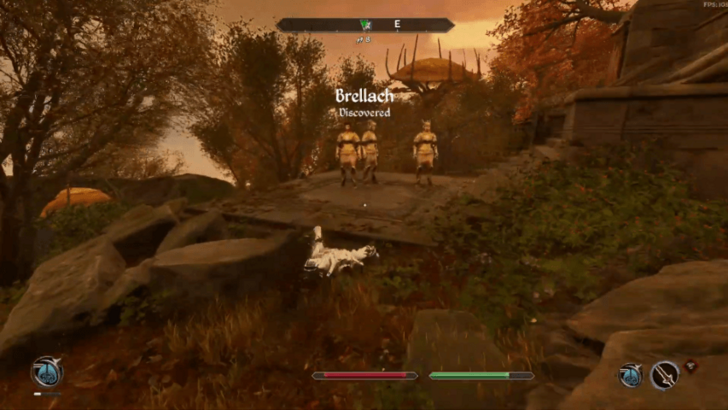 Depending on whether players chose Mania or Dementia during the Ritual of Accession, they will have to travel to either Brellach (Dementia) or Pinnacle Rock (Mania) and help out the opposite faction. If they are the Duke of Dementia, they will help the Golden Saints in Brellach. If they are the Duke of Mania, they will help the Dark Seducers in Pinnacle Rock. |
|
| 3 | Talk to Issmi or Adeo |
 Upon arriving to the specific stronghold, players will need to speak to the captain there. For Brellach (Dementia), they have to speak to the Golden Saint Captain Issmi. For Pinnacle Rock (Mania), they have to speak to the Dark Seducer Captin Adeo. |
|
| 4 | Rescue Staada or Dylora |
 If players are helping the Golden Saints, their next task is to rescue the Golden Staint Commander, Staada, who is held captive inside Brellach. If players are helping the Dark Seducers, their next task is to rescue the Dark Seducer Commander, Dylora, who is held captive inside Pinnacle Rock. To start the mission, players need to tell Issmi or Adeo that they are ready to go. Note that regardless of which side players are helping, the quest will be the same for both. |
|
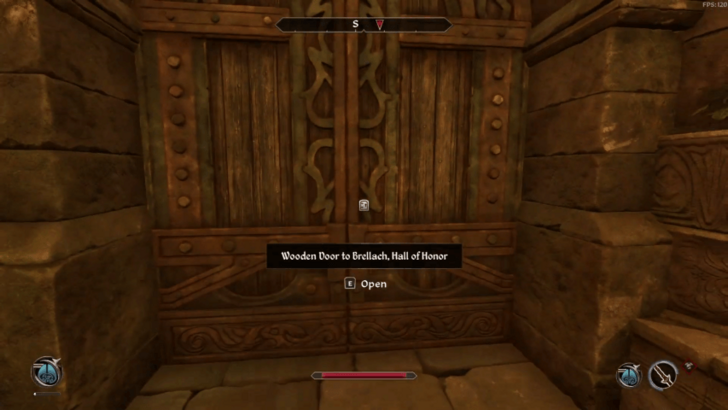
| 5 | Reach the Hall of Reverence |
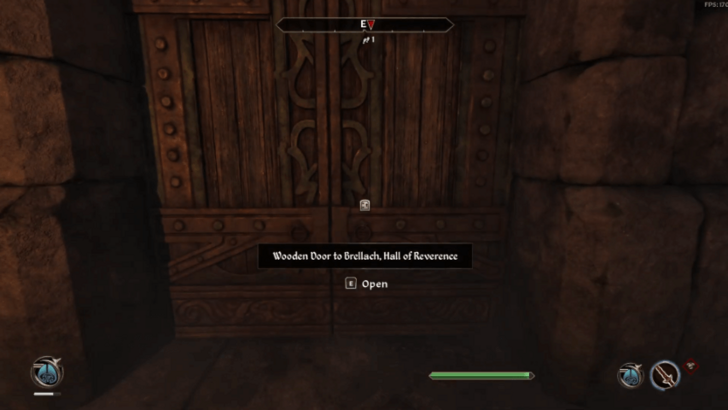 Upon entering Brellach or Pinnacle Rock, players need to head west and follow the path through multiple metal doors leading to rooms with enemies. Once players enter the third room, they need to go up the stairs that's in the middle of the room, then go straight through the metal door at the end into the fourth room. From there, they just need to follow the path and enter through the wooden door to the Hall of Reverence that's located on the right side of a small room. |
|
| 6 | Free Staada/Dylora |
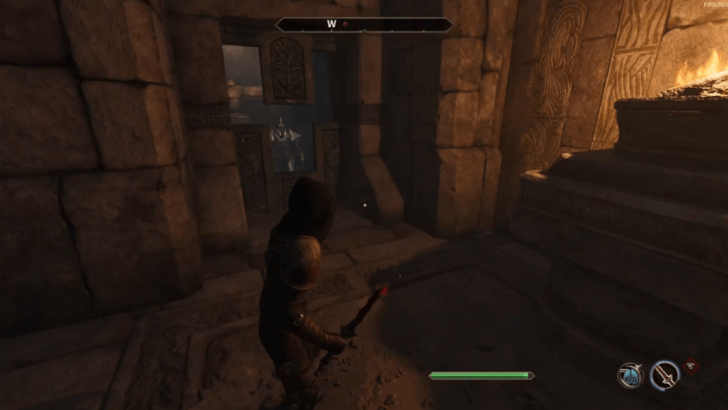 Once inside the Hall of Reverence, players need to follow the path into a large room where they will encounter Knights and Priests, then head up stairs there and head west through the metal door. |
|
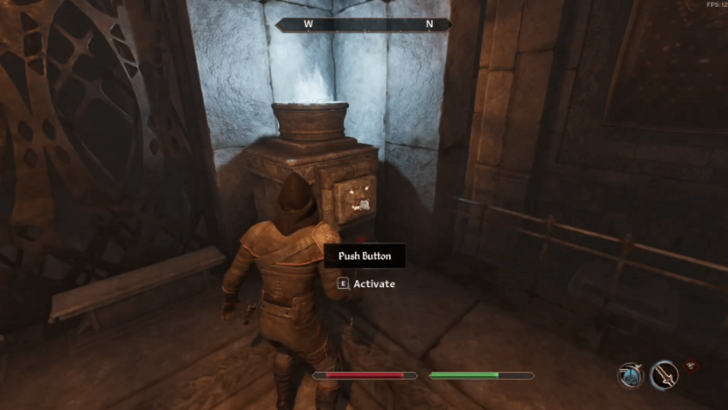 From there, players need to go up the stairs and press the button on the firepit that's on the northwest corner of a small room guarded by enemies to open the gate to the next room. After pressing the button, they then have to move to the next room that was initially blocked by a metal gate. |
|
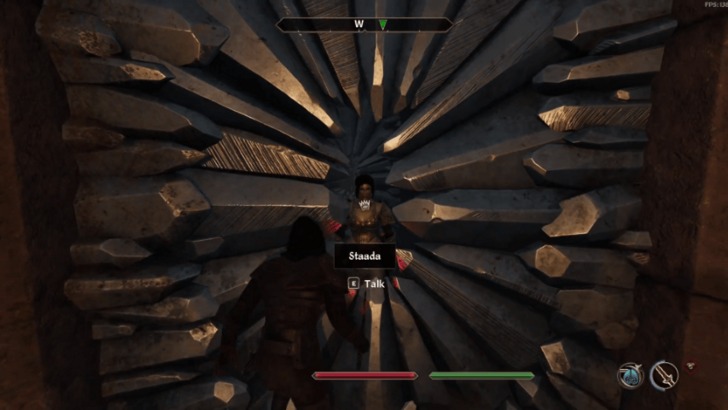 Upon entering the next room, players just have to follow the path ahead until they reach a large room where they will find Staada or Dylora imprisoned inside a small room covered with crystals. They can talk to Staada or Dylora through one of the openings to find out how to free her. She will say that the only way to break the barrier is to use a chime. |
|
 The chime is located just up the stairs that's between two stone busts. Players need to interact with it to ring it and free Staada. Once Staada or Dylora is free, players have to talk to her before proceeding with the quest. |
|
| 7 | Reach the Wellspring |
 After freeing and talking to Staada or Dylora, players need to head south through the metal door into the next room, go up the stairs, then move east and enter the wooden door to the Hall of Devotion. |
|
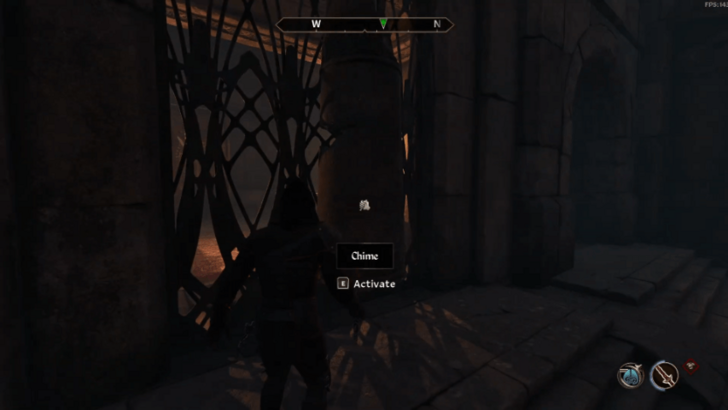
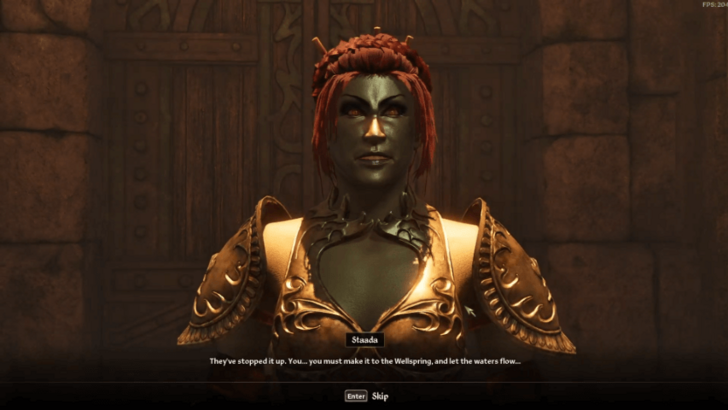 Once inside the Hall of Devotion, players need to talk to Staada or Dylora. This will trigger the event where she and her companions will be unconcious due to the stopping of the Wellspring. |
|
 From there, players have to ring the chime inside the room to break the barrier leading to the next room. |
|
 After the barrier breaks, they need to follow the path ahead, cross the bridge, and keep going south through multiple the metal doors until they encounter a metal gate where they need to press the button to open it. |
|
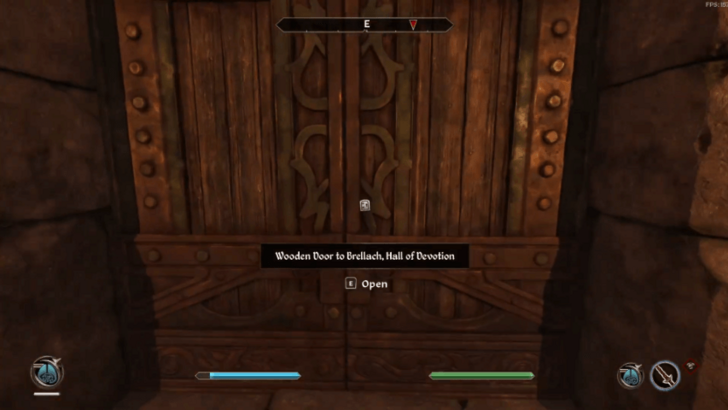
 Upon entering the large room through the metal gate, players just need to head east until they enter a small hallway, then go south and enter the wooden door to the Font of Rebirth. |
|
 From there, players need to go down the stairs, move to the other side of the room, climb up the stairs there, then follow the path until they reach another button. They now have to press the button to open the metal gate, cross the bridge to the other side, and enter through the metal door. |
|
 Afterwards, players just have to follow the path ahead and press the button to open the metal gate that leads to the room where they Wellspring is located. |
|
| 8 | Restore the Wellspring |
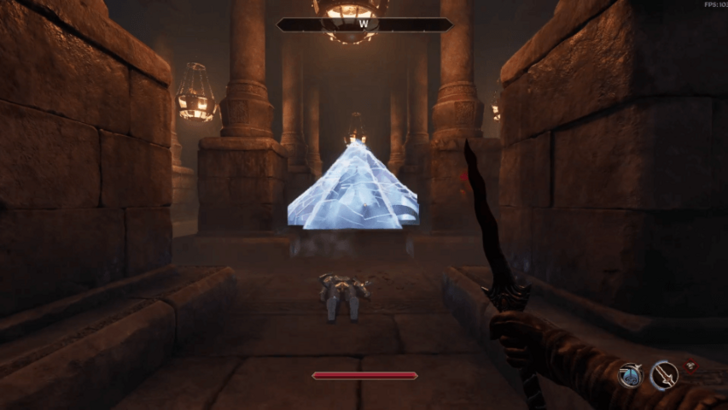 To restore the Wellspring, players will need to ring all four (4) chimes located on each corner of the room while fighting a group of enemies. It's best to get rid of the enemies in the room first before ringing the chimes as it can be annoying to deal with them while ringing the chimes. |
|
 Once the Wellspring is restored, Staada or Dylora and the other Golden Saints or Dark Seducers will appear in the room. The quest is completed after talking to Staada or Dylora. |
15. Symbols of Office

| 1 | Talk to Sheogorath |
|---|---|
 At the Palace of Sheogorath, talk to Sheogorath. After the conversation, a cutscene will trigger in which Sheogorath vanishes. |
|
| 2 | Speak to Haskill |
 With Sheogorath gone, speak to Haskill nearby and ask about the next steps. He will give you a Knifepoint Crystal and then task you with remaking the Staff of Sheogorath, so you can claim the Throne of Madness. |
|
| 3 | Travel to Knifepoint Hollow |
 Travel to Knifepoint Hollow. To get there, fast travel to Bliss in New Sheoth and make your way northwest until you find a large tree with glowing mushrooms near a lake. Enter the cave through a root door beneath the tree. |
|
| 4 | Find Dyus |
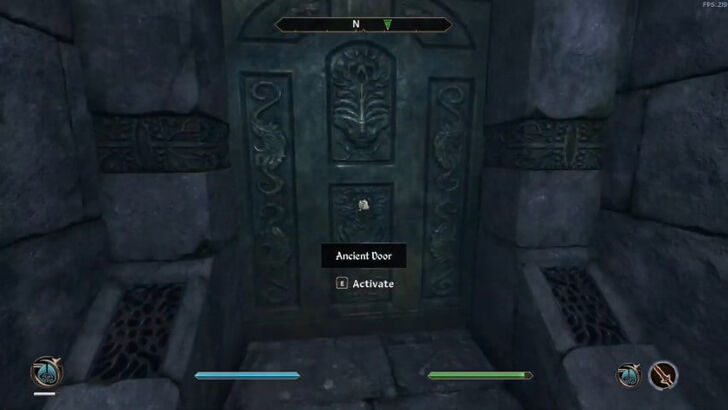 Once inside, take the left path and continue forward until you reach an Ancient Door. Interact with the door to make it crumble, where you will find Dyus sitting on a throne. |
|
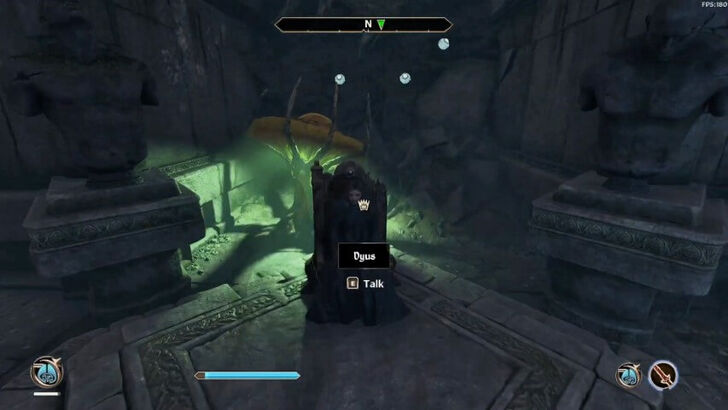 Talk to Dyus and ask about the Staff of Sheogorath. He will then ask you to find two items: the Eye of Ciirta and a Branch of the Tree of Shades. Make sure to ask about the locations of both items so they are marked on your map. |
|
| 5 | Head to Howling Halls |
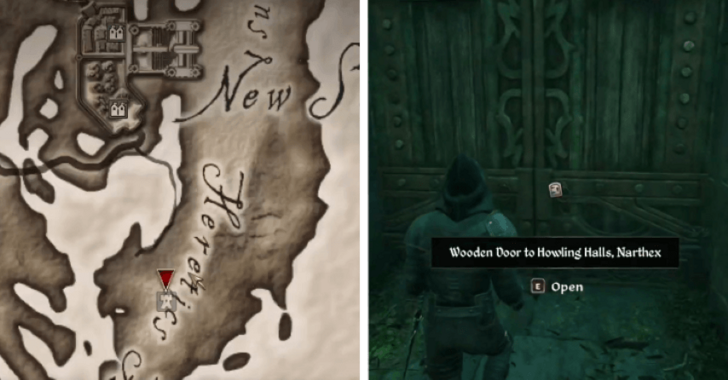 You can obtain the two items in any order, but for this walkthrough, we’ll start with the Eye of Ciirta, which is located in Howling Halls. Fast travel to the Crucible in New Sheoth and head south until you reach a stone ruin up a hill. |
|
| 6 | Reach the Antechamber |
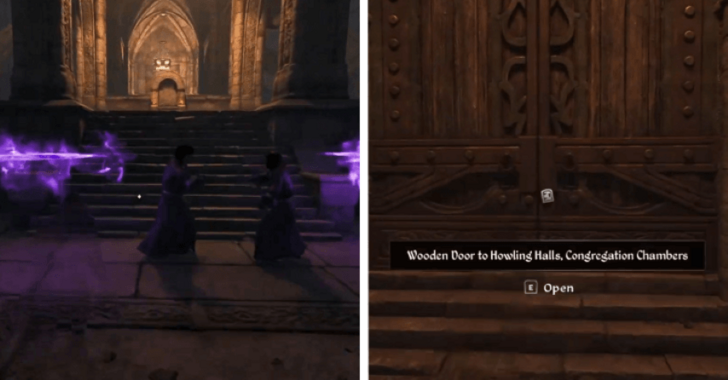 Enter the Howling Halls and head west. Interact with the Metal Door to reach a large hall, then continue forward into the Congregation Chambers. Watch out for enemies roaming the ruins! |
|
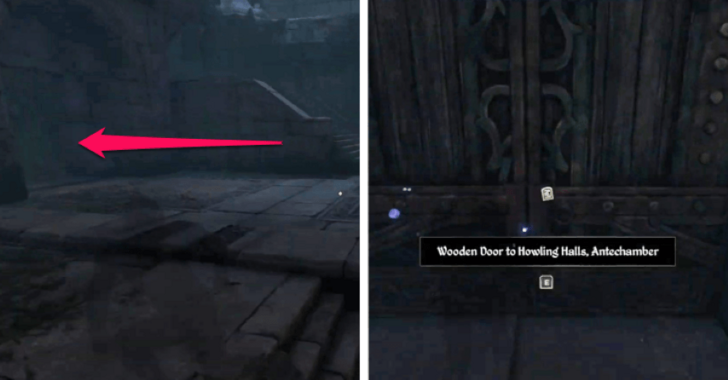 Head north, go upstairs, and turn left into the doorway beside the staircase. Continue through the dining hall and enter the Antechamber. |
|
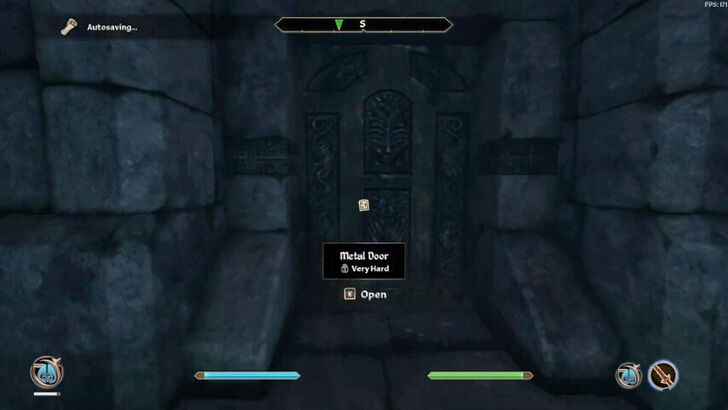 Advance forward until you reach a Metal Door with a Very Hard lock. Use the Howling Chamber Key (dropped by enemies in the area) or a lockpick to open it. ▶ Where to Get Lockpicks |
|
| 7 | Obtain Ciirta's Eye |
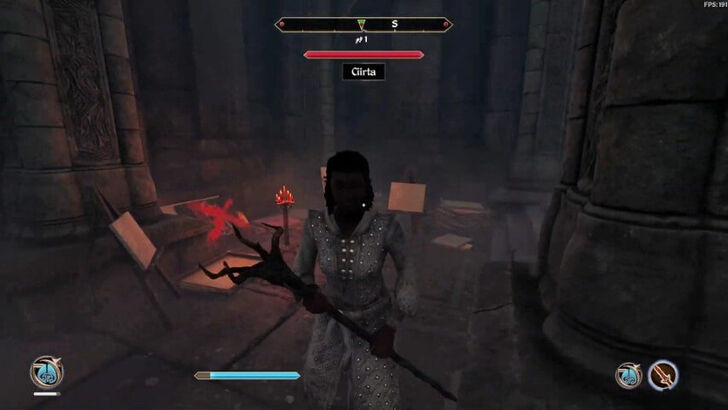 Once the Metal Door is open, kill Ciirta inside. Be prepared, as she will be surrounded by enemies. |
|
 After killing Ciirta, loot her body to obtain Ciirta's Eye. Exit the Howling Halls the way you came. |
|
| 8 | Head to Milchar |
 For the second item, fast travel to Hale in Mania and head southeast until you see a large, short tree with a narrow entrance. Enter the ruin through the root door. |
|
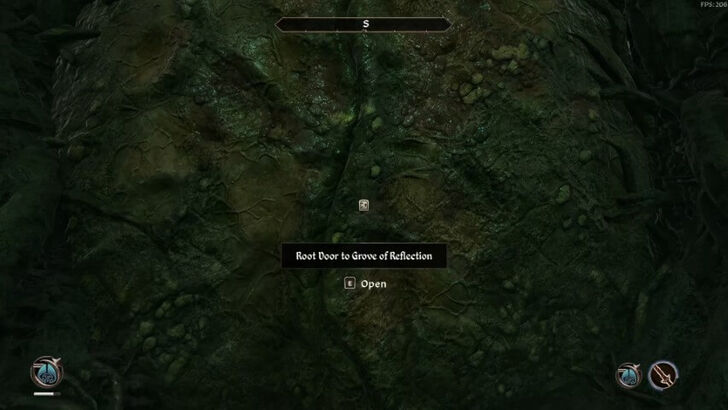 Proceed forward into the Grove of Reflection. Watch out for enemies patrolling the area! |
|
 Inside the Grove of Reflection, jump down the hole on the right and turn left to reach the Standing Stone. |
|
| 9 | Defeat Your Doppelganger |
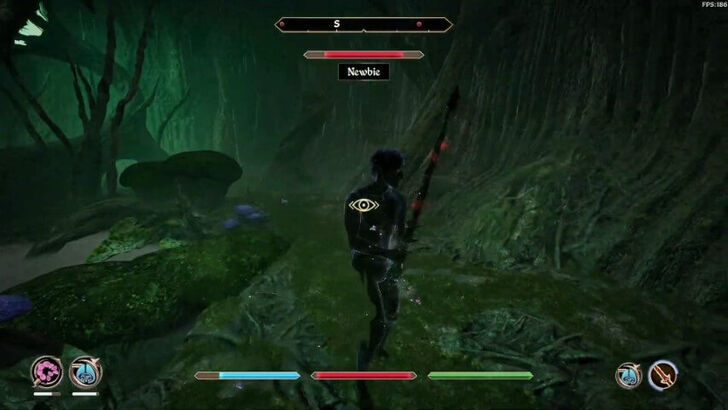 Interact with the Standing Stone to summon a shadowy version of yourself. Defeat your doppelganger! |
|
| 10 | Obtain the Branch |
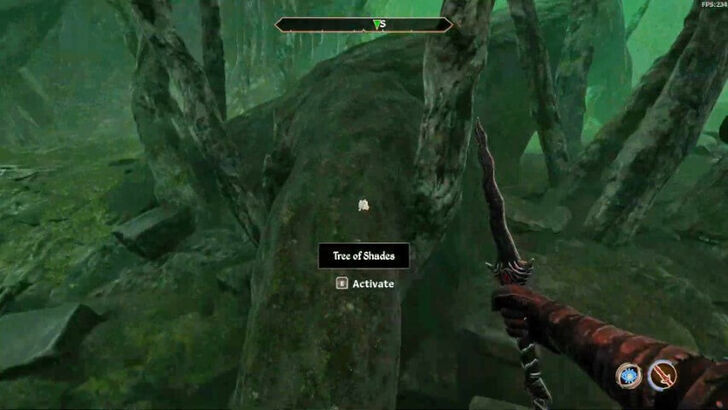 After defeating your doppelganger, interact with the nearby Tree of Shades to obtain the Branch of the Tree of Shades. |
|
| 11 | Return to Dyus |
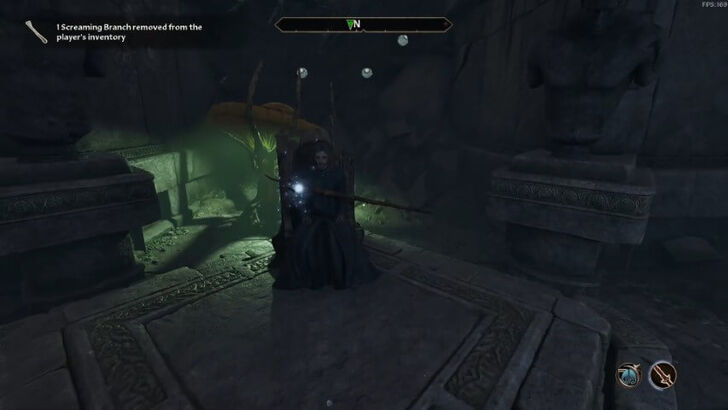 With all items in hand, return to Dyus in Knifepoint Hollow. Watch as he creates the Staff of Sheogorath, then take the staff. |
|
| 12 | Interact with the Font of Madness |
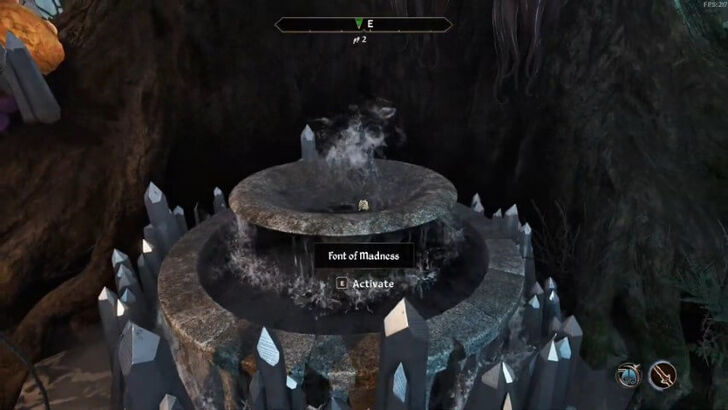 Head back to the Palace of Sheogorath and interact with the Font of Madness behind Sheogorath's throne. This will complete the quest and immediately lead to the next one, The Roots of Madness. |
16. The Roots of Madness

The Roots of Madness Walkthrough
| 1 | Talk to Haskill | |
|---|---|---|
 Talk to Haskill inside the Palace of Sheogorath right in front of the throne to find out what's happening with the Font of Madness. |
||
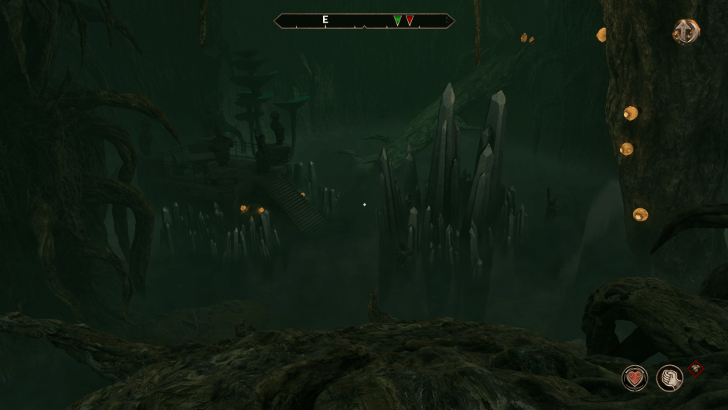
| 2 | Enter the Fountainhead | |
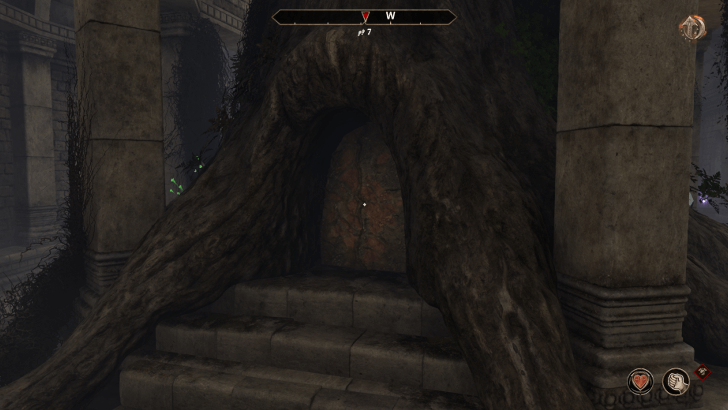 Enter the root door just behind the tree on the throne inside the Palace of Sheogorath to find the source of the poison. |
||
| 3 | Find the Source | |
 |
 |
|
| Inside the Fountainhead, explore the areas to the left and right side of the dungeon. You'll find Priests of Order poisoning the minor pools in each area, eliminate them to progress. | ||
| 4 | Head to the Pools of Mania and Dementia | |
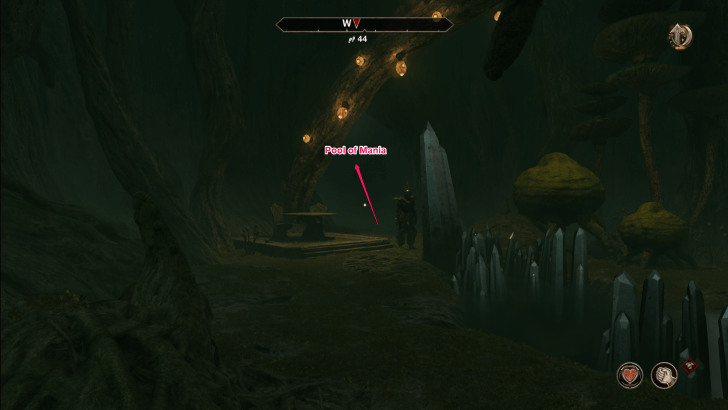 |
 |
|
| Right behind the Priests of Order in each area is a door that leads to the Pools of Mania (left side) and Dementia (right side). Pass through these doors and explore the area. | ||
| 5 | Cleanse the Pools | |
 |
 |
|
| At each of the pools, you'll find more Priests of Order as well as Syl and Thadon poisoning the pools. Eliminate them to cleanse the pools from their corruption. | ||
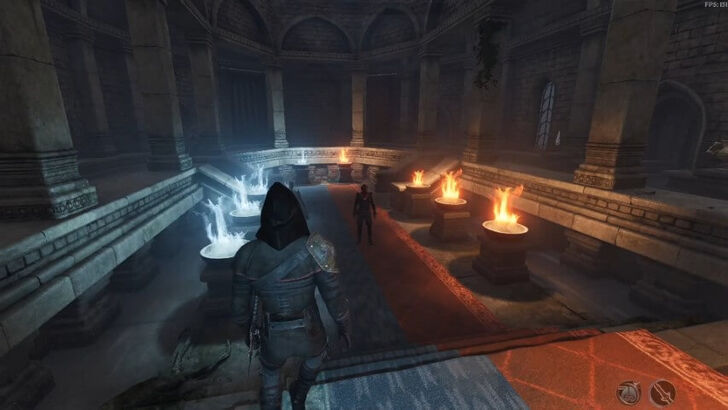
| 6 | Interact with the Font of Madness | |
 After cleansing both pools, head back to the throne room of the Palace of Sheogorath and interact with the Font of Madness behind the throne to complete the quest. |
||
17. The End of Order

| 1 | Talk to the Palace Guard Captain |
|---|---|
 At the Palace of Sheogorath, talk to the Palace Guard Captain. This will depend on which duchy you conquered during the Ritual of Accession. If you chose the House of Mania, the Palace Guard Captain will be a Golden Saint. If you chose the House of Dementia, it will be a Dark Seducer. |
|
| 2 | Help the Palace Guard |
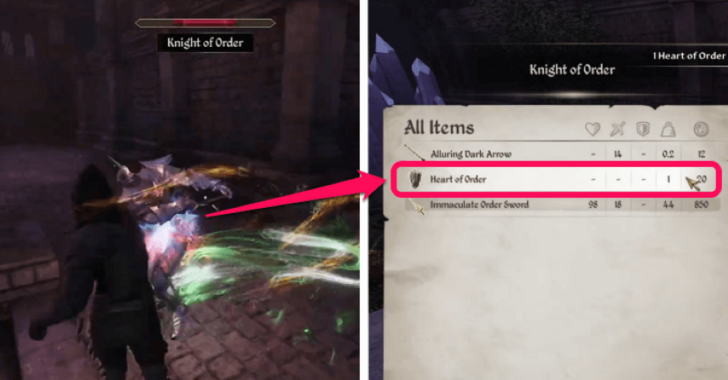 Head to the Palace Courtyard and assist the Palace Guard in defeating the Knights of Order. Make sure to loot their Hearts of Order, which you'll need to deactivate the obelisks. |
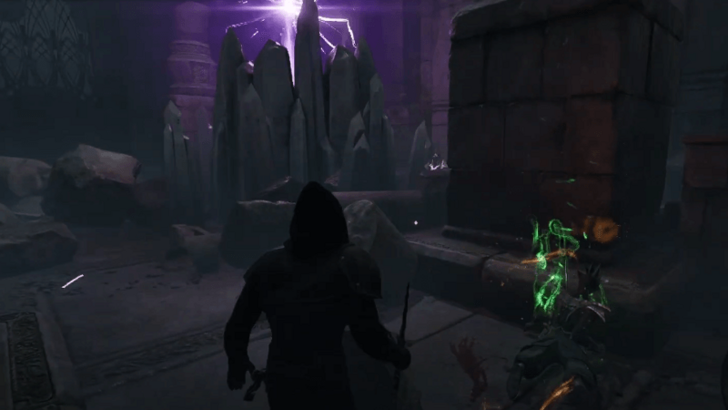
|
| 3 | Deactivate the Obelisks |
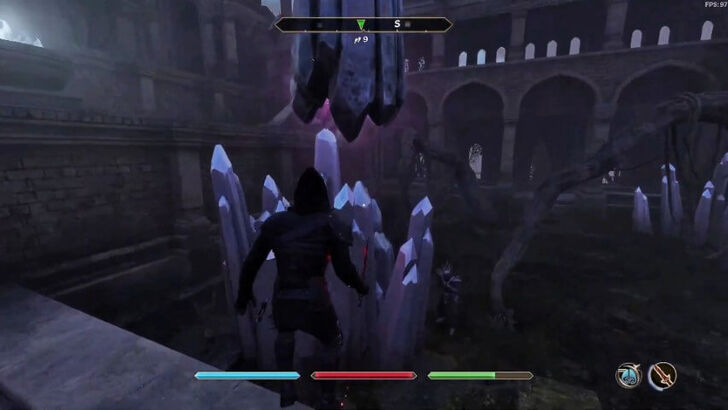 You need to place three Hearts of Order into the obelisks to deactivate them. Start with the obelisk on the south side of the courtyard. |
|
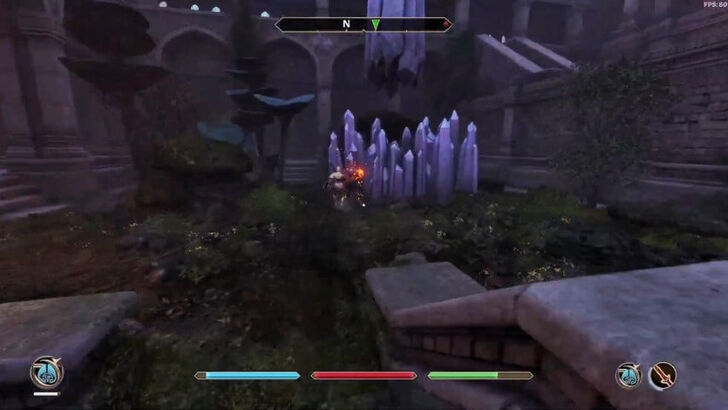 As soon as you deactivate the obelisk, another obelisk will appear on the opposite side. Defeat at least three more enemies, loot their Hearts of Order, and place them into the obelisk to disable it as well. |
|
| 4 | Defeat Jyggalag |
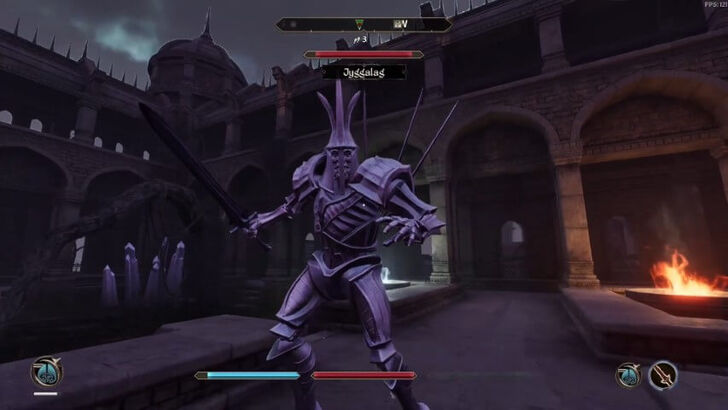 After deactivating both obelisks, Jyggalag will spawn in the courtyard. Defeat him by any means necessary! |
18. The Prince of Madness

The Prince of Madness Walkthrough
| 1 | Talk to Haskill |
|---|---|
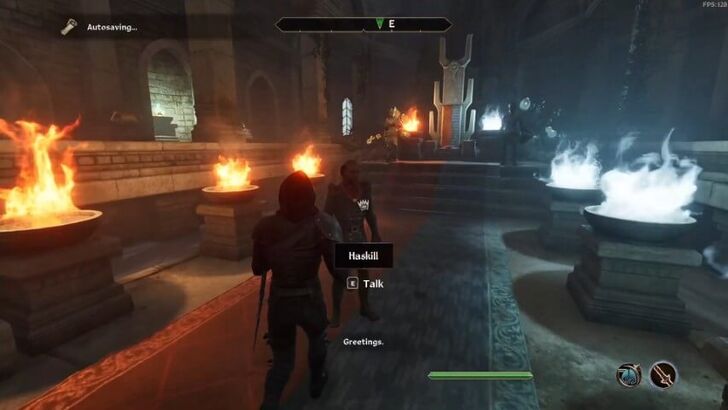 After defeating Jyggalag during The End of Order, head back inside the Palace of Sheogorath and talk to Haskill. He will congratulate you and the quest will be complete, concluding all main quests in the Shivering Isles expansion of the The Elder Scrolls IV: Oblivion Remastered. |
|
| 2 | Continue Your Journey |
 You can talk to Haskill about rewards, duties, and the next steps after completing the expansion. |
How Long is Shivering Isles?
10 Hours to Complete the Story

Focusing only on the Main Quests, you can expect to complete the Shivering Isles expansion in about 10 hours. This estimate assumes you're not aiming for full game completion.
But for those taking on Side Quests and exploring everything the Shivering Isles has to offer, the completionist run will take over 38 hours.
List of All Shivering Isles Quests
Oblivion Remastered Related Guides

List of All Shivering Isles Quests
All Shivering Isles Main Quests
All Shivering Isles Side Quests
Comment
Author

Shivering Isles Walkthrough
Please participate in our site
improvement survey
03/2026
improvement survey
03/2026
Would you assist in
improving Game8's site?
improving Game8's site?

×
We are listening to our users' valuable opinions and discussing how to act on them.
The information collected through this survey will be used for the purpose of improving our services. In addition, the information will only be disclosed a part of a statistic in a format that will not allow identification of personal information.
Begin Survey
Not Now
×
Please rate each item regarding Game8.co's Advertisements.
Amount of Ads
Very Dissatisfied
Somewhat Dissatisfied
Fine
Somewhat Satisfied
Highly Satisfied
Placement of Ads
Timing of Ad Display
Ad Loading Speed
Safeness of Ads
Content of Ads
×
Please rate each item regarding Game8.co's Quality of Articles.
Amount of information
Very Dissatisfied
Somewhat Dissatisfied
Fine
Somewhat Satisfied
Highly Satisfied
Frequency of updates
Speed of new information
Accuracy of articles
Understandibility of articles
Readability of sentences
×
Please rate each item regarding Game8.co's Usability of the Site.
Ease of finding information
Very Dissatisfied
Somewhat Dissatisfied
Fine
Somewhat Satisfied
Highly Satisfied
Loading Speed
Use of Color
Font Size
Visibility of Images
Easy to Understand Layout
×
Please rate each item regarding Game8.co's Message Boards, Comments.
Ease of Writing
Very Dissatisfied
Somewhat Dissatisfied
Fine
Somewhat Satisfied
Highly Satisfied
Readability
Ease in Finding Information
Comment Quality
Comment Quantity
Admin Response
×
Please rate each item regarding Game8.co's Site's new design.
Please rate our site's new design
Very Dissatisfied
Somewhat Dissatisfied
Fine
Somewhat Satisfied
Highly Satisfied
Do you think that the website's design change makes the site easier to use?
Has the new design made it easier for you to find information on the site?
Has the new design improved the overall visual appeal of the site?
How would you rate your overall satisfaction with the new design of the site?
×
How likely are you to recommend Game8 to someone you know?
Very Unlikely
0
1
2
3
4
5
6
7
8
9
10
Very Likely
If you have other opinions regarding potential improvement to the website, please share them with us. We would appreciate your honest opinion.
Note: This is a free response section, so you can proceed without entering anything.
Note: Please be sure not to enter any kind of personal information into your response.
Note: Please be sure not to enter any kind of personal information into your response.
×
Thank You
×
Thank you for participating in our survey! Your answers will help us to improve the quality of our website and services.
We hope you continue to make use of Game8.
We hope you continue to make use of Game8.
Close
Rankings
- We could not find the message board you were looking for.
Gaming News


![Slay the Spire 2 Review [Early Access] | Still the Deckbuilder to Beat](https://img.game8.co/4433115/44e19e1fb0b4755466b9e516ec7ffb1e.png/thumb)

![Resident Evil Village Review [Switch 2] | Almost Flawless Port](https://img.game8.co/4432790/e1859f64830960ce4248d898f8cd38d9.jpeg/thumb)
Popular Games

Genshin Impact Walkthrough & Guides Wiki
Honkai: Star Rail Walkthrough & Guides Wiki
Umamusume: Pretty Derby Walkthrough & Guides Wiki
Pokemon Pokopia Walkthrough & Guides Wiki
Resident Evil Requiem (RE9) Walkthrough & Guides Wiki
Monster Hunter Wilds Walkthrough & Guides Wiki
Wuthering Waves Walkthrough & Guides Wiki
Arknights: Endfield Walkthrough & Guides Wiki
Pokemon FireRed and LeafGreen (FRLG) Walkthrough & Guides Wiki
Pokemon TCG Pocket (PTCGP) Strategies & Guides Wiki


Recommended Games
Fire Emblem Heroes (FEH) Walkthrough & Guides Wiki
Diablo 4: Vessel of Hatred Walkthrough & Guides Wiki
Yu-Gi-Oh! Master Duel Walkthrough & Guides Wiki
Super Smash Bros. Ultimate Walkthrough & Guides Wiki
Pokemon Brilliant Diamond and Shining Pearl (BDSP) Walkthrough & Guides Wiki
Elden Ring Shadow of the Erdtree Walkthrough & Guides Wiki
Monster Hunter World Walkthrough & Guides Wiki
The Legend of Zelda: Tears of the Kingdom Walkthrough & Guides Wiki
Persona 3 Reload Walkthrough & Guides Wiki
Cyberpunk 2077: Ultimate Edition Walkthrough & Guides Wiki


All rights reserved
© 2025 ZeniMax Media Inc. All Rights Reserved.
The copyrights of videos of games used in our content and other intellectual property rights belong to the provider of the game.
The contents we provide on this site were created personally by members of the Game8 editorial department.
We refuse the right to reuse or repost content taken without our permission such as data or images to other sites.