Rebuilding the Gatekeeper Walkthrough
This is a Rebuilding the Gatekeeper walkthrough for the Shivering Isles expansion in The Elder Scrolls IV Oblivion Remastered. Learn how to complete Rebuilding the Gatekeeper and its rewards here!
| ◀ Previous Guide | Next Guide ▶ |
|---|---|
| Retaking the Fringe | The Helpless Army |
List of Contents
Rebuilding the Gatekeeper Walkthrough
Travel to and Enter Xalsem
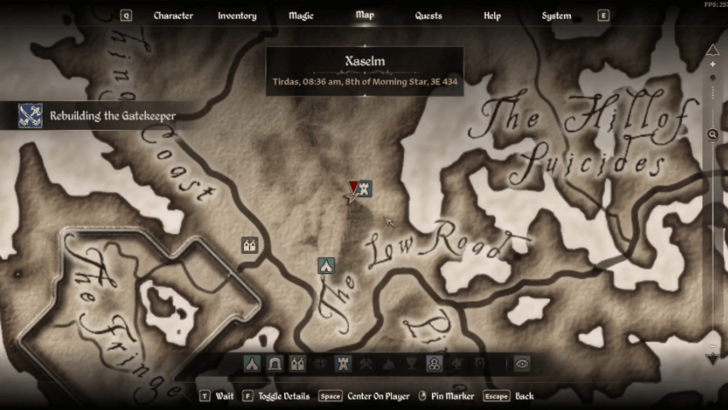
Starting from the Gates of Madness, players need to travel northeast to Xaselm and enter the dungeon. They may encounter a few enemies along the way, but they're easy to defeat.
Cross the Bridge
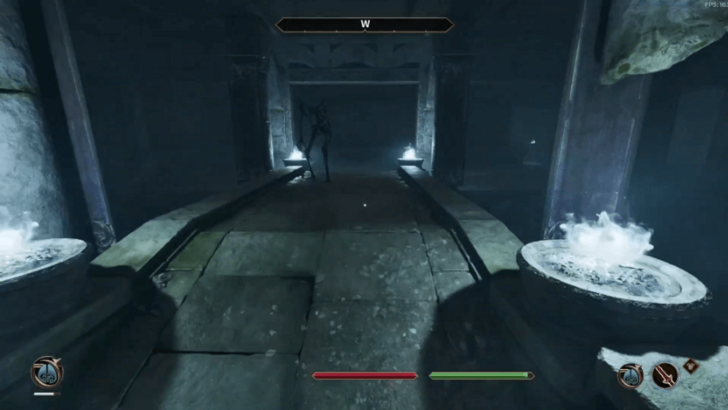
Once inside Xalsem, players need to head down the stairs and enter the Metal Door. From there, they just have to go straight towards the statue at the end of the room and follow the path up the stairs to the right to cross the bridge to the next section. There are a few enemies along this path, but they're easy to take out.
Open the Metal Gate
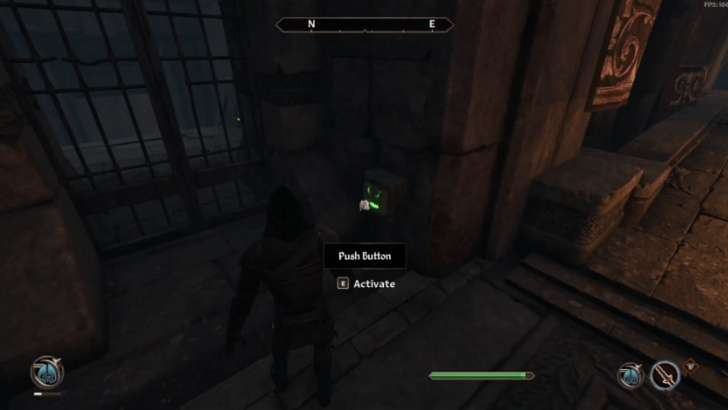
After crossing the bridge, players need to go right, then head down the stairs there. Once on the ground floor, they just need to follow the path to the left towards the narrow corridors until they arrive in a darkly-light room.
Upon arriving in the room, they need to head up the stairs and press the green button near the Metal Gate located on the corner of the room to open it and proceed to the next section.
Players will encounter some enemies along the way, but they should be easy to take out.
Enter the Experiment Chambers

Upon entering the Metal Gate, players just need to follow the path ahead and enter the door to Experiment Chambers located on the right side of the room at the end of the path.
Enter the Sanctum of Vivisection
Once inside the Experiment Chambers, players should head straight and take the path down the stairs that's on the left side of the Metal Gate guarded by a Torn Flesh Atronach. While taking the path, players will need to cross the bridge and follow the path until they enter the room where they will face two (2) Skinned Hounds.
In that room, players will then need to head down to the bottom level. Once at the bottom level, they need to go up the stairs that's on the opposite side of the stairs they used to get to the bottom level and enter through the Metal Door.
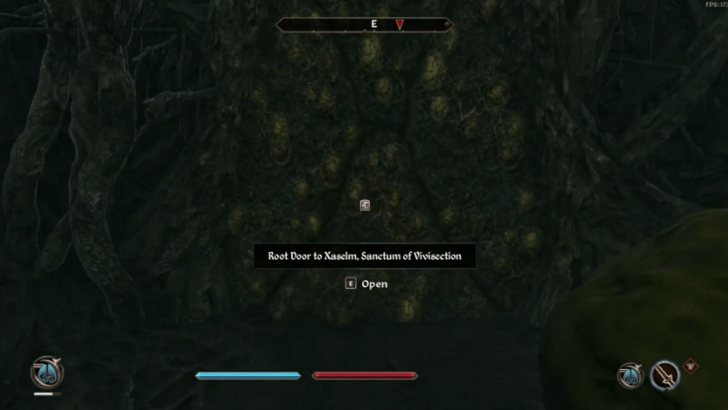
Once inside the room, they just need to enter the large opening on the left wall of the room and take the first right turn until they reach the root door to the Sanctum of Vivisection.
Find and Speak to Relmyna Verenim

Once inside the Sanctum of Vivisection, players need to follow the path leading to a room, then take the right path up to the part where there is a small stairs with two statues and two firepits. From there, they need to enter through the Metal Door on the right side, which leads them to a room where they will find Relmyna Verenim.
Exit the Chambers
After speaking to Relmyna Verenim and learning about the required items to make a Gatekeeper, she will give a key that opens a door leading to the Gardens directly from her sanctum.
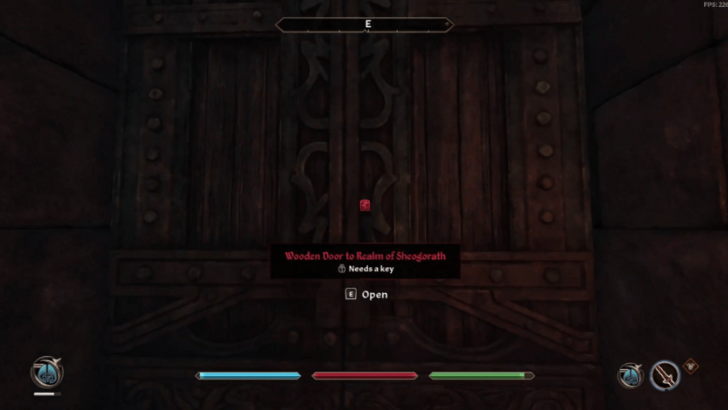
Starting from Relmyna Verenim's room, players just need to exit through the room's door, head straight towards the other room on the opposite side, and follow the left path leading to a large wodden door to the Realm of Sheogorath.
Travel to the Gardens of Flesh and Bone
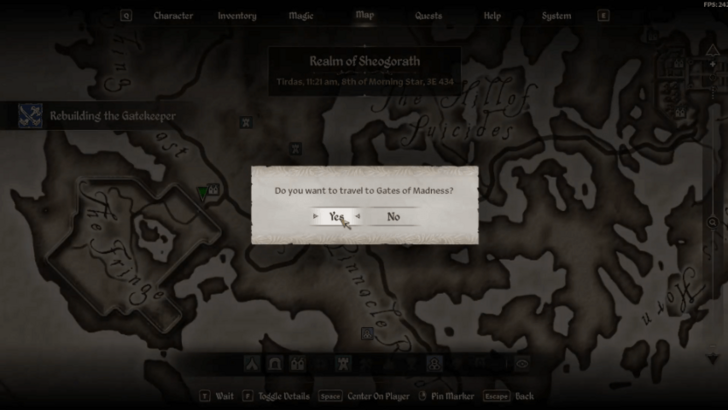
After exiting to the Realm of Sheogorath, players need travel to the Gardens of Flesh and Bone via one of the Gates of Madness. Upon entering the wooden door to the Gardens of Flesh and Bone, quest markers will appear on the compass bar that indicates the location of each ingredient. Players can simply follow each quest markers to collect the ingredients. The ingredients can be collected in any order.
Head Up the Rooted Path

Starting from the entrance of the Gardens, players just need to head straight and enter through the Metal Door. Once inside the room, they need to sprint towards the Metal Door on the right side of the stairs in the room to avoid getting crushed by the falling rocks. Inside that room, they then need to go up through the opening on the wall on the left side of the room.
Head to the Tree Bridge

From the rooted path, players need to follow the path lit by torches up until they enter through the metal door to the Conservatorium Corpusculum.
Once inside, they need to head down the stairs and enter the metal door on the right side. Then, they need to go straight and enter through another metal door into another room.
Once inside the room, they have to go down the stairs, head left, and move up to the opening on the wall with a rooted path.
Inside the path, they will encounter a tree bridge. Below that bridge is an open space. From here, players can follow the different paths to collect the items.
Dermis Membrane

The Dermis Membrane is located on the left side of the space below the tree bridge. It's the flower that glows orange. To collect it, players just need to interact with the flower.
Osseous Marrow
For the Osseous Marrow, players need to follow the path on the right side of the open space below the tree bridge. The path leads to another room.
Upon exiting the path into the room, they need to go up the opening on the wall into another rooted path. They then need to take the left path that leads to an open space.
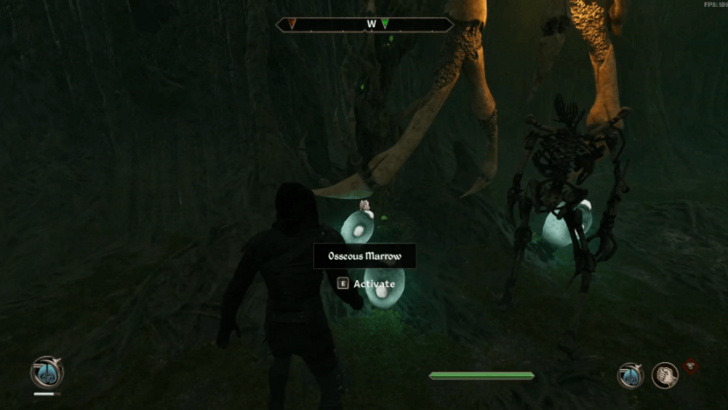
Once in the open space, they need to climb the log where they will find the Osseous Marrow.
To collect the Osseous Marrow, players just need to interact with the skeletal structure.
Essence of Breath

For the Essence of Breath, instead of taking the left path that leads to the open space where the Osseous Marrow is located, they have to take the one beside it or the middle path, which leads to the Caverns of Susurration.
Upon entering the Caverns, players will notice floating green lights as they go deeper into the area. They just need to follow the green lights to reach the room where the Essence of Breath can be obtained.
To collect the Essence of Breath, players just need to interact with the object containing it.
Blood Liqueur
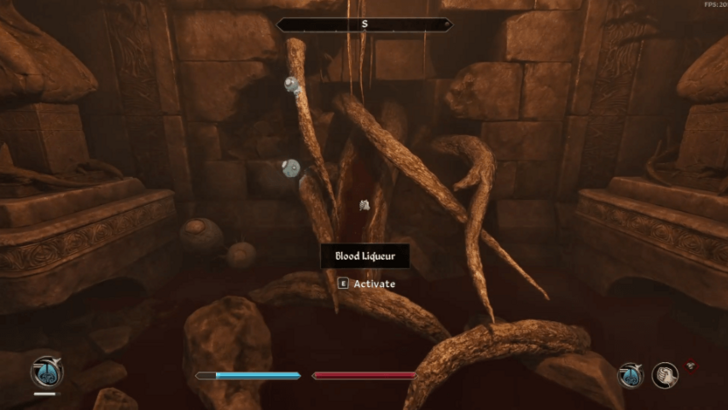
For the Blood Liqueur, instead of going straight to the open space where the Essence of Breath is located, they have to head to the right path just before the open space. This path leads to the Natatorium of Wound Bled Tears.
Upon entering the Natatorium of Wound Bled Tears, players need to follow the path ahead until they encounter an intersection. In the intersection, they need to take the path that's lit by torches. They then just have to follow the path ahead until they reach a metal door that's guarded by a Stitched Flesh Atronach, which is where the Blood Liqueur is located.
To enter through the metal door, players need to push the green button that's on the side facing the metal door of the small platform in the middle of the room.
To collect the Blood Liqueur, players just need to interact with the roots.
Exit to The Fringe
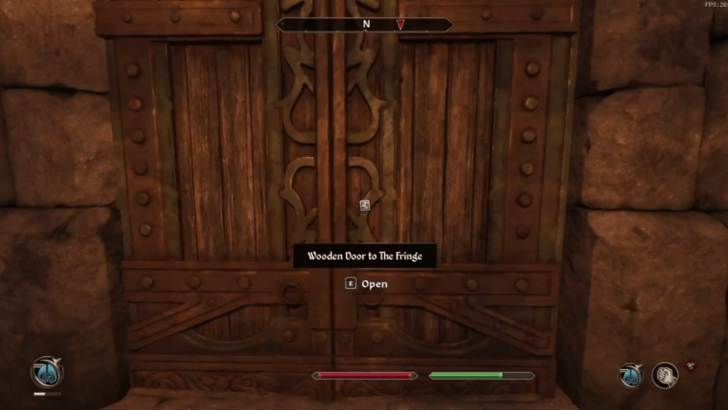
After collecting the Blood Liquer, players need to go back through the metal door, go up the stairs, and enter the hallway into a stone room. From there, they need to go through the opening on the wall into a rooted path, then head to the path lit by a torch, and enter through the door to the Gardens of Flesh and Bones.
Once inside the Gardens of Flesh and Bones, player just need to follow the path ahead while opening the branch gates along the path. The path leads to the room where the falling rocks happened earlier. From there, players have to exit through the door they entered at the start into The Fringe.
Return to Relmyna Verenim
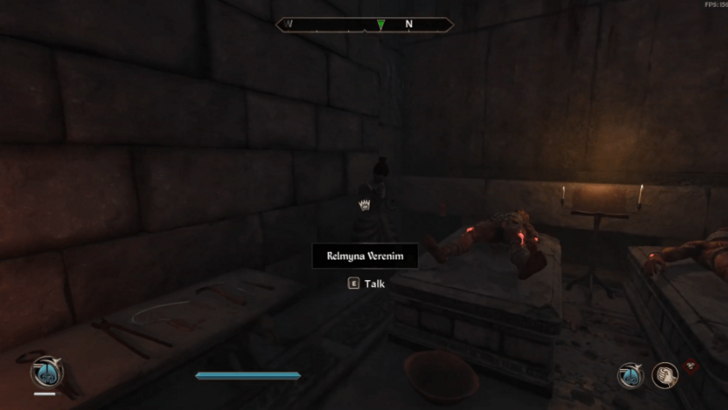
Upon exiting the Gardens of Flesh and Bones, players need to return to Relmyna Verenim in Xalsem via the secret entrance and talk to her. Relmyna Verenim should be somewhere in the Sanctum of Vivisection.
Rebuild the Gatekeeper

After talking to Relmyna Verenim, players will have to choose the body parts to use for the Gatekeeper. Each body part has a trait attached to it, so it's best for players to select the ones they prefer for the Gatekeeper.
Once players have chosen the body parts, they have to go talk to Relmyna again to begin the ritual. After talking, players just need to follow her to the destination where the ritual will take place, which is in the Gates of Madness where the Gatekeeper was first encountered.
Once there, they need to talk to Relmyna for the last time to start the actual ritual. At this point, player just need to follow Relmyna's instructions, which is simply placing each ingredient into the magic pool on her command.
Talk to Sheogorath

Once the ritual is complete, players will now have to go to Sheogorath to report the new Gatekeeper, which completes the quest.
Oblivion Remastered Related Guides
List of All Shivering Isles Quests
All Shivering Isles Main Quests
| 1 | A Door in Niben Bay |
|---|---|
| 2 | Through the Fringe of Madness |
| 3 | A Better Mousetrap |
| 4 | Baiting the Trap |
| 5 | Understanding Madness |
| 6 | Addiction |
| 7 | The Lady of Paranoia |
| 8 | The Cold Flame of Agnon |
| 9 | Ritual of Accession |
| 10 | Ritual of Mania |
| 11 | Ritual of Dementia |
| 12 | Retaking the Fringe |
| 13 | Rebuilding the Gatekeeper |
| 14 | The Helpless Army |
| 15 | Symbols of Office |
| 16 | The Roots of Madness |
| 17 | The End of Order |
| 18 | The Prince of Madness |
All Shivering Isles Side Quests
Comment
Author

Rebuilding the Gatekeeper Walkthrough
Rankings
- We could not find the message board you were looking for.
Gaming News


Popular Games

Genshin Impact Walkthrough & Guides Wiki
Honkai: Star Rail Walkthrough & Guides Wiki
Arknights: Endfield Walkthrough & Guides Wiki
Umamusume: Pretty Derby Walkthrough & Guides Wiki
Wuthering Waves Walkthrough & Guides Wiki
Pokemon TCG Pocket (PTCGP) Strategies & Guides Wiki
Abyss Walkthrough & Guides Wiki
Zenless Zone Zero Walkthrough & Guides Wiki
Digimon Story: Time Stranger Walkthrough & Guides Wiki
Clair Obscur: Expedition 33 Walkthrough & Guides Wiki


Recommended Games
Fire Emblem Heroes (FEH) Walkthrough & Guides Wiki
Pokemon Brilliant Diamond and Shining Pearl (BDSP) Walkthrough & Guides Wiki
Diablo 4: Vessel of Hatred Walkthrough & Guides Wiki
Super Smash Bros. Ultimate Walkthrough & Guides Wiki
Yu-Gi-Oh! Master Duel Walkthrough & Guides Wiki
Elden Ring Shadow of the Erdtree Walkthrough & Guides Wiki
Monster Hunter World Walkthrough & Guides Wiki
The Legend of Zelda: Tears of the Kingdom Walkthrough & Guides Wiki
Persona 3 Reload Walkthrough & Guides Wiki
Cyberpunk 2077: Ultimate Edition Walkthrough & Guides Wiki


All rights reserved
© 2025 ZeniMax Media Inc. All Rights Reserved.
The copyrights of videos of games used in our content and other intellectual property rights belong to the provider of the game.
The contents we provide on this site were created personally by members of the Game8 editorial department.
We refuse the right to reuse or repost content taken without our permission such as data or images to other sites.