Best World Settings for Palworld
★ Home Sweet Home Content Guide
☆ New Pals Announced for Version 1.0!
★ New Pal: Hartalis
☆ Weapons: Core Eject Shotgun | Marksman Revolver
★ Armor: V1 Armor | V2 Armor
☆ New Features: PvP | Paint Mode

Adjust the world settings in Palworld and tailor it to your preferred experience. See a full list of world settings, as well as a recommended setting for beginners, casual players, and veterans of survival games!
List of Contents
Best World Settings
New to Survival Games
| Option | Recommended Setting |
|---|---|
| Difficulty | Casual |
| EXP Rate | 2 |
| Damage from Pals Multiplier | 0.3 |
| Pal Capture Rate | 2 |
| Damage from Player Multiplier | 2 |
| Damage to Player Multiplier | 0.5 |
| Player Hunger Depletion Rate | 0.3 |
| Player Stamina Depletion Rate | 0.3 |
| Dropped Items Multiplier | 2 |
| (h) to Incubate Massive Egg | 24 |
| Enable Raid Events | Disable |
Players who are new to survival games should pick the Casual difficulty for the best beginner experience. Even when selecting a difficulty setting, you can still adjust all the world settings to tailor the experience to your preferences.
The settings in the table above are slightly adjusted from the game's recommended Casual difficulty settings to better suit the experience for beginners.
Standard Experience
| Option | Recommended Setting |
|---|---|
| Difficulty | Normal |
| Pal Appearance Rate | 2 |
| Death Penalty | Drop all Items except Equipment |
The recommended settings the game has to offer for the Standard experience is fine as it is, though you still have the freedom to adjust a couple of settings to your liking.
We recommend refining your experience by adjusting the settings shown in the table above. Keep in mind that increasing the Pal Appearance Rate may impact performance.
For Veterans
| Option | Recommended Setting |
|---|---|
| Difficulty | Hard |
| Pal Appearance Rate | 2 |
| Damage to Pals | 0.8 |
| Dropped Items Multiplier | 1 |
| Gatherable Objects Respawn Interval | 2 |
If you're a veteran or a seasoned player of survival games, you might want to consider choosing the hardest difficulty Palworld has to offer to give you more challenge in-game.
You can still freely change the world settings even on the hardest difficulty and tailor it to your experience. We recommend chaging the settings shown in the table above that makes the experience a bit more difficult yet rewarding
Which Difficulty Settings to Choose
All World Settings
Recommended Settings for Each Difficulty
| Option | Casual | Normal | Hard |
|---|---|---|---|
| Day Time Speed | 1 | 1 | 1 |
| Night Time Speed | 1 | 1 | 1 |
| EXP Rate | 2 | 1 | 0.5 |
| Pal Capture Rate | 2 | 1 | 1 |
| Pal Appearance Rate | 1 | 1 | 1 |
| Damage from Pals Multiplier | 0.5 | 1 | 2 |
| Damage to Pals Multiplier | 2 | 1 | 0.5 |
| Pal Hunger Depletion Rate | 0.5 | 1 | 1.5 |
| Pal Stamina Reduction Rate | 0.5 | 1 | 1.5 |
| Pal Auto HP Regeneration Rate | 2 | 1 | 0.5 |
| Pal Sleep Health Regeneration Rate | 2 | 1 | 0.5 |
| Damage from Player Multiplier | 2 | 1 | 0.7 |
| Damage to Player Multiplier | 0.5 | 1 | 4 |
| Player Hunger Depletion Rate | 0.3 | 1 | 1 |
| Player Stamina Reduction Rate | 0.3 | 1 | 1 |
| Player Auto HP Regeneration Rate | 2 | 1 | 0.6 |
| Player Sleep Regeneration Rate | 2 | 1 | 0..6 |
| Damage to Structure Multiplier | 2 | 1 | 0.7 |
| Structure Deterioration Rate | 0.2 | 1 | 1 |
| Maximum Number of Dropped Items in a World | Max | Max | Max |
| Gatherable Items Multiplier | 3 | 1 | 0.8 |
| Gatherable Objects HP Multiplier | 0.5 | 1 | 1 |
| Gatherable Objects Respawn Interval | 0.5 | 1 | 2 |
| Dropped Items Multiplier | 2 | 1 | 0.7 |
| (h) to Incubate Massive Egg | 24 | 72 | 72 |
| Enable Raid Events | Disable | Enable | Enable |
| Death Penalty | No Items Dropped | Drop All Items | Drop all Items and all Pals on Team |
| Max Number of Guilds | 20 | 20 | 20 |
If you intend to customize your world fully, refer to the table above for the recommended settings of each option that suits the difficulty level you wish to experience.
All World Settings Explained
Metrics Defined
Here's the list of all the World Settings in the game and what each of them refers to.
| Setting | Definition |
|---|---|
| Difficulty | Displays the difficulty level of the game. Players are able to choose either Casual, Normal, Hard and Custom difficulties. |
| Day Time Speed | Refers to how fast or slow day time moves in-game. |
| Night Time Speed | Refers to how fast or slow nighttime time moves in-game. Sleep on a bed if you wish to skip time and wake up next morning! |
| EXP Rate | Displays how much EXP you and your Pal will gain after defeating an enemy. |
| Pal Capture Rate | This refers to how often you can capture a Pal. Setting it on 0 means you'll barely manage to catch anything and setting it on max makes you easily capture any Pal or Human. |
| Pal Appearance Rate | This refers to how often Pals or lucky Pals spawn in your world. Setting it on 0 means you'll barely manage to see Pals and rare Pals roaming around. |
| Damage from Pals Multiplier | This refers to how much damage your Pals deal onto enemies/enemy Pals. Setting it on 0 will make your Pals deal extremely low damage. |
| Damage to Pals Multiplier | This refers to how much damage enemies deal onto a Player's Pal. Setting it on 0 will make your enemies deal extremely low damage. |
| Pal Hunger Depletion Rate | Refers to how often a Pal gets hungry after doing chores, when kept inside the Pal box and when idling in your party. |
| Pal Stamina Reduction Rate | This refers to how much damage your Pals deal onto enemies/enemy Pals. Setting it on 0 will make your Pals deal extremely low damage. |
| Pal Auto HP Regeneration Rate | Refers to how much HP a Pal recovers after getting hit. |
| Pal Sleep Health Regeneration Rate | Refers to how fast Pals recover HP when sleeping on a Pal bed. |
| Damage from Player Multiplier | Refers to how much a Player deals damage to enemies. Players already have low Attack to begin with, so adjust it accordingly to suit your preference! |
| Damage to Player Multiplier | Refers to the amount of damage a Player takes from getting hit. This includes getting damaged from elemental attacks that linger, fall damage, and specific things Player is drowning. |
| Player Hunger Depletion Rate | Refers to how long it takes for the Player to get Hungry. Setting this to max will make the hunger meter deplete as slow as possible. |
| Player Stamina Reduction Rate | Refers to how fast the stamina bar of the Player decreases when Running, Dodging, or Swimming. Raise the metrics to last longer and decrease it to consume Stamina faster. |
| Player Auto HP Regeneration Rate | Refers to how fast a player recovers their HP after taking a hit. |
| Player Sleep Regeneration Rate/th> | Refers to how fast a Player regenerates when they sleep on a bed. |
| Damage to Structure Multiplier | Refers to how much damage a structure gets when getting hit by invaders during Raid Events. |
| Structure Deterioration Rate | Refers to how slow or fast a structure can get destroyed. Raise it to make walls, floors, workbenches, etc. sturdier. |
| Maximum Number of Dropped Items in a World | Set the maximum number of dropped items you'd like to have in your world. |
| Gatherable Items Multiplier | Multiplies or lessens the gatherable objects like Pal Spheres, Eggs, and Treasure Chests in your world. |
| Gatherable Objects HP Multiplier | Increases or decreases the amount of HP a gatherable item has. |
| Gatherable Objects Respawn Interval | Refers to the Respawn time of gatherable objects and resources in a player's world. |
| Dropped Items Multiplier | Refers to the drop rate of items from gathering, and items that drop from defeating enemies. Raise the metrics to get more item drops, or lower it to have less item drops. |
| Time (h) to Incubate Massive Eggs | Refers to the time spent on incubating large sized eggs. Raise the metric number to quickly hatch a huge egg. |
| Enable Raid Events | Raid events refer to enemies, NPCs, and Pals to invade your base. Enable or Disable it according to your preference! |
| Death Penalty | Refers to the conditions that will apply if a Player dies in the game. Choose a condition from one of the choices presented to apply an effect. |
| Max Number of Guilds | Set the maximum number of guilds you'd like to have in your world. |
Best PC Settings
Graphic Settings
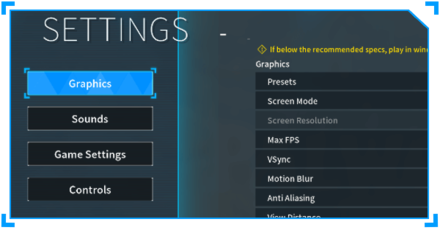
By default, the game will set its Graphic Settings to whatever it recommends for your PC specs. If ever you are experiencing any lag or poor game performance, then considering changing your Graphics Presets to Low or Very Low.
Palworld Related Guides

Home Sweet Home Update Tips
| Home Sweet Home Tips | |
|---|---|
| Paint Mode Guide | PvP Functionality Guide |
Tides of Terraria Update Tips
Feybreak Update Tips
Feybreak Update All New Content Guide
Sakurajima Update Tips
All Sakurajima Update Features
General Palworld Tips
Pal Catching Tips
| Pal Catching Tips | |
|---|---|
| How to Catch Pals | How to Catch and Sell Humans |
| How to Get Lucky Pals | Pal Sphere Farming Guide |
| How to Reroll Dungeon Bosses | |
Survival and Exploration Tips
| Best Base Locations | |
|---|---|
| Coal Base | Paldium Fragment Base |
| Ore Base | Sulfur Base |
| Skill Fruit Base | - |
Settings and Multiplayer Tips
Glitches and Exploits
Author

Best World Settings for Palworld
Rankings
- We could not find the message board you were looking for.
Gaming News


![Monster Hunter Stories 3 Review [First Impressions] | Simply Rejuvenating](https://img.game8.co/4438641/2a31b7702bd70e78ec8efd24661dacda.jpeg/thumb)
Popular Games

Genshin Impact Walkthrough & Guides Wiki
Honkai: Star Rail Walkthrough & Guides Wiki
Umamusume: Pretty Derby Walkthrough & Guides Wiki
Pokemon Pokopia Walkthrough & Guides Wiki
Resident Evil Requiem (RE9) Walkthrough & Guides Wiki
Monster Hunter Wilds Walkthrough & Guides Wiki
Wuthering Waves Walkthrough & Guides Wiki
Arknights: Endfield Walkthrough & Guides Wiki
Pokemon FireRed and LeafGreen (FRLG) Walkthrough & Guides Wiki
Pokemon TCG Pocket (PTCGP) Strategies & Guides Wiki


Recommended Games
Diablo 4: Vessel of Hatred Walkthrough & Guides Wiki
Cyberpunk 2077: Ultimate Edition Walkthrough & Guides Wiki
Fire Emblem Heroes (FEH) Walkthrough & Guides Wiki
Yu-Gi-Oh! Master Duel Walkthrough & Guides Wiki
Super Smash Bros. Ultimate Walkthrough & Guides Wiki
Pokemon Brilliant Diamond and Shining Pearl (BDSP) Walkthrough & Guides Wiki
Elden Ring Shadow of the Erdtree Walkthrough & Guides Wiki
Monster Hunter World Walkthrough & Guides Wiki
The Legend of Zelda: Tears of the Kingdom Walkthrough & Guides Wiki
Persona 3 Reload Walkthrough & Guides Wiki


All rights reserved
© Pocketpair, Inc.
The copyrights of videos of games used in our content and other intellectual property rights belong to the provider of the game.
The contents we provide on this site were created personally by members of the Game8 editorial department.
We refuse the right to reuse or repost content taken without our permission such as data or images to other sites.
Hello, Most settings are correct but ones, stamina reduction rate and damage from/to pals is not. Higher rate actually reduces your stamina quicker. Stands for 'At which rate your stamina will reduce while sprinting, mining, etc.' Damage from/to pals applies to all pals, yours and the wild ones.