Maddening Difficulty Guide: Differences and Tips
★ Use Zelestia, Gregory, & Madeline in Wave 4 of the DLC!
☆ Unlock the Fell Xenologue by visiting the Ancient Well!
★ All Paired Endings and Mementos from the Pact Ring.
☆ Unit Tier List | Best Classes | Best Pairings | Best Party
★ Farming Guides: Bond Fragments | SP | Gold | Ingots
☆ Increase Supports with Gifts and Recreation.
Fire Emblem Engage's Maddening difficulty is the hardest mode available and suited for players who seek a challenge. Learn about maddening mode differences and tips for maddening difficulty.
List of Contents
Maddening Difficulty Differences
Maddening Difficulty Features
Unit Stat Growth is Fixed
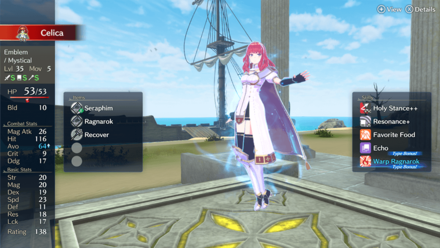
Unlike the other difficulty modes, units in Maddening difficulty have fixed stat growths. This means that each character and class has predetermined stats every level. Note that saving and resetting will reroll stats on level up.
▶︎ Growth Rates Explained for Character Stats
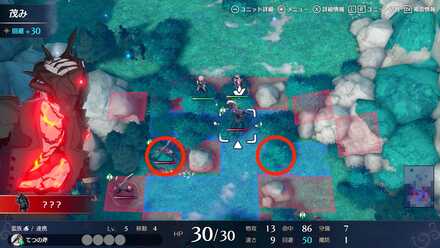
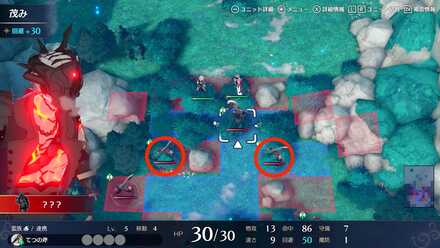
More Enemies with Better Stats and Skills
| Differences Between Hard and Maddening Difficulty | |
|---|---|
 Empty tile |
 New enemy! |
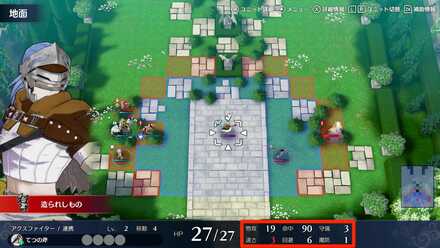 Hard difficulty enemy stats |
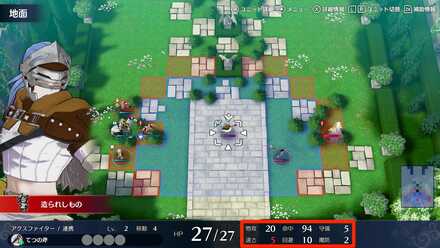 Increased stats! |
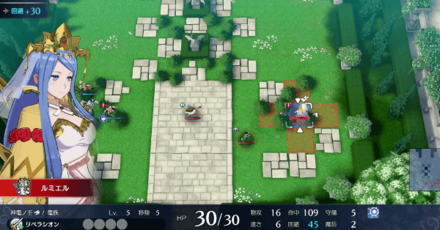 Hard difficulty enemy skills |
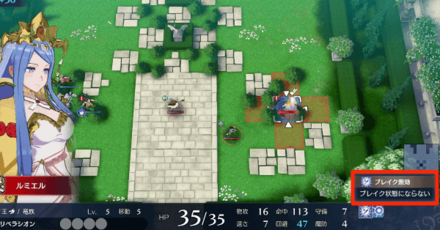 More skills! |
▶︎ Difficulty Level Differences
Draconic Time Crystal Usage is Limited
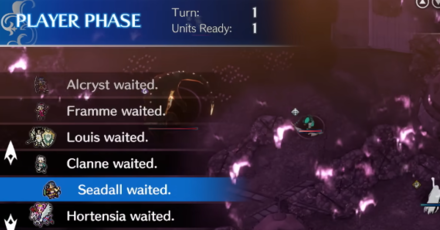
In Maddening difficulty, the Draconic Time Crystal only has 10 charges. This is the same as Hard difficulty, but each rewind is more crucial on Maddening. Try to use it wisely and save it to revert crucial mistakes that could end your run.
Enemy Unit AI is Better

As expected, the behavior of enemies change as well because of the improved AI. An example of this is if an enemy will deal either 0 Hit or 0 Damage to your unit, it will not attack but instead approach you to prevent a counterattack.
Maddening Difficulty Tips
Get as Much EXP as Possible
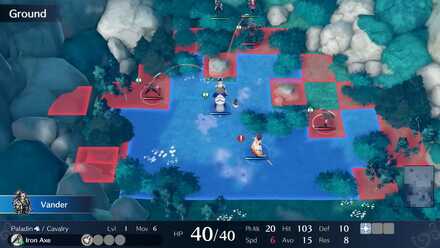
The strength of your units is directly tied to their levels. Try to earn as much EXP as you can by defeating all enemies and not skipping optional battles. Take note that healing units also reward EXP. If you have a unit that can wield a Staff, do not be afraid to spam healing skills.
Adopt a More Defensive Playstyle
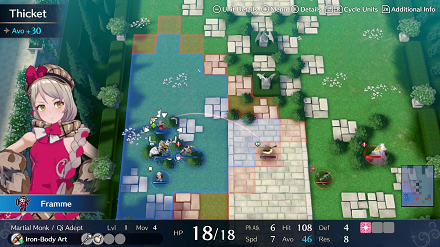
Enemies in Maddening difficulty have higher stats so it is unwise to recklessly send out your units into enemy territory. Try to pick fights that you are sure to win and to ensure victory, make use of the surrounding terrain.
Use Terrain Effects to Your Advantage
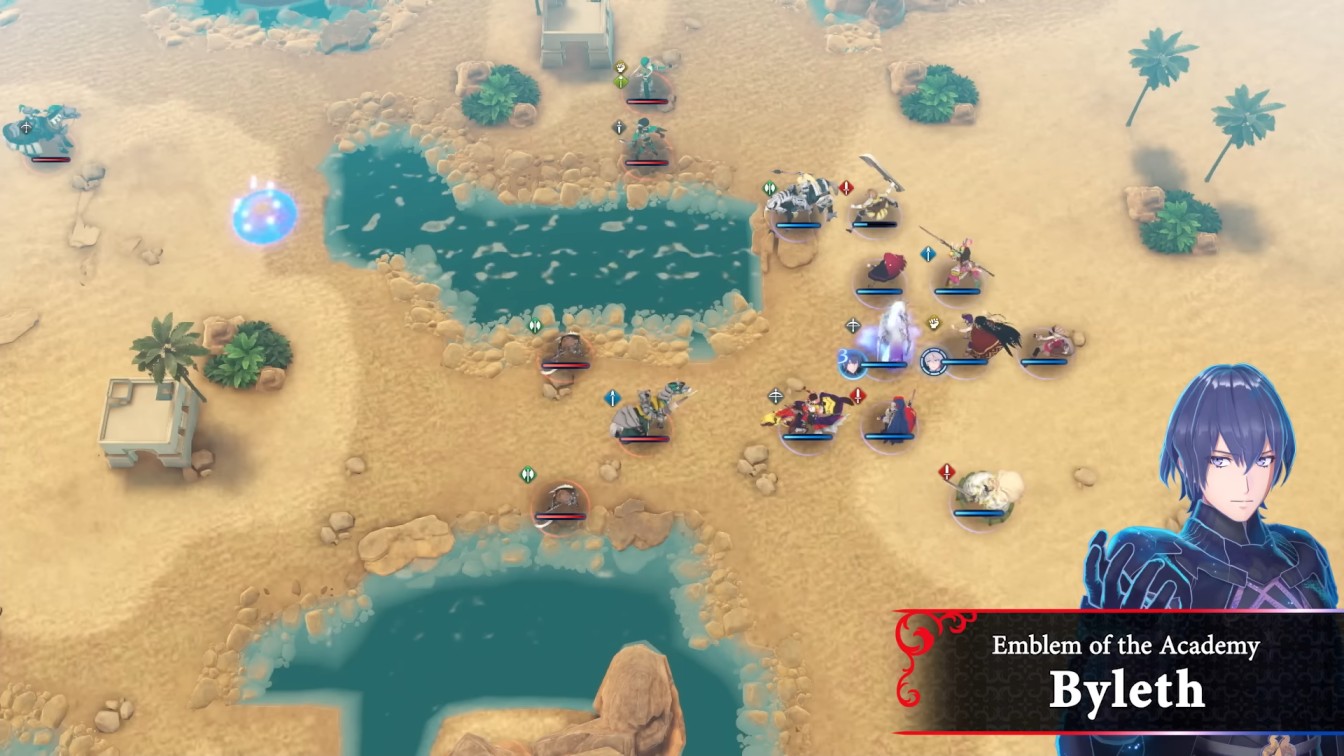
Some enemies will be able to one-shot your units or at least deal heavy damage. Try to fight in terrain where your units will receive bonuses to defenses. When attacking, always try to go for Breaks to avoid counterattacks.
▶︎ Terrains and Terrain Resistance Explained
Carefully Maneuver Your Frontline and Backline Units
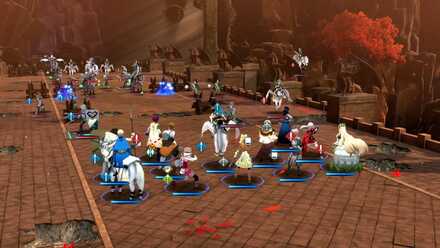
It is important to have your units play their roles properly in Maddening difficulty. Always position your frontline units so they will be able to protect your backline units. Have your backline units finish enemy units as fast as possible so your frontline do not suffer from too much damage.
Keep Your Units in Top Condition
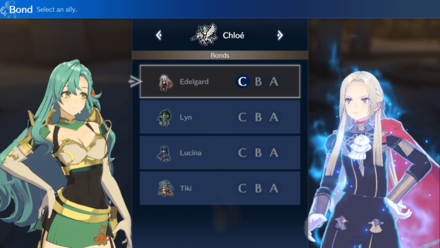
Always make sure that your units are as strong as possible. Give them the strongest equipment that you can and do not neglect Support Levels. Do not forgot to eat at Cafe Terrace before battles and use Skill Inheritance to give your units the upper hand in combat.
Maddening Difficulty Guide and Strategies
Focus Resources on Few Units
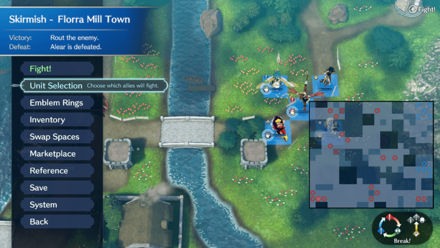
With the limited experience on Maddening mode, we want to make sure that our resources are actually going to the right characters. Avoid allowing allies to take experience points if you're planning to bench them and never use them again on the later chapters.
EXP Farming Guide: How to Level Up Fast
Plan Out Chosen Units Ahead

With the given experience limitation, you should also take note of which units you can actually get on the later chapters. Make sure to choose your units according to this information so you can immediately pin point which units you want to invest stat growth items to and which units you want to include in your party once you reach later chapters.
Use Engage When You Can
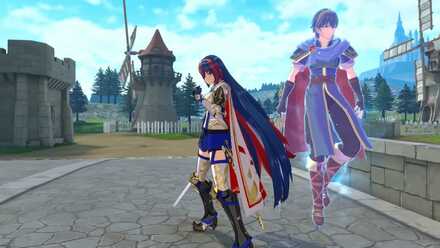
While saving Engage Mode for the boss battle works in other difficulties, it will probably not work Maddening difficulty. Try to use Engage Mode as much as you can to end fights quickly and suffer minimal damage. Of course, it is still a good idea to have it ready when you are about to fight the boss of the stage.
Use Healing Tiles to Farm EXP
Some tiles like Forts will heal units standing on it. Station a Bow user and lure enemies close to get some EXP easily as they will not be able to retaliate.
Be Aware of Each Unit's Role and Skills

Always play to the strengths of your units. It is best to be familiar with the skills and capabilities of your units. Take advantage of their unit types, weapon advantages, and skills to quickly dispatch enemies.
Use the Qi Adept's Chain Guard
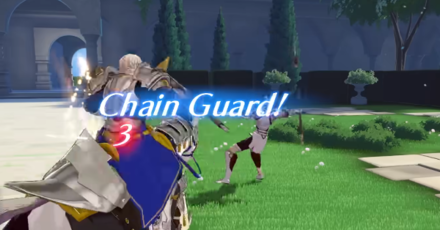
The Qi Adept's Chain Guard ability will come in clutch to reduce the damage taken by your units. Framme is a Qi Adept that you will be able to recruit early in the game. Try to fit one in your party when you can!
Qi Adept Units
 Framme Framme |
 Jean Jean |
 Seadall Seadall |
Increase Support Level by Healing
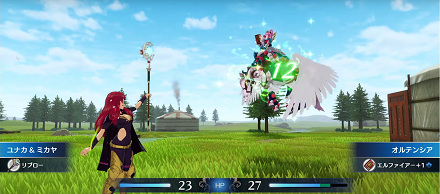
Fighting is not the only way to make your units stronger. In combat, healing units increases their Support Levels which will be useful later in the game.
▶︎ How to Increase Support Level
Maddening Chapter Walkthroughs
Prologue: The Emblems
| Victory Conditions | ||
|---|---|---|
| Rout the Enemy | ||
| Defeat Conditions | ||
| Alear is Defeated | ||
| 1 | Have Alear approach the enemy. | |
| 2 | Attack the enemies. | |
| 3 | Use Engage to finish the battle. | |
▶︎ Prologue: The Emblems Walkthrough
Chapter 1: Awake at Last
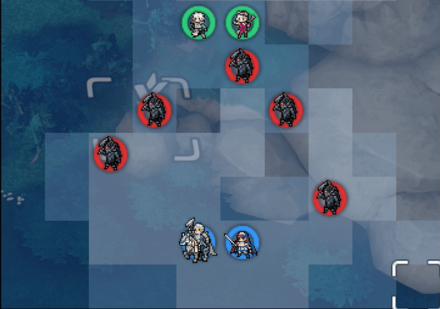 First Phase |
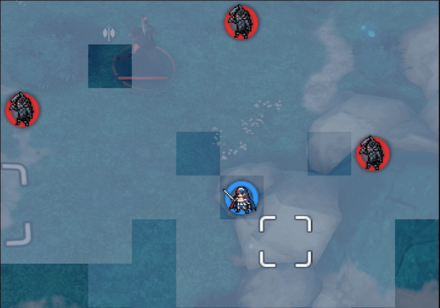 Second Phase |
| Victory Conditions | ||
|---|---|---|
| Rout the Enemy | ||
| Defeat Conditions | ||
| Alear is Defeated | ||
| 1 | Damage enemies with Vander. | |
| 2 | Finish them off with Alear. | |
| 3 | Use Engage to clear all the enemies. | |
▶︎ Chapter 1: Awake at Last Walkthrough
Chapter 2: Queen Lumera
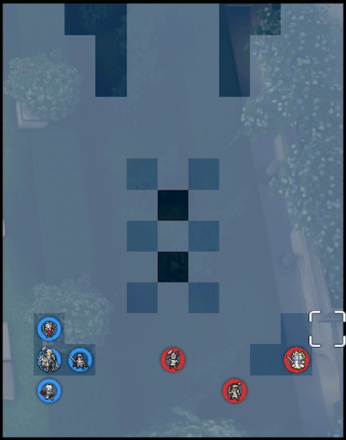 First Phase |
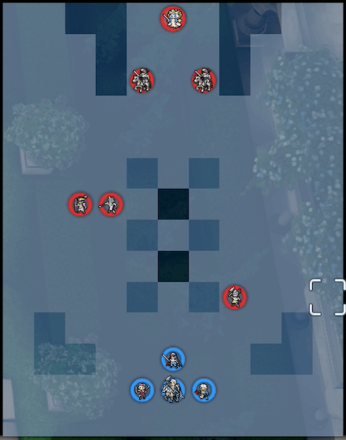 Second Phase |
| Victory Conditions | ||
|---|---|---|
| Defeat Lumera | ||
| Defeat Conditions | ||
| Alear is Defeated | ||
| Summary | ||
|
・Vander is still a key unit ・Archer can potentially one-shot Framme. ・Defeating Lumera will move you to the next phase with HP recovered. |
||
| 1 | Damage enemies with Vander and finish them with Framme and Clanne. | |
| 2 | Do the same with the Archers. | |
| 3 | Damage Lumera with Vander and use Alear's Engage Attack to deal the finishing blow and go to the next phase. | |
| 4 | Have Vander, Clanne, and Alear defeat the nearby enemies. | |
| 5 | Defeat the archers and restore Vander's HP with Framme and put her in a safe position. | |
| 6 | Surround and defeat the spearmen and heal Fran's HP with consumables if low. | |
| 7 | Press the attack with Alear and Vander to lure Lumera and use Framme's Chain Guard. | |
| 8 | Continue attacking Lumera and end with Alear's Lodestar Rush and Clanne's magic attacks. | |
Defeat all other enemies before luring out Lumera
When luring out Lumera, use Framme's Chain Guard to reduce damage.
▶︎ Chapter 2: Queen Lumera Walkthrough
Chapter 3: Hostilities
 |
| Victory Conditions | ||
|---|---|---|
| Rout the Enemy | ||
| Defeat Conditions | ||
| Alear is Defeated | ||
| Summary | ||
|
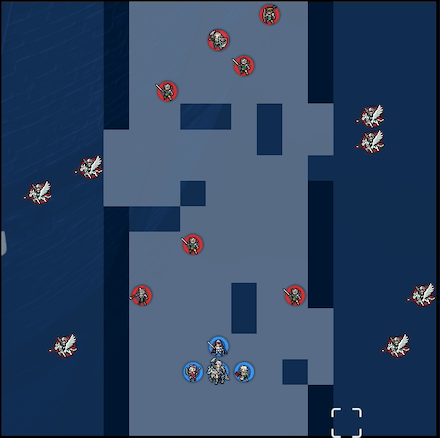
・On turn 2, reinforcements will arrive ・Slowly push forwards while having Etie deal with the flying units ・Boss will be resistant to most attacks except Clanne's magic |
||
| 1 | ・Defeat the enemies on the right with Vander and Alear. Use Chain Guard for defense. | |
| 2 | ・Defeat the flying units on the right with Etie and Clanne. ・Take care of the melee enemies with Vander and Alear. ・Defeat the spearman with Boucheron and Alfred. |
|
| 3 | ・Slowly move forwards. | |
| 4 | ・Defeat the enemies as you press on. | |
| 5 | ・Have Vander lure out the flying units on the right. | |
| 6 | ・Using the debris in the center, form a wall with your units. | |
| 7 | ・Boss is resistant to physical attacks so use magic attacks. | |
Be careful when luring the flying units on the rear, right side
Be careful when moving forward because when you enter the attack range of the flying units on the right side near the boss, all other units will move in to attack. Clear all other units before moving to defeat the flying units.
▶︎ Chapter 3: Hostilities Walkthrough
Fire Emblem Engage Related Guides

▶︎ Beginner's Guide to Fire Emblem Engage
All Tips and Tricks
Author
Maddening Difficulty Guide: Differences and Tips
improvement survey
03/2026
improving Game8's site?

Your answers will help us to improve our website.
Note: Please be sure not to enter any kind of personal information into your response.

We hope you continue to make use of Game8.
Rankings
- We could not find the message board you were looking for.
Gaming News
Popular Games

Genshin Impact Walkthrough & Guides Wiki

Honkai: Star Rail Walkthrough & Guides Wiki

Umamusume: Pretty Derby Walkthrough & Guides Wiki

Pokemon Pokopia Walkthrough & Guides Wiki

Resident Evil Requiem (RE9) Walkthrough & Guides Wiki

Monster Hunter Wilds Walkthrough & Guides Wiki

Wuthering Waves Walkthrough & Guides Wiki

Arknights: Endfield Walkthrough & Guides Wiki

Pokemon FireRed and LeafGreen (FRLG) Walkthrough & Guides Wiki

Pokemon TCG Pocket (PTCGP) Strategies & Guides Wiki
Recommended Games

Diablo 4: Vessel of Hatred Walkthrough & Guides Wiki

Fire Emblem Heroes (FEH) Walkthrough & Guides Wiki

Yu-Gi-Oh! Master Duel Walkthrough & Guides Wiki

Super Smash Bros. Ultimate Walkthrough & Guides Wiki

Pokemon Brilliant Diamond and Shining Pearl (BDSP) Walkthrough & Guides Wiki

Elden Ring Shadow of the Erdtree Walkthrough & Guides Wiki

Monster Hunter World Walkthrough & Guides Wiki

The Legend of Zelda: Tears of the Kingdom Walkthrough & Guides Wiki

Persona 3 Reload Walkthrough & Guides Wiki

Cyberpunk 2077: Ultimate Edition Walkthrough & Guides Wiki
All rights reserved
©2023 Nintendo / INTELLIGENT SYSTEMS.
The copyrights of videos of games used in our content and other intellectual property rights belong to the provider of the game.
The contents we provide on this site were created personally by members of the Game8 editorial department.
We refuse the right to reuse or repost content taken without our permission such as data or images to other sites.


![Everwind Review [Early Access] | The Shaky First Step to A Very Long Journey](https://img.game8.co/4440226/ab079b1153298a042633dd1ef51e878e.png/thumb)

![Monster Hunter Stories 3 Review [First Impressions] | Simply Rejuvenating](https://img.game8.co/4438641/2a31b7702bd70e78ec8efd24661dacda.jpeg/thumb)


