Aether Raids Guide
★ Latest Banners: Tiki: Everlasting Voice | Springtime Sisters
☆ New: Mythic Tiki (Adult) | Spring Thórr, Spring Dorothea, Spring Sothe, Spring Eirika
★ Free Units: Spring Bernadetta
☆ State of the Meta (February 2026)

A guide to Aether Raids, one of the modes of play in Fire Emblem Heroes (FEH). This guide will show you how to play Aether Raids, recommended structures, the best Aether Raids units, and how to build your Aether Raid defense!
List of Contents
How to Play Aether Raids
Defeat enemy units in 7 turns
To win in Aether Raids, you must take out all enemy units within 7 turns. This is unlike the Arena wherein there is no turn-limit. This makes Aether Raids more fast-paced and strategic than the other competitive game modes.
Enemies do not move unless your units are in range of them
Enemy units in Aether Raids are AI-controlled and they will not move unless they are attacked or one of your units end the phase while in the range of the enemy danger zone. This encourages offensive strategies, which are very fit for the context of the game mode.
There are exceptions to this rule, however. These include, but are not limited to:
- Maps that utilize healing assist traps such as Restore+ traps or Return+ traps fueled by Winter Bernadetta's Hrist
- Maps fielding 7 units and using a dance trap
- Maps trapping units in a corner using a weaponless hero
Destroy Aether structures
It is not a clear requirement to destroy the opponents' Aether structures in a raid, but doing so will help recover some of the Aether raiding costs. Doing so consistently will allow you more raids in a season. This gives you the best opportunity to climb through the tiers in Aether Raids.
You must destroy the Aether structures before wiping out the entire enemy team as taking out the final enemy unit will end the raid immediately.
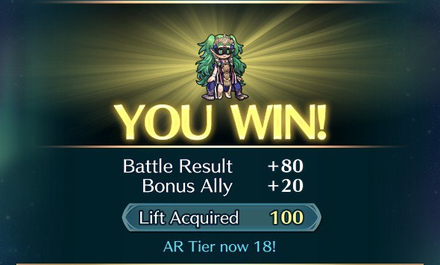
Aim for a high score
|
Your score or lift after an Aether Raid decreases -20 per each ally that is taken out. It is increased whenever you integrate a bonus unit or an in-season Mythic hero that is accompanied by blessed allies.
Take note that appropriately blessed units and bonus units are granted with bonus stats that keep them from dying and help you achieve victory. Try your best to always integrate them into the mix so to give yourself the best chances for winning.
Defend your Aether Keep

Take out all enemies or survive for 7 turns!
In Aether Raids defense, your units will be controlled by AI. Your Aether Raids defense team will win if they are able to take out all raiding units or if at least 1 survives after the 7th turn.
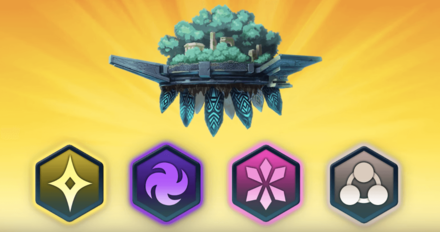
Make use of defensive Mythic heroes
Dark and Anima Mythic heroes are considered to be defensive heroes. They reduce your lift gain when they are used in offensive Aether Raids, but they mitigate the amount of lift lost if they are used in defensive Aether Raids. Since most of these heroes are strong heroes anyway, we highly recommend using them in your defense maps. Take note that your Mythic hero must be under the appropriate season to be able to migitate the lift loss.
• Number of Mythic Heroes (max. 2) × number of allies with blessings × 5 • Number of merges × 1 (max. 20)
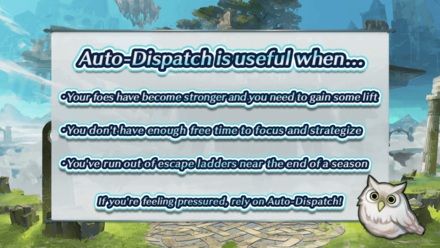

In July 2020, Auto-Dispatch for Aether Raids was released. This enables players to send out raiding parties to automatically battle for some lift. Enemy units encountered in Aether Raids are not player-owned and are much weaker than those encountered in normal offensive Aether Raids. It can be used 3 times per season and the characters dispatched can still be used in normal offensive Aether Raids.
Other notes for Auto-Dispatch
|
Although Auto-Dispatch is a very convenient function, it takes time for your units to reward you with lift and it is not cost-efficient in terms of Aether to lift ratio. Additionally, you also can not recover lift as Aether stuctures are not available in Auto-Dispatch.
Make use of Mythical Heroes
| Eff. |
Atk+3 |
Spd+4 |
Def+5 |
|
|---|---|---|---|---|
|
|
|
|
|
|
|
|
|
|
|
|
|
|
|
|
|
|
|
|
|
|
|
|
Light and Astra heroes are considered as offensive Mythic heroes that increase your lift upon winning an offensive Aether Raid. Dark and Anima heroes on the other hand are considered defensive heroes that decreases the lift loss upon failing to defend against an Aether Raid. The increase and decrease in lift can be increased by merging the Mythic hero responsible and by deploying them into battle with heroes that are blessed with the appropriate blessing.
Because of these, we strongly recommend you to aim for Mythic heroes to help you gain and preserve lift!
Spread your firepower throughout the many seasons

You can have up to 5 raiding teams per season when raiding in Aether Raids. Because of the many seasons, there will be many different line-ups used by other players depending on the season. We recommend having a diverse line-up of teams that can cover many different match-ups under a specific season.
You can re-use units in many different teams. What we mean by spread your firepower is that you should use your resources to make sure that you are strong in all seasons!
Aether Raids Structures
Structures can be built and upgraded
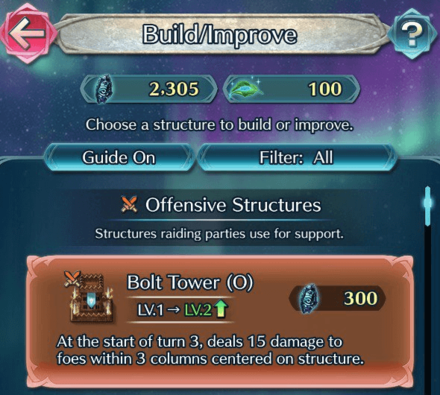
The structures that give you advantage in Aether Raids can be created using Aether Stones. By creating and improving structures, you are able to increase your efficiency and make room for more strategy in both sides of an Aether Raids. Making use of Aether Stones also grant you with Heavenly Dew that is used to upgrade said structures.
Aether Stones are awarded through playing Aether Raids. This encourages you to play Aether Raids consistently to grow stronger in this game mode!
Offensive and defensive structures
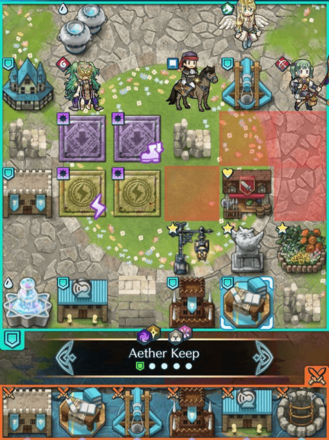
Defensive structures take up the majority of the screenshot. They are within the aquamarine outline. The offensive structures are at the bottom of the screen inside the orange outline.
There are two kinds of structure in Aether Raids, offensive and defensive structures. Your defensive structures are present in your Aether Raids defense map and their presence and effects will help you in defending your Aether structures and heroes. Offensive structures on the other hand are present with you during Aether Raids offense and have effects that will help you take down the enemy team. They have tiers and they can be improved by using Heavenly Dew on them. Improving these structures will strengthen their effects making it easy for you to defend or raid Aether Keeps.
We strongly recommend you focus on upgrading defensive structures over offensive structures. Offensive structures take up space on your bottom row. Oftentimes, the empty space is more valuable than the offensive structure itself; those empty spaces can be used to hide your units from defense teams that specialize in engaging on turn one.
The exception to this recommendation is the Escape Ladder. Always deploy this offensive structure unless it is out of charges.
Best structures to prioritize upgrades on
 |
 |
The Aether Fountain and the Aether Amphorae are structures that increase the amount of Aether you can store and the amount of Aether you restore per day. This means that having them upgraded means that you can partake in more Aether Raids per day! This is the reaon why we strongly recommend you upgrade these two structures first.
 |
 |
If the level of your Fortress (O) is higher than the level of your opponents' Fortress (D), then you will gain a stat bonus to all of your allies. This is a huge boost to your team or to the enemy team so we recommend upgrading your fortresses right after maxing out your Aether structures!
Prioritize Fortress (D) above Fortress (O). Aether Raids has a built-in feature where a lower level Fortress (O) is boosted in strength to match the defense team's Fortress (D). Only upgrade Fortress (O) when it is necessary to upgrade the Fortress (D) further.
 |
Bonus structures change every other season. If they are present in your side of the field, then they will grant your fortress an extra level. If both Aether structures and both fortresses are at max level and you do not have the current bonus structure, we strongly recommend you building one for the season!
|
The Escape Ladder has a maximum of 6 charges (As of July 2021) per week. It reduces one charge each time you surrender a map or lose all of your units. Each use of the Escape Ladder returns the Aether spent for that battle.
This structure essentially lets you try again if you lose or surrender a match. Without question, this is the most important structure to upgrade after the Fortress (D) and at least a level 1 bonus structure.
If ever your Escape Ladder runs out of charges, don't forget to remove it from your lineup of active structures. It won't do anything except take up space; space that could've been used to hide your weaker heroes from opposing units.
Increase Lift by Using Mythic Heroes!
Light and Astra: Increase Lift Gain
| Increased Lift Gain Formula |
|---|
| Number of Mythic Heroes × number of allies with blessings × 10 + Number of merges × 1 |
If the Mythic hero and blessed allies successfuly win an offensive Aether Raid, the lift gained will be increased by the value above.
The best teambuilding formula to maximize lift gain is using 3 Mythic heroes and 2-3 blessed heroes, with the 3rd blessed hero on the 6th unit slot.
Dark and Anima: Decrease Lift Loss
| Decreased Lift Loss Formula |
|---|
| Number of Mythic Heroes (max. 2) × number of allies with blessings × 5 + Number of merges × 1 (max. 20) |
If the Mythic hero and blessed allies fail to defend the Aether Keep, the lift loss will be decreased by the value above.
The best teambuilding formula to minimize lift loss is using 2 Mythic heroes and 4 blessed heroes, with the 7th slot unit either another blessed hero or a 3rd Mythic hero.
Stat Bonus for Blessed Allies
Mythic heroes grant their blessed allies stat bonuses depending on their Mythic element. The stat bonuses can be seen in a table in this section under Make use of Mythical Heroes.
Best Aether Raids Units
Versatile and/or specialized defensive units
|
|
|
|
|
Baiting enemy units into unfavorable engagements is a very strong playstyle that also works in Aether Raids. Players often field defense teams with overlapping ranges to ensure that if you try to bait one unit, you end up having to withstand multiple attacks from different heroes.
Versatile defensive units such as Brave Hector and Brave Edelgard are a catch-all answer to withstanding multiple attacks. If properly supported by units such as Flayn and Corrin (M), these defensive units can survive multiple engagements and eliminate a number of enemy units in one turn.
Specialized defensive units such as Micaiah and Fallen Lyon work wonders against defense maps that also specialize in a specific type of offense. Various defense teams field multiple ranged cavalry units, and these two are great units to use against those teams.
High-powered offensive ranged units
|
|
|
|
|
Being ranged also allows you to attack past the many buildings that are present in Aether Raids. In some situations, you may be able to take out whole teams without them retaliating too much. This is why high-powered offensive units like the ones above are very effective as well.
A good strategy to use is Hit and Run. Using an offensive ranged unit, kill an enemy and then retreat to safety with Reposition after an allied refresher unit gives them another turn. This activates the defense map and triggers the AI to approach your units. You can then pick them off one at a time on your next turn.
Units with multiple actions in one turn
|
|
|
|
|
Using units with multiple actions in one turn such as the ones shown above, you can clear a majority of the enemy team in one turn. Ninja Lyn and New Year Peony achieve this through their respective Duo skills. Fallen Edelgard has a built-in extra action on Twin-Crest Power. Units like Pirate Tibarn utilize the special skill Galeforce to obtain another action.
Refresher-assist units
|
|
|
|
|
Since the turns are limited, you may need your stronger units to take two actions per turn and dancers can allow them to do so. In Aether Raids, we recommend flying refresher-assist units over grounded ones as there are terrain such as lava lakes, bodies of water and mountains that hinder ground dancers' mobility.
List of Heroes with Refresher Skills
Aether Raids Defense Guide
Protect your Aether structures
It is a good idea to prioritize protecting your Aether structures. This is because players will be actively seeking these structures to destroy them as it restores Aether for them. When they have breached your defenses, and your Aether structures are still up, they will be actively trying to juggle keeping their units alive, taking out your units and taking out these Aether structures. Odds are, they will fail at least one of these.
Utilize your Fortress (D) properly
Fortress (D) is the only structure that cannot be destroyed by enemy units. Flying units can not pass through it as well. It works well with some of the impassable terrain already in Aether Raids maps. Be creative in taking advantage of this structure to funnel your enemies right into your line of fire!
Run trial-and-error raids on your defense map
Under the Aether Keep interface, tap on Help & Extras to Test Defenses. This will allow you to run practice raids on your Aether Keep. Through this process, you will be able to know what the weaknesses of your Aether Keep are. Additionally we also recommend that you watch the raids from other players that are done against your Aether Keep. You will know how other minds go through your defenses and through that, you might be able to make changes that will better your defenses.
You can also run practice raids on your friends' maps under Friend Mock Battle! Use this to practice your raiding skills.
Defense map examples
Example 1: Using offensive cavalry ranged units to threaten starting spaces

A sample Cavline defense map with mostly F2P options.
This sample defense map utilizes F2P options like Reinhardt and Nanna to threaten the starting tiles for the raider's party. It also contains two Mythic heroes in Bramimond and Triandra to minimize lift loss in case the defense team fails.
Each defense team should have at least 2 Mythic heroes, with a 3rd possibly on the team as well through the 7th unit slot, and 4-5 appropriately blessed units. This team composition is the best way to minimize lift loss should the defense team lose.
A good number of players enter battle with a full row of offensive structures, leaving no room for their weaker units (such as their Mythic heroes who do not receive bonus stats) to hide. As soon as the enemy phase begins, the ranged cavalry units will be in range of at least one enemy, forcing them to engage. Bramimond will then move and be in range of a refresh from either Triandra or Masquerade Eldigan, allowing a second action to follow-up on the first wave of attack from the ranged cavalry units.
The bottom row is filled with decorations and the unbreakable Fortress, with the row above it filled with traps. The purpose of this building placement is to waste the raider's time and reduce the chance that he/she cannot engage with player phase units on turn 1.
Example 2: Utilizing the 7th unit slot as a dance and/or rally trap

A highly invested rally up trap defense map with mostly premium options.
This sample defense map presents multiple threatening units backed up by two Nótts, a Triandra, and a Legendary Sigurd to make the AI as unpredictable as possible. The Nótt on the second row is the 7th slot unit and will end her turn immediately. The other Nótt will move to the tile with the real gravity trap and use her Rally Up assist, creating a vertical line of Nótts with stacking Pathfinder to allow Legendary Sigurd to attack backline units as far as 7 spaces away and activate Holy-Knight Aura.
The rest of the ranged cavalry units will then engage, now with 4 movement due to Holy-Knight Aura and up to two possible Pathfinder spaces of additional movement, threatening enemy units as far as 8 spaces away.
The key component of defenses like these is having an offensive staff cavalry unit with Odd Recovery 3. Odd Recovery 3 cleanses all debuffs from nearby allies, especially dangerous ones like Isolation and Gravity. Without those penalties, the rest of the team is free to move and act unimpeded.
Nótt and Legendary Sigurd maps are very common in the Vault of Heaven since Nótt's release in-game. Various popular FEH content creators such as Eldervi have made videos showing the prowess of these two units put together, and a lot of people have emulated their success by building similar teams. If you are in the Vault of Heaven, ensure that you are prepared for defense maps similar to this.
Best Aether Raids Defense Units and Setups
Aether Raids Rewards

Rewards in Aether Raids include dragonflowers, Heroic Grails and Aether Stones that allow you to power-up not only your units, but your structures in your Aether Keep as well. Heroic Grails are used to summon heroes that you can use outside of the Aether Raids game mode. This makes this game mode a must-play if you want to progress efficiently in the game.
Rewards are dependent on your rank
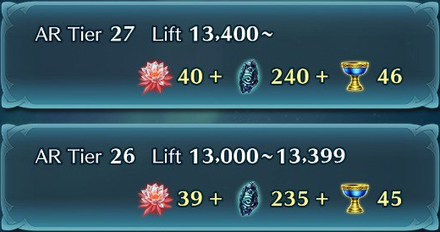
The amount of rewards you get is dependent on your AR Tier! Progress through the AR Tiers to consistently get huge amounts of resources in the long run!
Aether is required to run raids

Aether is required to run raids! To increase the amount of Aether you get every day, you need to upgrade your Aether structures with Aether stones. At the end of every season, all of your Aether is replenished.
No rating system similar to Arena
Scoring is much simpler and is not dependent on a unit's overall power like the system used in the Arena. This means that you are more free to use your favorite units and bonus characters without penalty!
Fire Emblem Heroes - Related Guides
FEH Guide Wiki Top Page

▶︎Return to the FEH Guide Wiki Top Page
 Heroes
 Stats and IVs
 Skills
 Sacred Seals
 Tier Lists and Rankings
 Beginner's Guide
 Summons
 Events
 Tactics Drills
 Arena
Arena Aether Raids
 Grand Hero Battles
 Bound Hero Battles
 Legendary Hero Battles
 Mythic Hero Battles
 Emblem Hero Battles
Author

Aether Raids Guide
Premium Articles
Rankings
- We could not find the message board you were looking for.
Gaming News

![Monster Hunter Stories 3 Review [First Impressions] | Simply Rejuvenating](https://img.game8.co/4438641/2a31b7702bd70e78ec8efd24661dacda.jpeg/show)
![Monster Hunter Stories 3 Review [First Impressions] | Simply Rejuvenating](https://img.game8.co/4438641/2a31b7702bd70e78ec8efd24661dacda.jpeg/thumb)

![The Seven Deadly Sins: Origin [First Impressions] | A Promising Start](https://img.game8.co/4440581/584e0bfb87908f12c4eab6e846eb1afd.png/thumb)
Popular Games

Genshin Impact Walkthrough & Guides Wiki
Umamusume: Pretty Derby Walkthrough & Guides Wiki
Pokemon Pokopia Walkthrough & Guides Wiki
Honkai: Star Rail Walkthrough & Guides Wiki
Monster Hunter Stories 3: Twisted Reflection Walkthrough & Guides Wiki
Arknights: Endfield Walkthrough & Guides Wiki
Wuthering Waves Walkthrough & Guides Wiki
Zenless Zone Zero Walkthrough & Guides Wiki
Pokemon TCG Pocket (PTCGP) Strategies & Guides Wiki
Monster Hunter Wilds Walkthrough & Guides Wiki


Recommended Games
Diablo 4: Vessel of Hatred Walkthrough & Guides Wiki
Cyberpunk 2077: Ultimate Edition Walkthrough & Guides Wiki
Fire Emblem Heroes (FEH) Walkthrough & Guides Wiki
Yu-Gi-Oh! Master Duel Walkthrough & Guides Wiki
Super Smash Bros. Ultimate Walkthrough & Guides Wiki
Pokemon Brilliant Diamond and Shining Pearl (BDSP) Walkthrough & Guides Wiki
Elden Ring Shadow of the Erdtree Walkthrough & Guides Wiki
Monster Hunter World Walkthrough & Guides Wiki
The Legend of Zelda: Tears of the Kingdom Walkthrough & Guides Wiki
Persona 3 Reload Walkthrough & Guides Wiki


All rights reserved
© 2025 Nintendo / INTELLIGENT SYSTEMS
The copyrights of videos of games used in our content and other intellectual property rights belong to the provider of the game.
The contents we provide on this site were created personally by members of the Game8 editorial department.
We refuse the right to reuse or repost content taken without our permission such as data or images to other sites.