How to Beat Galahad
This is a guide to Galahad, a Boss battle in Bravely Default 2 (Bravely Default II). Read on to know how to beat Galahad, its strengths and weaknesses, and the best strategy against Galahad.
List of Contents
Galahad Notes
Unbeatable in First Encounter
Galahad's first battle will end abruptly after a few turns have passed. This guide is for the second battle against Galahad at the treetop.
Galahad Basic Info
Galahad Strengths, Weaknesses, and Obtainable Items
| Vulnerabilities | |
|---|---|
| Half Damage | |
| Immunity | No Immunities |
| Absorbs | No Damage Type Absorbed |
| Items Dropped |
Giant's Shield |
| Stealables | None available |
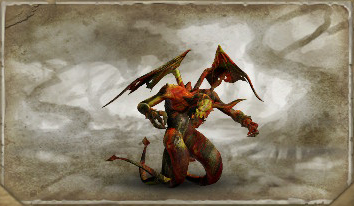
Picto-Demons Strengths, Weaknesses, and Obtainable Items
| Picto-Mona | |
|---|---|
 |
|
| Description | A monster drawn in shades of darkness. The theme of the composition is 'Vigorous Self-Criticism'. |
| Family | Demon |
| Vulnerabilities | |
| Half Damage | No Resistances |
| Immunity | |
| Absorbs | No Damage Type Absorbed |
| Items Dropped | None available |
| Stealables | None available |
| Picto-Beleth | |
|---|---|
 |
|
| Description | A monster drawn in shades of darkness. The theme of the composition is 'A Soul Fixated'. |
| Family | Demon |
| Vulnerabilities | |
| Half Damage | No Resistances |
| Immunity | |
| Absorbs | |
| Items Dropped | None available |
| Stealables | None available |
| Picto-Amrita | |
|---|---|
 |
|
| Description | A monster drawn in shades of darkness. The theme of the composition is 'Tears of Anguish'. |
| Family | Demon |
| Vulnerabilities | |
| Half Damage | No Resistances |
| Immunity | |
| Absorbs | No Damage Type Absorbed |
| Items Dropped | None available |
| Stealables | None available |
How to Beat Galahad
Galahad Recommended Jobs, Abilities, and Equipment
Recommended Jobs
| Best Jobs | |||
|---|---|---|---|
|
|
|
|
|
Recommended Sub-Jobs
| Best Sub-Jobs | |||
|---|---|---|---|
|
|
|
|
|
Recommended Abilities and Items
| Best Abilities/Items | |||
|---|---|---|---|
| Godspeed Strike | Flash the Cash / High Roller | Banishra (Petunia) | Shadowbind |
Recommended Equipment
| Recommended Equipment | |||
|---|---|---|---|
| Silver Glasses | Earthing Rod | Courage Ring | - |
Galahad Movesets
| Blinding Flash | Inflicts blind to all your characters. |
|---|---|
| Personal Protection | Blocks attacks directed at allies. |
| Reprisal | Inflicts 50% of damage taken back to the attacker. |
| Weighty Blow | Deals heavy damage to the target. |
| Anti Critical | Reduces Crit chacnce against Galahad by 25%. |
Picto Demon Moves
| White Wind (spirit) | Heals all allies equp to current HP. |
|---|---|
| Loathsome Lunge (Knight) | Damages and inflicts dread to the target. |
| Thanatophobia (Knight) | Instantly kills an enemy with Dread. |
| Stun Smash (Demon) | Damages and stuns the enemy. |
| Shadow Nova (Demon) | Inflicts dark elemental damage. |
Galahad Strategy Guide
Use Bare Handed Tactics and Other Non-Weapon Physical Damage
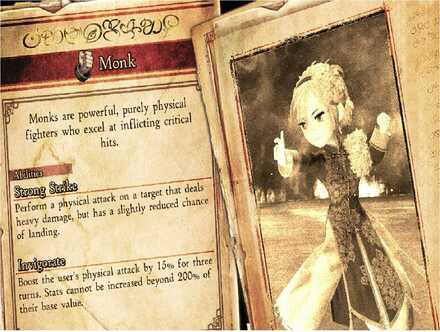
The Picto-Amrita and Picto-Mona are immune to several elemental and weapon damage. Avoid equipping weapons that have other elemental properties or you may leave your character unable to deal damage during the fight.
The Bare-Knuckle Brawler ability from the Monk will increase a character's damage and aim if you do not have any weapon equiped. This will easily work around the Pictodemon's immunities.
Alternatively, you can use the Freelancer's Body Slam because its damage doesn't have a type.
Paralyze Galahad
Galahad will be a pain in the fight due to his defensive abilities. To prevent this, you should paralyze Galahad in the first few turns.
Lily, who will be helping out, can do this, but you can paralyze Galahad yourself using the Ranger's Shadowbind.
Defeat the Picto-Mona First!
During the start of the battle, you'll want to eliminate Picto-Mona first! You can easily focus her after paralyzing Galahad so make sure to go all out!
Leaving her alone will allow her to recover her and her allies' HP via White Wind.
All Enemies are Weak to Light
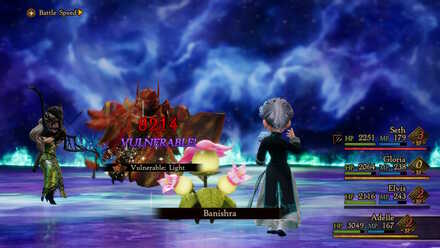
Try capturing some Petunias in the woods north of Wisland with Beastmaster. They can greatly help in taking down all the Picto-demons as well as Galahad.
Level 12 Black Mage Ignores Elemental Immunity
If you have a Level 12 Black Mage, their second speciality allows their spells to do damage, despite any immunities.
It's another way to go past the Pictodemon's tricky immunities.
Bravely Default 2 Boss Fight Guides
All Boss Fight Guides

Story Boss Battles
 Selene and Dag
 Horten
 Orpheus
 Anihal
 Bernard
 Prince Castor
 Roddy
Roddy Lily
Lily Folie
Folie Martha
 Helio and Gladys
 Domenic
 Lonsdale
 Marla
Marla Vigintio
 Adam
Adam Asura
Asura Catoblepas
 Genbu
Genbu Immortal
 Edna
Edna Night's Nexus
Halls of Tribulation
| Halls of Tribulation | ||
|---|---|---|
 Hall of Tribulation I Hall of Tribulation I |
 Hall of Tribulation II Hall of Tribulation II |
 Hall of Tribulation III Hall of Tribulation III |
 Hall of Tribulation IV Hall of Tribulation IV |
 Hall of Tribulation V Hall of Tribulation V |
 Hall of Tribulation VI Hall of Tribulation VI |
 Hall of Tribulation VII Hall of Tribulation VII |
 Secret Boss Secret Boss
|
- |
Quest Boss Battles
| Quest Bosses | ||
|---|---|---|
 Shirley Shirley |
 Glenn Glenn |
 Fenrir Fenrir |
 Enormocrag Enormocrag |
 Amphora Amphora |
 Empuse, Frankenfalcot, and Papilloid Empuse, Frankenfalcot, and Papilloid |
 Jealous Jody Jealous Jody |
 Eclipse Eclipse |
 Vespus Hex Vespus Hex |
 Hoenir Hoenir |
 D-Vergr D-Vergr
|
 Hephaestus Hephaestus
|
 Xolotl Xolotl |
- | - |
Rare Monsters
| Rare Monsters | ||
|---|---|---|
 Leannan Sith Leannan Sith |
 Coral Emperor Coral Emperor |
 Mushussu Mushussu |
 Nightmare Nightmare |
 Jormungandr Jormungandr |
 Treant Treant |
 Baba Yaga Baba Yaga |
 Baal Baal |
 Astaroth Astaroth |
 Orc King Orc King |
 Skullcap Skullcap |
 Zeus Zeus |
 Cyclops Cyclops |
 Susanoo Susanoo |
- |
Author

How to Beat Galahad
Rankings
- We could not find the message board you were looking for.
Gaming News


Popular Games

Genshin Impact Walkthrough & Guides Wiki
Umamusume: Pretty Derby Walkthrough & Guides Wiki
Crimson Desert Walkthrough & Guides Wiki
Monster Hunter Stories 3: Twisted Reflection Walkthrough & Guides Wiki
Honkai: Star Rail Walkthrough & Guides Wiki
Pokemon Pokopia Walkthrough & Guides Wiki
The Seven Deadly Sins: Origin Walkthrough & Guides Wiki
Wuthering Waves Walkthrough & Guides Wiki
Zenless Zone Zero Walkthrough & Guides Wiki
Arknights: Endfield Walkthrough & Guides Wiki


Recommended Games
Fire Emblem Heroes (FEH) Walkthrough & Guides Wiki
Diablo 4: Vessel of Hatred Walkthrough & Guides Wiki
Cyberpunk 2077: Ultimate Edition Walkthrough & Guides Wiki
Yu-Gi-Oh! Master Duel Walkthrough & Guides Wiki
Super Smash Bros. Ultimate Walkthrough & Guides Wiki
Pokemon Brilliant Diamond and Shining Pearl (BDSP) Walkthrough & Guides Wiki
Elden Ring Shadow of the Erdtree Walkthrough & Guides Wiki
Monster Hunter World Walkthrough & Guides Wiki
The Legend of Zelda: Tears of the Kingdom Walkthrough & Guides Wiki
Persona 3 Reload Walkthrough & Guides Wiki


All rights reserved
© 2021 SQUARE ENIX CO., LTD. All Rights Reserved.
The copyrights of videos of games used in our content and other intellectual property rights belong to the provider of the game.
The contents we provide on this site were created personally by members of the Game8 editorial department.
We refuse the right to reuse or repost content taken without our permission such as data or images to other sites.