List of Maps
Here is the complete list of all maps for each overworld located in Bravely Default 2 for the Nintendo Switch. Refer to these maps to know chest, enemy, and dungeon locations!
List of Contents
Overworld Maps
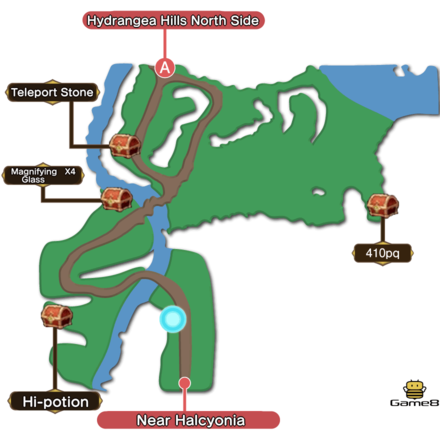
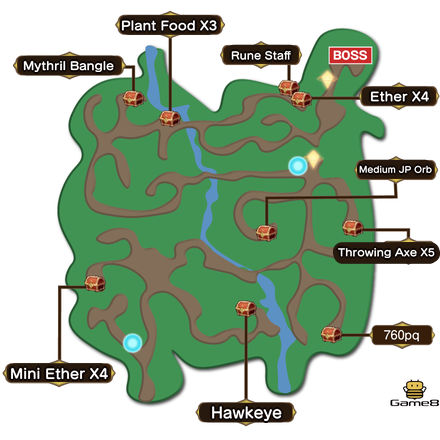
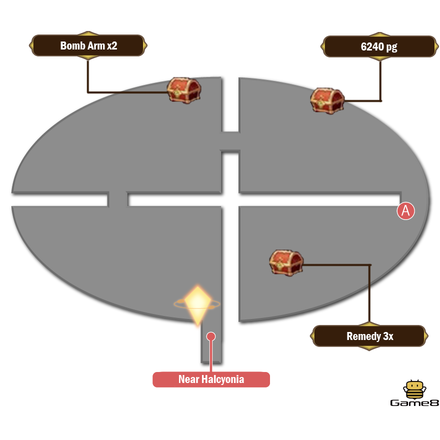
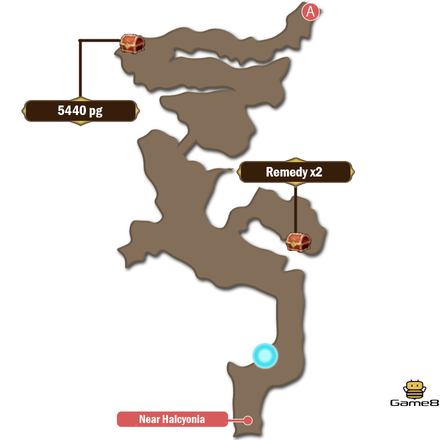
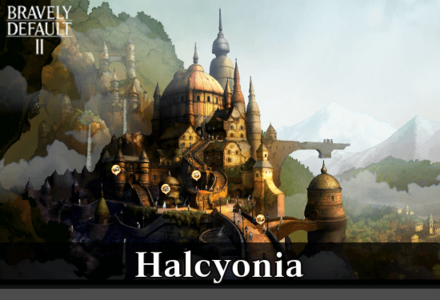
Near Halcyonia
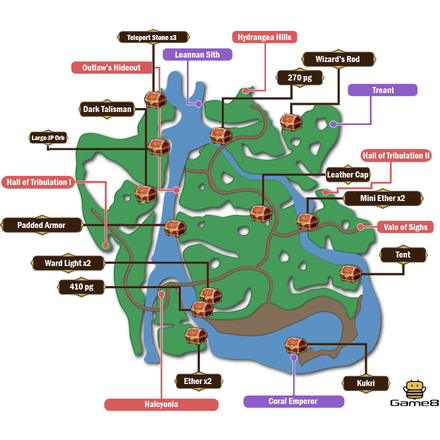
Near Halcyonia Map and Treasure Chest Guide
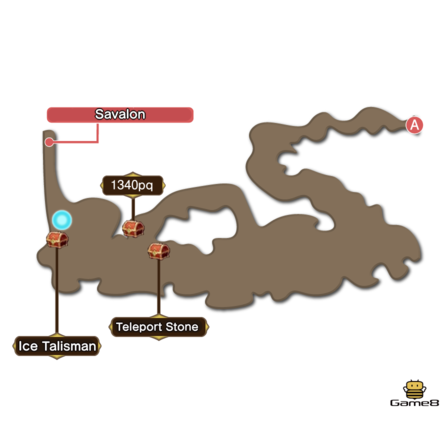
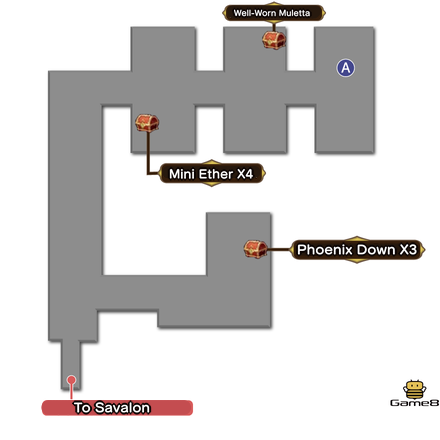
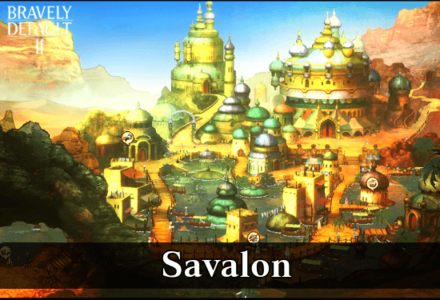
Near Savalon
Near Savalon Map and Treasure Chest Guide
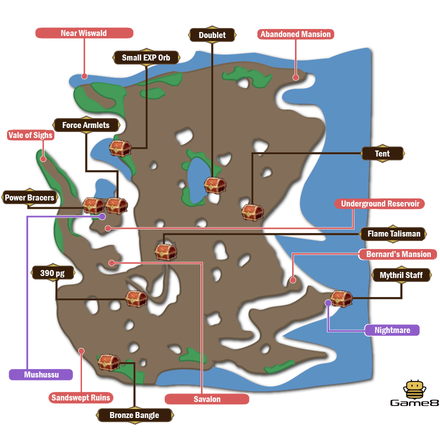
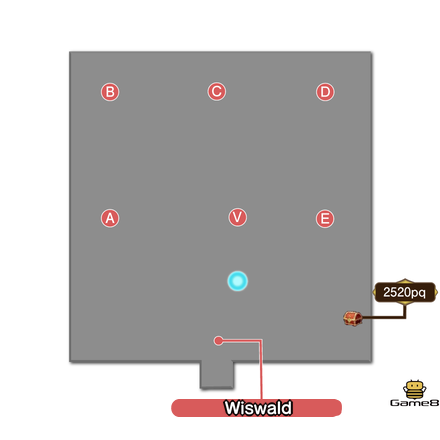
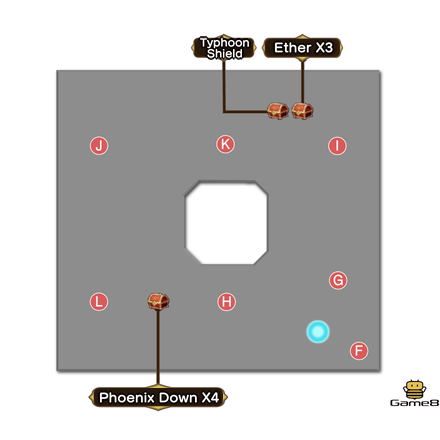
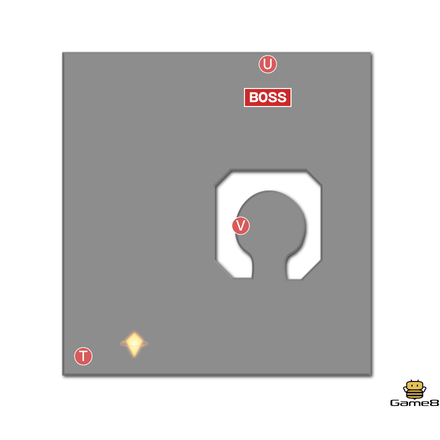
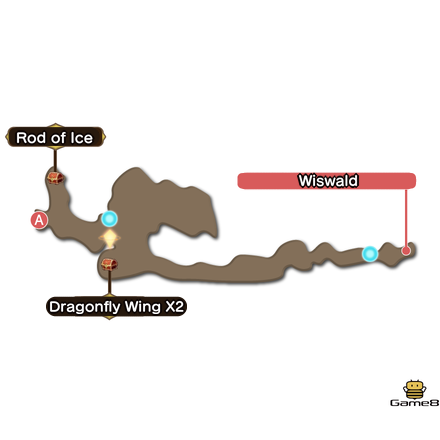
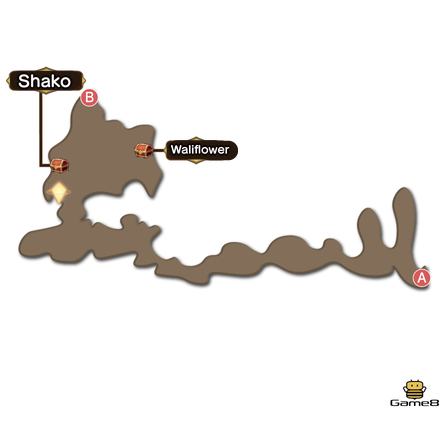
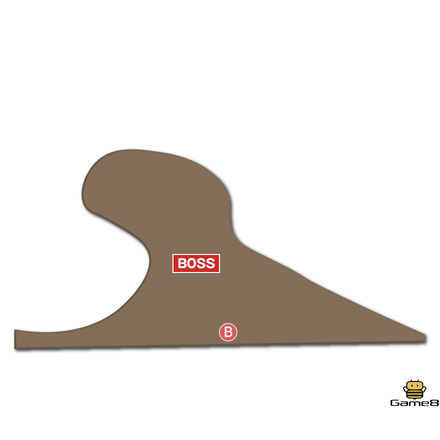
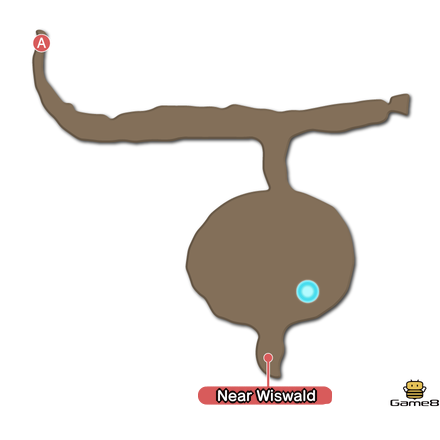
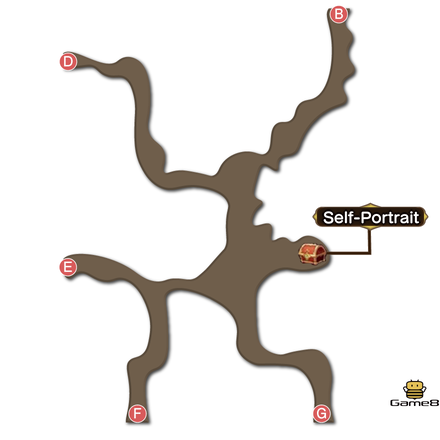
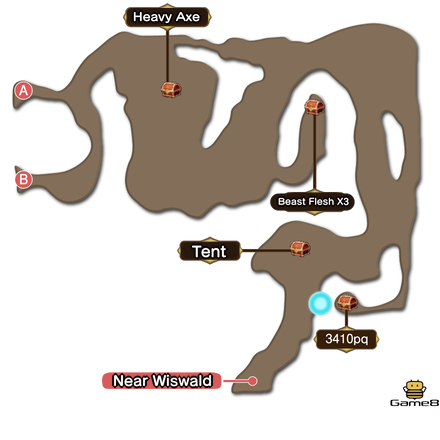
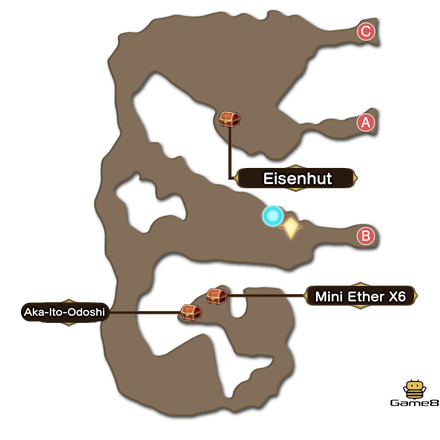
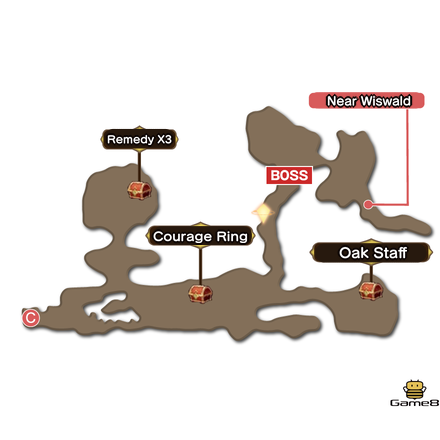
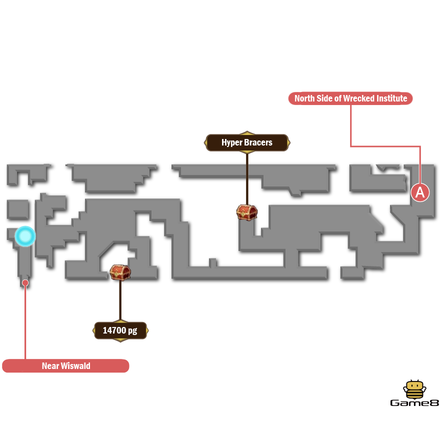
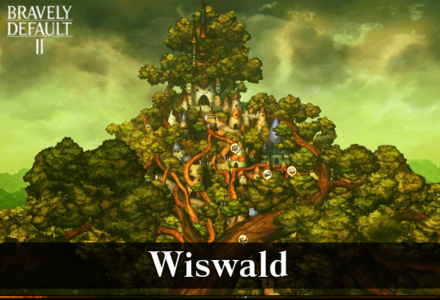
Near Wiswald

Near Wiswald Map and Treasure Chest Guide
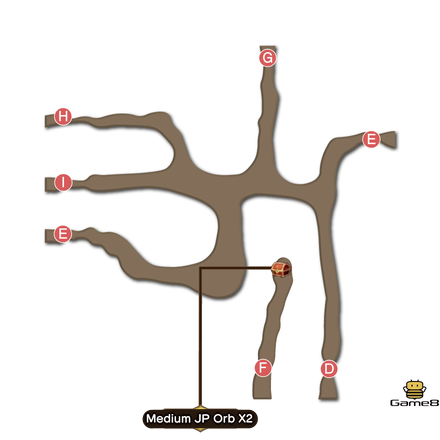
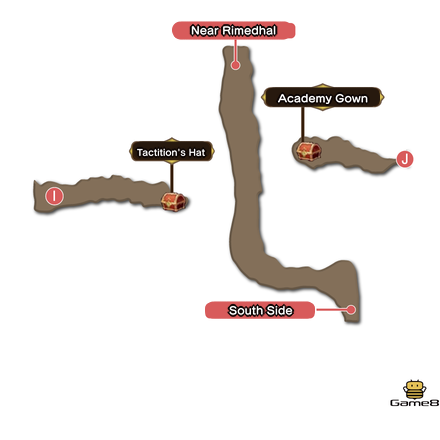
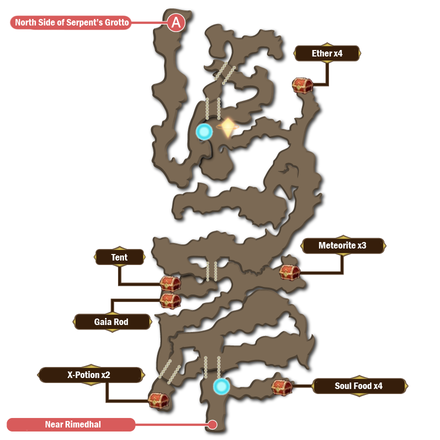
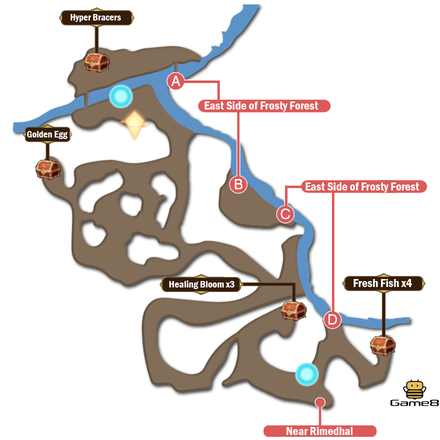
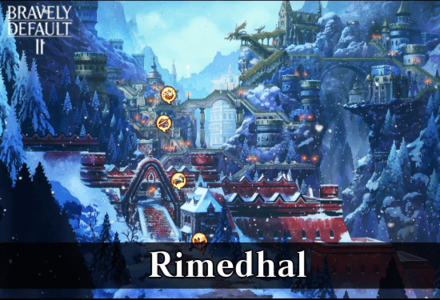
Near Rimedhal

Near Rimedhal Map and Treasure Chest Guide
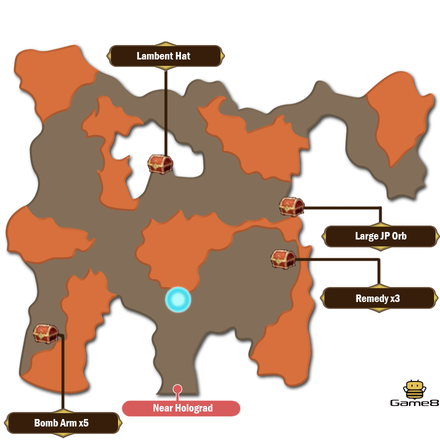
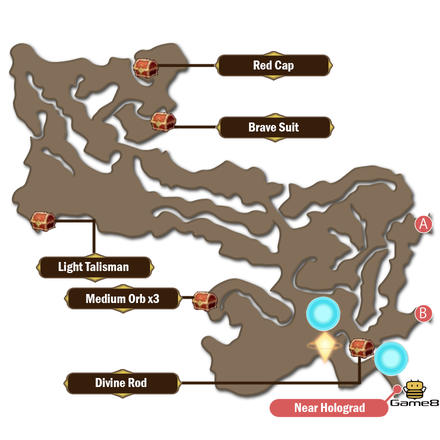
Near Holograd
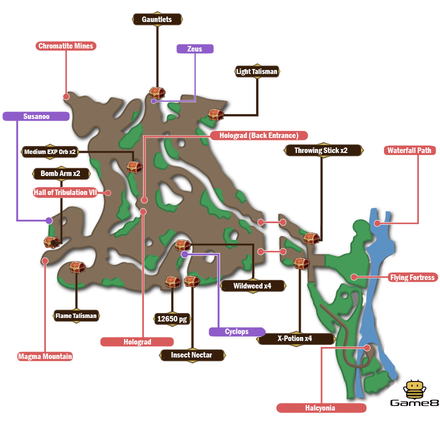
Near Holograd Map and Treasure Chest Guide
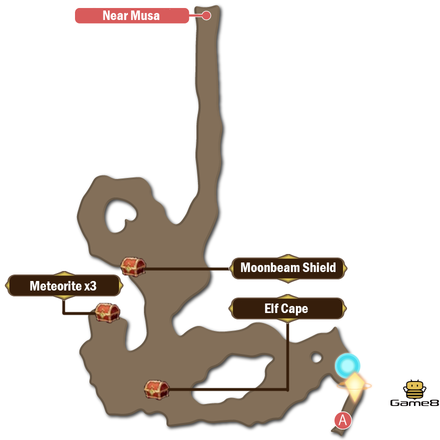
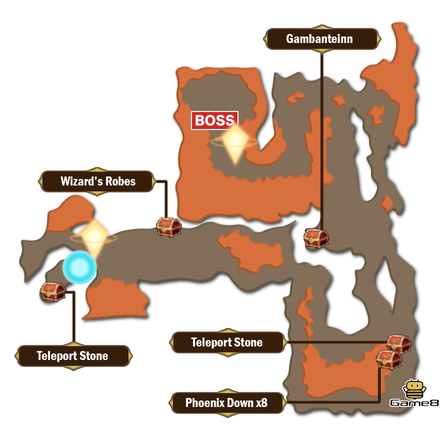
Near Musa

Near Musa Map and Treasure Chest Guide
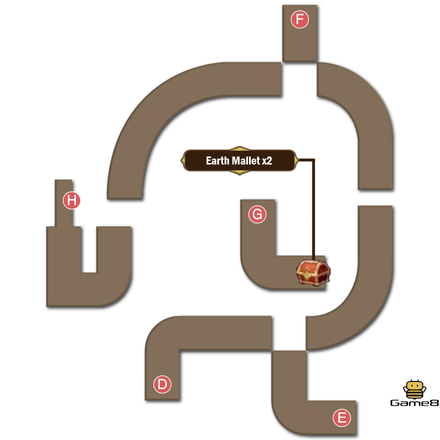
Dunegon Maps
Prologue
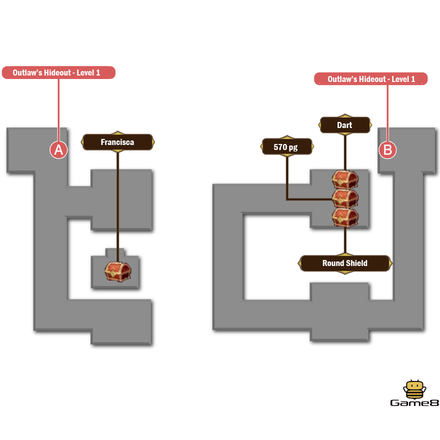
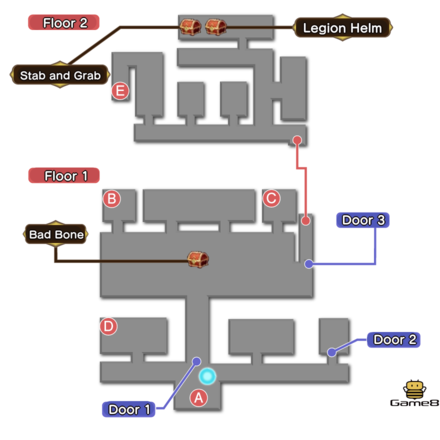
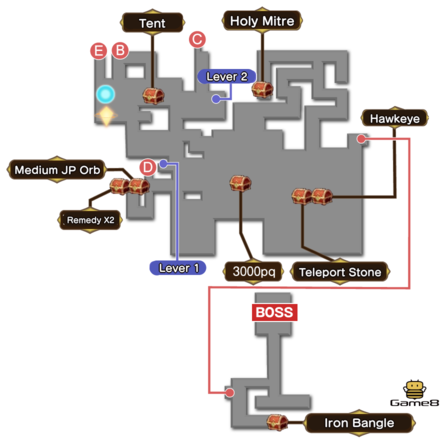
Outlaw's Hideout
 |
 |
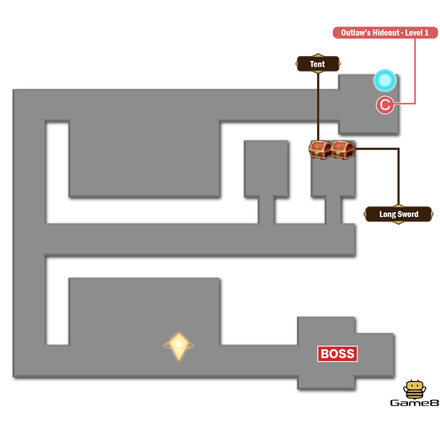 |
Outlaw's Hideout Dungeon Guide
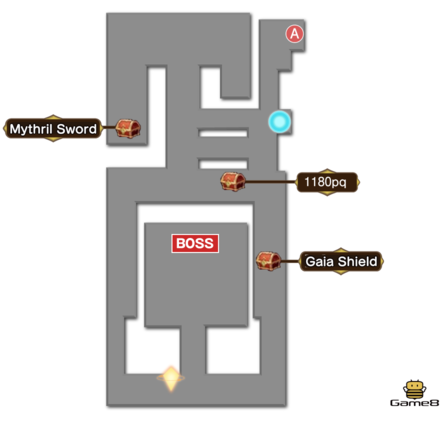
Hydrangea Hills
 |
 |
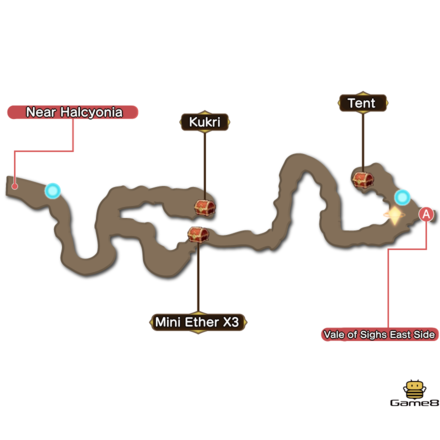
Vale of Sighs
 |
 |
|---|
Chapter 1
Sandswept Ruins
 |
 |
|---|
Underground Reservoir
 |
 |
Underground Reservoir Dungeon Guide
Abandoned Mansion
 |
 |
 |
Abandoned Mansion Dungeon Guide
Bernard's Mansion
 |
 |
Bernard's Mansion Dungeon Guide
Savalon Dungeon
 |
Chapter 2 Dungeons
Wiswald Woods
 |
|---|
Wiswald Woods Dungeon Map and Treasure Chest Locations
Sewers Dungeon
 |
|---|
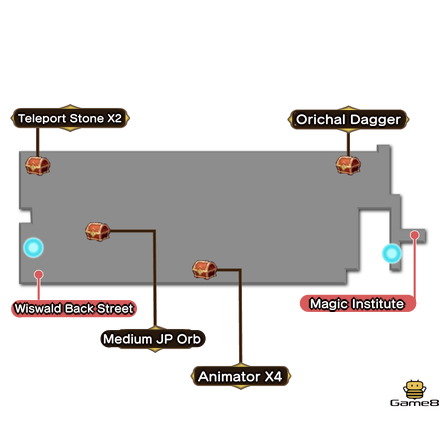
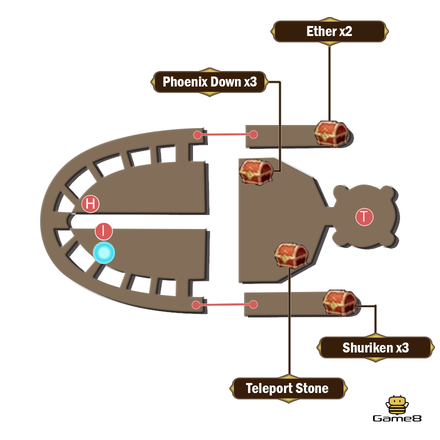
Institute
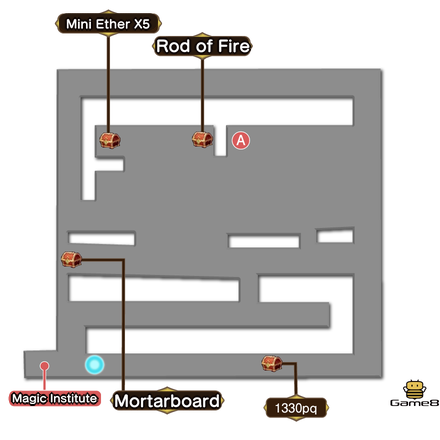 |
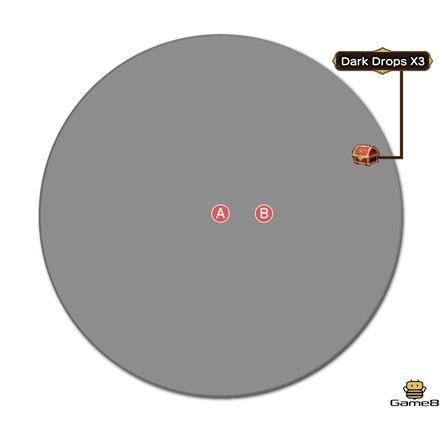 |
|---|---|
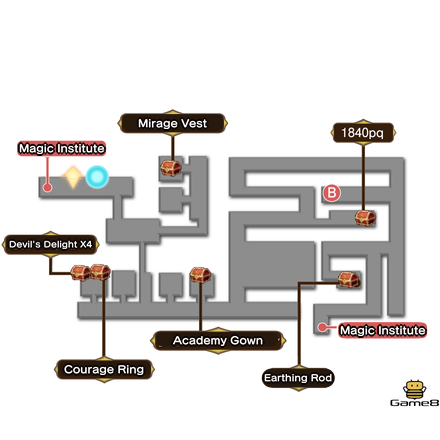 |
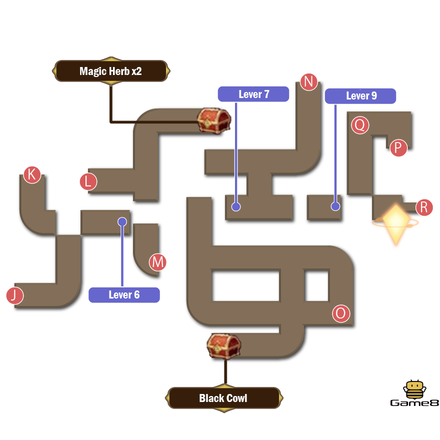
Treetop Tower
 |
 |
|---|---|
 |
 |
 |
 |
 |
Secret Studio
 |
 |
|---|---|
 |
Wayward Woods
| Area 1 | |
|---|---|
 |
 |
 |
- |
| Area 2 | Area 3 |
 |
 |
| Area 4 | |
 |
 |
Miasma Woods
 |
 |
|---|---|
 |
Chapter 3 Dungeons
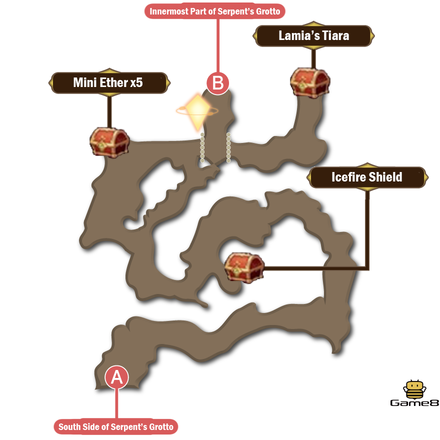
Serpent's Grotto
 |
 |
|---|---|
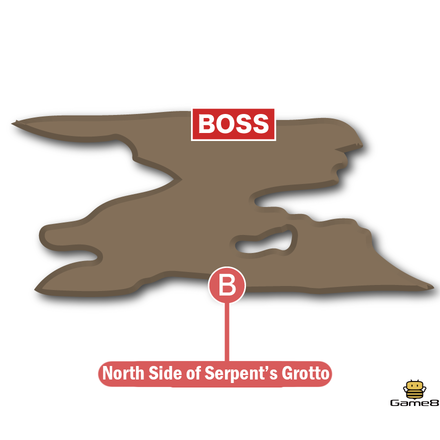 |
Serpent's Grotto Dungeon Guide
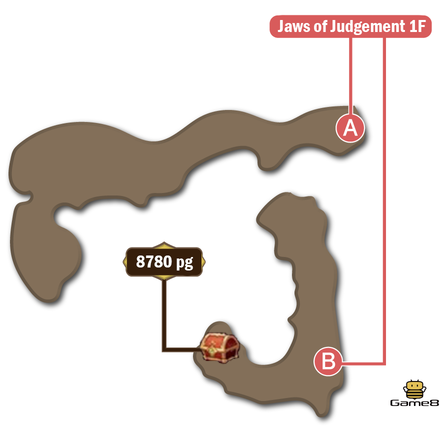
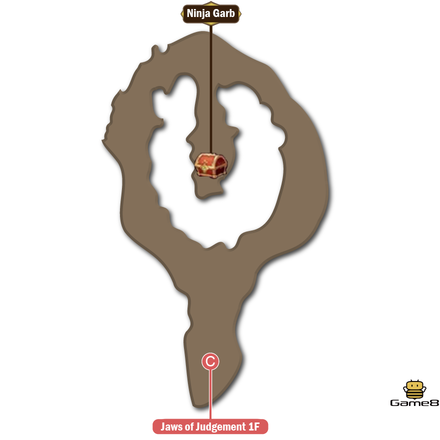
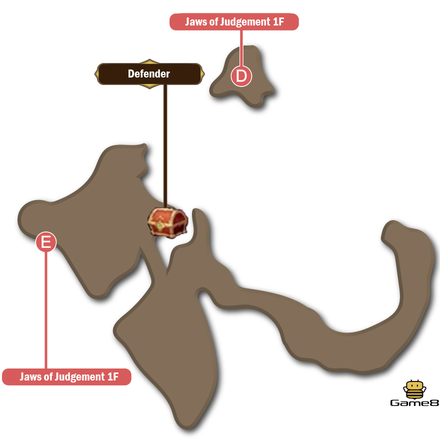
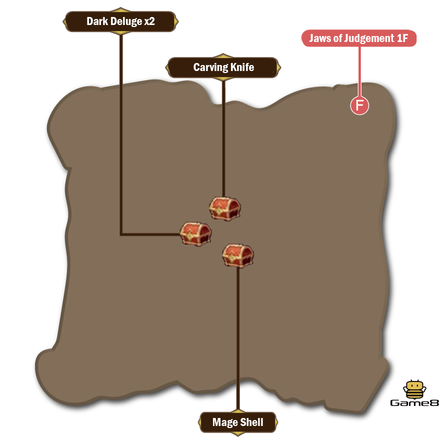
Jaws of Judgement
 |
 |
|---|---|
 |
 |
 |
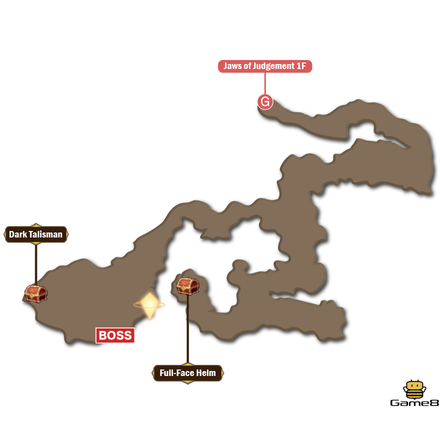 |
Jaws of Judgement Dungeon Guide
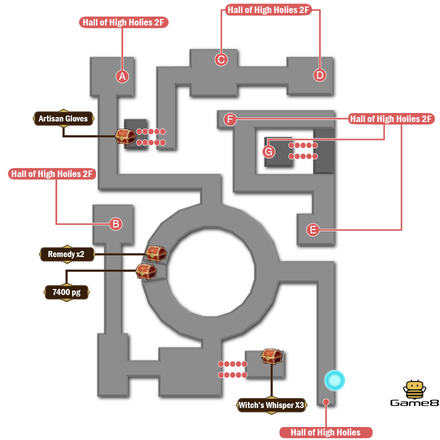
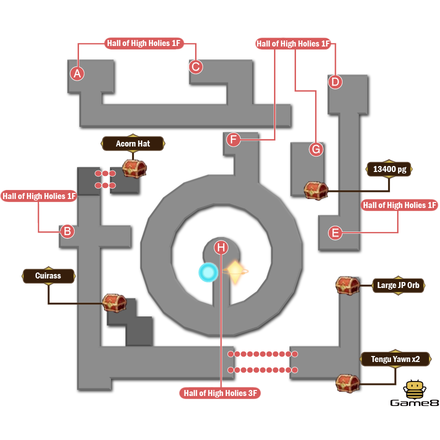
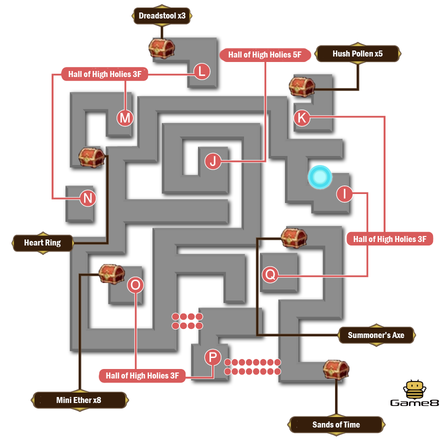
Hall of Holies
 |
 |
|---|---|
 |
 |
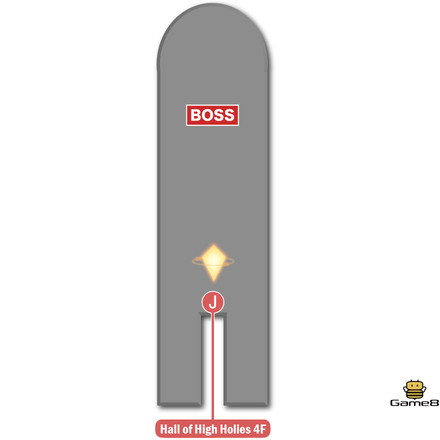 |
Hall of High Holies Dungeo Guide
Frosty Forest
 |
 |
|---|
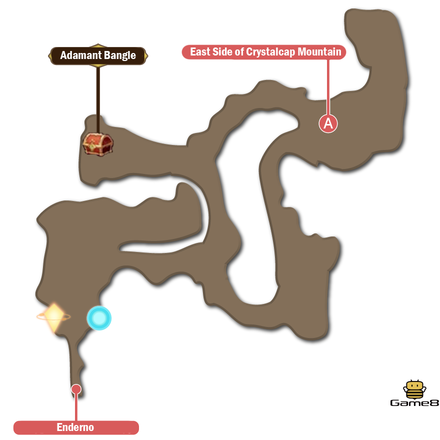
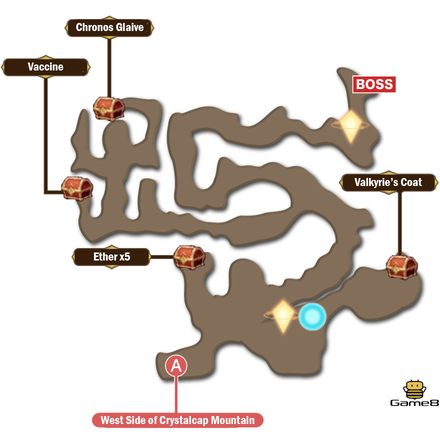
Crystalcap
 |
 |
|---|
Crystalcap Mountain Dungeon Guide
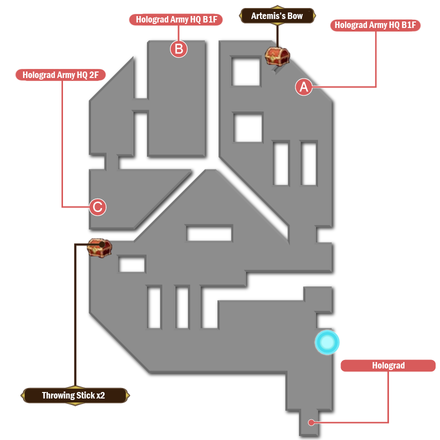
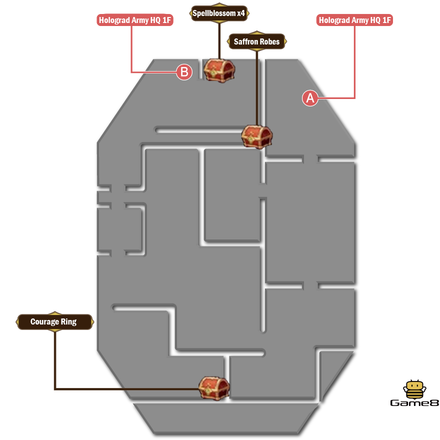
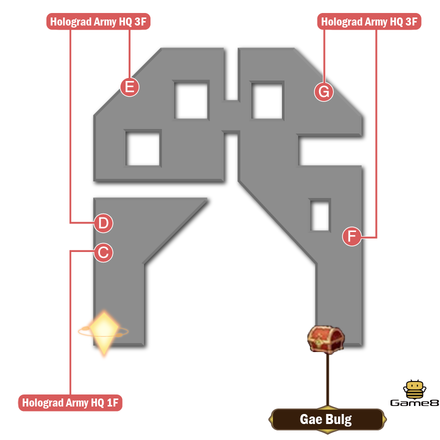
Chapter 4 Dungeons
Holograd Army HQ
 |
 |
|---|---|
 |
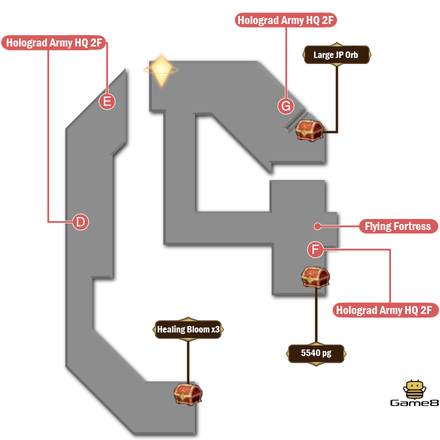 |
Holograd Army HQ Dungeon Guide
Flying Fortress
 |
 |
|---|---|
 |
 |
 |
 |
 |
 |
 |
 |
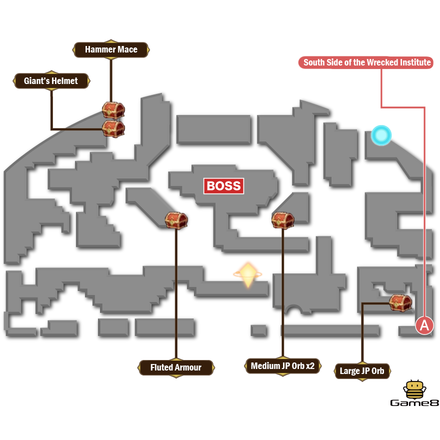
Wrecked Institute
 |
 |
|---|
Wrecked Institute Dungeon Guide
Chapter 5 Dungeons
Waterfall Path
 |
 |
|---|
Magma Mountain
 |
 |
|---|
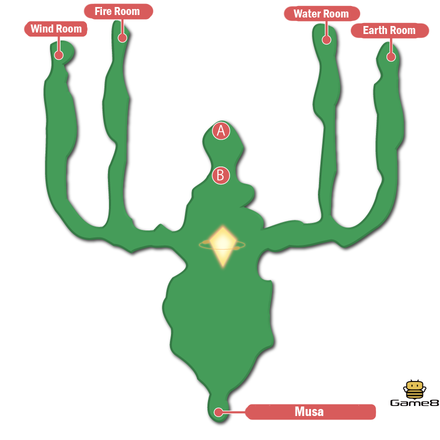
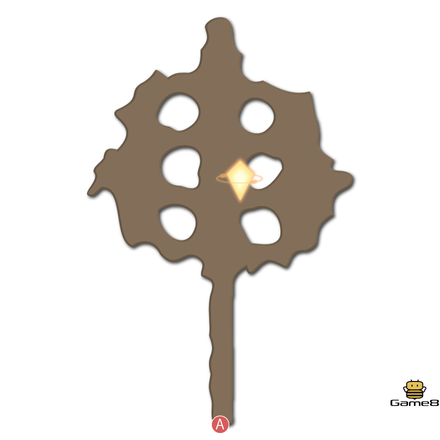
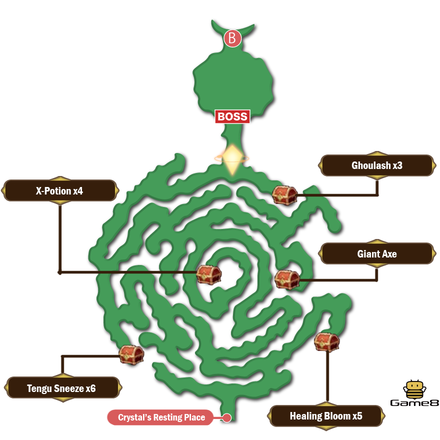
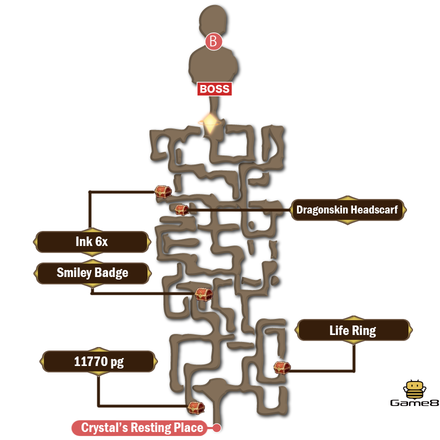
Crystal's Resting Place
 |
 |
|---|---|
 |
 |
 |
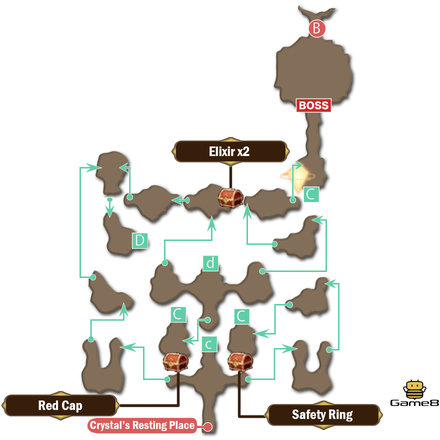 |
Crystal's Resting Place Dungeon Guide
Chromatite Mines
 |
 |
|---|
Chromatite Mines Dungeon Guide
Chapter 6 Dungeons
Fount of Knowledge
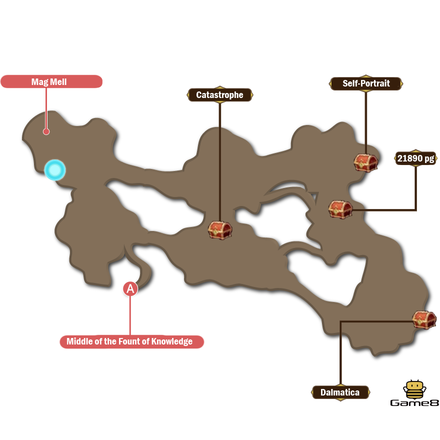 |
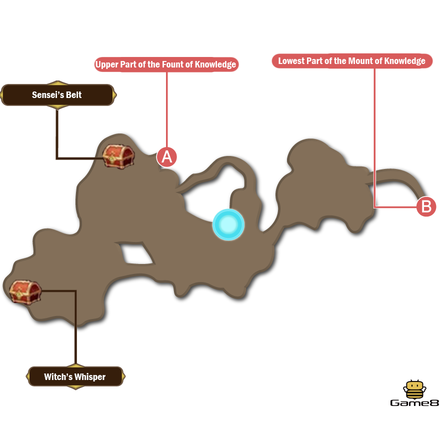 |
|---|---|
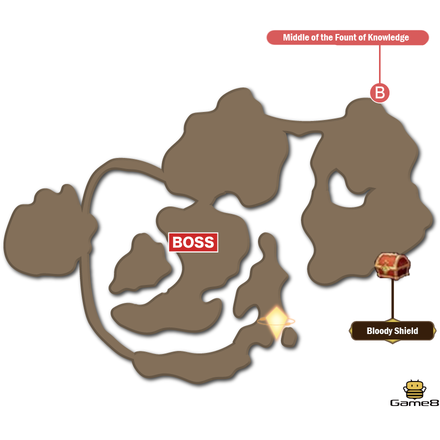 |
Fount of Knowledge Dungeon Guide
Chapter 7
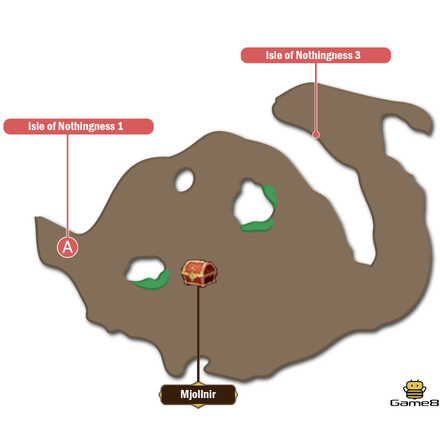
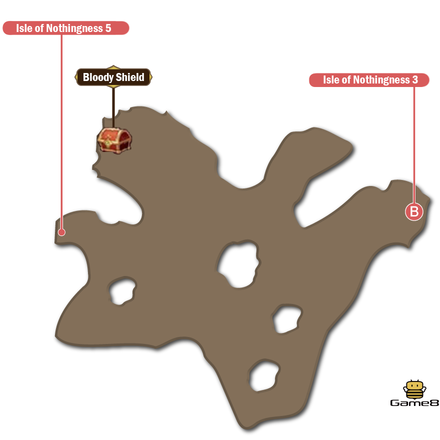
Isle of Nothingness
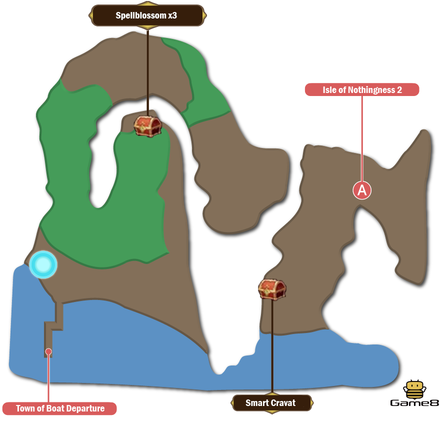 |
 |
|---|---|
 |
 |
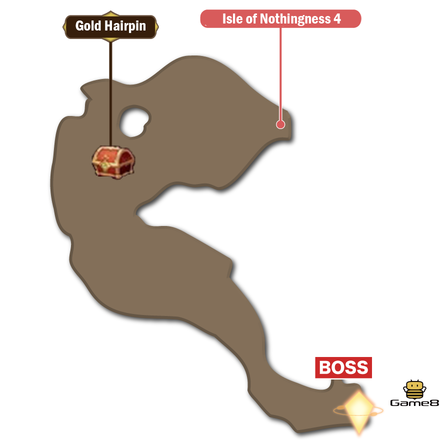 |
Isle of Nothingness Dungeon Guide
Bravely Default 2 Related Guides
Bravely Default 2 Location Guides

| Towns | |
|---|---|
 Halcyonia Halcyonia |
 Savalon Savalon |
 Wiswald Wiswald |
 Rimedhal Rimedhal |
 Enderno Enderno |
 Holograd Holograd |
 Musa Musa |
 Mag Mell Mag Mell |
Author
Rankings
- We could not find the message board you were looking for.
Gaming News


![Monster Hunter Stories 3 Review [First Impressions] | Simply Rejuvenating](https://img.game8.co/4438641/2a31b7702bd70e78ec8efd24661dacda.jpeg/thumb)
Popular Games

Genshin Impact Walkthrough & Guides Wiki
Honkai: Star Rail Walkthrough & Guides Wiki
Umamusume: Pretty Derby Walkthrough & Guides Wiki
Pokemon Pokopia Walkthrough & Guides Wiki
Resident Evil Requiem (RE9) Walkthrough & Guides Wiki
Monster Hunter Wilds Walkthrough & Guides Wiki
Wuthering Waves Walkthrough & Guides Wiki
Arknights: Endfield Walkthrough & Guides Wiki
Pokemon FireRed and LeafGreen (FRLG) Walkthrough & Guides Wiki
Pokemon TCG Pocket (PTCGP) Strategies & Guides Wiki


Recommended Games
Diablo 4: Vessel of Hatred Walkthrough & Guides Wiki
Cyberpunk 2077: Ultimate Edition Walkthrough & Guides Wiki
Fire Emblem Heroes (FEH) Walkthrough & Guides Wiki
Yu-Gi-Oh! Master Duel Walkthrough & Guides Wiki
Super Smash Bros. Ultimate Walkthrough & Guides Wiki
Pokemon Brilliant Diamond and Shining Pearl (BDSP) Walkthrough & Guides Wiki
Elden Ring Shadow of the Erdtree Walkthrough & Guides Wiki
Monster Hunter World Walkthrough & Guides Wiki
The Legend of Zelda: Tears of the Kingdom Walkthrough & Guides Wiki
Persona 3 Reload Walkthrough & Guides Wiki


All rights reserved
© 2021 SQUARE ENIX CO., LTD. All Rights Reserved.
The copyrights of videos of games used in our content and other intellectual property rights belong to the provider of the game.
The contents we provide on this site were created personally by members of the Game8 editorial department.
We refuse the right to reuse or repost content taken without our permission such as data or images to other sites.