Final Demo Guide, Tips, and Boss Fight Strategies
This is a walkthrough for the final demo for Bravely Default 2 (Bravely Default II) for the Nintendo Switch. Read on to know the objectives for this chapter, all the boss fights available, all side quests, and all the necessary tips to get through the demo in one piece.
List of Contents
Bravely Default 2 Demo Walkthrough
Main Objectives
Below are the key objectives in the final demo for Bravely Default 2. Refer to the table below to jump to a specific section of the chapter.
| Savalon to Sandswept Ruins | Underground Reservoir |
Savalon - Sandswept Ruins
| Objective | |
|---|---|
| 1 | Head to Salvano |
| 2 | Proceed to the Plaza then into the Palace |
| 3 | Return to the plaza once again then enter the bar Before exiting, head to the 2nd floor then head to the left. Follow the path then exit from there. Open the chest to get a Clothespin. 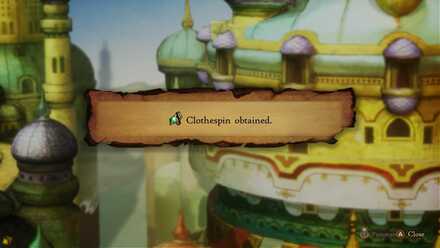 |
| Optional |
Sidequests available!
Say It With Shells Target Practice The Harbinger of Calamity |
| 4 | Exit Salvano (there will be a short scene at the exit) and head to the Sandswept Ruins to the south. |
| 5 | From the entrance, keep heading northeast. After entering an arc, head left then north at the dead end. Loot the chest at the other side of the wall when you're heading left as it contains a clothespin that can be used against the boss of the area. 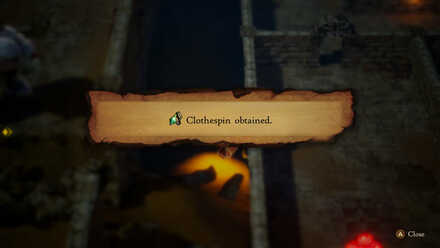 |
| 6 | After heading north, head left then south to find a teleporter, activate it. |
| 7 | From the teleporter, keep on heading east then south. After encountering a dead end and descending the stairs, head right to find the boss. Make sure to save and restore your party's HP and MP via a tent! |
| Boss Fight | 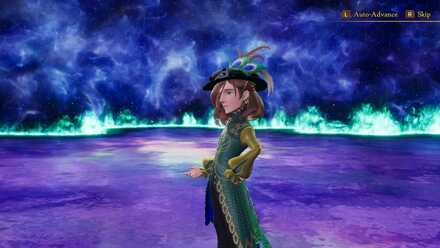 Orpheus Boss Fight Orpheus Boss Fight |
| 8 | Exit the Sandswept Ruins and return to Savalon. |
| 9 | Go to the designated area on the map to find Anihal. |
| 10 | Talk to the man in a white garb on the east. |
| 11 | Go to the house to the southeast side of Savalon then use the stairs to descend. |
Savalon - Underground Reservoir
| Objective | |
|---|---|
| Note | The dungeon is filled with several enemies that can inflict poison. Buying and equipping 4 star pendants from the weapon shop can greatly reduce the enemy's damage output for this dungeon. |
| 1 | Head down the slope then head right. To the left is an enemy and a chest that contains an Ice Talisman. |
| 2 | After encountering three diverging paths, head north first then exit to find a rare monster. Do not engage it. Instead, head around it and get the two chests which cointain the Force Armlet and Power Bracers for your white mage and monk. |
| 3 | Return to the three diverging paths and head down. Heading right leads to a chest with a pitchfork. |
| 4 | After encountering the dtwo splitting paths, take the path upward (the downward one leads to a chest with 3 Antarctic Winds) |
| 5 | Save at the next save point then prepare for a boss fight. |
| Boss Fight | Anihal Boss Fight. |
| 6 | After beating Anihal, exit the Reservoir and return to Savalon. |
| 7 | Head to Anihal's house. The prince will leave your party after this so try to do everything you want battle wise as your party's performance will weaken without his attacks and debuffs. |
| 8 | End of Demo. |
Demo Bosses
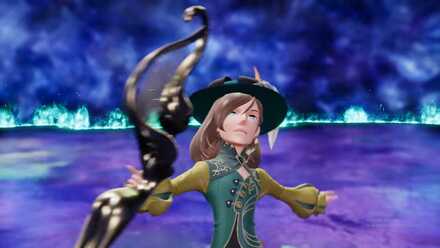
Boss Fight: Orpheus
| Vulnerabilities |   
|
|---|---|
| Half Damage | 
|
| Immunities | None. |
| Absorbs | None. |
| Stealable Items | None. |
Orpheus is the bearer of the Gaming Halld Asterisk and is a support type enemy. He is also capable of inflicting sleep as a revenge move against magic users so make sure that you have obtained the Clothespins along the way or it will be difficult for Gloria and Elvis to fight him!
Boss Fight: Anihal
| Vulnerabilities | 

|
|---|---|
| Half Damage | None. |
| Immunities | None. |
| Absorbs | None. |
| Stealable Items | None. |
Anihal is the bearer of the Beast Master Asterisk and is surrounded with pet monsters during your fight against her. Proper prioritization of targets, status ailment immunity, and resource management is the key to win this battle.
Rare Monster Fight: Mushussu
Mushussu is the “weaker” super boss found in the Bravely Default 2 demo. It's capable of unleashing an AOE attack that can deal roughly 400 damage to everyone, a single target damage attack that inflicts poison and around 1000 damage to its target, and can use a revenge attack against bard abilities. Read our guide below to learn how to beat the Mushussu!
Demo Obtainable Asterisks
Bard Job
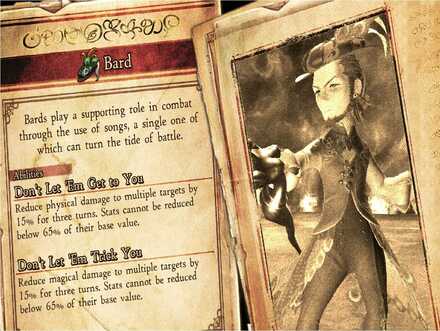
As shown in your fight against Orpheus, the Bard is capable of providing supportive buffs to your allies. While the recovery support skills belongs to the white mage, stat buffs are the Bard's forte. Try to include it as a sub job to your support characters to solidify their role as a support!
Bard Job Abilities and Proficiencies
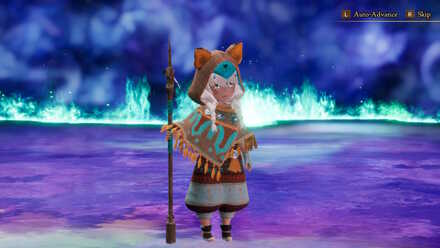
Beastmaster Job
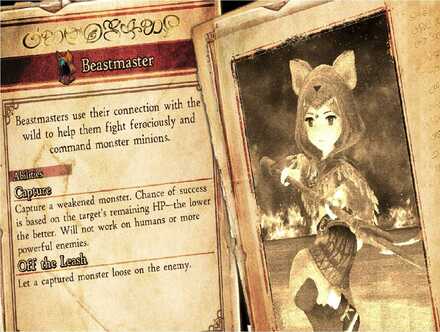
The Beastmaster is a master of the Spear and Bow. The Beastmaster's main focus is reducing an enemy's HP and capturing it. The Beastmaster's true shine is its ability to unleash captured enemies on its foes to use unique abilities that are exclusive to the Beastmaster Job!
Beastmaster Job Abilities and Proficiencies
Demo Sidequests
Say It With Shells
| Quest No.1 | Objective | Reward | Difficulty | |
|---|---|---|---|---|
| 1 | Collect some pretty seashells 0/3 | 520 pg | ★★ | |
| Giver: A man in a blue roof house that can be found at the end of the dock just before the road to the palace in Savalon. | ||||
Target Practice
| Quest No. | Objective | Reward | Difficulty | |
|---|---|---|---|---|
| 2 | Defeat some goblin archers. (0/3) | Iron Bow | ★★★★ | |
| Giver: Guard in the Palace in Savalon | ||||
The Harbinger of Calamity
| Quest No. | Objective | Reward | Difficulty | |
|---|---|---|---|---|
| 3 | Defeat the one-eyedcreature. | 680 pg | ★★★ | |
| Giver:A guy wearing a white robe on the bridge near the entrance of Savalon. | ||||
Demo Tips
Pick Up the Clothespin in 2nd floor of Salvano's Gaming Hall and the chest in the Ruins
|
|
Clothespin is an accessory that provides immunity to sleep. The first boss that you'll encounter will be using revenge abilities against your casters and will put them to sleep, potentially cancelling brave actions and wasting any BP you used.
Purchase a Star Pendant, a White Veil, and a Silver Glass
After the Sandswept Ruins, you'll head to a dungeon and fight against enemies that can inflict poison. The boss of the area can also inflict poison, silence, and blind status effects.
Do Not Engage the Mushussu Immediately
The Mushussu is a tougher enemy than the regular story bosses you'll encounter. While you should be well-prepared before facing it, it is possible to defeat it.
Bravely Default 2 Related Guides
Bravely Default 2 Story Walkthroughs
| Story Chapter Walkthroughs | |
|---|---|
| Demo Walkthrough | |
 Prologue Prologue |
 Chapter 1 Chapter 1 |
 Chapter 2 Chapter 2 |
 Chapter 3 Chapter 3 |
 Chapter 4 Chapter 4 |
 Chapter 5 Chapter 5 |
 Chapter 6 Chapter 6 |
 Chapter 7 Chapter 7 |
| Side Quests | |
| Complete Quest List | |
| More Guides | |
| New Game + Options & How to Unlock | |
Author
Final Demo Guide, Tips, and Boss Fight Strategies
Rankings
- We could not find the message board you were looking for.
Gaming News


![Monster Hunter Stories 3 Review [First Impressions] | Simply Rejuvenating](https://img.game8.co/4438641/2a31b7702bd70e78ec8efd24661dacda.jpeg/thumb)
Popular Games

Genshin Impact Walkthrough & Guides Wiki
Honkai: Star Rail Walkthrough & Guides Wiki
Umamusume: Pretty Derby Walkthrough & Guides Wiki
Pokemon Pokopia Walkthrough & Guides Wiki
Resident Evil Requiem (RE9) Walkthrough & Guides Wiki
Monster Hunter Wilds Walkthrough & Guides Wiki
Wuthering Waves Walkthrough & Guides Wiki
Arknights: Endfield Walkthrough & Guides Wiki
Pokemon FireRed and LeafGreen (FRLG) Walkthrough & Guides Wiki
Pokemon TCG Pocket (PTCGP) Strategies & Guides Wiki


Recommended Games
Diablo 4: Vessel of Hatred Walkthrough & Guides Wiki
Cyberpunk 2077: Ultimate Edition Walkthrough & Guides Wiki
Fire Emblem Heroes (FEH) Walkthrough & Guides Wiki
Yu-Gi-Oh! Master Duel Walkthrough & Guides Wiki
Super Smash Bros. Ultimate Walkthrough & Guides Wiki
Pokemon Brilliant Diamond and Shining Pearl (BDSP) Walkthrough & Guides Wiki
Elden Ring Shadow of the Erdtree Walkthrough & Guides Wiki
Monster Hunter World Walkthrough & Guides Wiki
The Legend of Zelda: Tears of the Kingdom Walkthrough & Guides Wiki
Persona 3 Reload Walkthrough & Guides Wiki


All rights reserved
© 2021 SQUARE ENIX CO., LTD. All Rights Reserved.
The copyrights of videos of games used in our content and other intellectual property rights belong to the provider of the game.
The contents we provide on this site were created personally by members of the Game8 editorial department.
We refuse the right to reuse or repost content taken without our permission such as data or images to other sites.