How to Unlock the True Ending | Chapter 7 Story Walkthrough and Boss Guides
This is a walkthrough for 7 of Bravely Default 2 (Bravely Default II) for the Nintendo Switch. Read on to know all the objectives for this chapter, all the boss fights and strategies against them, all the side quests and missions, and all the necessary tips to get through this chapter.
List of Contents
Bravely Default 2 Chapter 7 Walkthrough
Main Objectives for True Ending
| Objective | |
|---|---|
| 1 | Talk to the boat owner. (Any location) |
| 2 | Once you talk to her, choose the "Go overseas" option and select the Isle of Nothingness. |
| 3 | The overseas path that could not be accessed will now become available to progress. |
| 4 | Choose Let's Go. → Head towards another battle with the Night's Nexus |
| 5 | Battle the Night's Nexus |
| 6 | Choose the command "Remember" for all 3 of your teammates and regain their memories. |
| 7 | The main character will use Brave several times. |
| 8 |  Defeat the Night's Nexus Defeat the Night's Nexus |
| 9 | End the game. |
| 10 | Choose Continue on the main menu to complete the ending. |
Things to do after the True Ending
| ! | ・New Game+ will be unlocked |
|---|---|
| ! | ・Challenge the Secret Boss after completing every Hall of Tribulation |
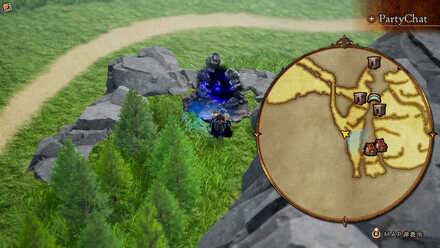
Hall of Tribulations Portal Locations
Chapter 7 Bosses
Night's Nexus First Phase Walkthrough

The Night's Nexus is the biggest baddie of the whole game. It's capable of many attacks that can disrupt your team like inflicting status ailments and reducing your MP pool. It's also protected by two hands that will respawn after death so keeping your damage high is vital for this fight.
Night's Nexus Second Phase
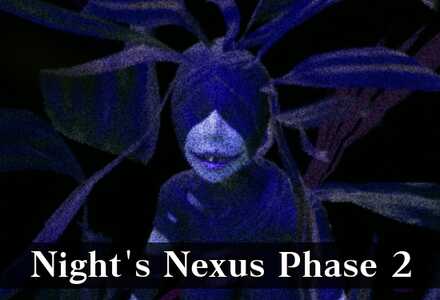
To further increase the battle's difficulty, the Night Nexus has a way stronger phase 2. It has more lethal moves that can inflict all debuffs and even deplete your own MP Pool! Learn how to beat the Night's Nexus with our guide down below!
Beast Boss # 66|Hall of Tribulation Secret Boss
| How to unlock: Clear all portals for the Halls of Tribulation Where to find: Graveyard of Rimedhal |

Gwydion, the dragon that Adam fells in Chapter 3, is the game's super boss. Sporting a massive half a million HP and attacks that can easily kill any party members with ease, Gwydion will not be an easy battle. Make sure to prepare accordingly!
Chapter 7 Tips
|
|
Opening the Hall of Tribulation|Unlock Higher Job Levels by Clearing Portals
Once you enter Chapter 6, your Freelancer will have its higher Job levels unlocked.
For your remaining Jobs, you need to clear out the bosses found at each portal in order to unlock the upper levels.
How to Unlock the Max Job Level
Chapter 7 Maps
| Chapter 7 | |
|---|---|
| Isle of Nothingness | - |
Bravely Default 2 Related Guides
Bravely Default 2 Story Walkthroughs
| Story Chapter Walkthroughs | |
|---|---|
| Demo Walkthrough | |
 Prologue Prologue |
 Chapter 1 Chapter 1 |
 Chapter 2 Chapter 2 |
 Chapter 3 Chapter 3 |
 Chapter 4 Chapter 4 |
 Chapter 5 Chapter 5 |
 Chapter 6 Chapter 6 |
Chapter 7 |
| Side Quests | |
| Complete Quest List | |
| More Guides | |
| New Game + Options & How to Unlock | |
Author
How to Unlock the True Ending | Chapter 7 Story Walkthrough and Boss Guides
Rankings
- We could not find the message board you were looking for.
Gaming News

![Monster Hunter Stories 3 Review [First Impressions] | Simply Rejuvenating](https://img.game8.co/4438641/2a31b7702bd70e78ec8efd24661dacda.jpeg/show)


![Monster Hunter Stories 3 Review [First Impressions] | Simply Rejuvenating](https://img.game8.co/4438641/2a31b7702bd70e78ec8efd24661dacda.jpeg/thumb)
Popular Games

Genshin Impact Walkthrough & Guides Wiki
Honkai: Star Rail Walkthrough & Guides Wiki
Umamusume: Pretty Derby Walkthrough & Guides Wiki
Pokemon Pokopia Walkthrough & Guides Wiki
Resident Evil Requiem (RE9) Walkthrough & Guides Wiki
Monster Hunter Wilds Walkthrough & Guides Wiki
Wuthering Waves Walkthrough & Guides Wiki
Arknights: Endfield Walkthrough & Guides Wiki
Pokemon FireRed and LeafGreen (FRLG) Walkthrough & Guides Wiki
Pokemon TCG Pocket (PTCGP) Strategies & Guides Wiki


Recommended Games
Diablo 4: Vessel of Hatred Walkthrough & Guides Wiki
Cyberpunk 2077: Ultimate Edition Walkthrough & Guides Wiki
Fire Emblem Heroes (FEH) Walkthrough & Guides Wiki
Yu-Gi-Oh! Master Duel Walkthrough & Guides Wiki
Super Smash Bros. Ultimate Walkthrough & Guides Wiki
Pokemon Brilliant Diamond and Shining Pearl (BDSP) Walkthrough & Guides Wiki
Elden Ring Shadow of the Erdtree Walkthrough & Guides Wiki
Monster Hunter World Walkthrough & Guides Wiki
The Legend of Zelda: Tears of the Kingdom Walkthrough & Guides Wiki
Persona 3 Reload Walkthrough & Guides Wiki


All rights reserved
© 2021 SQUARE ENIX CO., LTD. All Rights Reserved.
The copyrights of videos of games used in our content and other intellectual property rights belong to the provider of the game.
The contents we provide on this site were created personally by members of the Game8 editorial department.
We refuse the right to reuse or repost content taken without our permission such as data or images to other sites.