Best Party Build for Each Story Chapter
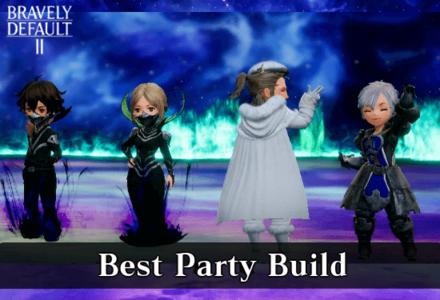
Welcome to our guide for the best party for every chapter in Bravely Default 2 for the Nintendo Switch. Check here to learn which Jobs will make each section of your adventure easier in the land of Excillent!
List of Contents
Party Member Mechanics
There Are No Stat Differences Between the Characters
It should be known that there doesn't seem to be any apparent differences when it comes to each character's stats. This allows you to rest assured that you can assign any class to any member without any drawbacks.
Beastmaster Is One of the Strongest Jobs
Beastmaster's capture mechanic allows it to become a force to be reckoned with as time passes and as you collect more creatures. The more captures you have, the more variety this Job will have in its arsenal of skills.
Best Prologue Party and Jobs Pairings
Maximize Freelancer During the Prologue
| Prologue Recommended Party | ||
|---|---|---|
| Main Job | Sub Job | |
| Attacker |  Freelancer Freelancer |
Any |
| Attacker |  Freelancer Freelancer |
Any |
| Attacker |  Freelancer Freelancer |
Any |
| Attacker |  Freelancer Freelancer |
Any |
| Notable Abilities | ||
By farming Exp for the Freelancer Job, you can work towards unlocking two very useful abilities: JP Up and JP Up and Up. These abilities add a multiplier to JP gained from battles.
With Sloan accompanying your party for most of the prologue, it is an easy chance to grind up levels as he will be there to help your team out with difficult battles.
Job Points Guide: How to Farm JP Quickly
Best Chapter 1 Party and Jobs Pairings
First Half of Chapter 1
| Chapter 1 Recommended Party - First Half | ||
|---|---|---|
| Main Job | Sub Job | |
| Attacker |  Vanguard Vanguard |
 Freelancer Freelancer |
| Attacker |  Black Mage Black Mage |
 Freelancer Freelancer |
| Healer |  White Mage White Mage |
 Freelancer Freelancer |
| Support |  Monk Monk |
 Freelancer Freelancer |
| Notable Abilities | ||
Now that a few more classes have been made available, we recommend this loadout as an all-around solid team.
Second Half of Chapter 1
| Chapter 1 Recommended Party - Second Half | ||
|---|---|---|
| Main Job | Sub Job | |
| Attacker |  Beastmaster Beastmaster |
 Freelancer Freelancer |
| Attacker |  Beastmaster Beastmaster |
 Freelancer Freelancer |
| Healer |  White Mage White Mage |
 Black Mage Black Mage |
| Support |  Bard Bard |
 Black Mage Black Mage |
| Notable Abilities | ||
Taking the opponent's monsters to fight for your side is an unparalleled source of damage in the earlier chapters. This, partnered with utility offered by the Bard class can help against difficult boss battles.
Best Chapter 2 Party and Job Pairings
First Half of Chapter 2
| Chapter 2 Recommended Party - First Half | ||
|---|---|---|
| Main Job | Sub Job | |
| Attacker |  Monk Monk |
 Thief Thief |
| Attacker |  Beastmaster Beastmaster |
 Berserk Berserk |
| Healer |  White Mage White Mage |
 Freelancer Freelancer |
| Support |  Bard Bard |
 Black Mage Black Mage |
| Notable Abilities | ||
After receiving Thief from the end of Chapter 1, we recommend equipping it right away. Godspeed Strike is a high-damage ability that can deal large amounts of single-target damage. Berserk's access to Crescent Moon and Level Slash is extremely useful for clearing out multiple enemies.
Second Half of Chapter 2
| Chapter 2 Recommended Party - Second Half | ||
|---|---|---|
| Main Job | Sub Job | |
| Attacker |  Monk Monk |
 Thief Thief |
| Attacker |  Monk Monk |
 Thief Thief |
| Healer |  White Mage White Mage |
 Red Mage Red Mage |
| Tank |  Bard Bard |
 Red Mage Red Mage |
| Notable Abilities | ||
The recovery provided by the Red Mage's Healara and Healaga is phenomenal during Chapter 2. Combined with the healing prowess of a White Mage, it rounds out the Healer role very well.
Best Chapter 3 Party and Job Pairings
First Half of Chapter 3
| Chapter 3 Recommended Party - First Half | ||
|---|---|---|
| Main Job | Sub Job | |
| Attacker |  Thief Thief |
 Monk Monk |
| Attacker |  Thief Thief |
 Monk Monk |
| Healer |  White Mage White Mage |
 Red Mage Red Mage |
| Tank |  Shield Master Shield Master |
 Vanguard Vanguard |
| Notable Abilities | ||
Starting with Chapter 3, enemies will start to hurt more and more. Having a tank in the form of your Shield Master is highly recommended. Devote this role to protecting your damage dealing allies.
Second Half of Chapter 3
| Chapter 3 Recommended Party - Second Half | ||
|---|---|---|
| Main Job | Sub Job | |
| Attacker |  Dragoon Dragoon
|
 Thief Thief |
| Attacker |  Dragoon Dragoon |
 Thief Thief |
| Healer |  White Mage White Mage |
 Spirit Master Spirit Master |
| Tank |  Shield Master Shield Master |
 Vanguard Vanguard |
| Notable Abilities | ||
If you get the Dragoon Job at the beginning of Chapter 3, we recommend using it in tandem with the Thief's abilities. Dragoons have naturally high attack and speed which can work in the favor of Thieves. This allows Godspeed Strike to deal even more damage.
When Spirit Master is unlocked, we recommend pairing it with the White Mage. It's abilities at Level 4 and Level 6 help maintain the team's overall health. At Level 7, you can also regenerate MP which makes heavy spell use less of an issue.
Best Chapter 4 and Chapter 5 Party and Job Pairings
|
In Chapter 4, you can choose between going to Halyconia and Savalon first, or Wiswald and the Airship. For the purposes of this guide, Halcyonia and Savalon are for the First Half, while Wiswald and the Airship are for the Second Half. |
First Half of Chapter 4
| Chapter 4 Recommended Party - First Half | ||
|---|---|---|
| Main Job | Sub Job | |
| Attacker |  Vanguard Vanguard or  Dragoon Dragoon |
 Thief Thief |
| Attacker |  Vanguard Vanguard or  Dragoon Dragoon |
 Thief Thief |
| Healer |  White Mage White Mage |
 Spirit Master Spirit Master |
| Tank |  Shield Master Shield Master |
 Vanguard Vanguard |
| Notable Abilities | ||
Vanguard's Specialty Attention Seeker gives it a boost to its Physical Attack and Crit Chance based on the user's chance of being targeted. This allows you to gain an overwhelming amount of physical power compared to other Jobs.
Second Half of Chapter 4 and Chapter 5
| Chapter 4 Recommended Party - Second Half | ||
|---|---|---|
| Main Job | Sub Job | |
| Attacker |  Phantom Phantom |
 Thief Thief |
| Attacker |  Phantom Phantom |
 Thief Thief |
| Healer |  White Mage White Mage |
 Spirit Master Spirit Master |
| Tank |  Shield Master Shield Master |
 Vanguard Vanguard |
| Notable Abilities | ||
After getting the Phantom Job at Savalon Royal Palace, we recommend using it as your primary Job for your attackers. Partnered with Thief, this allows you to deal destructive amounts of damage with Godspeed Strike in tandem with the buffs from Become Lightning.
Related Bravely Default 2 Guides
Bravely Default 2 Tips and Tricks Guides
Author
Best Party Build for Each Story Chapter
Rankings
- We could not find the message board you were looking for.
Gaming News
Popular Games

Genshin Impact Walkthrough & Guides Wiki

Honkai: Star Rail Walkthrough & Guides Wiki

Umamusume: Pretty Derby Walkthrough & Guides Wiki

Pokemon Pokopia Walkthrough & Guides Wiki

Resident Evil Requiem (RE9) Walkthrough & Guides Wiki

Monster Hunter Wilds Walkthrough & Guides Wiki

Wuthering Waves Walkthrough & Guides Wiki

Arknights: Endfield Walkthrough & Guides Wiki

Pokemon FireRed and LeafGreen (FRLG) Walkthrough & Guides Wiki

Pokemon TCG Pocket (PTCGP) Strategies & Guides Wiki
Recommended Games

Diablo 4: Vessel of Hatred Walkthrough & Guides Wiki

Cyberpunk 2077: Ultimate Edition Walkthrough & Guides Wiki

Fire Emblem Heroes (FEH) Walkthrough & Guides Wiki

Yu-Gi-Oh! Master Duel Walkthrough & Guides Wiki

Super Smash Bros. Ultimate Walkthrough & Guides Wiki

Pokemon Brilliant Diamond and Shining Pearl (BDSP) Walkthrough & Guides Wiki

Elden Ring Shadow of the Erdtree Walkthrough & Guides Wiki

Monster Hunter World Walkthrough & Guides Wiki

The Legend of Zelda: Tears of the Kingdom Walkthrough & Guides Wiki

Persona 3 Reload Walkthrough & Guides Wiki
All rights reserved
© 2021 SQUARE ENIX CO., LTD. All Rights Reserved.
The copyrights of videos of games used in our content and other intellectual property rights belong to the provider of the game.
The contents we provide on this site were created personally by members of the Game8 editorial department.
We refuse the right to reuse or repost content taken without our permission such as data or images to other sites.






![Monster Hunter Stories 3 Review [First Impressions] | Simply Rejuvenating](https://img.game8.co/4438641/2a31b7702bd70e78ec8efd24661dacda.jpeg/thumb)


