Chapter 1 Story Walkthrough and Boss Guides
This is a walkthrough for Chapter 1 of Bravely Default 2 (Bravely Default II) for the Nintendo Switch. Read on to know all the objectives for this chapter, all the boss fights and strategies against them, all the side quests and missions, and all the necessary tips to get through this chapter.
List of Contents
Bravely Default 2 Chapter 1 Walkthrough
Main Objectives
Below are the keypoint objectives to do for Chapter 1 of Bravely Default 2. Refer to the table below to jump to a specific section of the chapter.
| Chapter 1 Objectives | |
|---|---|
| Sandswept Ruins | Underground Reservoir |
| Bernard's Mansion | Savalon Palace |
Sandswept Ruins
| Objective | |
|---|---|
| 1 | Head to Savalon. |
| 2 | Proceed to the Plaza then into the Palace. |
| 3 | Return to the plaza once again then enter the Gaming Hall. Before exiting, head to the second floor then head to the left. Follow the path then exit from there. Open the chest to get a Clothespin. 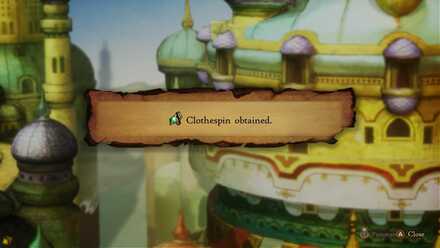 |
| 4 | Exit Savano (there will be a short scene at the exit) and head to the Sandswept Ruins to the south. |
| 5 | From the entrance, keep heading northeast. After entering an arc, head left then north at the dead end. Loot the chest at the other side of the wall when you're heading left as it contains a Clothespin that can be used against the boss of the area. 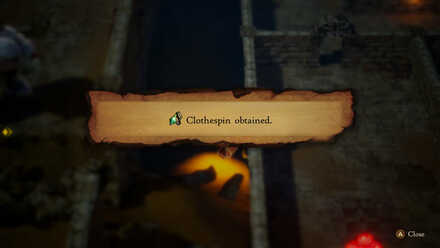 |
| 6 | After heading north, head left then south to find a teleporter, activate it. |
| 7 | From the teleporter, keep on heading east then south. After encountering a dead end and descending the stairs, head right to find the boss. Make sure to save and restore your party's HP and MP via a Tent! |
| Boss Fight | 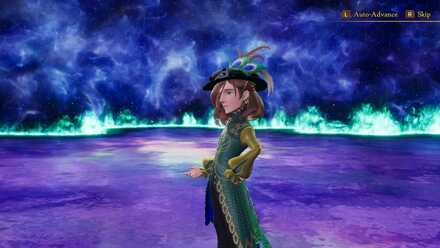 Orpheus Orpheus |
| 8 | Exit the Sandswept Ruins and return to Savalon. |
| 9 | Go to the designated area on the map to find Anihal. |
| 10 | Talk to the man in a white garb in the east. |
| 11 | Go to the house to the southeast side of Savalon then use the stairs to descend. |
Underground Reservoir
| Objective | |
|---|---|
| Note | The Underground Reservoir is filled with several enemies that can inflict poison. Buying and equipping 4 Star Pendants from the weapon shop can greatly reduce the enemy's damage output for this dungeon. |
| 1 | Head down the slope and to the right. To the left is an enemy and a chest that contains an Ice Talisman. |
| 2 | The path is pretty linear, after encountering three diverging paths, head north first then exit to find a rare monster. Do not engage it. Head to its back and get the two chests which Force Armlet and Power Bracers for your White Mage and Monk. |
| 3 | Return to the three diverging paths, then head down. (Heading right leads to a chest with a pitchfork) |
| 4 | After encountering two splitting paths, take the path upward. (Downward leads to a chest with 3 Antarctic Winds) |
| 5 | Save at the next save point then prepare for a boss fight. |
| Boss Fight | 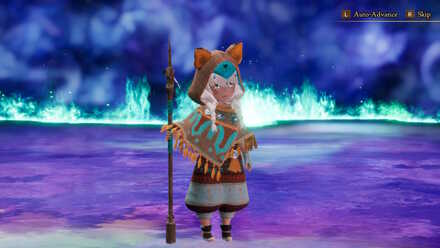 Anihal Anihal |
| 6 | After beating Anihal, exit the Reservoir and return to Savalon. |
| 7 | Head to Anihal's house. The prince will leave your party after this so try to do everything you want battle wise as your party's performance will weaken without his attacks and debuffs. |
Bernard's Mansion
| Objective | |
|---|---|
| 1 | After getting the key from Anihal, head to the eastern most side of the desert to find Bernard's Mansion. |
| 2 | Upon entering Bernard's Mansion, head left then go down the stairs. Go right and cross the two bridges to activate the switch. |
| 3 | Enter the main hall then enter the right most door. Go down the stairs and head downwards to activate the next switch. |
| 4 | Go back to where you start. Head to the right most room. Activate the switch. |
| 5 | Return to the entrance hall then go up the stairs. Head to the left most door to open a new set of stairs. |
| 6 | You will be in the basement. From the teleport area and save point, go right, then go down. Go right before heading under the two bridges. |
| 7 | Keep going right and under bridges until you reach a wall and stairs going upwards. When you climb up and head right, a hallway with a save point. A boss battle is up ahead. |
| Boss Fight | 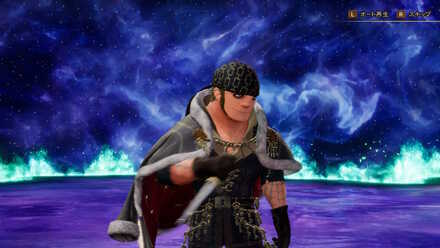 Bernard Bernard |
Savalon Palace
| Objective | |
|---|---|
| 1 | Exit Savalon's Dungeon. |
| 2 | Head to Savalon Palace and prepare for a boss fight. |
| 3 |
 Prince Castor Prince Castor |
| 4 | After the battle. Exit Savalon then head north to find Truff. |
| 5 | Complete Truff's Side Quest then continue heading north. |
Chapter 2 Story Walkthrough and Boss Guides
Chapter 1 Maps
| Chapter 1 Maps | |
|---|---|
| Savalon | Near Savalon |
| Sandswept Ruins | Underground Reservoir |
| Abandoned Mansion | Bernard's Mansion |
| Savalon Palace Dungeon | - |
Chapter 1 Bosses
Boss Fight: Orpheus
Orpheus is the bearer of the Bard Asterisk and is a support type enemy. He is also capable of inflicting sleep as a revenge move against magic users so make sure that you have obtained the Clothespins along the way or it will be difficult for Gloria and Elvis to fight him!
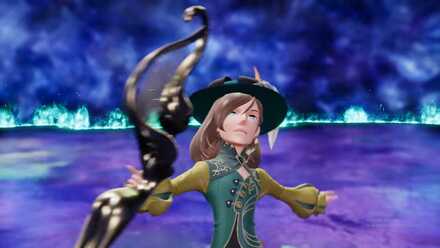
Boss Fight: Anihal
Anihal is the bearer of the Beastmaster Asterisk which is why she's surrounded with pet monsters on your fight against her.
To win this fight, you need silence immunity with a White Veil and proper resource management.
Boss Fight: Bernard
Bernard posses the Thief asterisk and is a force to be reckoned with. He has fast speed and evasion rate and can steal HP from your characters.
He also has the move Godspeed Strike which inflicts a high base damage and repeats itself for a few turns. Prepare your highest damaging abilities as you'll want to end this battle quickly.
Boss Fight: [Spoiler]
Optional Boss: Shirley
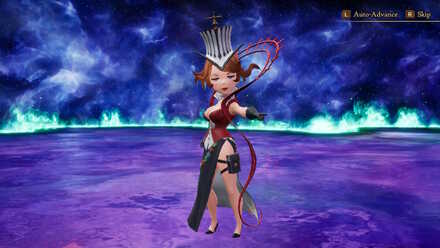
Shirley posses the Gambler Asterisk. She uses moves that relies on the roulette to dish out heavy (or light) damage to everyone. A luck based battle, but beating her can be consistent.
Chapter 1 Obtainable Asterisks
Bard Job
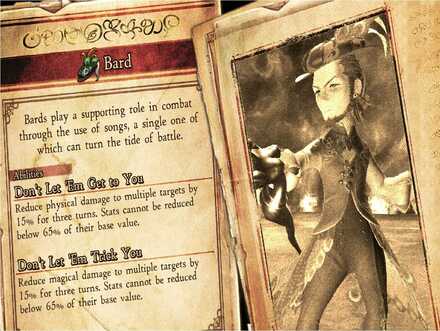
As shown in your fight against Orpheus, the Bard is capable of providing buffs to your allies. While the HP recovery skills belong to the White Mage, stat buffs are the Bard's forte.
Try to include it as a sub job to your support characters to add increase your party's preformance!
Bard Job Abilities and Best Sub-Jobs
Beastmaster Job
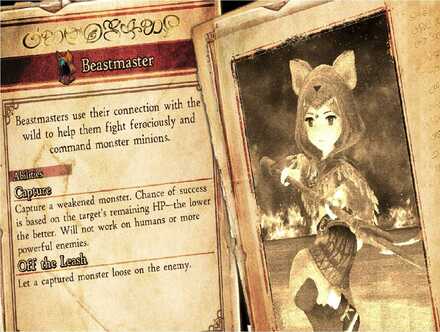
The Beastmaster is a master of the Spear and Bow. They have access to powerful abilities and skills that will be helpful for any build!
The Beastmaster's true shine is its ability to unleash captured enemies on its foes to use unique abilities!
Beastmaster Job Abilities and Best Sub-Jobs
Thief Job
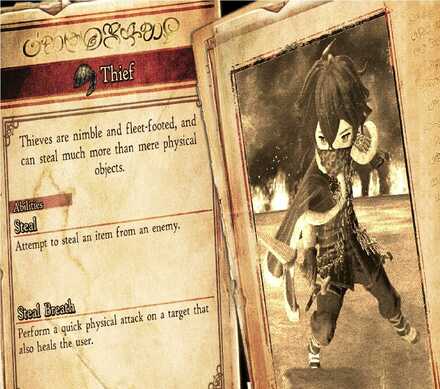
The Thief class specializes in speed and is an expert in taking items and resources from enemies.
Their insane speed coupled by powerful combat abilities makes the Thief one of the best offensive classes!
Thief Job Abilities and Best Sub-Jobs
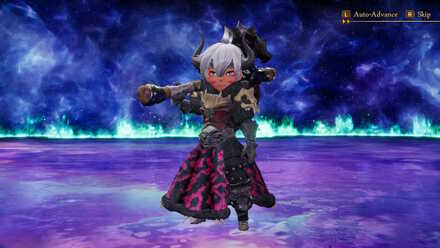
Berserker Job
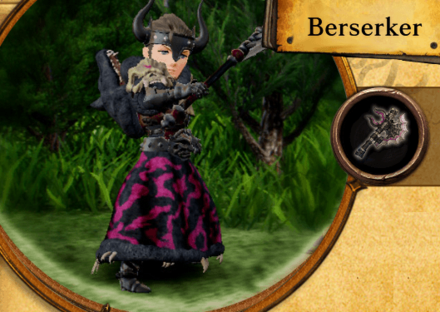
The Berserker class disregards defense for more damage. It specializes in offense and can even control themselves when inflicted with Berserk. If you're looking for damage, give the Berserker a try!
Berserker Job Abilities and Best Sub-Jobs
Gambler Job

The Gambler Job is a class that focuses on the player's luck and using pg to unleash abilities unto enemy. It also possesses pg raising support ability so if you ever feel like you're short on money, don't hesitate to look at the Gambler class.
Gambler Job Abilities and Best Sub-Jobs
Chapter 1 Sidequests
Presentation is Everything
| Quest No. | Objective | Reward | Difficulty | |
|---|---|---|---|---|
| 8 | Collect some sprigs of motley trefoil |
Small JP Orb x 3 | ★★★★ | |
| Quest Giver | ||||
| An old lady in the king's castle in Halcyonia | ||||
Always By Your Side
| Quest No. | Objective | Reward | Difficulty | |
|---|---|---|---|---|
| 12 | Go and pick some snow lilies |
Wind Talisman x 1 | ★★★★★ | |
| Quest Giver | ||||
| King of Halcyonia | ||||
In the Dark
| Quest No. | Objective | Reward | Difficulty | |
|---|---|---|---|---|
| 14 | Borrow a lantern. |
Booster Bun (Physical Defence) x 1 | ★ | |
| Quest Giver | ||||
| A soldier outside of the Outlaw's Hideout during nighttime | ||||
Belle of the Ball
| Quest No. | Objective | Reward | Difficulty | |
|---|---|---|---|---|
| 15 | Collect some roc tail feathers. (0/3) |
Feather Hat x 1 | ★★★★ | |
| Quest Giver | ||||
| A woman near the stairs at Halcyonia during daytime | ||||
The Harbinger of Calamity
| Quest No. | Objective | Reward | Difficulty | |
|---|---|---|---|---|
| 16 | Defeat the one-eyed creature. | 680 pg | ★★★ | |
| Quest Giver | ||||
| A guy wearing a white robe on the bridge near the entrance of Savalon (only available after the scene with the prince) | ||||
Say It with Shells
| Quest No. | Objective | Reward | Difficulty | |
|---|---|---|---|---|
| 17 | Collect some pretty seashells. (0/3) | 520 pg | ★★ | |
| Quest Giver | ||||
| A man in a blue roof house that can be found at the end of the dock just before the road to the palace in Savalon | ||||
Target Practice
| Quest No. | Objective | Reward | Difficulty | |
|---|---|---|---|---|
| 18 | Defeat some goblin archers. (0/3) |
Iron Bow x 1 | ★★★★ | |
| Quest Giver | ||||
| Guard in the palace in Savalon | ||||
Book Smarts
| Quest No. | Objective | Reward | Difficulty | |
|---|---|---|---|---|
| 19 | Borrow a book from the boy who likes reading. |
Silver Glasses x 2 | ★★ | |
| Quest Giver | ||||
| An old man southeast of the gambling hall in Savalon during daytime | ||||
A Long Lunch
| Quest No. | Objective | Reward | Difficulty | |
|---|---|---|---|---|
| 20 | Deliver the lunch to the ruins. |
Large JP Orb x 1 | ★★ | |
| Quest Giver | ||||
| A woman outside the inn in Savalon during nighttime | ||||
Heart and Sole
| Quest No. | Objective | Reward | Difficulty | |
|---|---|---|---|---|
| 21 | Help find some new shoes for Adelle. |
Snug Scarf x 1 | ★ | |
| Quest Giver | ||||
| Elvis | ||||
Add Some Sparkle
| Quest No. | Objective | Reward | Difficulty | |
|---|---|---|---|---|
| 22 | Find some sparkly sand |
Teleport Stone x 5 | ★★ | |
| Quest Giver | ||||
| Avid glassblower in the Gambling hall in Savalon during daytime | ||||
Bond of Brothers
| Quest No. | Objective | Reward | Difficulty | |
|---|---|---|---|---|
| 23 | Speak to the younger brother. |
Peace Ring x 1 | ★ | |
| Quest Giver | ||||
| Prisoner inside the jail in Savalon | ||||
Taking a Gamble
| Quest No. | Objective | Reward | Difficulty | |
|---|---|---|---|---|
| 24 | Play a hand of B 'n' D. |
Medium JP Orb x 2 | ★★★★ | |
| Quest Giver | ||||
| Shirley in the Gambling Hall | ||||
A Fragrant Lie
| Quest No. | Objective | Reward | Difficulty | |
|---|---|---|---|---|
| 25 | Find the expensive perfume. |
Booster Bun (Magical Attack) x 2 | ★★★ | |
| Quest Giver | ||||
| Man near the weapon shop in Savalon during the daytime | ||||
A Fluttery Stomach
| Quest No. | Objective | Reward | Difficulty | |
|---|---|---|---|---|
| 26 | Defeat some silkmoths. |
Mythril Shield x 1 | ★★★★ | |
| Quest Giver | ||||
| One of the guards in Savalon palace during nighttime. | ||||
Rich Pickings
| Quest No. | Objective | Reward | Difficulty | |
|---|---|---|---|---|
| 27 | Find the supposedly priceless vase. |
Small JP Orb x 1 | ★★★★★ | |
| Quest Giver | ||||
| Troubled father in the Gambling Hall during daytime | ||||
Abandoned Mansion Dungeon Map and Treasure Chest Locations
Human's Best Friend: Part II
| Quest No. | Objective | Reward | Difficulty | |
|---|---|---|---|---|
| 28 | Ask around about schnitzels. |
Medium Experience Orb x 1 | ★★ | |
| Quest Giver | ||||
| Truff at the north of Savalon | ||||
Chapter 1 Tips
Pick Up Two Clothespins in Savalon
|
|
Clothespin is an accessory that provides immunity to sleep. The first boss that you'll encounter will be using revenge abilities against your casters by putting them to sleep.
This is a must-have accessory, so save some PG by opening these chests.
Purchase a Star Pendant, a White Veil, and a Silver Glasses
After the Sandswept Ruins, you'll head to a dungeon and fight against enemies that can inflict poison. The bosses in this chapter will inflict different status ailements, namely inflict poison, silence, and blind. Make sure you prepare accordingly for each boss
Equipping a Star Pendant, White Veil, and Silver Glasses provides you immunity to the three ailments mentioned above.
Learn Muzzle Before Heading to the Abandoned Mansion
Before accepting the Rich Pickings, learn Muzzle by leveling a Beastmaster to Level 4.
Amphora, the boss of this quest is capable of unleashing area wide Thundara spells that can wipe the whole team.
Using Muzzle is a great strategy against Amphora to stop it from defeating the whole party in one turn.
List of Savalon Shop Items
Available From The Beginning
Items
| Item | Price | Item | Price |
|---|---|---|---|
| Antidote | 15 | Mini Ether | 90 |
| Phoenix Down | 150 | Potion | 40 |
| Atlatl | 240 | Magnifying Glass | 22 |
| Teleport Stone | 180 | Tent | 270 |
| Ward Light | 180 | Eye Drops | 20 |
| Stone | 240 | Echo Herbs | 24 |
| Wakeup Bell | 180 | Animator | 52 |
| Throwing Knife | 240 | Shuriken | 240 |
| Throwing Stick | 240 | Bomb Fragment | 260 |
| Antarctic Wind | 260 | Zeus's Wrath | 260 |
Weapons
| Weapon | Price | Weapon | Price |
|---|---|---|---|
| Broadaxe | 500 | Iron Bow | 1060 |
| Shortbow | 470 | Mythril Dagger | 860 |
| Wizard's Rod | 420 | Kukri | 90 |
| Double-Bladed Bhuj | 1080 | Spear | 820 |
| Glaive | 1020 | Mythril Staff | 980 |
Armor
| Armor | Price | Armor | Price |
|---|---|---|---|
| Round Shield | 250 | Barrel Helm | 170 |
| Headband | 540 | Leather Cap | 120 |
| Mystic Hood | 150 | Ring Mail | 930 |
| Doublet | 780 | Caravan Coat | 290 |
| Manarobe | 260 |
Accessories
| Accessory | Price | Accessory | Price |
|---|---|---|---|
| Ice Talisman | 1560 | Flame Talisman | 1560 |
| Leather Gloves | 190 | Iron Bangle | 880 |
| Bronze Bangle | 560 | Thunder Talisman | 1560 |
| Star Pendant | 600 | Silver Glasses | 620 |
| White Veil | 760 |
Available After defeating Orpheus
Items
| There are no new items available for purchase |
Weapons
| Weapon | Price |
|---|---|
| Mythril Axe | 1590 |
| Mythril Spear | 1510 |
Armor
| Armor | Price | Armor | Price |
|---|---|---|---|
| Mythril Helm | 810 | Holy Mitre | 720 |
| Feather Hat | 760 | Turban | 670 |
| Mythril Armour | 1540 |
Accessories
| There are no new items available for purchase |
Available from Chapter 2
Items
| Item | Price | Item | Price |
|---|---|---|---|
| Ether | 220 | Hi-Potion | 200 |
| Balsam | 66 | Smelling Salts | 85 |
Weapons
| There are no new items available for purchase |
Armor
| There are no new items available for purchase |
Accessories
| There are no new items available for purchase |
Available from Chapter 3
Items
| Item | Price |
|---|---|
| Stardust | 260 |
| Dark Drops | 260 |
| Direct Moonlight | 260 |
| Remedy | 300 |
Weapons
| There are no new items available for purchase |
Armor
| There are no new items available for purchase |
Accessories
| There are no new items available for purchase |
Available from Chapter 4
Items
| Item | Price | Item | Price |
|---|---|---|---|
| Pathogen | 2000 | Witch's Whisper | 1500 |
| Wildweed | 1000 | Dreadstool | 500 |
| Numbneedle | 250 | Hush Pollen | 200 |
| Ink | 100 | Magic Herb | 800 |
| Healing Herb | 100 | X-Potion | 630 |
Weapons
| Weapon | Price | Weapon | Price |
|---|---|---|---|
| Gaia Rod | 7120 | Great Bow | 7120 |
| Summoner's Axe | 8360 | Carving Knife | 6790 |
| Yggdrasil Staff | 7010 | Chronos Glaive | 8220 |
| Staggering Sword | 7970 |
Armor
| Armor | Price | Armor | Price |
|---|---|---|---|
| Cuirass | 5620 | Valkyrie's Coat | 5230 |
| Ninja Garb | 4890 | Brigandine | 4930 |
| Full-Face Helm | 3850 | Adamant Hat | 1450 |
| Acorn Hat | 4200 | Iron Headband | 2840 |
| Tactician's Hat | 2630 | Mortarboard | 1250 |
| Spiked Shield | 4310 |
Accessories
| Armor | Price | Armor | Price |
|---|---|---|---|
| White Veil | 760 | Safety Ring | 2320 |
| Locket | 2200 | Peace Ring | 2270 |
| Courage Ring | 840 | Earthing Rod | 880 |
| Clothespin | 4200 | Earth Talisman | 3490 |
| Wind Talisman | 3490 | Feather Mantle | 1120 |
| Artisan Gloves | 2470 | Vambraces | 3420 |
| Power Bracers | 2190 | Heart Ring | 2860 |
| Adamant Bangle | 3310 |
Available from Chapter 5
Items
| Item | Price | Item | Price |
|---|---|---|---|
| Spellblossom | 15000 | Healing Bloom | 2000 |
| Meteorite | 2200 | Dark Deluge | 2200 |
| Direct Sunlight | 2200 | Tengu Sneeze | 2200 |
| Earth Mallet | 2200 | Pantheon's Wrath | 2200 |
| Arctic Wind | 2200 | Bomb Arm | 2200 |
| Elixir | 10000 |
Weapons
| Weapon | Price | Weapon | Price |
|---|---|---|---|
| Gambanteinn | 10260 | Ama-no-Kagoyumi | 10640 |
| Ama-no-Sakahoko | 10700 | Deforester | 10810 |
| Ama-no-Murakumo | 10470 | Yatagarasu | 10350 |
Armor
| Armor | Price | Armor | Price |
|---|---|---|---|
| Minerva Bustier | 7570 | Saffron Robes | 5690 |
| Dragonskin Headscarf | 6470 | Ascetic's Cap | 3370 |
| Blessing | 6670 | Icefire Shield | 5020 |
Accessories
| Armor | Price | Armor | Price |
|---|---|---|---|
| Vaccine | 10870 | Self-Portrait | 11810 |
| Snappy Sash | 10780 | Adamant Gauntlets | 6840 |
Available from Chapter 6
Items
| Item | Price | Item | Price |
|---|---|---|---|
| Soul Food | 5770 | Devil's Delight | 5190 |
| Ghoulash | 5770 | Plant Food | 5190 |
| Insect Nectar | 5630 | Fresh Fish | 5440 |
| Beast Flesh | 5440 | People Pleasers | 5630 |
Weapons
| There are no new items available for purchase |
Armor
| There are no new items available for purchase |
Accessories
| There are no new items available for purchase |
Available from Chapter 7
Items
| There are no new items available for purchase |
Weapons
| There are no new items available for purchase |
Armor
| There are no new items available for purchase |
Accessories
| There are no new items available for purchase |
Bravely Default 2 Related Guides
Bravely Default 2 Story Walkthroughs
| Story Chapter Walkthroughs | |
|---|---|
| Demo Walkthrough | |
 Prologue Prologue |
Chapter 1 |
 Chapter 2 Chapter 2 |
 Chapter 3 Chapter 3 |
 Chapter 4 Chapter 4 |
 Chapter 5 Chapter 5 |
 Chapter 6 Chapter 6 |
 Chapter 7 Chapter 7 |
| Side Quests | |
| Complete Quest List | |
| More Guides | |
| New Game + Options & How to Unlock | |
Author
Chapter 1 Story Walkthrough and Boss Guides
Rankings
- We could not find the message board you were looking for.
Gaming News


![Monster Hunter Stories 3 Review [First Impressions] | Simply Rejuvenating](https://img.game8.co/4438641/2a31b7702bd70e78ec8efd24661dacda.jpeg/thumb)
Popular Games

Genshin Impact Walkthrough & Guides Wiki
Honkai: Star Rail Walkthrough & Guides Wiki
Umamusume: Pretty Derby Walkthrough & Guides Wiki
Pokemon Pokopia Walkthrough & Guides Wiki
Resident Evil Requiem (RE9) Walkthrough & Guides Wiki
Monster Hunter Wilds Walkthrough & Guides Wiki
Wuthering Waves Walkthrough & Guides Wiki
Arknights: Endfield Walkthrough & Guides Wiki
Pokemon FireRed and LeafGreen (FRLG) Walkthrough & Guides Wiki
Pokemon TCG Pocket (PTCGP) Strategies & Guides Wiki


Recommended Games
Diablo 4: Vessel of Hatred Walkthrough & Guides Wiki
Cyberpunk 2077: Ultimate Edition Walkthrough & Guides Wiki
Fire Emblem Heroes (FEH) Walkthrough & Guides Wiki
Yu-Gi-Oh! Master Duel Walkthrough & Guides Wiki
Super Smash Bros. Ultimate Walkthrough & Guides Wiki
Pokemon Brilliant Diamond and Shining Pearl (BDSP) Walkthrough & Guides Wiki
Elden Ring Shadow of the Erdtree Walkthrough & Guides Wiki
Monster Hunter World Walkthrough & Guides Wiki
The Legend of Zelda: Tears of the Kingdom Walkthrough & Guides Wiki
Persona 3 Reload Walkthrough & Guides Wiki


All rights reserved
© 2021 SQUARE ENIX CO., LTD. All Rights Reserved.
The copyrights of videos of games used in our content and other intellectual property rights belong to the provider of the game.
The contents we provide on this site were created personally by members of the Game8 editorial department.
We refuse the right to reuse or repost content taken without our permission such as data or images to other sites.