All Gym Locations and How to Beat
As of December 2025, Game8 has ended coverage of Once Human. Thank you very much for your understanding and we hope you continue to enjoy Game8's guides.

Here’s a complete guide to all Gym locations and how to beat them in Once Human's Deviation: Survive, Capture, and Preserve Scenario. Keep reading to discover every Gym's location, tips and tricks to overcome each gym leader, what Gyms are, and what rewards you can get.
List of Contents
All Gym Locations
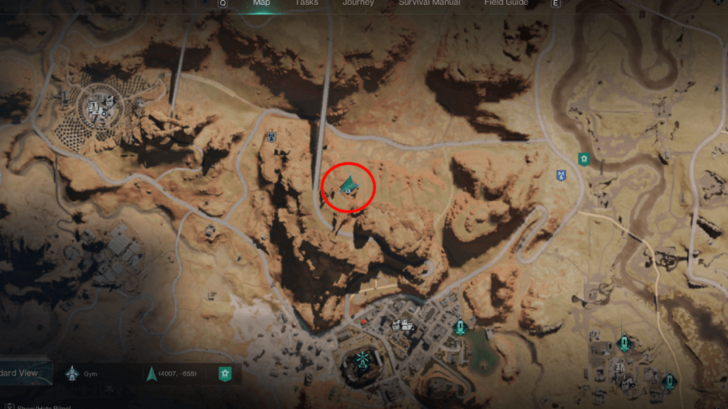
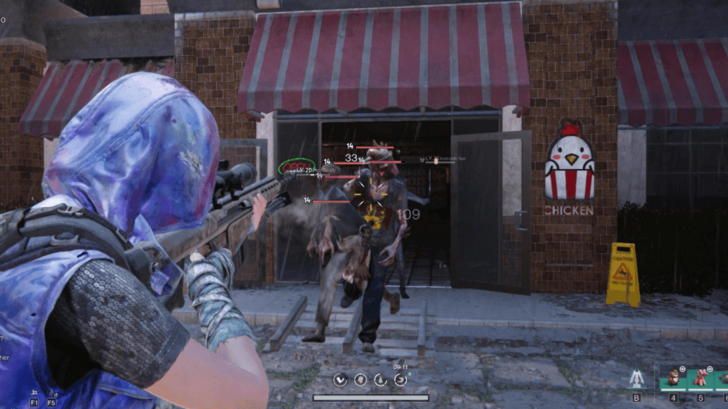
Winston Lv. 6 Gym
| Map View | World View | ||||
|---|---|---|---|---|---|
 |
 |
||||
| Leader Deviations | |||||
 Dr. Teddy
(Lv.8, A Rank) Dr. Teddy
(Lv.8, A Rank) |
 Festering Gel
(Lv.8, B Rank) Festering Gel
(Lv.8, B Rank) |
 Buzzy Bee
(Lv.8, B Rank) Buzzy Bee
(Lv.8, B Rank) |
|||
| Recommended Deviations | |||||
 Logging Beaver Logging Beaver
(Lv. 10+) |
 The Digby Boy
(Lv. 10+) |
Dr. Teddy
(Lv. 10+) |
|||
How to Beat Winston
Winston’s lineup is made up entirely of Support deviations, so bring at least two strong DPS to cut through quickly and outpace their healing. Focus them down in this order: Dr. Teddy → Festering Gel → Buzzy Bee.
Keep in mind, you don’t have to wipe out every enemy - victory is yours as long as you finish the battle with more deviations alive than Winston.
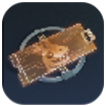
Dynamite Soul Lv. 8 Gym
| Map View | World View | ||||
|---|---|---|---|---|---|
 |
 |
||||
| Leader Deviations | |||||
 Chefosaurus Rex
(Lv.5, S Rank) Chefosaurus Rex
(Lv.5, S Rank) |
 Invincible Sun
(Lv.5, A Rank) Invincible Sun
(Lv.5, A Rank) |
 Flame Essence
(Lv.5, B Rank) Flame Essence
(Lv.5, B Rank) |
|||
| Recommended Deviations | |||||
|
Invincible Sun
(Lv. 12+) |
Festering Gel
(Lv. 12+) |
Dr. Teddy
(Lv. 12+) |
|||
How to Beat Dynamite Soul
Dynamite Soul's deviations are all DPS and will definitely destroy your team if you don't have any tank or support healers.
Defeat in order: Chefosaurus Rex, Invincible Sun, Flame Essence. Chefosaurus Rex has the highest and most dangerous skill out of the three. It's best to defeat it first before other deviations.
Marlin Lv. 9 Gym
| Map View | World View | ||||
|---|---|---|---|---|---|
 |
 |
||||
| Leader Deviations | |||||
|
Buzzy Bee
(Lv.9, B Rank) |
Invincible Sun
(Lv.9, B Rank) |
 Atomic Snail
(Lv.9, A Rank) Atomic Snail
(Lv.9, A Rank) |
|||
| Recommended Deviations | |||||
|
Invincible Sun
(Lv. 12+) |
Logging Beaver
(Lv. 12+) |
Dr. Teddy
(Lv. 12+) |
|||
How to Beat Marlin
Marlin uses one DPS and two support deviations. You can do two DPS and one healer and it should be enough to defeat her team.
Focus on Invincible Sun. It can wipe out your team if you don't defeat it fast, as the Atomic Snail and Buzzy Bee can speed up its Psi Skill.
Marina Lv. 13 Gym
| Map View | World View | ||||
|---|---|---|---|---|---|
 |
 |
||||
| Leader Deviations | |||||
 Electric Eel
(Lv.12, B Rank) Electric Eel
(Lv.12, B Rank) |
 Hydronaut Fish
(Lv. 12, A Rank) Hydronaut Fish
(Lv. 12, A Rank) |
 Orb Lightning (Lv. 12, B Rank) Orb Lightning (Lv. 12, B Rank) |
|||
| Recommended Deviations | |||||
|
Invincible Sun
(Lv. 16+) |
Flame Essence
(Lv.16+) |
Electric Eel
(Lv. 16+) |
|||
How to Beat Marina
Marina’s team consists of Electric Eel, Hydronaut Fish, and Orb Lightning, all focused on DPS. The biggest threat is Electric Eel, with its massive lightning AoE that can quickly overwhelm you, so take it out first. After that, focus on Hydronaut Fish, then finish with Orb Lightning.
If you're struggling even with support or tank options, aim for a higher-level DPS-focused team (like the recommeded trio) to push through.
Hermes Lv. 16 Gym
| Map View | World View | ||||
|---|---|---|---|---|---|
 |
 |
||||
| Leader Deviations | |||||
| Lv. 17 Logging Beaver (B Rank) |
 Lv. 17 Lethal Rabbit Lv. 17 Lethal Rabbit (A Rank) |
 Lv. 17 Shattered Maiden Lv. 17 Shattered Maiden (B Rank) |
|||
| Recommended Deviations | |||||
|
Invincible Sun
(Lv. 20+) |
Flame Essence
(Lv. 20+) |
Dr. Teddy
(Lv. 20+) |
|||
How to Beat Hermes
Hermes fields two DPS deviations - one focused on single-target damage and the other on AoE. To counter this, it’s best to bring along a reliable healer and a durable tank to absorb pressure.
Defeat in order: Logging Beaver → Lethal Rabbit → Shattered Maiden. Keep your distance from Logging Beaver and Lethal Rabbit, as closing in may draw their focus and unleash heavy damage.
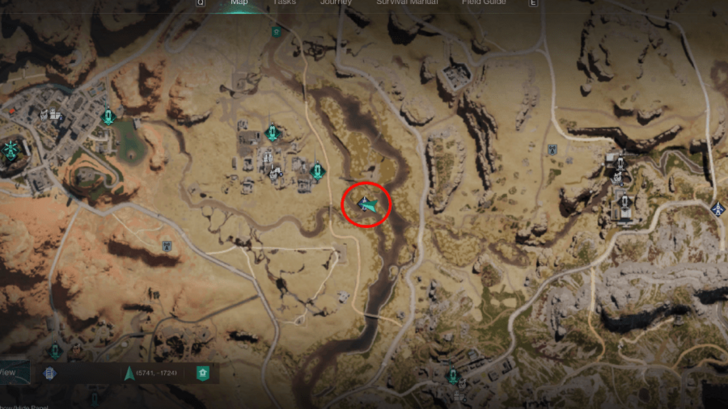
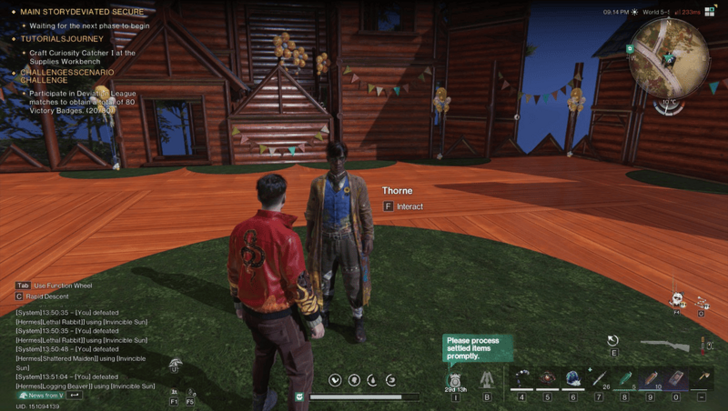
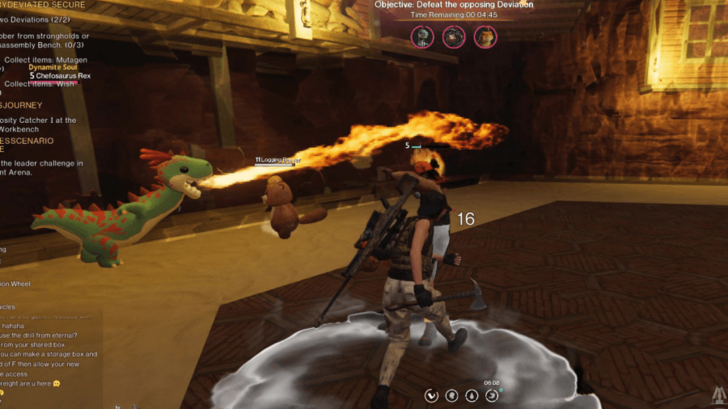
Thorne Lv. 17 Gym
| Map View | World View | ||||
|---|---|---|---|---|---|
 |
 |
||||
| Leader Deviations | |||||
 Lv. 15 Growshroom Lv. 15 Growshroom (A Rank) |
Lv. 15 Festering Gel (A Rank) |
 Lv. 15 H37 Lv. 15 H37 (B Rank) |
|||
| Recommended Deviations | |||||
|
Invincible Sun
(Lv. 20+) |
Flame Essence
(Lv. 20+) |
Dr. Teddy
(Lv. 20+) |
|||
How to Beat Thorne
Thorne relies entirely on support and tank deviations, so the best counter is to bring in high-offense DPS deviations to cut through quickly. Focus on eliminating H37 and Festering Gel first to break their defensive core, then clean up the rest.
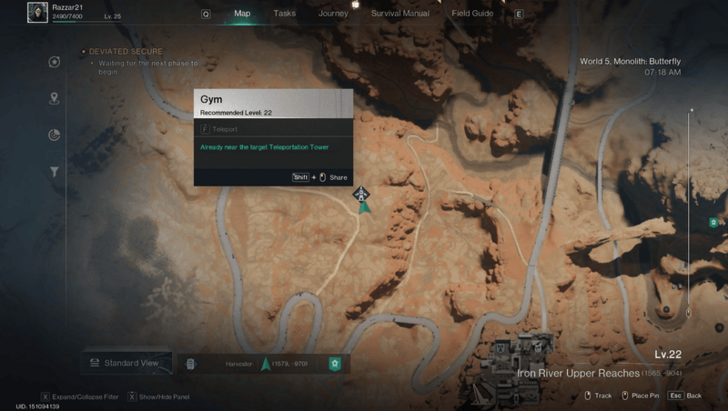
Red Hot Chili Pepper Lv. 22 Gym
| Map View | World View | ||||
|---|---|---|---|---|---|
 |
 |
||||
| Leader Deviations | |||||
 Space Turner
(Lv. 22, A Rank) Space Turner
(Lv. 22, A Rank) |
 Rain Man
(Lv. 22, A Rank) Rain Man
(Lv. 22, A Rank) |
 Mini Wonder
(Lv. 22, S Rank) Mini Wonder
(Lv. 22, S Rank) |
|||
| Recommended Deviations | |||||
|
Invincible Sun
(Lv. 30+) |
Electric Eel
(Lv. 30+ |
Flame Essence
(Lv. 30+) |
|||
How to Beat Red Hot Chili Pepper
By this stage, your deviations should be maxed to level 30 (after defeating the Extradimensional Cat in Verdant Arena) or higher if you’re further into the scenario. Red Hot Chili Pepper’s lineup is dangerous, so bring a strong DPS-focused team to handle the pressure.
Take down Rain Man first, followed by Mini Wonder, and finish with Space Turner.
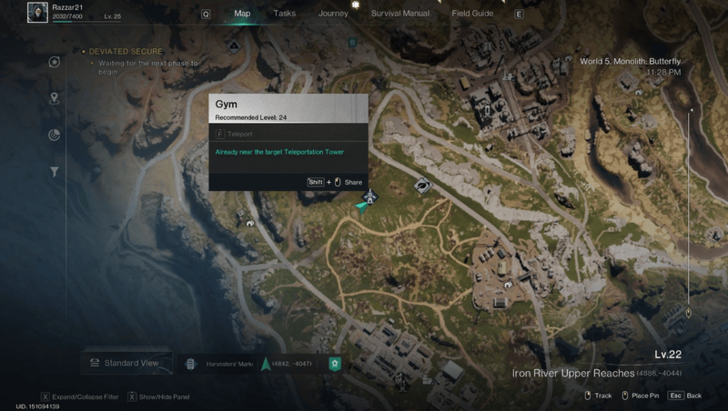
Peter Lv. 24 Gym
| Map View | World View | ||||
|---|---|---|---|---|---|
 |
 |
||||
| Leader Deviations | |||||
 Pup Buddy
(Lv. 22, A Rank) Pup Buddy
(Lv. 22, A Rank) |
 Snow Globe
(Lv. 22, A Rank) Snow Globe
(Lv. 22, A Rank) |
Growshroom
(Lv. 22, S Rank) |
|||
| Recommended Deviations | |||||
|
Atomic Snail
(Lv. 30+) |
Electric Eel
(Lv. 30+) |
Flame Essence
(Lv. 30+) |
|||
How to Beat Peter
Peter fields a well-rounded team: Growshroom serves as the tank, Pup Buddy provides crowd control, and Snow Globe unleashes devastating AoE damage. Take out Snow Globe first, since its wide-area attacks pose the greatest threat.
Egon Lv. 26 Gym
| Map View | World View | ||||
|---|---|---|---|---|---|
 |
 |
||||
| Leader Deviations | |||||
|
Festering Gel
(Lv. 35, B Rank) |
H37
(Lv. 35, A Rank) |
Growshroom
(Lv. 35, A Rank) |
|||
| Recommended Deviations | |||||
|
Atomic Snail
(Lv. 30+) |
Electric Eel
(Lv. 30+) |
Flame Essence
(Lv. 30+) |
|||
How to Beat Egon
Egon’s fight mirrors Thorne’s but at a tougher level. He leans on durable supports and tanks, so bring strong DPS to cut through fast. Prioritize taking down H37 and Festering Gel first, then sweep the rest.
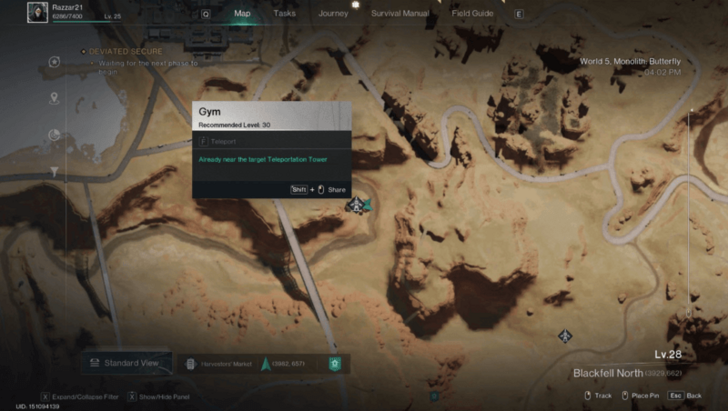
Dorothy Lv. 30 Gym
| Map View | World View | ||||
|---|---|---|---|---|---|
 |
 |
||||
| Leader Deviations | |||||
|
Electric Eel
(Lv. 27, B Rank) |
Hydronaut Fish
(Lv. 27, A Rank) |
Orb Lightning (Lv. 27, B Rank) |
|||
| Recommended Deviations | |||||
|
Atomic Snail
(Lv. 30+) |
Electric Eel
(Lv. 30+) |
Flame Essence
(Lv. 30+) |
|||
How to Beat Dorothy
Dorothy uses the same lineup as Marina: Electric Eel, Hydronaut Fish, and Orb Lightning, but at a higher level. Electric Eel is still the biggest threat with its devastating AoE, so take it down first. Then, target Hydronaut Fish, and finish with Orb Lightning.
Since Dorothy’s team packs more power, you’ll need a stronger DPS-focused trio to cut through before the damage overwhelms you.
Nova Lv. 32 Gym
| Map View | World View | ||||
|---|---|---|---|---|---|
|
|
||||
| Leader Deviations | |||||
 Ice Pot
(Lv. 27, B Rank) Ice Pot
(Lv. 27, B Rank) |
Snow Globe
(Lv. 27, A Rank) |
Rain Man
(Lv. 27, B Rank) |
|||
| Recommended Deviations | |||||
|
Atomic Snail
(Lv. 30+) |
Electric Eel
(Lv. 30+) |
 Polar Jelly Polar Jelly
(Lv. 40+) |
|||
How to Beat Nova
Nova’s team is dangerous, with Snow Globe as the centerpiece. Its AoE can shred your lineup, so make taking it out your top priority. Aim to have your deviations at level 35 - 45 before the fight for a smoother time. After eliminating Snow Globe, focus on Rain Man, then finish off Ice Pot to secure the win.
By this stage, aim to capture level 40+ deviations in northern areas like Agate Tundra or Vena Fjord, giving you the edge you need for this battle.
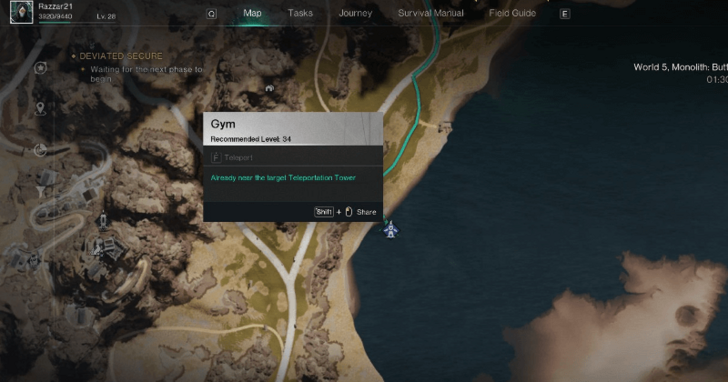
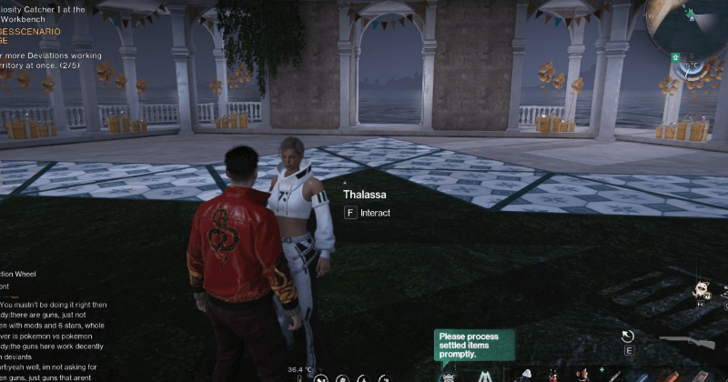
Thalassa Lv. 34 Gym
| Map View | World View | ||||
|---|---|---|---|---|---|
 |
 |
||||
| Leader Deviations | |||||
|
Buzzy Bee
(Lv. 30, B Rank) |
Invincible Sun
(Lv. 30, A Rank) |
Atomic Snail
(Lv. 30, B Rank) |
|||
| Recommended Deviations | |||||
|
Atomic Snail
(Lv. 40+) |
Snow Globe
(Lv. 40+) |
Polar Jelly
(Lv. 40+) |
|||
How to Beat Thalassa
Thalassa fields a balanced lineup of Buzzy Bee, Invincible Sun, and Atomic Snail. Take out Invincible Sun first to remove its strong presence early, then focus on Atomic Snail to break down its durability. Save Buzzy Bee for last to wrap up the fight cleanly.
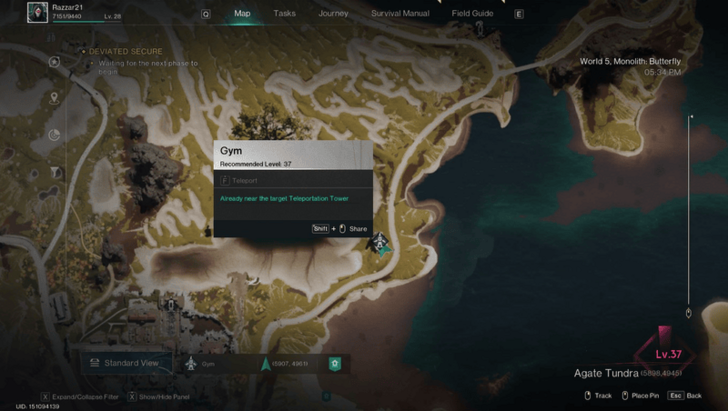
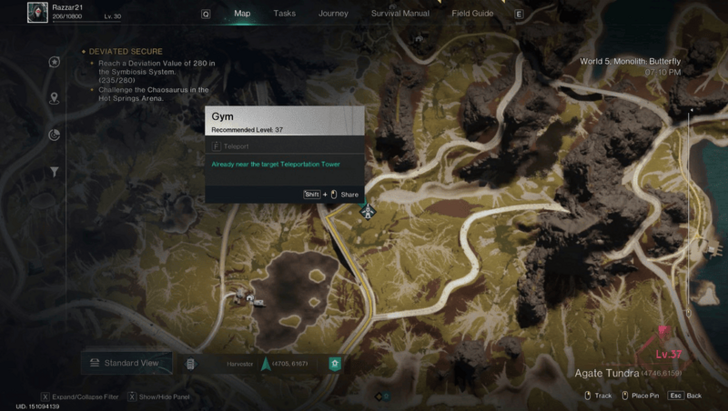
Alice Lv. 37 Gym
| Map View | World View | ||||
|---|---|---|---|---|---|
 |
 |
||||
| Leader Deviations | |||||
|
Chefosaurus Rex
(Lv. 35, S Rank) |
Invincible Sun
(Lv. 35, A Rank) |
Flame Essence
(Lv. 35, B Rank) |
|||
| Recommended Deviations | |||||
|
Atomic Snail
(Lv. 40+) |
Electric Eel
(Lv. 40+) |
Polar Jelly
(Lv. 40+) |
|||
How to Beat Alice
Alice’s lineup is similar to Dynamite Soul’s, relying heavily on DPS-focused deviations that can quickly overwhelm you. This time, bring an even stronger DPS team supported by one Support deviation, try using Electric Eel and Polar Jelly for damage, with Atomic Snail as support to help them unleash their psi-skills faster.
Defeat her deviations in this order: Chefosaurus Rex → Invincible Sun → Flame Essence. Chefosaurus Rex is the most dangerous of the three, so eliminate it first before taking down the others.
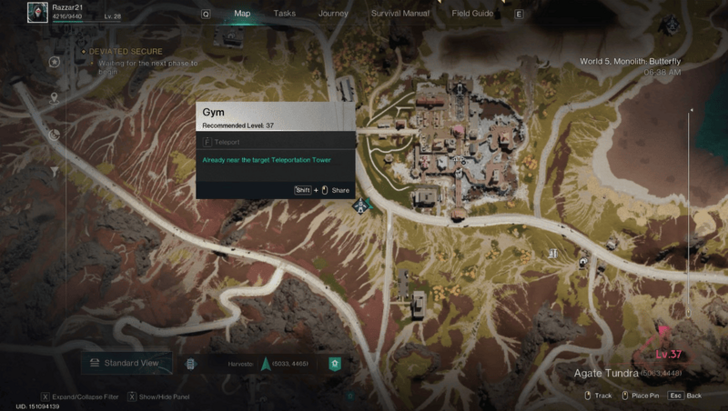
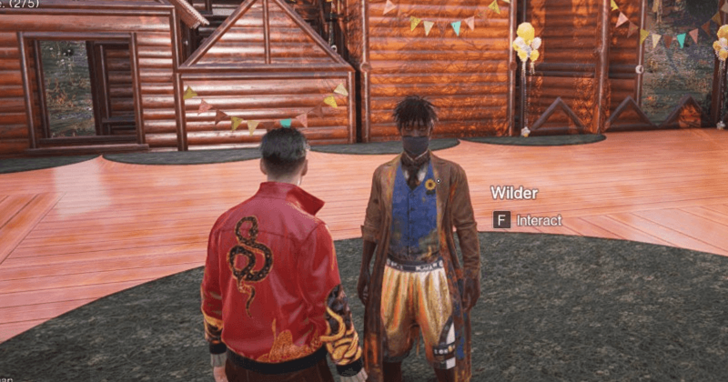
Wilder Lv. 37 Gym
| Map View | World View | ||||
|---|---|---|---|---|---|
 |
 |
||||
| Leader Deviations | |||||
|
Space Turner
(Lv. 35, S Rank) |
Rain Man
(Lv. 35, A Rank) |
Mini Wonder
(Lv. 35, B Rank) |
|||
| Recommended Deviations | |||||
|
Polar Jelly
(Lv. 40+) |
 Nutcracker Nutcracker
(Lv. 40+) |
 By-the-Wind By-the-Wind
(Lv. 40+) |
|||
How to Beat Wilder
Wilder’s lineup is identical to Red Hot Chili Pepper’s, so use the same strategy: focus on Rain Man first, then Mini Wonder, and finish with Space Turner. Bring a strong DPS-heavy team to handle the pressure and end the fight quickly.
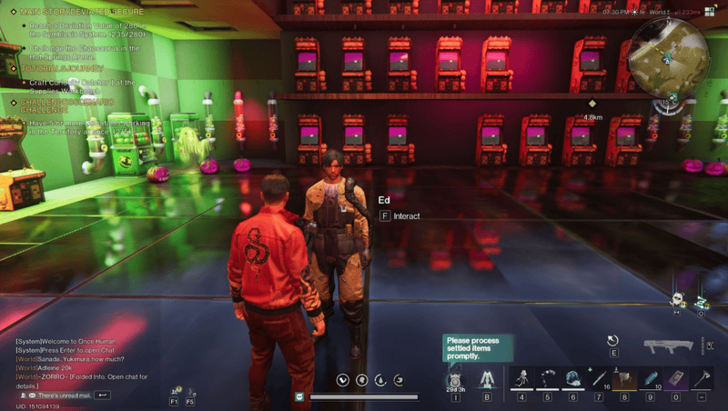
Ed Lv. 37 Gym
| Map View | World View | ||||
|---|---|---|---|---|---|
 |
 |
||||
| Leader Deviations | |||||
 Disco Ball
(Lv. 38, B Rank) Disco Ball
(Lv. 38, B Rank) |
Pup Buddy
(Lv. 38, A Rank) |
Atomic Lighter
(Lv. 38, A Rank) |
|||
| Recommended Deviations | |||||
|
Atomic Snail
(Lv. 40+) |
Electric Eel
(Lv. 40+) |
Polar Jelly
(Lv. 40+) |
|||
How to Beat Ed
Ed’s lineup features Atomic Lighter, Disco Ball, and Pup Buddy, but at this stage, your team should be strong enough to wipe them out with ease. Bring your best DPS deviations along with an Atomic Snail for faster psi-skill recovery and extra support to finish the fight quickly.
Helix Lv. 38 Gym
| Map View | World View | ||||
|---|---|---|---|---|---|
|
|
||||
| Leader Deviations | |||||
|
Logging Beaver
(Lv. 38, B Rank) |
Shattered Maiden
(Lv. 38, A Rank) |
Lethal Rabbit
(Lv. 38, A Rank) |
|||
| Recommended Deviations | |||||
|
Atomic Snail
(Lv. 40+) |
Electric Eel
(Lv. 40+) |
Polar Jelly
(Lv. 40+) |
|||
How to Beat Helix
Helix uses the same lineup as Hermes, with no major twists or surprises. Use the same strategy you used before to take them down efficiently.
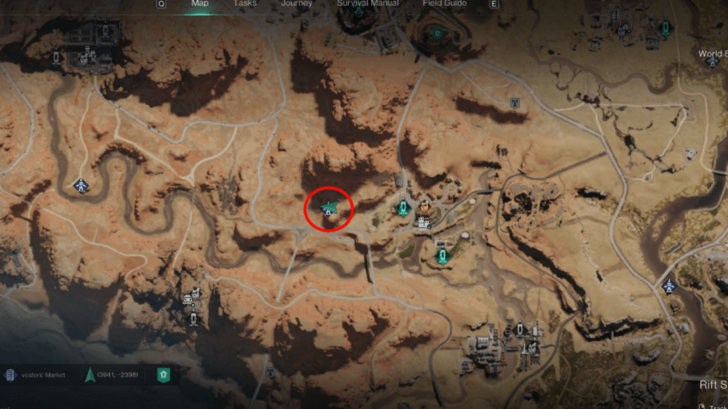
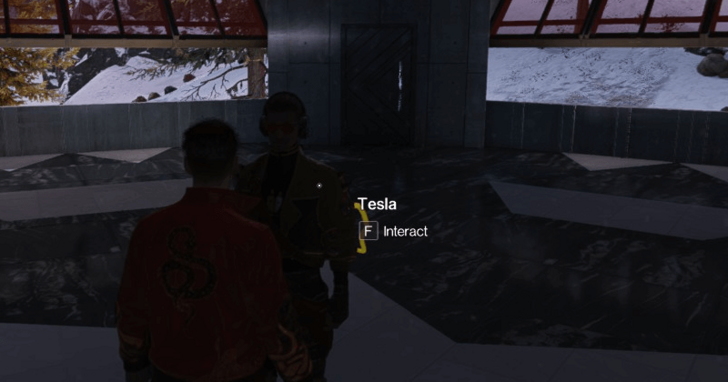
Tesla Lv. 42
| Map View | World View | ||||
|---|---|---|---|---|---|
 Coordinates: Arkam Mountains (3857, 3644) Coordinates: Arkam Mountains (3857, 3644) |
 |
||||
| Leader Deviations | |||||
|
Festering Gel
(Lv. 42, B Rank) |
Dr. Teddy
(Lv. 42, A Rank) |
Buzzy Bee
(Lv. 52, A Rank) |
|||
| Recommended Deviations | |||||
|
Atomic Snail
(Lv. 45+) |
Electric Eel
(Lv. 45+) |
Polar Jelly
(Lv. 45+) |
|||
How to Beat Tesla
Tesla's lineup is identical to Winston’s, featuring Dr. Teddy, Festering Gel, and Buzzy Bee, just at a higher leve;. By now, this battle should be straightforward if your team is well-leveled; focus on strong DPS to finish it quickly.
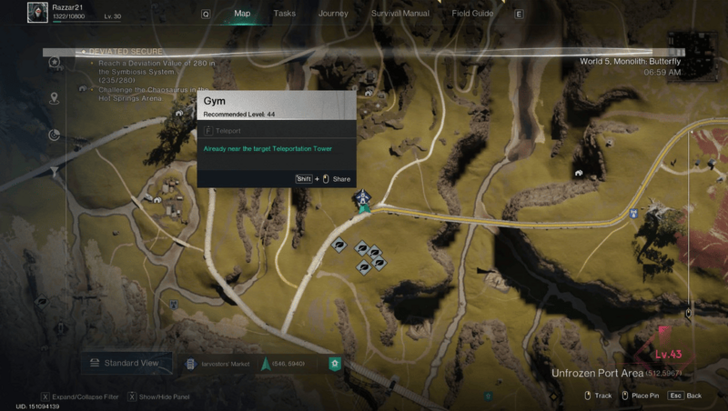
Hatter Lv. 44
| Map View | World View | ||||
|---|---|---|---|---|---|
 |
 |
||||
| Leader Deviations | |||||
|
Snow Globe
(Lv. 46, B Rank) |
Ice Pot
(Lv. 46, A Rank) |
Rain Man
(Lv. 46, A Rank) |
|||
| Recommended Deviations | |||||
|
Atomic Snail
(Lv. 50) |
Electric Eel
(Lv. 50) |
Polar Jelly
(Lv. 50) |
|||
How to Beat Hatter
Hatter's fight is where it gets spicy: Snow Globe and Rain Man dish out heavy DPS while Ice Pot messes with targeting by provoking. Bring a hard-hitting DPS core (plus one tank/support if you need sustain).
Burst Snow Globe first for safety (its AoE), then cut down Rain Man, and finish Ice Pot.
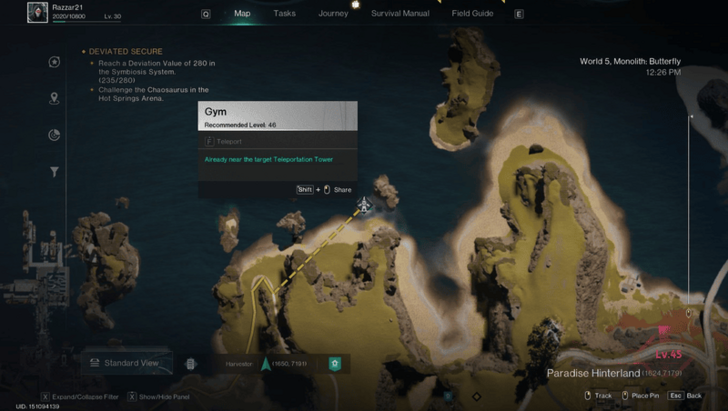
Lynn Lv. 46
| Map View | World View | ||||
|---|---|---|---|---|---|
 |
 |
||||
| Leader Deviations | |||||
|
Snow Globe
(Lv. 48, B Rank) |
Ice Pot
(Lv. 48, A Rank) |
Rain Man
(Lv. 48, A Rank) |
|||
| Recommended Deviations | |||||
|
Ice Pot
(Lv. 50) |
Snow Globe
(Lv. 50) |
Polar Jelly
(Lv. 50) |
|||
How to Beat Lynn
Lynn's battle mirrors Hatter's but at a much higher level. It’s one of the toughest fights yet, so make sure your deviations are around level 50 before challenging her. Focus on Snow Globe → Rain Man → Ice Pot in that order, and rely on strong DPS with solid support to survive her overwhelming damage output.
Gym Battles Tips and Tricks
Challenge Gyms at a Higher Level
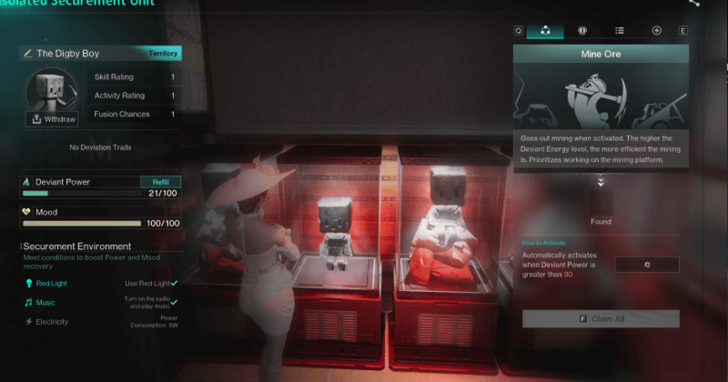
Make sure your team is strong before taking on Gym Leaders. You can either capture higher-level deviations or level up your squad. An easy way to farm experience is by capturing plenty of Digby Boys and placing them in the Isolated Securement Unit, as they’ll generate Exp Aggregators, which you can then use to instantly level up your deviations.
How to Level Up Deviations Fast
Make Sure Your Deviations Synergize
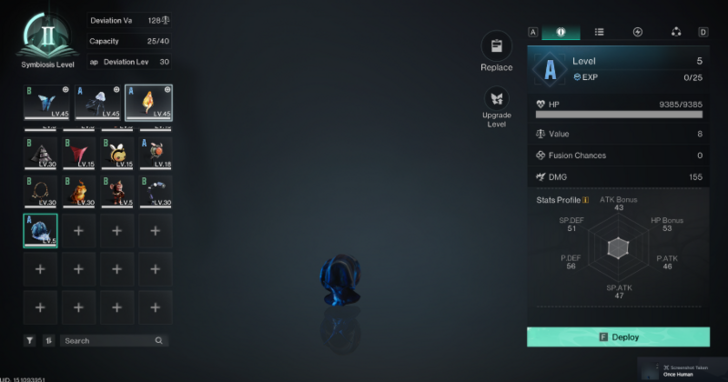
Your Deviations’ ultimates (Psi-Skills) win or lose fights. Pick Deviations whose techniques and Psi-Skills set each other up, so your biggest plays land when they matter.
For instance, pairing Atomic Snail with heavy hitters like Electric Eel or Polar Jelly lets them unleash their Psi-Skills more often, turning your team into a nonstop damage machine.
Manually Activate Your Psi-Skills
Don’t leave everything to auto-battle - timing is everything. Manually trigger your deviations' Psi-Skills when they’ll have the most impact. Smart activation can swing a fight in your favor far more than passive play ever will.
Target the Biggest Threats With Your Deviations
Use the ping button to direct your deviations toward the most dangerous enemy first, making it easier to take down priority targets before they overwhelm your team. Decide whether to take out healers, the squishiest enemies, or the highest-damage deviations first.
How to Control Your Deviations
Gym Battle Rewards
List of Rewards
| Gym Battle Rewards | |
|---|---|
 Skill Mutagen Skill Mutagen |
A datachip inscribed with specific Technique. Deviations may learn from it through fusion. |
 Energy Links Energy Links |
Use to buy common items and resources. |
 Combat Memory I, II, or III Combat Memory I, II, or III |
Can be used at the Supplies Workbench to craft EXP Aggregators |
 Weapon Blueprints (Uncommon)
 |
Special recipes you need in order to craft and upgrade weapons |
Gym rewards are randomized. Most will grant useful resources like Energy Links, Mutagens, or Combat Memory, while a select few offer the rarer prize of Weapon Blueprints.
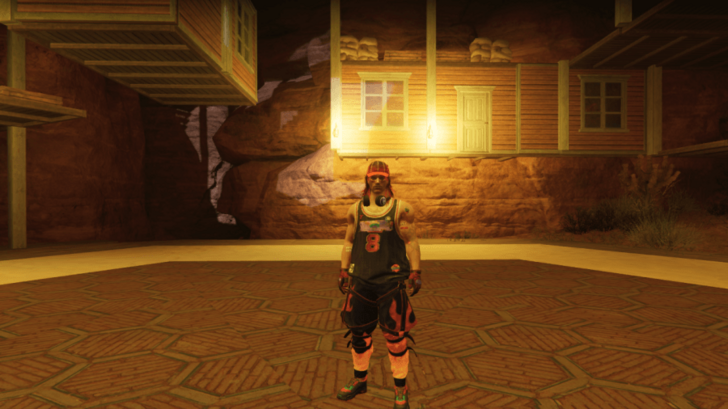
What are Gyms?
Fight Gym Leaders to a Deviation Battle
In Deviation: Survive, Collect, Preserve Scenario, Gyms are special arenas where you face off against powerful Gym Leaders in full-on deviation battles.
Defeating a Gym Leader not only tests your strength but also grants exclusive rewards, like rare Weapon and Armor Blueprints that are much harder to obtain in this scenario than in others.
Ask About Specific Deviation Location
Don't forget to talk to the Gym Leaders about Deviations - they often drop hints about where certain deviations can be found. This makes it easier to track down stronger and rarer deviations to strengthen your team faster.
Once Human Related Guides

Deviation SCP Guides
Comment
Author

All Gym Locations and How to Beat
Rankings
- We could not find the message board you were looking for.
Gaming News


Popular Games

Genshin Impact Walkthrough & Guides Wiki
Umamusume: Pretty Derby Walkthrough & Guides Wiki
Pokemon Pokopia Walkthrough & Guides Wiki
Honkai: Star Rail Walkthrough & Guides Wiki
Monster Hunter Stories 3: Twisted Reflection Walkthrough & Guides Wiki
Arknights: Endfield Walkthrough & Guides Wiki
Wuthering Waves Walkthrough & Guides Wiki
Zenless Zone Zero Walkthrough & Guides Wiki
Pokemon TCG Pocket (PTCGP) Strategies & Guides Wiki
Monster Hunter Wilds Walkthrough & Guides Wiki


Recommended Games
Fire Emblem Heroes (FEH) Walkthrough & Guides Wiki
Diablo 4: Vessel of Hatred Walkthrough & Guides Wiki
Cyberpunk 2077: Ultimate Edition Walkthrough & Guides Wiki
Yu-Gi-Oh! Master Duel Walkthrough & Guides Wiki
Super Smash Bros. Ultimate Walkthrough & Guides Wiki
Pokemon Brilliant Diamond and Shining Pearl (BDSP) Walkthrough & Guides Wiki
Elden Ring Shadow of the Erdtree Walkthrough & Guides Wiki
Monster Hunter World Walkthrough & Guides Wiki
The Legend of Zelda: Tears of the Kingdom Walkthrough & Guides Wiki
Persona 3 Reload Walkthrough & Guides Wiki


All rights reserved
Privacy Policy, Terms of Use 2024 NetEase, Inc.All Rights Reserved
The copyrights of videos of games used in our content and other intellectual property rights belong to the provider of the game.
The contents we provide on this site were created personally by members of the Game8 editorial department.
We refuse the right to reuse or repost content taken without our permission such as data or images to other sites.