Cradle Override Guide
As of December 2025, Game8 has ended coverage of Once Human. Thank you very much for your understanding and we hope you continue to enjoy Game8's guides.
Cradle Overrides in Once Human let you deck out your character with powerful passive buffs that elevate their abilities to new heights. See how to unlock the cradle, how to unlock cradle nodes, the different cradle overrides, and what cradle overrides are in this guide.
List of Contents
How to Unlock the Cradle
Follow the Main Quest
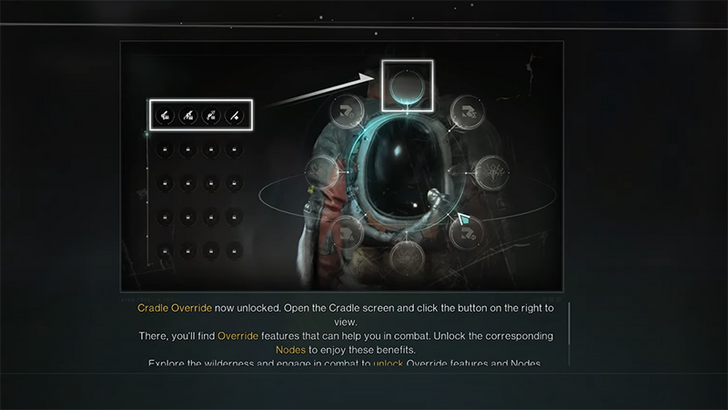
Unlocking the Cradle is straightforward if you stick to the main questline. Progress through the story until you reach Meyer's Market in Broken Delta during Murmurs in the Forest task. There, you will have a chat with Maxie. After your conversation, the Cradle feature will be unlocked, opening up a world of powerful passive buffs and character enhancements.
How to Unlock Cradle Nodes
Defeat Bosses in Monoliths
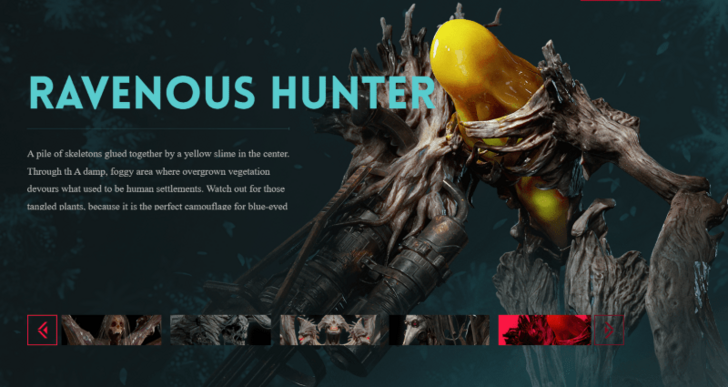
| Boss | Location |
|---|---|
| Ravenous Hunter | Monolith of Greed in Dayton Wetlands |
| Treant | Gaia Cliff Monolith in Broken Delta |
| Arachsiam | Mirage Monolith in Iron River |
| Shadow Hound | Monolith of Thirst in Chalk Peak |
To equip Cradle Overrides, you need to unlock Cradle Nodes. These nodes are your special slots for placing Overrides, with a total of 8 nodes to fill with powerful passives.
You start with just one node when you first unlock the Cradle, but you can gain more by defeating Bosses (or Great Ones) in Monoliths. Keep pushing through the main quests, and you will find yourself taking on these formidable foes to expand your Cradle's potential. Each boss you defeat will unlock you a single node in your cradle.
Clear Securement Silos
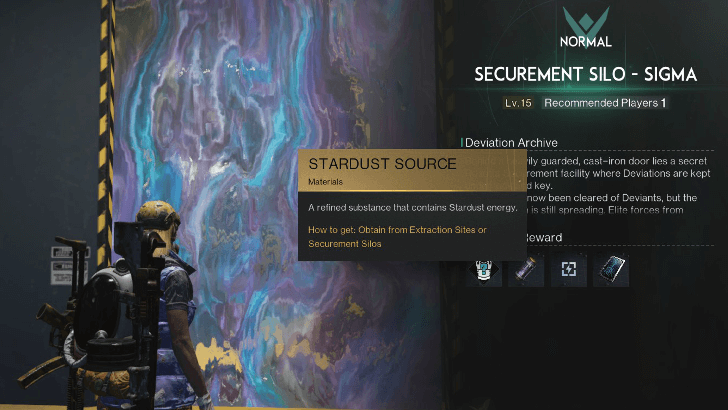
| Silo Name | Location | Recommended Level |
|---|---|---|
| Securement Silo - Sigma | South of Eastern Railway Junction in Broken Delta | 15 |
| Securement Silo - Phi | East of Greywater Industrial Zone in Iron River | 25 |
| Securement Silo - Alpha | Within Alpha Institute in Chalk Peak | 35 |
| Securement Silo - Theta | North of Blackfell Oil Fields within Iron Sands | 45 |
You can also unlock Cradle Nodes by clearing Securement Silos. These silos are essentially dungeons brimming with challenges—and danger. Packed with formidable Rosetta units, these areas require strategy and skill to navigate. Conquer the silos, and you will unlock Cradle Nodes to boost your Meta's burgeoning power.
Cradle Overrides
| Choose Your Overrides | |||||||||||
|---|---|---|---|---|---|---|---|---|---|---|---|
| Season Start Overrides | Level 10 or Phase 2 | ||||||||||
| Level 20 or Phase 2 | Level 30 or Phase 3 | Level 40 or Phase 4 | |||||||||
Season Start Overrides
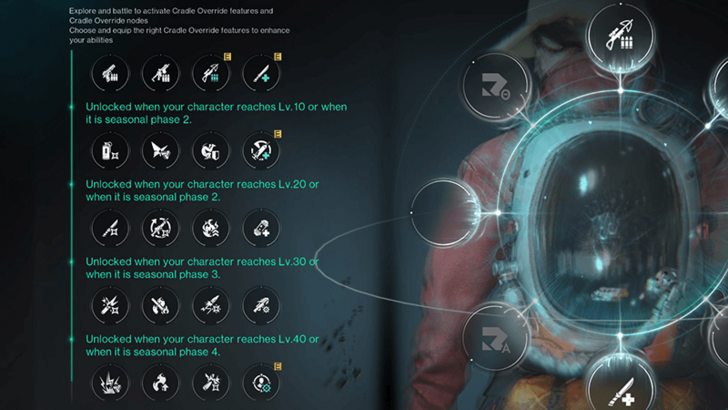
| Override | Effects |
|---|---|
| Handgun Enhancement | DMG +20% when holding pistols or shotguns. Reload 1 ammo from reserve upon defeating an enemy. |
| Automatic Weapon Enhancement | DMG +20% when holding SMGs, rifles, or LMGs. Reload 10% of magazine capacity from reserve upon defeating an enemy. |
| Long-Range Enhancement | DMG +20% when holding sniper rifles or crossbows. 30% chance to automatically reload one bullet from the backpack upon defeating a target. |
| Melee Enhancement | DMG +20% when holding melee weapons. Recover 20% of expended Stamina upon defeating a target with a melee weapon. Can trigger once every 3s. |
These overrides make their debut at the start of each season, offering a range of initial buffs tailored to the weapon you choose. They are the perfect way to give your gear a fresh boost and start the season with a bang!
Level 10 or Phase 2 Overrides
| Override | Effects |
|---|---|
| Master Tactician | After using a tactical item, DMG against the Great Ones (bosses) +25% for 15s. |
| Deviation Master | While a Deviation is present, DMG against the Great Ones (bosses) and elites +50%. |
| Agility | After rolling, Weapon DMG Reduction +15% and Status DMG Reduction +15% for 4s. |
| Rapid Aid | Healing medicine cooldown time -30%, healing effects +15%. |
These overrides add a splash of tactical flair to your gameplay, giving you buffs tailored for specific situations. From extra damage against bosses to quicker healing, these perks let you adapt and conquer with style!
Level 20 or Phase 2 Overrides
| Override | Effects |
|---|---|
| Brawl Boost | Damage from Metas -20%, effect halved after dealing damage to a Meta but reset once out of combat. |
| Tactical Combo | Weapon DMG +25% for 4s after switching weapons or reloading. |
| Status Enhancement | After hitting a weakspot, Status DMG +25% for 3s. |
| Sprint | Movement Speed +5%, Running Stamina Cost -15%. |
These overrides pack a punch with perks like reduced damage from human attacks, bonus weapon damage after a quick swap, enhanced status effects, and a speed boost when you sprint.
Level 30 or Phase 3 Overrides
| Override | Effects |
|---|---|
| First Round Blast | After reloading, Instant DMG (Power Surge and Unstable Bomber) +25% for 4s. |
| Sustained Suppression | Killing an enemy with Continuous DMG (such as Burn or Frost Vortex) increases Continuous DMG by +20% for 10s, stackable up to 3 times. |
| Deadly Combo | After hitting a weakspot with bullet effects (Bounce and Shrapnel), bullet effect DMG +25% for 3s. |
| Steady Hand | While in Fortress Warfare or Fast Gunner status, Weakspot DMG +40%, Weakspot DMG to the Bull's Eye +20%. |
These overrides add a tactical edge to your weapon effects, boosting your damage and making every shot count. Equip them to enhance your firepower and keep your enemies on their toes!
Level 40 or Phase 4 Overrides
| Override | Effects |
|---|---|
| Transient Impact | After triggering a Power Surge, Power Surge DMG +25% for 3s. |
| Prairie Fire Inferno | Based on the number of nearby units affected by Burn, increases Blaze DMG by +15% per unit, up to a maximum of +60%. |
| Bullet Hunt | After killing a target with ranged weapons, Shrapnel DMG +35% for 15s. |
| Bounty Hunter | After defeating a unit you marked, Weapon DMG +25%, Weakspot DMG +35%, lasting for 15s. |
These overrides pack the same punch as the previous ones, amping up your weapon effects with boosts to damage and performance.
What Are Cradle Overrides?
Passive Buffs
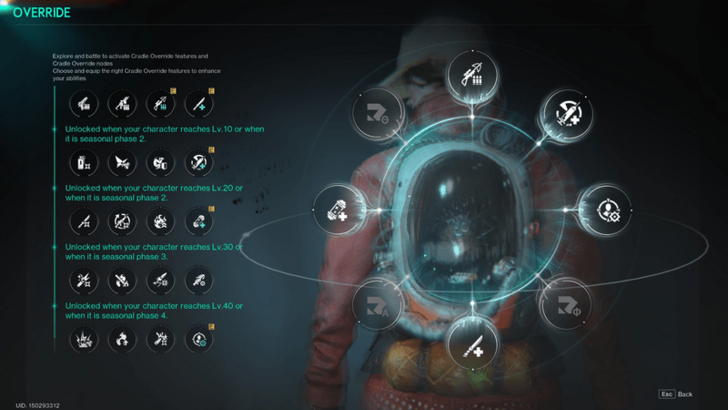
Cradle Overrides are powerful passive buffs that amplify your Meta's abilities and weapon effects in Once Human. These buffs can significantly boost damage, improve status effects, and enhance your overall performance in combat.
To equip these overrides, you need to unlock nodes, which act as slots for your buffs. Each Cradle Node you unlock allows you to slot in a different override, enabling you to customize your character's strengths and adapt to various challenges.
Once Human Related Guides

Tips and Tricks: Beginner's Guide
All Tips and Tricks
Comment
Author
Cradle Override Guide
improvement survey
03/2026
improving Game8's site?

Your answers will help us to improve our website.
Note: Please be sure not to enter any kind of personal information into your response.

We hope you continue to make use of Game8.
Rankings
- We could not find the message board you were looking for.
Gaming News
Popular Games

Genshin Impact Walkthrough & Guides Wiki

Honkai: Star Rail Walkthrough & Guides Wiki

Umamusume: Pretty Derby Walkthrough & Guides Wiki

Pokemon Pokopia Walkthrough & Guides Wiki

Resident Evil Requiem (RE9) Walkthrough & Guides Wiki

Monster Hunter Wilds Walkthrough & Guides Wiki

Wuthering Waves Walkthrough & Guides Wiki

Arknights: Endfield Walkthrough & Guides Wiki

Pokemon FireRed and LeafGreen (FRLG) Walkthrough & Guides Wiki

Pokemon TCG Pocket (PTCGP) Strategies & Guides Wiki
Recommended Games

Diablo 4: Vessel of Hatred Walkthrough & Guides Wiki

Fire Emblem Heroes (FEH) Walkthrough & Guides Wiki

Yu-Gi-Oh! Master Duel Walkthrough & Guides Wiki

Super Smash Bros. Ultimate Walkthrough & Guides Wiki

Pokemon Brilliant Diamond and Shining Pearl (BDSP) Walkthrough & Guides Wiki

Elden Ring Shadow of the Erdtree Walkthrough & Guides Wiki

Monster Hunter World Walkthrough & Guides Wiki

The Legend of Zelda: Tears of the Kingdom Walkthrough & Guides Wiki

Persona 3 Reload Walkthrough & Guides Wiki

Cyberpunk 2077: Ultimate Edition Walkthrough & Guides Wiki
All rights reserved
Privacy Policy, Terms of Use 2024 NetEase, Inc.All Rights Reserved
The copyrights of videos of games used in our content and other intellectual property rights belong to the provider of the game.
The contents we provide on this site were created personally by members of the Game8 editorial department.
We refuse the right to reuse or repost content taken without our permission such as data or images to other sites.


![Everwind Review [Early Access] | The Shaky First Step to A Very Long Journey](https://img.game8.co/4440226/ab079b1153298a042633dd1ef51e878e.png/thumb)

![Monster Hunter Stories 3 Review [First Impressions] | Simply Rejuvenating](https://img.game8.co/4438641/2a31b7702bd70e78ec8efd24661dacda.jpeg/thumb)


