Securement Silo EX1 Walkthrough and Location
As of December 2025, Game8 has ended coverage of Once Human. Thank you very much for your understanding and we hope you continue to enjoy Game8's guides.
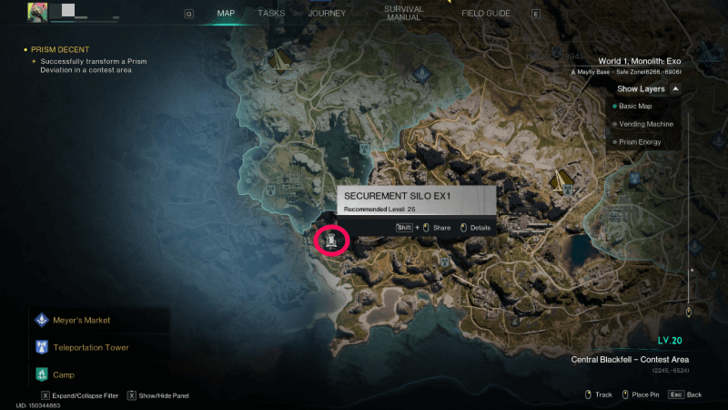
Securement Silo EX1 in Once Human can be found in the southern Chalk Peak region. Read on to learn more about Securement Silo EX1 including its location, recommended level, secret room or seepage zone, as well as a walkthrough, and the rewards you earn for completing it.
List of Contents
Securement Silo EX1 Location and Recommended Level
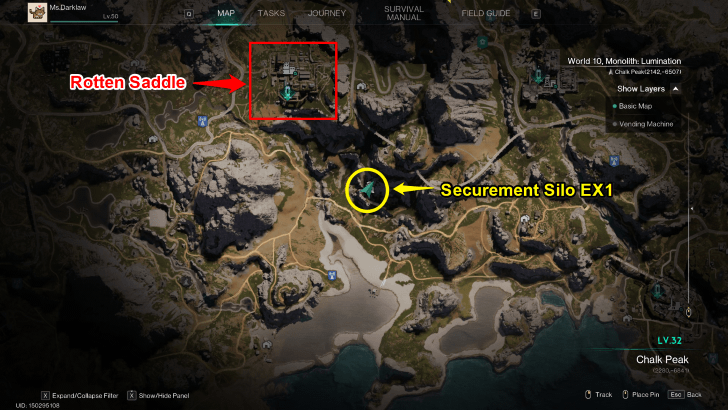
Located in the Chalk Peak Region
| Manibus / Evolution's Call | Prismverse's Clash |
|---|---|
 |
 |
| Recommended Level | |
| ・Normal: Lv. 35 (1 Player) ・Hard: Lv. 50 (3 Players) ・Pro: Lv. 60 (4 Players) |
TBD |
Securement Silo EX1 can be found in the southern Chalk Peak region near the coast and Rotten Saddle.
Before you take on the dungeon, make sure you're at the appropriate level to avoid dying easily.
Securement Silo EX1 Walkthrough
Securement Silo EX1 Objectives
| Jump to a Section |
|---|
|
|
1. Go to the Underground Lab

Upon entering the silo, make your way to the elevator by heading to the room on the right. There will be a few enemies in this area but they can be cleared quick.
2. Clear Out the Lab Monsters

Exit the elevator and follow the hall to the lab. The lab has a lot of elite enemies as well as a miniboss in the form of Arbiter. Defeat all the enemies and Arbiter to move on to the next area.
You won't be able to leave the area as the key card needed will only drop after defeating Arbiter.
Use Tables to Keep Your Distance From the Enemies

Use tables in the lab to keep your distance from the enemies. This lets you move around and reload or heal while avoiding any damage from enemies.
3. Defeat Enemies in the First Prison Building
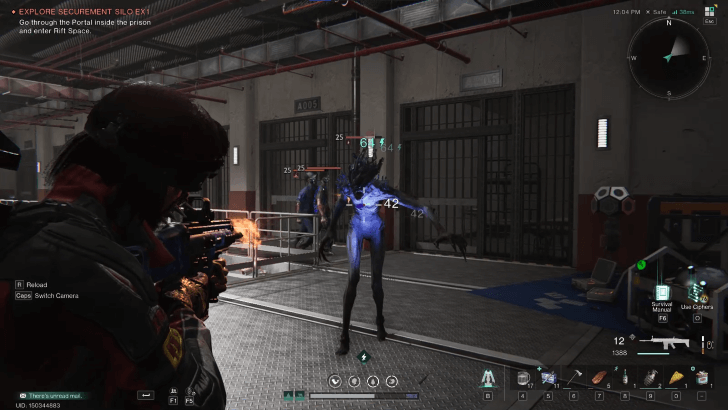
Exit the lab and follow the stairs to the prison. This area has a lot of enemies so reload and heal up before getting to the bottom of the stairs. The first prison building has a lot of enemies you need to clear before you can make your way to the second prison building.
Shoot The Tumors In The Hallway
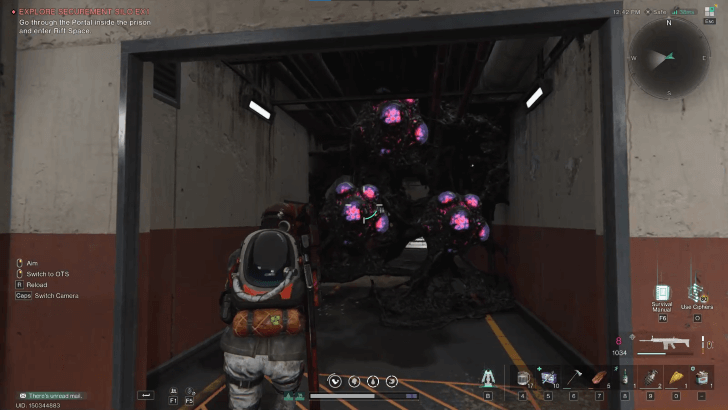
After clearing the enemies in the prison, enter the hallway in the second floor and shoot the tumors in the hallway to get to the second prison building.
4. Go Through the Portal in the Prison
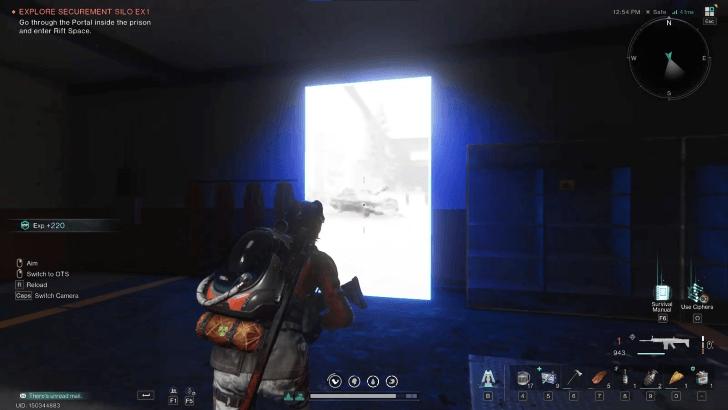
After passing through the hallway, you can completely ignore the enemies in the room, jump down and enter the portal below.
5. Stop at Red, Go at Green
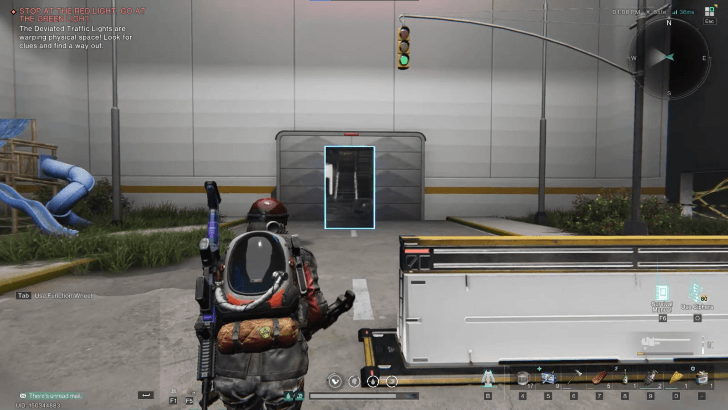
Entering the portal will bring you to a room with a deviated traffic light. When the light is red, stop and don't move as any movement will cause you to teleport back to the starting postion. Once the light turns green, make your way to the portal on the other end of the room.
Just like the previous room, you can ignore the enemies in this area and focus on the red and green light. They will always be moving to get to you even when the light is red, causing them to turn into statues.
6. Defeat the Boss Sennacherib
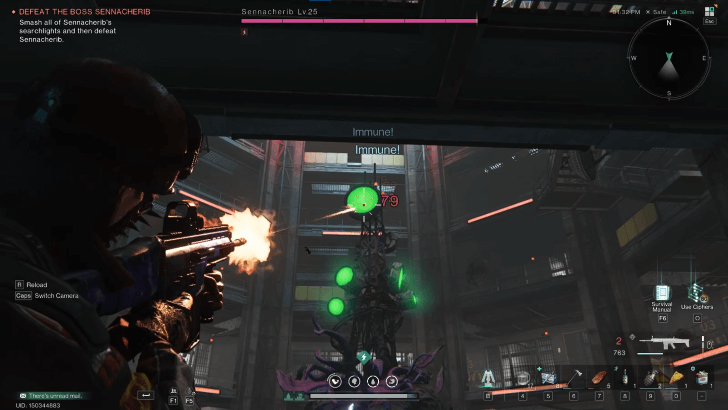
Exiting through the portal leads you to the room with the final boss of the silo: Sennacherib. To defeat it, you will need to shoot out the lights on its head until all the lights are off. Similar to the room before, move only when the lights are green as yellow or red lights will cause Sennacherib to attack you.
Use The Pillars To Avoid Its Attacks
There are multiple pillars in the area you can use to shield yourself from Sennacherib's line of sight as this not only lets you dodge its attacks, but if you get spotted while moving during a red light, the pillars will block the laser attack.
Securement Silo EX1 Secret Room (Seepage Zone)
No Secret Room or Seepage Zone
Unlike the other Securement Silos, Securement Silo EX1 has no secret room or Seepage Zone.
Securement Silo EX1 Rewards
List of Rewards
| Securement Silo EX1 Rewards |
|---|
|
・Deviants ・Shiny Deviants ・Atomic Lighter ・Polar Jelly ・Weapons / Armor ・Armor Mods (Mask Mod) ・Stardust Source ・Energy Link ・Armor Mod Parts ・Eclipse Cortex Lv. 3 (Hard and Pro Mode) |
Securement Silo EX1 Details
 |
|
| Recommended Level (Manibus and Evolution's Call) |
Normal: Lv. 35 (1 Player) Hard: Lv. 50 (3 Players) Pro: Lv. 60 (4 Players) |
|---|---|
| Recommended Level (Prismverse's Clash) |
TBD |
| Region | Chalk Peak |
| Boss | ・Sennacherib |
| Rewards | ・Mask Mods ・Stardust Source ・Energy Link ・Armor Mod Parts ・Eclipse Cortex Lv. 3 (Hard and Pro Mode) |
| Deviant | ・Polar Jelly ・Atomic Lighter |
| Secret Room / Seepage Area? | No |
Once Human Related Guides

All Securement Silos
| Securement Silos | |
|---|---|
| EX1 | PHI |
| Alpha | Sigma |
| Theta | PSI |
All Way of Winter Securement Silos
| All Securement Silo Guides in Way of Winter | |
|---|---|
| Securement Silo Delta | Securement Silo EX1 |
| Securement Silo PSI | Securement Silo 08 |
Author
Securement Silo EX1 Walkthrough and Location
improvement survey
03/2026
improving Game8's site?

Your answers will help us to improve our website.
Note: Please be sure not to enter any kind of personal information into your response.

We hope you continue to make use of Game8.
Rankings
- We could not find the message board you were looking for.
Gaming News
Popular Games

Genshin Impact Walkthrough & Guides Wiki

Honkai: Star Rail Walkthrough & Guides Wiki

Umamusume: Pretty Derby Walkthrough & Guides Wiki

Pokemon Pokopia Walkthrough & Guides Wiki

Resident Evil Requiem (RE9) Walkthrough & Guides Wiki

Monster Hunter Wilds Walkthrough & Guides Wiki

Wuthering Waves Walkthrough & Guides Wiki

Arknights: Endfield Walkthrough & Guides Wiki

Pokemon FireRed and LeafGreen (FRLG) Walkthrough & Guides Wiki

Pokemon TCG Pocket (PTCGP) Strategies & Guides Wiki
Recommended Games

Fire Emblem Heroes (FEH) Walkthrough & Guides Wiki

Diablo 4: Vessel of Hatred Walkthrough & Guides Wiki

Yu-Gi-Oh! Master Duel Walkthrough & Guides Wiki

Super Smash Bros. Ultimate Walkthrough & Guides Wiki

Pokemon Brilliant Diamond and Shining Pearl (BDSP) Walkthrough & Guides Wiki

Elden Ring Shadow of the Erdtree Walkthrough & Guides Wiki

Monster Hunter World Walkthrough & Guides Wiki

The Legend of Zelda: Tears of the Kingdom Walkthrough & Guides Wiki

Persona 3 Reload Walkthrough & Guides Wiki

Cyberpunk 2077: Ultimate Edition Walkthrough & Guides Wiki
All rights reserved
Privacy Policy, Terms of Use 2024 NetEase, Inc.All Rights Reserved
The copyrights of videos of games used in our content and other intellectual property rights belong to the provider of the game.
The contents we provide on this site were created personally by members of the Game8 editorial department.
We refuse the right to reuse or repost content taken without our permission such as data or images to other sites.


![Slay the Spire 2 Review [Early Access] | Still the Deckbuilder to Beat](https://img.game8.co/4433115/44e19e1fb0b4755466b9e516ec7ffb1e.png/thumb)

![Resident Evil Village Review [Switch 2] | Almost Flawless Port](https://img.game8.co/4432790/e1859f64830960ce4248d898f8cd38d9.jpeg/thumb)


There is a room to the left of the medical ward area with a weapon crate that you can open with the key you get from the arbiter.