How to Find and Activate the Adamantine Forge
★ All Updates for Patch 5
☆ Beginner Guides for All Starter Players
★ Simple Character Creation Guide for beginners
☆ A Full Guide to Multiclassing
★ All Side Quests and Event Points
☆ All Races and Subraces
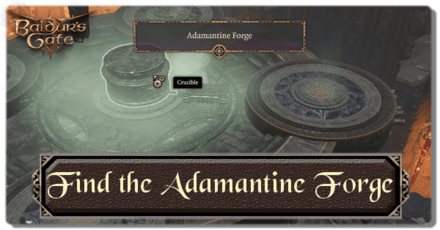
The Adamantine Forge is a location in Baldur's Gate 3 (BG3) where players can forge Adamantine equipment. See how to find the Location of the Adamantine Forge, how to use it, and where to get all Moulds and Mithal Ores used to craft the Adamantine Equipment!
| Adamantine Forge Guides | ||
|---|---|---|
| How to Get to the Grymforge | ||
| Best Adamantine Item | Adamantine Forge Walkthrough | How to Beat Grym (Adamantine Forge) |
List of Contents
How to Find the Adamantine Forge
Take a Shortcut with Misty Step
Southeast from where True Soul Nere was trapped, you can find a ledge where you can use Misty Step to get across the lava and onto a cliff. Activate the waypoint and have your other members warp to convene.
If no one in your party has Misty Step learned, you can kill True Soul Nere to get his Disintegrating Night Walkers which grants the ability to use Misty Step.
Deliver Nere's Head: How to Beat Nere
Classes That Learn Misty Step
Below is a list of classes that learn Misty Step naturally by gaining levels.
- Sorcerer (Level 3)
- Bard (Level 3)
- Wizards (Level 3)
- Paladins (Level 5 Oath of the Ancients & Oath of Vengeance)
- Eldritch Knight Subclass (Level 7)
- Arcane Trickster (Level 7)
Misty Step Spell Guide and Effects
Take the Path Behind the Rubble
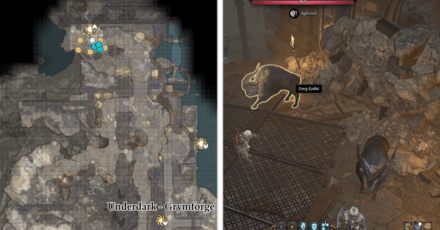
If you don't mind taking a detour to do some exploration, there is another way to the Adamantine Forge. Head to the northern area of the Grymforge until you see some Duergar and a couple of Deep Rothe.
Use Animal Handling on a Deep Rothe
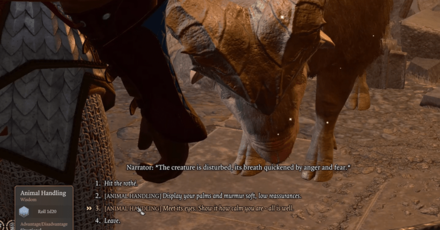
If you succeed the Animal Handling check, the Rothes will destroy the rubble. However, the Duergar aren't willing to share the Adamantine with others, so prepare to fight. The two Deep Rothes will help you in this encounter if you showed them kindness.
Use Runepowder Vial from Philomeen
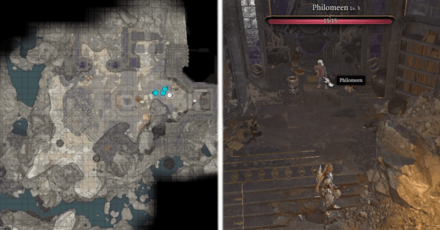
If you hit the Deep Rothes, they will retaliate and the Duergar will help you put them down. Without the Deep Rothes, you'll have to find another way to clear the rubble like using a Runepowder Vial from Philomeen.
Use Explosives to Secure a Path
If you don't want to seek out Philomeen for the Runepowder Vial, you can use two Smokepowder Bombs instead if you have them on hand. Just throw two of them directly at the rubble to clear the rubble.
Smokepowder Bomb Effects and How to Get
Follow the Path Inside
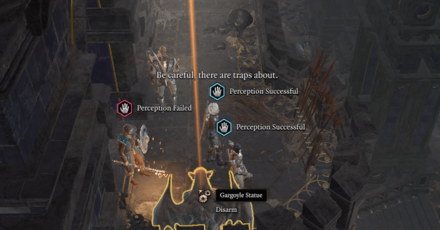
After clearing the rubble, head inside and follow the linear path. Tread carefully as you will encounter some traps along the way. Successful Perception checks will reveal them.
Descend the Ladder
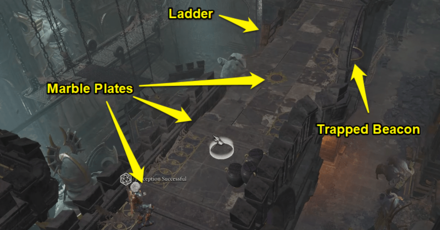
As you head deeper, you will encounter some marble plates on the bridge. Disarm or jump over the marble plates then descend the ladder on the East side of the bridge to proceed to the Adamantine Forge.
At the end of the bridge are a few more traps that spew fire. There is a chest present that contains The Protecty Sparkswall. You can use Misty Step to get past the gate and pull the lever to disable the traps. There is another ladder nearby which you can climb down to open a chest.
How to Get the Protecty Sparkswall Armor
Use the Levers and Platforms
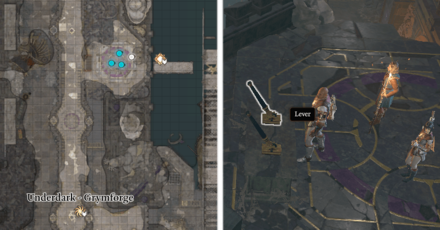
After descending the ladder, you'll arrive at a pair of levers and a moving platform. You'll need to have one party member stay here to pull on the levers, and two members to get on the platform, preferably those with high Strength as they will be doing some jumping.
Don't worry about choosing who will go because there are no enemies here, just some platforming.
| # | How to Proceed Using the Platforms |
|---|---|
| 1 |
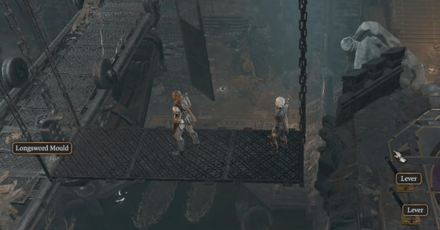 ・Have two members hop on the platform. ・Switch the character who will pull the levers. ・Facing the levers, pull the right lever. |
| 2 |
・Split up your characters on the platform. ・Have one jump onto the bridge in the middle. ・Pick up the Longsword Mould. ・Have the other jump onto the castle wall to the East. |
| 3 |
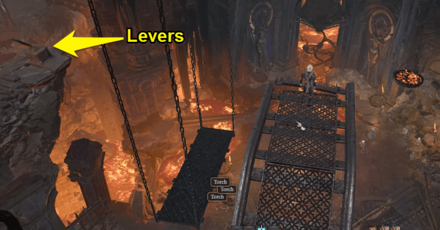 ・Get your character on the bridge to head South until the end. ・You will see another platform and set of levers. ・Have this character wait here. ・Swap back to your other character. |
| 4 |
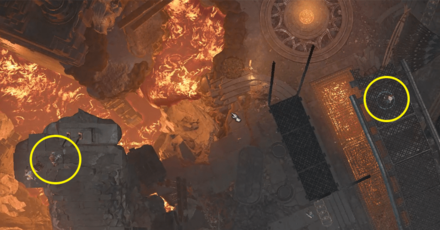 ・With the other character, head South to reach the other pair of levers. ・Loot the skeleton nearby for the Scimitar Mold. ・Facing the levers, pull the right lever to raise the platform. ・Get your character who is waiting to hop onto the platform. ・Swap characters again then pull the left lever to move the platform forward. |
| 5 |
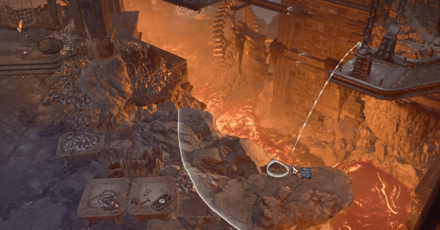 ・Once the platform has crossed, pull the right lever again to lower it. ・Proceed and jump on the cliff. ・Activate the waypoint nearby and have your other members warp here. |
Proceed to the Adamantine Forge
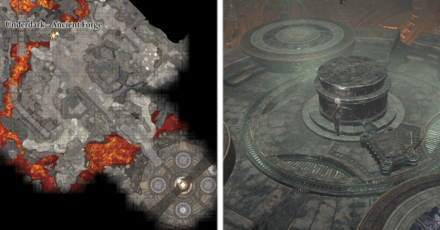
With the platforming finished, you are free to explore and loot the area. There is only one way to go here and it leads to the Adamantine Forge.
You will encounter some Animated Armor as you head deeper so be prepared for a fight. Look out for the Scale Mail Mould on the ground here. Once you've cleared them, the Adamantine Forge is just a few steps away.
How to Use the Adamantine Forge
Defeat Grym then Use the Mithal Ores and Moulds
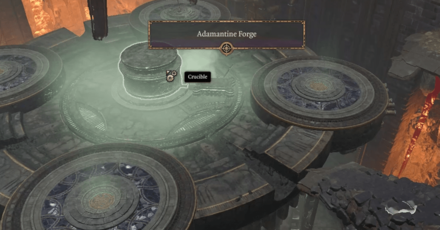
To use the Adamantine Forge, you'll need to have Mithral Ore and Moulds. Insert your Mithral Ore in the Crucible at the center, then place a Mould in the Mould Chamber.
Pull the lever then get ready to fight Grym. You'll have to defeat this boss to claim your forged equipment.
List of All Adamantine Items
All Adamantine Items
| All Adamantine Items | ||
|---|---|---|
| Adamantine Mace | Adamantine Longsword | Adamantine Scimitar |
| Adamantine Scale Mail | Adamantine Splint Armour | Adamantine Shield |
How to Get Mithral Ores
Near the Stairs of the Adamantine Forge
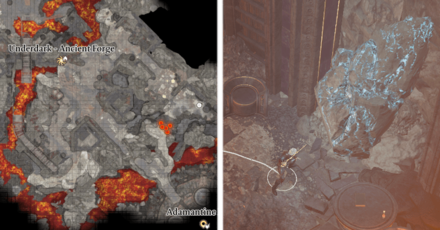
Go down the stairs that lead to the Adamantine Forge. Look towards the northeast and you'll see a Mithral Vein. Make your way down towards it but prepare to be ambushed by some enemies.
You will encounter five Magma Mephits and they are resistant to fire, cold, and poison. They explode on death so try to not let them get close. They can also disarm so if you have an Eldritch Knight on your party, use Weapon Bond before combat.
Eldritch Knight Subclass Guide and Build
Southwest of the Ancient Forge Waypoint
 Map Location |
 World Location |
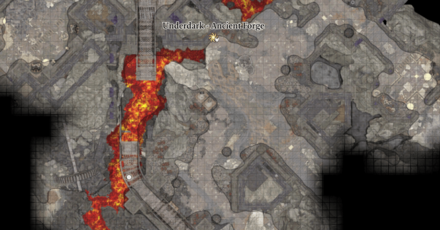
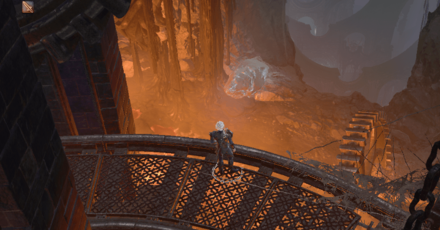
Head southwest from the Ancient Forge Waypoint. Get up the platform and you'll see another Mithral Vein. Use Feather Fall or other mobility spells to safely get across. You can make your way back up by teleporting to the Ancient Forge Sigil from your map.
Feather Fall Spell Guide and Effects
How to Get Moulds
Longsword Mould Location
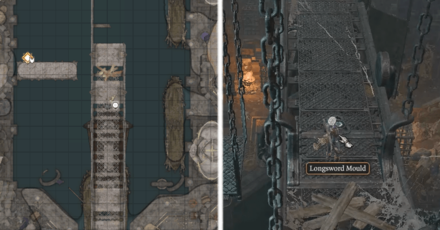
The Longsword Mould can be found right after you get on the hanging bridge near the first pair of levers.
Shield Mould Location
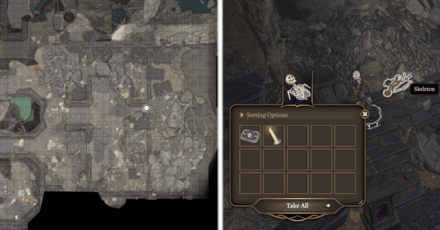
The Shield Mould can be found on a skeleton at the end of the Dormitory. You can enter the Dormitory by lockpicking the Double Iron Doors after jumping off the first moving platform.
Scimitar Mould Location
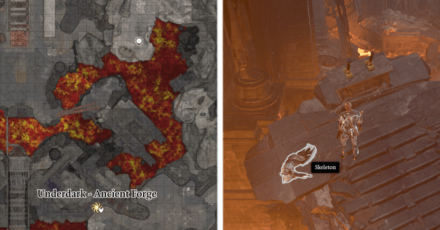
The Scimitar Mould is found on a skeleton just beside the second pair of levers, past the Dormitory.
Mace Mould Location

The Mace mould can be found on a table near the Ancient Forge waypoint. The table is also near the cliff you jump onto if you used the platforms to get to the Adamantine Forge.
Splint Mould Location
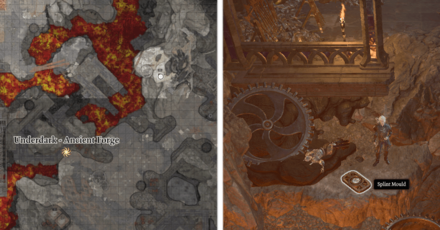
The Splint Mould is found beside a skeleton lying beside a big cog, near the Ancient Forge waypoint.
Scale Mail Mould Location
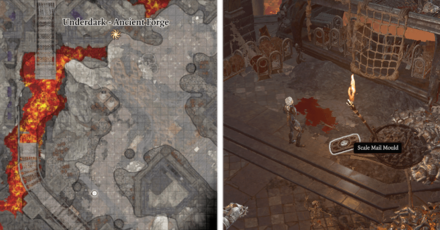
The Scale Mail Mould is found on the ground where you fight a group of Animated Armor on the way to the Adamantine Forge.
Find the Adamantine Forge Rewards
Adamantine Equipment
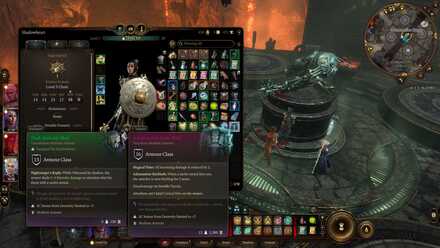
Adamantine equipment are some of the notable rewards you can get from this side quest. You'll need to craft them and fight Grym, but they are worth the time and effort.
The Protecty Sparkswall
 Map Location |
 World Location |
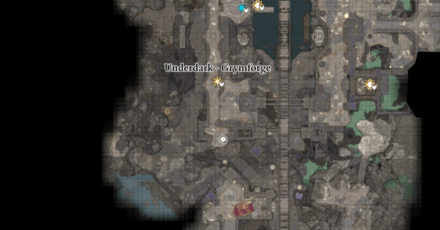
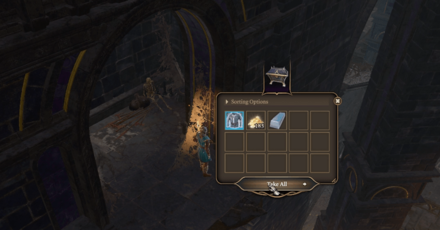
Another notable reward you can is The Protecty Sparkswall which is suitable for casters. Simply activate turn-based mode, use Misty Step to get through the bars, then pull the lever to disable the traps. Near the cliff behind the gargoyle is a chest containt The Protecty Sparkswall.
Baldur's Gate 3 Related Guides

Prologue Side Quests
| All Prologue Side Quests | |
|---|---|
| How to Free the Intellect Devourer | How to Free Shadowheart |
Act 1 Side Quests
Druid's Grove Quests
The Risen Road Quests
| The Risen Road Quests | |
|---|---|
| Find the Missing Shipment | How to Rescue the Grand Duke |
| Rescue the Trapped Man | How to Free Oskar Fevras |
Blighted Village Quests
Goblin Camp Quests
| Goblin Camp Quests | |
|---|---|
| How to Get Volo's Ersatz Eye | Defiled Temple Puzzle |
| Find the Nightsong | Ask the Goblin Priestess for Help |
Nautiloid Crash Region Quests
Underdark Quests
| Underdark Quests | ||
|---|---|---|
| Arcane Tower Guide | Defeat the Duergar Intruders | Save the Grymforge Gnomes |
| Find the Adamantine Forge | Deliver Nere's Head | How to Find the Mushroom Picker |
| How to Cure the Poisoned Gnome | Help the Cursed Monk | Omeluum Location |
Mountain Pass Quests
| Mountain Pass Quests | ||
|---|---|---|
| Steal a Githyanki Egg | How to Beat Gremishkas | How to Access Guardian of Faith Room |
| Dawnmaster Puzzle Guide | Where to Find the Githyanki Creche | - |
This section is currently under construction. Check back later for updates!
Act 2 Side Quests
Last Light Inn Quests
Gauntlet of Shar Quests
| Gauntlet of Shar Quests | |
|---|---|
| Gauntlet of Shar: All Trials and Umbral Gems | Kill Raphael's Old Enemy |
Mind Flayer Colony Quests
| Mind Flayer Colony Quests |
|---|
| How to Solve the Necrotic Laboratory |
Act 3 Side Quests
Rivington Quests
| Rivington Quests | ||
|---|---|---|
| Investigate the Suspicious Toys | Solve the Open Hand Temple Murders | Find the Missing Letters |
| How to Get to Wyrm's Rock Fortress | How to Find Dribbles the Clown | - |
Lower City Quests
| Lower City Quests | ||
|---|---|---|
| How to Get to the House of Hope | How to Get to Cazador's Palace | Rescue Orin's Victim |
| Aid the Underduke | How to Get to the House of Grief | Investigate the Murders |
Comment
Author
How to Find and Activate the Adamantine Forge
Rankings
Gaming News
Popular Games

Genshin Impact Walkthrough & Guides Wiki

Honkai: Star Rail Walkthrough & Guides Wiki

Arknights: Endfield Walkthrough & Guides Wiki

Umamusume: Pretty Derby Walkthrough & Guides Wiki

Wuthering Waves Walkthrough & Guides Wiki

Pokemon TCG Pocket (PTCGP) Strategies & Guides Wiki

Abyss Walkthrough & Guides Wiki

Zenless Zone Zero Walkthrough & Guides Wiki

Digimon Story: Time Stranger Walkthrough & Guides Wiki

Clair Obscur: Expedition 33 Walkthrough & Guides Wiki
Recommended Games

Fire Emblem Heroes (FEH) Walkthrough & Guides Wiki

Pokemon Brilliant Diamond and Shining Pearl (BDSP) Walkthrough & Guides Wiki

Diablo 4: Vessel of Hatred Walkthrough & Guides Wiki

Super Smash Bros. Ultimate Walkthrough & Guides Wiki

Yu-Gi-Oh! Master Duel Walkthrough & Guides Wiki

Elden Ring Shadow of the Erdtree Walkthrough & Guides Wiki

Monster Hunter World Walkthrough & Guides Wiki

The Legend of Zelda: Tears of the Kingdom Walkthrough & Guides Wiki

Persona 3 Reload Walkthrough & Guides Wiki

Cyberpunk 2077: Ultimate Edition Walkthrough & Guides Wiki
All rights reserved
© 2023 Larian Studios. All rights reserved. Larian Studios is a registered trademark of arrakis nv, affiliate of Larian Studios Games ltd. All company names, brand names, trademarks and logos are the property of their respective owners. © 2020 Wizards of the coast. All rights reserved. Wizards of the coast, Baldur’s Gate, Dungeons & Dragons, D&D, and their respective logos. Are registered trademarks of wizards of the coast LLC
The copyrights of videos of games used in our content and other intellectual property rights belong to the provider of the game.
The contents we provide on this site were created personally by members of the Game8 editorial department.
We refuse the right to reuse or repost content taken without our permission such as data or images to other sites.


