Steal a Githyanki Egg Side Quest: Should You Give the Egg to Esther
★ All Updates for Patch 5
☆ Beginner Guides for All Starter Players
★ Simple Character Creation Guide for beginners
☆ A Full Guide to Multiclassing
★ All Side Quests and Event Points
☆ All Races and Subraces
This is a walkthrough on stealing the Githyanki Egg at Creche Yllek in Baldur's Gate 3 (BG3). Learn about Lady Esther, how to get into Creche Yllek, how to steal the Githyanki Egg, should you give it to Esther, and all different ways to complete the quest!
List of Contents
Side Quest Details
| Journal Entry | |
|---|---|
| Steal a Githyanki Egg | |
| Recommended Level | Lv. 4 |
| Reward | 258 Gold |
| Location | |
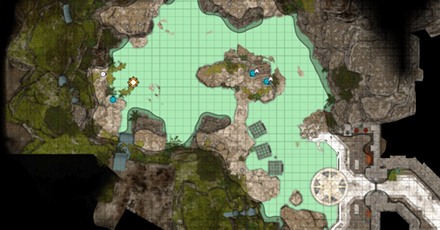
| Creche Yllek (Quest Item) X: 1276, Y: -763 |
|
 |
|
How to Steal the Githyanki Egg Quest Guide
Talk to Lady Esther in the Rosymorn Monastery
| Lady Esther Map and Location |
|---|
| Rosymorn Monastery Trail (Moutain Pass) X: -42, Y: -127 |
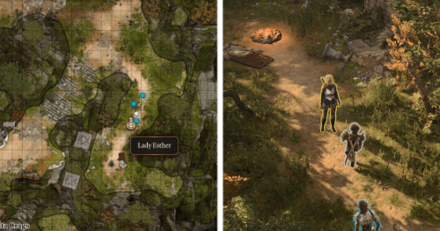 |
Before making your way to Creche Yllek to get the Githyanki Egg, talk first to Lady Esther at the Rosymorn Monastery Trails once you have entered the Mountain Pass.
You can use a Persuasion Check (DC21) when talking to Lady Esther to give you the money upfront before you go to steal the Githyanki Egg. If successful, she will give you 275 Gold.
Agree to her in stealing the Githyanki Egg to start the quest, else, you can come back later. While you are at it, you can also access her item shop, which hold some rare blue gear.
Use the Cable Car or Pass the Trail
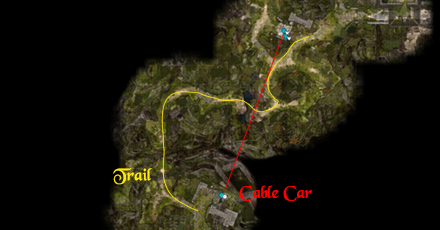
While heading towards the Rosymorn Monastery, you will encounter a cable car that you can use to travel there safely if you succeed in a Strength Check (DC12) on the Cable Car Wheel.
If you decide to go down the path instead of taking the cable car, you will have to carefully navigate around hidden Impulsion Traps. Successful Perception Checks will make it easier to spot these traps and get around them.
Head to the Monastery Entrance
| Rosymorn Monastery Entrance |
|---|
| Rosymorn Monastery X: 68, Y: 13 |
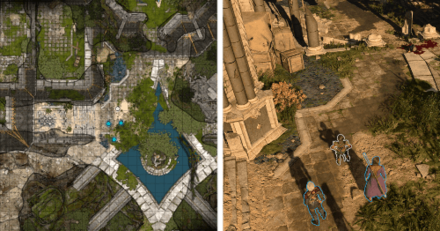 |
After passing the trail or using the cable car, proceed through the side of the monastery until you reach the entrance. A cutscene will trigger where three Halflings are being subdued by Githyanki.
After the cutscene, there are three routes you can take to entering Creche Yllek. You can either go inside the monastery through the window, use the cliffside to cross to the other side of monastery, or use the hidden passage.
How to Enter Creche Yllek
| All Creche Yllek Entrance Routes | |
|---|---|
| Main Entrance |
|
| Hidden Passage | |
| Once you are at the monastery entrance, there three ways to get into Creche Yllek. The Hidden Passage route is the quickest and easiest if you can lockpick the passage door. | |
Enter Through the Monastery
| Main Entrance Location |
|---|
| Rosymorn Monastery X: 74, Y: 87 |
 |
After reaching the end of the stairway leading to the entrance of the Monastery, check the windows at the left of the entrance and use the Jump Skill to get inside. A drunk kobold will walk into the room.
The kobold will not engage on sight due to its drunken state. Kill it quickly with a Surprise attack. Head to the next room which is full of kobolds. You can get pass all of them through stealth, or enage in battle for some extra XP.
After the battle, you are mostly safe to navigate and explore the Monastery by climbing to the second floor, clearing out the rooms, and then making it to the exit of the other side of the monastery. Find an entrance covered by wooden planks, break it, and then go down until you reach the door of the Monastery Basement.
Enter Through the Cliffside
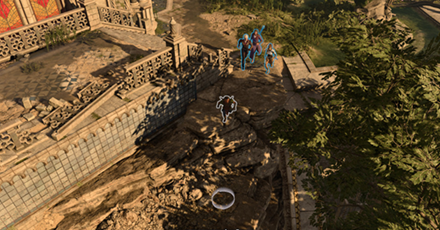
After reaching the end of the stairway leading to the entrance of the Monastery, check the side of the stairway to see a rocky path that can be traversed going down.
Cross the path up to the other side, then climb the vines up leading to a crumbled portion of the monastery. Head inside, break the entrance covered by wooden planks, and then walk through all the day way down until you reach the door to the Monastery Basement.
Enter the Creche's Hidden Passage
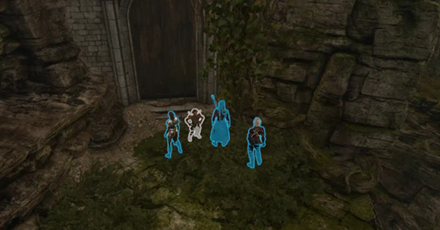
Like the Cliffside entrance route, check the side of the stairway near the monastery entrance and head down the rocky path. At the edge of the cliff, look for the knotted roots to climb down to the lower levels of the cliff.
Use your Jump skill to cross over the cliff gaps. You will find a Hidden Passage to the creche that can be lockpicked.
Once you gain access through lockpicking, you will be questioned by a Githyanki. Refer to the next section on getting past the Githyanki sentinels that you will meet either at the main entrance or the hidden passage.
How to Steal the Githyanki Egg from the Creche
| Outcomes for the Githyanki Egg |
|---|
Getting Past the Creche Guards

| NPC Dialogue | |
|---|---|
| Gish Far'aag: I expected no visitors, faithful, or otherwise. Why have you come? | Dialogue Options | Dialogue Results |
| Allow Lae'zel to answer. | Result: Granted entry. |
| I'm on your side! Captain Voss sent me to find an item for you. | Result: Choose to produce the artefact grants immediate entry. Else, choose the extra Skill Checks. |
| I was infected by an illithid, and was told to seek a githyanki creche. | Result: If you have Lae'zel with you, they will let you pass. If not, you must prove it with more Skill Checks. |
| [INTIMIDATION (DC18)] Let me pass. Fighting me will end badly for you. |
Success: Granted entry. Failure: Battle starts. |
| [PERSUASION (DC18)] You githyanki hate illithid. I have proof that hey are invading. We need your help. |
Success: Granted entry. Failure: Battle starts. |
The dialogue options above may differ according to your party and previous choices.
When inside Creche Yllek, talking to the locals here is much easier when your character is of Githyanki descent, or you have Lae'zel as the one talking to them. There will be Skill Check dialogue options that you can use to gain safe access to the creche.
- If you are not a Githyanki, you can win a Persuasion Check that lets them grant you passage. If you fail this check, you will have to fight them.
- If you are of Githyanki descent like Lae'zel, it will be much easier for the guard to let you through with Githyanki-related dialogue options.
Go to the Creche Hatchery
| Creche Yllek Hatchery Location | |
|---|---|
| Creche Yllek (Quest Item) X: 1318, Y: -782 |
|
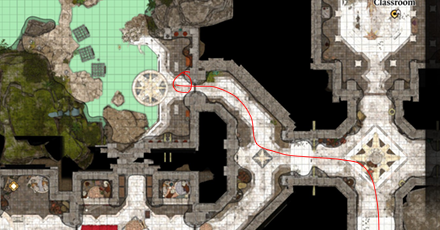 |
Once inside Creche Yllek, continue on to reach the creche's center room. Head west and then north to an Oak Door which leads into the Hatchery.
You will know that you are inside the Hatchery by presence of green acid pools, traps, cages, and three Githyanki.
Avoid the Hatchery Traps
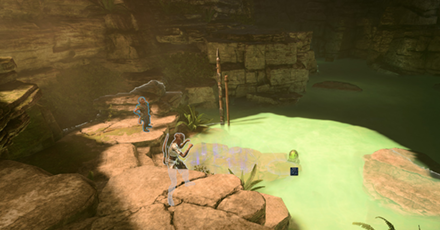
Focus on crossing the acid pools and strange gas that may be triggered by traps. Look out also for teleportation traps that bring you to one of the three cells near the Hatchery entrance.
It is recommended you use the character with the best jump distance here, since most of the traps can be avoided by using the elevated platforms to cross.
If any of your party members are caught in one of the teleportation traps sent to the cages, have someone grab a key from the Githyanki Warrior Vu'un through pickpocketing or by force.
Persuade or Defeat the Githyanki

| NPC Dialogue | |
|---|---|
| Varsh Ko'kuu: I don't have time to parent you as well. What do you want now? | Dialogue Options | Dialogue Results |
| You're being protective of this egg - why? | Success: More options for Persuasion Checks. Failure: He sends you off. Have another party member persuade him. |
| I want the egg - how much for it? | Result: Battle starts. |
| [PERSUASION] Why do you care so much about one dud egg? |
Result: Roll a Wisdom Check. If you win, pass the next Persuasion (DC14), then Persuasion (DC16) dialogues, and choose any dialogue but stealing or selling to persuade him. |
| [GITHYANKI] Our broods are bigger than this, kin. Where are the others? |
Result: Roll a Wisdom Check. If you win, pass the Githyanki Persuasion (DC14), then the Githyanki Persuasion (DC16) dialogue, and a dialogue related to stealing to convince him to give you the egg. |
The dialogue above may change depeniding on your party and choices.
Head over to Varsh Ko'kuu who is overseeing the Githyanki Egg at the end of the Hatchery, and initiate a dialogue with him.
A Perception Check involving Wisdom (Insight) will roll. If successful, you will notice the Githyanki's hopelessness. You will gain new dialogue which, when also successful, will let Varsh give you a pair of magic boots that will allow you to take the egg peacefully. Choosing any dialogue related to selling or stealing the egg will always result in a battle.
Alternatively, you can choose to defeat all Githyanki in the room and then collect the egg (make sure to loot Varsh Ko'kuu for his boots that gives you damage immunity from acid surfaces). Before starting the battle, make sure to close the door to prevent any guard from the outside spotting you.
Pick Up the Githyanki Egg
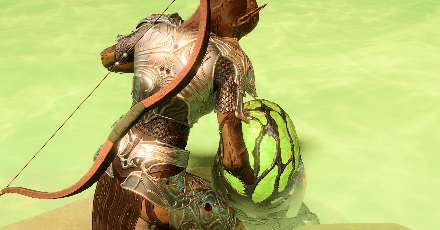
After convincing Varsh Ko'kuu to give you the egg or defeating all of the Githyanki, proceed to collecting the egg at the end of the area.
Use the Jump skill and Varsh Ko'kuu's Boots to safely cross the hazards, and then head to the side of the egg (disarm the traps whenever necessary.)
After collecting the egg, you can exit the room via fast travel to the Waypoint in Creche Yllek. Exit the creche then fast travel to the Waypoint in Trielta Crags, which is the nearest to Lady Esther.
Should You Give the Stolen Egg to Lady Esther?
Multiple Outcomes for the Githyanki Egg
| Outcomes for the Githyanki Egg |
|---|
|
|
Give the Githyanki Egg for Gold
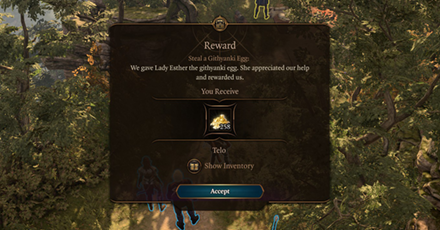
Lady Esther will reward you with 258 Gold (provided she did not pay you upfront). Keep in mind, however, that you will lose access to her shop after this is done.
To maximize what you can get out of Lady Esther in this scenario, buy what you need from Lady Esther's shop, give her the egg for the 258 Gold reward (or keep it if she was successfully persuaded to pay upfront previously), and then kill her to loot the rare equipment.
Refuse to Give the Egg
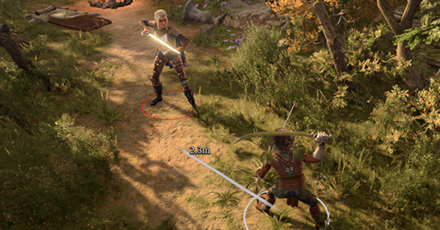
Returning to talk to Lady Esther and telling her that you do not support giving the Githyanki Egg will instantly result in a battle.
If you want to prepare to fight Lady Esther, tell her that you are still working on getting the egg and then perform a surprise attack on her.
Lady Esther's strength is that she can turn invisible. But her weakness is that she fights alone. This battle is much easier to handle if you outnumber her with three other party members.
Give Lady Esther an Owlbear Egg

| NPC Dialogue | |
|---|---|
| Lady Esther: It looks different to what I expected. Are you sure that's a gith egg? | Dialogue Options | Dialogue Results |
| No, it's an owlbear's. I just like it. | Result: No reward. Proceed with the quest. |
| [NATURE (DC21)]The curves, the colouration, the size - looks right to me. |
Success: Egg taken. You are rewarded for it. Failure: Continue with the quest. |
| [DECEPTION (DC21)] No, but this owlbear egg is worth much more. And itt can all be yours. |
Success: Egg taken. You are rewarded for it. Failure: Continue with the quest. |
| [PERSUASION (DC21)] Of course not. It's from an owlbear. But I bet your employers won't know the difference. | Success: Egg taken. You are rewarded for it. Failure: Continue with the quest. |
There is another known egg that you can give to Lady Esther: the Owlbear Egg. This can be acquired in the Owlbear Nest when looking for the Owlbear Cub.
The egg is worth 750 Gold, which is 492 Gold more than she would reward you for the Githyanki Egg.
It is, however, better that you just sell the Owlbear Egg than to give it to Lady Esther considering the high Difficulty Class (DC21) required to pass the dialogue checks.
Baldur's Gate 3 Related Guides

Prologue Side Quests
| All Prologue Side Quests | |
|---|---|
| How to Free the Intellect Devourer | How to Free Shadowheart |
Act 1 Side Quests
Druid's Grove Quests
The Risen Road Quests
| The Risen Road Quests | |
|---|---|
| Find the Missing Shipment | How to Rescue the Grand Duke |
| Rescue the Trapped Man | How to Free Oskar Fevras |
Blighted Village Quests
Goblin Camp Quests
| Goblin Camp Quests | |
|---|---|
| How to Get Volo's Ersatz Eye | Defiled Temple Puzzle |
| Find the Nightsong | Ask the Goblin Priestess for Help |
Nautiloid Crash Region Quests
Underdark Quests
Mountain Pass Quests
| Mountain Pass Quests | ||
|---|---|---|
| Steal a Githyanki Egg | How to Beat Gremishkas | How to Access Guardian of Faith Room |
| Dawnmaster Puzzle Guide | Where to Find the Githyanki Creche | - |
This section is currently under construction. Check back later for updates!
Act 2 Side Quests
Last Light Inn Quests
Gauntlet of Shar Quests
| Gauntlet of Shar Quests | |
|---|---|
| Gauntlet of Shar: All Trials and Umbral Gems | Kill Raphael's Old Enemy |
Mind Flayer Colony Quests
| Mind Flayer Colony Quests |
|---|
| How to Solve the Necrotic Laboratory |
Act 3 Side Quests
Rivington Quests
| Rivington Quests | ||
|---|---|---|
| Investigate the Suspicious Toys | Solve the Open Hand Temple Murders | Find the Missing Letters |
| How to Get to Wyrm's Rock Fortress | How to Find Dribbles the Clown | - |
Lower City Quests
| Lower City Quests | ||
|---|---|---|
| How to Get to the House of Hope | How to Get to Cazador's Palace | Rescue Orin's Victim |
| Aid the Underduke | How to Get to the House of Grief | Investigate the Murders |
Comment
Author
Steal a Githyanki Egg Side Quest: Should You Give the Egg to Esther
Rankings
- We could not find the message board you were looking for.
Gaming News
Popular Games

Genshin Impact Walkthrough & Guides Wiki

Honkai: Star Rail Walkthrough & Guides Wiki

Umamusume: Pretty Derby Walkthrough & Guides Wiki

Pokemon Pokopia Walkthrough & Guides Wiki

Resident Evil Requiem (RE9) Walkthrough & Guides Wiki

Monster Hunter Wilds Walkthrough & Guides Wiki

Wuthering Waves Walkthrough & Guides Wiki

Arknights: Endfield Walkthrough & Guides Wiki

Pokemon FireRed and LeafGreen (FRLG) Walkthrough & Guides Wiki

Pokemon TCG Pocket (PTCGP) Strategies & Guides Wiki
Recommended Games

Diablo 4: Vessel of Hatred Walkthrough & Guides Wiki

Cyberpunk 2077: Ultimate Edition Walkthrough & Guides Wiki

Fire Emblem Heroes (FEH) Walkthrough & Guides Wiki

Yu-Gi-Oh! Master Duel Walkthrough & Guides Wiki

Super Smash Bros. Ultimate Walkthrough & Guides Wiki

Pokemon Brilliant Diamond and Shining Pearl (BDSP) Walkthrough & Guides Wiki

Elden Ring Shadow of the Erdtree Walkthrough & Guides Wiki

Monster Hunter World Walkthrough & Guides Wiki

The Legend of Zelda: Tears of the Kingdom Walkthrough & Guides Wiki

Persona 3 Reload Walkthrough & Guides Wiki
All rights reserved
© 2023 Larian Studios. All rights reserved. Larian Studios is a registered trademark of arrakis nv, affiliate of Larian Studios Games ltd. All company names, brand names, trademarks and logos are the property of their respective owners. © 2020 Wizards of the coast. All rights reserved. Wizards of the coast, Baldur’s Gate, Dungeons & Dragons, D&D, and their respective logos. Are registered trademarks of wizards of the coast LLC
The copyrights of videos of games used in our content and other intellectual property rights belong to the provider of the game.
The contents we provide on this site were created personally by members of the Game8 editorial department.
We refuse the right to reuse or repost content taken without our permission such as data or images to other sites.


![Monster Hunter Stories 3 Review [First Impressions] | Simply Rejuvenating](https://img.game8.co/4438641/2a31b7702bd70e78ec8efd24661dacda.jpeg/thumb)


