Investigate the Selûnite Resistance
★ All Updates for Patch 5
☆ Beginner Guides for All Starter Players
★ Simple Character Creation Guide for beginners
☆ A Full Guide to Multiclassing
★ All Side Quests and Event Points
☆ All Races and Subraces
This is a walkthrough for the Investigate the Selûnite Resistance sidequest in Baldur's Gate 3. Read on to learn how to unlock the quest, where to find the hidden meeting area in Reithwin Mason's Guild, and the rewards you'll get from finishing the quest!
List of Contents
Side Quest Details
| Journal Entry | |
|---|---|
| Investigate the Mason's Guild The Mason's Guild seems to have been the centre of Selûnite resistance in the area. We should seek it out and investigate further. |
|
| Recommended Level | Level 6 |
| Rewards | ・Helmet of Arcane Acuity ・Moonrise Tower Prison Stash ・Random Scrolls and Potions ・Infernal Iron |
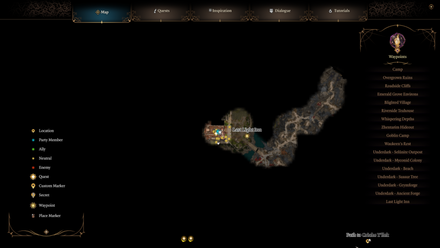
| Starting Location | |
| Last Light Inn in the Shadow Cursed Lands | |
 |
|
How to Start Investigate the Selûnite Resistance
Read Haldfred's Note in the Last Light Inn Basement
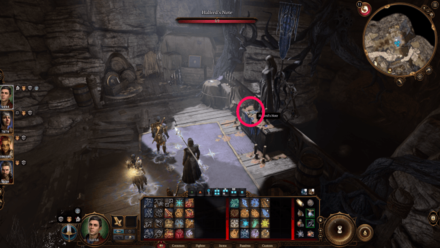
To start the sidequest, you'll need to read Haldfred's Note in the hidden Selûnite Altar located in the basement of the Last Light Inn.
How to Get to the Last Light Inn Basement
Investigate the Selûnite Resistance Walkthrough
| Investigate the Selûnite Resistance | |
|---|---|
| 1 | |
| 2 | |
| 3 | |
| 4 | |
| 5 | |
| 6 | |
| 7 |
Get the Tower-Shaped Key from Mattis

If you helped the Tiefling Refugees in the Emerald Grove, speak to Mattis who is in the main hall of the Last Light Inn and he will mention that Mol gave him a Dusty Key.
You can Persuade or Buy the key for 2000 Gold, which you can further bring down to 1000 Gold. Regardless of your choice, the Dusty Key becomes the Tower-Shaped Key.
Head Southwest from the Last Light Inn

You can reach the Reithwin Mason's Guild by following the path southwest from the Last Light Inn and through the makeshift bridge that brings you to the Reithwin Town Waypoint.
Requires Moonlantern of Pixie's Blessing
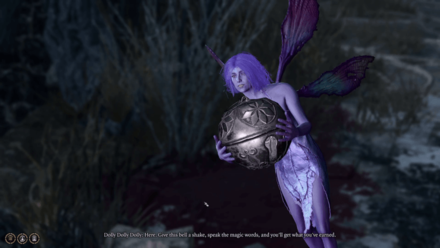
The area where the Reithwin Mason's Guild is surrounded by shadow that even the Blessing of Selûne can't protect against.
You'll need full protection, which you can get by obtaining the Moonlantern from Kar'niss and freeing the pixie to get the Pixie's Blessing*.
Seek Protection from the Shadow Curse
Head Down the Ornate Wooden Hatch
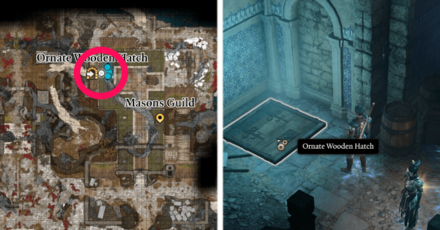
Once inside the Reithwin Mason's Guild, go to the western side of main area and climb down the Ornate Wooden Hatch.
Open the Keyholed Herald
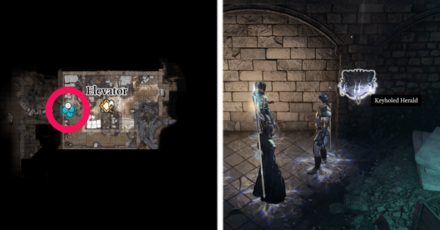
Once inside, head to the western side of the room to trigger a Perception Check that will reveal the Keyholed Herald.
Of you got the Tower-Shaped Key from Mattis, simply interact with the Keyholed Herald to reveal the hidden passageway. Otherwise, you may also lockpick the Keyholed Herald to open it.
Enter the Hidden Meeting Area
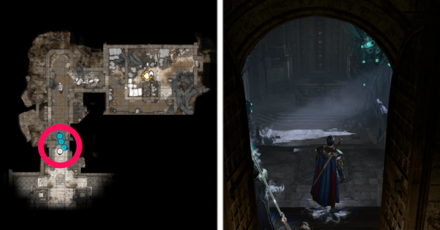
Follow the passageway south and pass through the doors to enter the hidden Selûnite Meeting Area. Before progressing further, make sure to take a Short Rest or Long Rest as there are enemies you'll need to defeat.
Note: There is a reinforced treasure chest in the hallway leading to the meeting area that you need to disarm and unlock, but the chest is empty so you can just ignore it.
Defeat the Shadows
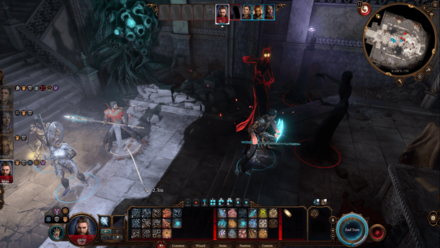
Head inside the room and you'll be attacked by five Shadows and a Wraith, with the latter emitting an Aura of Oblivion that extinguishes nearby light sources, which will cause the other shadows to disappear in areas with no light.
Prioritize killing the Wraith so that you can use your Torch, Light, Produce Flame, and Dancing Lights spells to illuminate the shadows and make them easier to track.
Note: Volo's Ersatz Eye grants you permanent See Invisibility, which will make it easier to track down the Wraith and Shadows.
Read Mason's Log

Once the Wraith and Shadows are defeated, read Mason's Log on the stone dining table to learn more about Ketheric Thorm to complete the sidequest.
Investigate the Selûnite Resistance Rewards
Helmet of Arcane Acuity

You can find a Reinforced Chest in the altar area of the hidden meeting room that contains a Helmet of Arcane Acuity.
This chest requires you to disarm the trap twice to unlock it safely.
Moonrise Towers Prison Stash
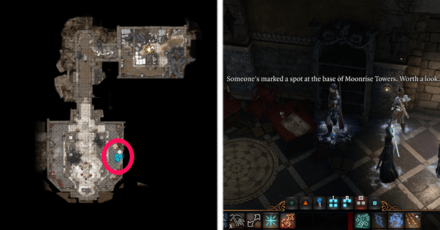
Head to the western side of the hidden meeting area and inspect the Moonrise Towers Diagram on the small table. This will unlock a map Hidden Stash icon on your map that directs you to Moonrise Towers.
The hidden stash is located in the cave area leading to the hidden dock where Wulbren and the Tieflings will escape when you help them break out from Moonrise Towers Prison and contains a random amount of gold and arrows.
Rescue the Tieflings (Shadow-Cursed Lands)
Random Scrolls and Potions
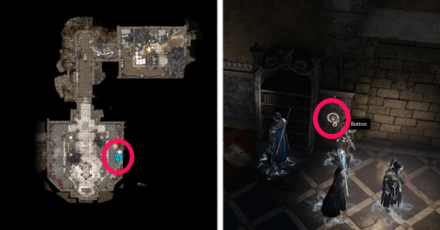
Near the table where you find the Moonrise Towers Diagram, pass by the wall for a Perception Check that will reveal a button. Press the button to open a hidden wine cellar and loot the two heavy chests that contain random scrolls and potions.
Infernal Iron
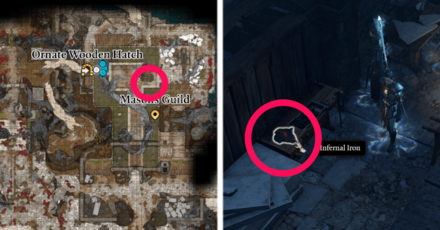
You can find Infernal Iron on a table on the eastern side of Reithwin Mason's Guild.
Note: The Infernal Iron is located in the open area where you find the Ornate Wooden Hatch and not in the hidden area beneath the Mason's Guild.
Lore and Backstory

Reading Mason's Log reveals some lore and backstory regarding Ketheric Thorm, particularly that there is a hidden Sharran Temple underneath the Reithwin Mason's Guild.
This is in fact the Gauntlet of Shar, which is accessible through the Thorm Mausoleum, and is a small hint as to where Ketheric's immortality stems from.
How to Beat the Gauntlet of Shar
Baldur's Gate 3 Related Guides

Prologue Side Quests
| All Prologue Side Quests | |
|---|---|
| How to Free the Intellect Devourer | How to Free Shadowheart |
Act 1 Side Quests
Druid's Grove Quests
The Risen Road Quests
| The Risen Road Quests | |
|---|---|
| Find the Missing Shipment | How to Rescue the Grand Duke |
| Rescue the Trapped Man | How to Free Oskar Fevras |
Blighted Village Quests
Goblin Camp Quests
| Goblin Camp Quests | |
|---|---|
| How to Get Volo's Ersatz Eye | Defiled Temple Puzzle |
| Find the Nightsong | Ask the Goblin Priestess for Help |
Nautiloid Crash Region Quests
Underdark Quests
Mountain Pass Quests
| Mountain Pass Quests | ||
|---|---|---|
| Steal a Githyanki Egg | How to Beat Gremishkas | How to Access Guardian of Faith Room |
| Dawnmaster Puzzle Guide | Where to Find the Githyanki Creche | - |
This section is currently under construction. Check back later for updates!
Act 2 Side Quests
Last Light Inn Quests
| Last Light Inn Quests | ||
|---|---|---|
| Seek Protection from the Shadow Curse | Rescue the Tieflings | Rescue Wulbren |
| How to Lift the Shadow Curse: Where to Find Thaniel | Find Zevlor | Help He Who Was |
| Investigate the Selûnite Resistance | - | - |
Gauntlet of Shar Quests
| Gauntlet of Shar Quests | |
|---|---|
| Gauntlet of Shar: All Trials and Umbral Gems | Kill Raphael's Old Enemy |
Mind Flayer Colony Quests
| Mind Flayer Colony Quests |
|---|
| How to Solve the Necrotic Laboratory |
Act 3 Side Quests
Rivington Quests
| Rivington Quests | ||
|---|---|---|
| Investigate the Suspicious Toys | Solve the Open Hand Temple Murders | Find the Missing Letters |
| How to Get to Wyrm's Rock Fortress | How to Find Dribbles the Clown | - |
Lower City Quests
| Lower City Quests | ||
|---|---|---|
| How to Get to the House of Hope | How to Get to Cazador's Palace | Rescue Orin's Victim |
| Aid the Underduke | How to Get to the House of Grief | Investigate the Murders |
Comment
Author
Investigate the Selûnite Resistance
improvement survey
03/2026
improving Game8's site?

Your answers will help us to improve our website.
Note: Please be sure not to enter any kind of personal information into your response.

We hope you continue to make use of Game8.
Rankings
- We could not find the message board you were looking for.
Gaming News
Popular Games

Genshin Impact Walkthrough & Guides Wiki

Honkai: Star Rail Walkthrough & Guides Wiki

Umamusume: Pretty Derby Walkthrough & Guides Wiki

Pokemon Pokopia Walkthrough & Guides Wiki

Resident Evil Requiem (RE9) Walkthrough & Guides Wiki

Monster Hunter Wilds Walkthrough & Guides Wiki

Wuthering Waves Walkthrough & Guides Wiki

Arknights: Endfield Walkthrough & Guides Wiki

Pokemon FireRed and LeafGreen (FRLG) Walkthrough & Guides Wiki

Pokemon TCG Pocket (PTCGP) Strategies & Guides Wiki
Recommended Games

Diablo 4: Vessel of Hatred Walkthrough & Guides Wiki

Fire Emblem Heroes (FEH) Walkthrough & Guides Wiki

Yu-Gi-Oh! Master Duel Walkthrough & Guides Wiki

Super Smash Bros. Ultimate Walkthrough & Guides Wiki

Pokemon Brilliant Diamond and Shining Pearl (BDSP) Walkthrough & Guides Wiki

Elden Ring Shadow of the Erdtree Walkthrough & Guides Wiki

Monster Hunter World Walkthrough & Guides Wiki

The Legend of Zelda: Tears of the Kingdom Walkthrough & Guides Wiki

Persona 3 Reload Walkthrough & Guides Wiki

Cyberpunk 2077: Ultimate Edition Walkthrough & Guides Wiki
All rights reserved
© 2023 Larian Studios. All rights reserved. Larian Studios is a registered trademark of arrakis nv, affiliate of Larian Studios Games ltd. All company names, brand names, trademarks and logos are the property of their respective owners. © 2020 Wizards of the coast. All rights reserved. Wizards of the coast, Baldur’s Gate, Dungeons & Dragons, D&D, and their respective logos. Are registered trademarks of wizards of the coast LLC
The copyrights of videos of games used in our content and other intellectual property rights belong to the provider of the game.
The contents we provide on this site were created personally by members of the Game8 editorial department.
We refuse the right to reuse or repost content taken without our permission such as data or images to other sites.


![Monster Hunter Stories 3 Review [First Impressions] | Simply Rejuvenating](https://img.game8.co/4438641/2a31b7702bd70e78ec8efd24661dacda.jpeg/thumb)


