How to Lift the Shadow Curse: Where to Find Thaniel
★ All Updates for Patch 5
☆ Beginner Guides for All Starter Players
★ Simple Character Creation Guide for beginners
☆ A Full Guide to Multiclassing
★ All Side Quests and Event Points
☆ All Races and Subraces
Lift the Shadow Curse is a quest chain in Baldur's Gate 3 (BG3) that involves reuniting Thaniel and Oliver to lift the shadow curse in Act 2. See how to start the quest, where to find Thaniel, how to get to Ketheric Thorm to lift the shadow curse permanently, as well as the rewards for this quest line.
List of Contents
How to Start Lift the Shadow Curse
Speak to Halsin in Camp
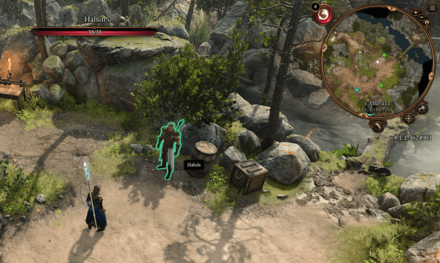
You can initiate this side quest by speaking to Halsin in camp during Act 2. He will only show up at camp if he joined you after saving him back in Act 1. He does not always appear in camp, so you might have to check back a few times.
How to Save the First Druid Halsin
Lift the Shadow Curse Walkthrough
| Lift the Shadow Curse Summary |
|---|
|
|
Wake Up Art Cullagh
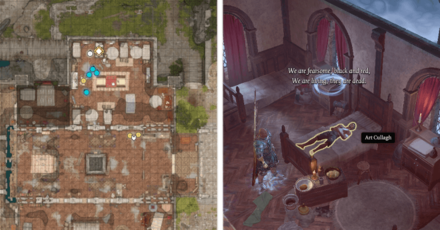
Halsin will need you to find a certain Thaniel to lift the shadow curse. You can get Thaniel's whereabouts from Art Cullagh at the Last Light Inn. He is inside the first door to your right when you enter the building.
Unfortunately, he is catatonic and cannot speak properly in this state. You'll need to play Art's lute to wake him up, which can be obtained from Malus Thorm.
How to Get Art's Lute

If you haven't obtained the Battered Lute from Malus Thorm yet, you can find him inside the House of Healing, northwest of Moonrise Towers.
As with the other Thorm bosses, you can get rid of Malus through conversation, instead of fighting him head on. Humor him with his experiments, and after some successful skill checks, you'll be able to make him have his nurses kill him, or turn on each other, after which he'll join them afterwards. Either way, take the Battered Lute from Malus Thorm's body and return to Art.
Bring Halsin to Art Cullagh

After playing Art's lute to wake him up, he'll want to meet with Halsin. Go to camp and tell Halsin you now know where Thaniel is and take him to Art. When they're done talking, Halsin will ask you to meet him at the lakeshore, just a few ways north of the Last Light Inn.
Before you speak to Halsin at the lakeshore, make sure you've long rested as there will be a big battle shortly. You'll face several waves of enemies, so prepare some AoE and multiple target spells like Magic Missile, or even Smokepowder Bombs.
Reunite Thaniel and Oliver
Defend the Portal Until Halsin Returns

With Thaniel's location confirmed, Halsin will enter a portal to save him. You'll need to defend the portal from four enemy waves. If the portal is destroyed, Halsin and Thaniel will die and you'll fail the quest.
Use AoE and Multi-Target Spells
You'll face four waves of enemies and it's time for your AoE and multi-target spells to shine. An AoE spell like Fireball can help deal with the grouped up enemies. Your martial characters can even help out by throwing Smokepowder Bombs if the opportunity presents itself.
An upcasted Magic Missile is particularly effective against the flock of shadow-cursed ravens as they only have 1 HP.
Bring Halsin to Oliver

After you've succesfully defended the portal, Halsin will return with Thaniel. Collect your spoils and return to camp to speak with Halsin. He'll tell you about needing to find Thaniel's missing half.
Thaniel's other half is Oliver, and you can find him in a run down house near the Shadowed Battlefield waypoint. If you've played hide and seek with him before, you'll only need to ask him to return to Thaniel.
Playing Hide and Seek with Oliver

If you haven't played hide and seek with him yet, he'll ask you to. Oliver will turn invisible and hide behind a wheelbarrow. Reveal him with a successful Perception check and he'll ask to play another round. This time, his so-called family will join but you'll have to cut them down.
If you have Volo's Ersatz Eye, finding Oliver becomes a trivial matter as it grants a permanent see invisibility passive. He won't notice you can see him through his invisibility and thus won't call you out for cheating. After indulging Oliver by playing with him, you can now ask him to return to Thaniel.
Enter Oliver's Shadow Portal
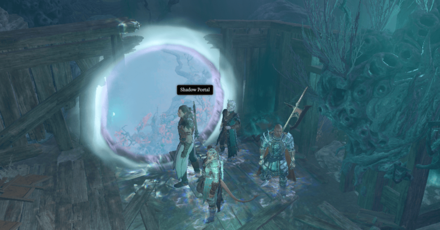
Oliver will refuse to return to Thaniel initially and step into a portal. Before you follow him, get ready for another fight. As with the earlier encounter, Magic Missile will come in handy again.
Take note that you do not need Halsin in this fight, so you can use your original team if you wish. Follow Oliver through the portal when you're ready.
Break Through Oliver's Nightdome
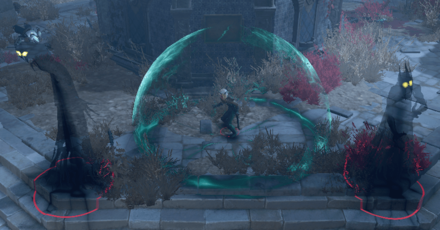
You'll find Oliver inside a Nightdome, joined by his so-called family again and they are the primary threat in this fight.
Oliver will also summon several Shadow Fiends. Killing them will deal significant damage to Oliver's Nightdome. They only have 1 HP, making Magic Missile an effective spell against them. After you've destroyed the Nightdome, talk to Oliver and tell him to reunite with Thaniel back at camp. Thaniel with then tell you that the only way to truly lift the shadow curse is to kill Ketheric Thorm.
Find Ketheric Thorm's Relic
Talk to Balthazar
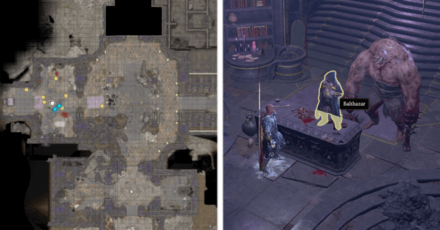
Before you can end Ketheric Thorm and lift the shadow curse once and for all, you'll need to first take care of the relic, his source of immortality. Make your way inside the Grand Mausoleum and to the Gauntlet of Shar until you find Balthazar. He will ask you to find Ketheric Thorm's relic inside the Gauntlet of Shar.
Balthazar will show up later to fight you once you've found the relic, with even more enemies. You can kill him here early, but try to Persuade him first for the Summon Golem Bell as it can help you with the Trials of Shar.
Pass the Trials of Shar and Get All Umbral Gems
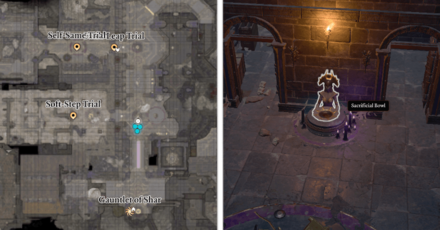
You'll need to pass the Trials of Shar and obtain four Umbral Gems to get to Ketheric Thorm's relic. Three Umbral Gems can be obtained by clearing the three trials.
The fourth Umbral Gem is held by Yurgir the Orthon. You can fight him and his allies head-on, or persuade him to off himself. Whichever method you choose, when you have all four Umbral Gems, you can now open the path to the relic by placing them into the Pedestals of Reckoning.
Gauntlet of Shar: All Trials and Umbral Gem Locations
Save the Nightsong in Shadowfell
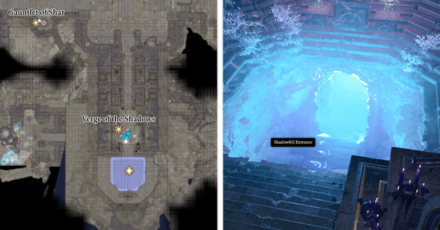
After placing all Umbral Gems in the Pedestals of Reckoning, you'll reach the Shadowfell Entrance. This is one of the points of no return, so tie up any loose ends in this act if you want before heading inside. If you haven't killed Balthazar yet, he will show up later inside, with more enemies in tow. Now is a good time to go back and kill him if you want an easier fight.
Once inside Shadowfell, head deeper until you encounter the Nightsong. You'll find the relic is not an object but a person. Free her to gain a valuable ally for the fight against Ketheric Thorm later. If you choose to kill her instead, you'll worsen the shadow curse instead.
Kill Ketheric Thorm
Assault Moonrise Towers

With Ketheric Thorm vulnerable, it's time to lay siege to Moonrise Towers. You can ask Jaheira to assist you in taking over Moonrise Towers and fight Z'rell and company. While this is a tough battle, you won't be able to rest after this battle so try to conserve your spell slots if you can.
Initiate Combat with Jaheira
If you have a hard-hitting AoE spell, use it to initiate combat instead of starting a dialogue with Z'rell as you'll need to go through her anyway.
Jaheira will then follow-up with an Ice Storm and possibly killing off the ogre before combat even starts.
Defeat Ketheric Thorm
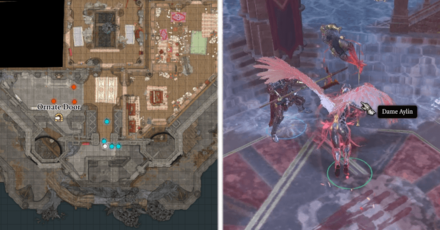
After clearing the first floor, head to the throne room. You'll see Jaheira who you can again ask to assist in battling Ketheric Thorm. Go up the flight of stairs behind the throne room. You'll encounter a few more enemies blocking the ornate door with Ketheric Thorm waiting inside.
The Nightsong will also join you here in combat. Try to focus on Ketheric if you can. When you've dealt enough, a cutscene will trigger and you'll need to pursue him into the hollow tower to the northeast, behind Jaheira. You can now take a long rest before jumping in.
Pursue Ketheric Thorm
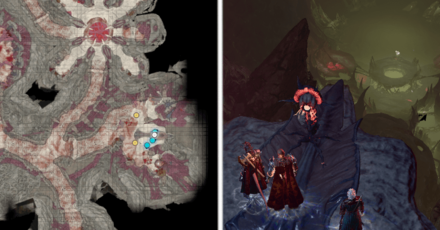
Head further into the Mind Flayer Colony and you'll eventually reach a fork. Enter the flesh-wrought door in the middle and you'll see a Neural Apparatus and a recovery station nearby.
This is the finale for Act 2 so you're in for a fight. If available, prepare Invisibility as it will come in handy for this encounter. Use the Neural Apparatus when you're ready and descend using the platform.
Free Dame Aylin
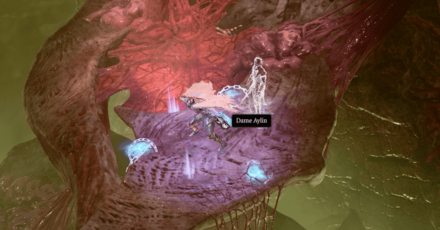
Before you step forward and trigger a dialogue with Ketheric Thorm, if you have it prepared, use your Invisibility spell and free Dame Aylin before combat. She is trapped in the southeast corner of the map. This will save you several turns of having to free her while in combat. When you've freed her, a dialogue with Ketheric will immediately start.
Be mindful of the Mind Flayer nearby as it can cast domination on Dame Aylin and control her. Make sure you can break its concentration from quickly.
Rematch with Ketheric Thorm
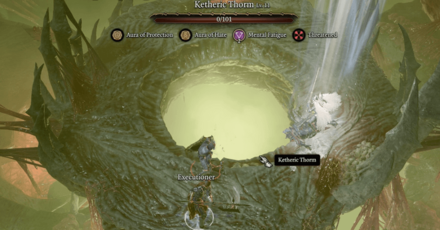
The rematch with Ketheric Thorm is similar to when you first fought him at Moonrise Tower. The only difference is Dame Aylin is shackled, but it shouldn't be a problem if you've freed her before the battle.
Defeat him a second time, with the help of Dame Aylin. Finish the battle as fast as you can because Necromites will keep spawning, but try not to use your hardest hitting attacks yet. When his HP runs out, another cutscene will trigger.
Defeat the Apostle of Myrkul
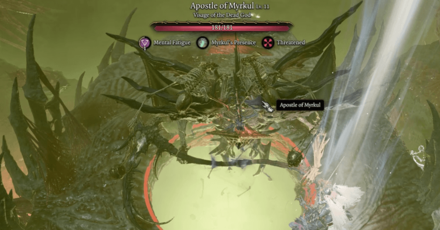
This is the final boss of Act 2. Now is the time to unleash your most powerful attacks and end the fight quickly. Its Bone Chill aura will make sure you won't succeed in a battle of attrition because it prevents all forms of healing.
If that wasn't enough, it can consume a Necromite and use Finger of Death, dealing massive damage to a single target, essentially a one-hit kill ability.
Gather Your Allies and Leave for Baldur's Gate
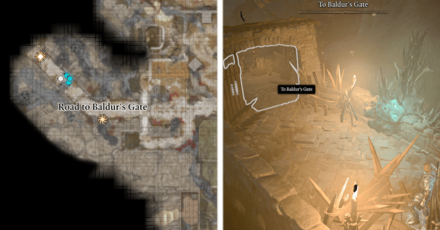
For the shadow curse to be lifted, you'll need to leave for Baldur's Gate. This is another point of no return and the end of Act 2, so make sure you took care of all unfinished business before leaving.
When you're ready, take the road to Baldur's gate and enjoy the cinematics before the next Act.
Lift the Shadow Curse Rewards
Notable Rewards from Lift the Shadow Curse
| Item | Source |
|---|---|
| Reaper's Embrace | Dropped by Ketheric Thorm |
| Ketheric's Warhammer | Dropped by Ketheric Thorm |
| Ketheric's Shield | Dropped by Ketheric Thorm |
| Surgeon's Subjugation Amulet | Dropped by Mallus Thorm |
| Moonlight Glaive | From saving the Nightsong |
Baldur's Gate 3 Related Guides

Prologue Side Quests
| All Prologue Side Quests | |
|---|---|
| How to Free the Intellect Devourer | How to Free Shadowheart |
Act 1 Side Quests
Druid's Grove Quests
The Risen Road Quests
| The Risen Road Quests | |
|---|---|
| Find the Missing Shipment | How to Rescue the Grand Duke |
| Rescue the Trapped Man | How to Free Oskar Fevras |
Blighted Village Quests
Goblin Camp Quests
| Goblin Camp Quests | |
|---|---|
| How to Get Volo's Ersatz Eye | Defiled Temple Puzzle |
| Find the Nightsong | Ask the Goblin Priestess for Help |
Nautiloid Crash Region Quests
Underdark Quests
Mountain Pass Quests
| Mountain Pass Quests | ||
|---|---|---|
| Steal a Githyanki Egg | How to Beat Gremishkas | How to Access Guardian of Faith Room |
| Dawnmaster Puzzle Guide | Where to Find the Githyanki Creche | - |
This section is currently under construction. Check back later for updates!
Act 2 Side Quests
Last Light Inn Quests
| Last Light Inn Quests | ||
|---|---|---|
| Seek Protection from the Shadow Curse | Rescue the Tieflings | Rescue Wulbren |
| How to Lift the Shadow Curse: Where to Find Thaniel | Find Zevlor | Help He Who Was |
| Investigate the Selûnite Resistance | - | - |
Gauntlet of Shar Quests
| Gauntlet of Shar Quests | |
|---|---|
| Gauntlet of Shar: All Trials and Umbral Gems | Kill Raphael's Old Enemy |
Mind Flayer Colony Quests
| Mind Flayer Colony Quests |
|---|
| How to Solve the Necrotic Laboratory |
Act 3 Side Quests
Rivington Quests
| Rivington Quests | ||
|---|---|---|
| Investigate the Suspicious Toys | Solve the Open Hand Temple Murders | Find the Missing Letters |
| How to Get to Wyrm's Rock Fortress | How to Find Dribbles the Clown | - |
Lower City Quests
| Lower City Quests | ||
|---|---|---|
| How to Get to the House of Hope | How to Get to Cazador's Palace | Rescue Orin's Victim |
| Aid the Underduke | How to Get to the House of Grief | Investigate the Murders |
Comment
Author
How to Lift the Shadow Curse: Where to Find Thaniel
improvement survey
03/2026
improving Game8's site?

Your answers will help us to improve our website.
Note: Please be sure not to enter any kind of personal information into your response.

We hope you continue to make use of Game8.
Rankings
- We could not find the message board you were looking for.
Gaming News
Popular Games

Genshin Impact Walkthrough & Guides Wiki

Honkai: Star Rail Walkthrough & Guides Wiki

Umamusume: Pretty Derby Walkthrough & Guides Wiki

Pokemon Pokopia Walkthrough & Guides Wiki

Resident Evil Requiem (RE9) Walkthrough & Guides Wiki

Monster Hunter Wilds Walkthrough & Guides Wiki

Wuthering Waves Walkthrough & Guides Wiki

Arknights: Endfield Walkthrough & Guides Wiki

Pokemon FireRed and LeafGreen (FRLG) Walkthrough & Guides Wiki

Pokemon TCG Pocket (PTCGP) Strategies & Guides Wiki
Recommended Games

Diablo 4: Vessel of Hatred Walkthrough & Guides Wiki

Fire Emblem Heroes (FEH) Walkthrough & Guides Wiki

Yu-Gi-Oh! Master Duel Walkthrough & Guides Wiki

Super Smash Bros. Ultimate Walkthrough & Guides Wiki

Pokemon Brilliant Diamond and Shining Pearl (BDSP) Walkthrough & Guides Wiki

Elden Ring Shadow of the Erdtree Walkthrough & Guides Wiki

Monster Hunter World Walkthrough & Guides Wiki

The Legend of Zelda: Tears of the Kingdom Walkthrough & Guides Wiki

Persona 3 Reload Walkthrough & Guides Wiki

Cyberpunk 2077: Ultimate Edition Walkthrough & Guides Wiki
All rights reserved
© 2023 Larian Studios. All rights reserved. Larian Studios is a registered trademark of arrakis nv, affiliate of Larian Studios Games ltd. All company names, brand names, trademarks and logos are the property of their respective owners. © 2020 Wizards of the coast. All rights reserved. Wizards of the coast, Baldur’s Gate, Dungeons & Dragons, D&D, and their respective logos. Are registered trademarks of wizards of the coast LLC
The copyrights of videos of games used in our content and other intellectual property rights belong to the provider of the game.
The contents we provide on this site were created personally by members of the Game8 editorial department.
We refuse the right to reuse or repost content taken without our permission such as data or images to other sites.


![Monster Hunter Stories 3 Review [First Impressions] | Simply Rejuvenating](https://img.game8.co/4438641/2a31b7702bd70e78ec8efd24661dacda.jpeg/thumb)


