Where to Find the Githyanki Crèche
★ All Updates for Patch 5
☆ Beginner Guides for All Starter Players
★ Simple Character Creation Guide for beginners
☆ A Full Guide to Multiclassing
★ All Side Quests and Event Points
☆ All Races and Subraces
This is a guide to locating the Githyanki Crèche in Baldur's Gate 3 (BG3). Read on to find out how to start this quest, the benefits and consequences of your dialogue options, as well as the rewards for completing this quest.
List of Contents
Side Quest Details
| Journal Entry | |
|---|---|
| Find the Githyanki Crèche Lae'zel told us that the githyanki should be able to cure us, if we can find one of their crèches. Someone named Zorru should know more. |
|
| Reward | ・Access to Crèche Y'llek Vendor ・3 Mind Flayer Parasite Specimens ・Githyanki Egg |
| Location | |
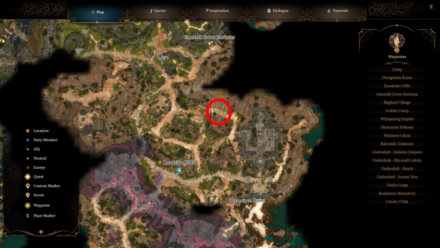
| Roadside Cliffs | |
 |
|
How to Start Find the Githyanki Crèche
Rescue Lae'zel
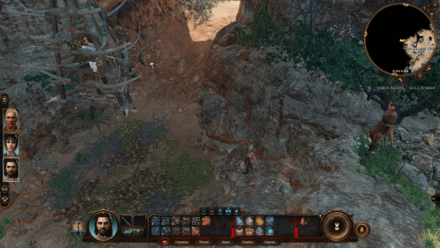
You can find Lae'zel north of the Roadside Cliffs waypoint or west of the Chapel Ruins where you can meet Withers.
Find the Githyanki Crèche Walkthrough
| Find the Githyanki Crèche | |
|---|---|
| 1 | |
| 2 | |
| 3 | |
| 4 | |
| 5 | |
| 6 | |
| 7 | |
| 8 |
Locate Zorru
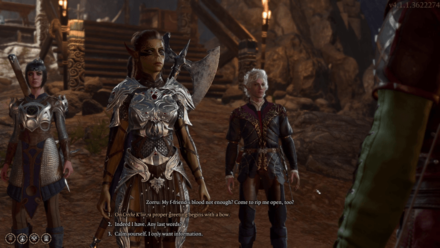
Zorru is located in The Hollow where the Tiefling Refugees are taking shelter in the Emerald Grove, located towards the back of the cave between Dammon and the room where Sazza is imprisoned.
Speak to him with Lae'zel in your party to learn about the location of a Githyanki Patrol.
Note: Zorru often moves around the Hollow, but he always stays at the western side of the cave system and never strays too close to the Emerald Grove itself.
Find the Githyanki Patrol
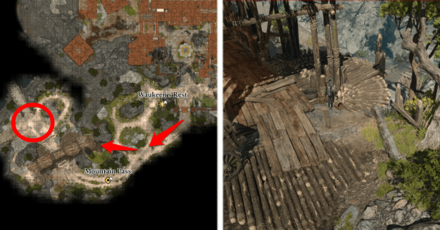
The Githyanki Patrol is located west of Waukeen's Rest. You can reach the location by following the southwestern path towards a wooden bridge where you'll encounter a Tiefling named Elykka who will warn you about the Githyanki warriors.
Get close enough to location to trigger a cutscene where Kith'rak Voss appears and wipes out the Flaming Fist.
Speak with Kith'rak Voss
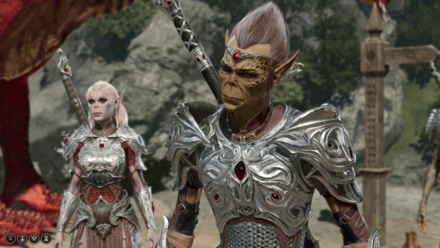
If Lae'zel is with you, she will automatically ungroup from your party to talk to Kith'rak Voss. Follow her to engage in dialogue with the Githyanki Knight.
Note: While it's possible to Deceive Kith'rak Voss and let him and the Githyanki Patrol leave peacefully, it's better that you fail the Deception check so that you can fight the Githyanki Patrol.
This is because Sarth Baretha, one of the Githyanki Warriors, has the Elaborate Slate that will point Lae'zel to the exact location of the Crèche in the Mountain Pass, as well as allow you to loot her Githyanki Greatsword.
With Lae'Zel
Speaking to the patrol with Lae'zel in your party will allow you to choose between letting Lae'zel to handle the dialogue, or speaking on her behalf.
By choosing to speak on Lae'zel's behalf, the dialogue proceeds as if you were without Lae'zel.
| Kith'rak Voss Dialogue | |
|---|---|
| Speak up, child. Affirm your mandate. | |
| Dialogue Options | Dialogue Results |
| Mouth a silent command to Lae'zel.: 'truth'. | Triggers a battle between your party and the Gith patrol. |
| Produce the odd artefact. You're looking for this, I take it? | |
| I have my own mandate. Time to die, gith. | |
| [PERSUASION (DC10)] Mouth a silent command to Lae'zel.: 'play along'. | Success:The Gith patrol leaves the party in peace, and we learn the location of the Githyanki Crèche. Failure: Triggers a battle between your party and the Gith patrol. |
Without Lae'Zel
| Kith'rak Voss Dialogue | |
|---|---|
| And as for you, tell me - why shouldn't I run you through this instant? | |
| Dialogue Options | Dialogue Results |
| [SLEIGHT OF HAND (DC10)] Silently hold his stare and discreetly prepare to attack. | Success:Proceeds the dialogue. Failure: Triggers a battle between your party and the Gith patrol. |
| [INSIGHT (DC10)] You would've done so already if you didn't want something from me first. |
|
| [INTIMIDATION (DC10)] I just want passage - if I have to go through you, so be it. |
|
| [PERSUASION (DC10)] I don't know you. I pose no threat. |
|
| Second Dialogue | |
| Dialogue Options | Dialogue Results |
| I'll help if I can. | Kith'rak starts casting Detect Thoughts. The player can pass an [ARCANA] and then a [WISDOM] check to protect their thoughts. This progresses the dialogue. Doing nothing or failing the checks will result in combat with the Gith patrol. |
| You'll need to start from the beginning - what is this weapon you're after? | |
| I might know something. But it'll cost you. | |
| Produce the artifact. Ask if this is what he seeks. | Triggers a battle between your party and the Gith patrol |
| Say nothing. | |
| Third Dialogue | |
| Bah! Nothing even approaching a useful thought in that skull. I ought to just kill you... | |
| Dialogue Options | Dialogue Results |
| [PERSUASION (DC10)] I could help if you let me live - search for this weapon, perhaps. | Success:The Gith patrol leaves the party in peace, and we learn the location of the Githyanki Crèche. Failure: Triggers a battle between your party and the Gith patrol. |
| [INTIMIDATION (DC10)] Why are you hesitating, then? Try it, I dare you. | Success:The Gith patrol leaves the party in peace, and we do not learn the location of the Githyanki Crèche. Failure: Triggers a battle between your party and the Gith patrol. |
| [DETECT THOUGHTS (DC12)] Read his thoughts. | Success:Unlocks new dialogue option - “Don't be too hasty. I could prove to be very useful.” Selecting the new option ends the dialogue peacefully as well as reveals the location of the Githyanki Crèche. Failure: Triggers a battle between your party and the Gith patrol. |
| Attack. | Triggers a battle between your party and the Gith patrol. |
Head to the Mountain Pass
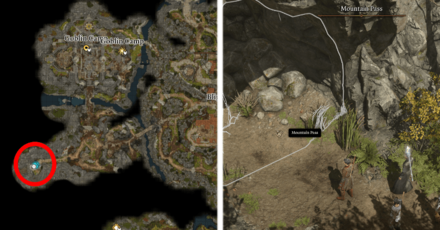
Follow the path south of the Goblin Camp to reach the Mountain Pass. Once at the Mountain Pass and if Lae'zel is in your party, she will tell you to prioritize getting to the Crèche.
You'll need to pass a Persuasion check to convince her to stay with your group if you decide to backtrack or go to a different area.
Operate and Ride the Cable Car
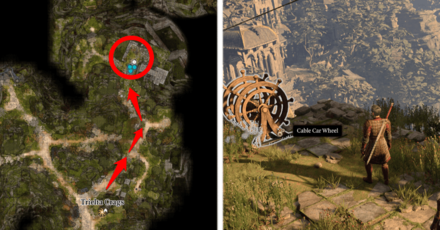
Head north from the Trielta Crags Waypoint and pass a Strength Check to operate the Cable Car Wheel so that you can get to Rosymorn Monastery.
Cross the Cliffs
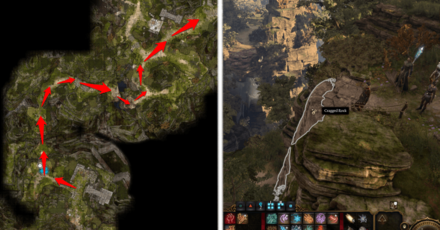
If you fail the Strength check on the Cable Car Wheel, follow the path west of the Cable Car and head down Cragged Rock. From there, you can simply jump across the cliffs to reach Rosymorn Monastery.
Head to the Monastery Entrance
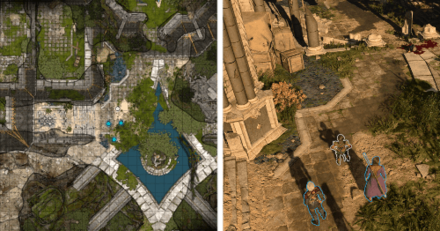
From the Rosymorn Monastery Waypoint, head west through the side of the monastery until you reach the main entrance.
A cutscene will trigger where a Githyanki will subdue and execute three Halflings. You can use Speak with Dead spell on them to reveal that they are Absolute Cultists.
Enter Crèche Y'llek
| All Crèche Y'llek Entrance Routes | |
|---|---|
| Main Entrance |
|
| Hidden Passage | |
Enter Through the Monastery
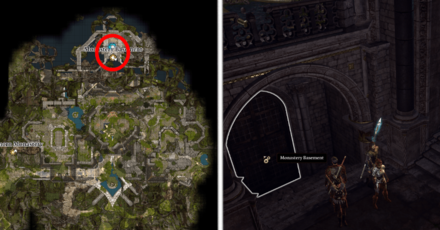
From the main entrance, check the windows to the left and Jump through the broken window to get inside a library. A drunk Kobold will barge into the room and fall asleep, allowing you to sneak past it or kill it.
Head to the next room full of drunk kobolds and are free to sneak pass them or kill them for experience.
After reaching the end of the stairway leading to the entrance of the Monastery, check the windows at the left of the entrance and use the Jump Skill to get inside. A drunk kobold will walk into the room.
After the battle, you are mostly safe to navigate and explore the Monastery by climbing to the second floor, clearing out the rooms, and then making it to the exit of the other side of the monastery. Find an entrance covered by wooden planks, break it, and then go down until you reach the door of the Monastery Basement.
Enter Through the Cliffside
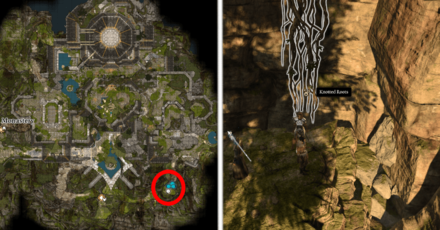
After reaching the end of the stairway leading to the entrance of the Monastery, check the side of the stairway to see a rocky path that can be traversed going down.
Cross the path up to the other side, then climb the vines up leading to a crumbled portion of the monastery. Head inside, break the entrance covered by wooden planks, and then walk through all the day way down until you reach the door to the Monastery Basement.
Enter the Creche's Hidden Passage
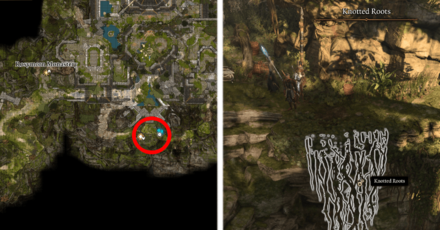
Like the Cliffside entrance route, check the side of the stairway near the monastery entrance and head down the rocky path. At the edge of the cliff, look for the knotted roots to climb down to the lower levels of the cliff.
Use your Jump skill to cross over the cliff gaps. You will find a Hidden Passage to the creche that can be lockpicked.
Once you gain access through lockpicking, you will be questioned by a Githyanki. Refer to the next section on getting past the Githyanki sentinels that you will meet either at the main entrance or the hidden passage.
Get Past the Crèche Guards
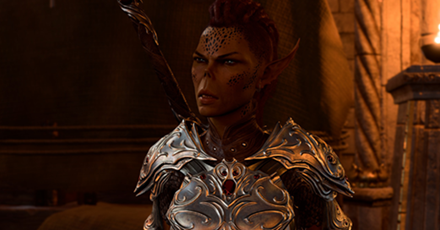
| NPC Dialogue | |
|---|---|
| Gish Far'aag: I expected no visitors, faithful, or otherwise. Why have you come? | Dialogue Options | Dialogue Results |
| Allow Lae'zel to answer. | Result: Granted entry. |
| I'm on your side! Captain Voss sent me to find an item for you. | Result: Choose to produce the artefact grants immediate entry. Else, choose the extra Skill Checks. |
| I was infected by an illithid, and was told to seek a githyanki creche. | Result: If you have Lae'zel with you, they will let you pass. If not, you must prove it with more Skill Checks. |
| [INTIMIDATION (DC18)] Let me pass. Fighting me will end badly for you. |
Success: Granted entry. Failure: Battle starts. |
| [PERSUASION (DC18)] You githyanki hate illithid. I have proof that hey are invading. We need your help. |
Success: Granted entry. Failure: Battle starts. |
The dialogue options above may differ according to your party and previous choices.
Once inside Crèche Y'llek, the guards will bar your way and you'll need to pass Persuasion or Intimidation checks to get inside. This is easier if you are playing as a Githyanki, but you can also let Lae'zel do the talking without doing any dialogue checks.
Regardless, successfully passing the dialogue checks will give you full access to the Githyanki Crèche where you can follow up Lae'zel's lead to Find a Cure.
Find the Githyanki Crèche Rewards
Access to Crèche Y'llek Vendor
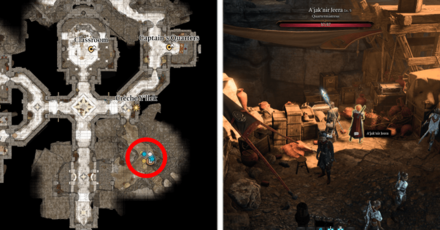
Finding the Githyanki Crèche gives you access to A'jak'nir Jeera as a vendor, who sells rare weapons such as Knife of the Undermountain King and the Defender Flail to name a few.
Mind Flayer Parasite Specimens
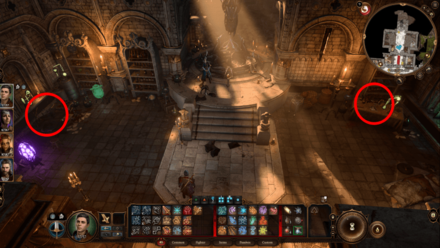
You can also get 3 Mind Flayer Parasite Specimens from the infirmary area where Ghustil Stornugoss is located in the western side of the Crèche.
Keep in mind that you'll need to steal these specimens off their table and getting caught will cause the Githyanki to grow suspicious of you.
All Illithid Parasite Locations
Githyanki Egg
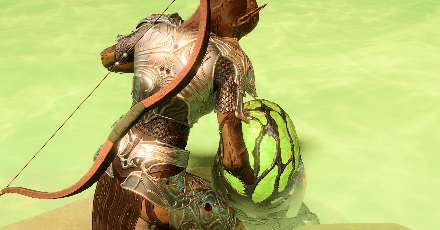
You can also steal a Githyanki Egg from the Hatchery Area in the northwestern side of the Crèche, which you can then give to Lady Esther to complete the Steal a Githyanki Egg Side Quest*.
Steal a Githyanki Egg Side Quest
Baldur's Gate 3 Related Guides

Prologue Side Quests
| All Prologue Side Quests | |
|---|---|
| How to Free the Intellect Devourer | How to Free Shadowheart |
Act 1 Side Quests
Druid's Grove Quests
The Risen Road Quests
| The Risen Road Quests | |
|---|---|
| Find the Missing Shipment | How to Rescue the Grand Duke |
| Rescue the Trapped Man | How to Free Oskar Fevras |
Blighted Village Quests
Goblin Camp Quests
| Goblin Camp Quests | |
|---|---|
| How to Get Volo's Ersatz Eye | Defiled Temple Puzzle |
| Find the Nightsong | Ask the Goblin Priestess for Help |
Nautiloid Crash Region Quests
Underdark Quests
Mountain Pass Quests
| Mountain Pass Quests | ||
|---|---|---|
| Steal a Githyanki Egg | How to Beat Gremishkas | How to Access Guardian of Faith Room |
| Dawnmaster Puzzle Guide | Where to Find the Githyanki Creche | - |
This section is currently under construction. Check back later for updates!
Act 2 Side Quests
Last Light Inn Quests
Gauntlet of Shar Quests
| Gauntlet of Shar Quests | |
|---|---|
| Gauntlet of Shar: All Trials and Umbral Gems | Kill Raphael's Old Enemy |
Mind Flayer Colony Quests
| Mind Flayer Colony Quests |
|---|
| How to Solve the Necrotic Laboratory |
Act 3 Side Quests
Rivington Quests
| Rivington Quests | ||
|---|---|---|
| Investigate the Suspicious Toys | Solve the Open Hand Temple Murders | Find the Missing Letters |
| How to Get to Wyrm's Rock Fortress | How to Find Dribbles the Clown | - |
Lower City Quests
| Lower City Quests | ||
|---|---|---|
| How to Get to the House of Hope | How to Get to Cazador's Palace | Rescue Orin's Victim |
| Aid the Underduke | How to Get to the House of Grief | Investigate the Murders |
Comment
Author
Where to Find the Githyanki Crèche
Rankings
- We could not find the message board you were looking for.
Gaming News
Popular Games

Genshin Impact Walkthrough & Guides Wiki

Honkai: Star Rail Walkthrough & Guides Wiki

Umamusume: Pretty Derby Walkthrough & Guides Wiki

Pokemon Pokopia Walkthrough & Guides Wiki

Resident Evil Requiem (RE9) Walkthrough & Guides Wiki

Monster Hunter Wilds Walkthrough & Guides Wiki

Wuthering Waves Walkthrough & Guides Wiki

Arknights: Endfield Walkthrough & Guides Wiki

Pokemon FireRed and LeafGreen (FRLG) Walkthrough & Guides Wiki

Pokemon TCG Pocket (PTCGP) Strategies & Guides Wiki
Recommended Games

Diablo 4: Vessel of Hatred Walkthrough & Guides Wiki

Cyberpunk 2077: Ultimate Edition Walkthrough & Guides Wiki

Fire Emblem Heroes (FEH) Walkthrough & Guides Wiki

Yu-Gi-Oh! Master Duel Walkthrough & Guides Wiki

Super Smash Bros. Ultimate Walkthrough & Guides Wiki

Pokemon Brilliant Diamond and Shining Pearl (BDSP) Walkthrough & Guides Wiki

Elden Ring Shadow of the Erdtree Walkthrough & Guides Wiki

Monster Hunter World Walkthrough & Guides Wiki

The Legend of Zelda: Tears of the Kingdom Walkthrough & Guides Wiki

Persona 3 Reload Walkthrough & Guides Wiki
All rights reserved
© 2023 Larian Studios. All rights reserved. Larian Studios is a registered trademark of arrakis nv, affiliate of Larian Studios Games ltd. All company names, brand names, trademarks and logos are the property of their respective owners. © 2020 Wizards of the coast. All rights reserved. Wizards of the coast, Baldur’s Gate, Dungeons & Dragons, D&D, and their respective logos. Are registered trademarks of wizards of the coast LLC
The copyrights of videos of games used in our content and other intellectual property rights belong to the provider of the game.
The contents we provide on this site were created personally by members of the Game8 editorial department.
We refuse the right to reuse or repost content taken without our permission such as data or images to other sites.


![Monster Hunter Stories 3 Review [First Impressions] | Simply Rejuvenating](https://img.game8.co/4438641/2a31b7702bd70e78ec8efd24661dacda.jpeg/thumb)


