How to Get the Blood of Lathander
★ All Updates for Patch 5
☆ Beginner Guides for All Starter Players
★ Simple Character Creation Guide for beginners
☆ A Full Guide to Multiclassing
★ All Side Quests and Event Points
☆ All Races and Subraces
The Blood of Lathander is a Legendary Mace you can get in Baldur's Gate 3 (BG3). Read on to learn more about The Blood of Lathander, the weapon's stats and effects, the location of Rosymorn monastery, and all necessary steps needed to obtain the Blood of Lathander!
List of Contents
The Blood of Lathander Overview
Legendary Weapon Stats
| The Blood of Lathander Info | ||
|---|---|---|
| Damage |
1d6 |
|
| Weapon Type | ||
| Effect |
Lathlander's Blesssing: Once per Long Rest, whjen your hit points are reduced to 0, you regain 2-12 hit points. Allies within 9m also regain 1-6 hit points. Lathlander's Light: Sheds holy light in a 6m radius. In combat, fiends and undead standing in the light are Blinded, unless they succeed a Constitution Saving Throw Weapon Enchantment +1 |
|
| Unlockable Skills/Spells | ||
| Rarity | Weight | Price |
| Legendary | 1.8
|
640
|
Lets the Wielder Cast Sunbeam
The Blood of Lathander will grant its wielder the ability use Sunbeam, a ranged offensive spell that is usually obtained only through levelling up Wizards and Sorcerers.
Sunbeam is an action that deals Radiant damage to enemies in a straight line in front of the caster. This is a useful spell to have as you fighting against Shadows and the undead in the Shadow-Cursed Lands in Act 2 and beyond.
Sunbeam Spell Guide and Effects
How to Get The Blood of Lathander
Complete the Find the Blood of Lathander Quest
| The Blood of Lathander Location | |
|---|---|
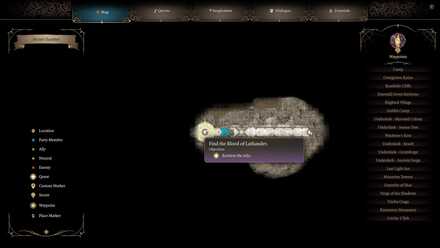
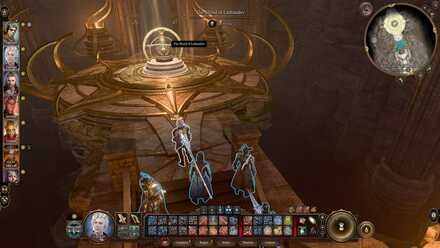
| The Blood of Lathander can be obtained from underneath the Rosymorn Monastery in the “Find the Blood of Lathander” quest under the “Githyanki Creche” questline. | |
| Map View | World View |
 |
 |
How to Get The Blood of Lathander Summary
- Explore the Rosymorn Monastery for ceremonial weapons.
- Find and explore the Secret Chamber.
- Get past the Secret Chamber's traps.
The quick summary to obtaining the Blood of Lathander is to search for the three (3) Ceremonial weapons in the Rosymorn Monastery. After using these Ceremonial weapons by placing them on their designated altars to obtain the Dawnmaster's Crest, explore the Secret Chamber in the Githyanki Creche and search for the Blood of Lathander.
However, there are several traps inside the Secret Chamber and obtaining the Ceremonial Weapons is easier said than done so read on to see all the steps needed to obtain the Blood of the Lathander!
Dawnmaster Puzzle (Rosymorn Monastery)
Find the Rosymorn Monastery Ceremonial Weapons
Reach the Rosymorn Monastery
| Outer Entrance | |
|---|---|
| Rosymorn Monastery X: 30, Y: 23 |
|
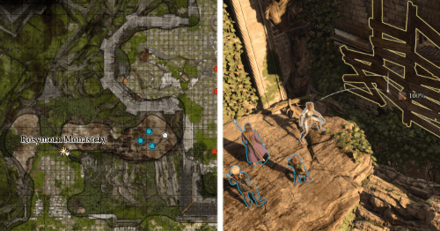 |
You can get to the Rosymorn Monastery after gaining access to the Mountain Pass.
Under the monastery is the Creche Y'llek, which is part of progressing Lae'zel's quest, and which you need to also access to as part of finishing the Dawnmaster Puzzle and getting the Blood of Lathander.
Acquire the Ceremonial Mace
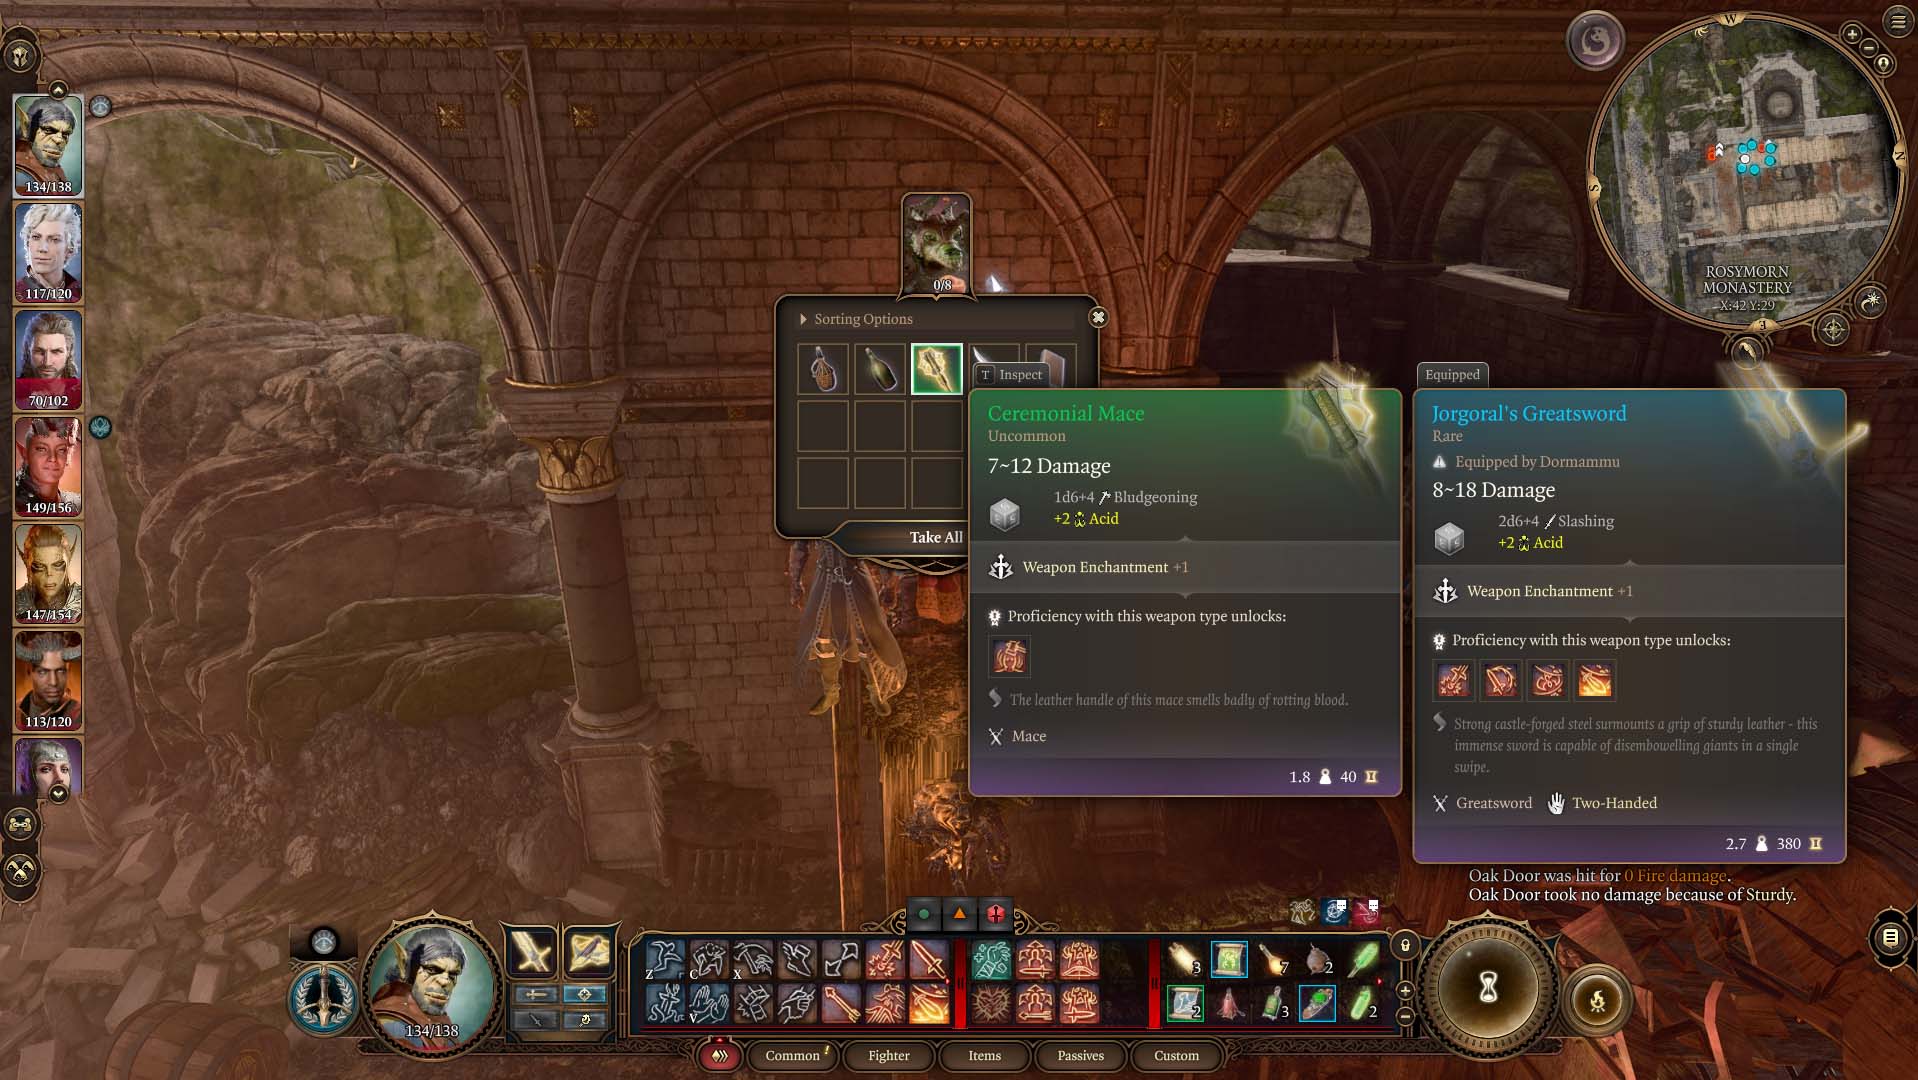
Head to the Mountain Pass, and proceed straight towards the Rosymorn Monastery. From there, you will need to search for a room occupied by Kobolds.
If you are at the entrance to the monastery where the cutscene between the Githyanki and the Halflings occured, look to the left side and check for broken windows. Jump into a window and you should encounter a drunk Kobold that is about to sleep.
Defeat the Kobolds in the room, and inspect their corpses until you find one holding the Ceremonial Mace.
Acquire the Rusted Mace (Alternative)
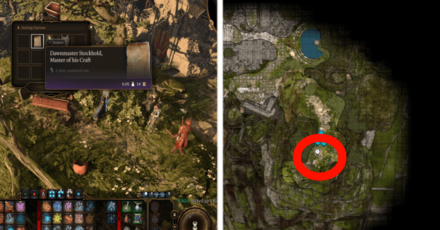
Alternatively, you can also dig up Dawnmaster Stockhold's grave and from there, you'll find a Rusted Mace with the note saying Dawnmaster Stockhold was buried together with a Ceremonial Mace.
You can place this on the Altar instead of the standard Ceremonial Mace that's in the possesion of the Kobold instead.
Acquire the Ceremonial Warhammer

Next, you will need to head up towards the roof just above from where you've slain the room full of kobolds. Go back out of the room and climb the Knotted Roots to get to the roof.
You can head north until you find more Knotted Roots behind an archway, or you can look for the knotted roots near the Guardian of Faith room which will take your directly to the front of the eagle.
Climb up and when you reach the roof, you will find the Ceremonial Warhammer located in the nest of an Ancient Eagle. You could try a stealth approach by smuggling the warhammer without antagonizing the Ancient Eagle, or the more direct approach where you outright kill the avian creature.
Acquire the Ceremonial Battleaxe
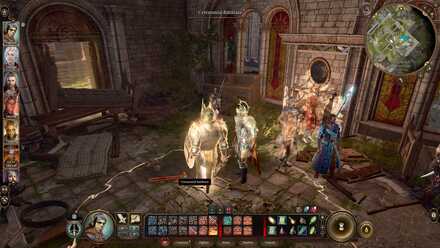
After acquiring the Ceremonial Warhammer, you will need to head towards the East Wing of the Rosymorn Monastery. You will find the Ceremonial Battleaxe in the area behind an Enchanted Door.
Even if you can unlock the door, you will have to find another way since it is barricaded by beds. Head to the Dawnmaster Room nearby with the circular stained glass. Look to your right and you will find a broken window you can jump into.
From the broken window, navigate the broken path to jump into another broken window into the Guardian of Faith's room. Use ranged attacks to defeat the Guardian of Faith and pick up the Ceremonial Battleaxe near it.
How to Access Guardian of Faith Room
Place the Weapons On Their Designated Altars
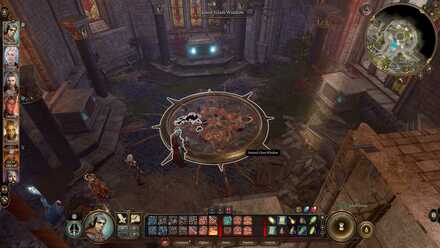
| Ceremonial Weapon Placements |
|---|
| ・Place the Ceremonial Warhammer on the pedestal that reads “Dawnmaster Seed” ・Place the Ceremonial Mace on the pedestal that reads “Dawnmaster Stockhold” ・Throw the Ceremonial Battleaxe on the pedestal that reads “Dawnmaster Vaseid” |
Once you have acquired all three ceremonial weapons, backtrack to the hallway and proceed to the puzzle room with the Dawnmaster Room
From there, place the ceremonial weapons on their designated altars to open a small chamber that holds a pouch containing the Dawnmaster's Crest inside it.
Search for the Blood of Lathander in the Secret Chamber
Reach Creche Y'llek Below the Monastery
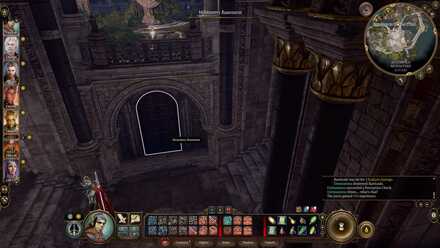
From the room where the Ceremonial Battleaxe could be looted, take the door that leads to a broken down staircase.
Jump down and make your way to the door to the Monastery Basement which leads to Creche Y'llek.
Where to Find the Githyanki Creche
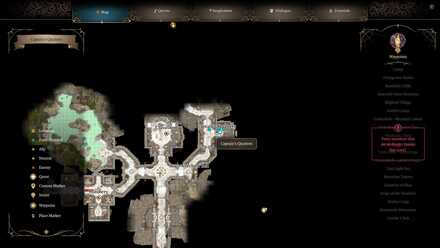
Head to the Captain's Quarters
| NPC Dialogue | |
|---|---|
| Gish Far'aag: I expected no visitors, faithful, or otherwise. Why have you come? | Dialogue Options | Dialogue Results |
| Allow Lae'zel to answer. | Result: Granted entry. |
| I'm on your side! Captain Voss sent me to find an item for you. | Result: Choose to produce the artefact grants immediate entry. Else, choose the extra Skill Checks. |
| I was infected by an illithid, and was told to seek a githyanki creche. | Result: If you have Lae'zel with you, they will let you pass. If not, you must prove it with more Skill Checks. |
| [INTIMIDATION (DC18)] Let me pass. Fighting me will end badly for you. |
Success: Granted entry. Failure: Battle starts. |
| [PERSUASION (DC18)] You githyanki hate illithid. I have proof that hey are invading. We need your help. |
Success: Granted entry. Failure: Battle starts. |
The dialogue options above may differ per character.
When entering the creche for the first time, you can ge through with dialogue checks or by defeating the guards. Being a Githyanki or having Lae'zel in your party will give you easier dialogue choices.
Once you are past the guards in Creche Y'llek, you will have to go through the Captain's Quarters. At the quarters, you can kill or pickpocket the Kith'rak Therezzyn to get the Gith Stone.
Insert the stone into the Githyanki Barrier Disruptor beside the yellow barrier to open it. Head inside and continue on by crossing the bridge and entering the next area, the Inquisitor's Chamber to find the next puzzle.
Reach the Inquisitor's Chambers
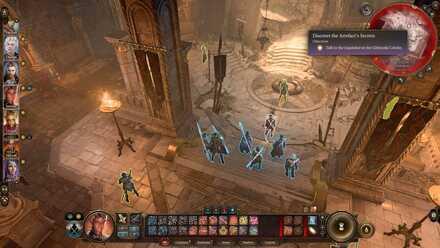
Once inside the Inquisitor's Chambers, you can go directly to the two statues to the west of the area. You do not have to interact with the Inquisitor when doing this.
Assuming that you are facing west here is the order in which you will turn them, from top to bottom.
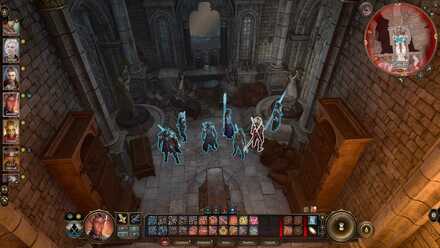
- Right Statue - Turn Once (1 time)
- Left Statue - Turn Thrice (3 times)
- Right Statue - Turn Twice (2 times)
You will need to physically attack the statue on the left before you could move it. After moving the statues in their designated positions, a path behind the Decorated Barrels will open up that leads to the Daybreak Gate.
Move the barrels to the side and then continue on to the newly revealed path.
### Use the Dawnmaster's Crest to Open the Gate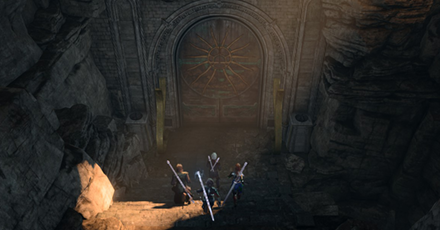
Proceed towards the Daybreak Gate revealed from positioning the two statues in their designated directions.
Simply enter the Daybreak Gate, and the area will take you to the Secret Chamber which houses the Blood of Lathander.
## Get Past Secret Chamber's TrapsRemove the Yellow Barriers
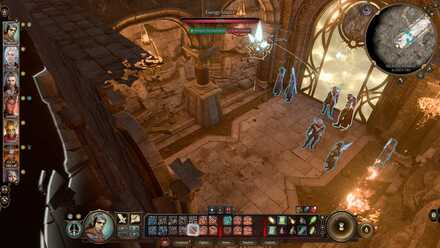
After going inside the Daybreak Gate, proceed onwards and use ranged attacks to destroy the Energy Sources that are powering up the yellow barriers hindering your progress.
Disarm the Dawnbreaker Trap
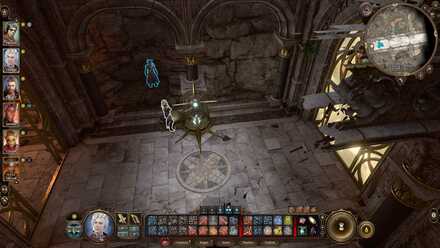
It is good to have Astarion or a Rogue in this area, as their proficiency bonuses will make disarming traps easier.
Position a member to the side of the Dawnbreaker so as not to be detected nor hit by its blastwave. Use a Sleight of Hand Check to safely disarm the trap before your party ventures.
Climb the left side of the Dawnbreaker and then traverse the backside until you find the energy source for the next gate.
Disarm the Second Dawnbreaker and Barrier
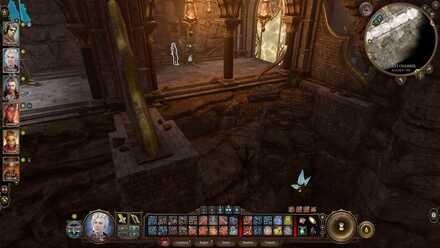
Drop down to the side of the second Dawnbreaker and roll another Sleight of Hand Check to disarm it. Then safely go to the ledge to destroy another Energy Source down below, and then proceed to the last room.
You will see that the Blood of Lathander is at the end of the platform, levitating. Use the Dawnmaster's Crest to free and obtain the weapon.
Baldur's Gate 3 Related Guides

All Legendary Weapons and Armor
All Legendary Weapons
| All Legendary Weapons | |
|---|---|
| Balduran's Giantslayer | Bloodthirst |
| Crimson Mischief | Devotee's Mace |
| Duellist's Prerogative | Gontr Mael |
| Markoheshkir | Nyrulna |
| Orphic Hammer | Selune's Spear of Night |
| Shar's Spear of Evening | Silver Sword of the Astral Plane |
| The Blood of Lathander | - |
All Legendary Armor
| All Legendary Armor | |
|---|---|
| Gloves of Soul Catching | Helldusk Armor |
| Helm of Balduran | Mask of the Shapeshifter |
| Scarab of Protection | Viconia's Walking Fortress |
All Legendary Books
| All Legendary Books | |
|---|---|
| Caution Before the Seelie | The Annals of Karsus |
| The Red Knight's Final Strategem | The Tharchiate Codex |
All Maces
| Mace | Adamantine Mace | Loviatar's Scourge |
| Xyanyde | The Blood of Lathander | Devotee's Mace |
| Ceremonial Mace | Rusty Mace | Crude Mace |
| Handmaiden's Mace | Infernal Mace |
Comment
Author
How to Get the Blood of Lathander
improvement survey
03/2026
improving Game8's site?

Your answers will help us to improve our website.
Note: Please be sure not to enter any kind of personal information into your response.

We hope you continue to make use of Game8.
Rankings
Gaming News
Popular Games

Genshin Impact Walkthrough & Guides Wiki

Honkai: Star Rail Walkthrough & Guides Wiki

Umamusume: Pretty Derby Walkthrough & Guides Wiki

Pokemon Pokopia Walkthrough & Guides Wiki

Resident Evil Requiem (RE9) Walkthrough & Guides Wiki

Monster Hunter Wilds Walkthrough & Guides Wiki

Wuthering Waves Walkthrough & Guides Wiki

Arknights: Endfield Walkthrough & Guides Wiki

Pokemon FireRed and LeafGreen (FRLG) Walkthrough & Guides Wiki

Pokemon TCG Pocket (PTCGP) Strategies & Guides Wiki
Recommended Games

Diablo 4: Vessel of Hatred Walkthrough & Guides Wiki

Fire Emblem Heroes (FEH) Walkthrough & Guides Wiki

Yu-Gi-Oh! Master Duel Walkthrough & Guides Wiki

Super Smash Bros. Ultimate Walkthrough & Guides Wiki

Pokemon Brilliant Diamond and Shining Pearl (BDSP) Walkthrough & Guides Wiki

Elden Ring Shadow of the Erdtree Walkthrough & Guides Wiki

Monster Hunter World Walkthrough & Guides Wiki

The Legend of Zelda: Tears of the Kingdom Walkthrough & Guides Wiki

Persona 3 Reload Walkthrough & Guides Wiki

Cyberpunk 2077: Ultimate Edition Walkthrough & Guides Wiki
All rights reserved
© 2023 Larian Studios. All rights reserved. Larian Studios is a registered trademark of arrakis nv, affiliate of Larian Studios Games ltd. All company names, brand names, trademarks and logos are the property of their respective owners. © 2020 Wizards of the coast. All rights reserved. Wizards of the coast, Baldur’s Gate, Dungeons & Dragons, D&D, and their respective logos. Are registered trademarks of wizards of the coast LLC
The copyrights of videos of games used in our content and other intellectual property rights belong to the provider of the game.
The contents we provide on this site were created personally by members of the Game8 editorial department.
We refuse the right to reuse or repost content taken without our permission such as data or images to other sites.


![Everwind Review [Early Access] | The Shaky First Step to A Very Long Journey](https://img.game8.co/4440226/ab079b1153298a042633dd1ef51e878e.png/thumb)

![Monster Hunter Stories 3 Review [First Impressions] | Simply Rejuvenating](https://img.game8.co/4438641/2a31b7702bd70e78ec8efd24661dacda.jpeg/thumb)


