Should You Save the Goblin Sazza
★ All Updates for Patch 5
☆ Beginner Guides for All Starter Players
★ Simple Character Creation Guide for beginners
☆ A Full Guide to Multiclassing
★ All Side Quests and Event Points
☆ All Races and Subraces
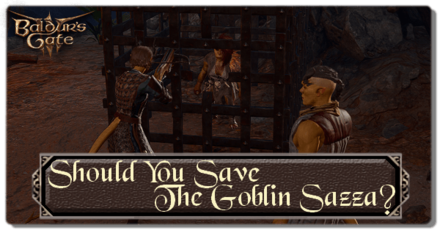
In Baldur's Gate 3, you should save Sazza in the Emerald Grove because there are many potential rewards in saving her. Read on to learn if you should save the goblin Sazza, how to save Sazza, and possible dialogue choices and outcomes for this side campaign.
Should You Save the Goblin Sazza?
It's much better to save Sazza, since there's a lot of potential rewards that you can get by saving her, and no benefits to letting her die.
- No Benefits in Letting Her Die
- Help Her Escape to Bypass Checks in Goblin Camp
- Get Assassin's Touch by Completing her Quest
- Get Achievement by Saving Her Three Times
No Benefits in Letting Her Die
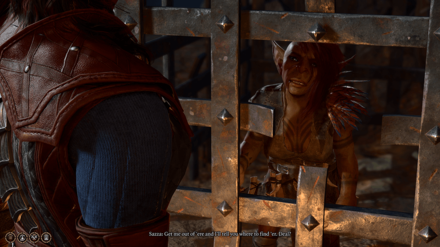
There are no rewards to letting Sazza die. Some allies like Astarion will approve of the choice to let her die, but more will disapprove, and it's not worth it.
You'll miss out on a lot of potential rewards and benefits if you let her die, so it's much better to keep her alive at every chance you can.
Emerald Grove Maps and Points of Interest
Help Her Escape Emerald Grove to Bypass Checks in Goblin Camp
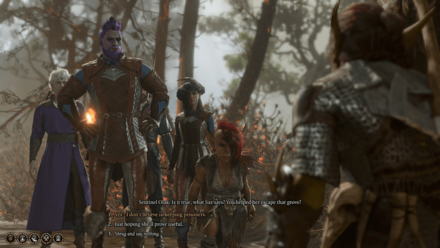
When you manage to save her in Emerald Grove and then help her sneak out, she'll return to the Goblin Camp. When you go to the Goblin Camp, instead of having to deal with the guards there, Sazza will vouch for you and allow you to get in without checks.
The same thing will happen with the guards in the Shattered Sanctum in the Goblin Camp.
Goblin Camp Maps and Points and Interest
Get Assassin's Touch by Completing her Save Quest
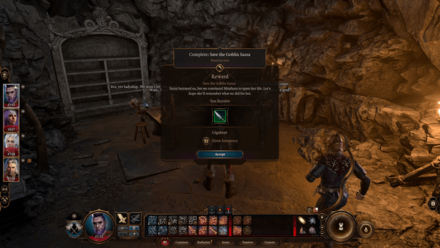
By completing the Save the Goblin Sazza quest, you'll gain the Assassin's Touch weapon.
You'll only be able to complete the quest and get the item if she stays alive until you peacefully meet with Minthara deep in the Shattered Sanctum.
How to Get Assassin's Touch
Get She Cannot Be Caged Achievement by Saving Her Three Times
The She Cannot Be Caged achievement can only be acquired by saving Sazza three times. The first one is saving her in Emerald Grove, while the second one is saving her from Minthara in the Shattered Sanctum.
The third instance where you can potentially save her is in Act 2, during the Infilitrate Moonlight Towers quest. During the scene where you get to decide her fate, defend her and release her to get the achievement.
This third instance is a bit hard to trigger and you'll need to have selected certain specific choices in Act 1 to keep her alive by Act 2.
Act 2: Infiltrate Moonrise Towers Walkthrough
Save the Goblin Sazza Quest Details
| Journal Entry | |
|---|---|
| Save the Goblin Sazza | |
| Reward | Assassin's Touch |
| Related Quest | Find a Cure |
| Location | |
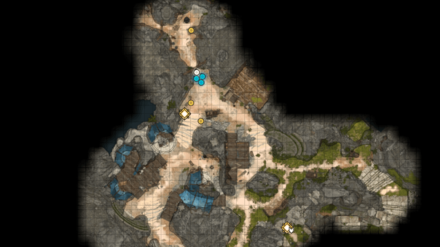
| Emerald Grove | |
 |
|
How to Save Sazza
To complete the Save the Goblin Sazza side quest, you'll need to save Sazza in Emerald Grove and help her escape, meet her in Goblin Camp, then save her once again against Minthara.
- Locate Arka, Sazza, and Memnos
- Stop Arka From Executing Sazza
- Free Sazza from Her Cage
- Escort Sazza in Escaping the Emerald Grove
- Go to the Goblin Camp
- Rescue Sazza from Minthara
Locate Arka, Sazza, and Memnos
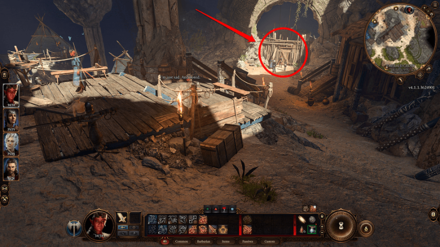
The goblin Sazza can be found behind a makeshift wooden wall towards the back end of The Hollow in the Emerald Grove.
Approach the wall and open the door to witness a confrontation between Sazza, Arka, and Memnos.
Stop Arka From Executing Sazza
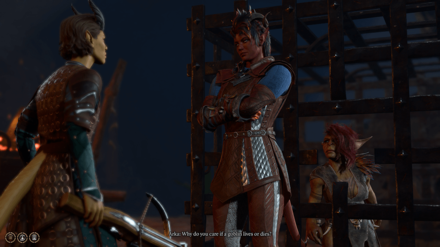
To stop Arka from executing Sazza, you will need to step between the crossbow and the goblin.
Doing so will progress the dialogue into the following skill checks.
| Arka Dialogue | |
|---|---|
| You! Move! | Dialogue Options | Dialogue Results |
| [PERSUASION (DC10)] No, shoot me. Should be easy, right? | Success: Arka begrudgingly relents and allows Sazza to live. Failure: Allows the MC to attempt a different skill check to convince Arka not to execute Sazza. |
| [PERSUASION (DC10)] This won't avenge Kanon. It won't change anything. |
|
| [INTIMIDATION (DC10)] Take your shot. Go on. |
Success: Arka begrudgingly relents and allows Sazza to live. Failure: Arka and Memnos become temporarily hostile against the MC and the party. |
| [DETECT THOUGHTS (DC10)] Read the tiefling's thoughts. |
Success:Unlocks a new dialogue option: “What would Kanon think of you now?” Selecting the new dialogue option guarantees Sazza's survival. Failure: Arka and Memnos become temporarily hostile against the MC and the party. |
Succeeding in any of the skill checks will result in Sazza's survival, so if you're trying to save Sazza, be sure to attempt the skill check that you have the advantage in.
Free Sazza from Her Cage
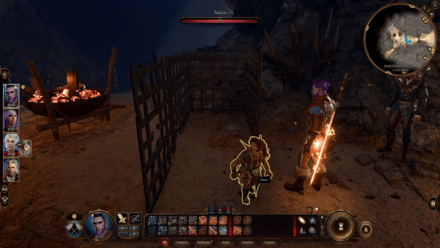
After the tieflings leave the prison area, you are now free to help Sazza escape. Make sure that there's no one nearby, then lockpick the cage.
Talk to Sazza; there aren't any wrong choices here, so continue the conversation until she agrees to follow you as a companion.
Escort Sazza in Escaping the Emerald Grove
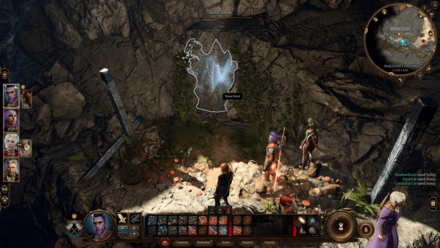
With Sazza now being your companion, you'll have to escort her out of the Emerald Grove. You'll have to go through the secret tunnel under Emerald Grove to avoid being seen by the tieflings and druids at the surface. Behind Sazza's cage, you should find a lower ledge that you could jump to. Enter the stone door that will be revealed with a Perception success.
Inside this secret tunnel, you need to protect Sazza from all the obstacles. Alongside the goblins that you have to defeat, there are Guardian Statues that will shoot your party until you activate the corresponding rune. Don't go rushing in as Sazza is pretty frail and will quickly die from these shots; split one member of the party that can tank a couple of hits to activate the runes.
After reaching the exit at the other end of the tunnel, Sazza will leave for the Goblin Camp, where she'll be waiting for you.
Go to the Goblin Camp
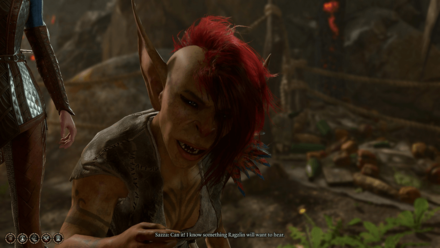
Follow Sazza into the front entrance of the Goblin Camp. She'll allow you to go through the guards without issue, which you won't be able to do if you didn't rescue her before going to the Goblin Camp.
Go deeper into the camp and enter the Shattered Sanctum. Sazza will also be there, allowing you to bypass the checks with the guards there who will normally be hostile against you.
Rescue Sazza from Minthara in the Shattered Sanctum
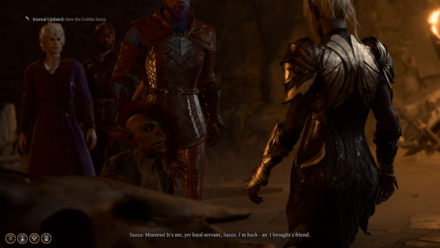
You'll next find Sazza by Minthara's side, deep in the Shattered Sanctum. Here, you'll be able to conclude the Save the Goblin Sazza quest. Talk to Sazza to start the conversation with Minthara, and you'll eventually be given a choice to support Sazza or throw her under the bus.
| Sazza Dialogue | |
|---|---|
| No! I mucked up, I'm sorry! But I didn't know who they woz... they didn't tell me nothin'! | Dialogue Options | Dialogue Results |
| Keep quiet. | Sazza will get dragged away to be fed to the spiders in the spider pit. You won't get any rewards. |
| I explained everything to her. She's just too stupid to understand. | |
| She's telling the truth. She didn't know. | Sazza will be spared by Minthara. After your conversation with Minthara, you'll get the Assassin's Touch weapon as a reward. |
There's only one choice to save Sazza from Minthara, which is to stand up to her, so select that choice. Afterwards, whatever choice you make with Minthara (even the ones that end up with you attacking her, including Sazza) will allow you to get the Assassin's Touch weapon at the end of the conversation.
If you wish to get the achievement to saving Sazza in Act 2, you'll need to end things favorably with Minthara, so avoid selecting the offensive 'I'll kill you' choices in this conversation.
Baldur's Gate 3 Related Guides

Prologue Side Quests
| All Prologue Side Quests | |
|---|---|
| How to Free the Intellect Devourer | How to Free Shadowheart |
Act 1 Side Quests
Druid's Grove Quests
| Druid Grove Quests | ||
|---|---|---|
| How to Steal the Sacred Idol | Should You Save The Goblin Sazza? | How to Avoid Tiefling Pickpockets |
| Save the Refugees | How to Save Nadira | How to Save Mirkon |
| How to Save the First Druid Halsin | How to Open the Stone Slab | Request Help from Nettie |
| How to Investigate and Expose Kagha | Save Arabella | - |
The Risen Road Quests
| The Risen Road Quests | |
|---|---|
| Find the Missing Shipment | How to Rescue the Grand Duke |
| Rescue the Trapped Man | How to Free Oskar Fevras |
Blighted Village Quests
Goblin Camp Quests
| Goblin Camp Quests | |
|---|---|
| How to Get Volo's Ersatz Eye | Defiled Temple Puzzle |
| Find the Nightsong | Ask the Goblin Priestess for Help |
Nautiloid Crash Region Quests
Underdark Quests
Mountain Pass Quests
| Mountain Pass Quests | ||
|---|---|---|
| Steal a Githyanki Egg | How to Beat Gremishkas | How to Access Guardian of Faith Room |
| Dawnmaster Puzzle Guide | Where to Find the Githyanki Creche | - |
This section is currently under construction. Check back later for updates!
Act 2 Side Quests
Last Light Inn Quests
Gauntlet of Shar Quests
| Gauntlet of Shar Quests | |
|---|---|
| Gauntlet of Shar: All Trials and Umbral Gems | Kill Raphael's Old Enemy |
Mind Flayer Colony Quests
| Mind Flayer Colony Quests |
|---|
| How to Solve the Necrotic Laboratory |
Act 3 Side Quests
Rivington Quests
| Rivington Quests | ||
|---|---|---|
| Investigate the Suspicious Toys | Solve the Open Hand Temple Murders | Find the Missing Letters |
| How to Get to Wyrm's Rock Fortress | How to Find Dribbles the Clown | - |
Lower City Quests
| Lower City Quests | ||
|---|---|---|
| How to Get to the House of Hope | How to Get to Cazador's Palace | Rescue Orin's Victim |
| Aid the Underduke | How to Get to the House of Grief | Investigate the Murders |
Comment
Author
Should You Save the Goblin Sazza
improvement survey
03/2026
improving Game8's site?

Your answers will help us to improve our website.
Note: Please be sure not to enter any kind of personal information into your response.

We hope you continue to make use of Game8.
Rankings
- We could not find the message board you were looking for.
Gaming News
Popular Games

Genshin Impact Walkthrough & Guides Wiki

Honkai: Star Rail Walkthrough & Guides Wiki

Umamusume: Pretty Derby Walkthrough & Guides Wiki

Pokemon Pokopia Walkthrough & Guides Wiki

Resident Evil Requiem (RE9) Walkthrough & Guides Wiki

Monster Hunter Wilds Walkthrough & Guides Wiki

Wuthering Waves Walkthrough & Guides Wiki

Arknights: Endfield Walkthrough & Guides Wiki

Pokemon FireRed and LeafGreen (FRLG) Walkthrough & Guides Wiki

Pokemon TCG Pocket (PTCGP) Strategies & Guides Wiki
Recommended Games

Diablo 4: Vessel of Hatred Walkthrough & Guides Wiki

Fire Emblem Heroes (FEH) Walkthrough & Guides Wiki

Yu-Gi-Oh! Master Duel Walkthrough & Guides Wiki

Super Smash Bros. Ultimate Walkthrough & Guides Wiki

Pokemon Brilliant Diamond and Shining Pearl (BDSP) Walkthrough & Guides Wiki

Elden Ring Shadow of the Erdtree Walkthrough & Guides Wiki

Monster Hunter World Walkthrough & Guides Wiki

The Legend of Zelda: Tears of the Kingdom Walkthrough & Guides Wiki

Persona 3 Reload Walkthrough & Guides Wiki

Cyberpunk 2077: Ultimate Edition Walkthrough & Guides Wiki
All rights reserved
© 2023 Larian Studios. All rights reserved. Larian Studios is a registered trademark of arrakis nv, affiliate of Larian Studios Games ltd. All company names, brand names, trademarks and logos are the property of their respective owners. © 2020 Wizards of the coast. All rights reserved. Wizards of the coast, Baldur’s Gate, Dungeons & Dragons, D&D, and their respective logos. Are registered trademarks of wizards of the coast LLC
The copyrights of videos of games used in our content and other intellectual property rights belong to the provider of the game.
The contents we provide on this site were created personally by members of the Game8 editorial department.
We refuse the right to reuse or repost content taken without our permission such as data or images to other sites.


![Everwind Review [Early Access] | The Shaky First Step to A Very Long Journey](https://img.game8.co/4440226/ab079b1153298a042633dd1ef51e878e.png/thumb)

![Monster Hunter Stories 3 Review [First Impressions] | Simply Rejuvenating](https://img.game8.co/4438641/2a31b7702bd70e78ec8efd24661dacda.jpeg/thumb)


