How to Beat Gerringothe Thorm (Toll House)
★ All Updates for Patch 5
☆ Beginner Guides for All Starter Players
★ Simple Character Creation Guide for beginners
☆ A Full Guide to Multiclassing
★ All Side Quests and Event Points
☆ All Races and Subraces

Gerringothe Thorm is a boss in the Shadow-Cursed Lands in Act 2 of Baldur's Gate 3 (BG3). Read on to learn how to beat Gerringothe Thorm, where to find her, as well as her drops!
List of Contents
How to Beat Gerringothe Thorm
| A | Destroy Visages to Lower Her HP |
|---|---|
| B | Defeat Her With Dialogue Checks |
| C | Engage in Open Combat |
Destroy Visages to Lower Her HP

Gerringothe Thorm has an incredibly high amount of HP due to the gold armor she's wearing, and the only way to knock the armor off is by destroying Visages floating around the Tollhouse using stealth range attacks.
There are 6 in total, and each time a visage is destroyed, a portion of her HP is taken away as it removes an armor piece from her.
The idea here is to utilize stealth and sneak around the house to destroy as many visages as possible without getting caught, as doing so will lock you in battle with her.
Taking Out All Visages Allows For a One-Shot Kill

If you manage to successfully destroy all Visages, you'll lower her HP to the point that you can just one-hit kill Gerringothe Thorm as she's completely stripped off of her armor that was protecting her.
Visages Will Change Locations If You Miss
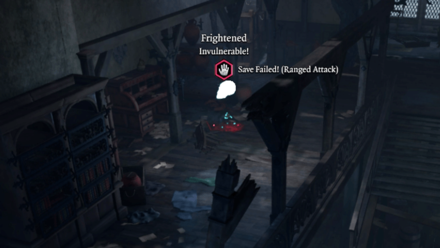
If you miss an attack roll on a visage, it will teleport to a random location inside the Tollhouse. It's best to use the darkness to gain advantage and increase your chances of landing the attack.
Use Only One Character
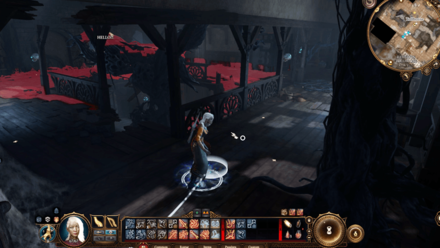
Sneaking around the Tollhouse without getting caught works best with just one character. Use a character that is excellent in Stealth, then leave the rest of the party outside the Tollhouse.
Defeat Her Through Dialogue Checks
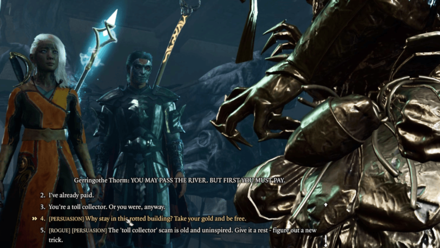
You can beat Gerringothe Thorm without directly entering battle with her by successfully going through a series of dialogue checks to convince her that you'll be replacing her as the tollkeeper.
Enter a conversation with her, then select the option to Toss a Piece of Coin at her, then ask her how much does she want exactly. From here, you'll roll two Persuasion, Deception, or Intimidation dialogue checks.
Engage in Open Combat
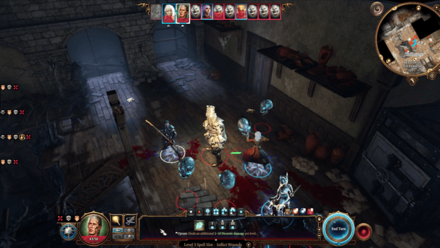
Be prepared for a long tough battle if you decide to fight her head on as the skull visages in the area will immediately become hostile and will obliterate you to pieces with their AoE skills.
Not to mention that Gerringothe Thorm herself could also cast out her own set of Burst spells, one of which will deal damage based on how much gold her target is carrying. Additionally, she could also summon giant halberds to join her in the fight.
Engaging her directly is the least recommended choice as your chances of winning are minimal. Going with the stealth route and dialogue method are better options in dealing with her.
Gerringothe Thorm Location
Tollhouse, North of Moonrise Towers
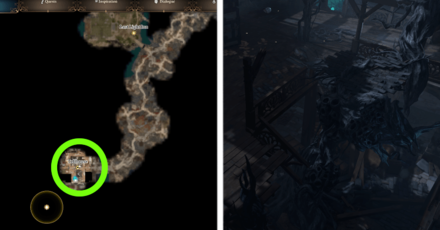
Gerringothe Thorm can be found on the second floor of the Tollhouse directly north of Moonrise Towers, and south of Last Light Inn.
Requires Greater Protection from Shadow Curse
You will need a Moonlantern, or the Pixie Blessing condition from a Filigreed Feywild Bell for greater protection from the shadow curse.
Both of which are obtainable from killing Kar'niss in the Seek Protection from the Shadow Curse side quest.
Gerringothe Thorm Drops and Rewards
Boss Drops
Once Gerringothe Thorm is defeated, you can loot the following from her:
- Twist of Fortune - Rare Morningstar melee weapon
- 251 Gold
- Unsigned Trade Visa
- Tollhouse Master's Office Key
Vault Rewards

Open the big vault to the east of the Master's Office Room to receive 514 Gold. This requires a Strength check (DC 16).
Master's Office Room
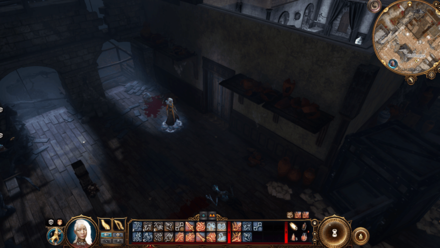
Use the Tollhouse Master's Office Key to open the room to the west of the locked vault. Once inside, open the Heavy Chest to obtain an Ironvine Shield.
Ironvine Shield: Armor Guide and How to Get
Double Oak Doors Room

On the southeast corner of the second floor, pick the lock of the double oak doors, then open the Opulent Chest inside to get a Gloves of Battlemage's Power
Gloves of Battlemage's Power: Armor Guide and How to Get
Baldur's Gate 3 Related Guides

Act 1 Bosses
| All Act 1 Bosses | ||
|---|---|---|
| Auntie Ethel | Bulette | Ch'r'ai W'Wargaz |
| Commander Zhalk | Dror Ragzlin | Flind |
| Grym | Kagha | Lump the Enlightened |
| Minthara | Nere | Owlbear |
| Phase Spider Matriarch | Priestess Gut | Spectator |
Act 2 Bosses
| All Act 2 Bosses | ||
|---|---|---|
| Ch'r'ai Tska'an | Balthazar | Fist Marcus |
| Gerringothe Thorm | Kar'niss | Ketheric Thorm |
| Malus Thorm | Thisobald Thorm | Yurgir |
Act 3 Bosses
| All Act 3 Bosses | ||
|---|---|---|
| Ansur | Auntie Ethel | Cazador Szarr |
| Dominated Red Dragon | Lord Enver Gortash | Lorroakan |
| Mystic Carrion | Orin the Red | Raphael |
| Sarevok | Steel Watcher Titan | Viconia DeVir |
| The Unbreakable Will of the Netherbrain | ||
Comment
2. The battle is very easy if you use Darkness on the Thorm, as she will just hang out blinded while you scoop up the gold. I entered Turn Mode, dropped Darkness centered on her when she was by the safe, then had Astarion sneak by and snag the gold. Then had him dash to the roof, and do a Sneak attack on a Visage, which initiated battle. I had the rest of the party take out the visages, and then mopping her up was a one-hit can of corn. Battle will not start until you attack a visage
Author
How to Beat Gerringothe Thorm (Toll House)
improvement survey
03/2026
improving Game8's site?

Your answers will help us to improve our website.
Note: Please be sure not to enter any kind of personal information into your response.

We hope you continue to make use of Game8.
Rankings
- We could not find the message board you were looking for.
Gaming News
Popular Games

Genshin Impact Walkthrough & Guides Wiki

Honkai: Star Rail Walkthrough & Guides Wiki

Umamusume: Pretty Derby Walkthrough & Guides Wiki

Pokemon Pokopia Walkthrough & Guides Wiki

Resident Evil Requiem (RE9) Walkthrough & Guides Wiki

Monster Hunter Wilds Walkthrough & Guides Wiki

Wuthering Waves Walkthrough & Guides Wiki

Arknights: Endfield Walkthrough & Guides Wiki

Pokemon FireRed and LeafGreen (FRLG) Walkthrough & Guides Wiki

Pokemon TCG Pocket (PTCGP) Strategies & Guides Wiki
Recommended Games

Diablo 4: Vessel of Hatred Walkthrough & Guides Wiki

Fire Emblem Heroes (FEH) Walkthrough & Guides Wiki

Yu-Gi-Oh! Master Duel Walkthrough & Guides Wiki

Super Smash Bros. Ultimate Walkthrough & Guides Wiki

Pokemon Brilliant Diamond and Shining Pearl (BDSP) Walkthrough & Guides Wiki

Elden Ring Shadow of the Erdtree Walkthrough & Guides Wiki

Monster Hunter World Walkthrough & Guides Wiki

The Legend of Zelda: Tears of the Kingdom Walkthrough & Guides Wiki

Persona 3 Reload Walkthrough & Guides Wiki

Cyberpunk 2077: Ultimate Edition Walkthrough & Guides Wiki
All rights reserved
© 2023 Larian Studios. All rights reserved. Larian Studios is a registered trademark of arrakis nv, affiliate of Larian Studios Games ltd. All company names, brand names, trademarks and logos are the property of their respective owners. © 2020 Wizards of the coast. All rights reserved. Wizards of the coast, Baldur’s Gate, Dungeons & Dragons, D&D, and their respective logos. Are registered trademarks of wizards of the coast LLC
The copyrights of videos of games used in our content and other intellectual property rights belong to the provider of the game.
The contents we provide on this site were created personally by members of the Game8 editorial department.
We refuse the right to reuse or repost content taken without our permission such as data or images to other sites.


![Monster Hunter Stories 3 Review [First Impressions] | Simply Rejuvenating](https://img.game8.co/4438641/2a31b7702bd70e78ec8efd24661dacda.jpeg/thumb)


There's a room on the 2nd floor to the right of the main stairs and safe blocked by impervious cursed vines. You can destroy the roof like you do in the office, and drop down, but you can also stack crates under the window/doorway outside, and just climb up and down. And the south doors lead to outside stairs to the basement, with loot in a secret room, including a soul coin, and a sub-basement cave. Just be careful not to stray south and trigger the Tower, but you can back out if u do