Gauntlet of Shar Trial Guides: All Umbral Gem Locations
★ All Updates for Patch 5
☆ Beginner Guides for All Starter Players
★ Simple Character Creation Guide for beginners
☆ A Full Guide to Multiclassing
★ All Side Quests and Event Points
☆ All Races and Subraces
This is a walkthrough on how to complete all trials of the Gauntlet of Shar, Umbral Gem locations, and the Silent Library in Baldur's Gate 3 (BG3). Learn how to complete the trials effectively, and where to find the Umbral Orbs for accessing Shadowfell.
| Gauntlet of Shar Quests | ||
|---|---|---|
| Kill Raphael's Old Enemy | Silent Library Puzzle | Gauntlet of Shar: All Trials |
List of Contents
Side Quest Details
| Journal Entry | |
|---|---|
| Infiltrate the Moonrise Towers Find the Nightsong |
|
| Recommended Level | Lv. 7 |
| Result | Access Shadowfell |
| Location | |
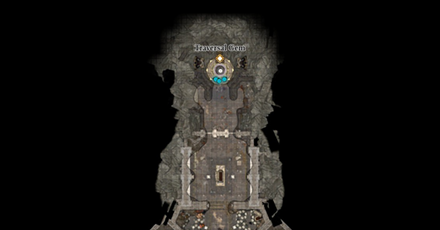
| Gauntlet of Shar (Thorm Mausoleum) X: -279, Y: -808 |
|
 |
|
How to Get to the Gauntlet of Shar
Find the Gauntlet of Shar in Thorm Mausoleum
| Find the Gauntlet of Shar |
|---|
|
|
Get Inside the Thorm Mausoleum
| Thorm Mausoleum Entrance |
|---|
| Thorm Mausoleum (Shadow-Cursed Lands) X: 190, Y: 110 |
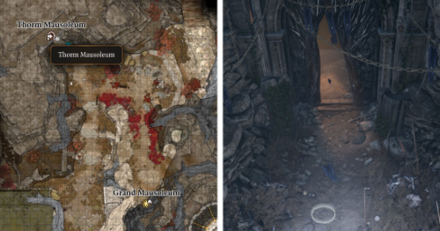 |
Before you can get to the Gauntet of Shar you need to get inside the Thorm Mausoleum at the Shadow-Cursed Lands first.
The Gauntlet of Shar can be infiltrated relatively safely when you have sided with the Moonrise Tower (you will still have to fight some of the Shadow enemies).
How to Get to the Shadow-Cursed Lands
Pass the Thorm Mausoleum Painting Puzzle
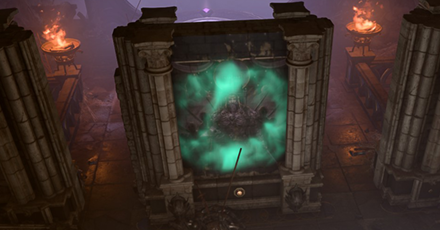
You need to solve two puzzles first before you can get to the trial rooms in the gauntlet. The first is the puzzle in the Thorm Mausoleum involving the paintings which will grant you access to the gauntlet. The second puzzle involves the protected Umbral Gem at the Statue of Shar which grants access to the gauntlet.
To solve the Thorm Mausoleum Puzzle, light up the paintings through their buttons in this order:
- Moonrise Tower (Southwest Painting)
- Ketheric Thorm Kneeling (Southeast Painting)
- Ketheric Thorm Portrait (Northern Painting)
Solving this puzzle will reveal a passage to the Gauntlet of Shar's entrance.
Pass the First Umbral Gem Puzzle in Gauntlet of Shar
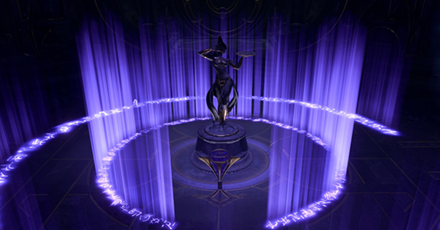
Head down the hallway of the gauntlet until you reach an area with the Statue of Shar. The main door across is sealed by the Umbral Gem in the middle, which you have to interact with to get past the door.
To solve the first Umbral Gem Gauntlet of Shar Puzzle, look for four (4) levers, one at each corner of the room, for lowering the Mystic Thuribles. Disarming the pressure plate traps right before them is valuable here, so have a Rogue or Astarion ready.
Once the four Thuribles have been lowered, turn of all within the area including your own light source to reveal an entry point to the protected Umbral Gem to unlock the main door. Proceed by continuing into the gauntlet.
Defeat Enemies with Balthazar's Skeletons
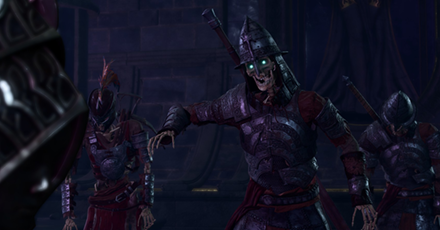
The area after the first umbral gem puzzle will reveal Balthazar's skeletons lurking around. A cutscene will trigger. After the talking to the skeletons, get ready to fight some Judiciars spawning from Umbral Tremors.
After clearing the area of enemies, head to the entrance far west of the room and head straight down the hallway. Skeletons that survived the encounter with the Judiciars will also head to that direction.
Balthazar's chamber is just located right after the Gauntlet of Shar waypoint which you can use as a fast travel point. North of the Gauntlet of Shar are the rooms to Shar's Trials for obtaining the Umbral Gems.
You Can Talk to Balthazar

Balthazar will be present in the Gauntlet of Shar, and he can be found to the west of the Gauntlet of Shar waypoint. You can choose to aid him in the quest for the Nightsong.
If you sided with the Moonrise Towers, you should be able to safely interact with him here. You can persuade him to give you a bell which can you use to summon Flesh to aid you in battle within the gauntlet.
You can also choose to whether fight him here, the end result being able to loot the Circle of Bones.
All Gauntlet of Shar Trials and Umbral Gems
| Shar's Trials and Umbral Gems Guide |
|---|
|
|
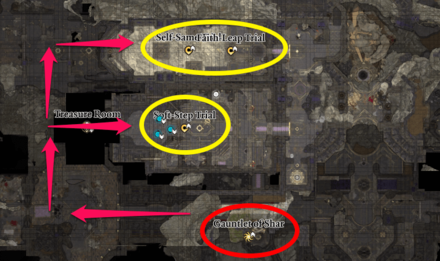
| There are a total of four (4) Umbral Gems you will need to take. Three must be collected from Shar's Trials at the gauntlet's west wing, and the fourth must taken from Yurgir at the east wing. When taking the Trials, you can have Shadowheart offer her blood at each altar to increase her approval. |
Umbral Gems in Gauntlet of Shar
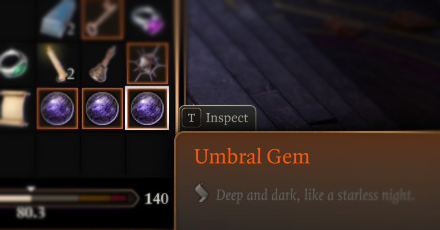
Completing all of Shar's Trials will give you a total of three (3) Umbral Gems. The fourth Umbral Gem can be found much later when you decide to look for Yurgir.
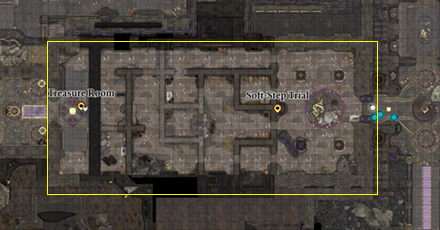
Soft-Step Trial
| Soft-Step Trial Room |
|---|
| Gauntlet of Shar (Thorm Mausoleuom) X: -763, Y: -755 |
 |
Four Umbral Gems are required to advance through the Gauntlet of Shar. Use them on one of the Pedestals that bring you to the lower portion of the gauntlet, up until the entrance to Shadowfell.
Three (3) of them are earned from completing the trials, and one (1) of them is gained from Yurgir. Making the required number of Umbral Gems to progress four (4).
The Soft-Step Trial is the first of Shar's three Trial rooms that you can enter. It is the nearest to the Gauntlet of Shar waypoint.
Disarm All Traps Before Starting the Trial
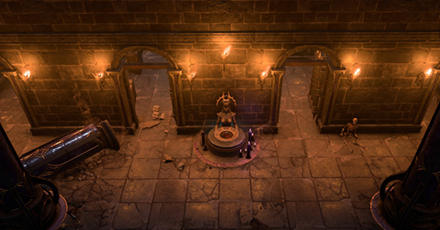
This trial is best done by a single Rogue, such as Astarion, due to the amount of of lockpicking and trap disarmament needed to pass through the maze safely.
You can safely disarm all of the traps before starting the trial (you just have to avoid sacrificing blood at the Ancient Altar first.)
Once all doors have been opened and all traps have been disarmed, you can have a character use the Ancient Altar and then navigate through the maze.
Evade the Roaming Shadows
There will be Shadows patrolling the middle of the room. If you are seen by any of them, you will be teleported back to the entrance.
To get past them, simply use Hide and study their patterns. Only move once their red search area is out of sight.
Once past the Shadows, head over to the end of the maze and acquire the first Umbral Gem. You can use the Transpositional Flux to teleport back to the trial room entrance.
Soft-Step Trial Umbral Gem
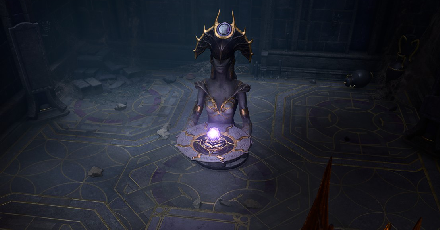
The Umbral Gem for the Soft-Step Trial room can be found at the end of the maze, behind a locked gate. You can either choose to lockpick it or you can grab the key at the center of the maze to open it.
Self-Same Trial
| Self-Same Trial Room |
|---|
| Gauntlet of Shar (Thorm Mausoleuom) X: -765, Y: -727 |
 |
The Self-Same Trial is the second of Shar's three Trial rooms that you can enter. It is the room a good distance next to the Soft-Step Trial entrance.
Prepare to Fight Your Copies
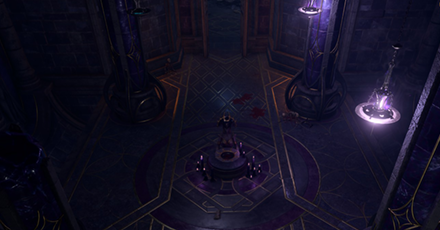
This room is combat-oriented. Once you sacrifice your blood to the Ancient Altar you will have to proceed through the area to fight your party's clones.
Any of your party members can fight clones, just make sure to study how the cloned party attacks first!
Fight Alone for Quick Completion
One alternative to finishing the trial quickly is by sending all of your members back to camp before using the Ancient Altar and then facing your own clone.
Keep in mind that the number of clones produced in this trial depend on the number of party members you have active.
Spot your singular clone sitting by the Brazier, use the Hide option and then perform a Surprise Attack to gain the advantage. One it has been defeated, you can collect the second Umbral Gem.
Self-Same Trial Umbral Gem
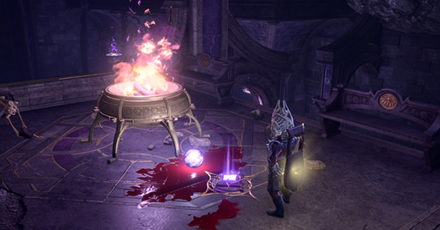
The Umbral Gem for the Self-Same Trial room can be found after defeating all of your copies in the area. It is usually found near the Brazier at the upper floor of the area after the fight.
Faith-Leap Trial
| Faith-Leap Trial Room |
|---|
| Gauntlet of Shar (Thorm Mausoleuom) (Floor Below Self-Same Trial Room) X: -752, Y: -727 |
 |
The Faith-Leap Trial is the third of Shar's three Trial rooms that you can enter. It is the room at the lower floor, right below the Same-Self Trial room.
Memorize Invisible Platforms

Of the three trial rooms, this is undoubtedly one of the hardest to complete due to the invisible platforms and needing to memorize where to go.
You will have to examine the disappearing room platforms from afar carefully (they become invisible if you are close to them.)
Leave Items or Jump on the Platforms
There are few ways you can go about this. One of them is economic: you do not need to memorize all of the invisible platforms.
Memorize select platforms and use the Jump function. This will make it much easier for you to traverse, and it is less taxing for the mind to do so.
Another safe but lengthy option is to leave items on the invisible platforms to mark them. You can use any item you do not necessary lead and creating a path of floating objects!
Use Fly or Misty Step
The most straightforward and convenient way to accomplish trial this is by having traversal spells such as Fly or Misty Step.
These kind of spells are usually available for classes such as the Paladin and Wizard.
Have similar members like Gale cast these spells on those who are going to partake in the trial.
Faith-Leap Umbral Gem
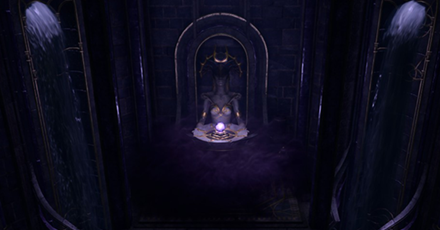
The Umbral Gem for the Faith-Leap Trial can be found at the very end of the Faith-Leap Trial room. Simply make it across the disappearing platforms.
Yurgir's Umbral Gem
| Yurgir Umbral Gem Location |
|---|
| Gauntlet of Shar (Thorm Mausoleuom) X: -650, Y: -756 |
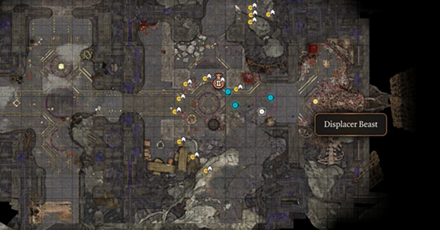 |
Yurgir the Orthon has the last of the four Umbral Gems necessary to gaining access to Shadowfell.
He is located at the east side of the Gauntlet of Shar (the same floor as the first two trial rooms). To get there, from the central room for inserting the collected Umbral Gems (Pedestal of Reckoning), head to the east broken stairway and follow the Displacer Beast.
From the initial position of the Displacer Beast, you can either choose to jump across and make a stealth approach to take on Yurgir and his minions, or you can go to the lower floor following the Displacer Beast and instead choosing to have a dialogue with Yurgir.
Fight Yurgir, Nessa, and the Merregons
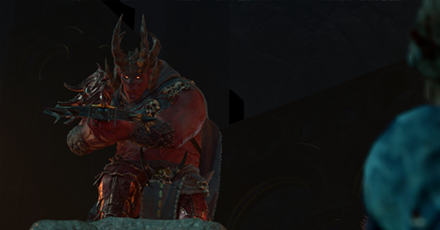
You can acquire the Umbral Gem by force by defeating Yurgir and all the combatants in the room.
Be warned that this will be a difficult fight since Yurgir by default is level 10, is resistant to most physical attacks, and can also turn invisible.
Persuade Yurgir to Kill Themselves
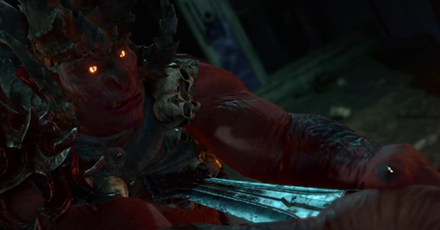
Fortunately, there is an easier way to deal with Yurgir. This, however, involves a lot of investment to persuasion and you may need to have either Astarion or Shadowheart talk to him.
Yurgir can be persuaded to kill his minions, his Displacer Beast Nessa, and himself through successful Persuasion Checks. You will need to, however, succeed in a passive Insight Check first after he sings to you his contract.
Insert Umbral Gems on Pedestals
| Pedestal of Reckoning Location |
|---|
| Gauntlet of Shar X: 718, Y: -779 |
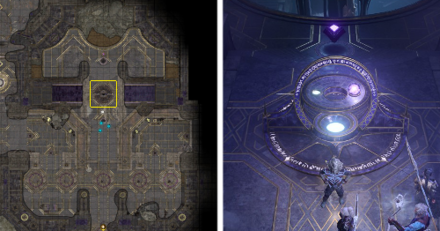 |
One (1) Umbral Gem is required for the first Pedestal of Reckoning which will take you to an area with another pedestal requiring three (3) Umbral Gems.
The Pedestal of Reckoning is located to the north of center room (which is right of the Gauntlet of Shar waypoint)
In total, the number Umbral Gems required to get to the Shadowfell entrance is four (4).
Get the Spear of Night at the Silent Library
Shadowheart and the Spear of Night
| Silent Library Location |
|---|
| Gauntlet of Shar (Below Soft-Step Trial Room) X: -745, Y: -752 |
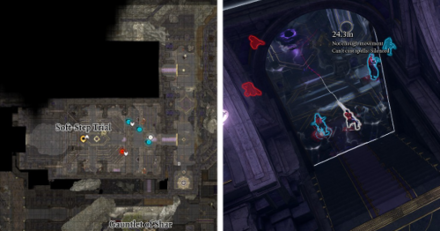 |
If you are going to access the Shadowfell with Shadowheart, you will need to get the Spear of Night from the Silent Library which is found at the lower floors, beneath the Soft-Step Trial Room.
Having the Spear of the Night will ensure that passing into the Shadowfell will not cause Shadowheart to hinder your progress.
It is also vital to acquiring any one of the two possible weapons after completing the Nightsong quest: Shar's Spear of Evening and Selune's Spear of Night.
Silent Library Puzzle and Location
Shadowfell Without Shadowheart

You can still proceed into Shadowfell without Shadowheart by not having her in your party when you access the Shadowfell entrance.
If Shadowheart is in your active party, you will not be able to proceed since she will ask to get the Spear of the Night first.
Refusing to do her request will agitate her, and forcing to push through the conversation without the spear will cause her to leave the party and attack you.
Baldur's Gate 3 Related Guides

Prologue Side Quests
| All Prologue Side Quests | |
|---|---|
| How to Free the Intellect Devourer | How to Free Shadowheart |
Act 1 Side Quests
Druid's Grove Quests
The Risen Road Quests
| The Risen Road Quests | |
|---|---|
| Find the Missing Shipment | How to Rescue the Grand Duke |
| Rescue the Trapped Man | How to Free Oskar Fevras |
Blighted Village Quests
Goblin Camp Quests
| Goblin Camp Quests | |
|---|---|
| How to Get Volo's Ersatz Eye | Defiled Temple Puzzle |
| Find the Nightsong | Ask the Goblin Priestess for Help |
Nautiloid Crash Region Quests
Underdark Quests
Mountain Pass Quests
| Mountain Pass Quests | ||
|---|---|---|
| Steal a Githyanki Egg | How to Beat Gremishkas | How to Access Guardian of Faith Room |
| Dawnmaster Puzzle Guide | Where to Find the Githyanki Creche | - |
This section is currently under construction. Check back later for updates!
Act 2 Side Quests
Last Light Inn Quests
Gauntlet of Shar Quests
| Gauntlet of Shar Quests | |
|---|---|
| Gauntlet of Shar: All Trials and Umbral Gems | Kill Raphael's Old Enemy |
Mind Flayer Colony Quests
| Mind Flayer Colony Quests |
|---|
| How to Solve the Necrotic Laboratory |
Act 3 Side Quests
Rivington Quests
| Rivington Quests | ||
|---|---|---|
| Investigate the Suspicious Toys | Solve the Open Hand Temple Murders | Find the Missing Letters |
| How to Get to Wyrm's Rock Fortress | How to Find Dribbles the Clown | - |
Lower City Quests
| Lower City Quests | ||
|---|---|---|
| How to Get to the House of Hope | How to Get to Cazador's Palace | Rescue Orin's Victim |
| Aid the Underduke | How to Get to the House of Grief | Investigate the Murders |
Comment
Author
Gauntlet of Shar Trial Guides: All Umbral Gem Locations
improvement survey
03/2026
improving Game8's site?

Your answers will help us to improve our website.
Note: Please be sure not to enter any kind of personal information into your response.

We hope you continue to make use of Game8.
Rankings
- We could not find the message board you were looking for.
Gaming News
Popular Games

Genshin Impact Walkthrough & Guides Wiki

Honkai: Star Rail Walkthrough & Guides Wiki

Umamusume: Pretty Derby Walkthrough & Guides Wiki

Pokemon Pokopia Walkthrough & Guides Wiki

Resident Evil Requiem (RE9) Walkthrough & Guides Wiki

Monster Hunter Wilds Walkthrough & Guides Wiki

Wuthering Waves Walkthrough & Guides Wiki

Arknights: Endfield Walkthrough & Guides Wiki

Pokemon FireRed and LeafGreen (FRLG) Walkthrough & Guides Wiki

Pokemon TCG Pocket (PTCGP) Strategies & Guides Wiki
Recommended Games

Diablo 4: Vessel of Hatred Walkthrough & Guides Wiki

Fire Emblem Heroes (FEH) Walkthrough & Guides Wiki

Yu-Gi-Oh! Master Duel Walkthrough & Guides Wiki

Super Smash Bros. Ultimate Walkthrough & Guides Wiki

Pokemon Brilliant Diamond and Shining Pearl (BDSP) Walkthrough & Guides Wiki

Elden Ring Shadow of the Erdtree Walkthrough & Guides Wiki

Monster Hunter World Walkthrough & Guides Wiki

The Legend of Zelda: Tears of the Kingdom Walkthrough & Guides Wiki

Persona 3 Reload Walkthrough & Guides Wiki

Cyberpunk 2077: Ultimate Edition Walkthrough & Guides Wiki
All rights reserved
© 2023 Larian Studios. All rights reserved. Larian Studios is a registered trademark of arrakis nv, affiliate of Larian Studios Games ltd. All company names, brand names, trademarks and logos are the property of their respective owners. © 2020 Wizards of the coast. All rights reserved. Wizards of the coast, Baldur’s Gate, Dungeons & Dragons, D&D, and their respective logos. Are registered trademarks of wizards of the coast LLC
The copyrights of videos of games used in our content and other intellectual property rights belong to the provider of the game.
The contents we provide on this site were created personally by members of the Game8 editorial department.
We refuse the right to reuse or repost content taken without our permission such as data or images to other sites.


![Monster Hunter Stories 3 Review [First Impressions] | Simply Rejuvenating](https://img.game8.co/4438641/2a31b7702bd70e78ec8efd24661dacda.jpeg/thumb)


