This survey will take about 1 minute.
Your answers will help us to improve our website.
Star Wars Jedi Survivor
List of All Bosses
★ Find out what gets carried over to New Game Plus!
☆ Learn how to get Beskar Steel and all weapon materials!
★ Make sure to get all the BD-1 Upgrades to help in combat!
☆ Get Map Upgrades to make hunting Collectibles easier!
There are 17 boss fights in the main story of Star Wars Jedi Survivor. Read on for a list of all bosses, including bounty hunters, legendary enemies, and optional bosses, as well as where to find them!
List of Contents
All Story Bosses
| Boss | Planet Chapter | Description |
|---|---|---|
 K-405 K-405 |
Coruscant | A variant of the KX-series security droid, these baton-wielding counterparts were designed primarily to train Imperial stormtroopers in the use of the electrobaton. Their movements, therefore, are similar to Scout Troopers, but with a mechanical mastery of the form which, combined with a reinforced chassis, makes them far more dangerous. |
 Ninth Sister Ninth Sister |
Coruscant | The powerful and imposing Ninth Sister has only grown more rage-fueled and vengeful in the years since first facing Cal Kestis. A mechanically-enhanced Dowutin, her brute strength alone can overpower foes, but she also possesses a natural empathic ability to read the minds of others. This combined with her mastery of the Force and raw, rage-driven strength make her one of the deadliest warriors in the Inquisitorius. |
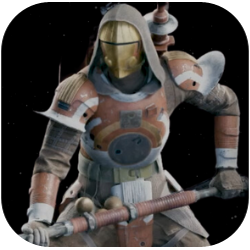 Zeik Zeik |
Koboh | These warriors knew a life of crime and battle long before they were Bedlam Raiders. Such experience and skill is rewarded with responsibility and equipment: armed with a pronged electrostaff and a jetpack. Raider veterans can bring pain and misery to their opponents from both land and air. |
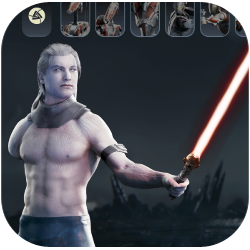 Dagan Gera Dagan Gera |
Koboh | Dagan Gera is a Jedi of the High Republic, freed from two centuries of stasis in bacta. Seemingly fallen to the dark side, he attacks wildly, but with all of the expertise of a former Jedi of the Order. |
 Skriton Skriton |
Jedha | Jedha is home to many dangerous creatures, but few are as ruthless and unpredictable as the skriton. A lopsided creature, the skriton's left claw is huge and incredibly powerful. Not only is it able to crush its prey easily, but it can also resist several heavy strikes. Its movement is erratic and hard to predict, making the skriton one of the deadliest creatures on the planet. |
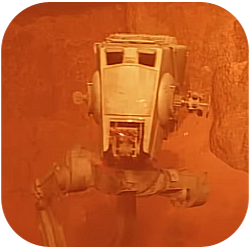 AT-ST AT-ST |
Jedha | The All Terrain Scout Transport (AT-ST) is a better-armed and armored evolution of the Republic army's reconnaissance transport. Preserving its predecessors lightweight bipedal form, the AT-ST is designed to swiftly scout out and disable smaller threats that may prove challenging for the much larger AT-AT. They are equipped with chin-mounted blaster cannons and side-mounted ordnance launchers, giving them superiority |
 Reprogrammed Magnaguard Reprogrammed Magnaguard |
Shattered Moon | Created by Holowan Mechanicals, the IG-100 MagnaGuards were some of the most proficient battle droids in the Separatist army. Primarily used to defeind high-ranking Separatist leaders, their electrostaffs were capavel of holding their own against Jedi lightsabers. Their surprising agility, combined with their ability to persist even with lost limbs, gave even the fiercest Jedi warriors a challenge. |
 Drya Thornne Drya Thornne |
Shattered Moon | Only the most dedicated of Bedlam Raiders are seen by Rayvis as worthy enough to be gifted with a lightsaber from his own collection. This warrior wields a single saber in conjunction with an armament of blasters and grenades, as well as a portable cloaking device, making them exceptionally lethal. |
 Tague Louesh Tague Louesh |
Koboh Part 2 | Rayvis saw fit to reward the finest and most loyal of Bedlam Raider warriors with their very own lightsabers - totems the Gen'Dai had taken from Jedi quarry in ages past. This lieutenant, armed with a double-bladed saber, also employs a wrist-mounted grappling hook to both traverse the battlefield and attack opponents. |
 Dagan Gera Dagan Gera |
Koboh Part 3 | Dagan Gera's purpose is reignitewd since his awakening in the forest, and he now pursues a path back to Tanalorr with dogged zeal. Now fully recovered from years of sedation inside the bacta tank, he brings the full skill of one of the Orders' finest warriors to bear. |
 Rayvis Rayvis |
Shattered Moon Part 2 | As a long-lived Gen'Dai, Rayvis has watched civilizations rise and fall as the centuries passed, yet his loyalty to Dagan Gera has not once wavered in all the years he has servedd him. A brutal and skilled fighter, Rayvis attacks with an array of weaponry, from a custom-made flail to rocket barrages. Bound by his warrior's code, there are few who have stood against him and lived. |
 Rick, the Door Technician Rick, the Door Technician |
Koboh Part 4 | The scout trooper is a variant of the Imperial stormtrooper, often dispatched alongside their standard counterparts to assist with reconnaissance and patrol. Their lighter armor gives them increased mobility, while their electrobaton is ideal for crowd control. Their skill in melee combat allows them to go toe-to-toe even against a lightsaber, however briefly. |
 Urgost, Fist of Rayvis Urgost, Fist of Rayvis |
Koboh Part 4 | For many Raiders, the electrohammer is a blunt instrument. For Urgost, it is the brush with which he paints his art. Rayvis saw something in Urgost - a measure, perhaps, of his own warrior code, and took it upon himself to provide tutelage in the way of such an unwieldy weapon. As such, Urgost now employs the electrohammer as if it were an extension of his own arms. |
 Dagan Gera Dagan Gera |
Koboh Part 4 | Dagan Gera has never been closer to returning to Tanalorr, and his power is returned fully - he is a skilled warrior with both his lightsabers and the Force. Such is his power, he can manipulate even the strongest of minds. |
 Bode Akuna Bode Akuna |
Jedha Part 3 | Bode Akuna has betrayed everyone to keep himself and his daughter safe. Revealed to be a Jedi who escaped the Jedi Purge, Bode attacks with both his blaster and a lightsaber taken from Dagan's fallen body. Years of clandestine operation have made him a most unpredictable and lethal warrior. |
 Darth Vader Darth Vader |
Cere Level | There are very few who have ever managed to escape the clutches of Darth Vader, and those who do gain only a short reprieve. A master of the Force and all its facets, this mechanized human attacks with relentless power, never tiring and never stopping until his prey is utterly destroyed. |
 Bode Akuna Bode Akuna |
Tanalorr | Bode has come too far to falter at the last moment. Among the ancient stones of Tanalorr, he will fight with a former Jedi's power to defend his daughter, with nothing off-limits in the desperate quest to keep Kata safe. |
All Legendary Enemy Bosses
| Legendary Enemy | Location |
|---|---|
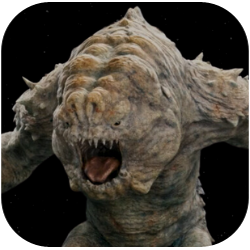 Rancor Rancor |
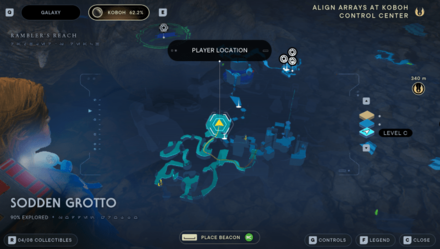 Inside a tunnel in Sodden Grotto (Left side of Rambler's Reach Outpost Meditation Point). |
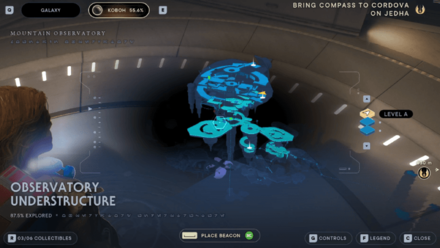
 Spawn of Oggdo Spawn of Oggdo |
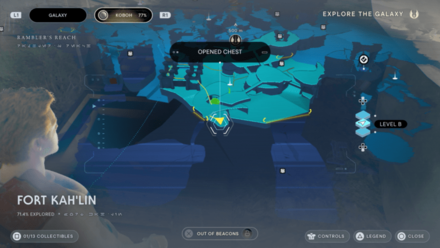 Use the Ascension Cable in Fort Kah'lin Meditation Point to climb watchtower and stand on the hatch to drop down the lair. |
 Beetu Deetu Beetu Deetu |
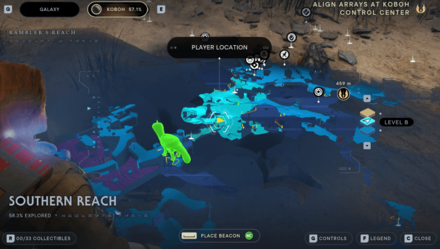 Koboh: From the Southern Reach Meditation Point, follow the path to Rambler's Reach Outpost. |
 Golden Skriton Golden Skriton |
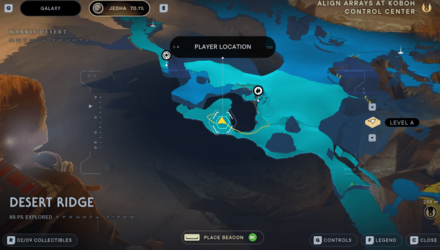 Jedha: At the open area on the left side of Desert Ridge Meditation Point (Past the Path of Restoration). |
 E3-VE3 E3-VE3 |
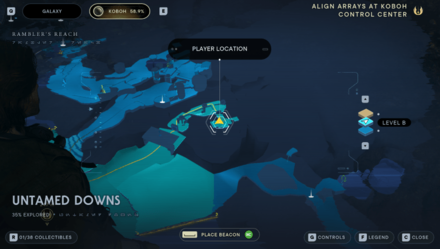 Koboh: Behind the Green Laser Gate in Untamed Downs (Right side of Bygone Settlement Meditation Point). |
 Sutaban Alpha Sutaban Alpha |
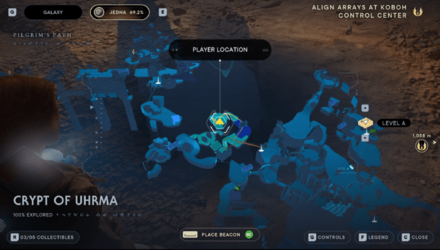 Jedha: Behind the waterfalls and the Green Laser Gate in Trailhead Pantheon (Beside the Crypt of Uhrma). |
 The Mire Terror The Mire Terror |
 Koboh: Use the zipline in Viscid Bog Meditation Point and cross the platforms to your right using Force Lift. |
 The Massiff The Massiff |
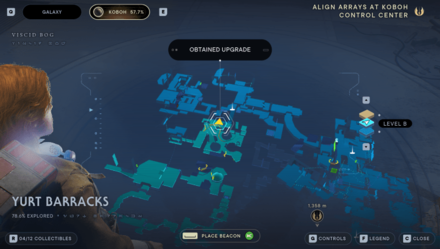 Koboh: Behind the screen above the huts in Yurt Barracks. |
 Gorocco Matriarch Gorocco Matriarch |
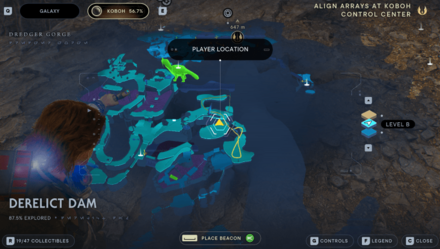 Koboh: Behind the yellow door after breaking the wall near the Derelict Dam Elevator. |
 Vile Bilemaw Vile Bilemaw |
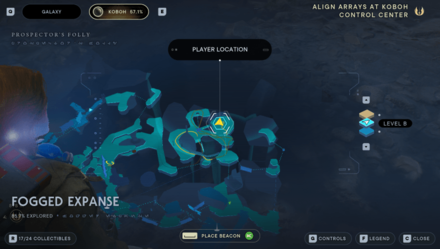 Koboh: Jump down the cliff after using the zipline in Fogged Expanse Meditation Point. |
| Urgost, Fist of Rayvis |
 Koboh: Part of the main story progression in Koboh Part 4. |
 D-L1T D-L1T |
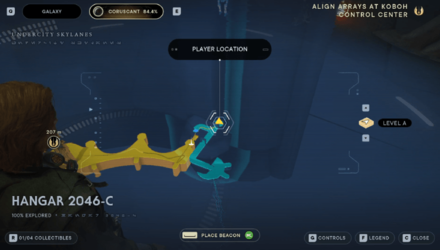 Coruscant: Activate the conduit on your left using Electro Dart after using the elevator in Hangar 2046-C. |
 Frenzied Jotaz Frenzied Jotaz |
 Coruscant: Enter the room on your left after using the Ascension Cable in Undercity Meats. Activate the conduit with Electro Dart. |
All Bounty Hunter Bosses
| Top Bounties | ||||
|---|---|---|---|---|
 Caij Vanda Caij Vanda |
||||
 Kili Oso Kili Oso |
- |  Jo the Cannibal Jo the Cannibal |
||
| Regular Bounties | ||||
 Korej Lim Korej Lim |
 Kip Ostar Kip Ostar |
 Meyen Corr Meyen Corr |
 Raz Raz |
 Corde The Half Corde The Half |
 PR-85T PR-85T |
 Mash Mash |
- |  Yuhong Yuhong |
 Vaslyn Martz Vaslyn Martz |
 Masi Finau Masi Finau |
 KLE-0 KLE-0 |
 Fenn Finau Fenn Finau |
 Gatt Medo Gatt Medo |
 Selfin Jook Selfin Jook |
All Optional Bosses
All Found on Koboh
| Found in Derelict Dam | ||
|---|---|---|
| Vashtan Wolfe | ||
| Found in Diagnostics Corridor | ||
| Mads Gresh | - | San Dersen |
| Found in Phon'Qi Caverns | ||
| Urjef Mekor | Sebb Eshan | Prince Patren |
| Found in Generator Underbelly | ||
| Hytho Pixx | ||
Above are bosses that are not needed to complete the story, the bounty questline, Legendary Enemy achievement, nor the tactical guide. However, they are listed as bosses after you defeat them.
Star Wars Jedi: Survivor Related Guides

Jedi Survivor Guide and Walkthrough
| Star Wars Jedi Survivor Wiki | |
|---|---|
 Walkthrough Walkthrough |
 Collectibles Collectibles |
 Jedi Chambers Jedi Chambers |
 Rumors Rumors |
 Puzzles Puzzles |
 Choices Choices |
 Skills Skills |
 Tips and Tricks Tips and Tricks |
 Outfits and Cosmetics Outfits and Cosmetics |
 Lightsabers Lightsabers |
 Blasters Blasters |
 BD-1 Parts BD-1 Parts |
 Enemies Enemies |
 Bosses Bosses |
 Bounties Bounties |
 Characters Characters |
 News and Game Info News and Game Info |
- |
Comment
Author

List of All Bosses
Please participate in our site
improvement survey
03/2026
improvement survey
03/2026
Would you assist in
improving Game8's site?
improving Game8's site?

×
We are listening to our users' valuable opinions and discussing how to act on them.
The information collected through this survey will be used for the purpose of improving our services. In addition, the information will only be disclosed a part of a statistic in a format that will not allow identification of personal information.
Begin Survey
Not Now
×
Please rate each item regarding Game8.co's Advertisements.
Amount of Ads
Very Dissatisfied
Somewhat Dissatisfied
Fine
Somewhat Satisfied
Highly Satisfied
Placement of Ads
Timing of Ad Display
Ad Loading Speed
Safeness of Ads
Content of Ads
×
Please rate each item regarding Game8.co's Quality of Articles.
Amount of information
Very Dissatisfied
Somewhat Dissatisfied
Fine
Somewhat Satisfied
Highly Satisfied
Frequency of updates
Speed of new information
Accuracy of articles
Understandibility of articles
Readability of sentences
×
Please rate each item regarding Game8.co's Usability of the Site.
Ease of finding information
Very Dissatisfied
Somewhat Dissatisfied
Fine
Somewhat Satisfied
Highly Satisfied
Loading Speed
Use of Color
Font Size
Visibility of Images
Easy to Understand Layout
×
Please rate each item regarding Game8.co's Message Boards, Comments.
Ease of Writing
Very Dissatisfied
Somewhat Dissatisfied
Fine
Somewhat Satisfied
Highly Satisfied
Readability
Ease in Finding Information
Comment Quality
Comment Quantity
Admin Response
×
Please rate each item regarding Game8.co's Site's new design.
Please rate our site's new design
Very Dissatisfied
Somewhat Dissatisfied
Fine
Somewhat Satisfied
Highly Satisfied
Do you think that the website's design change makes the site easier to use?
Has the new design made it easier for you to find information on the site?
Has the new design improved the overall visual appeal of the site?
How would you rate your overall satisfaction with the new design of the site?
×
How likely are you to recommend Game8 to someone you know?
Very Unlikely
0
1
2
3
4
5
6
7
8
9
10
Very Likely
If you have other opinions regarding potential improvement to the website, please share them with us. We would appreciate your honest opinion.
Note: This is a free response section, so you can proceed without entering anything.
Note: Please be sure not to enter any kind of personal information into your response.
Note: Please be sure not to enter any kind of personal information into your response.
×
Thank You
×
Thank you for participating in our survey! Your answers will help us to improve the quality of our website and services.
We hope you continue to make use of Game8.
We hope you continue to make use of Game8.
Close
Rankings
- We could not find the message board you were looking for.
Gaming News


![Everwind Review [Early Access] | The Shaky First Step to A Very Long Journey](https://img.game8.co/4440226/ab079b1153298a042633dd1ef51e878e.png/thumb)

![Monster Hunter Stories 3 Review [First Impressions] | Simply Rejuvenating](https://img.game8.co/4438641/2a31b7702bd70e78ec8efd24661dacda.jpeg/thumb)
Popular Games

Genshin Impact Walkthrough & Guides Wiki
Honkai: Star Rail Walkthrough & Guides Wiki
Umamusume: Pretty Derby Walkthrough & Guides Wiki
Pokemon Pokopia Walkthrough & Guides Wiki
Resident Evil Requiem (RE9) Walkthrough & Guides Wiki
Monster Hunter Wilds Walkthrough & Guides Wiki
Wuthering Waves Walkthrough & Guides Wiki
Arknights: Endfield Walkthrough & Guides Wiki
Pokemon FireRed and LeafGreen (FRLG) Walkthrough & Guides Wiki
Pokemon TCG Pocket (PTCGP) Strategies & Guides Wiki


Recommended Games
Diablo 4: Vessel of Hatred Walkthrough & Guides Wiki
Fire Emblem Heroes (FEH) Walkthrough & Guides Wiki
Yu-Gi-Oh! Master Duel Walkthrough & Guides Wiki
Super Smash Bros. Ultimate Walkthrough & Guides Wiki
Pokemon Brilliant Diamond and Shining Pearl (BDSP) Walkthrough & Guides Wiki
Elden Ring Shadow of the Erdtree Walkthrough & Guides Wiki
Monster Hunter World Walkthrough & Guides Wiki
The Legend of Zelda: Tears of the Kingdom Walkthrough & Guides Wiki
Persona 3 Reload Walkthrough & Guides Wiki
Cyberpunk 2077: Ultimate Edition Walkthrough & Guides Wiki


All rights reserved
© 2023 Electronic Arts Inc.
The copyrights of videos of games used in our content and other intellectual property rights belong to the provider of the game.
The contents we provide on this site were created personally by members of the Game8 editorial department.
We refuse the right to reuse or repost content taken without our permission such as data or images to other sites.