All Treasure Locations
★ Find out what gets carried over to New Game Plus!
☆ Learn how to get Beskar Steel and all weapon materials!
★ Make sure to get all the BD-1 Upgrades to help in combat!
☆ Get Map Upgrades to make hunting Collectibles easier!
Priorite Shards, Datadiscs, and Jedha Scrolls are collectible Treasures in Star Wars Jedi Survivor. Read on to learn more about each Treasure type and where you can get them!
All Treasure Locations
Priorite Shards
Priorite Shards are a unique treasure you can use as trade items with Doma in Koboh in exchange for cosmetic items such as hairstyles, outfits, and even songs which some NPC will ask from you in side quests.
| Map Location | In-game Location |
|---|---|
 Enlarge Enlarge |
 Enlarge Enlarge |
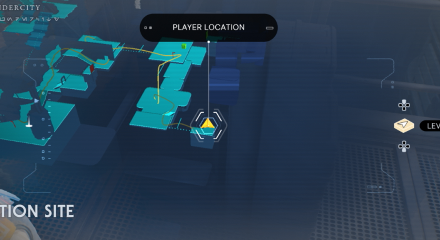
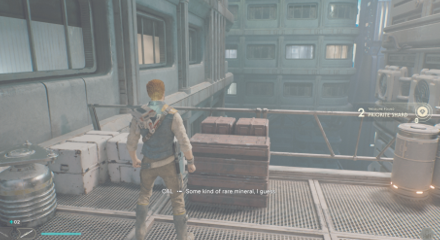
| Planet: Coruscant | Area: Renovation Site 4733 | |
 Enlarge Enlarge |
 Enlarge Enlarge |
|
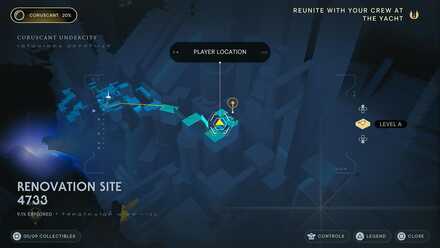
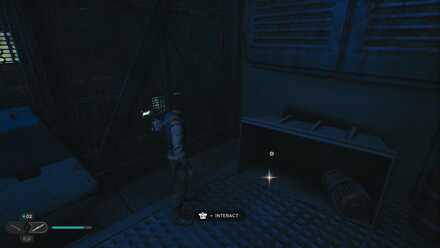
Planet: Coruscant | Area: Renovation Site 4733
Where to Find: This shard can be found on the left side of the slippery ramp after meeting up with Bode. |
|
 Enlarge Enlarge |
 Enlarge Enlarge |
|
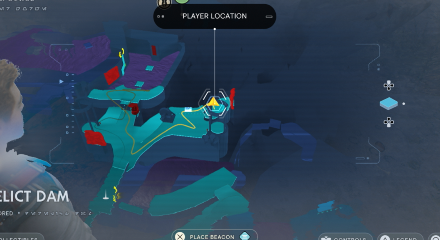
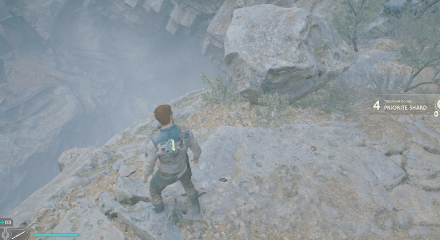
Planet: Koboh | Area: Derelict Dam
Where to Find: From the Meditation Point, take the road that forks to the right and drop down from the cliff. You'll find the Shard next to a rock. |
|
 Enlarge Enlarge |
 Enlarge Enlarge |
|
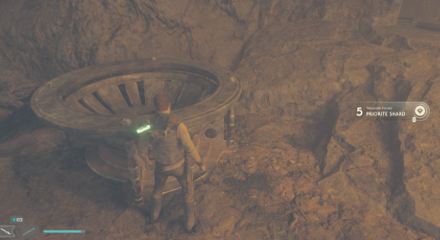
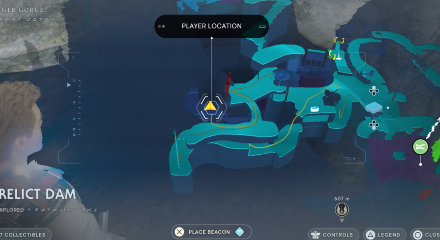
Planet: Koboh | Area: Derelict Dam
Where to Find: Inside a large empty brazier past a BX Droid inside a cave. |
|
 Enlarge Enlarge |
 Enlarge Enlarge |
|
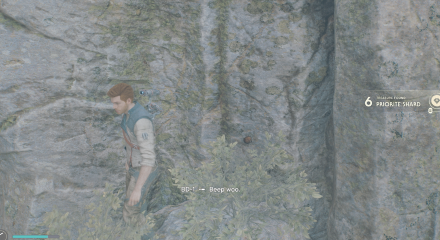
Planet: Koboh | Area: Derelict Dam
Where to Find: Once you've blown a hole in the cave, lure the Roller Mine towards the road to the right past the broken elevator and throw it to the tarred wall below. Follow the path, climb the rope, and you'll find the Shard on your left by the rock below. |
|
 Enlarge Enlarge |
 Enlarge Enlarge |
|
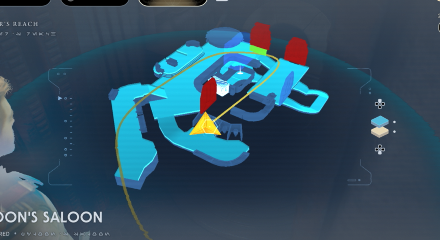
Planet: Koboh | Area: Pyloon's Saloon
Where to Find: Enter the saloon and take the path on your right towards the bathroom. You'll find the Shard just by the toilet. |
|
 Enlarge Enlarge |
 Enlarge Enlarge |
|
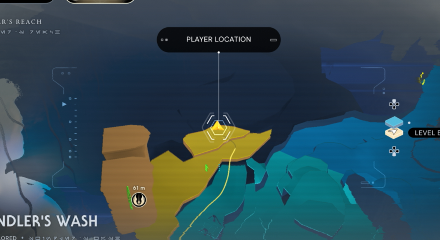
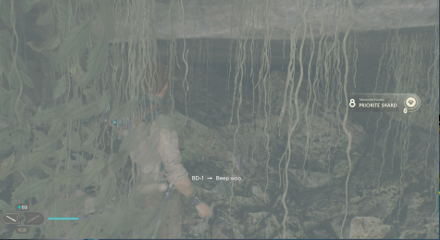
Planet: Koboh | Area: Swindler's Wash
Where to Find: From the Meditation Point, go around to the other side of the bridge and climb the ledge past the Droids that drop down. You'll find the Shard past the ponds inside a small cave opening. |
|
 Enlarge Enlarge |
 Enlarge Enlarge |
|
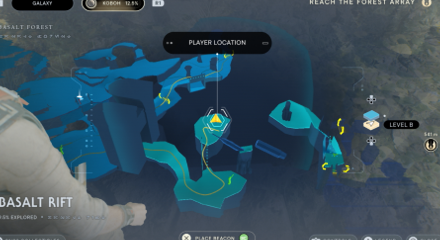
Planet: Koboh | Area: Basalt Rift
Where to Find: Wall run your way to the left platform and destroy the farthest pillar and the Shard will drop from there. |
|
 Enlarge Enlarge |
 Enlarge Enlarge |
|
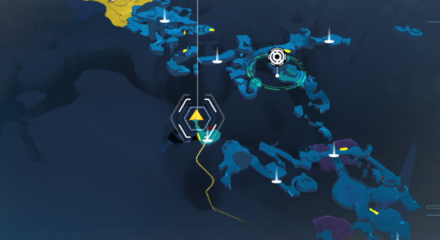
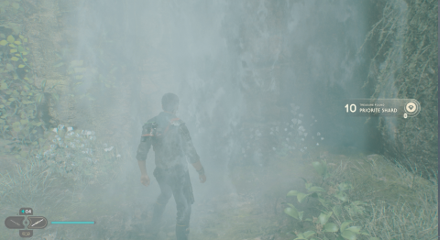
Planet: Koboh | Area: Nekko Pools
Where to Find: Found in an isolated section of the area you'll need a Nekko to access. |
|
 Enlarge Enlarge |
 Enlarge Enlarge |
|
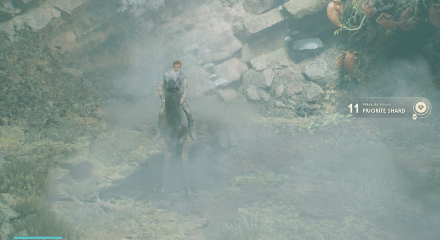
Planet: Koboh | Area: Nekko Pools
Where to Find: Can be found in a swampy section of the area. |
|
 Enlarge Enlarge |
 Enlarge Enlarge |
|
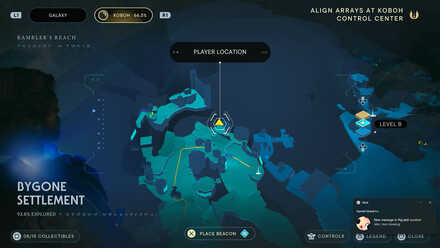
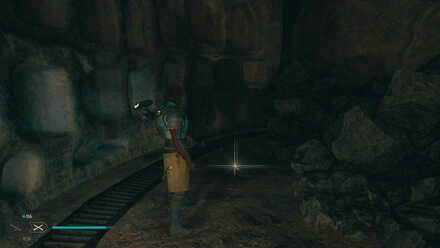
Planet: Koboh | Area: Bygone Settlement
Where to Find: From the Meditation Point, wall run your way up the buildings and you'll find the chest on your right inside a house full of debris. |
|
 Enlarge Enlarge |
 Enlarge Enlarge |
|
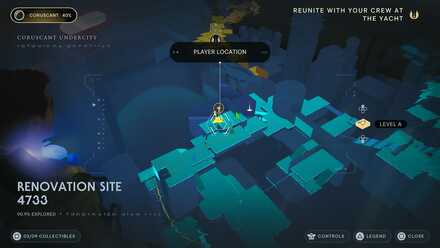
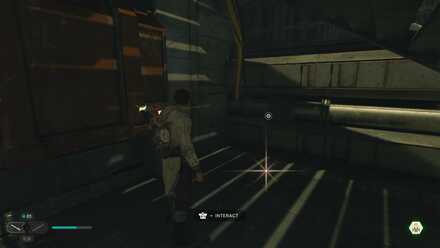
Planet: Coruscant | Area: Renovation Site 4733
Where to Find: You can find this shard under a ramp as you follow your objective towards the Yacht. |
|
 Enlarge Enlarge |
 Enlarge Enlarge |
|
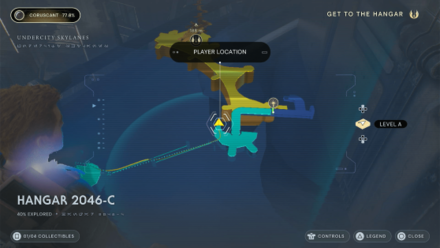
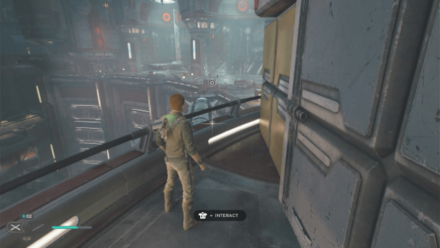
Planet: Coruscant | Area: Hangar 2046-C
Where to Find: At the start of the area by a door after climbing the rope and crossing two ziplines. |
|
 Enlarge Enlarge |
 Enlarge Enlarge |
|
Planet: Koboh | Area: Gorge Crash Site
Where to Find: After crossing the bridge past the Meditation Point, you'll find the Shard on your left inside a small cave. |
|
 Enlarge Enlarge |
 Enlarge Enlarge |
|
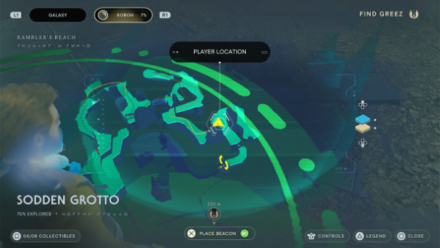
Planet: Koboh | Area: Sodden Grotto
Where to Find: Dropped by a Scavenger Droid inside the cave. |
|
 Enlarge Enlarge |
 Enlarge Enlarge |
|
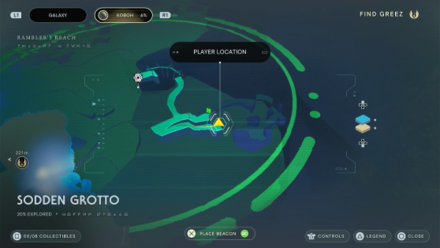
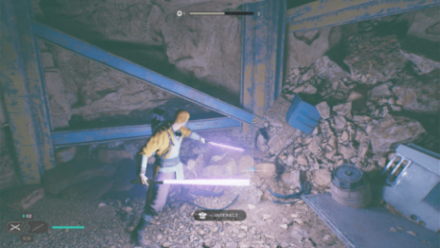
Planet: Koboh | Area: Sodden Grotto
Where to Find: Once inside the cave, follow the road down and take the path leading downwards. You'll find the Shard by a dark corner near the ledge. |
|
 Enlarge Enlarge |
 Enlarge Enlarge |
|
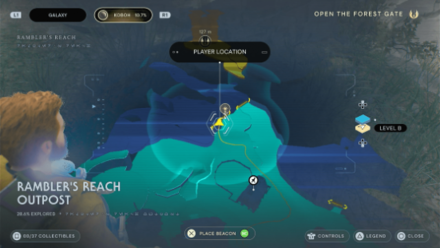
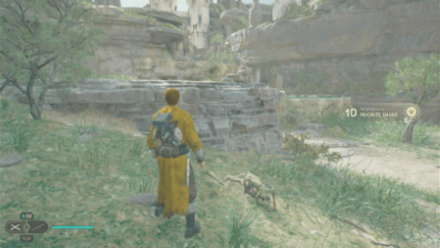
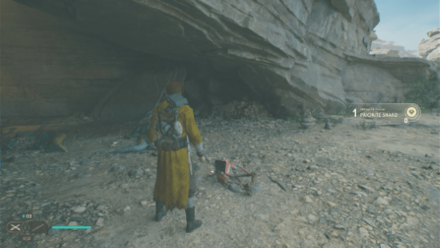
Planet: Koboh | Area: Rambler's Reach Outpost
Where to Find: Head north past the Stables towards the broken drawbridge and you'll find a Scavenger Droid nearby that drops this. |
|
 Enlarge Enlarge |
 Enlarge Enlarge |
|
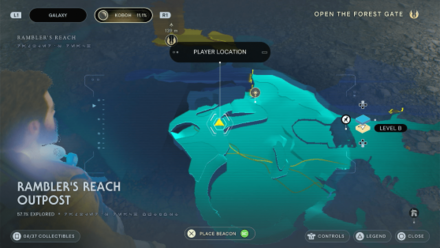
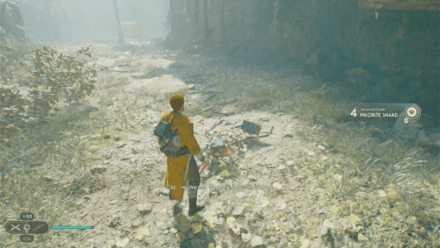
Planet: Koboh | Area: Rambler's Reach Outpost
Where to Find: Head west of the Stables towards the ship and you'll find a Scavanger Droid that drops a Shard near a den of Gorgers. |
|
 Enlarge Enlarge |
 Enlarge Enlarge |
|
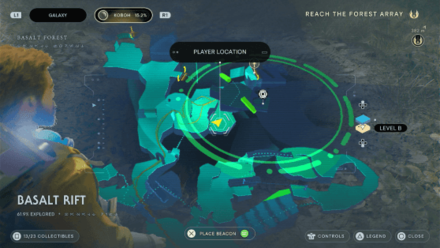
Planet: Koboh | Area: Basalt Rift
Where to Find: From the Meditation Point, head past the archway and the Stormtroopers all the way to the lowest level and take a right before the sleeping Bilemaw. You'll find a Scavanger Droid that drops the Shard. |
|
 Enlarge Enlarge |
 Enlarge Enlarge |
|
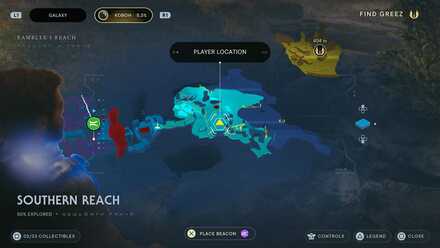
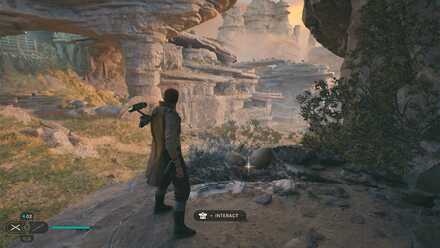
Planet: Koboh | Area: Southern Reach
Where to Find: Can be picked up from the top of the scalable wall on the right side of the plain as you descend from Mosey's shack. |
|
 Enlarge Enlarge |
 Enlarge Enlarge |
|
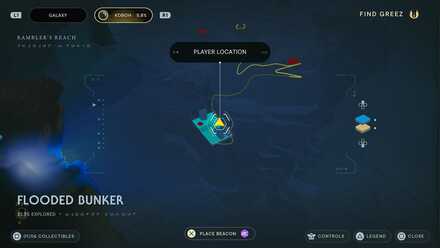
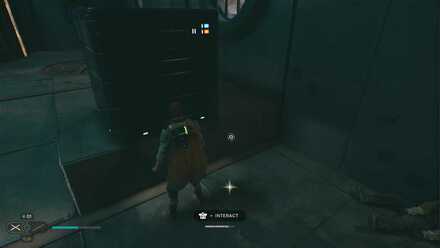
Planet: Koboh | Area: Flooded Bunker
Where to Find: You can get this shard inside a bunker past the Southern Reach. A droid with energy shields will be guarding the area. |
|
 Enlarge Enlarge |
 Enlarge Enlarge |
|
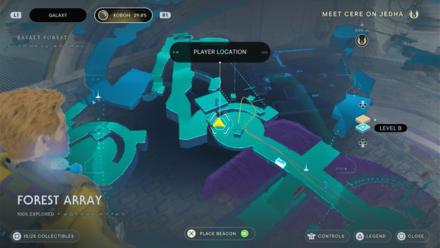
Planet: Koboh | Area: Forest Array
Where to Find: From the Meditation Point, take a right past the nearby workbench and climb the elevated platform. Swing the first lamp and turn around to swing the second lamp above. You'll find the Shard two platforms ahead. |
|
 Enlarge Enlarge |
 Enlarge Enlarge |
|
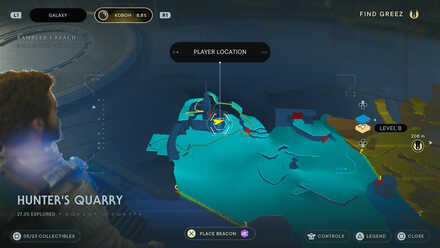
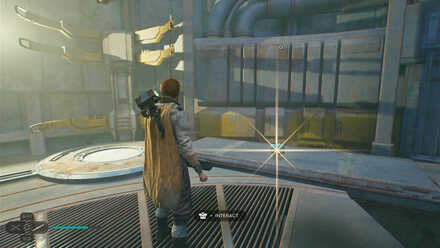
Planet: Koboh | Area: Hunter's Quarry
Where to Find: Found inside the building on top of the scalable wall on the far side of Hunter's Quarry. |
|
 Enlarge Enlarge |
 Enlarge Enlarge |
|
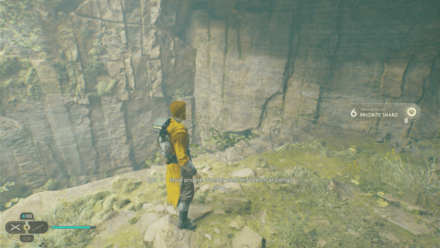
Planet: Koboh | Area: Basalt Rift
Where to Find: From the Meditation Point, backtrack to the entrance until you reach the narrow passageway and climb the vines on your left. You'll find the shard on the platform above. |
|
 Enlarge Enlarge |
 Enlarge Enlarge |
|
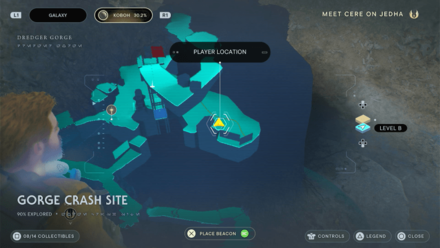
Planet: Koboh | Area: Gorge Crash Site
Where to Find: From the Meditation Point, go past the small lake and wall run your way up to the right. You'll find the chest by a nest on top. |
|
 Enlarge Enlarge |
 Enlarge Enlarge |
|
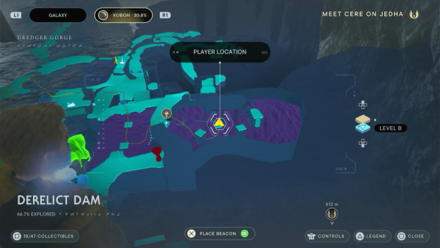
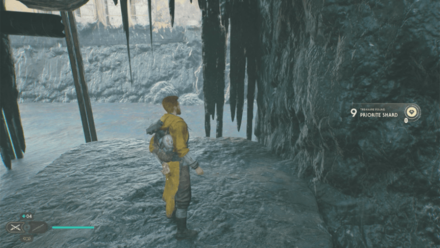
Planet: Koboh | Area: Derelict Dam
Where to Find: Once you've blown up a hole in the Dam, climb it and cross the platforms on the other side past a B1 Battle Droid and Raider Grunt. You'll find the Shard at the left of the first platform. |
|
 Enlarge Enlarge |
 Enlarge Enlarge |
|
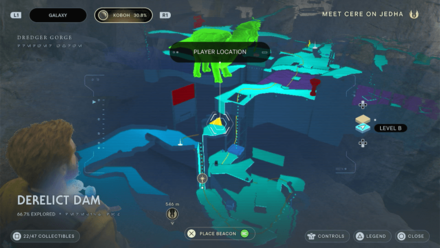
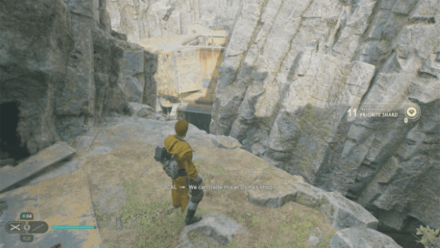
Planet: Koboh | Area: Derelict Dam
Where to Find: From the Southern Reach Meditation Point, wall jump up past the hole and you'll find the Shard on top. |
|
 Enlarge Enlarge |
 Enlarge Enlarge |
|
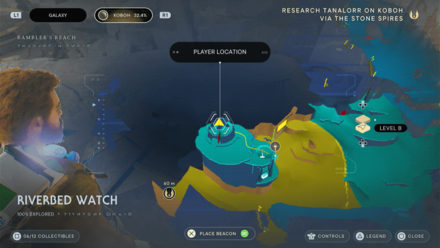
Planet: Koboh | Area: Riverbed Watch
Where to Find: From the Riverbed Watch Meditation Point, head inside the building and climb up to the very top, defeat the group of droids and enter the building forward. You'll find the Shard by the edge. |
|
 Enlarge Enlarge |
 Enlarge Enlarge |
|
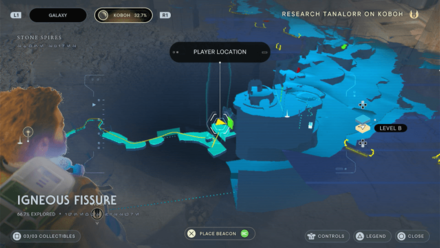
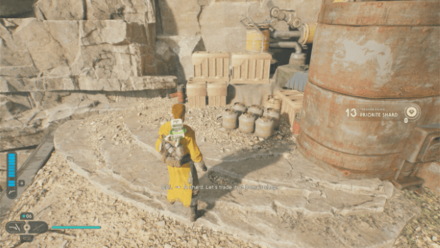
Planet: Koboh | Area: Igneous Fissure
Where to Find: From the Meditation Point, turn around and wall run towards the platform across. Walk past the beams, follow the path forward and climb the vines up top. You'll find the Shard on your left just by the door. |
|
 Enlarge Enlarge |
 Enlarge Enlarge |
|
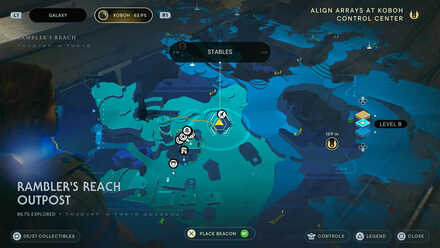
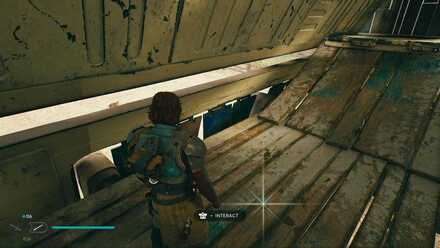
Planet: Koboh | Area: Rambler's Reach Outpost
Where to Find: Use a Nekko to double jump to the second floor of the Stables. The shard will be located on one of the paths. |
|
 Enlarge Enlarge |
 Enlarge Enlarge |
|
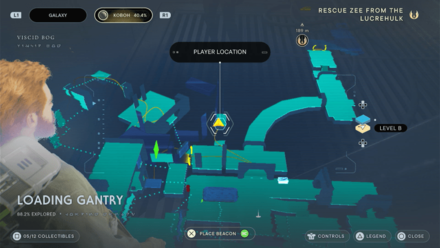
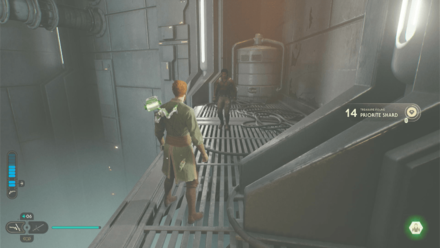
Planet: Koboh | Area: Loading Gantry
Where to Find: Once you've reunited with Bode, go back to the door you've unlocked and facing the green laser wall, you'll find the Shard to your right by the edge. |
|
 Enlarge Enlarge |
 Enlarge Enlarge |
|
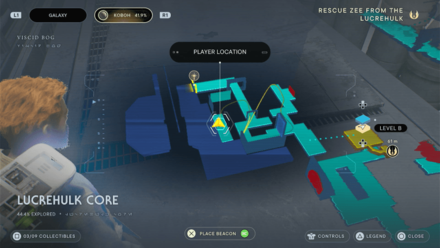
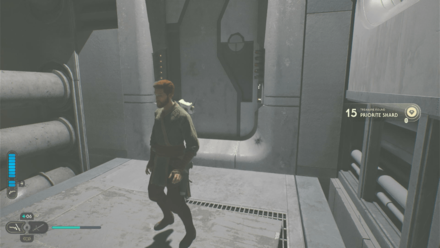
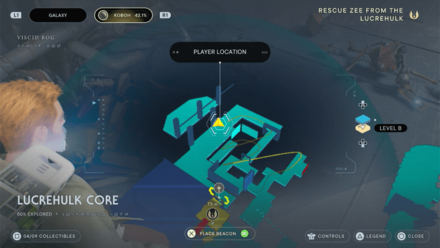
Planet: Koboh | Area: Lucrehulk Core
Where to Find: On the bridge with the two shielded turrets, jump and dash to the platform on the left and you'll find the Shard by the floor. |
|
 Enlarge Enlarge |
 Enlarge Enlarge |
|
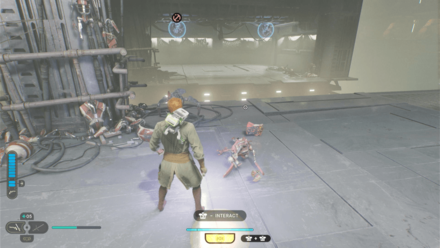
Planet: Koboh | Area: Lucrehulk Core
Where to Find: Go past the bridge with two shielded turrets and you'll find a Scavenger Droid infront of you that drops the Shard. |
|
 Enlarge Enlarge |
 Enlarge Enlarge |
|
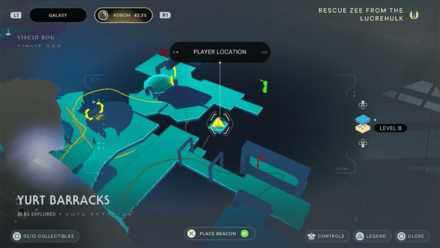
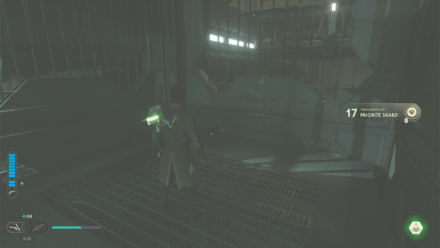
Planet: Koboh | Area: Yurt Barracks
Where to Find: At the second part of the raider's Living Quarters, after crossing the gap and defeating the nearby raiders, move forward a bit and enter the path to your right. You'll find the shard on a platform hidden on your left. |
|
 Enlarge Enlarge |
 Enlarge Enlarge |
|
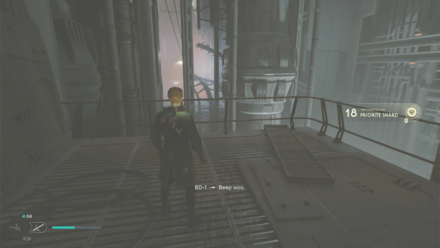
Planet: Koboh | Area: Generator Underbelly
Where to Find: By the first shortcut, there's two scalable scaffoldings nearby. Cross them and you'll find the Shard on your left by the railings. |
|
 Enlarge Enlarge |
 Enlarge Enlarge |
|
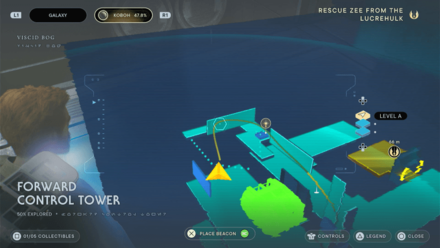
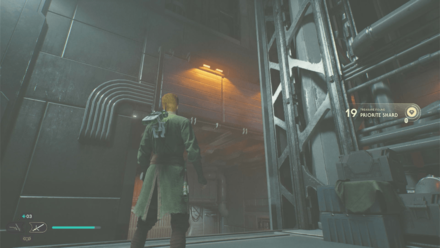
Planet: Koboh | Area: Forward Control Tower
Where to Find: After the cutscene with Dagan Gera and Rayvis, turn around and bring down the center wall. Climb it and bring the wall back up. Wall run your way through and you'll come across the Shard at the last wall. |
|
 Enlarge Enlarge |
 Enlarge Enlarge |
|
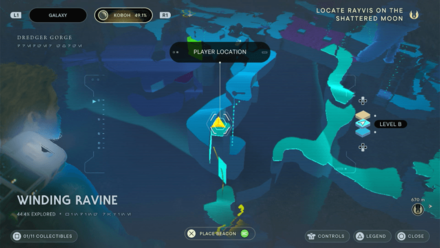
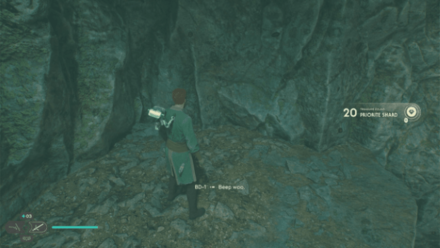
Planet: Koboh | Area: Winding Ravine
Where to Find: Wall run through the gorge and once you've reach the platform across, wall run again on your right and you'll find the Shard on a platform above. |
|
 Enlarge Enlarge |
 Enlarge Enlarge |
|
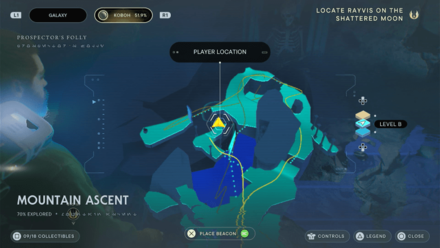
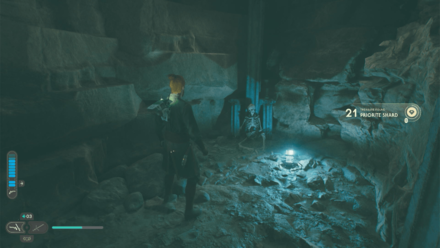
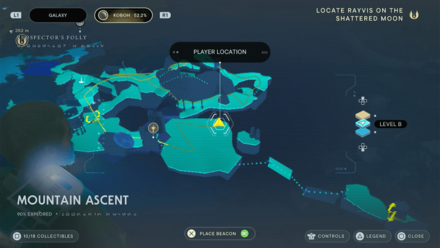
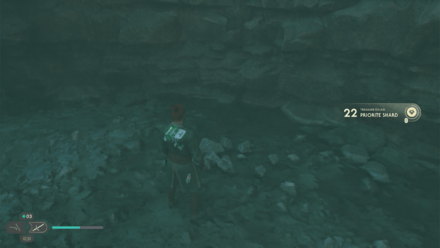
Planet: Koboh | Area: Mountain Ascent
Where to Find: Before the shortcut back down, head right, jump and dash across and you'll find the Shard at the end of the cave. |
|
 Enlarge Enlarge |
 Enlarge Enlarge |
|
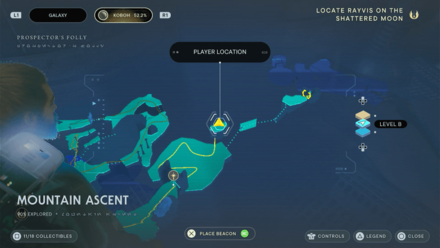
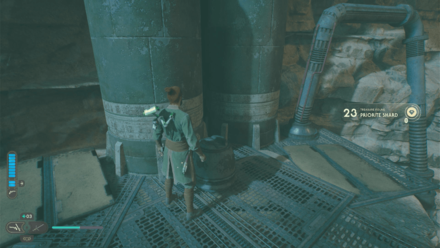
Planet: Koboh | Area: Mountain Ascent
Where to Find: In the area where you have to fight two Bilemaws, use Lift and Slam on a nearby burrow and the Shard will pop out. |
|
 Enlarge Enlarge |
 Enlarge Enlarge |
|
Planet: Koboh | Area: Mountain Ascent
Where to Find: In the area where you have to fight two Bilemaws, grapple up the nearby ledge and you'll find the Shard on top. |
|
 Enlarge Enlarge |
 Enlarge Enlarge |
|
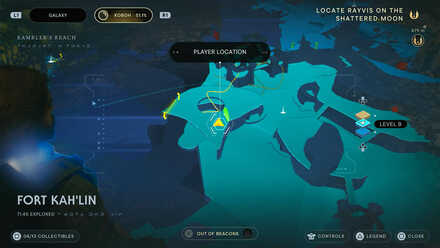
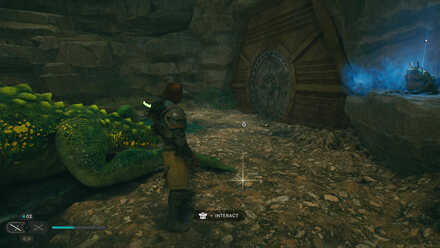
Planet: Koboh | Area: Fort Kah'lin
Where to Find: Found inside the Spawn of Oggdo combat arena. Pick it up after defeating the Oggdo. |
|
 Enlarge Enlarge |
 Enlarge Enlarge |
|
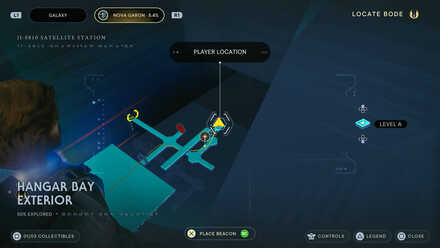
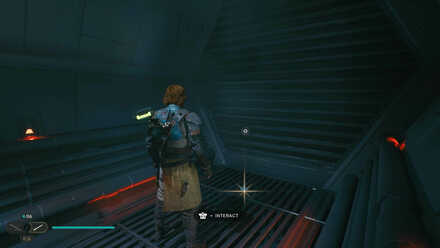
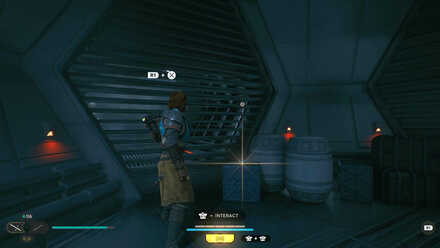
Planet: Nova Garon | Area: Hangar Bay Exterior
Where to Find: From the Hangar Bay, take the right at the first intersection, then a left at the next intersection. The shard will be on top of an elevated platform you can reach by doublejumping. |
|
 Enlarge Enlarge |
 Enlarge Enlarge |
|
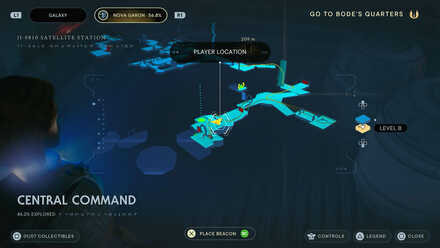
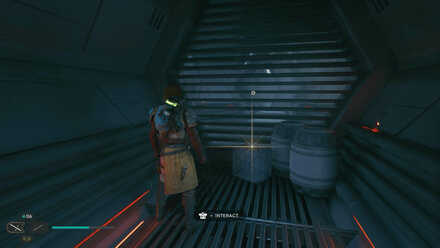
Planet: Nova Garon | Area: Hangar Bay
Where to Find: When you pass through the first electron wall, take a right and the shard will be in the adjacent room. |
|
 Enlarge Enlarge |
 Enlarge Enlarge |
|
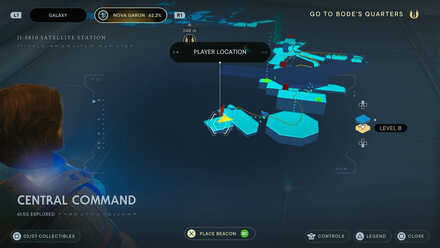
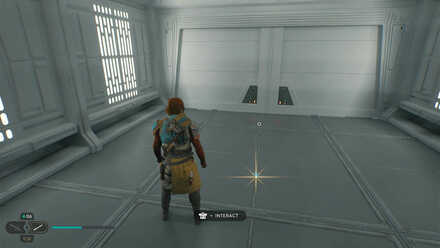
Planet: Nova Garon | Area: Central Command
Where to Find: Found after jump climbing one of the walls in the left most room of the Central Command. |
|
 Enlarge Enlarge |
 Enlarge Enlarge |
|
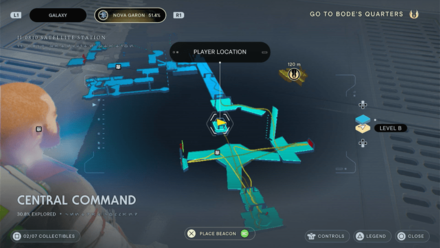
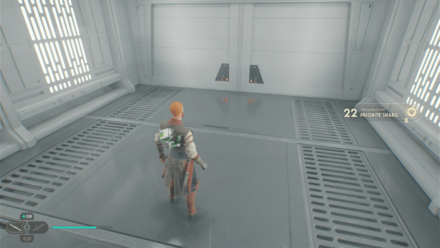
Planet: Nova Garon | Area: Central Command
Where to Find: Found in an elevated platform past the revolving red electron walls. |
|
 Enlarge Enlarge |
 Enlarge Enlarge |
|
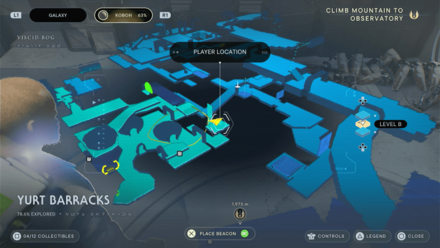
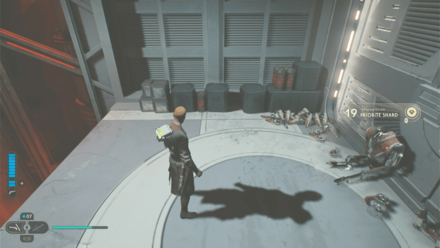
Planet: Nova Garon | Area: Central Command
Where to Find: From the center, head for the doorway across the huge gap and you'll find the Shard on the floor. |
|
 Enlarge Enlarge |
 Enlarge Enlarge |
|
Planet: Koboh | Area: Yurt Barracks
Where to Find: From the Lucrehulk Core Meditation Point, take the path down on the left and circle around the hut on your left. Go through the narrow path and climb up the wall and jump and dash to your right. You'll find the Shard on the platform. |
|
 Enlarge Enlarge |
 Enlarge Enlarge |
|
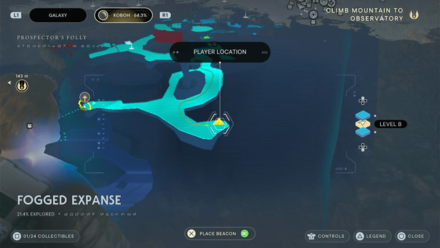
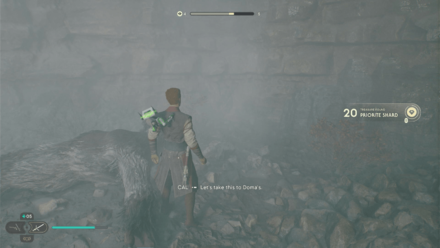
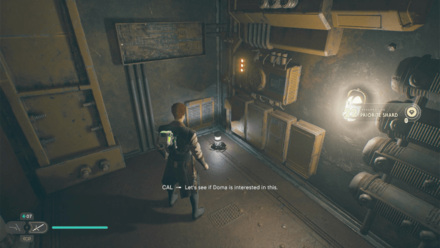
Planet: Koboh | Area: Fogged Expanse
Where to Find: From the Meditation Point, follow the path forward and hug the path to your left. You'll find the Shard on the floor that you need to use Lift on. |
|
 Enlarge Enlarge |
 Enlarge Enlarge |
|
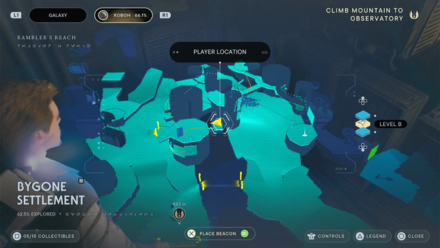
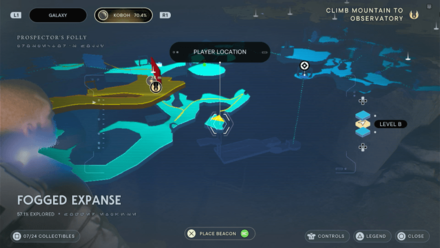
Planet: Koboh | Area: Bygone Settlement
Where to Find: From the Meditation Point, wall run your way up the buildings and keeping following the path until you climb onto a room with two droids and a Raider nearby. Defeat them and you'll find the Shard inside the narrow pathway. |
|
 Enlarge Enlarge |
 Enlarge Enlarge |
|
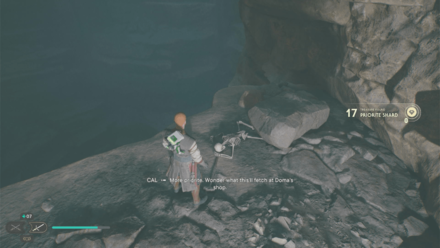
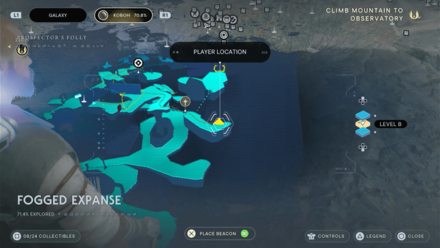
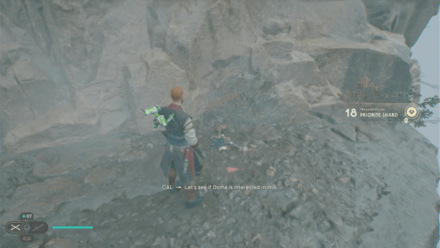
Planet: Koboh | Area: Fogged Expanse
Where to Find: From the Meditation Point, head forward and enter the cave on the left. Jump across the gap and you'll find the Shard by a skeleton. |
|
 Enlarge Enlarge |
 Enlarge Enlarge |
|
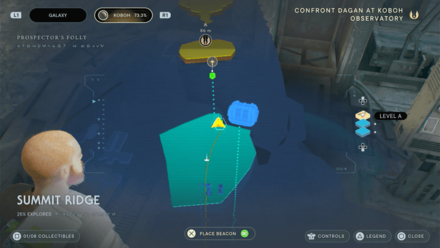
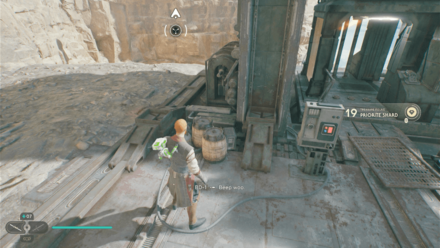
Planet: Koboh | Area: Fogged Expanse
Where to Find: Once you've activated the charge to move the wall, wall run past it and head up the bridge and grapple towards the platform above. You'll find the Scavanger Droid that drops the Shard. |
|
 Enlarge Enlarge |
 Enlarge Enlarge |
|
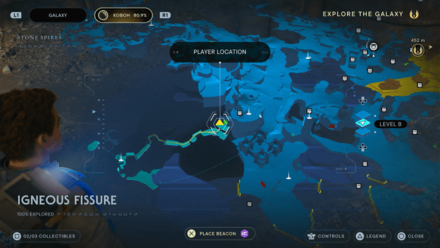
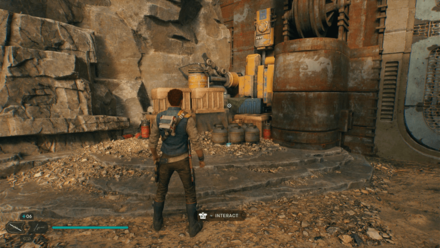
Planet: Koboh | Area: Summit Ridge
Where to Find: Found just infront of the Meditation Point beside the elevator. |
|
 Enlarge Enlarge |
 Enlarge Enlarge |
|
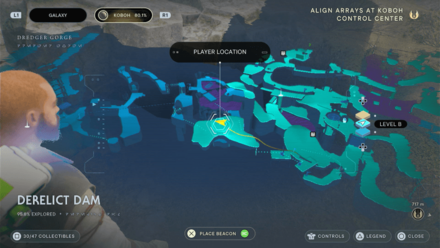
Planet: Koboh | Area: Igneous Fissure
Where to Find: From the Meditation Point, wall run into the cave and follow the path until you reach a large door. The shard will be on the left side of the door. |
|
 Enlarge Enlarge |
 Enlarge Enlarge |
|
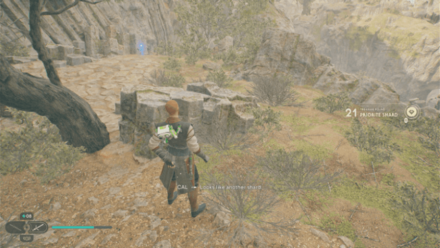
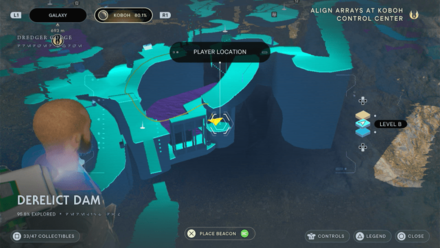
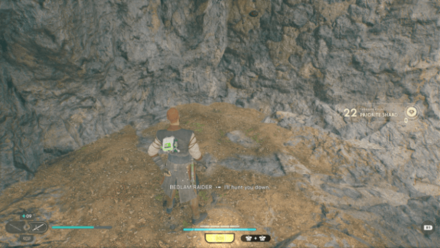
Planet: Koboh | Area: Derelict Dam
Where to Find: After defeating the Gorocco Matriarch, head past the balloons and you'll find the Shard at the area above beside a tree. |
|
 Enlarge Enlarge |
 Enlarge Enlarge |
|
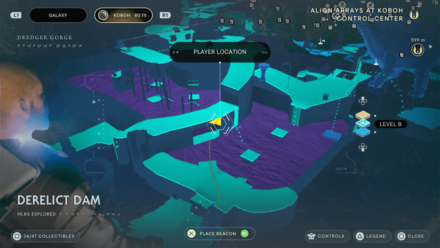
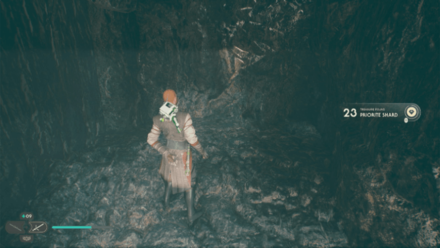
Planet: Koboh | Area: Derelict Dam
Where to Find: From the Meditation Point, cross the bridge beside you and drop down to the platform below. You'll find the Shard on the ground. |
|
 Enlarge Enlarge |
 Enlarge Enlarge |
|
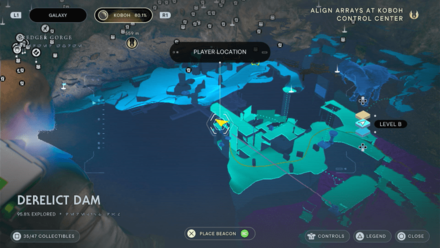
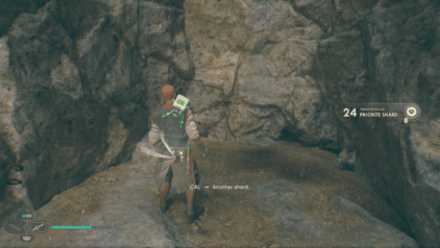
Planet: Koboh | Area: Derelict Dam
Where to Find: Once you've blown up the Dam, head inside the hole and you'll find the Shard on your right inside a small cave. |
|
 Enlarge Enlarge |
 Enlarge Enlarge |
|
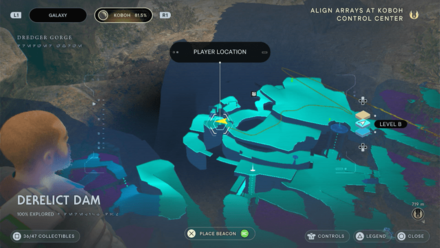
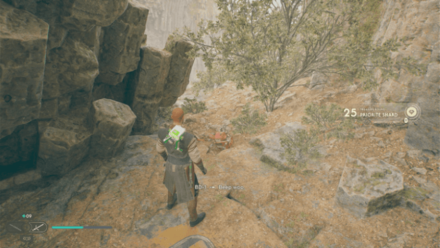
Planet: Koboh | Area: Derelict Dam
Where to Find: At the Yellow Platform Puzzle, for the first Coupler and climb the walls. You'll find the Shard on the platform above. |
|
 Enlarge Enlarge |
 Enlarge Enlarge |
|
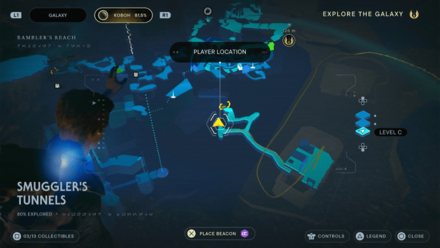
Planet: Koboh | Area: Derelict Dam
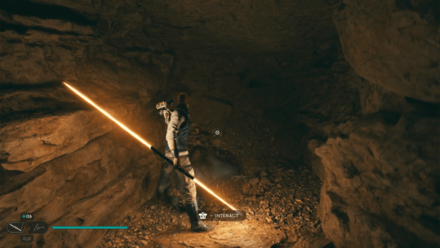
Where to Find: Take the giant bird at Boiling Bluff and head towards the west side of the area. You'll find a Scavanger Droid on an area below that drops the Shard. |
|
 Enlarge Enlarge |
 Enlarge Enlarge |
|
Planet: Koboh | Area: Smuggler's Tunnel
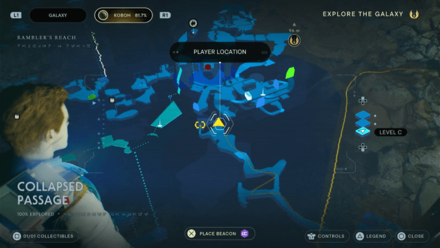
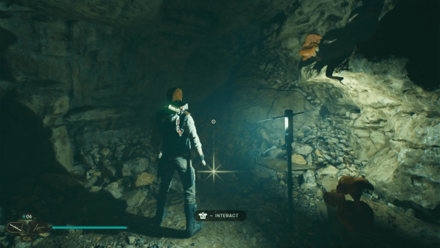
Where to Find: Use a Nekko to reach the roof of the building near the river in Rambler's Reach Outpost. This will lead to an alternate route to the Smuggler's Tunnel. The shard will be on the left side of the first split route you encounter. |
|
 Enlarge Enlarge |
 Enlarge Enlarge |
|
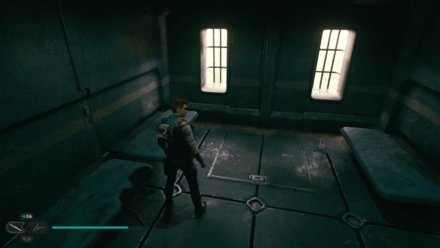
Planet: Koboh | Area: Smuggler's Tunnel
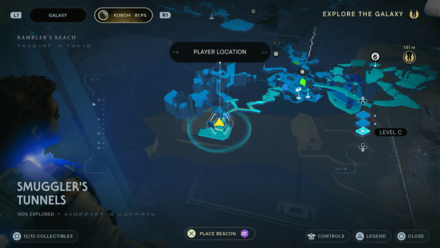
Where to Find: Use a Nekko to reach the roof of the building near the river in Rambler's Reach Outpost. This will lead to an alternate route to the Smuggler's Tunnel. The shard will be near the end of the tunnel. |
|
 Enlarge Enlarge |
 Enlarge Enlarge |
|
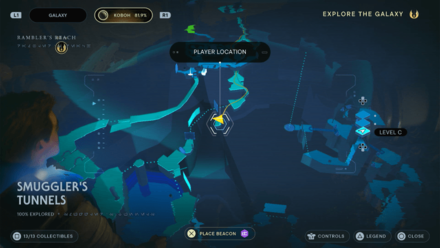
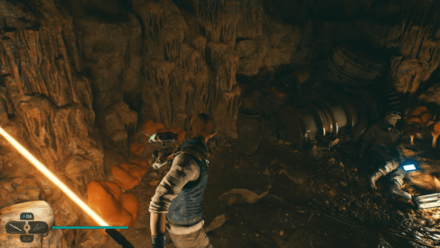
Planet: Koboh | Area: Smuggler's Tunnel
Where to Find: Use a Nekko to reach the roof of the building near the river in Rambler's Reach Outpost. |
|
 Enlarge Enlarge |
 Enlarge Enlarge |
|
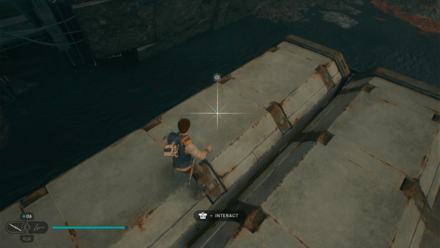
Planet: Koboh | Area: Smuggler's Tunnel
Where to Find: Use a Nekko to reach the roof of the building near the river in Rambler's Reach Outpost. This will lead to an alternate route to the Smuggler's Tunnel. The shard is found deep within the tunnel to the left of the green laser gate in a vase you need to break. |
|
 Enlarge Enlarge |
 Enlarge Enlarge |
|
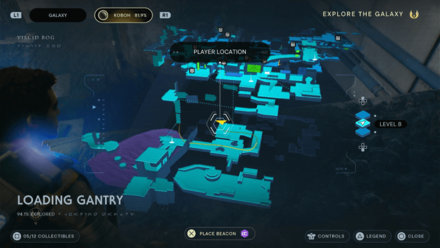
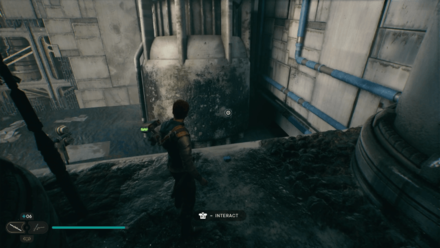
Planet: Koboh | Area: Loading Gantry
Where to Find: Reach the boat in the area by jumping on the crate in the middle of the tar pit. The shard can be found on top of one of the crates on the boat. |
|
 Enlarge Enlarge |
 Enlarge Enlarge |
|
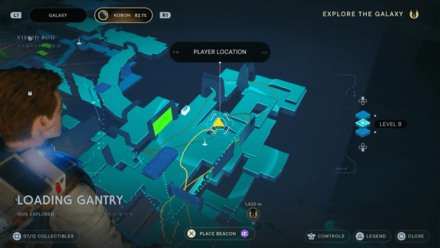
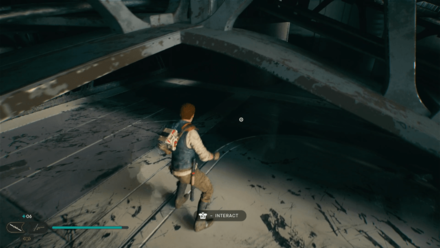
Planet: Koboh | Area: Loading Gantry
Where to Find: From the Meditation Point, pass through the broken door. Head straight to the end of the area and walk up the slanted platforms. The shard can be found behind the storage tanks. |
|
 Enlarge Enlarge |
 Enlarge Enlarge |
|
Planet: Koboh | Area: Loading Gantry
Where to Find: Found underneath the slanted platforms in the area. |
|
 Enlarge Enlarge |
 Enlarge Enlarge |
|
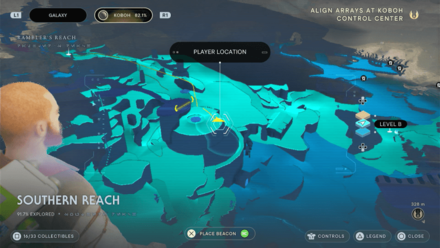
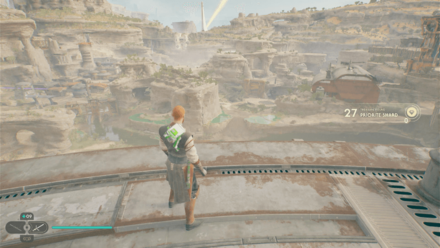
Planet: Koboh | Area: Southern Reach
Where to Find: Head towards the large silo and climb on top of it. You'll find the Shard by the edge. |
|
 Enlarge Enlarge |
 Enlarge Enlarge |
|
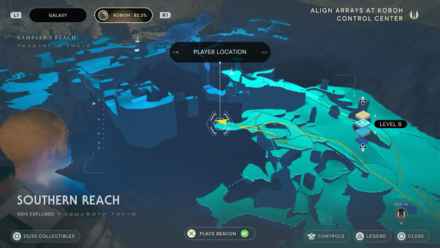
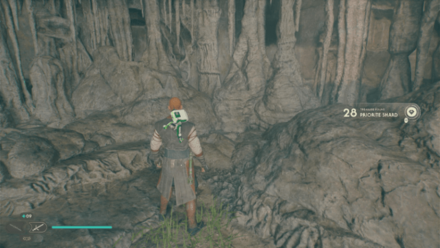
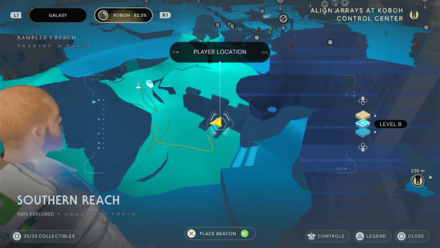
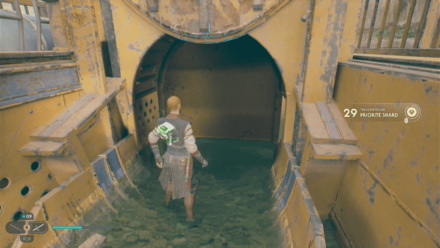
Planet: Koboh | Area: Southern Reach
Where to Find: From the roof of the silo, turn around and climb the cascading rocks and you'll find the Shard inside the cave entrance. |
|
 Enlarge Enlarge |
 Enlarge Enlarge |
|
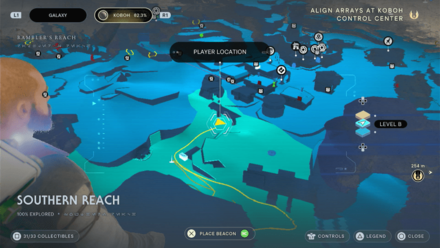
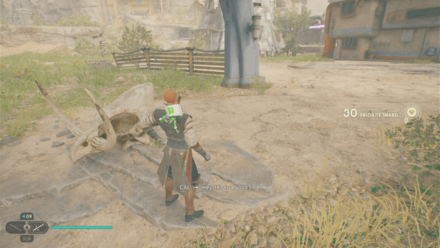
Planet: Koboh | Area: Southern Reach
Where to Find: From the Rambler's Reach Outpost Meditation Point, head towards the nearby sewers and use Life to open up the gate. You'll find the Shard inside. |
|
 Enlarge Enlarge |
 Enlarge Enlarge |
|
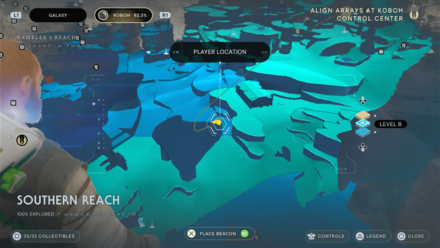
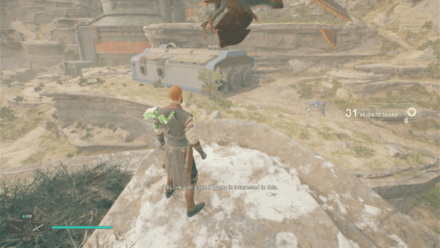
Planet: Koboh | Area: Southern Reach
Where to Find: From the Rambler's Reach Outpost Meditation Point, head towards the archway and use force pull on the skull on top. The Shard will drop down with it. |
|
 Enlarge Enlarge |
 Enlarge Enlarge |
|
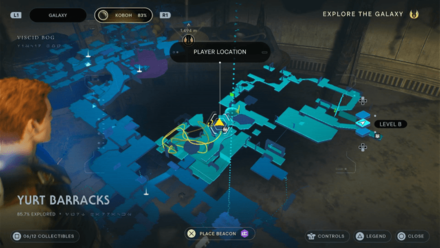
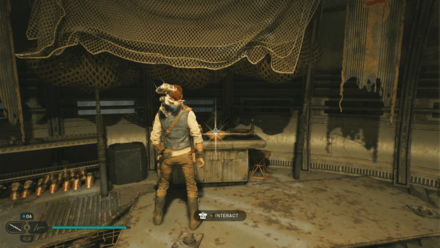
Planet: Koboh | Area: Southern Reach
Where to Find: From the Southern Reach Meditation Point, take the nearby Reltor and fly towards the large rock beside the Rambler's Reach Outpost Meditation Point. You'll find the Shard beneath the nearby Reltor. |
|
 Enlarge Enlarge |
 Enlarge Enlarge |
|
Planet: Koboh | Area: Yurt Barracks
Where to Find: Found in the shack on the second level of the area. This part can be accessed by jumping on the roofs of the shacks on the ground floor. |
|
 Enlarge Enlarge |
 Enlarge Enlarge |
|
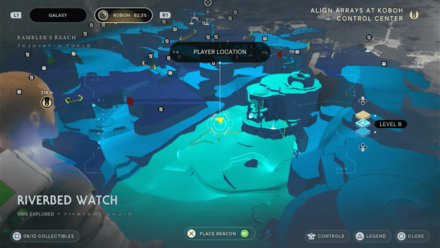
Planet: Koboh | Area: Riverbed Watch
Where to Find: From the Meditation Point, head for the rock in the middle of the river and you'll find the Scavenger Droid that drops the Shard. |
|
 Enlarge Enlarge |
 Enlarge Enlarge |
|
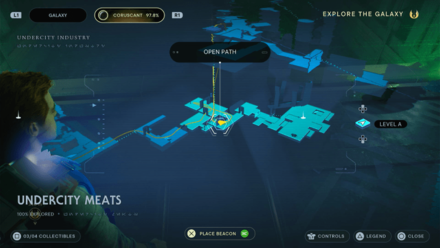
Planet: Coruscant | Area: Undercity Meats
Where to Find: Found underneath the elevator platform that requires you to pass through a green laser gate to reach. Dash out of the elevator once it starts rising. |
|
 Enlarge Enlarge |
 Enlarge Enlarge |
|
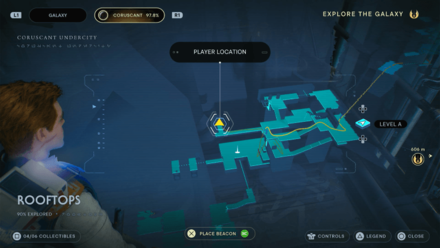
Planet: Coruscant | Area: Rooftops
Where to Find: From the Rooftops Meditation Point, use the nearby wall to climb up and go around the area to reach the shard. |
|
 Enlarge Enlarge |
 Enlarge Enlarge |
|
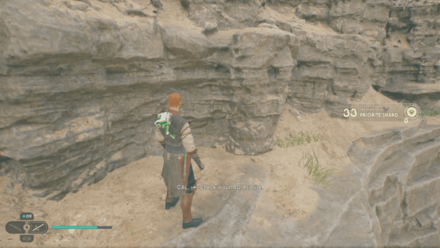
Planet: Coruscant | Area: Hangar 2046-C
Where to Find: Can be found on a digging droid near the Mantis that you'll have to kill. |
|
 Enlarge Enlarge |
 Enlarge Enlarge |
|
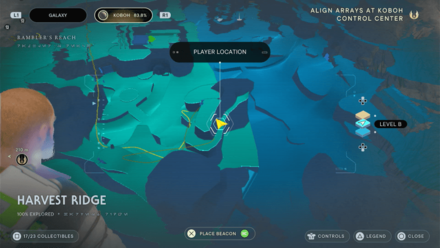
Planet: Koboh | Area: Harvest Ridge
Where to Find: From the Meditation Point, take the Reltor and fly towards the large rock on the right. You'll find the Shard behind the top wall you can run on. |
|
 Enlarge Enlarge |
 Enlarge Enlarge |
|
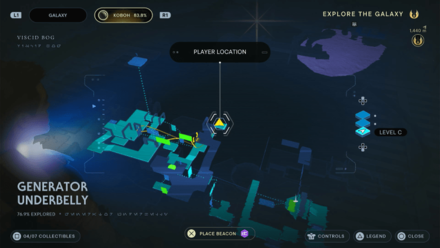
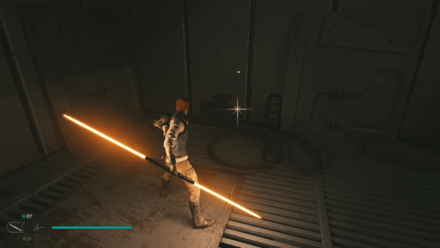
Planet: Koboh | Area: Generator Underbelly
Where to Find: After the wall running section head left to a dark section. The shard will be found at the end of the path. |
|
 Enlarge Enlarge |
 Enlarge Enlarge |
|
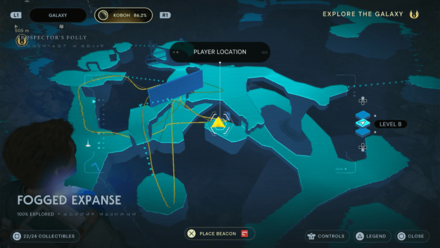
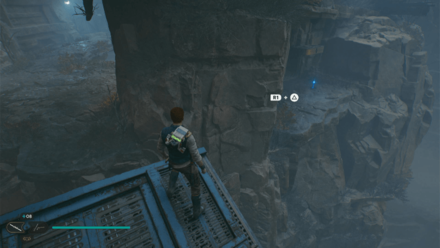
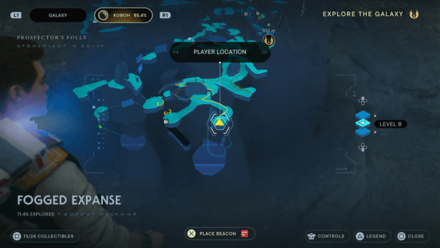
Planet: Koboh | Area: Fogged Expanse
Where to Find: After wall running from the meditation point, look back and use the same structure after it moved to wall run again to a small isolated area. Look down to find the shard that will need Force lift, and an essence. |
|
 Enlarge Enlarge |
 Enlarge Enlarge |
|
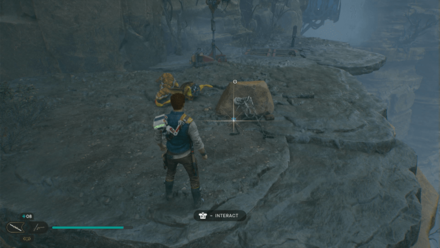
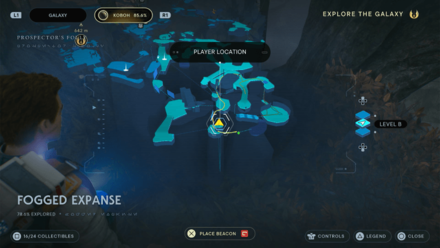
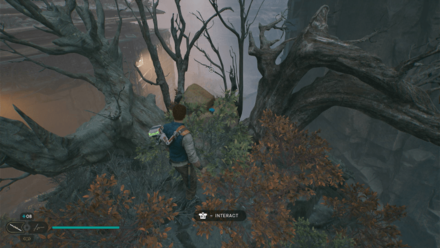
Planet: Koboh | Area: Fogged Expanse
Where to Find: Found near the outdoor elevator along with 6 Koboh Spiker seeds. |
|
 Enlarge Enlarge |
 Enlarge Enlarge |
|
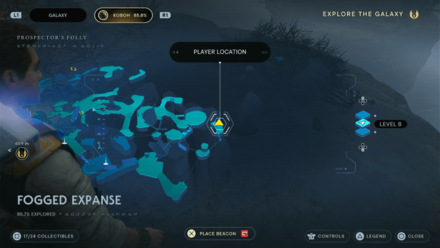
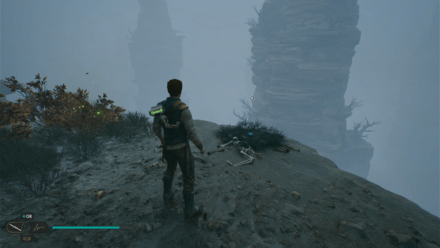
Planet: Koboh | Area: Fogged Expanse
Where to Find: After grabbing on to the balloon, look back to find a small area you can jump to. |
|
 Enlarge Enlarge |
 Enlarge Enlarge |
|
Planet: Koboh | Area: Fogged Expanse
Where to Find: Found after jumping from the balloon along with 3 Koboh Spikers. |
|
 Enlarge Enlarge |
 Enlarge Enlarge |
|
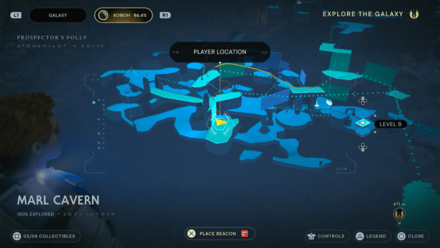
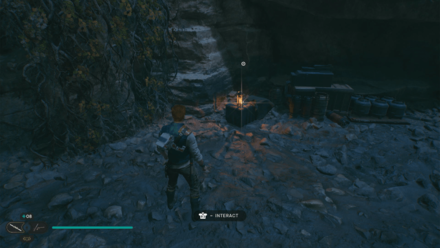
Planet: Koboh | Area: Marl Cavern
Where to Find: When you reach the cavern with wall run platforms, drop down to find the shard. |
|
 Enlarge Enlarge |
 Enlarge Enlarge |
|
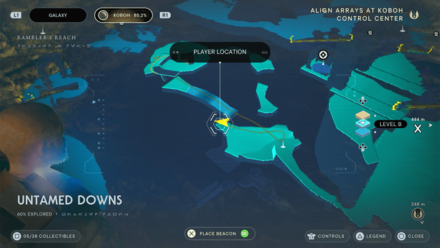
Planet: Koboh | Area: Untamed Downs
Where to Find: Found just below the Meditation Point behind the waterfall. |
|
 Enlarge Enlarge |
 Enlarge Enlarge |
|
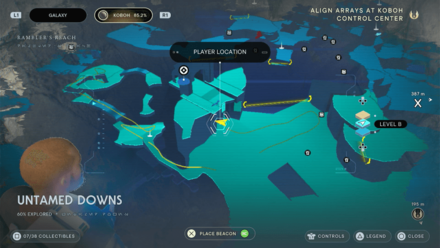
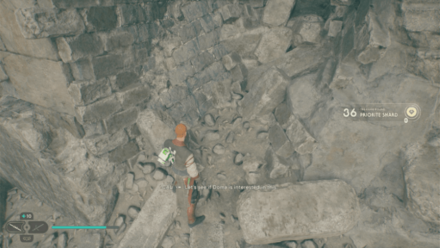
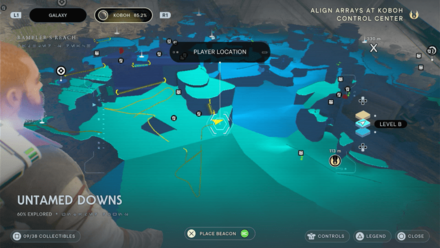
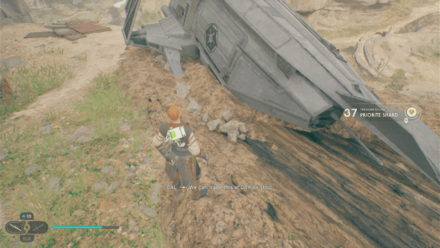
Planet: Koboh | Area: Untamed Downs
Where to Find: Outside the Meditation Point infront of some old ruins. |
|
 Enlarge Enlarge |
 Enlarge Enlarge |
|
Planet: Koboh | Area: Untamed Downs
Where to Find: Found beside crashed ship in the middle of the area. |
|
 Enlarge Enlarge |
 Enlarge Enlarge |
|
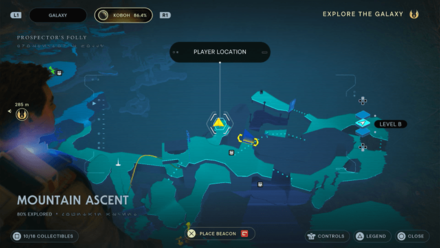
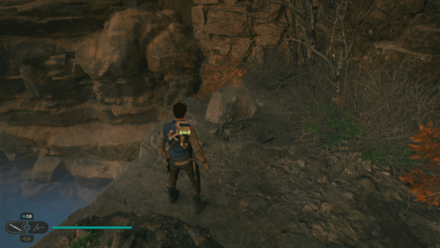
Planet: Koboh | Area: Mountain Ascent
Where to Find: From the Meditation Point, head left. Jump towards the falls to the left and to the next platform to find the shard. |
|
 Enlarge Enlarge |
 Enlarge Enlarge |
|
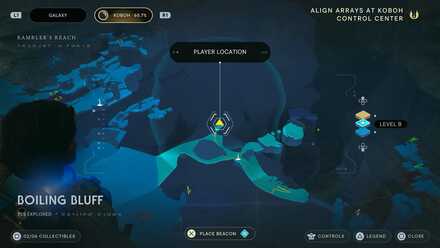
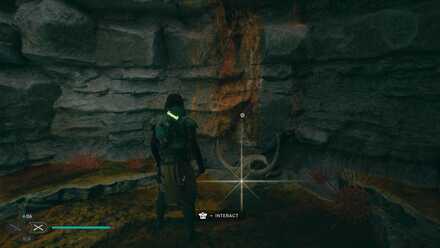
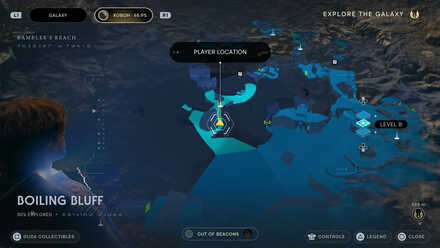
Planet: Koboh | Area: Boiling Bluff
Where to Find: From the Meditation Point, ride a Nekko and use it to jump to past the wall in the map image. The shard will be next to a skull. |
|
 Enlarge Enlarge |
 Enlarge Enlarge |
|
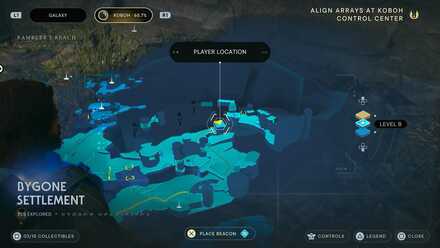
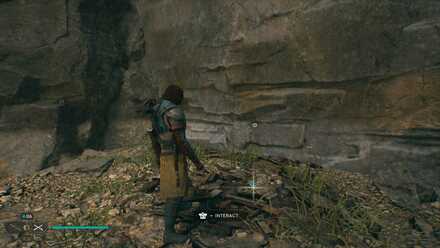
Planet: Koboh | Area: Bygone Settlement
Where to Find: From the Meditation Point, get on a Nekko and continue forward. Jump up from the Nekko to reach the shard.' |
|
 Enlarge Enlarge |
 Enlarge Enlarge |
|
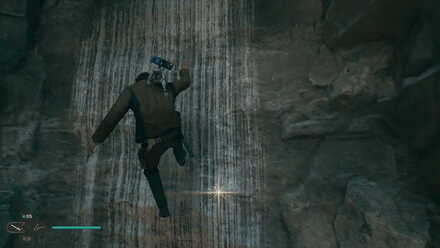
Planet: Koboh | Area: Boiling Bluff
Where to Find: From the Meditation Point, ride a Nekko and use it to jump to up a singular pillar. Jump with the Nekko, then jump from the Nekko, then dash to the wall. Climb-jump until you reach the top. |
|
 Enlarge Enlarge |
 Enlarge Enlarge |
|
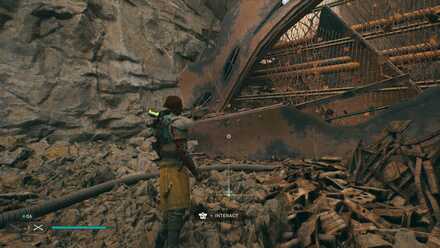
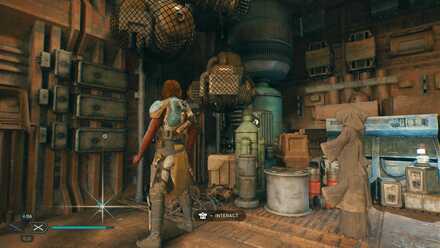
Planet: Koboh | Area: Bygone Settlement
Where to Find: On the way to the platform where you recruit the Jawas, slip through the narrow crack in the wall to get the shard. |
|
 Enlarge Enlarge |
 Enlarge Enlarge |
|
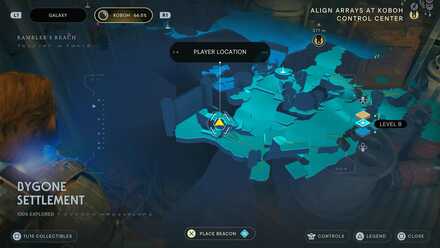
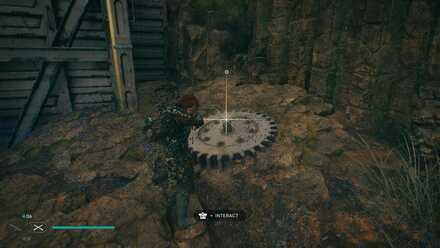
Planet: Koboh | Area: Bygone Settlement
Where to Find: On the platform where you recruit the Jawas, the shard is just located on the other side of the room. |
|
 Enlarge Enlarge |
 Enlarge Enlarge |
|
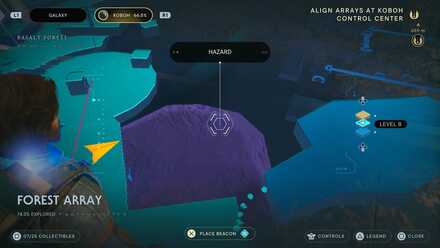
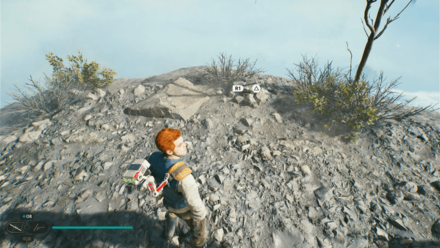
Planet: Koboh | Area: Forest Array
Where to Find: From the Meditation Point, there will be a shard on the distance in the middle of the hazard. You can run and jump towards it to claim it. Even if you died, you will be able to gain the shard. |
|
 Enlarge Enlarge |
 Enlarge Enlarge |
|
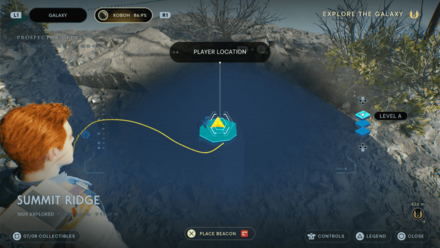
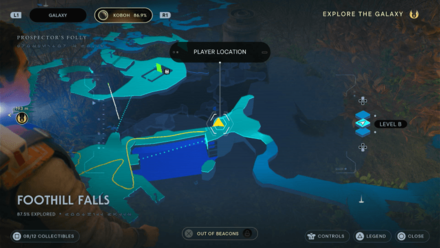
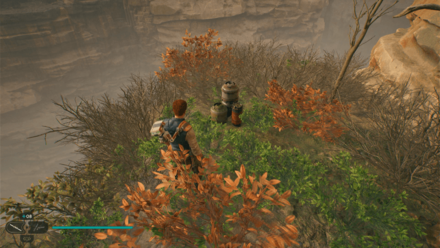
Planet: Koboh | Area: Summit Ridge
Where to Find: Found on one of the areas you can reach by using force pull and push on a balloon. |
|
 Enlarge Enlarge |
 Enlarge Enlarge |
|
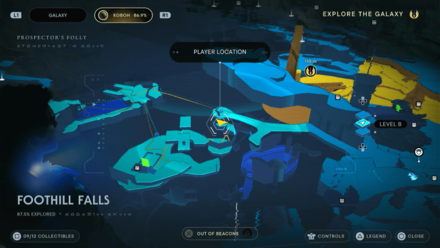
Planet: Koboh | Area: Foothill Falls
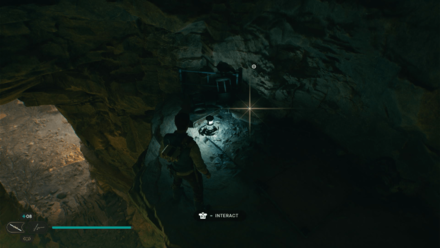
Where to Find: Walk across the falls to reach the area where the shard is. |
|
 Enlarge Enlarge |
 Enlarge Enlarge |
|
Planet: Koboh | Area: Foothill Falls
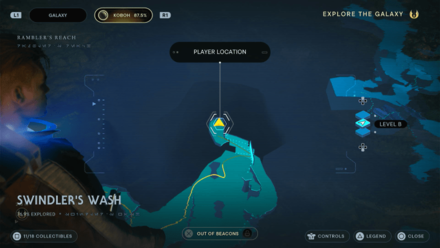
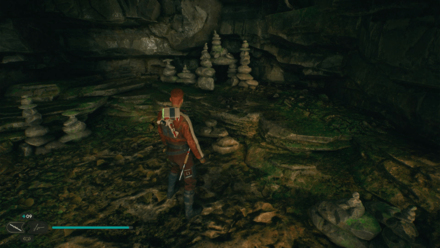
Where to Find: After riding the Relter, turn left to a narrow path that will lead to a cave. Use the Nekko to wall run to a high point in the cave where you'll find the shard. |
|
 Enlarge Enlarge |
 Enlarge Enlarge |
|
Planet: Koboh | Area: Swinder's Wash
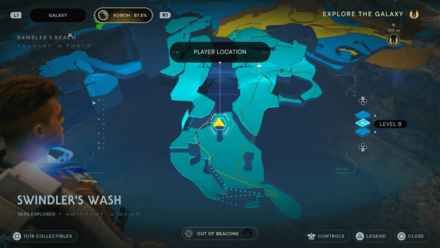
Where to Find: Found in the area with the Bilemaw. Head to the end of the area and wall run to reach the high point on the left. |
|
 Enlarge Enlarge |
 Enlarge Enlarge |
|
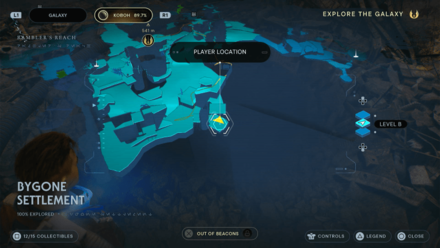
Planet: Koboh | Area: Swinder's Wash
Where to Find: Found in the area with the Bilemaw. Head to the end of the area and wall run to reach the high point on the right. Then jump to the raised surface in the middle. |
|
 Enlarge Enlarge |
 Enlarge Enlarge |
|
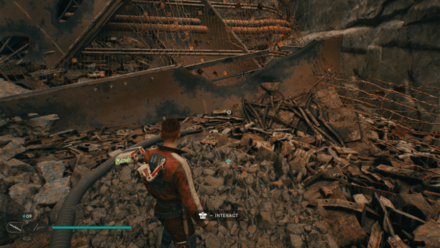
Planet: Koboh | Area: Bygone Settlement
Where to Find: In the area where you recruit the Jawas, there's a narrow path you can squeeze through that will lead to the shard. |
|
 Enlarge Enlarge |
 Enlarge Enlarge |
|
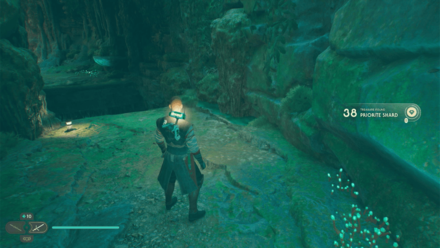
Planet: Koboh | Area: Untamed Downs
Where to Find: Inside the cave, climb up the vines and turn around. You'll find the Shard on the platform across. |
|
 Enlarge Enlarge |
 Enlarge Enlarge |
|
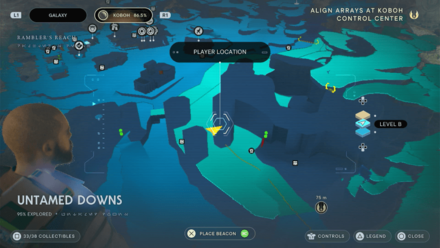
Planet: Koboh | Area: Untamed Downs
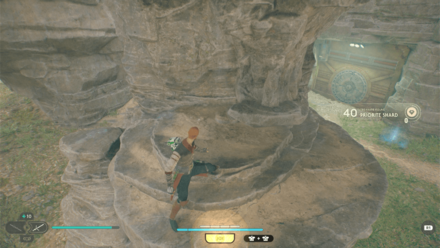
Where to Find: Climb up using the Nekko and dash inside the green laser wall. Climb up the walls and dash towards the platform below. You'll find the Shard by the edge. |
|
 Enlarge Enlarge |
 Enlarge Enlarge |
|
Planet: Koboh | Area: Untamed Downs
Where to Find: Found on a high platform by a pillar overlooking Harvest Ridge. |
|
 Enlarge Enlarge |
 Enlarge Enlarge |
|
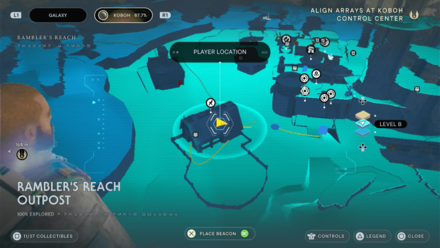
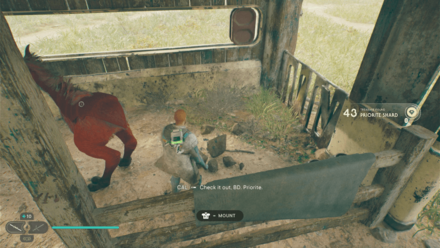
Planet: Koboh | Area: Rambler's Reach Outpost
Where to Find: Bring a bright colored Nekko to the Stables and put it in a stall. Rest and you'll find the Shard by the Nekko's stall. |
|
 Enlarge Enlarge |
 Enlarge Enlarge |
|
Planet: Koboh | Area: Rambler's Reach Outpost
Where to Find: From the rooftop garden, climb up the tower and take the Reltor towards the outer building near the lake. You'll find the Shard on the roof. |
|
Datadiscs
Datadiscs are a unique resource that while not exactly convertible to Republic credits or any other form of currency, they can be taken to Zee to decrypt its contents
| Map Location | In-game Location |
|---|---|
 Enlarge Enlarge |
 Enlarge Enlarge |
|
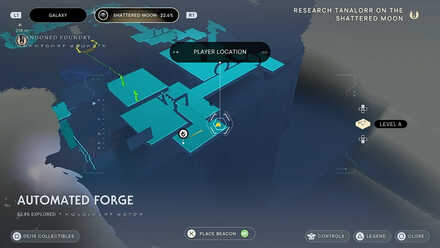
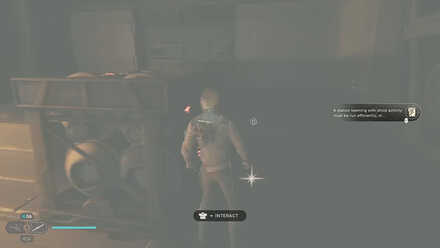
Planet: Shattered Moon | Area: Automated Forge
Where to Find: Found near the Force Tear in the Automated Forge. |
|
 Enlarge Enlarge |
 Enlarge Enlarge |
|
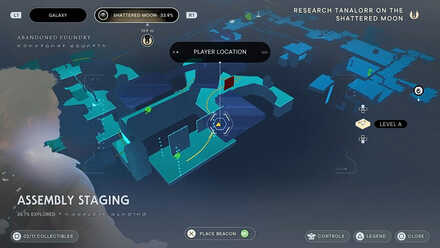
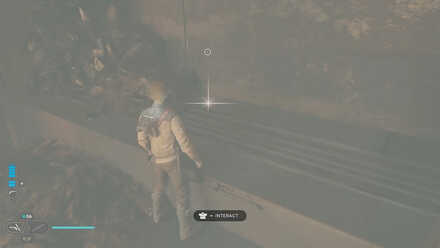
Planet: Shattered Moon | Area: Assembly Staging
Where to Find: Past the green laser wall, grapple on to the climable wall and it will break and cause you to drop down. Defeat the group of Shiverpedes and you'll find the Disc nearby. |
|
 Enlarge Enlarge |
 Enlarge Enlarge |
|
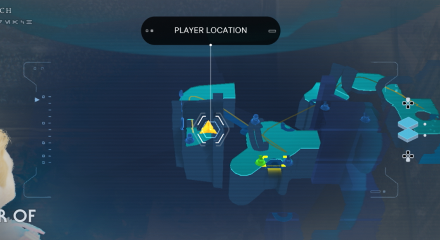
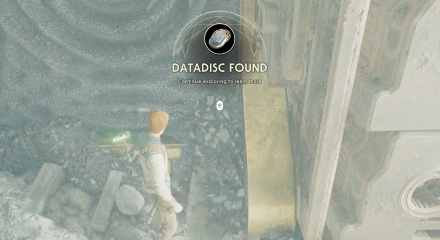
Planet: Koboh | Area: Chamber of Duality
Where to Find: Set the Orb to activate the bridge on your right. Cross it then use the force pull on the pullcord and place it on a stand to open the door and you'll find the Datadisc inside the room. |
|
 Enlarge Enlarge |
 Enlarge Enlarge |
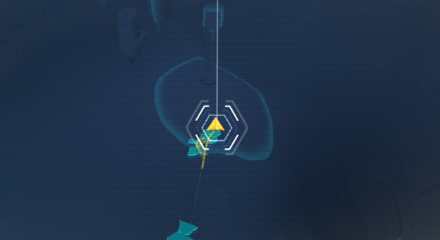
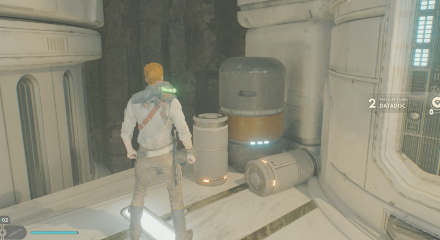
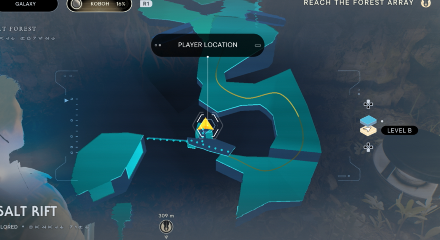
| Planet: Koboh | Area: Rift Passage | |
 Enlarge Enlarge |
 Enlarge Enlarge |
|
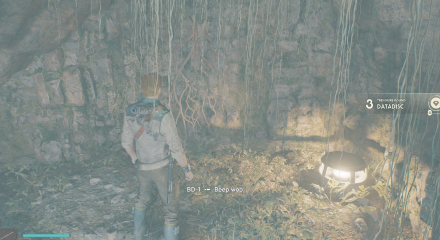
Planet: Koboh | Area: Basalt Rift
Where to Find: At the area full of Koboh Dust, hug the wall right and climb the vines. You'll find the Disc on your right. |
|
 Enlarge Enlarge |
 Enlarge Enlarge |
|
Planet: Koboh | Area: Forest Array
Where to Find: From the center, set the Orb Couplerto face towards the Meditation Point. Walk across and you'll find the Disc just by the archway. |
|
 Enlarge Enlarge |
 Enlarge Enlarge |
|
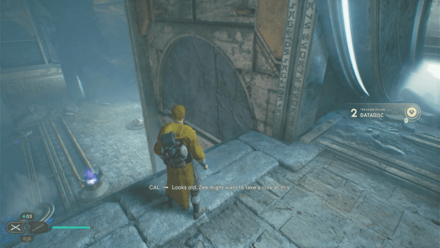
Planet: Koboh | Area: Chamber of Reasons
Where to Find: Past the "A Secret Meeting" Force Echo, move forward and you'll find the Disc on your left by the edge. |
|
 Enlarge Enlarge |
 Enlarge Enlarge |
|
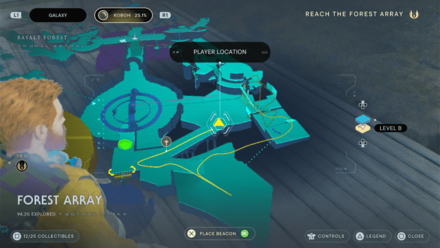
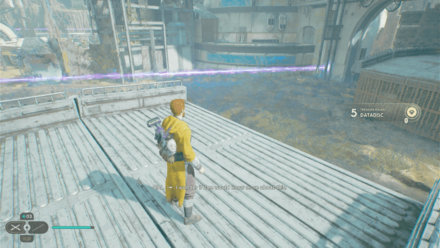
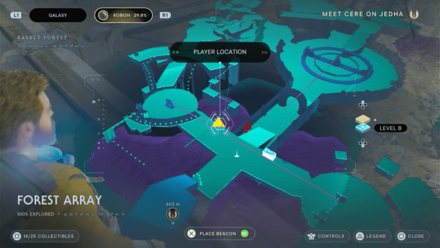
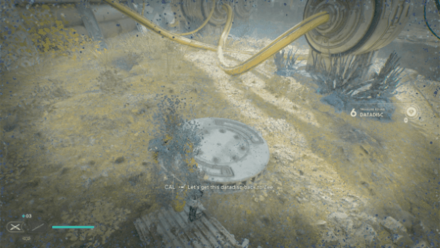
Planet: Koboh | Area: Forest Array
Where to Find: From the center, set the Orb Coupler to face towards the west opening. Walk across, climb the railings, fly using the mount, and go up the stairs. Face towards the railings you climbed and you'll find the Disc at the end of the platform. |
|
 Enlarge Enlarge |
 Enlarge Enlarge |
|
Planet: Koboh | Area: Forest Array
Where to Find: From the Meditation Point, look towards the area with Koboh Dusts and some platforms. Drop down and you'll find the Disc on the ground. |
|
 Enlarge Enlarge |
 Enlarge Enlarge |
|
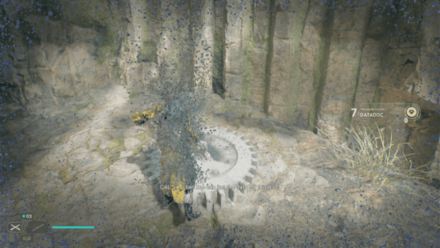
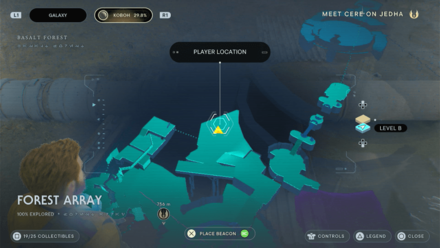
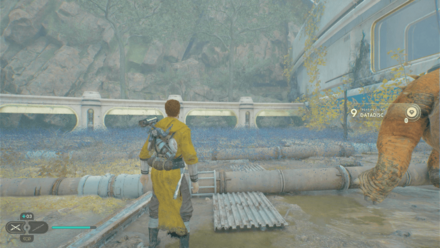
Planet: Koboh | Area: Forest Array
Where to Find: From the Meditation Point, face towards the empty Koboh Dust pit with a grappable railing on the side. Drop down and you'll find the Disc on top of a gear. |
|
 Enlarge Enlarge |
 Enlarge Enlarge |
|
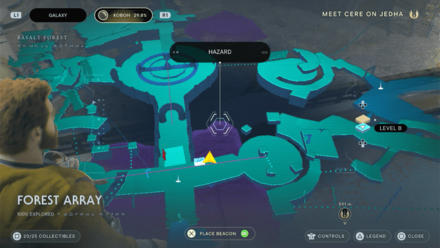
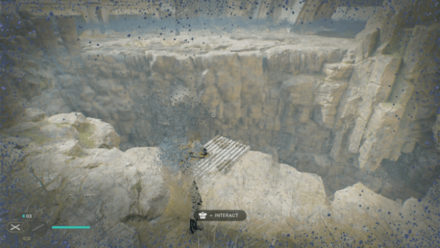
Planet: Koboh | Area: Forest Array
Where to Find: From the center, set the Orb Coupler to face towards the west opening. Walk across, climb the railings and drop down. Fly with the mount and you'll find the Disc hidden among the Koboh Dust near the Bilemaw. |
|
 Enlarge Enlarge |
 Enlarge Enlarge |
|
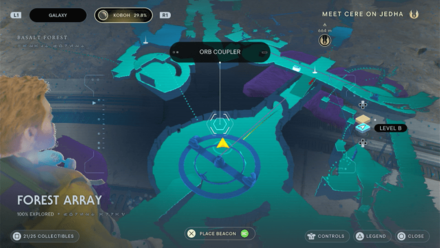
Planet: Koboh | Area: Forest Array
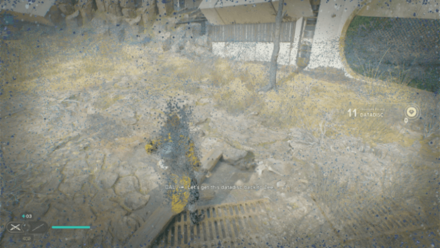
Where to Find: From the Meditation Point, face towards the nearby workbench and drop down to the Koboh Dust. You'll find the Disc at the edge by a piece of metal. |
|
 Enlarge Enlarge |
 Enlarge Enlarge |
|
Planet: Koboh | Area: Forest Array
Where to Find: From the center, face between the Meditation Point and some rocks on the left. Cross the Koboh Dust a bit and you'll find the Disc nearby. |
|
 Enlarge Enlarge |
 Enlarge Enlarge |
|
Planet: Koboh | Area: Basalt Rift
Where to Find: From the Meditation Point, go past the archway and take the road up past the rock blocking the path. Take a left past the Mogu and wall run your way up the wall. You'll find the Disc on your left by the edge. |
|
 Enlarge Enlarge |
 Enlarge Enlarge |
|
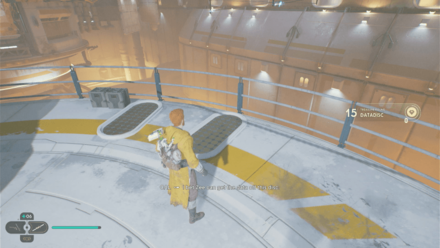
Planet: Shattered Moon | Area: Automated Forge
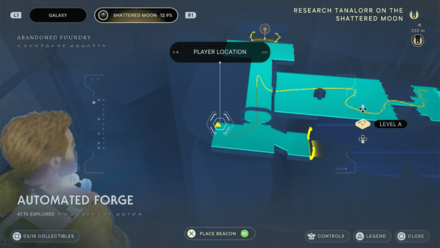
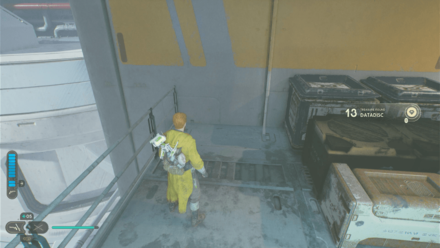
Where to Find: Past the room full of Droids, take a left and you'll find the Disc outside on your left behind some boxes near the Maintenance Droid. |
|
 Enlarge Enlarge |
 Enlarge Enlarge |
|
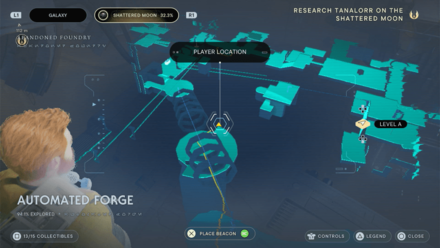
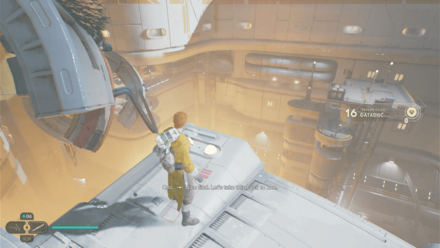
Planet: Shattered Moon | Area: Automated Forge
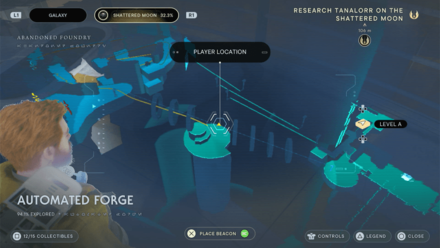
Where to Find: Past the three ziplines and a series of wall runs, grapple on to the zip and wall run again. Unlock the shortcut back to the workbench, take it and drop down mid-way to a platform. You'll find the Disc by the railings. |
|
 Enlarge Enlarge |
 Enlarge Enlarge |
|
Planet: Shattered Moon | Area: Automated Forge
Where to Find: Past the three ziplines and a series of wall runs, grapple on to the zip and wall run again. Unlock the shortcut back to the workbench, take it and drop down mid-way to a platform. You'll find the Disc by the edge. |
|
 Enlarge Enlarge |
 Enlarge Enlarge |
|
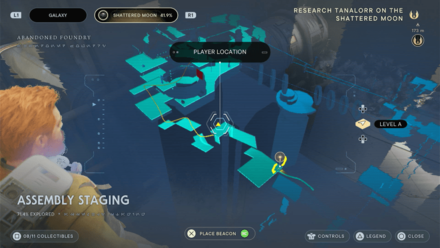
Planet: Shattered Moon | Area: Assembly Staging
Where to Find: After falling down the pit full of Shiverpedes, grapple on to the flying droids and climb up the wall. You'll find the Disc on your right by the corner. |
|
 Enlarge Enlarge |
 Enlarge Enlarge |
|
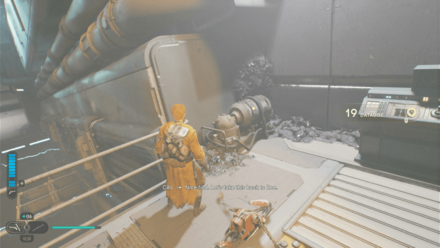
Planet: Shattered Moon | Area: Assembly Staging
Where to Find: Past the room with a green laser wall, follow the path until you reach an area with passing electricity. Jump past the platforms and climb the platform on your left. You'll find the Disc by the corner. |
|
 Enlarge Enlarge |
 Enlarge Enlarge |
|
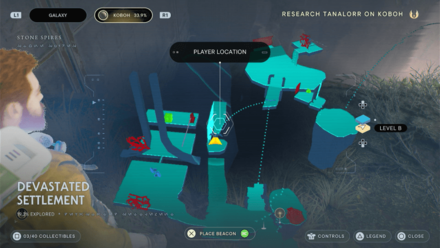
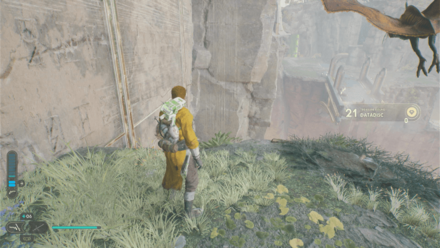
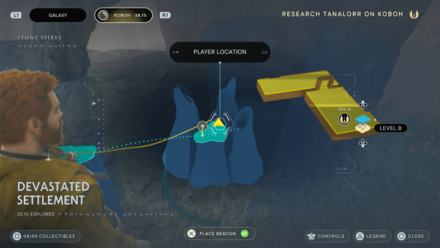
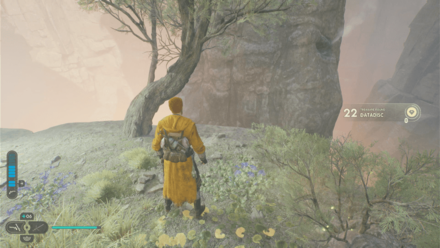
Planet: Koboh | Area: Devastated Settlement
Where to Find: From the Meditation Point, grapple up on your left, climb the wall and jump across. Follow the path right past the waterfall and you'll find the Disc on a climable wall. |
|
 Enlarge Enlarge |
 Enlarge Enlarge |
|
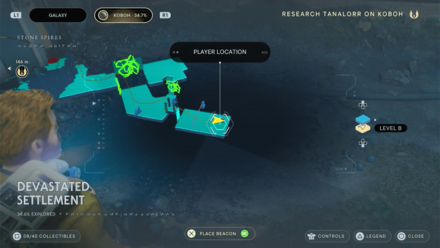
Planet: Koboh | Area: Devastated Settlement
Where to Find: From the Meditation Point, use the mount to fly across and drop down on the small island rock. You'll find the Disc by the edge. |
|
 Enlarge Enlarge |
 Enlarge Enlarge |
|
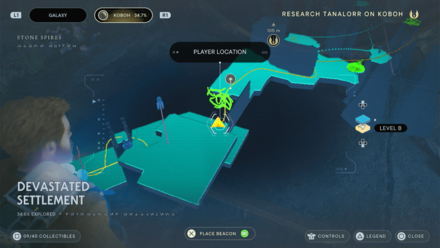
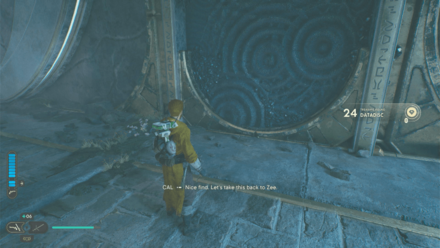
Planet: Koboh | Area: Devastated Settlement
Where to Find: After unlocking the Koboh Grinder, use it to trace a path towards the Koboh Matter high on the wall and the Disc will drop. |
|
 Enlarge Enlarge |
 Enlarge Enlarge |
|
Planet: Koboh | Area: Devastated Settlement
Where to Find: After unlocking the Koboh Grinder, bring the orb with you and head back past the waterfall opening. Place the Orb on the nearby Coupler and use the Koboh Grinder to trace it along the Koboh Matter and the Disc will drop. |
|
 Enlarge Enlarge |
 Enlarge Enlarge |
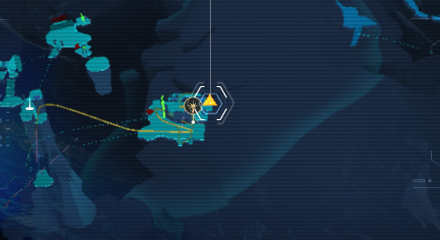
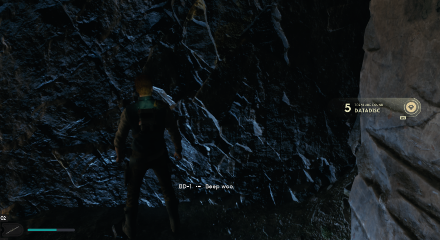
| Planet: Koboh | Area: Devastated Settlement | |
 Enlarge Enlarge |
 Enlarge Enlarge |
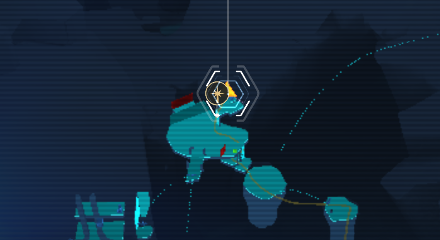
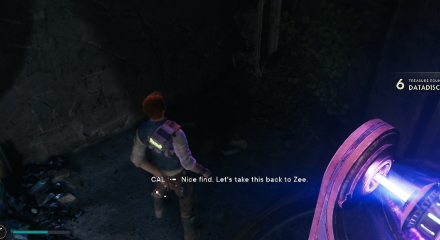
| Planet: Koboh | Area: Devastated Settlement | |
 Enlarge Enlarge |
 Enlarge Enlarge |
|
Planet: Koboh | Area: Devastated Settlement
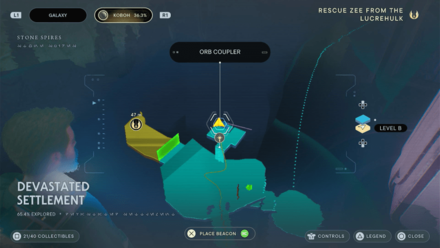
Where to Find: From the Meditation Point, backtrack towards the green laser wall and climb up the ledge on the right. Use the Koboh Grinder to destroy the blocking Koboh Matter and you'll find the Disc next to the Coupler. |
|
 Enlarge Enlarge |
 Enlarge Enlarge |
|
Planet: Koboh | Area: Phon'Qi Caverns
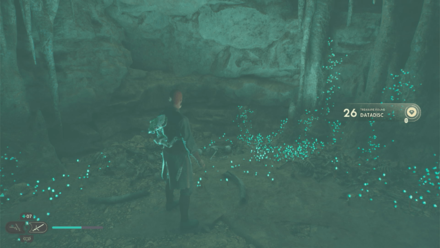
Where to Find: Found inside the room where you fight a Rancor next to a lamp. |
|
 Enlarge Enlarge |
 Enlarge Enlarge |
|
Planet: Koboh | Area: Phon'Qi Caverns
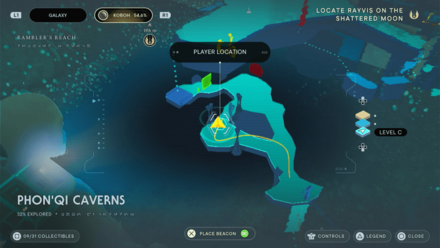
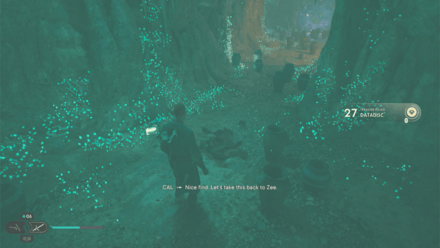
Where to Find: Past the room full of Cavern Fungus, go down the fork on the left and defeat the Magnaguard. You'll find the Disc drop after destroying one of the vases. |
|
 Enlarge Enlarge |
 Enlarge Enlarge |
|
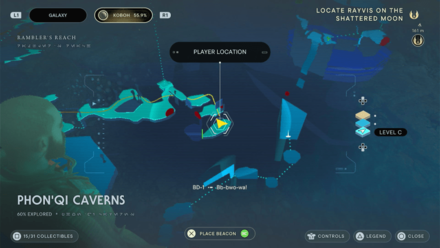
Planet: Koboh | Area: Phon'Qi Caverns
Where to Find: Once you fall down the pitfall trap, climb up the scalable wall and dash through the green laser vent. You'll find the Disc on floor. |
|
 Enlarge Enlarge |
 Enlarge Enlarge |
|
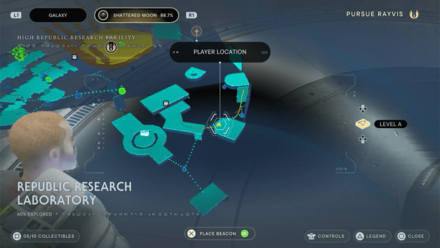
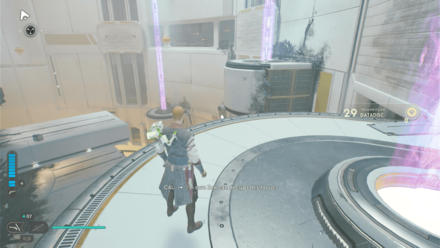
Planet: Shattered Moon | Area: Republic Research Laboratory
Where to Find: After obtaining the Ascension Cable Upgrade, take the nearby balloon and jump towards the right. Climb up and activate the other ballons, you'll find the Disc at on top. |
|
 Enlarge Enlarge |
 Enlarge Enlarge |
|
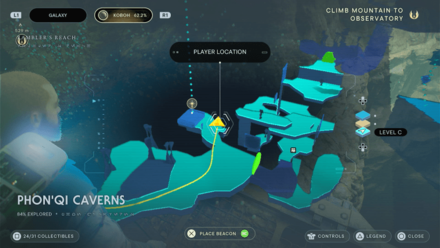
Planet: Koboh | Area: Phon'Qi Caverns
Where to Find: Destroy one of the vases near the elevator by the ledge. |
|
 Enlarge Enlarge |
 Enlarge Enlarge |
|
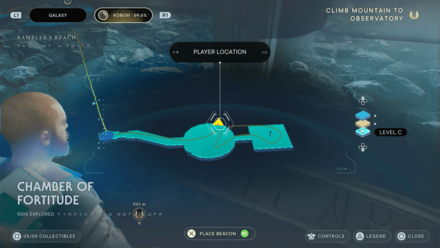
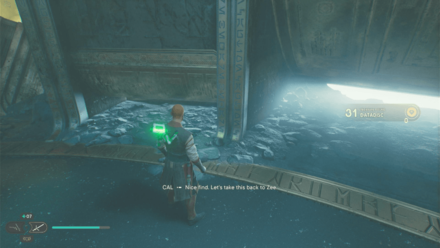
Planet: Koboh | Area: Chamber of Fortitude
Where to Find: Defeat Anoth Estra and you'll find the Disc by destroying one of the vases in the room. |
|
 Enlarge Enlarge |
 Enlarge Enlarge |
|
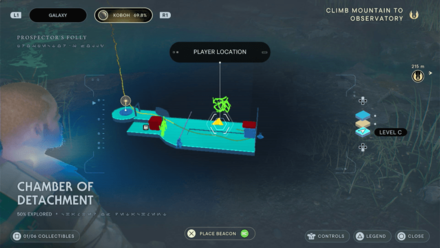
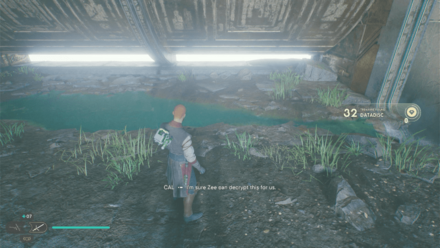
Planet: Koboh | Area: Chamber of Detachment
Where to Find: Get the Orb from behind the cube and place it on the Coupler nearby. use the Koboh Grinder to remove Koboh Matter high up by the wall. The Disc will drop from there. |
|
 Enlarge Enlarge |
 Enlarge Enlarge |
|
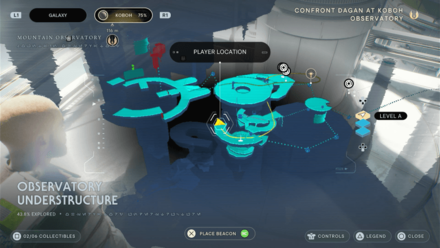
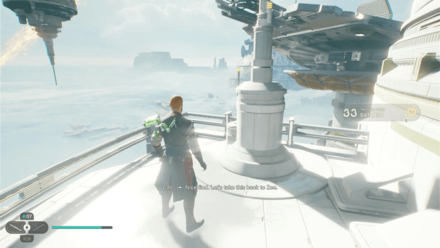
Planet: Koboh | Area: Observatory Understructure
Where to Find: From the Meditation Point, climb up and climb on your right. You'll find the Disc at the end of the path. |
|
 Enlarge Enlarge |
 Enlarge Enlarge |
|
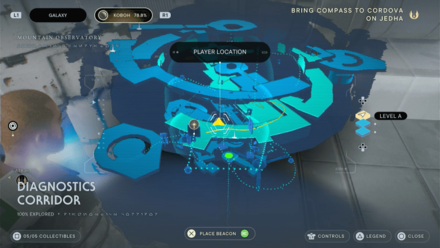
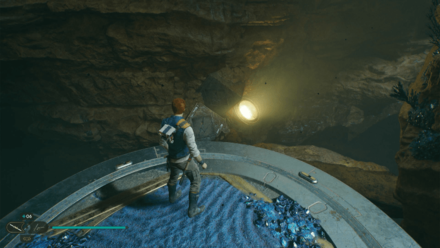
Planet: Koboh | Area: Diagnostics Corridor
Where to Find: Rotate the Minor Oculus twice and follow the path forward. Bring the balloon outside and cross towards the other balloon on the right. Enter the green laser wall and you'll find the Disc by some crates. |
|
 Enlarge Enlarge |
 Enlarge Enlarge |
|
Planet: Koboh | Area: Collapsed Passage
Where to Find: After the wall jump section of the area, look back and you'll find a platform hanging off the edge. Head towards it and jump to the area with a bluish surface, and walk to the end of it. |
|
 Enlarge Enlarge |
 Enlarge Enlarge |
|
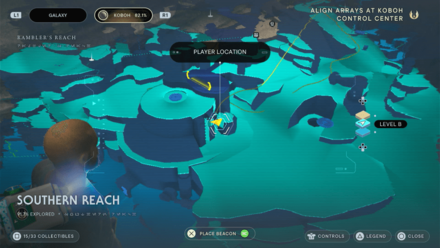
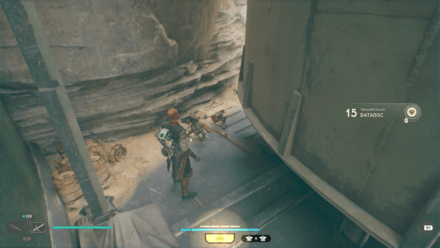
Planet: Koboh | Area: Southern Reach
Where to Find: Head towards the large silo and you'll find the Scavenger Droid just behind a smaller silo that drops the Disc. |
|
 Enlarge Enlarge |
 Enlarge Enlarge |
|
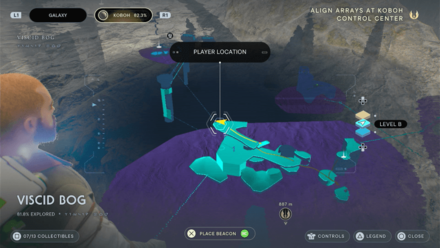
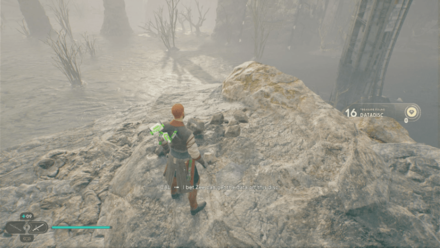
Planet: Koboh | Area: Viscid Bog
Where to Find: From the Meditation Point, turn around and grapply towards the nearby island. You'll find the Disc on the edge of a high rock. |
|
 Enlarge Enlarge |
 Enlarge Enlarge |
|
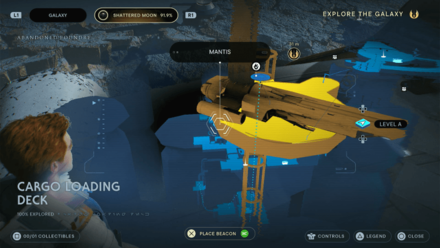
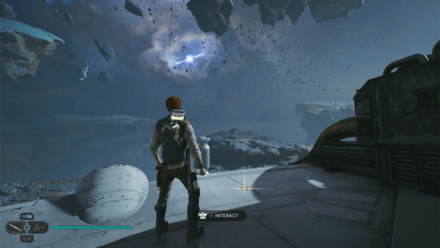
Planet: Shattered Moon | Area: Cargo Loading Deck
Where to Find: Found on the right side of the Mantis. |
|
 Enlarge Enlarge |
 Enlarge Enlarge |
|
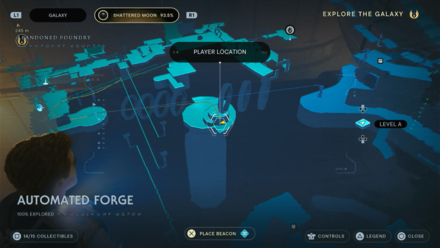
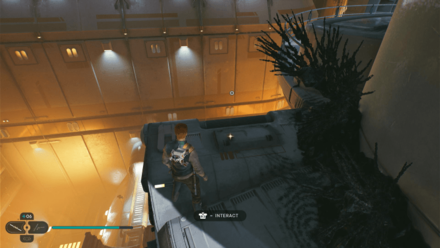
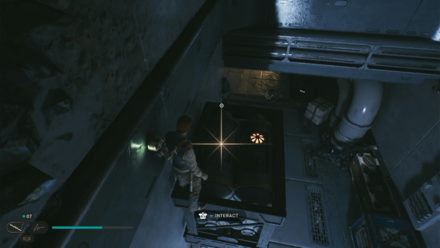
Planet: Shattered Moon | Area: Automated Forge
Where to Find: Past the three ziplines and a series of wall runs, grapple on to the zip and wall run again. Unlock the shortcut back to the workbench, take it and drop down mid-way to a platform. You'll find the Disc by the edge. |
|
 |
 Enlarge Enlarge |
|
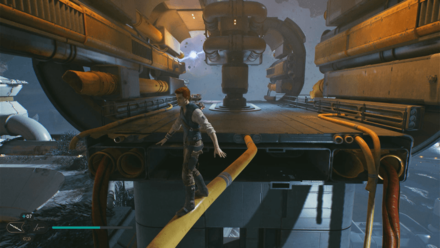
Planet: Shattered Moon | Area: Assembly Staging
Where to Find: After the long zipline going from Automated Forge to Assembly Staging, head to the right. At the end of the path, the Datadisc will be on top of the boxes. |
|
 Enlarge Enlarge |
 Enlarge Enlarge |
|
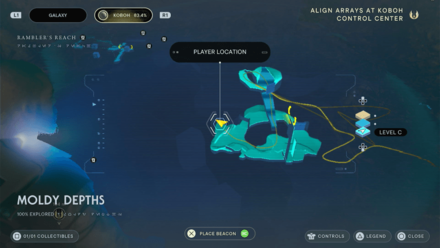
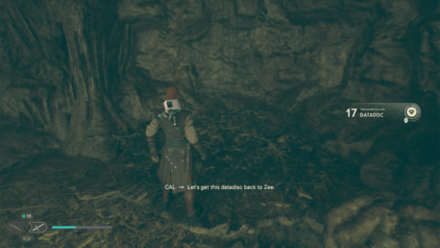
Planet: Koboh | Area: Moldy Depths
Where to Find: Head for the center area in Harvest Ridge and enter the cave there behind the door. Slide down and drop down to the right path. You'll find the Disc in that area by a nest. |
|
 Enlarge Enlarge |
 Enlarge Enlarge |
|
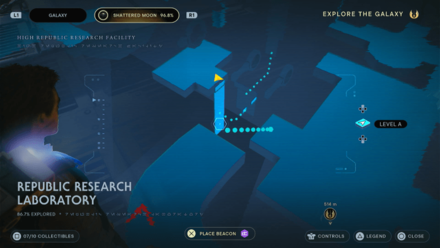
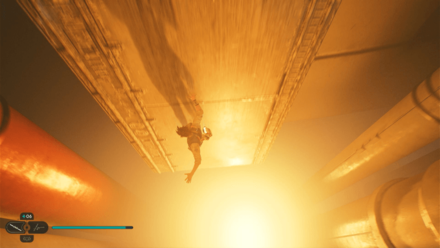
Planet: Shattered Moon | Area: Assembly Staging
Where to Find: Found on a digging droid after the jumping upward puzzle with moving electric currents. |
|
 Enlarge Enlarge |
 Enlarge Enlarge |
|
Planet: Shattered Moon | Area: Array Channel
Where to Find: On a section where you'll need to wall jump through an electric current, slide down to bottom end of the wall to find the Datadisc. |
|
 Enlarge Enlarge |
 Enlarge Enlarge |
|
Planet: Koboh | Area: Observatory Understructure
Where to Find: Once you reach the largest structure, turn left. The Datadisc will be found on a digging droid. |
|
 Enlarge Enlarge |
 Enlarge Enlarge |
|
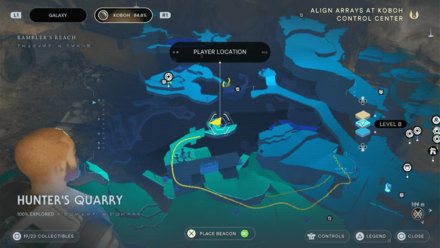
Planet: Koboh | Area: Hunter's Quarry
Where to Find: Take the balloons outside the entrance and you'll find the Disc above the ruins. |
|
 Enlarge Enlarge |
 Enlarge Enlarge |
|
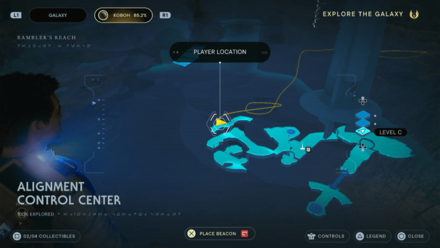
Planet: Koboh | Area: Alignment Control Center
Where to Find: You can see the Datadisc from the top of the cave that leads to the Alignment Control Center. |
|
 Enlarge Enlarge |
 Enlarge Enlarge |
|
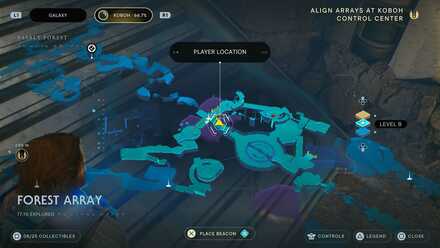
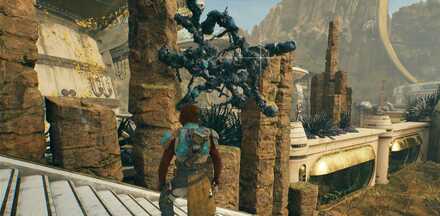
Planet: Koboh | Area: Forest Array
Where to Find: Use the laser from the Meditation Point and BD-1's Koboh Grinder to get the datadisc trapped in the material. |
|
 Enlarge Enlarge |
 Enlarge Enlarge |
|
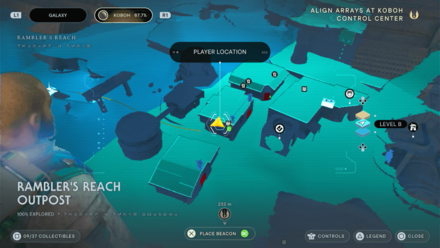
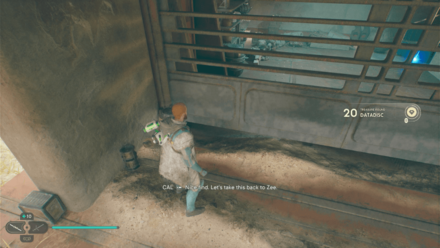
Planet: Koboh | Area: Rambler's Reach Outpost
Where to Find: From the Meditation Point, head straight past the entrance and you'll find the Disc on your left inside the building. Requires you to recruit Jawa first. |
|
 Enlarge Enlarge |
 Enlarge Enlarge |
|
Planet: Koboh | Area: Rambler's Reach Outpost
Where to Find: From the Meditation Point, head straight past the entrance and you'll find the Disc on your right by the door. Requires you to recruit Jawa first. |
|
Jedha Scrolls
Jedha Scrolls are exclusively found only on Jedha. There are about 50 scrolls for you to collect throughout one playthrough and trade with Sister Taske.
| Map Location | In-game Location |
|---|---|
 Enlarge Enlarge |
 Enlarge Enlarge |
|
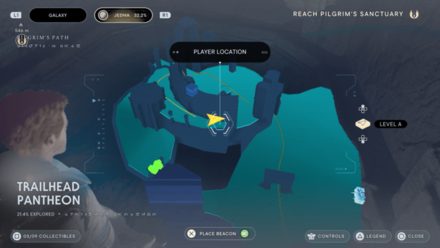
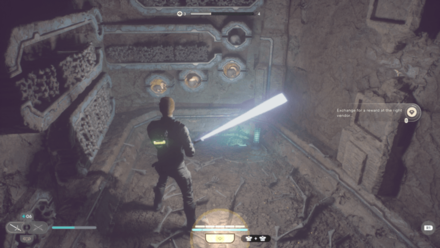
Area: Trailhead Pantheon
Where to Find: Once you've brought the cube to climb the ledge, enter the cave and go down the path on the left. You'll find the Scroll at the end. |
|
 Enlarge Enlarge |
 Enlarge Enlarge |
|
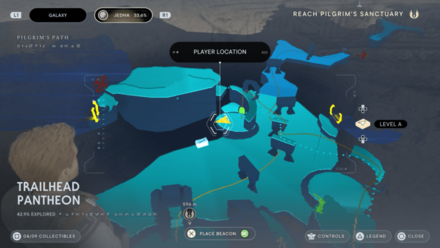
Area: Trailhead Pantheon
Where to Find: Found inside the building at the bottom of the spiral stairs. |
|
 Enlarge Enlarge |
 Enlarge Enlarge |
|
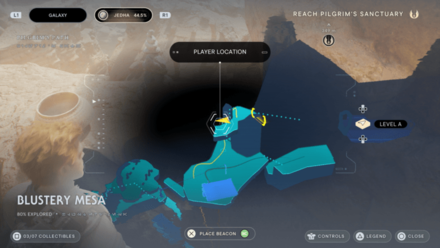
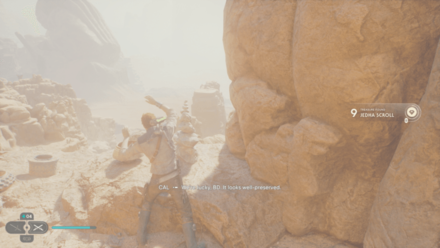
Area: Blustery Mesa
Where to Find: From the Timeworn Bridge Meditation Point, backtrack down and use the wind the jump up the platform inbetween the rocks. Climb the wall on your right and you'll find the Scroll up top on your right back some stacked rocks. |
|
 Enlarge Enlarge |
 Enlarge Enlarge |
|
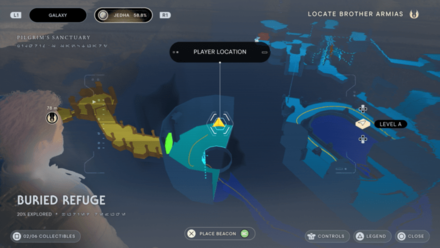
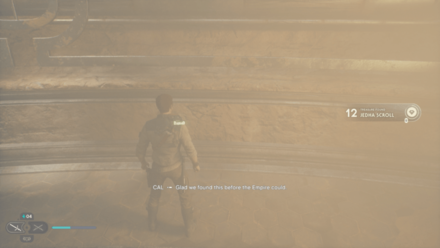
Area: Buried Refuge
Where to Find: After coming out of the water, force pull the gate on the right and you'll find the Scroll by the wall. |
|
 Enlarge Enlarge |
 Enlarge Enlarge |
|
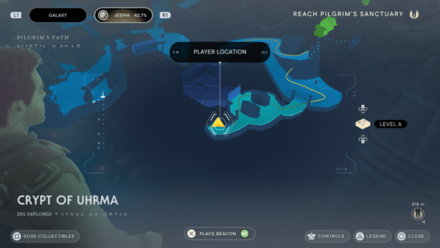
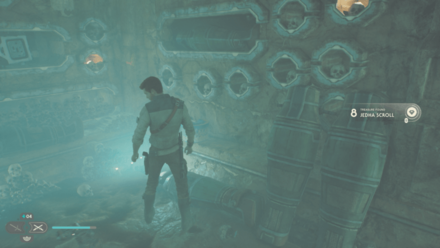
Area: Crypt of Uhrma
Where to Find: Enter the crypt and hug the wall to your left. You'll find the Scroll at the end of the path. |
|
 Enlarge Enlarge |
 Enlarge Enlarge |
|
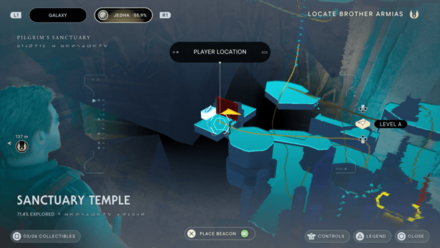
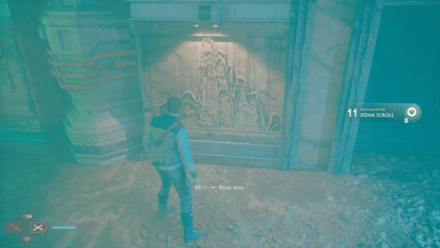
Area: Sanctuary Temple
Where to Find: Infront of the green laser wall on the second floor. |
|
 Enlarge Enlarge |
 Enlarge Enlarge |
|
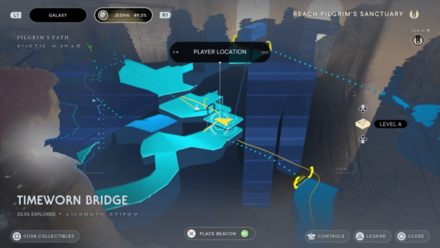
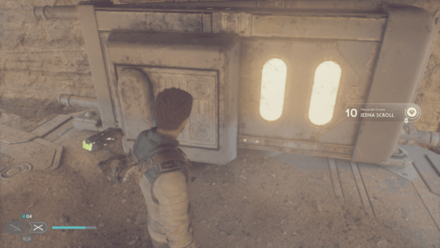
Area: Timeworn Bridge
Where to Find: From the Timeworn Bridge Meditation Point, follow the path forward and you'll find the Scroll beneath the metal platform. |
|
 Enlarge Enlarge |
 Enlarge Enlarge |
|
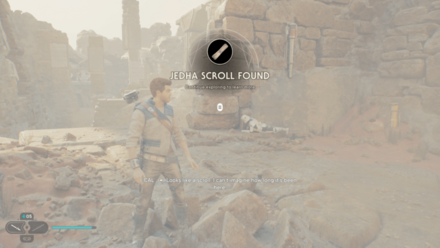
Area: Monastery Walls
Where to Find: From the Monastery Walls Meditation Point, head down the middle path into an opening you can force push. You'll find the Scroll on a dead Stormtrooper body after defeat the nearby enemies. |
|
 Enlarge Enlarge |
 Enlarge Enlarge |
|
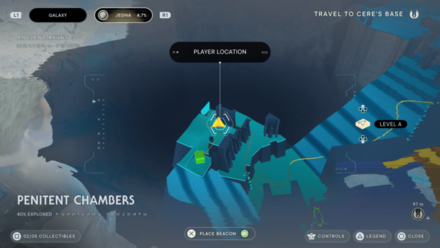
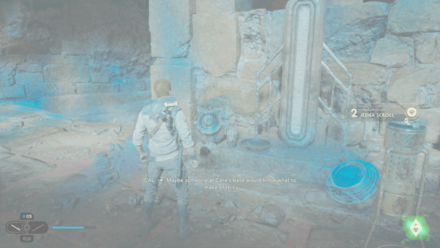
Area: Penitent Chambers
Where to Find: After meeting Merrin and defeating the group of Stormtroopers, grapple up and wall run to a ledge and you'll find the Scroll on your left by a small monument. |
|
 Enlarge Enlarge |
 Enlarge Enlarge |
|
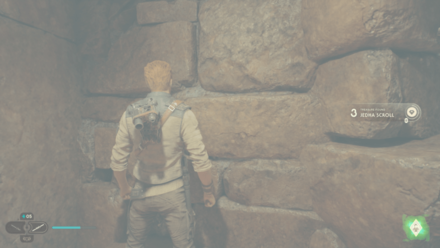
Area: Halls of Ranvell
Where to Find: After watching Merrin defeat the Stormtroopers, wall jump up and you'll find the Scroll up top by the ledge. |
|
 Enlarge Enlarge |
 Enlarge Enlarge |
|
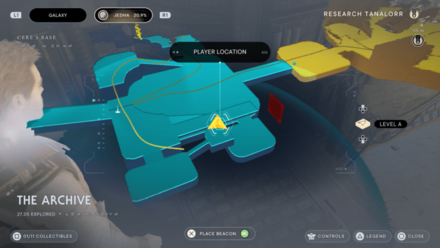
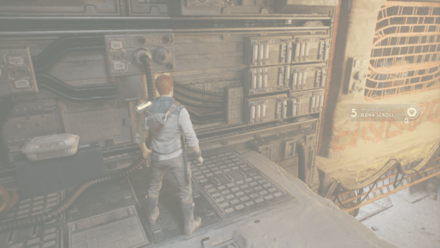
Area: The Archive
Where to Find: From the Meditation Point, face where the Mantis is, walk forward a bit and enter the red door on your right. Go through the narrow passageway on your left and you'll find the Scroll on the floor to your left. |
|
 Enlarge Enlarge |
 Enlarge Enlarge |
|
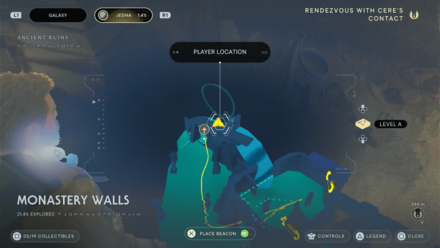
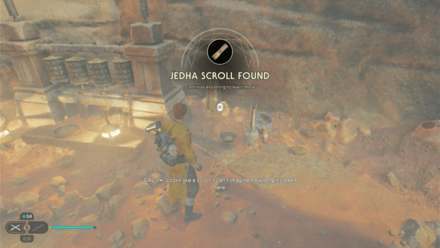
Area: Monastery Walls
Where to Find: Follow the path westward past the room with a Sutaban. You'll find it beside the "Pilgrims, Lost" Force Echo. |
|
 Enlarge Enlarge |
 Enlarge Enlarge |
|
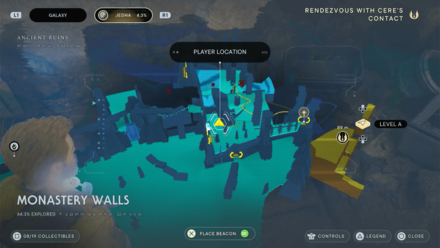
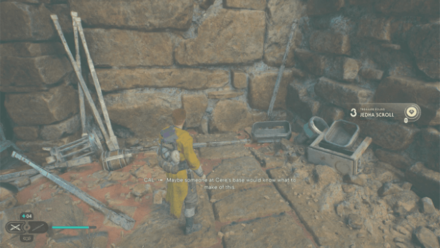
Area: Monastery Walls
Where to Find: From the Penitent Chambers Meditation Point, backtrack across the beam and past the Flametroopers and you'll find the Scroll just beside the workbench. |
|
 Enlarge Enlarge |
 Enlarge Enlarge |
|
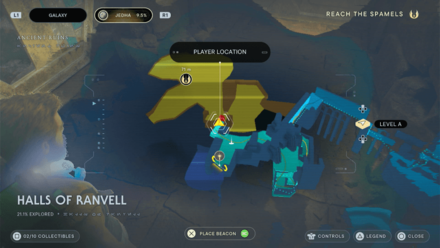
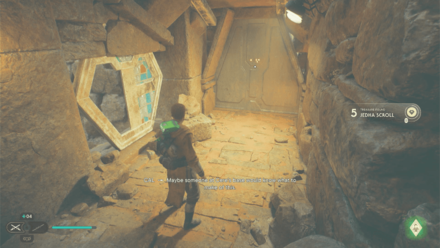
Area: Halls of Ranvell
Where to Find: Past the "Pilgrims, Attacked" Force Echo, head down the hall and you'll find the Scroll infront of the door. |
|
 Enlarge Enlarge |
 Enlarge Enlarge |
|
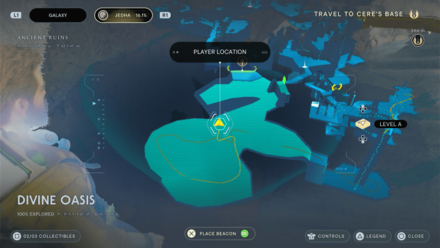
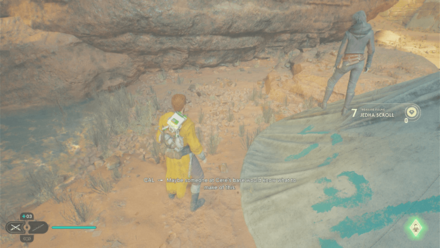
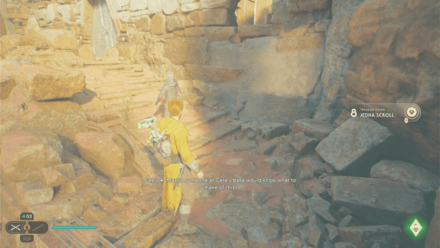
Area: Divine Oasis
Where to Find: After defeating the Skriton, head outside and you'll find the Scroll behind the tent. |
|
 Enlarge Enlarge |
 Enlarge Enlarge |
|
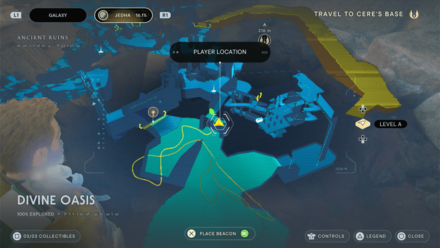
Area: Divine Oasis
Where to Find: After defeating the Skriton, head outside, tame and ride the beast, then head for the exit. You'll find the Scroll on your right on top of a high ledge that you need to jump off the beast from. |
|
 Enlarge Enlarge |
 Enlarge Enlarge |
|
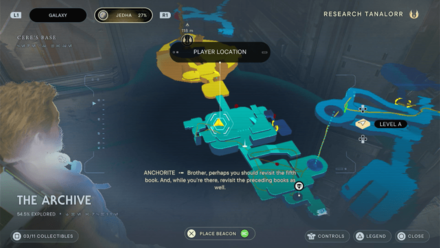
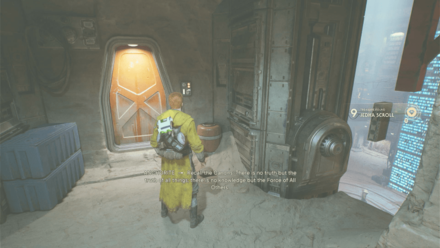
Area: The Archive
Where to Find: From the Meditation Point, face where the Mantis is, walk forward a bit and enter the red door on your left. Climb the wall, enter the narrow passageway, and climb another wall again. You'll find the Scroll just outside the door to your left. |
|
 Enlarge Enlarge |
 Enlarge Enlarge |
|
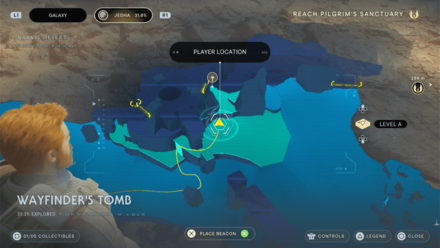
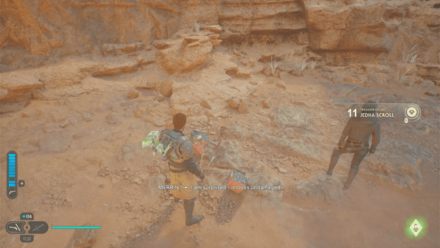
Area: Wayfinder's Tomb
Where to Find: From the Arid Flats Meditation Point, head north towards some broken pillars. Once you're past them, you'll find a Scavanger Droid on your left that drops the Scroll. |
|
 Enlarge Enlarge |
 Enlarge Enlarge |
|
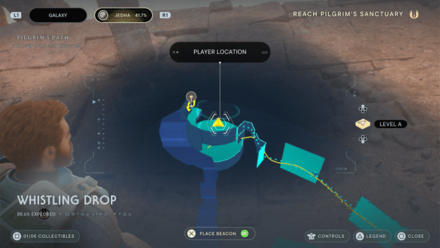
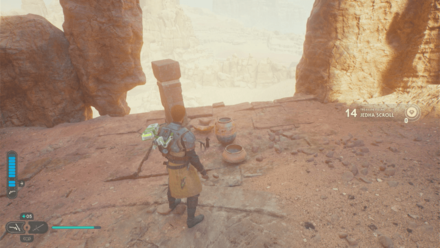
Area: Whistling Drop
Where to Find: After crossing the series of climbable walls, defeat the group of Stormtroopers in the area and you'll find the Scroll nearby next to a small pillar. |
|
 Enlarge Enlarge |
 Enlarge Enlarge |
|
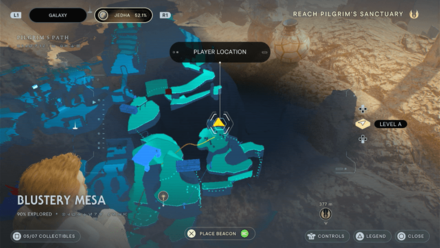
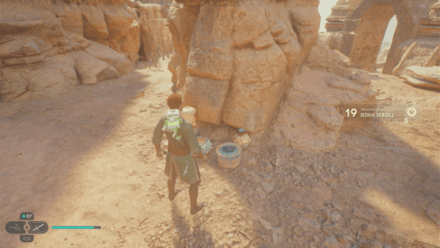
Area: Blustery Mesa
Where to Find: From the Timeworn Bridge Meditation Point, backtrack down and use the wind the jump up the platform inbetween the rocks. Jump towards the platform with some pillars across and you'll find the Scroll by the edge to your left. |
|
 Enlarge Enlarge |
 Enlarge Enlarge |
|
Area: Timeworn Bridge
Where to Find: From the archway, enter the building on your left, grapple up, and wall run across. You'll find the Scroll behind a rock. |
|
 Enlarge Enlarge |
 Enlarge Enlarge |
|
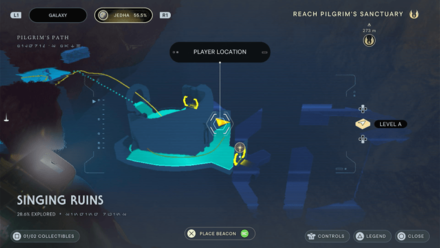
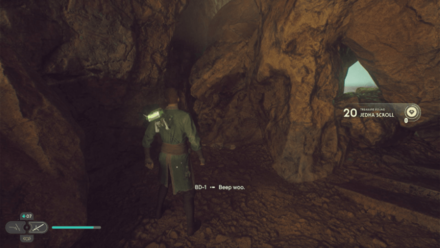
Area: Singing Ruins
Where to Find: Past the narrow passageway, move forward a bit and you'll find the Scroll on a path to your left. |
|
 Enlarge Enlarge |
 Enlarge Enlarge |
|
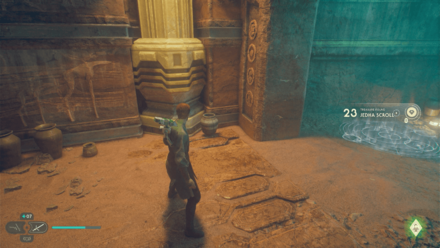
Area: Sepulcher Pass
Where to Find: Found just beside the Sepulcher Pass Meditation Point. |
|
 Enlarge Enlarge |
 Enlarge Enlarge |
|
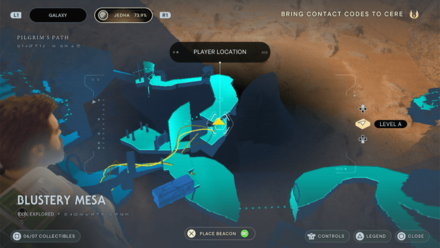
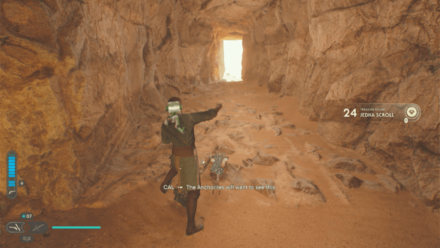
Area: Blustery Mesa
Where to Find: From the Crypt of Uhrma Meditation Point, enter the building and go up the stairs past the shortcut door. Wall run you way across the left and dash towards the cave opening. You'll find a Scavenger Droid that drops the Scroll. |
|
 Enlarge Enlarge |
 Enlarge Enlarge |
|
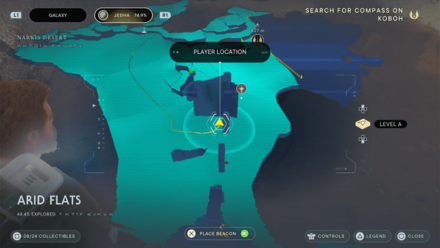
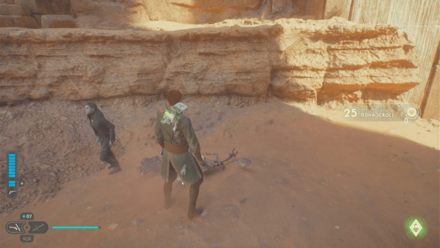
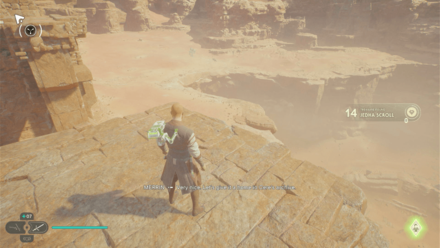
Area: Arid Flats
Where to Find: Head towards the broken pillars in the middle of the desert and you'll find the Scroll nearby. |
|
 Enlarge Enlarge |
 Enlarge Enlarge |
|
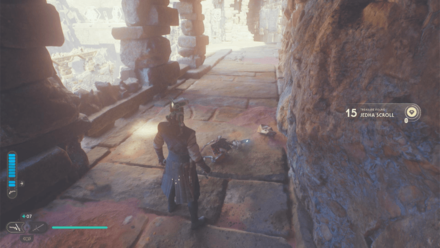
Area: Arid Flats
Where to Find: Found at the end of the broken bridge at Wayfinder's Tomb. |
|
 Enlarge Enlarge |
 Enlarge Enlarge |
|
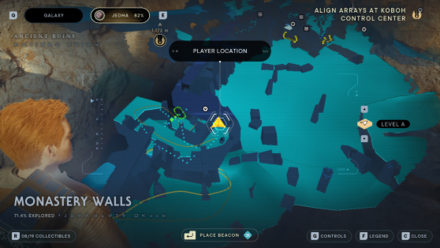
Area: Penitent Chambers
Where to Find: From the Meditation Point, head down the bridge below and climb the ledges on the right. You'll find a Scavenger Droid along the path that drops the Scroll. |
|
 Enlarge Enlarge |
 Enlarge Enlarge |
|
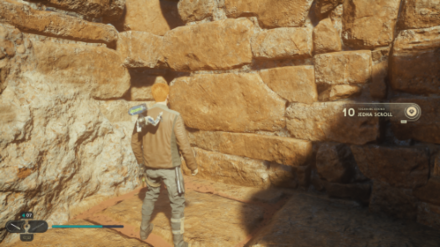
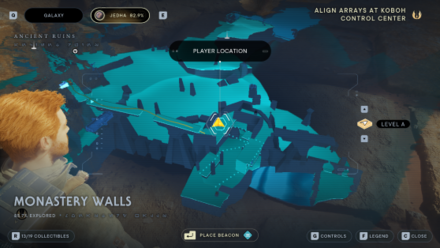
Area: Monastery Walls
Where to Find: On top of the Sutaban room by the Force Tear and Chest, you will find a scalable wall. Jump up to it and follow the path until you reach a dead end and find the Jedha Scroll next to another Chest. |
|
 Enlarge Enlarge |
 Enlarge Enlarge |
|
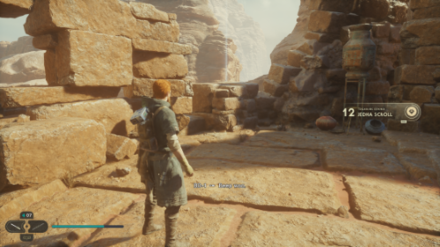
Area: Monastery Walls
Where to Find: On the same bridge where you found the Skeleton Key Blaster Cosemetic, go to the very end of it to find the Jedha Scroll next to a cosmetics Chest |
|
 Enlarge Enlarge |
 Enlarge Enlarge |
|
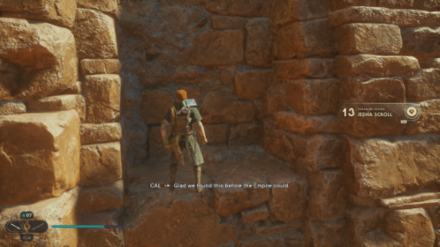
Area: Monastery Walls
Where to Find: From the Monastery Walls Meditation Point, run along the wall to your right past the Prayer Wheels and jump on the ledge near the dead-end |
|
 Enlarge Enlarge |
 Enlarge Enlarge |
|
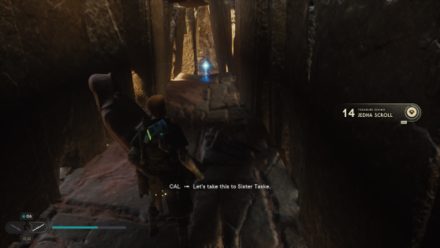
Area: Monastery Walls
Where to Find: From the Monastery Walls Work Bench, look to the wall opening to the right and you'll see wall-climbable pillars. Jump Dash towards the 2nd pillar then turn around until you face a broken bridge that you will need to jump on to. Walk until the end of the bridge to find an opening. |
|
 Enlarge Enlarge |
 Enlarge Enlarge |
|
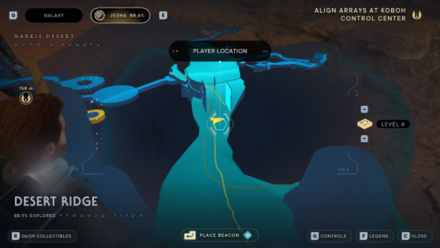
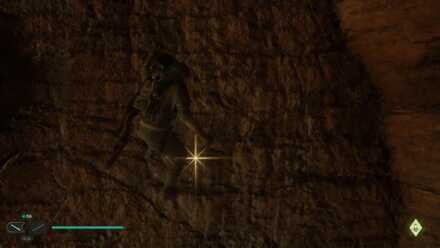
Area: Desert Ridge
Where to Find: From the rope Shortcut near the edge of the area connecting to the Anchorite Base Entrance, look left to see a scalable wall. Climb up to it and walk past the chest towards a scalable wall, the scroll will be on the wall itself, simply jump up to the wall and slide down to obtain it. |
|
 Enlarge Enlarge |
 Enlarge Enlarge |
|
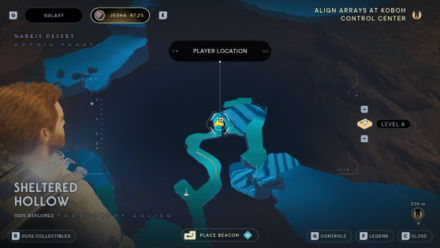
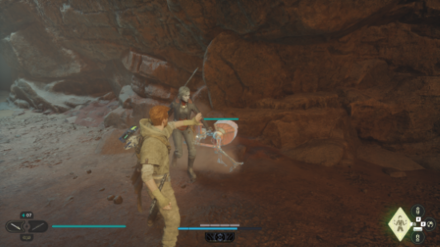
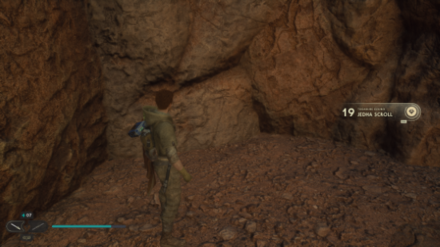
Area: Sheltered Hollow
Where to Find: When you exit the Sheltered Hollow tunnels you will enter an opening with a Scavenger Droid nearby that drops a Jedha Scroll |
|
 Enlarge Enlarge |
 Enlarge Enlarge |
|
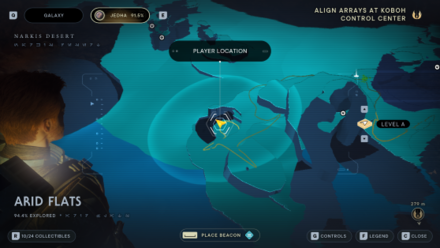
Area: Narkis Highlands
Where to Find: Grapple up to the balloon above the Skriton pit then turn to the Grapple Point on the wall-runnable wall then jump towards the scalable wall and jump up until you see the ledge to your right |
|
 Enlarge Enlarge |
 Enlarge Enlarge |
|
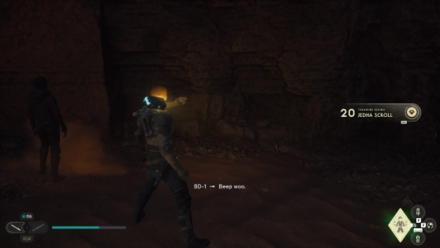
Area: Arid Flats
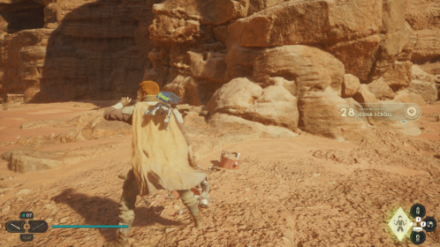
Where to Find: Found in the cave with the Hardshells and Sutaban |
|
 Enlarge Enlarge |
 Enlarge Enlarge |
|
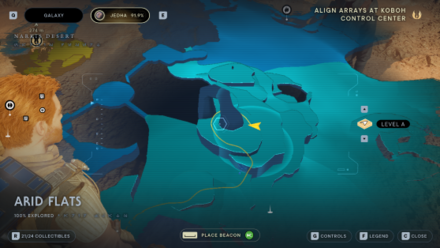
Area: Arid Flats
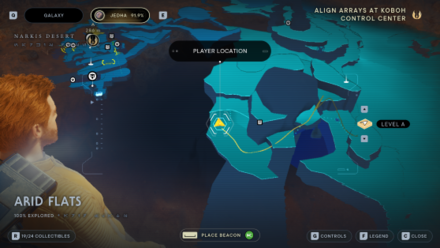
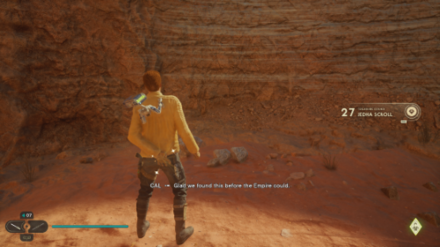
Where to Find: Cross the gap behind the Anchorite Base Meditation Point using the jump dash then keep walking forward until you find a Scavenger Droid |
|
 Enlarge Enlarge |
 Enlarge Enlarge |
|
Area: Arid Flats
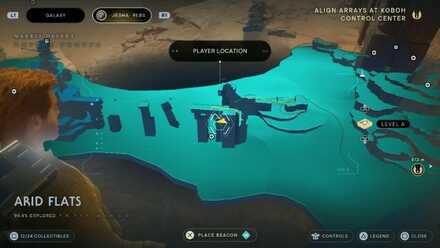
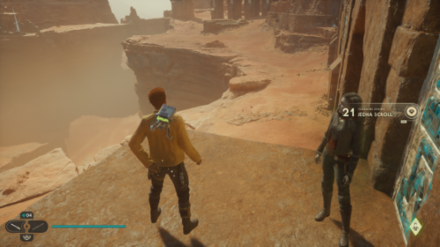
Where to Find: From the Anchorite Base Meditation Point, keep heading right past the pool where skoova is to find a path. Head to that path until you find a Skriton. The Scroll will be near a runnable wall. |
|
 Enlarge Enlarge |
 Enlarge Enlarge |
|
Area: Arid Flats
Where to Find: At the start of the broken bridge connecting to Wayfinder's Tomb, there is a ledge by the left-hand side. Jump down to obtain the Scroll |
|
 Enlarge Enlarge |
 Enlarge Enlarge |
|
Area: Arid Flats
Where to Find: A Scavenger Droid can be found at the bottom of the broken bridge connecting to Wayfinder's Tomb |
|
 Enlarge Enlarge |
 Enlarge Enlarge |
|
Area: Arid Flats
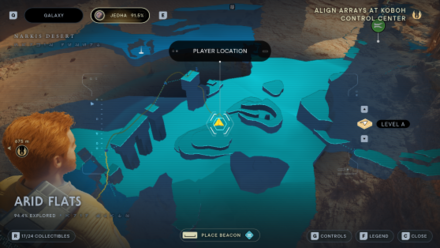
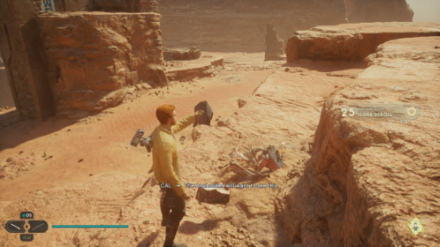
Where to Find: By the platform where you can find a Force Upgrade and a Relter, drop down to obtain the Scroll |
|
 Enlarge Enlarge |
 Enlarge Enlarge |
|
Area: Arid Flats
Where to Find: In the area near the broken bridge, you will find a Scavenger Droid |
|
 Enlarge Enlarge |
 Enlarge Enlarge |
|
Area: Trailhead Pantheon
Where to Find: From the Crypt of Uhrma Meditation Point, go behind the right Jedi statue to find the scroll in the breakable pots |
|
 Enlarge Enlarge |
 Enlarge Enlarge |
|
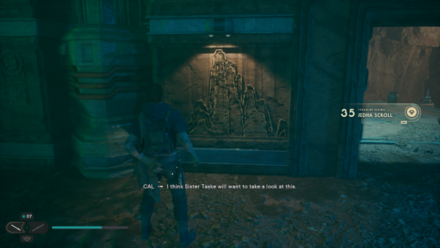
Area: Sanctuary Temple
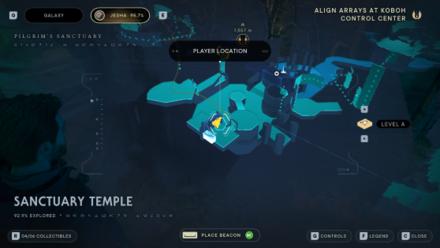
Where to Find: Head to the very right of the temple to find a small room with a workbench and a green forcefield. The Scroll can be found by the artwork on the wall. |
|
 Enlarge Enlarge |
 Enlarge Enlarge |
|
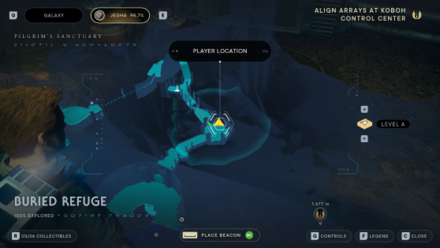
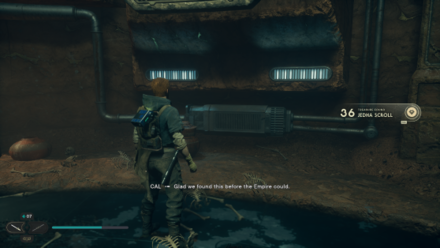
Area: Buried Refuge
Where to Find: From the Buried Refuge Meditation Point, follow the tunnel into the area and go past the Green Force Field into the room with water. The Scroll can be found by some brown pots. |
|
Star Wars Jedi Survivor Related Guides

All Collectibles
| All Collectible Types | |
|---|---|
| Chests | Stim Upgrades |
| Perks | Skill Points |
| Perk Slots | BD-1 Scans |
| Force Echoes | Seeds and Plants |
| Priorite Shards | Datadiscs |
| Jedha Scrolls | Essences |
| Force Essences | Health Essences |
| Treasures | Fish |
| Recruits | Force Tears |
| BD-1 Upgrades | - |
Collectibles by Planet
| All Planets | |
|---|---|
| Coruscant | Koboh |
| Jedha | Shattered Moon |
| Nova Garon | Tanalorr |
Comment
Author
All Treasure Locations
improvement survey
03/2026
improving Game8's site?

Your answers will help us to improve our website.
Note: Please be sure not to enter any kind of personal information into your response.

We hope you continue to make use of Game8.
Rankings
- We could not find the message board you were looking for.
Gaming News
Popular Games

Genshin Impact Walkthrough & Guides Wiki

Honkai: Star Rail Walkthrough & Guides Wiki

Umamusume: Pretty Derby Walkthrough & Guides Wiki

Pokemon Pokopia Walkthrough & Guides Wiki

Resident Evil Requiem (RE9) Walkthrough & Guides Wiki

Monster Hunter Wilds Walkthrough & Guides Wiki

Wuthering Waves Walkthrough & Guides Wiki

Arknights: Endfield Walkthrough & Guides Wiki

Pokemon FireRed and LeafGreen (FRLG) Walkthrough & Guides Wiki

Pokemon TCG Pocket (PTCGP) Strategies & Guides Wiki
Recommended Games

Diablo 4: Vessel of Hatred Walkthrough & Guides Wiki

Fire Emblem Heroes (FEH) Walkthrough & Guides Wiki

Yu-Gi-Oh! Master Duel Walkthrough & Guides Wiki

Super Smash Bros. Ultimate Walkthrough & Guides Wiki

Pokemon Brilliant Diamond and Shining Pearl (BDSP) Walkthrough & Guides Wiki

Elden Ring Shadow of the Erdtree Walkthrough & Guides Wiki

Monster Hunter World Walkthrough & Guides Wiki

The Legend of Zelda: Tears of the Kingdom Walkthrough & Guides Wiki

Persona 3 Reload Walkthrough & Guides Wiki

Cyberpunk 2077: Ultimate Edition Walkthrough & Guides Wiki
All rights reserved
© 2023 Electronic Arts Inc.
The copyrights of videos of games used in our content and other intellectual property rights belong to the provider of the game.
The contents we provide on this site were created personally by members of the Game8 editorial department.
We refuse the right to reuse or repost content taken without our permission such as data or images to other sites.


![Everwind Review [Early Access] | The Shaky First Step to A Very Long Journey](https://img.game8.co/4440226/ab079b1153298a042633dd1ef51e878e.png/thumb)

![Monster Hunter Stories 3 Review [First Impressions] | Simply Rejuvenating](https://img.game8.co/4438641/2a31b7702bd70e78ec8efd24661dacda.jpeg/thumb)


