This survey will take about 1 minute.
Your answers will help us to improve our website.
Star Wars Jedi Survivor
All Puzzle Solutions
★ Find out what gets carried over to New Game Plus!
☆ Learn how to get Beskar Steel and all weapon materials!
★ Make sure to get all the BD-1 Upgrades to help in combat!
☆ Get Map Upgrades to make hunting Collectibles easier!
There are a couple of puzzles that you will need to solve to obtain secret items and progress through Star Wars Jedi Survivor. Read on to learn how to solve all puzzles, all of their locations, and their rewards.
All Koboh Puzzle Solutions
| Puzzle | Location |
|---|---|
| Tar Pit Puzzle (Roller Mines) |
Gorge Crash Site |
| Derelict Dam Wall 1 (Roller Mines) |
Derelict Dam |
| Derelict Dam Wall 2 (Roller Mines) |
Derelict Dam |
| Derelict Dam Elevator Puzzle 1 (Roller Mines) |
Derelict Dam |
| Derelict Dam Elevator Puzzle 2 (Ascension Cable Balloon) |
Boiling Bluff |
| Koboh - Forest Array (Purple Orb and Blue Socket) |
Forest Array |
| First Laser (Koboh Matter Goo) |
Devastated Settlement |
| Second Laser (Koboh Matter Goo) |
Devastated Settlement |
| Third Laser (Koboh Matter Goo) |
Devastated Settlement |
| Summit Ridge Puzzle (Ascension Cable Balloon) |
Summit Ridge |
| Observatory Understructure Puzzle (Ascension Cable Balloon) |
Observatory Understructure |
| How to Open the Moldy Depths Door | Moldy Depths |
| Harvest Ridge Barn Puzzle | Harvest Ridge |
| Hunter's Quarry Door Puzzle | Hunter's Quarry |
| How to Open the Melted Door | Foothill Falls |
| Derelict Dam Yellow Platform Puzzle | Foothill Falls |
| Pit Droid Door Puzzle | Gorge Crash Site |
| Alignment Control Center Red Screen Puzzle | Alignment Control Center |
| Rambler's Reach Outpost Puzzle | Rambler's Reach Outpost |
| Vashtan Wolfe Puzzle | Derelict Dam |
| Generator Underbelly Puzzle | Generator Underbelly |
Tar Pit Puzzle Solution
| Gorge Crash Site Puzzle Solution | |
|---|---|
| 1 |  Pull the Roller Mine from the tar. |
| 2 | 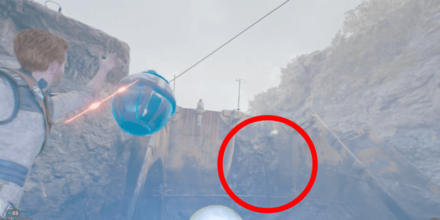 Use Force Push to throw the Roller Mine on the Breakable Structure covered with tar. |
| 3 |  This will destroy the Breakable Structure and lift the platform you are standing on. |
All Roller Mine and Breakable Structure Puzzles Solution
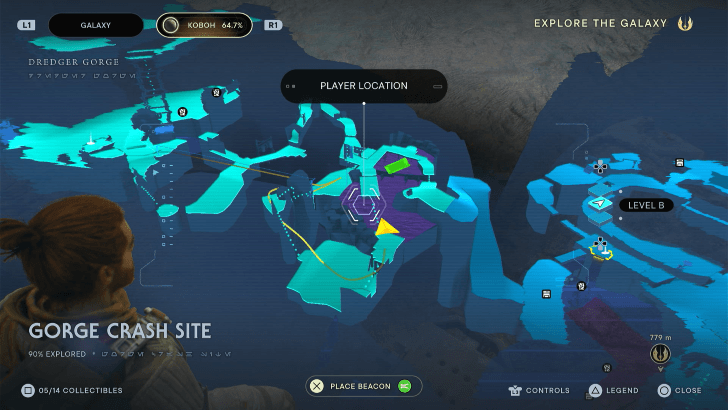
Tar Pit Puzzle Location
| Map Location | In-Game Location |
|---|---|
 |
 |
| Koboh - Gorge Crash Site | |
1st Derelict Dam Wall Puzzle Solution
| Derelict Dam 1st Wall Puzzle Solution | |
|---|---|
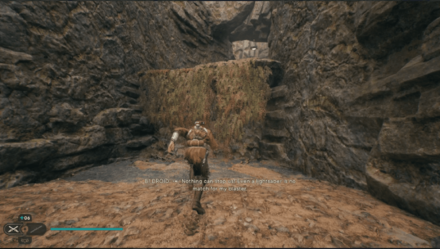
| 1 | 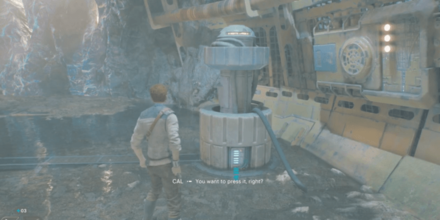 Approach the panel near the dead end and BD-1 use it to spawn Roller Mines. |
| 2 |  Pick up the Roller Mine at the center. |
| 3 |  Use Force Push and throw the Roller Mine on the Breakale Structure. |
| 4 | 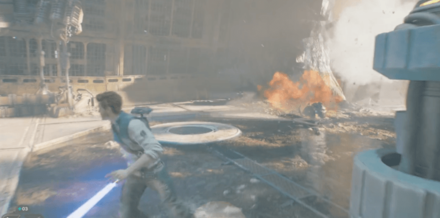 This will open up a new path that you can take to progress further. |
1st Breakable Wall Puzzle Location
| Map Location | In-Game Location |
|---|---|
 |
 |
| Koboh - Derelict Dam | |
2nd Derelict Dam Wall Puzzle Solution
| Derelict Dam 2nd Wall Puzzle Solution | |
|---|---|
| 1 | 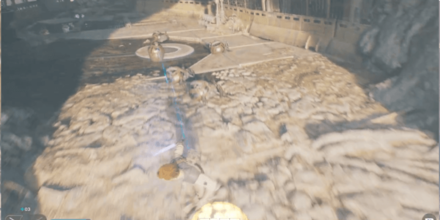 Wait for another Roller Mine to spawn and lure it/make it chase you towards the bridge. If you use Force Pull on it to bring it to the Breakable Structure, it may explode prematurely. |
| 2 |  Use the Roller Mine and throw it to the bridge to lower it. |
| 3 | 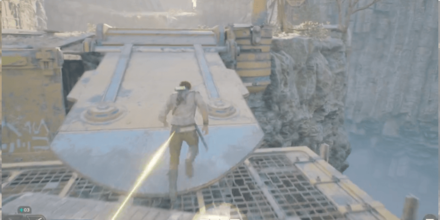 Lure another Roller Mine and bring it towards the tar pit. |
| 4 |  Throw the Roller Mine on the left Breakable Stucture to raise the platforms. |
2nd Breakable Wall Puzzle Location
| Map Location | In-Game Location |
|---|---|
 |
 |
| Koboh - Derelict Dam | |
How to Activate Derelict Dam 1st Elevator
| Derelict Dam 1st Elevator Puzzle Solution | |
|---|---|
| 1 | 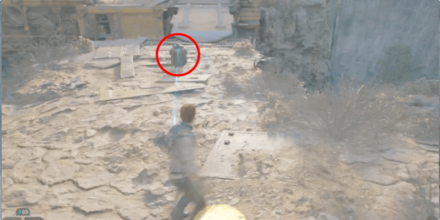 From the Meditation point, follow the path and go left before you reach the bridge. Here, you can lure the Roller Mine and follow the path to your right. |
| 2 | 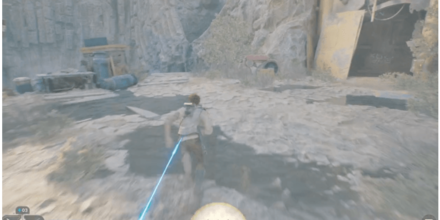 Head towards the cliff near the Workbench and the Prospector. |
| 3 | 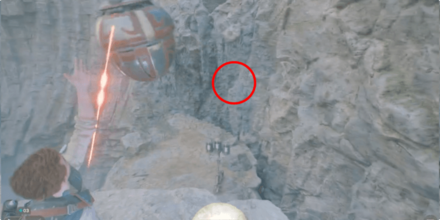 Pick up the Roller Mine and throw it on the Breakable Structure. Jump down and follow the path that leads to a new area. |
| 4 | 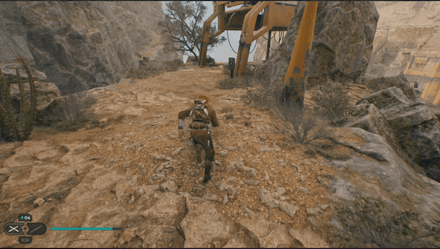 Here, you can interact with the panel in front of you to activate the elevator. |
| 5 |  Upon activating the elevator, head towards the yellow gate on your left. Use Force Lift on the yellow gate to open up a new path. |
| 6 | 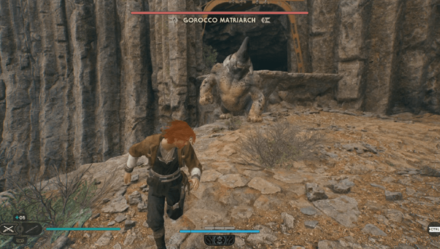 Follow the path and defeat the legendary creature Gorocco Matriarch. |
| 7 |  Pick up the Stim Canister on your right near the cliff. |
| 8 | 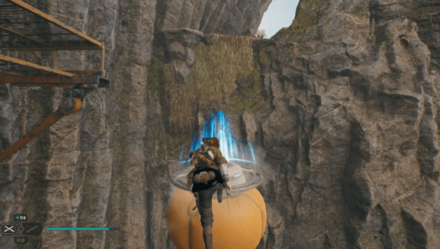 After that, you can use the Ascension Cable Balloons near the cliff to climb up the ledge. |
| 9 | 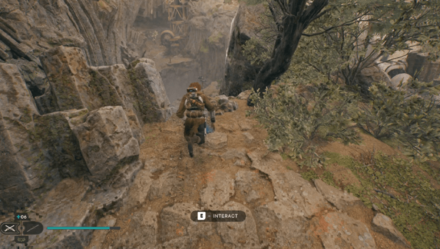 Upon reaching the top, you will be back to Gorge Crash Site. Here you can pick up a Priorite Shard near the rocks in the middle and a Skill Point on the cliff. |
Derelict Dam 1st Elevator Puzzle Location
| Map Location | In-Game Location |
|---|---|
 |
 |
| Koboh - Derelict Dam | |
Derelict Dam Elevator Puzzle Solution
How to Activate Derelict Dam 2nd Elevator
| Derelict Dam 2nd Elevator Puzzle Solution | |
|---|---|
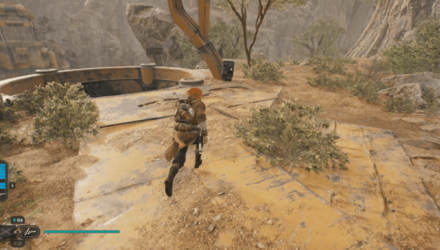
| 1 | 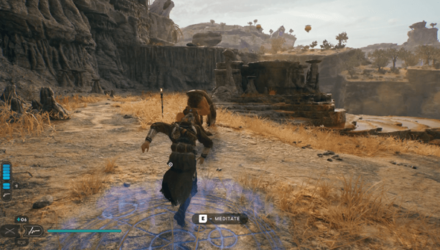 From the Boiling Bluff Meditation Point, turn to your left and ride the Nekko mount. |
| 2 | 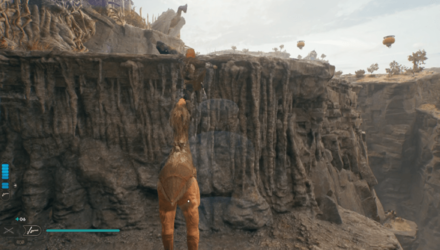 Use the Nekko mount to climb the ledge and pick up the Ascension Cable Ballon to your right. |
| 3 | 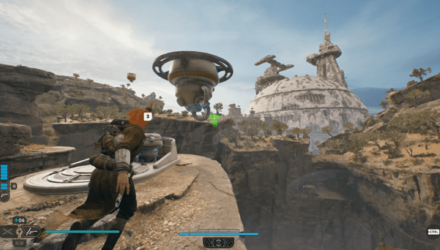 Throw the balloon in front of you and use it to reach the platform near the giant bird. |
| 4 | 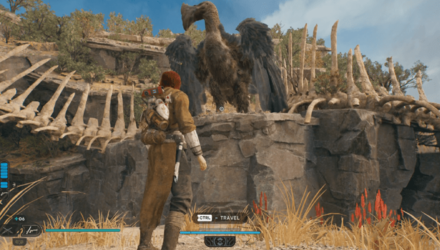 Interact with the giant bird and it will transport you at the top level of Derelict Dam. |
| 5 | 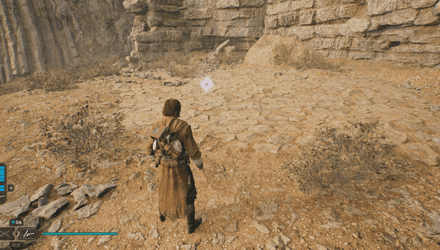 From here, you will be able to see a Force Tear to your right. |
| 6 | 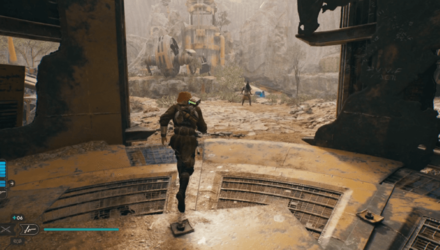 Activate the elevator to your left to return to the central area in Derelict Dam. |
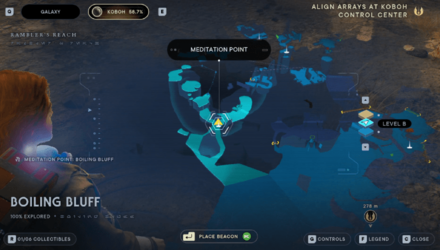
Derelict Dam 2nd Elevator Puzzle Location
| Map Location | In-Game Location |
|---|---|
 |
 |
| Koboh - Boiling Bluff | |
Koboh Purple Orb and Blue Socket Puzzle Solution
| Forest Array Purple Orb Puzzle Solution | |
|---|---|
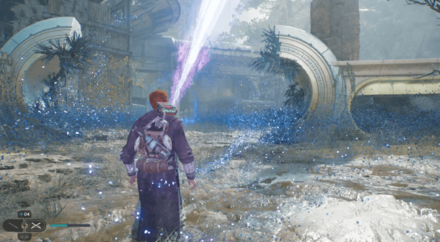
| 1 | 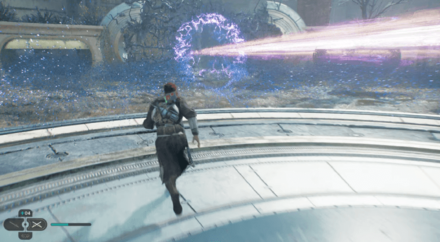 From its starting position, Force Pull the lever twice to disintegrate the dark roots in the direction of the aviary creature. Head towards the climbable wall and follow the path until you encounter Stormtroopers. |
| 2 | Defeat the Stormtroopers and head up the stairs to the blue socket. You'll need to get the purple orb from the previous area. |
| 3 | 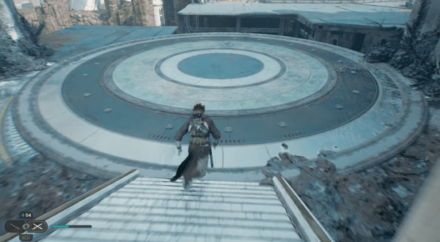 From the blue socket, head the opposite direction (back the way you came) towards the door. |
| 4 | 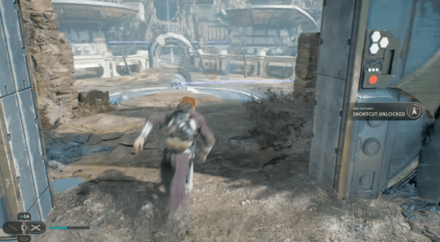 Open the door to unlock a shortcut. |
| 5 | 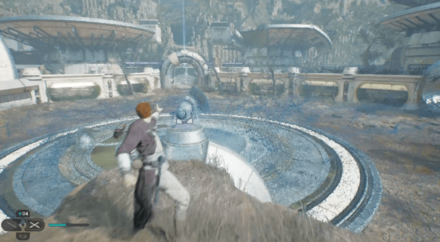 From the shortcut, Force Pull the purple orb from the Central Rotational Apparatus and bring it towards the blue socket. |
| 6 | 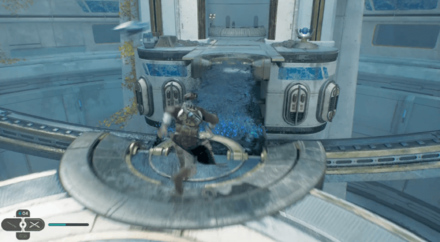 Cross the newly formed bridge and Force Pull the purple orb from your current position, then Force Push the orb to the other blue socket across the gap. |
All Purple Orb and Blue Socket Puzzles
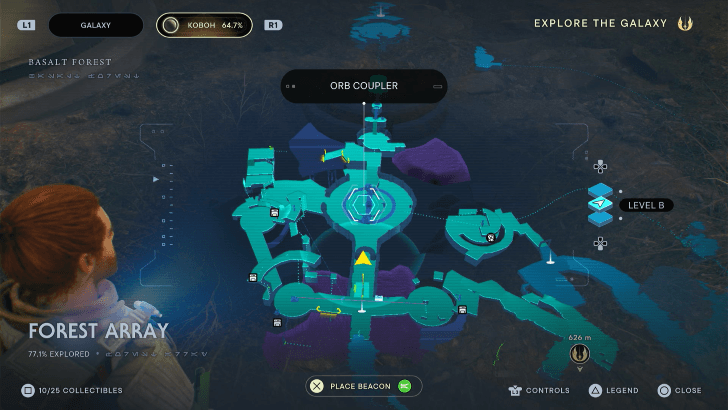
Forest Array Purple Orb Puzzle Location
| Map Location | In-Game Location |
|---|---|
 |
 |
| Koboh - Forest Array | |
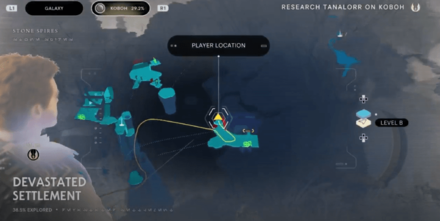
Devastated Settlement - First Laser Puzzle Solution
| Devastated Settlement Laser 1 Puzzle Solution | |
|---|---|
| 1 |  Use Force Push twice to spin the contraption in the middle of the room. This will move the laser on the other side. |
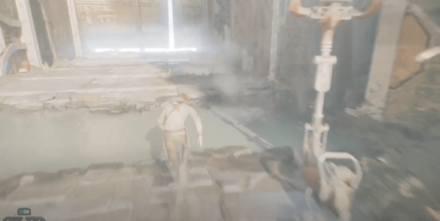
| 2 | 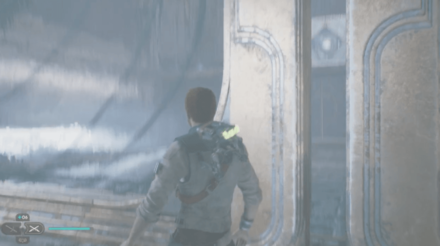 Squeeze through the small crevice in the yellow wall to get into the inner room. |
| 3 | 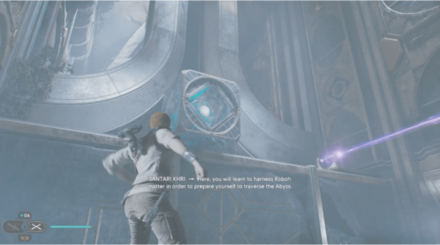 Force Pull the large cube down from the platform. (Note that there is a bug here wherein you will not be able to pull the large cube down. You can fix this by loading a previous save file) |
| 4 | 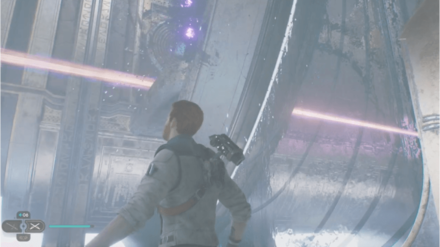 Head back through the crevice in the wall and Force Push the contraption, in order for the laser to make it all the way across the room. This will destroy the Koboh Matter from blocking a slot for an orb. |
| 5 |  Go through the crevice again and Force Pull the orb from the laser contraption. Force Push/throw the orb to the new orb slot on the wall. |
| 6 |  Head through the crevice in the wall one last time to get into the outer room. Use Force Pull to grab the orb from the slot on the wall, then bring the orb with you to the outside. |
| 7 | 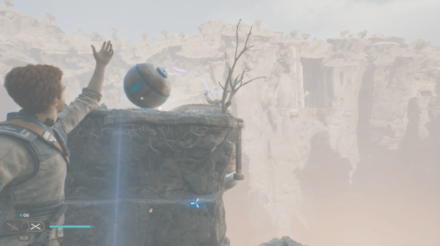 Force Push/throw the orb towards the laser contraption on the ledge across the room you just exited from. |
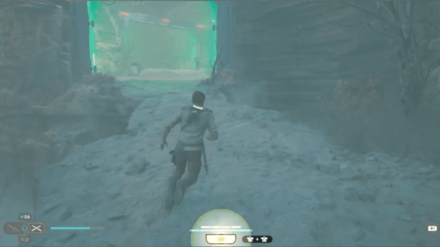
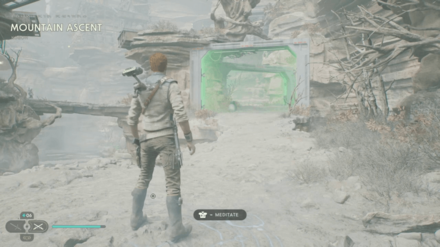
| 8 | 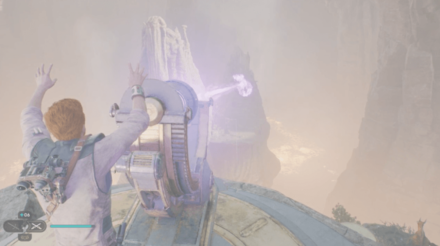 Aim the laser at the vines on your lower left to open the geyser. This will release an updraft that can lift you higher when mounted. |
Devastated Settlement Puzzle Solution
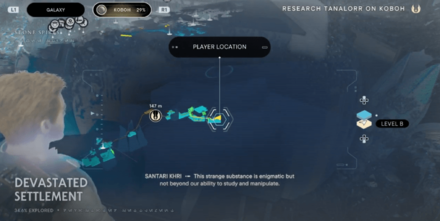
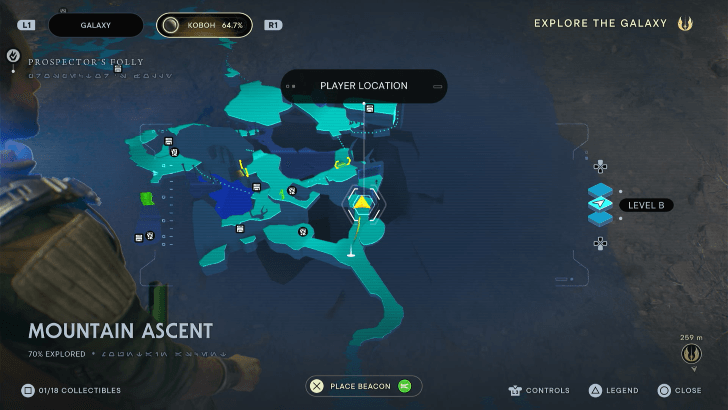
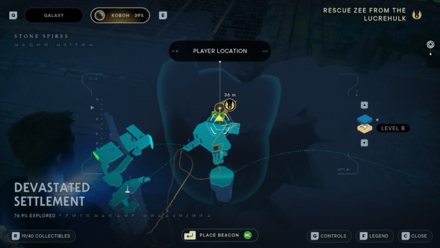
First Laser Puzzle Location
| Map Location | In-Game Location |
|---|---|
 |
 |
| Koboh - Devastated Settlement | |
Devastated Settlement - Second Laser Puzzle Solution
| Devastated Settlement Laser 2 Puzzle Solution | |
|---|---|
| 1 |  From the 1st laser, you can now use the new vent updraft to glide to the 2nd laser. |
| 2 | 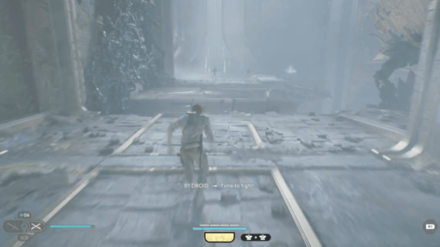 Head inside the new chamber, where you can get the 2nd orb. Jump onto the platform and it will collapse. Fight the Gorocco enemies below. You can Force Confuse them so that they fight each other. |
| 3 | 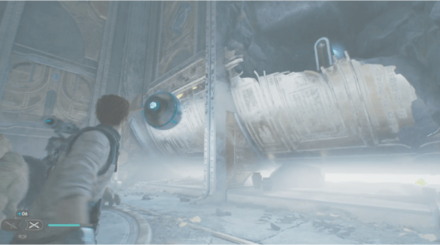 Force Pull the purple orb on the wall after defeating all the enemies. |
| 4 |  Force Pull the cracked wall for it to break. Force Push the purple orb into the slot inside the destroyed wall. This opens a new adjacent area. |
| 5 | 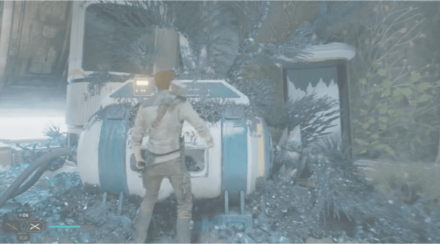 Head to the new area, then drop down. There's a chest at the end containing the BD-1 upgrade Koboh Grinder. You need this for story progression. |
| 6 |  Open up the Koboh Grinder and use it to draw a line directly from the laser toward the corrupted vines on your right. The Koboh Grinder can destroy these vines when connected to the laser's heat. |
| 7 | 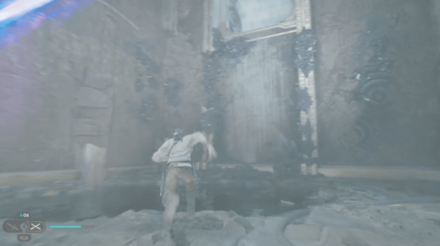 Head back to the previous room by wall jumping on the wall behind the destroyed vines. Pick up the purple orb from where you last placed it. |
| 8 | 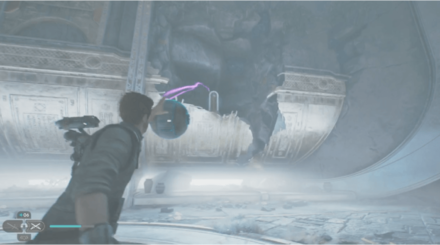 Force Push the purple orb to its original slot in the wall to your left to fire up the laser. |
| 9 | 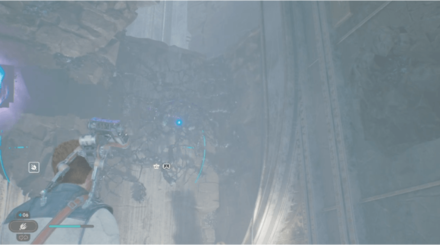 Use the Koboh Grinder to draw a line from the laser to the vines on your right to open a new path. |
| 10 | 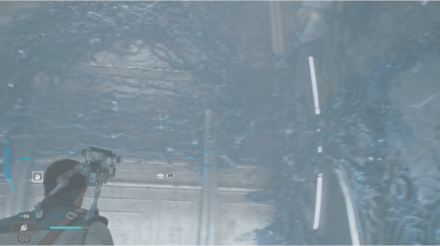 Use the Koboh Grinder again to draw another line from the laser to the vines on top of the wall that you can run on. |
| 11 | 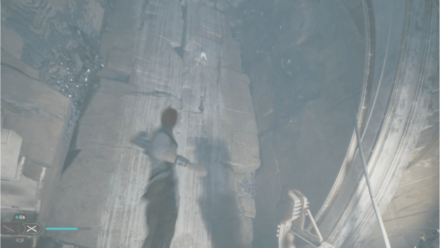 Head to the wall on the right and use the grappling hook to get back to the second floor. |
| 12 |  From the second floor, you can Force Pull to pick up the orb. Place it on the orb slot to your left. |
| 13 |  Head back outside by running on the wall to cross over the gap. |
| 14 |  From the other side of the gab, Force Pull to get the orb again. Head outside with the orb and place it on the laser slot. |
| 15 | 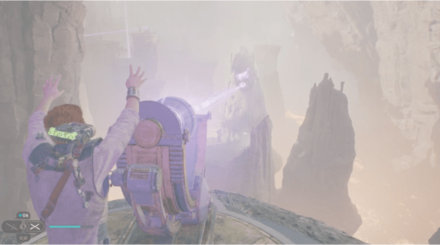 Aim the laser at the geyser covered in vines directly in front of the platform you're on. |
Second Laser Puzzle Location
| Map Location | In-Game Location |
|---|---|
 |
 |
| Koboh - Devastated Settlement | |
Devastated Settlement - Third Laser Puzzle Solution
| Devastated Settlement Laser 3 Puzzle Solution | |
|---|---|
| 1 |  Use the mount and the new geyser updraft to reach Laser 3 across the Devastated Settlement. |
| 2 | 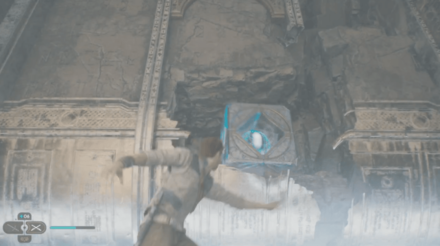 Head inside the cavern, then pull the large cube you'll immediately see in front of you in the main room. |
| 3 | 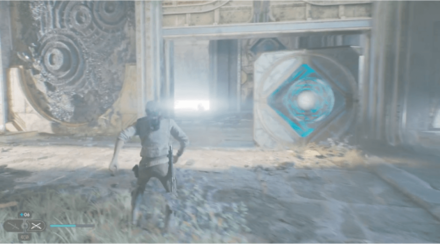 Force Push the large cube to the door gap on your left, as you'll need it later to prevent the door from closing. |
| 4 | 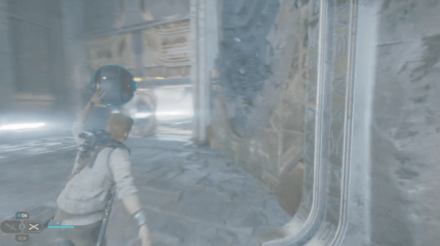 Head inside that room and Force Pull the purple orb and bring it outside into the main room. |
| 5 |  Force Push the purple orb into the laser slot inside the main room. |
| 6 | 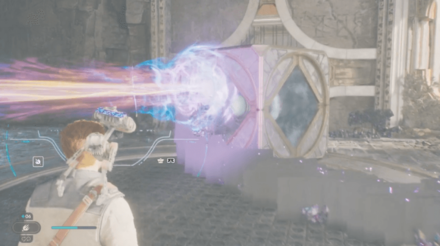 Move the large cube in front of the laser to block the laser beam from shooting outside. |
| 7 | 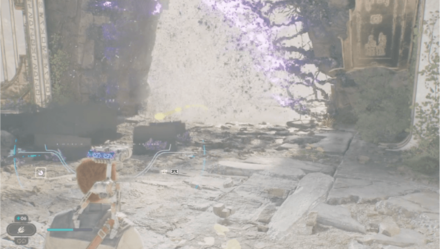 Using the Koboh Grinder, draw a line from the large cube to the vines to the right. |
| 8 | 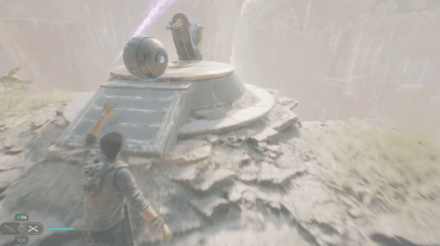 Force Pull the purple orb and head outside through the new passageway. Place the orb in the third and final Devastated Settlement laser. |
| 9 | 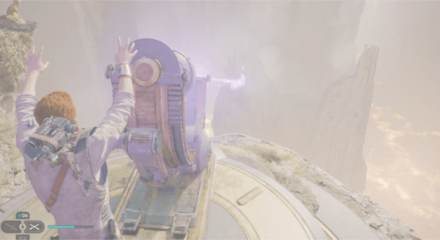 Point the final Devastated Settlement laser to the geyser directly in front of you. |
Third Laser Puzzle Location
| Map Location | In-Game Location |
|---|---|
 |
 |
| Koboh - Devastated Settlement | |
Summit Ridge Puzzle Solution
| How to Solve Ascension Cable Balloon Puzzle | |
|---|---|
| 1 | 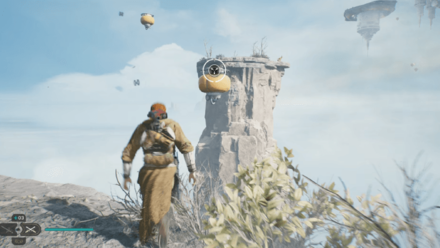 Pick up an Ascension Cable Balloon from your right and throw on your left. |
| 2 | 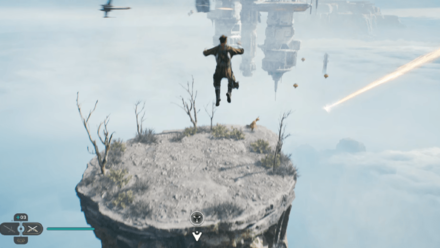 Throw the balloon in front of you and use it to get to the pillar to your left. |
| 3 | 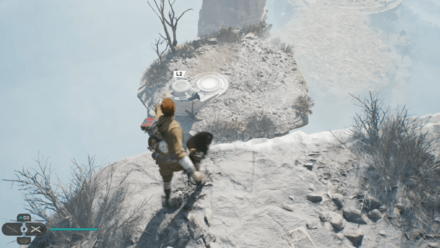 From here, you will need to pick up another Ascension Cable Ballon from the pillar to your right. |
| 4 | 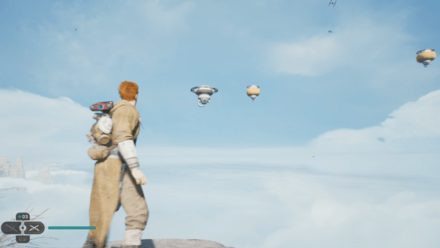 Throw it on the left side of the pillar, near the other balloons. |
| 5 | 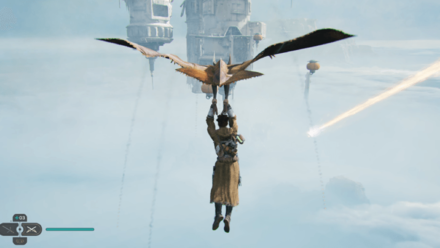 Continue following the path until you reach the flying mount, Relter. |
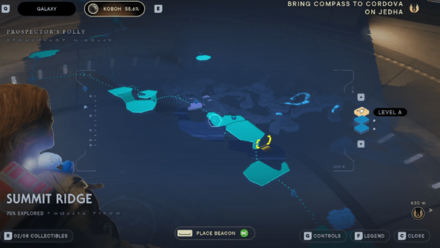
Summit Ridge Puzzle Location
| Map Location | In-Game Location |
|---|---|
 |
 |
| Koboh - Summit Ridge | |
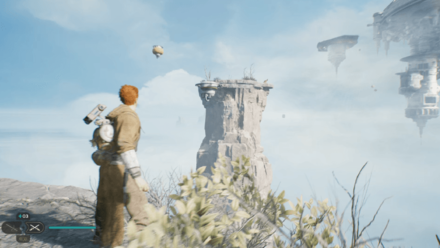
Observatory Understructure Puzzle Solution
How to Go Inside the Undestructure
| Going Inside | |
|---|---|
| 1 | 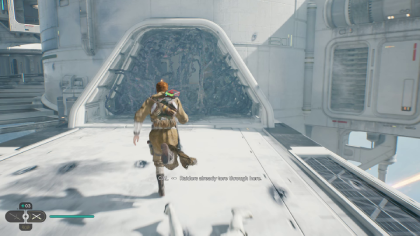 Proceed to the structure covered with Koboh matter at the entrance, and head left. |
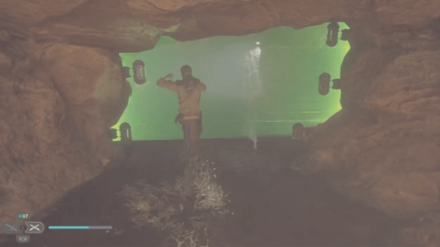
| 2 | 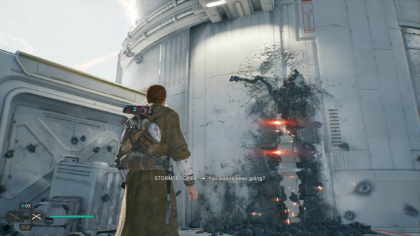 You will find a cracked opening with burnt edges. Proceed to slip inside. |
| 3 | 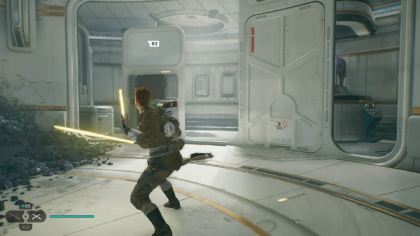 Force push a wall panel with the trigger prompt. |
| 4 |  Enter BD-1 Mode, and aim the Electro Dart towards the charging battery inside the glass-paneled room through the hole. |
| 5 | 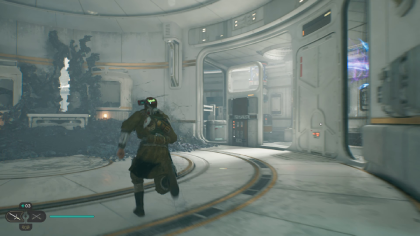 The charge will trigger a small hatch to open in the room. Head outside the area through the cracked opening you entered from. |
| 7 | 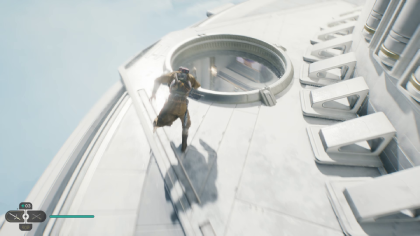 The locked room from the other side of the understructure could now be accessed as a result of the Electro Dart charge from earlier. |
| 8 | 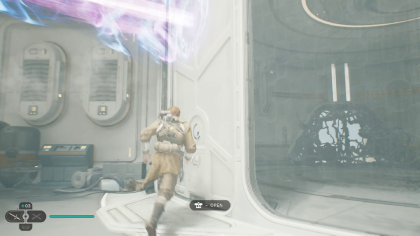 Unlock the entrance of the room to let the laser energy pass through. |
| 9 | 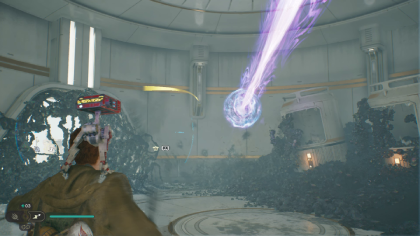 Enter BD-1 Mode, and use the Koboh Grinder to connect the laser towards the Koboh Matter using the wall's surface. |
| 10 | 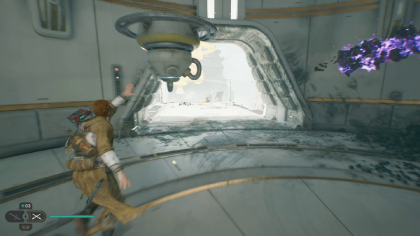 After the Koboh Matter burns away, force pull a yellow balloon and carry it outside the understructure. |
| 11 | 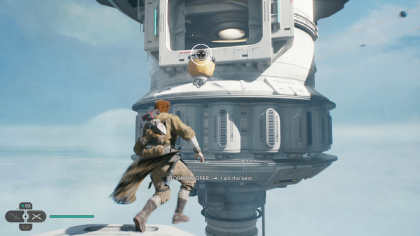 Place the yellow balloon towards a manageable distance you can grapple with your Ascension Cable. |
| 12 |  Progress through the game. |
Observatory Understructure Puzzle Solution
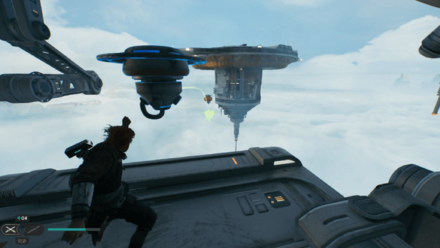
Ascension Balloon Puzzle Solution
| Ascension Cable Balloons Puzzle | |
|---|---|
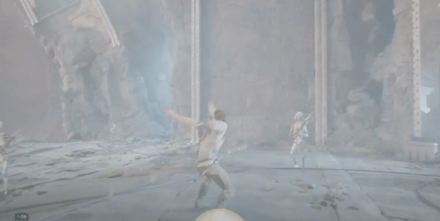
| 1 | 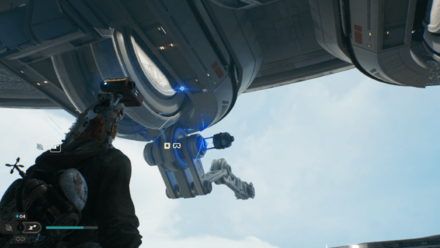 Shoot the conduit on your left to move the arm that holds the Ascension Cable Balloon. |
| 2 | 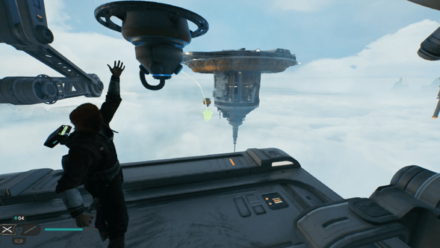 Grab the balloon using Force Pull and throw it in front of you to create a path. |
| 3 |  Cross to the other side by using the balloon and climb to the top where you will meet Bode. |
| 4 | 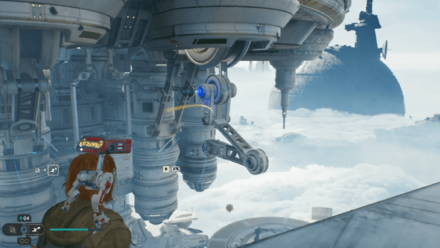 Shoot the conduit again to position the arm to its original position and grab another balloon. |
| 5 | 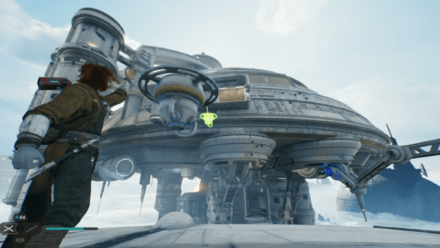 Look to your left and aim it towards the climbable wall to complete the puzzle. |
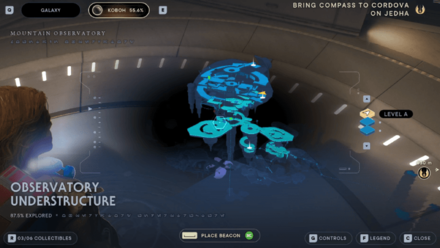
Ascension Balloon Puzzle Location
| Map Location | In-Game Location |
|---|---|
 |
 |
| Koboh - Observatory Understurcture | |
How to Open the Moldy Depths Door
| Moldy Depths Door Puzzle Solution | |
|---|---|
| 1 |  Approach the yellow gate at the middle of Harvest Ridge |
| 2 |  Grab the rope beside the yellow gate to open it. |
| 3 |  Pull the rope and attach it to the contraption nearby. |
| 4 | 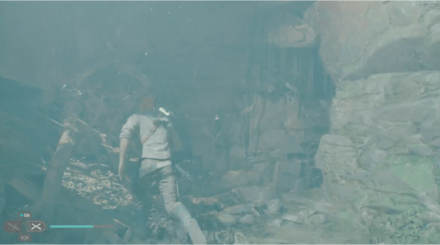 Enter the gate and follow the path. You will have to squeeze through a small gap to reach Moldy Depths. |
| 5 | 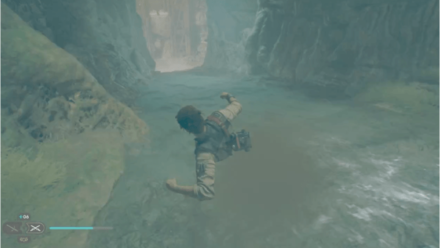 Continue moving forward and slide down until you reach the end. Go to your right and drop down the cliff. |
| 6 | 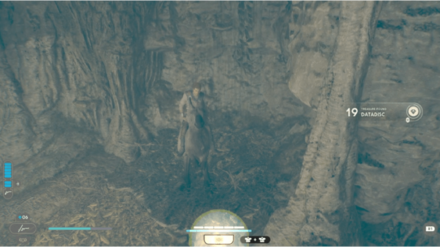 Pick up the Datadisc in the corner of the room. |
| 7 | 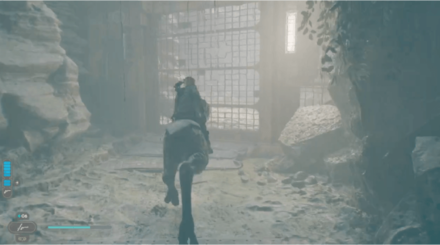 Ride the mount and circle the area until you reach the closed gate. |
| 8 | 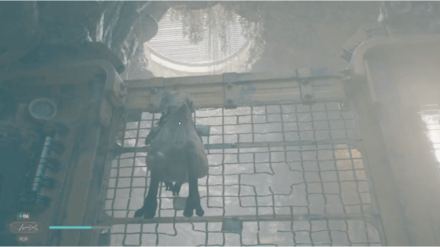 Jump and then dismount to reach the other side. |
| 9 | 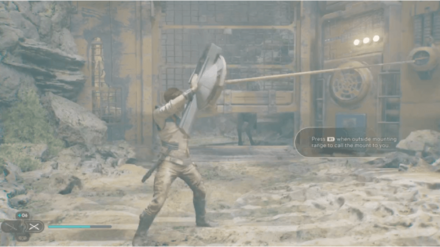 Pull the rope to open the gate and then call the mount to make it cross. |
| 10 | 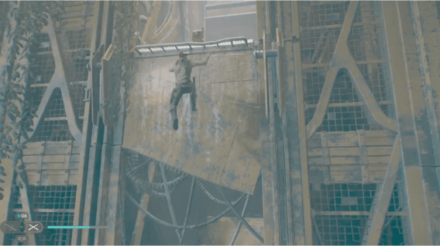 Using the same technique that you used earlier, jump with your mount then dismount. |
| 11 | 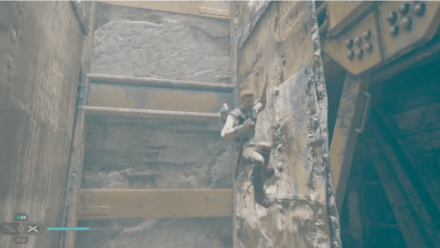 Perform a wall-to-wall jump until you reach the end. |
How to Open the Moldy Depths Door
Moldy Depths Door Puzzle Location
| Map Location | In-Game Location |
|---|---|
 |
 |
| Koboh - Moldy Depths | |
Harvest Ridge Barn Puzzle Solution
| Barn Door Puzzle Solution | |
|---|---|
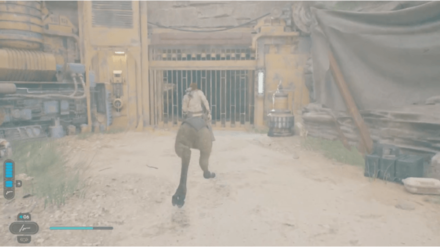
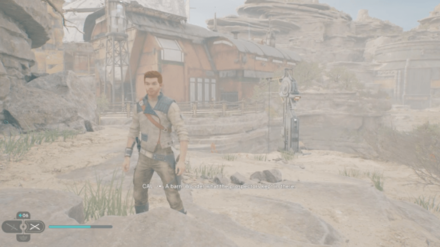
| 1 |  After solving the Moldy Depths Door Puzzle, go deeper into Harvest Ridge and look for the barn. |
| 2 | 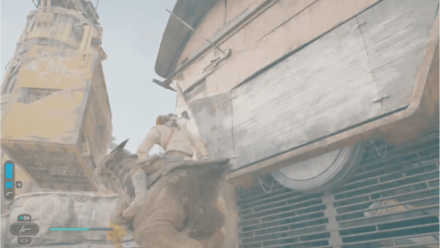 Ride the mount and approach the gate. |
| 3 |  Jump with your mount and then dismount to reach the wall. Perform a wall run until you reach the ledge. |
| 4 | 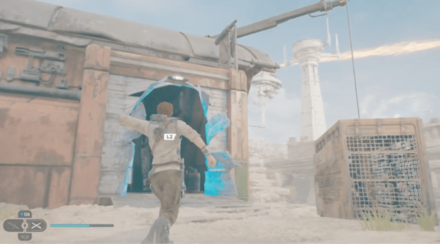 Use Force-Pull to tear open the barn door. |
| 5 | 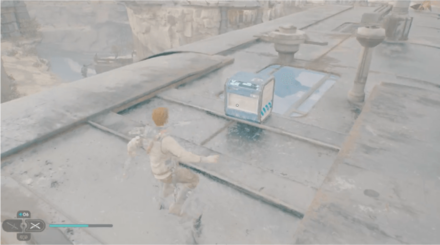 Before you enter, make sure to climb up the wall and pick up the Music Track on the barn rooftop. |
| 6 | 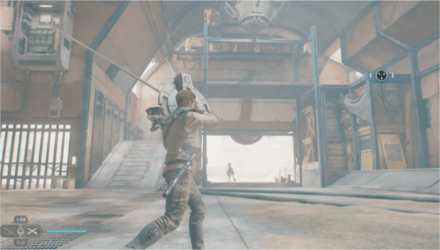 Head inside of the barn and pull the rope above the gate. |
| 7 | 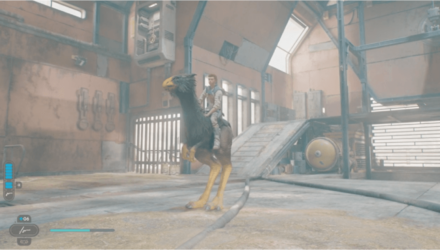 Call your mount while holding the rope and the gate is open. |
| 8 | 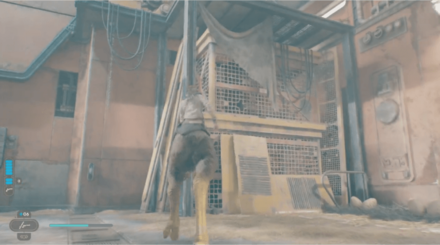 Let go of the rope and use your mount to climb the ledge behind you. |
| 9 | 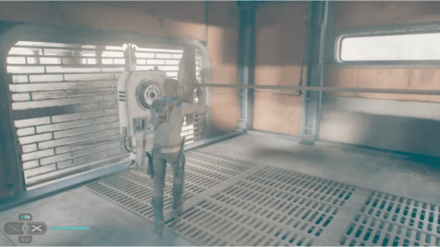 Force-Pull the rope to hold the gate open and attach it to the contraption. |
| 10 | 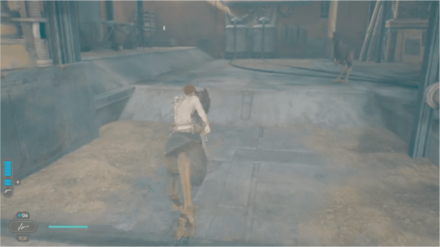 Drop down and go outside the gate to get another mount. |
| 11 | 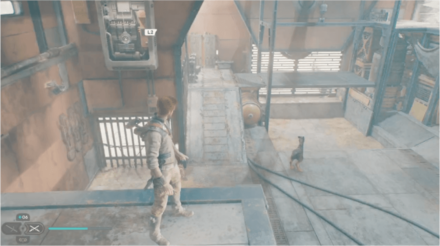 Head back inside and lower the platform by removing the attached rope. |
| 12 | 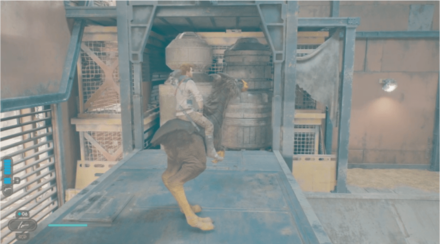 Place one of your mounts on the platform above the gate. |
| 13 | 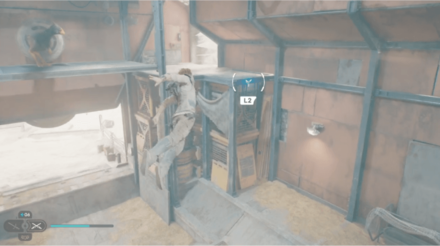 Redo the steps to open the gate and lift the platform. |
| 14 | 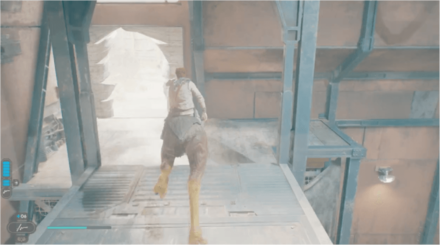 Now that one of your mounts is lifted by the platform, you can now go outside with your mount. |
| 15 | 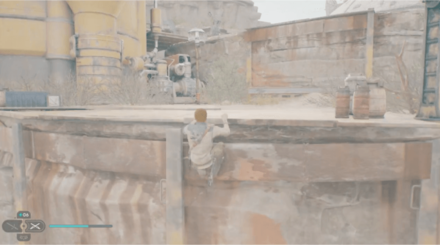 Climb the ledge using your mount and pick up the New Perk Slot. |
| 16 | 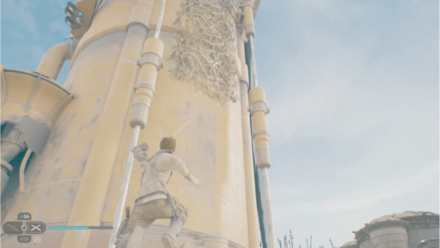 After picking up the New Perk Slot, use your grappling hook to climb the yellow tower behind you. |
| 17 | 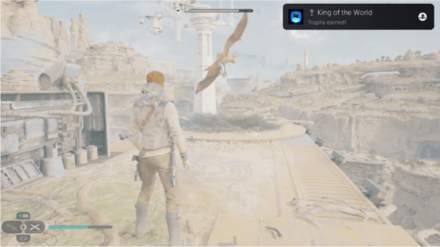 Once you reach the top, you will receive the King of the World Trophy. |
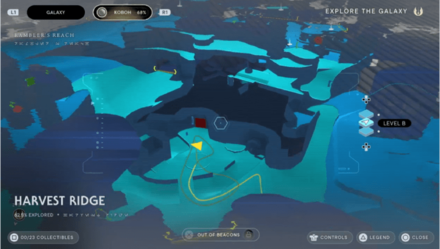
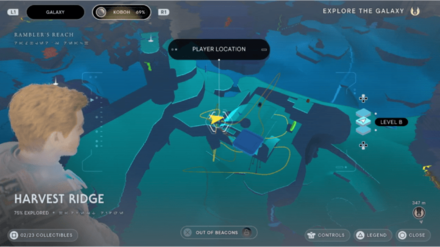
Harvest Ridge Barn Puzzle Location
| Map Location | In-Game Location |
|---|---|
 |
 |
| Koboh - Harvest Ridge | |
Hunter's Quarry Door Puzzle Solution
| Hunter's Quarry Puzzle Solution | |
|---|---|
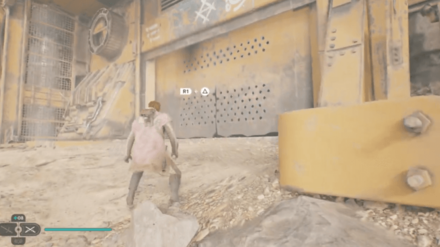
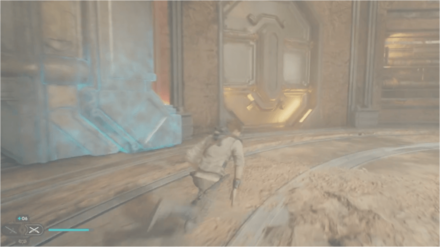
| 1 |  Go straight ahead and use your Lightsaber on the wall to slow down your fall. Make sure that you land on the platform to avoid dying. |
| 2 | 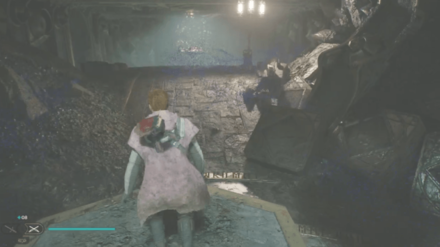 Follow the path that leads to the dark area near the vines. From here, you will be able to pick up the purple orb on your left. |
| 3 |  While picking up the orb, do not forget to take the Sense Echo in the same room. |
| 4 |  Carry the orb to the tunnel below the platform that you came from. |
| 5 |  Here, you can place the orb in the socket and pick up Skill Point in the corner of the room. |
| 6 | 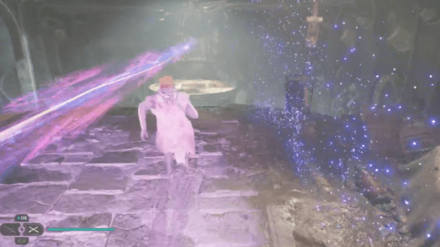 Pick up the orb again and return to the first room where you will place the orb and destroy the vines to get out. |
| 7 | 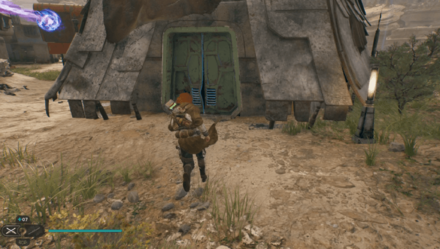 Head out of the cave and use Force Push on the door to your right to see the Koboh Vines. |
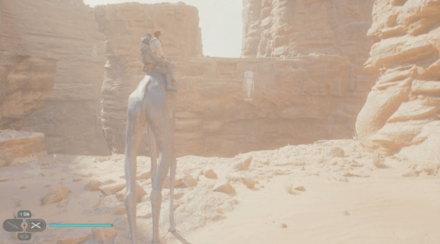
| 8 | 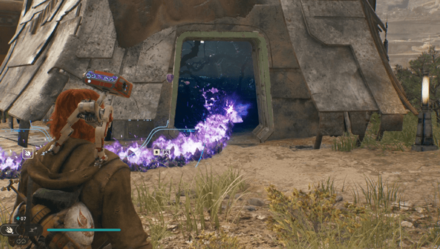 Draw a line from the laser to the house that you just opened to destroy the Koboh Vines. |
| 9 |  Go inside the house and open the chest to obtain the Quickdraw. |
Hunter's Quarry Door Puzzle Solution
Hunter's Quarry Door Puzzle Location
| Map Location | In-Game Location |
|---|---|
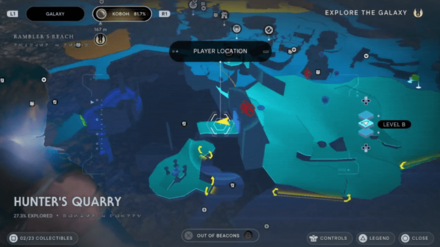 |
 |
| Koboh - Hunter's Quarry | |
How to Open the Melted Door in Foothill Falls
| Melted Door Puzzle Solution | |
|---|---|
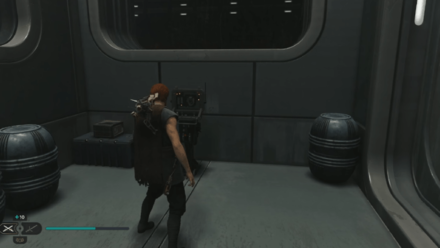
| 1 | 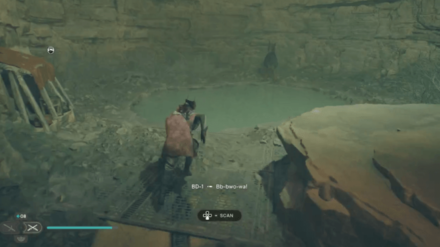 Go outside the house and enter a small cave on your right. Ride the Nekko mount that you will see this cave and go outside. |
| 2 | 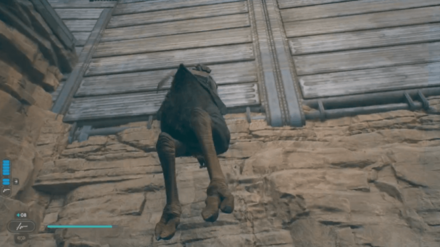 Go to the left side of the house and jump using your mount. |
| 3 | 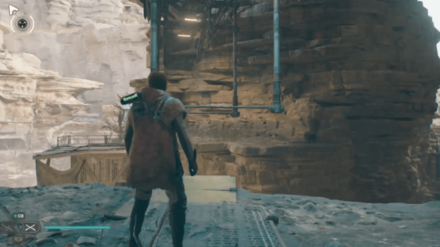 Dismount mid-air and perform a wall run to climb the platform. After this, use the bars and jump to reach the other side. |
| 4 | 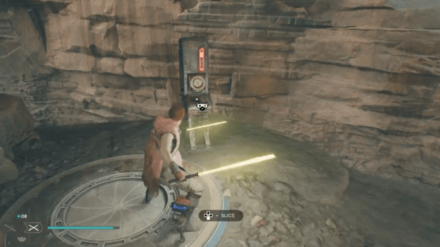 Interact with the panel using BD-1 to spawn a Roller Mine. |
| 5 | 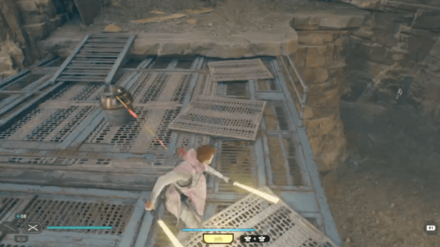 The Roller Mine will start following you and it will explode after a few seconds. |
| 6 | 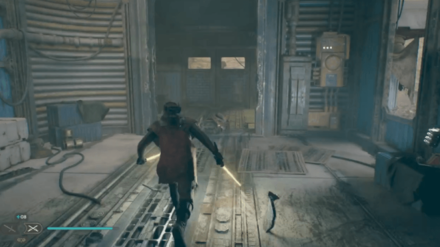 Immediately jump down the house and use the Force to throw the mine on the melted door. |
| 7 | 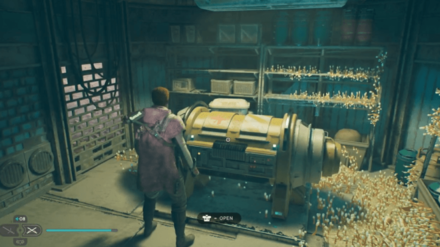 This will open up a new path where you can obtain a Stim Upgrade. |
How to Open the Melted Door in Foothill Falls
Melted Door in Foothill Falls Puzzle Location
| Map Location | In-Game Location |
|---|---|
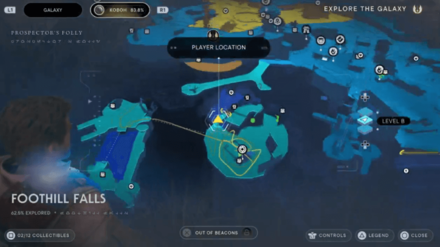 |
 |
| Koboh - Foothill Falls | |
Derelict Dam Yellow Platform Puzzle Solution
| Derelict Dam Yellow Platform Puzzle Solution | |
|---|---|
| 1 | 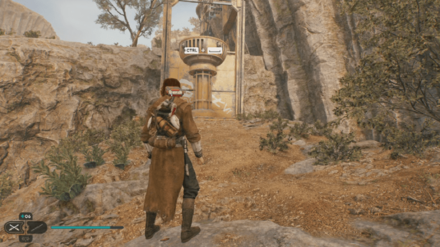 Use Force Slam on the yellow platform directly in front of the friendly creature after passing the tar pit. |
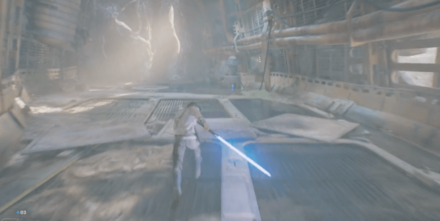
| 2 | 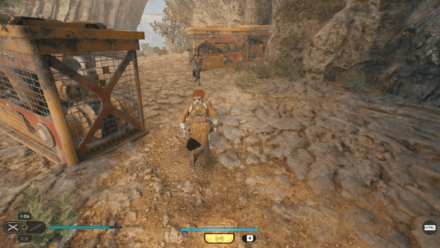 Continue following the path and eliminate all enemies in the area. |
| 3 | 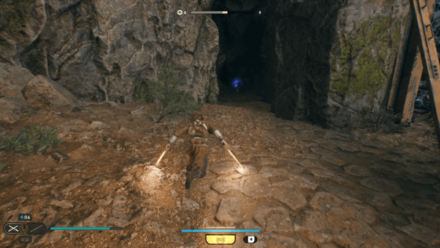 Grab the purple orb inside the cave on your left near the Koboh Vines. |
| 4 | Force Throw it over to the adjacent platform. The orb may roll off the platform after throwing it. You can aim it at the machine to bounce it off and slow it down to have more time to pick it up. |
| 5 | 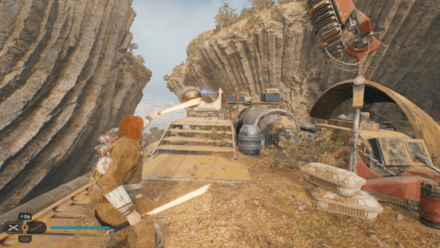 Pick up the orb and throw it on the slot to activate the laser and remove the Koboh Vines that are blocking the way. |
| 6 | 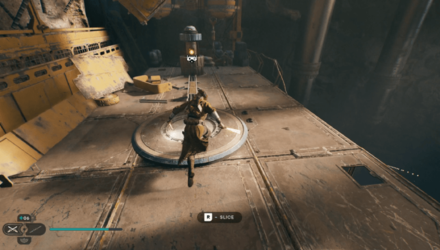 Follow the new path and activate the panel to spawn roller mines. |
| 7 | Go up the platform and use Force Pull to pick up the Roller Mine. After picking it up, immediately release it before it explodes and use it to destroy the breakable wall. |
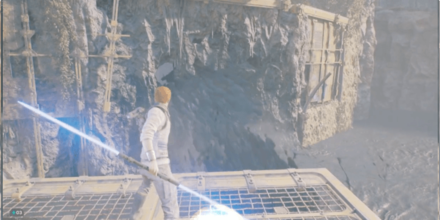
| 8 |  Once you are inside the cave, use Koboh Grinder and draw a line from the laser to the Koboh Vines above. |
| 9 | 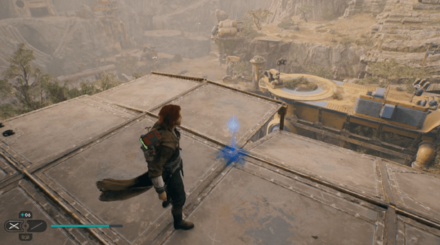 Head towards the new path until you reach the top and go left pick up the new Perk Slot. |
Derelict Dam Yellow Platform Puzzle Solution
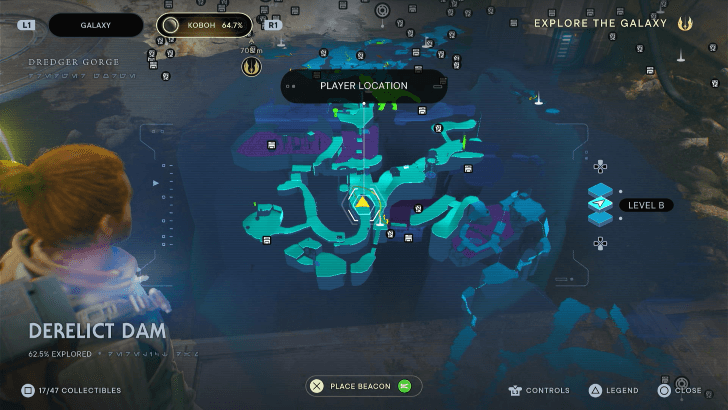
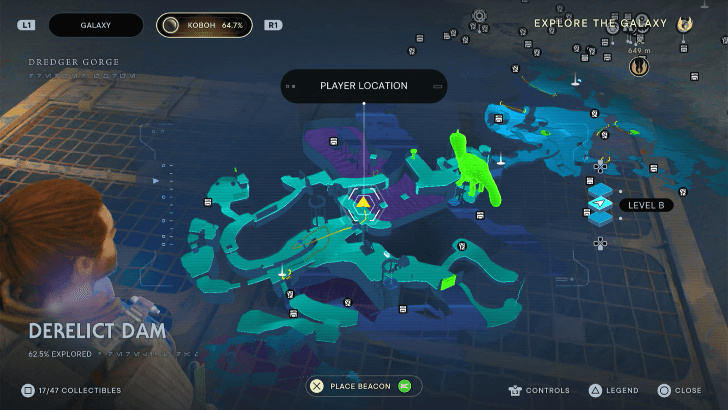
Derelict Dam Yellow Platform Puzzle Location
| Map Location | In-Game Location |
|---|---|
 |
|
| Koboh - Derelict Dam | |
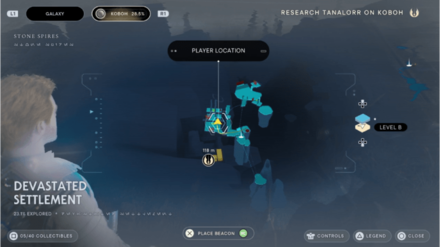
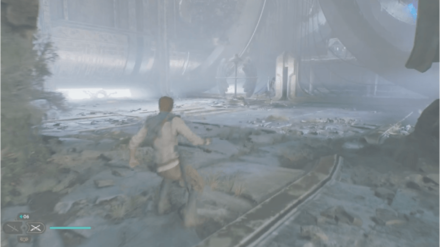
Pit Droid Puzzle Solution
| Pit Droid Puzzle Solution | |
|---|---|
| 1 | 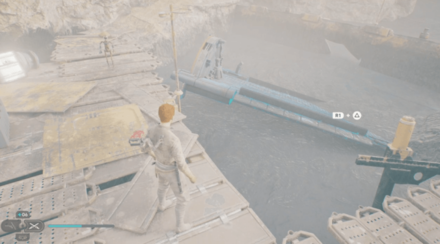 Return to Gorge Crash Site and head towards the tar pit where you used the Roller Mines to lift the platform. |
| 2 |  Here, you will find the Pit Droid with its ship stuck in tar. Simply use your Lift ability on the ship to release it from the tar to solve this puzzle. |
| 3 | 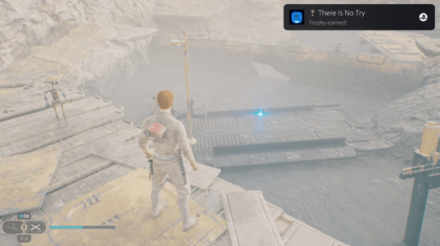 You will receive the a the There Is No Try Trophy for completing this. |
| 4 | 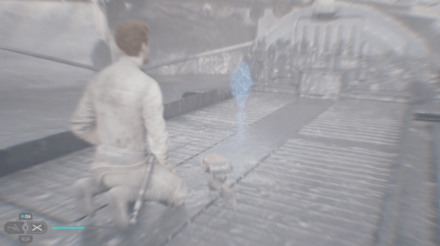 You can also pick up the Force Essence on the ship and recruit the Pit Droid by interacting with him. |
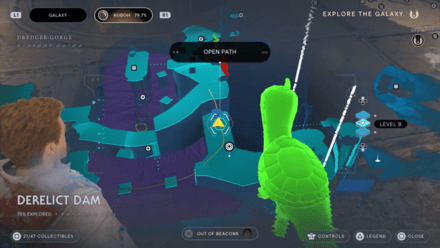
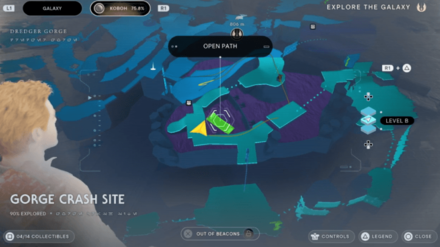
Pit Droid Puzzle Location
| Map Location | In-Game Location |
|---|---|
 |
|
| Koboh - Gorge Crash Site | |
Alignment Control Center Puzzle Solution
| How to Get to Alignment Control Center | |
|---|---|
| 1 | 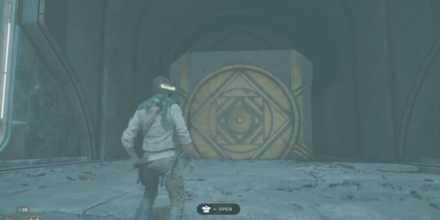 First you must complete All 7 Jedi Chambers in Koboh before going to the Alignment Control Center. |
| 2 |  You will come across a yellow bridge that you will lower after the Leave the Forest Array objective and while completing the Check on the Mantis objective during Koboh Part 1. |
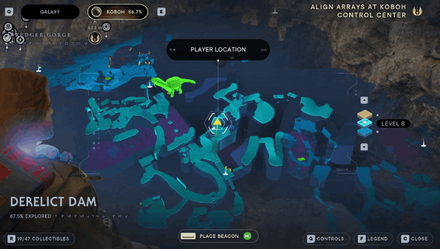
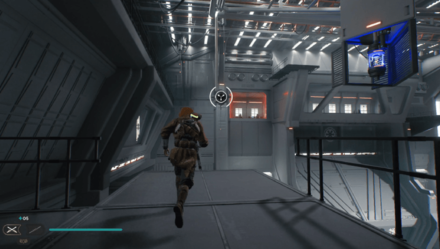
| 3 |  Go towards the opposite direction of the yellow bridge and you will find a door in the cliffside that leads you to the Alignment Control Center. |
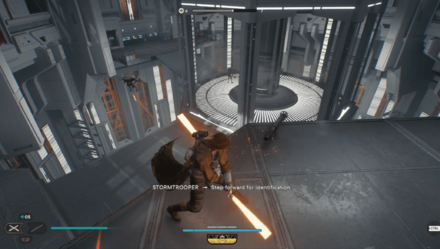
| 4 |  Inside the Alignment Control Center, head down the elevator to the reach the terminal in front of 7 screens. |
| 5 |  If you have completed all Jedi Chambers, then all the screens should be green. BD-1 can then access the terminal across it to obtain the Upgrades Map Upgrade. |
Alignment Control Center Puzzle Solution
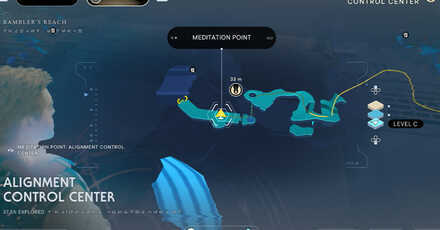
Alignment Control Center Puzzle Location
| Map Location | In-Game Location |
|---|---|
 |
|
| Koboh - Alignment Control Center | |
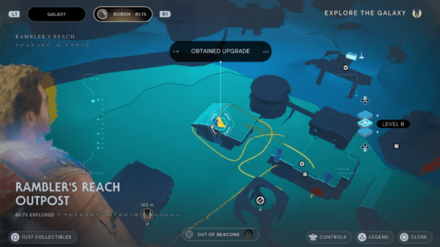
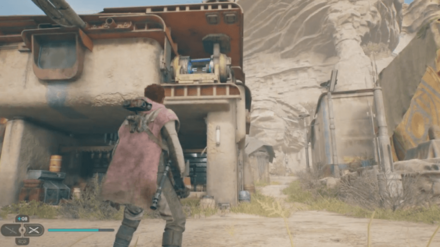
Rambler's Reach Outpost Puzzle Solution
| Rambler's Reach Outpost Puzzle Solution | |
|---|---|
| 1 | 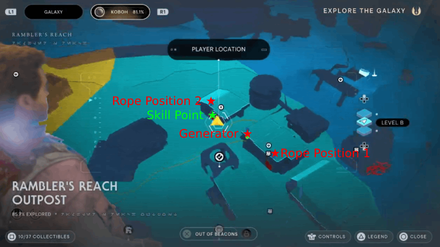 In Rambler's Reach Outpost, look for a house with a generator on the roof. |
| 2 | 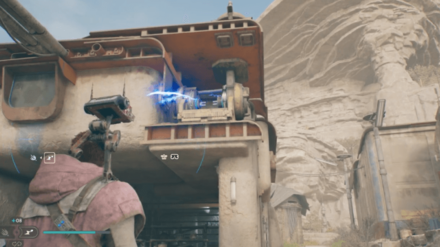 Shoot the generator using BD-1's Electro Dart. |
| 3 | 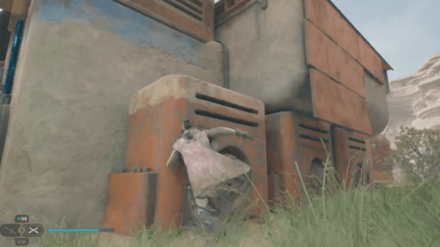 Run at the back of that house and climb to the rooftop. |
| 4 | 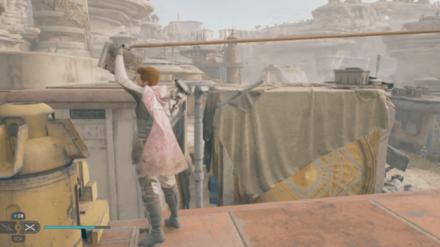 Grab the rope from the contraption and pull it across to the other house beside it. (You can reach the other house by using the bridge) |
| 5 | 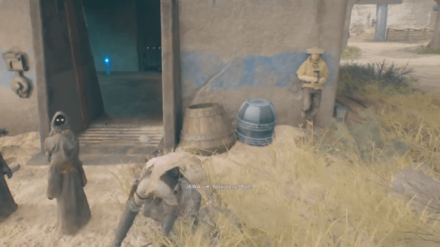 After doing this, you will notice that the door is now open. Drop down from the roof and pick up the Skill Point. |
Rambler's Reach Outpost Puzzle Solution
Rambler's Reach Outpost Puzzle Location
| Map Location | In-Game Location |
|---|---|
 |
 |
| Koboh - Rambler's Reach Outpost | |
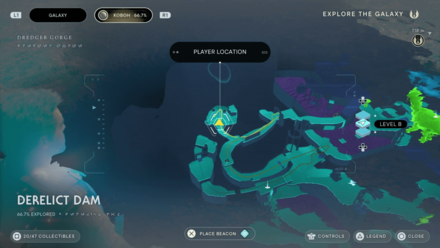
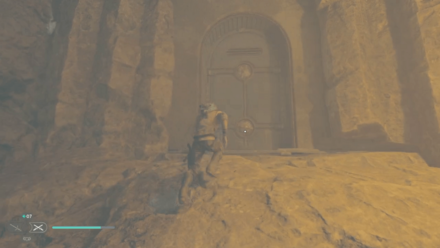
Vashtan Wolfe Puzzle Solution
Hit the Blue Mechanism with an Electro Dart

Near Vashtan Wolfe's door, if you look up, you'll find a blue mechanism. You'll simply have to hit it with an Electro Dart. This unlocks a chest near Vashtan Wolfe's door. When you open the chest, you'll engage in a boss battle with Vashtan Wolfe.
The Electro Dart is an upgrade to BD-1 that can be found in Koboh, but only at later stages of the game.
Vashtan Wolfe Door Puzzle Location
| Map Location | In-Game Location |
|---|---|
 |
 |
| Koboh - Derelict Dam | |
Vashtan Wolfe Puzzle: Can You Open the Door?
Generator Underbelly Chest Puzzle Solution
Use Electro Dart to Access the Hidden Panel
| Where to Find BX Droid Upgrade | |
|---|---|
| 1 |  From the Generator Underbelly Meditation Point, Force Lift the platform below you to cross the other side. |
| 2 | 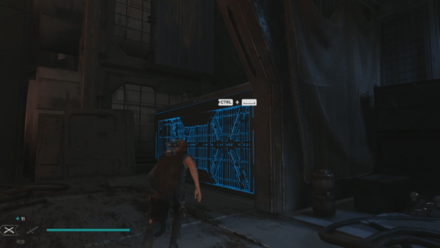 Go to your left and Force Lift another platform to reach the 2nd level. |
| 3 | 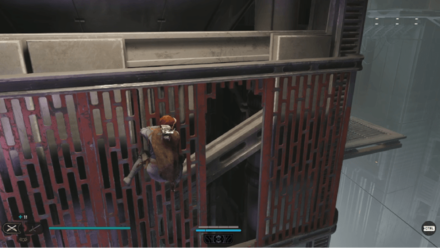 Continue following the path until you see the zipline. |
| 4 | 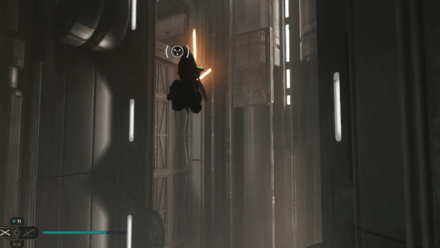 Go to your right and jump towards the door above you. You will need to use your Ascension Cable to reach this area. |
| 5 |  Enter the room and look for the conduit on your left. Use BD-1's Electro Dart to open the door. |
| 6 |  Force Lift the wall on your left and perform a wall run to reach the other side. |
| 7 | 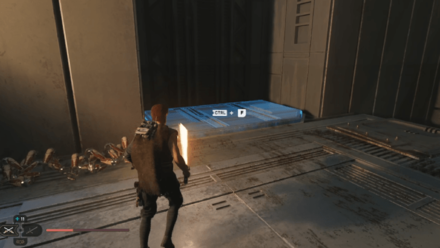 Use Force Slam to go up to the 2nd level. |
| 8 | 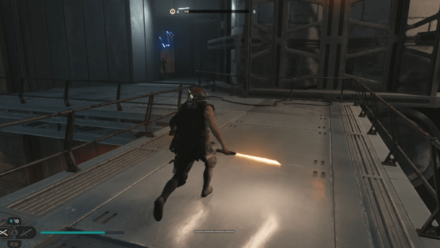 Continue following the path until you reach the room with electric gates. |
| 9 |  Stand behind the electric gate and use Force Lift on the wall in front of you. |
| 10 | 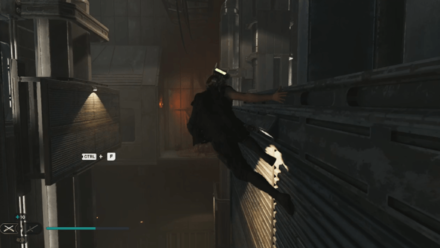 Immediately head out and perform a wall run to reach the ledge on the opposite side. |
| 11 | 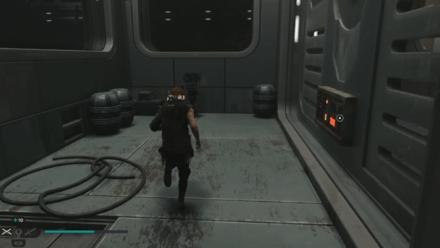 Look to your left and interact with the panel to obtain the Slice: BX Droids. |
Generator Underbelly Chest Puzzle Location
| Map Location | In-Game Location |
|---|---|
 |
 |
| Koboh - Generator Underbelly | |
All Jedha Puzzle Solutions
| Puzzle | Location |
|---|---|
| Trailhead Pantheon Puzzle | Trailhead Pantheon |
| Whistling Drop Wind Puzzle | Whistling Drop |
| Buried Refuge Door Puzzle | Buried Refuge |
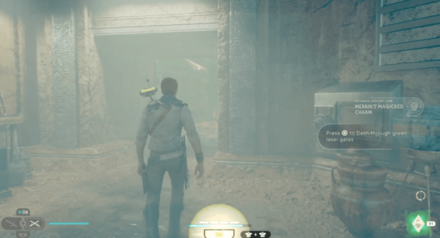
| How to Pass Through Green Laser Gates | Buried Refuge |
| Crypt of Uhrma Puzzle | Crypt of Uhrma |
| Cere's Door Puzzle | Veiled Hangar |
| Wayfinder's Tomb Puzzle | Path of Conviction |
| Path of Conviction Puzzle | Path of Conviction |
| Path of Persistence Puzzle | Path of Persistence |
| Path of Restoration Puzzle | Path of Restoration |
Trailhead Pantheon Puzzle Solution
| Trailhead Pantheon Puzzle Solution | |
|---|---|
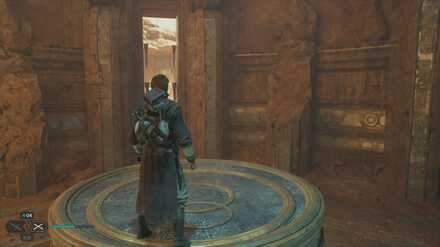
| 1 | 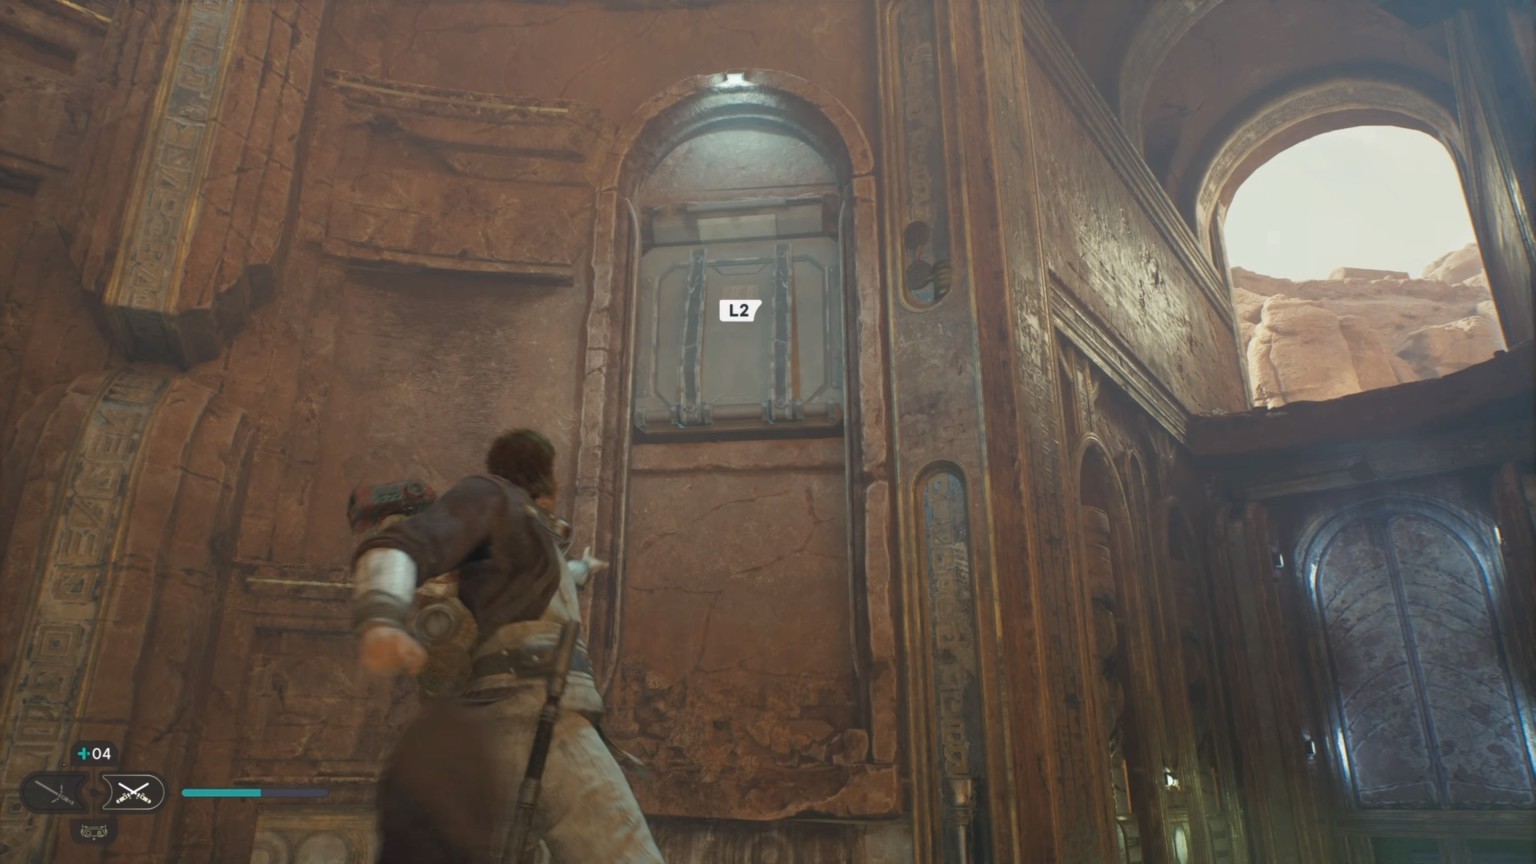 Stand on top of the circular pedestal in the middle of the Trailhead Pantheon and Force Pull the metal cover on the wall to your left. This will reveal a rope you can pull. |
| 2 | 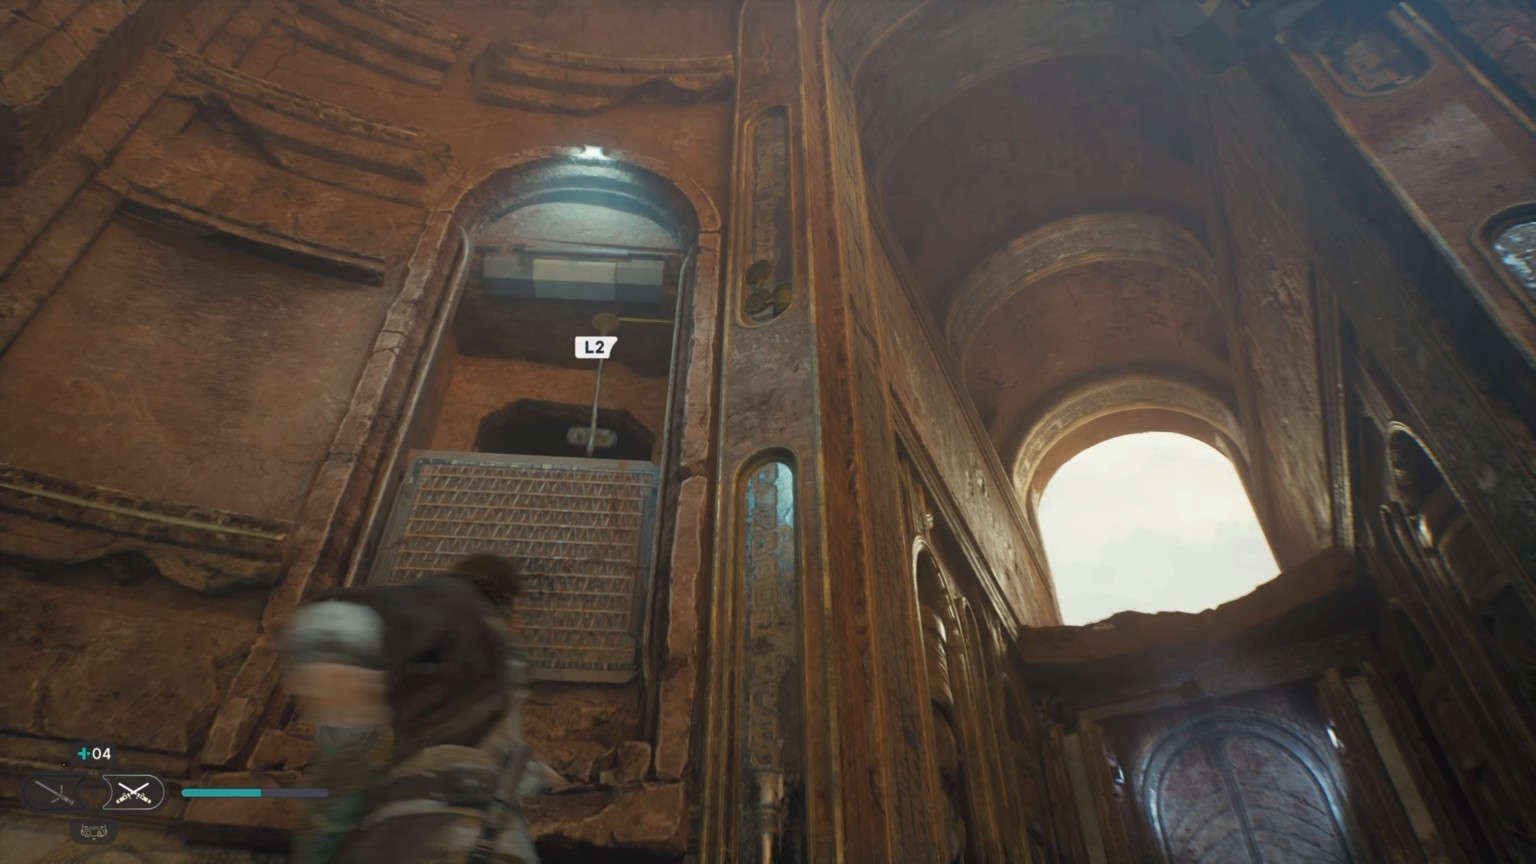 Drop down from the circular pedestal and Force Pull the rope in order to lift open the gate containing the box. |
| 3 | 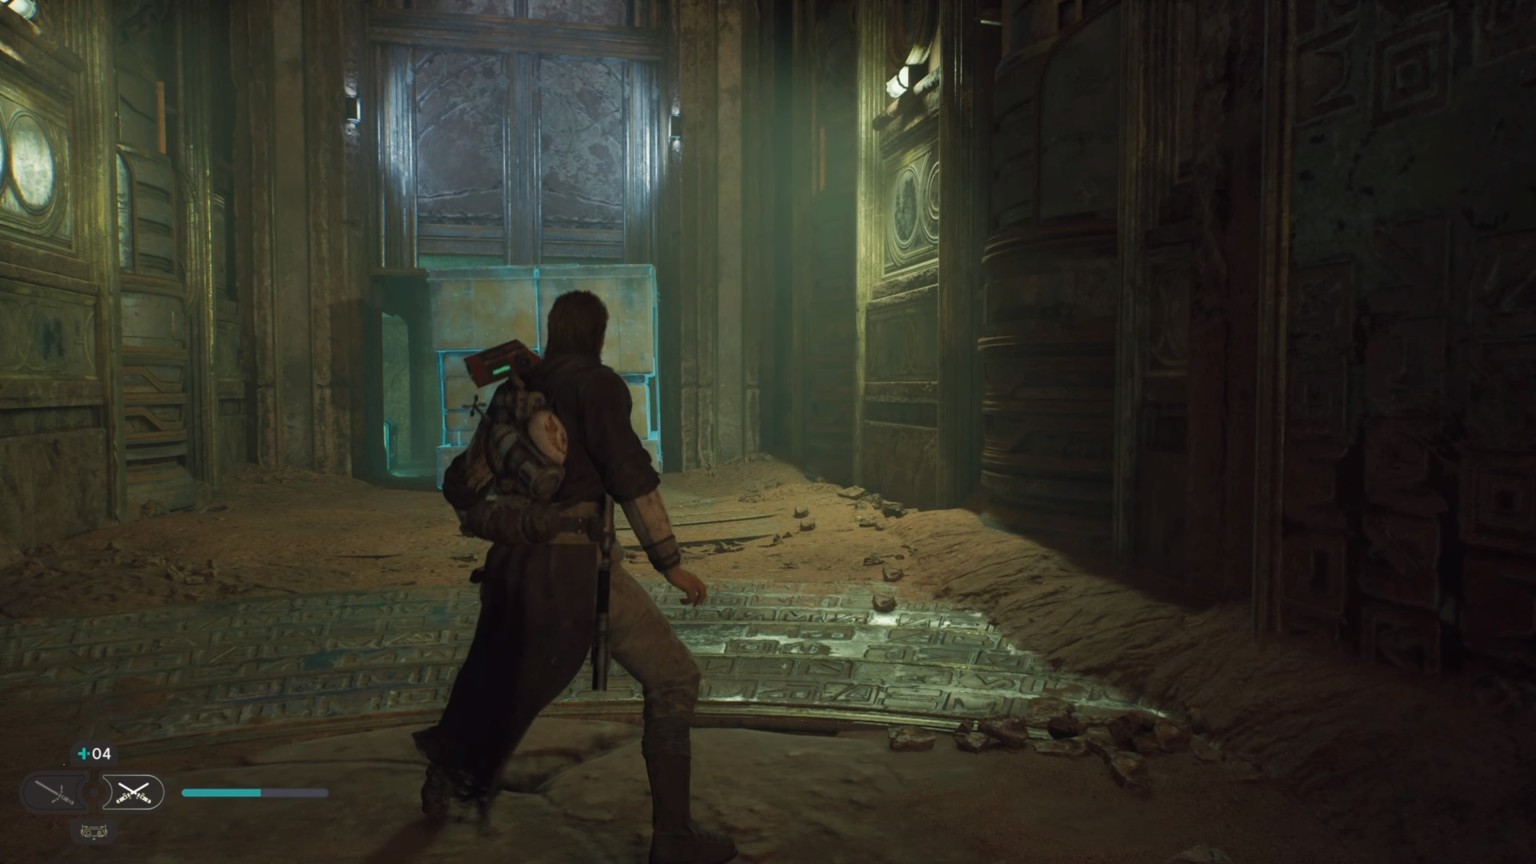 Very quickly, let go of the rope and run a bit towards the box. Force Pull it out of the gate before it lowers. |
| 3a | 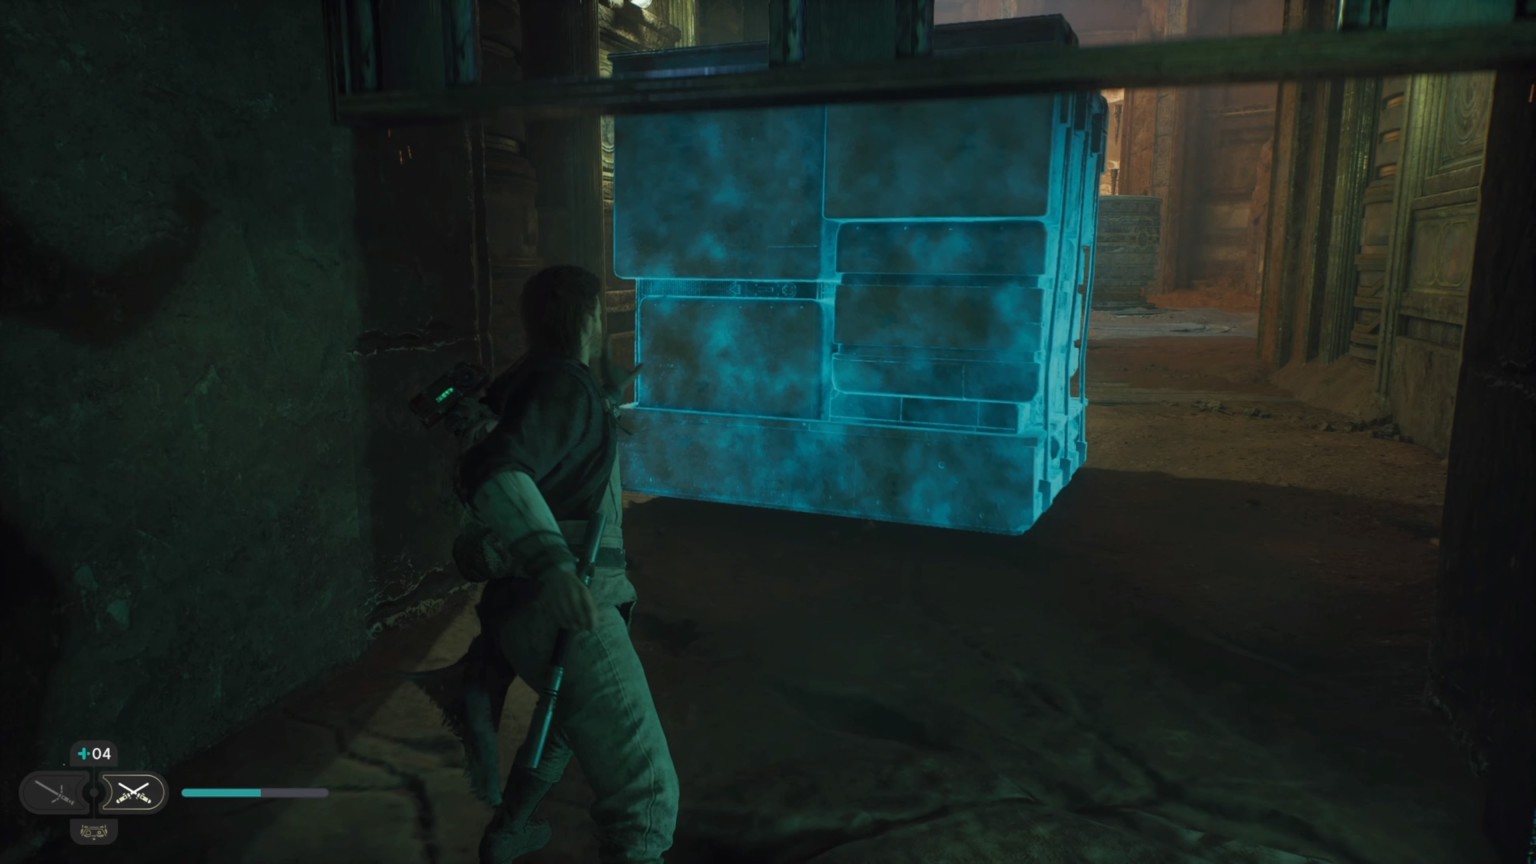 If it gets stuck under the gate, you can go inside and Force Push it out. |
| 4 | Force Push the box to the main room where the circular pedestal is. |
| 5 | 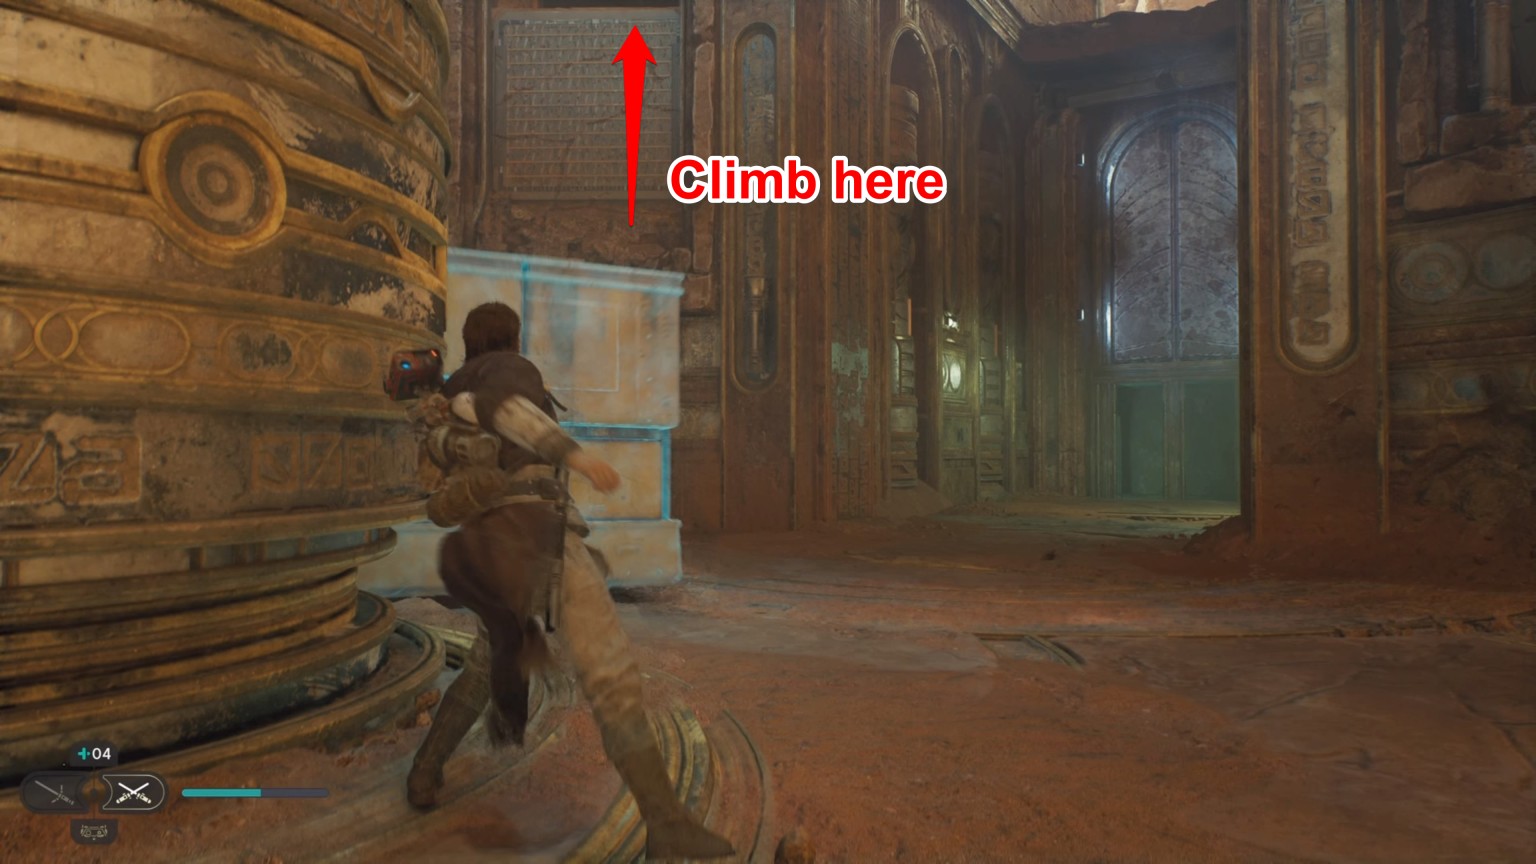 Force Push the box to underneath where the rope is in order to climb the wall and get out of the Trailhead Pantheon. |
Trailhead Pantheon Puzzle Solution
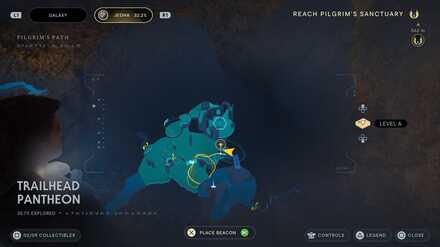
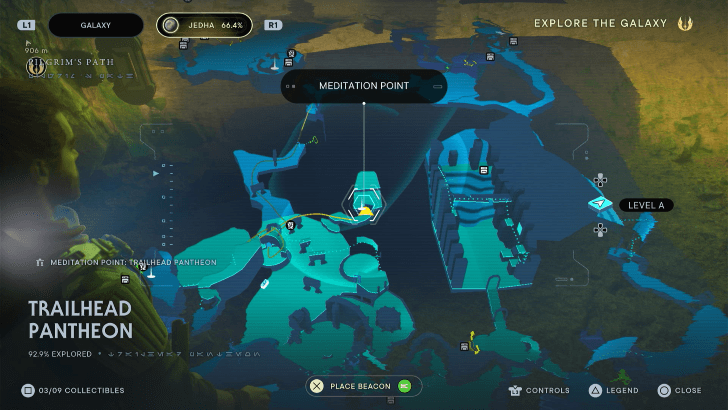
Trailhead Pantheon Puzzle Location
| Map Location | In-Game Location |
|---|---|
 |
 |
| Jedha - Trailhead Pantheon | |
Whistling Drop Wind Puzzle Solution
1st Whistling Drop Wind Puzzle
| Whistling Drop Wind Puzzle 1 Solution | |
|---|---|
| 1 |  Climb the wall on the left side of the entrance. Proceed through the area until you reach a gap where you need to double jump. (Only when there is no gust) |
| 2 |  On your left, you can pass through a small crevice to reach the new area. |
| 3 |  Force-Pull the metal object from the other side to block the gust of wind. This will allow you to cross the gap earlier. |
| 4 | 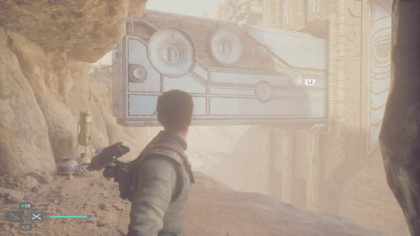 Once you pulled the metal object, jump across the gap and rest at the meditation point to your right. |
2nd Whistling Drop Wind Puzzle
| Whistling Drop Wind Puzzle 2 Solution | |
|---|---|
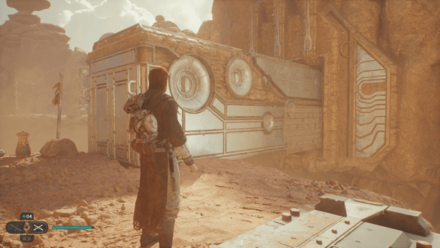
| 1 |  Continue following the path to the next area. Here, you will have to fight a couple of Stormtroopers. Once you have defeated them, head down the path to your right. |
| 2 |  After following the path, it will lead you to a windy section where you need to climb the wall to cross the gap. |
| 3 |  Upon reaching the end of the first climbable wall, drop down and grab the metal bar to reach the second climbable wall. |
| 4 |  Drop down the climbable wall at once you have reached the end. Due to the wind, you need to drop down to the leftmost side of the wall or you will be blown away. |
| 5 |  Use your grappling hook and slide down towards the metal bar below you. |
| 6 | 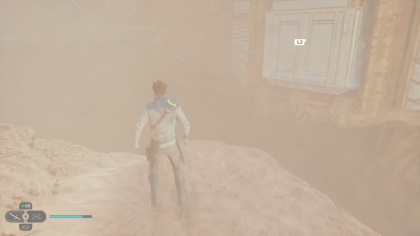 Continue following the climbable wall up to the ledge where you can Force-Pull another metal object to block the gust of wind. |
| 7 |  Jump down the ledge below after pulling the metal object. |
| 8 |  After that, you can jump towards the climbable wall in front of you. You will be able to reach the wall because the wind current from below will boost your jump. |
| 9 | 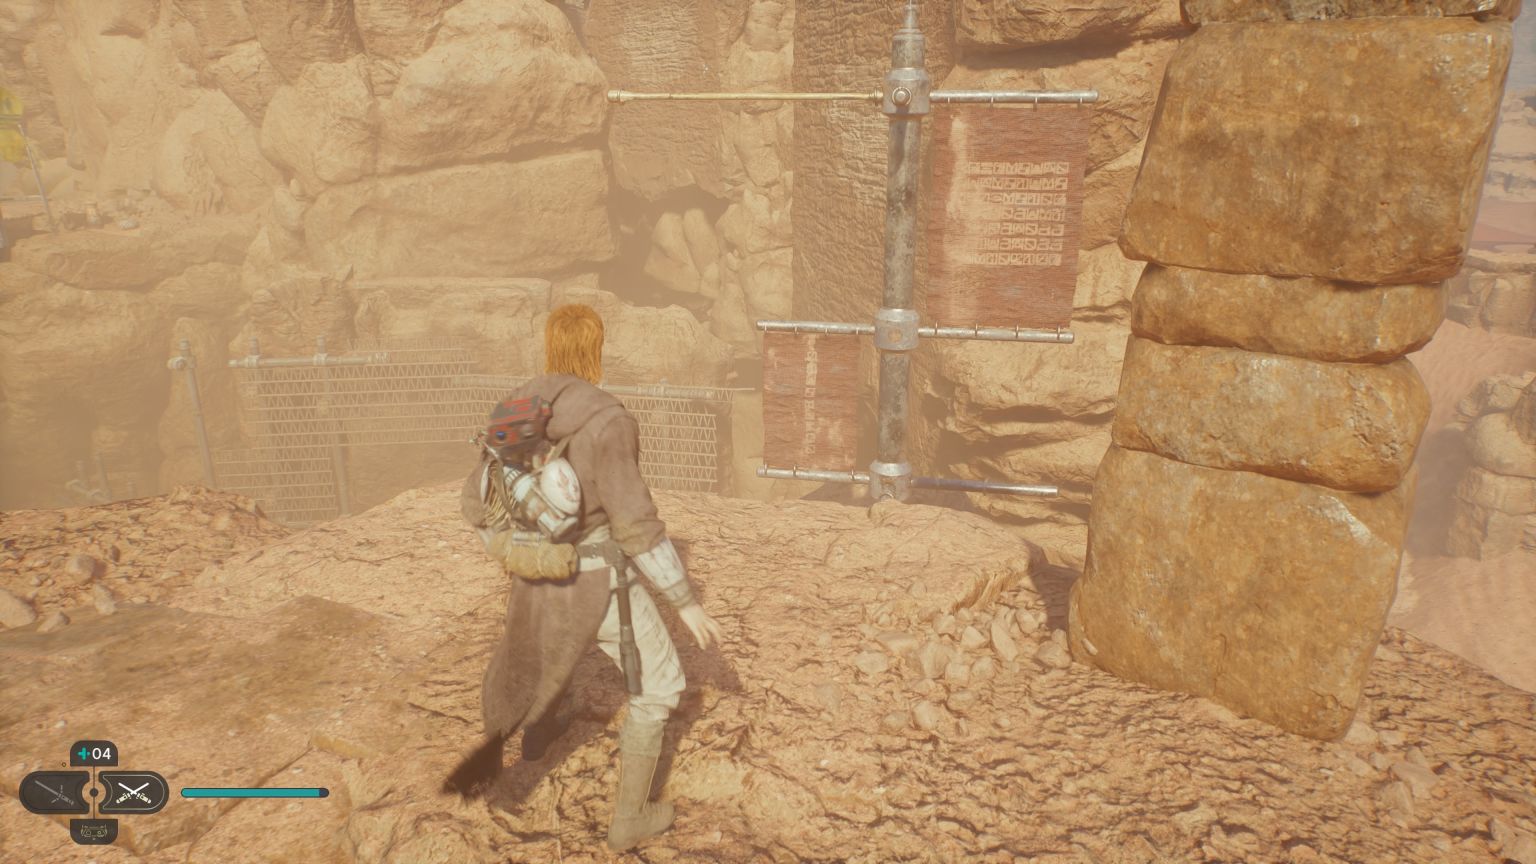 Return to the spinning contraption. It is now anchored and you can use the metal bar to swing across the next ledge. Do a wall run towards the next area where you have to fight against Stormtroopers. |
Whistling Drop Wind Puzzle Solutions
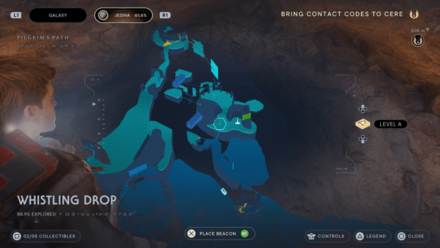
Whistling Drop Wind Puzzle Location
| Map Location | In-Game Location |
|---|---|
 |
 |
| Jedha - Whistling Drop | |
Buried Refuge Door Puzzle Solution
| Buried Refuge Door Puzzle Solution | |
|---|---|
| 1 | 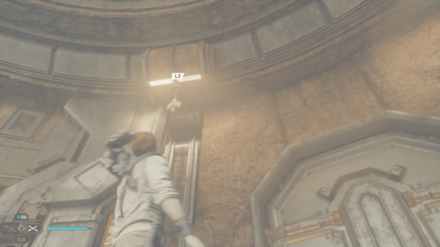 Use Force-Pull to grab the rope and remove the stone blocking the gate. |
| 2 | 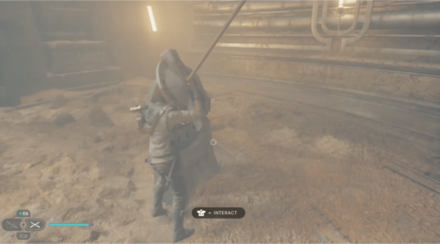 Attach the rope to the contraption nearby to prevent it from dropping. |
| 3 | 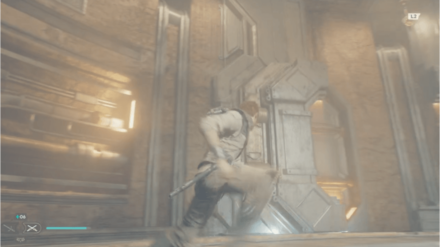 Use Force-Pull to move the gate at the center. |
| 4 | 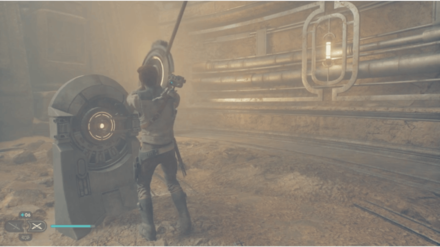 Once the gate has passed the center, you can remove the rope from the contraption and let it go. |
| 5 | 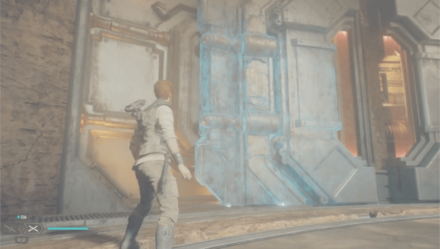 Pull the gate back using Force. It will now be centered. |
| 6 | 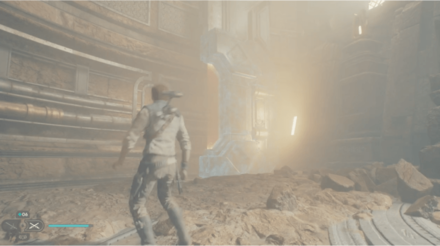 Use Force-Pull on the other half of the gate. |
| 7 | 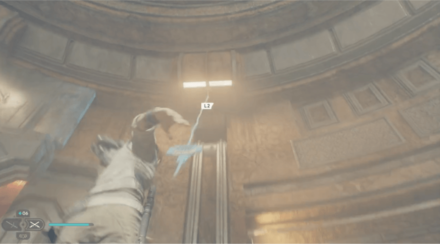 While the other half of the gate is moving, pull the rope back to remove the stone that is blocking the way. (You will need to do this fast before the gate reaches the center.) |
Jedha Buried Refuge Door Puzzle Solution
Buried Refuge Door Puzzle Location
| Map Location | In-Game Location |
|---|---|
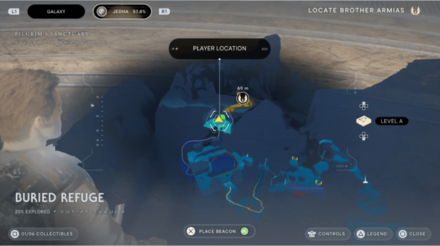 |
 |
| Jedha - Buried Refuge | |
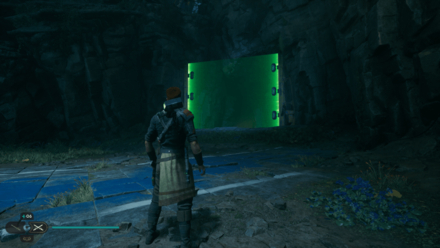
How to Pass Through Green Laser Gates
There are a couple of Green Gates that can be found on different planets but the first one that you will encounter is on Jedha. You can easily pass through these Green Gates by using your Dash ability. This also allows you to pass through gusts of wind which can be found in certain areas.
How to Pass Through Green Laser Gates
All Green Laser Gate Locations
| Map Location | In-Game Location |
|---|---|
|
 |
 Jedha |
 |
 |
 |
Koboh |
 |
 |
 |
 Shattered Moon |
 |
Crypt of Uhrma Puzzle Solution
| Crypt of Uhrma Puzzle Solution | |
|---|---|
| 1 | 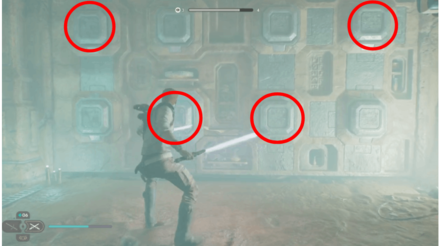 Upon reaching your destination, you will encounter a puzzle where you have to pull specific pillars to open the door. You can see the pattern for these pillars over the cliff in Blustery Mesa. |
| 2 | 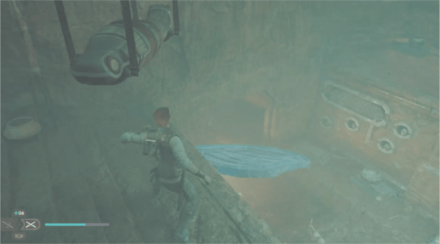 Head inside the crypt and use Force-Pull on the vent. |
| 3 |  Before going down, pick up the Stim Canister on the opposite end of the room. |
| 4 | 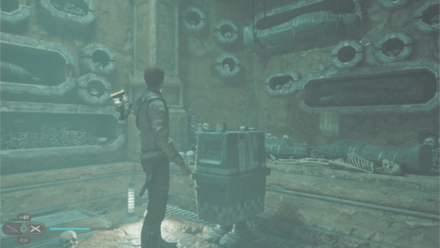 Beside the Stim Canister, there is also a Force Echo on your right. Make sure to pick it up before leaving. |
| 5 | 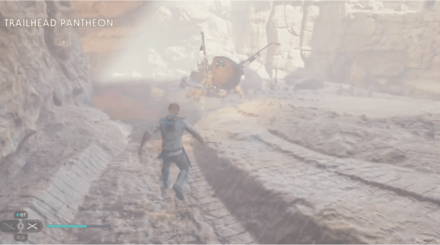 Head down the vent and follow the path until you reach the Trailhead Pantheon and meet Skoova. |
| 7 |  Continue moving forward and you will encounter a Green Laser Gate. You will need the Dash ability to pass through here. |
| 8 |  Pass through the waterfalls and squeeze through the small gap to fight the Sutaban Alpha. Be extremely careful especially if you are playing on high difficulty. This is one of the legendary enemies in the game. |
| 9 |  After defeating Sutaban Alpha, you can explore deeper in the tunnel where you can get the Gambler perk. |
Crypt of Uhrma Puzzle Solution
Where to Find Solution
| Map Location | In-Game Location |
|---|---|
 |
 |
| The solution can be found by checking the pilars in Blustery Mesa right after you use the elevator. | |
Crypt of Uhrma Puzzle Location
| Map Location | In-Game Location |
|---|---|
 |
 |
| Jedha - Crypt of Uhrma | |
Cere's Door Puzzle Solution
| Cere's Door Puzzle Solution | |
|---|---|
| 1 | 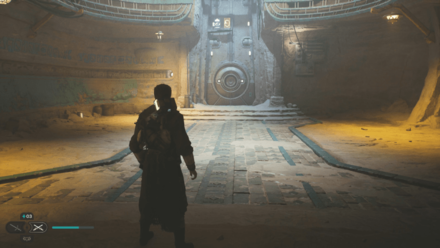 Use Force Push on the orb located on your left to open Cere's Door. |
| 2 | 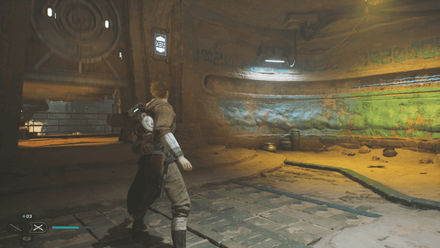 After using Force Push on the orb, the door behind you will close. (You can open this again by using Force Push on the orb to bring it back to its original position.) |
Cere's Door Not Opening Solution
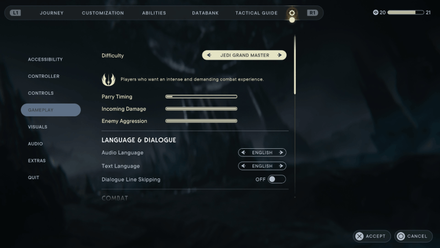
There is a bug wherein you will not be able to open the door even after using Force Push. You can easily fix this problem by changing the difficulty in the settings.
Cere's Door Puzzle Location
| Map Location | In-Game Location |
|---|---|
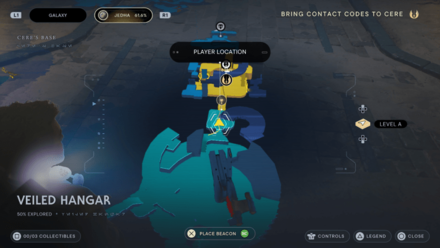 |
 |
| Jedha - Veiled Hangar | |
Wayfinder's Tomb Puzzle Solutions
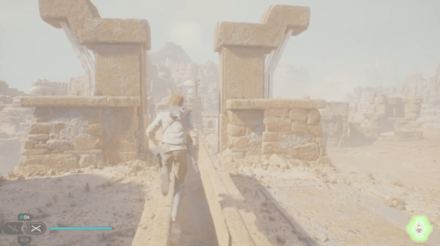
First, you must complete all three paths before you can enter the Wayfinder's Tomb at the center of Arid Flats. These Paths are all adjacent to the Arid Flats and can easily be accessed by exploring the whole area.
| Wayfinder's Tomb Puzzle | ||
|---|---|---|
| Path of Conviction | Path of Persistence | Path of Restoration |
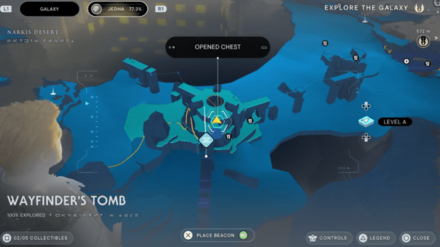
How to Get to Wayfinder's Tomb
| Map Location | In-Game Location |
|---|---|
 |
 |
| Jedha - Wayfinder's Tomb | |
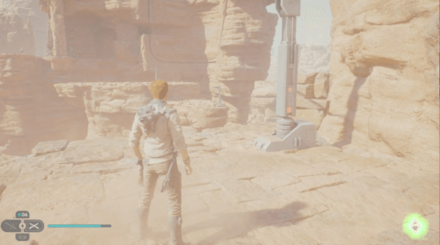
Path of Conviction Puzzle Solution
| Path of Conviction Puzzle Solution | |
|---|---|
| 1 |  Use your grappling hook to reach the other side. |
| 2 | 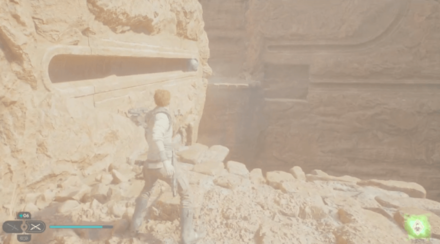 Force-Pull the marble on your left. This will lower the marble in front of you for a short period. |
| 3 | 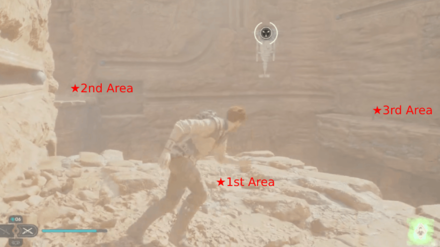 Go to the 2nd Area immediately and Force-Push the marble. |
| 4 | 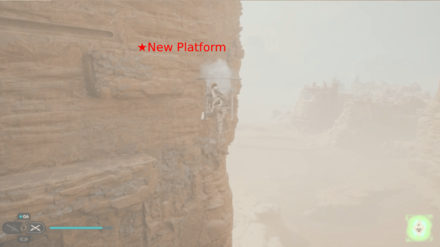 If you have done this correctly, a platform will appear above the 3rd Area. |
| 5 | Return to the 1st Area and pull the marble to lower the slot again. |
| 6 | 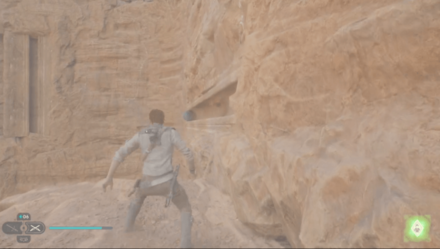 Immediately jump towards the new platform and force push the marble to align the marble's path to the top. |
| 7 | 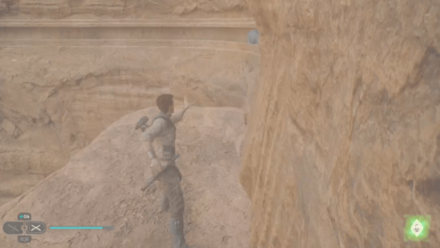 Jump down and force-push the second marble back to its original position. |
| 8 | 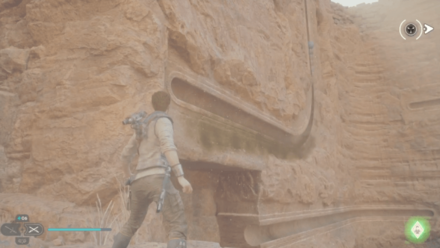 Go back to the 2nd Area and force-push the marble to bring it up. |
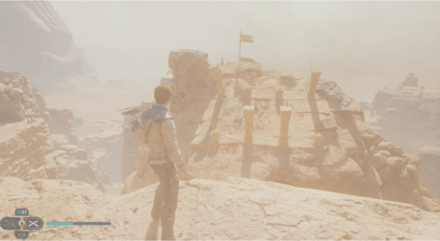
| 9 | 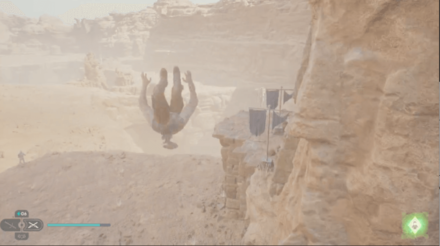 You will now need to go back to the Arid Flats and head toward the flags. |
| 10 | 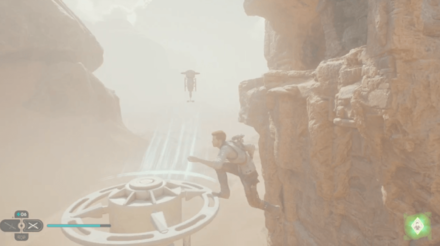 Use your grappling hook and jump towards the ledge on your left. You will have to fight a couple of Stormtroopers in this area. |
| 11 | 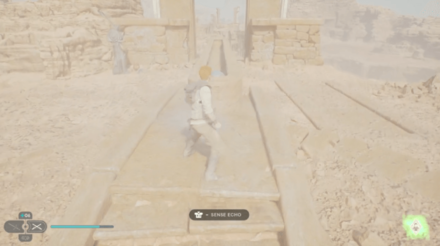 Continue going up until you reach the top. Do not forget to pick up the Force Echo near the marble. |
| 12 | 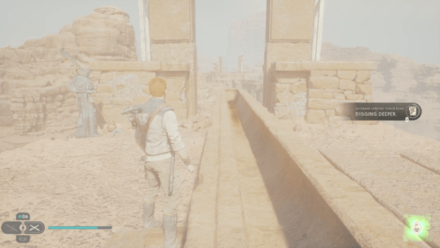 Use Force-Push on the last marble to complete the Path of Conviction. |
| 13 | 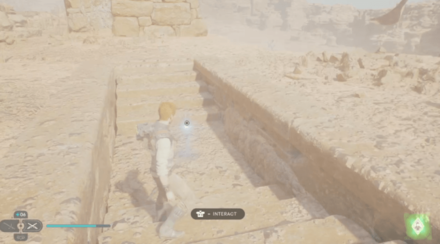 After completing the Path of Conviction, there is a New Perk Slot that will appear on your right. |
How to Get to Path of Conviction
| Map Location | In-Game Location |
|---|---|
 |
 |
| Jedha - Path of Conviction | |
Path of Persistence Puzzle Solution
| Path of Persistence Puzzle Solution | |
|---|---|
| 1 | 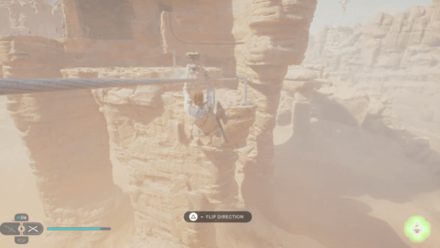 Use the zipline from Arid Flats to reach the Path of Persistence. |
| 2 | 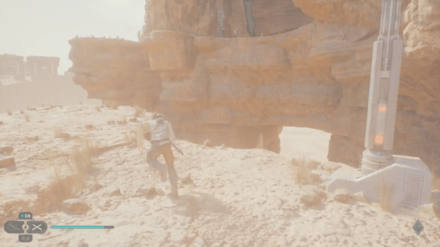 Head straight to your left using your grappling hook. You will have to fight Stormtroopers in this area. |
| 3 | 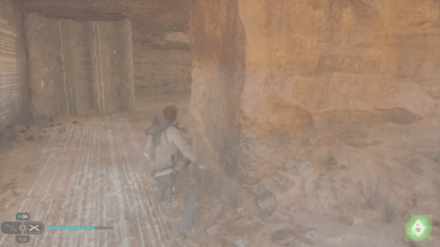 Continue following the path until you reach the marble ahead. |
| 4 | 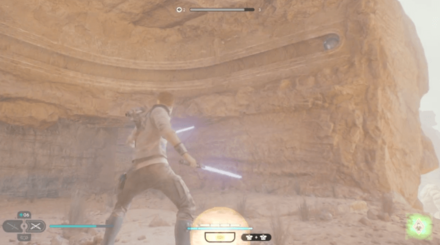 Force-Push the marble to move the entire wall behind you. |
| 5 | 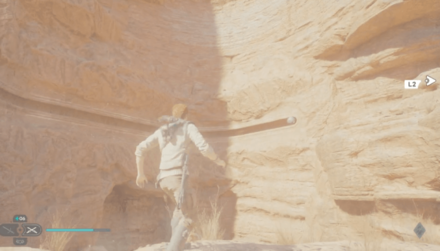 Backtrack to the entrance but now you go to your left instead of right. |
| 6 | 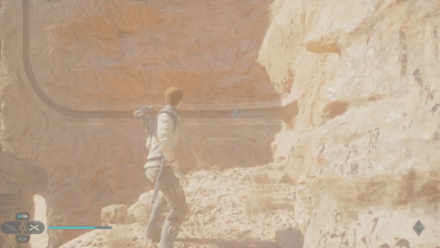 Use Force-Push on the marble and it will reach the top. |
| 7 |  Return to the first marble and move the wall back to its original position. |
| 8 |  Head outside and perform a wall run to reach the peak of the Path of Persistence. |
| 9 | 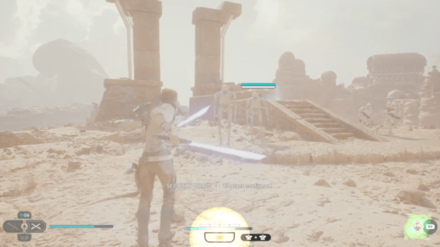 Defeat all of the enemies present in the area. |
| 10 | 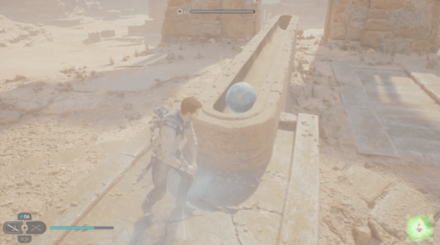 Pick up the Force Echo near the marble. |
| 11 | 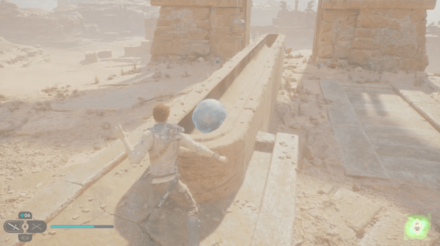 Use Force-Push on the marble to complete the Path of Persistence. |
| 12 | 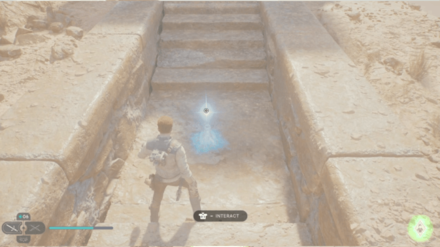 After you complete the puzzle in the Path of Persistence, A hatch will open up where you can pick up a New Perk Slot. |
How to Get to Path of Persistence
| Map Location | In-Game Location |
|---|---|
 |
 |
| Jedha - Path of Persistence | |
Path of Restoration Puzzle Solution
| Path of Restoration Puzzle Solution | |
|---|---|
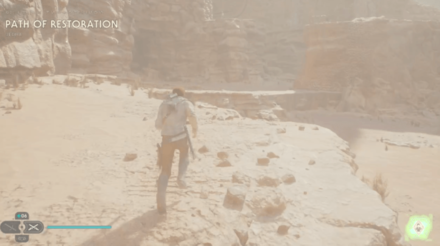
| 1 |  On Arid Flats, climb the wall and jump over the ledge to reach the Path of Restoration. |
| 2 |  Continue following the path on your left. For now, you can ignore the room where you can see enemies below you. |
| 3 | 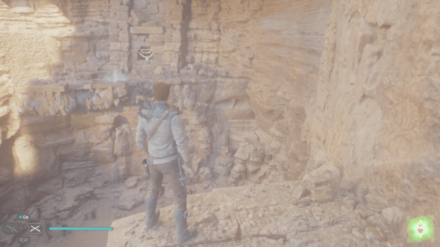 To continue going left, you will need to perform a wall run to reach the first marble that you need to move. |
| 4 | 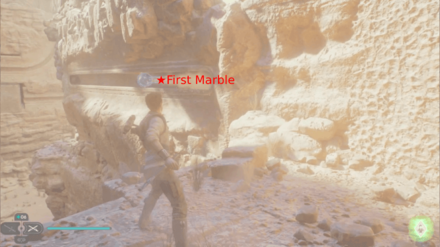 Use Force-Push to move the marble. This will change the path of the next marble that you need to move. |
| 5 | 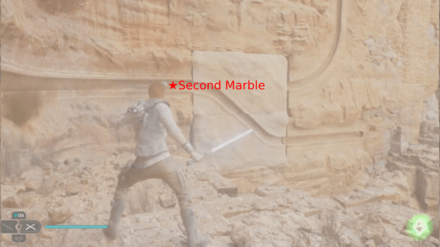 Wall run back to the previous area and Force-Push the marble on your left. This also unlocks a hidden path near the first room where there are enemies below. |
| 6 | 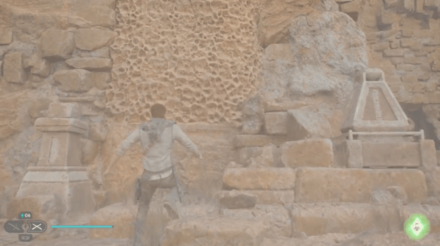 Climb the new path until you reach the top. Here you will find another marble that you need to move. |
| 7 | 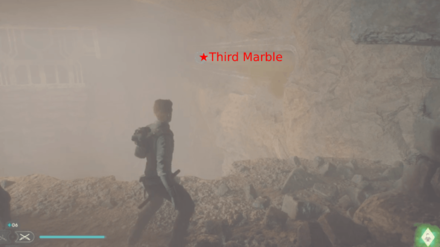 Use Force-Push on this marble and return to the marble where you had to do a wall run. |
| 8 |  Once you are back on the first marble, Force-Push it again to return the second marble to its original position. |
| 9 | 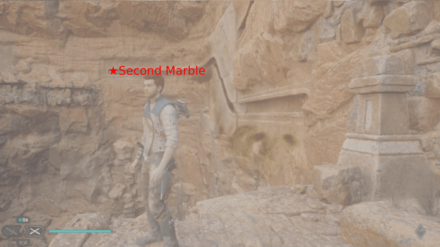 Bring the second marble back to its original position. |
| 10 | 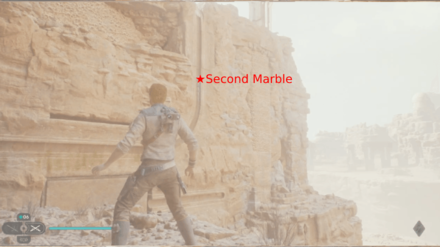 Use Force-Push again on the first marble to create a path that leads to the top. Then, use Force-Push on the second marble to bring it to the top. |
| 11 | 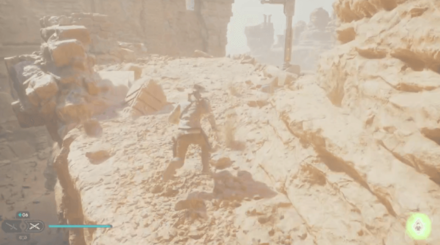 Go back up to the platform where you can see the zipline. This can be found above the first marble. |
| 12 | 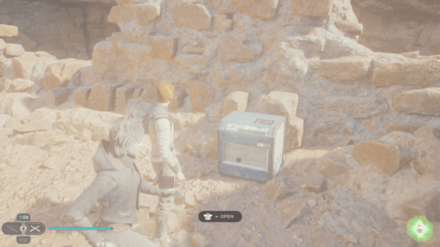 Before using the zipline, pick up the chest containing the Wanderer Outfit. |
| 13 | 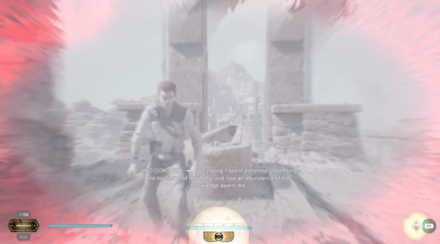 Use the zipline and pick up the Force Echo near the final marble. |
| 14 | 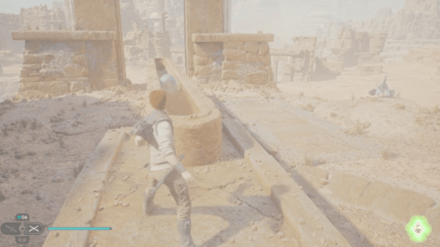 Force-Push the final marble to solve the Path of Restoration puzzle. |
| 15 | 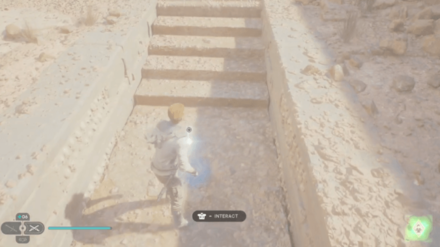 Do not forget to pick up the New Perk Slot on your right, after completing the Path of Restoration puzzle. |
How to Get to Path of Restoration
| Map Location | In-Game Location |
|---|---|
 |
 |
| Jedha - Path of Restoration | |
All Shattered Moon Puzzle Solutions
| Puzzle | Location |
|---|---|
| Republic Research Laboratory Puzzle | Republic Research Laboratory |
Republic Research Laboratory Puzzle Solution
| Republic Research Laboratory Puzzle Solution | |
|---|---|
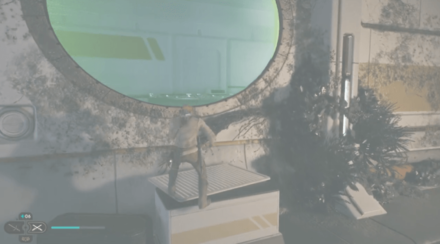
| 1 | 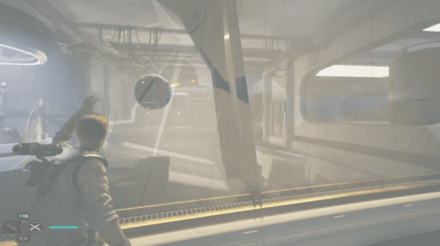 Pick up the orb from the other side and throw it on the inclined platform. Immediately move to your right and pick up the orb again before it slides off. |
| 2 | 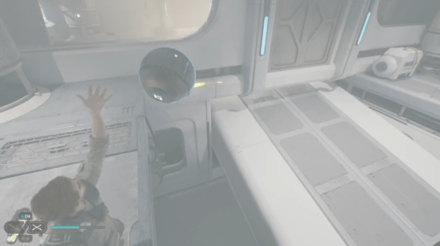 Throw it again on the other inclined platform that connects to the room to your right and pick it up. |
| 3 | 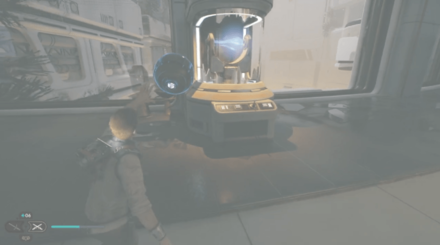 Place the orb on the slot right behind you to activate the laser. |
| 4 | 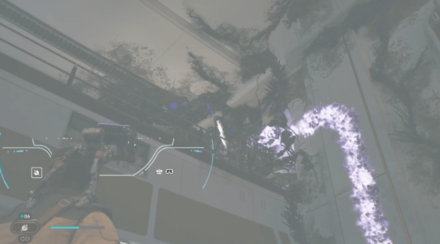 Use BD-1 Koboh Grinder to draw a line from the laser to the vines on the second floor to open a new path. |
| 5 |  Pass through the green laser gate using your dash ability. |
| 6 | 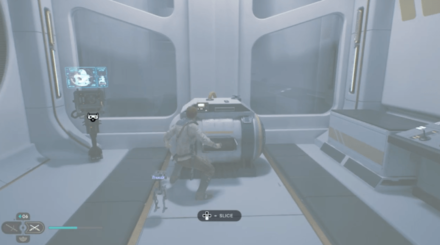 Pick up the Slice: Droideka from the chest on your left. |
| 7 | 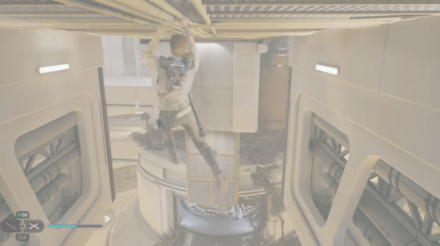 Return to the laser and use BD-1's Koboh Grinder again to open up the path to your right. |
| 8 | 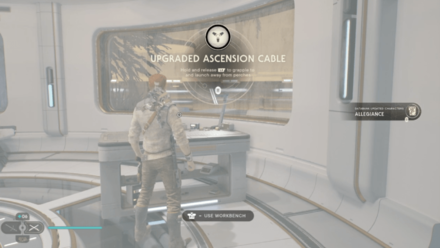 Move your way down the path until you reach another room. From here, you can pick up the Upgraded Ascension Cable on the Workbench. |
| 9 | 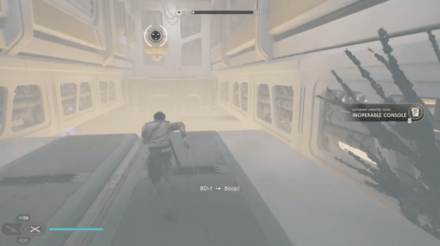 Using the Upgraded Ascension Cable, use the console on the other side to open up a new path and enter it. |
| 10 |  There is a Model 13 - Body on top of the platform at the center. Make sure to pick this up before heading up. |
| 11 | 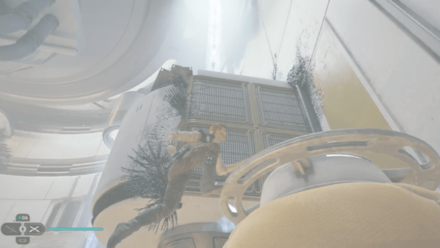 Continue heading up using the Upgraded Ascension Cable until you see Rayvis. |
| 12 | 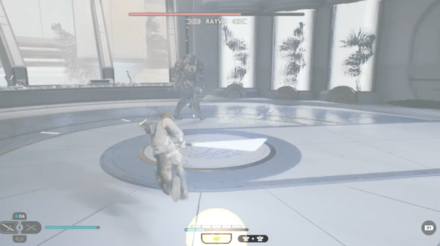 Enter the room and cutscene will play. After the cutscene, you have to fight Rayviss. |
| 13 | 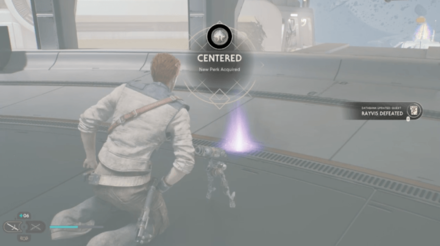 Once you have defeated Rayvis, pick up the Centered perk before leaving the area. |
Republic Research Laboratory Puzzle Solution
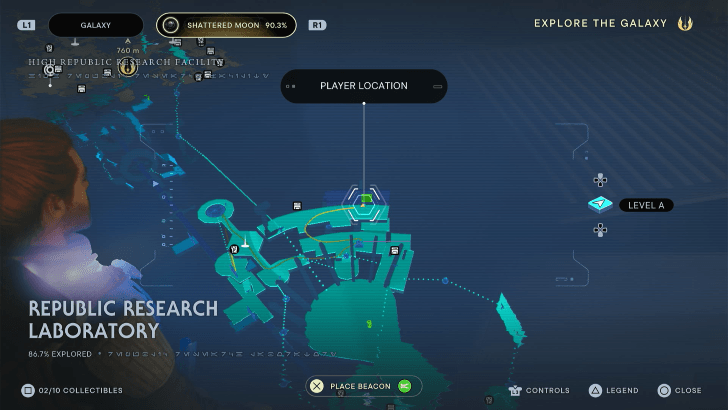
Republic Research Laboratory Puzzle Location
| Map Location | In-Game Location |
|---|---|
 |
 |
| Shattered Moon - Republic Research Laboratory | |
All Nova Garon Puzzle Solutions
| Puzzle | Location |
|---|---|
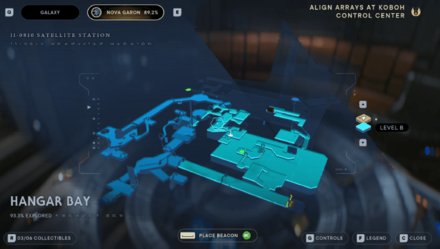
| How to Pass Through Electron Walls | Hangar Bay |
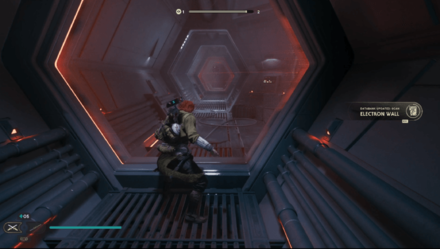
How to Pass Through Electron Walls
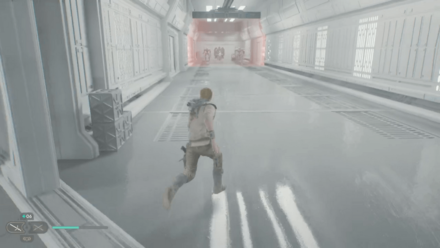
Similar to Green Laser Gates, you can also pass through these Electron Walls by using your Dash ability but they will deal damage if you touch them. You can find these Electron Walls in areas around Nova Garon.
All Electron Wall Locations
| Map Location | In-Game Location |
|---|---|
 |
 |
 |
 |
 |
 |
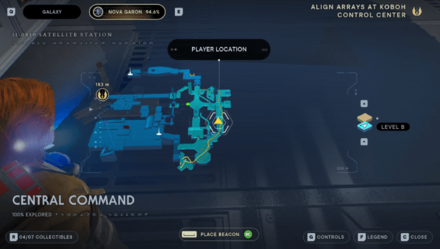 |
 Central Command Central Command |
Star Wars Jedi Survivor Related Guides

Jedi Survivor Guide and Walkthrough
| Star Wars Jedi Survivor Wiki | |
|---|---|
 Walkthrough Walkthrough |
 Collectibles Collectibles |
 Jedi Chambers Jedi Chambers |
 Rumors Rumors |
 Puzzles Puzzles |
 Choices Choices |
 Skills Skills |
 Tips and Tricks Tips and Tricks |
 Outfits and Cosmetics Outfits and Cosmetics |
 Lightsabers Lightsabers |
 Blasters Blasters |
 BD-1 Parts BD-1 Parts |
 Enemies Enemies |
 Bosses Bosses |
 Bounties Bounties |
 Characters Characters |
 News and Game Info News and Game Info |
- |
Comment
Author

All Puzzle Solutions
Please participate in our site
improvement survey
03/2026
improvement survey
03/2026
Would you assist in
improving Game8's site?
improving Game8's site?

×
We are listening to our users' valuable opinions and discussing how to act on them.
The information collected through this survey will be used for the purpose of improving our services. In addition, the information will only be disclosed a part of a statistic in a format that will not allow identification of personal information.
Begin Survey
Not Now
×
Please rate each item regarding Game8.co's Advertisements.
Amount of Ads
Very Dissatisfied
Somewhat Dissatisfied
Fine
Somewhat Satisfied
Highly Satisfied
Placement of Ads
Timing of Ad Display
Ad Loading Speed
Safeness of Ads
Content of Ads
×
Please rate each item regarding Game8.co's Quality of Articles.
Amount of information
Very Dissatisfied
Somewhat Dissatisfied
Fine
Somewhat Satisfied
Highly Satisfied
Frequency of updates
Speed of new information
Accuracy of articles
Understandibility of articles
Readability of sentences
×
Please rate each item regarding Game8.co's Usability of the Site.
Ease of finding information
Very Dissatisfied
Somewhat Dissatisfied
Fine
Somewhat Satisfied
Highly Satisfied
Loading Speed
Use of Color
Font Size
Visibility of Images
Easy to Understand Layout
×
Please rate each item regarding Game8.co's Message Boards, Comments.
Ease of Writing
Very Dissatisfied
Somewhat Dissatisfied
Fine
Somewhat Satisfied
Highly Satisfied
Readability
Ease in Finding Information
Comment Quality
Comment Quantity
Admin Response
×
Please rate each item regarding Game8.co's Site's new design.
Please rate our site's new design
Very Dissatisfied
Somewhat Dissatisfied
Fine
Somewhat Satisfied
Highly Satisfied
Do you think that the website's design change makes the site easier to use?
Has the new design made it easier for you to find information on the site?
Has the new design improved the overall visual appeal of the site?
How would you rate your overall satisfaction with the new design of the site?
×
How likely are you to recommend Game8 to someone you know?
Very Unlikely
0
1
2
3
4
5
6
7
8
9
10
Very Likely
If you have other opinions regarding potential improvement to the website, please share them with us. We would appreciate your honest opinion.
Note: This is a free response section, so you can proceed without entering anything.
Note: Please be sure not to enter any kind of personal information into your response.
Note: Please be sure not to enter any kind of personal information into your response.
×
Thank You
×
Thank you for participating in our survey! Your answers will help us to improve the quality of our website and services.
We hope you continue to make use of Game8.
We hope you continue to make use of Game8.
Close
Rankings
- We could not find the message board you were looking for.
Gaming News


![Everwind Review [Early Access] | The Shaky First Step to A Very Long Journey](https://img.game8.co/4440226/ab079b1153298a042633dd1ef51e878e.png/thumb)

![Monster Hunter Stories 3 Review [First Impressions] | Simply Rejuvenating](https://img.game8.co/4438641/2a31b7702bd70e78ec8efd24661dacda.jpeg/thumb)
Popular Games

Genshin Impact Walkthrough & Guides Wiki
Honkai: Star Rail Walkthrough & Guides Wiki
Umamusume: Pretty Derby Walkthrough & Guides Wiki
Pokemon Pokopia Walkthrough & Guides Wiki
Resident Evil Requiem (RE9) Walkthrough & Guides Wiki
Monster Hunter Wilds Walkthrough & Guides Wiki
Wuthering Waves Walkthrough & Guides Wiki
Arknights: Endfield Walkthrough & Guides Wiki
Pokemon FireRed and LeafGreen (FRLG) Walkthrough & Guides Wiki
Pokemon TCG Pocket (PTCGP) Strategies & Guides Wiki


Recommended Games
Cyberpunk 2077: Ultimate Edition Walkthrough & Guides Wiki
Diablo 4: Vessel of Hatred Walkthrough & Guides Wiki
Fire Emblem Heroes (FEH) Walkthrough & Guides Wiki
Yu-Gi-Oh! Master Duel Walkthrough & Guides Wiki
Super Smash Bros. Ultimate Walkthrough & Guides Wiki
Pokemon Brilliant Diamond and Shining Pearl (BDSP) Walkthrough & Guides Wiki
Elden Ring Shadow of the Erdtree Walkthrough & Guides Wiki
Monster Hunter World Walkthrough & Guides Wiki
The Legend of Zelda: Tears of the Kingdom Walkthrough & Guides Wiki
Persona 3 Reload Walkthrough & Guides Wiki


All rights reserved
© 2023 Electronic Arts Inc.
The copyrights of videos of games used in our content and other intellectual property rights belong to the provider of the game.
The contents we provide on this site were created personally by members of the Game8 editorial department.
We refuse the right to reuse or repost content taken without our permission such as data or images to other sites.