Cohok Charge Mechanics and How to Beat
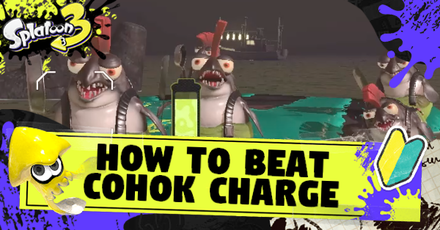
Cohok Charge is a Known Occurence in Splatoon 3's Salmon Run Next Wave where all Lesser Salmonids are replaced by the larger Cohoks accompanying Boss Salmonids. Read on to learn about this special wave's mechanics, as well as how to beat it and strategies.
List of Contents
Cohok Charge Mechanics
Cohok Charge Known Occurrence
 Cohok Charge Cohok Charge |
|
| How to Get Golden Eggs | |
|---|---|
| Special Wave Information | |
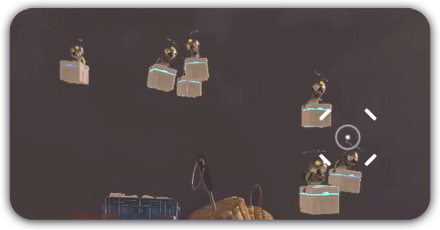
A Large Number of Cohoks Spawn
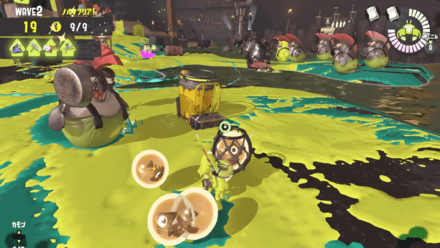
During Cohok Charge, a large number of Cohoks will spawn and swarm players. They are the only Lesser Salmonids fought during this special wave and will accompany Boss Salmonids.
Although the Cohoks don't have increased speed and damage, their large size and tendency to group together makes them challenging to take out. They are particularly troublesome if they obscure the view of dangerous Boss Salmonids or push players in the water during High Tide!
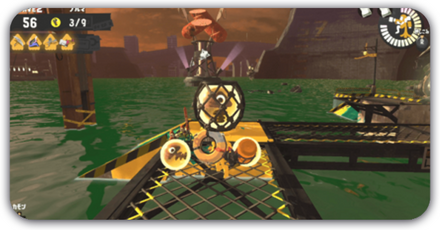
Use Cannons to Defeat Cohoks
Cannons are located throughout the stage and will splat Cohoks in one hit! At least two players should get on the cannons and focus on defeating Cohoks while the other players take care of Boss Salmonids.
Cohok Charge Strategies and How to Beat
| Strategies for Glowfly Rush |
|---|
| |
Divide the Team to Cannon and Egg Retrieval Duty
It's a good idea to divide the team into two groups: one focused on using cannons and the other on egg retrieval duty. This ensures that there's at least two players providing covering fire while the rest are focused on retrieving Golden Eggs to hit the quota!
Players with Slow Weapons Should Get on Cannons
Players given weapons with low fire rate such as Splat Chargers and Sloshers should use the Cannons instead. While this makes you immobile, the cannons have a higher fire rate and can instantly splat the rampaging Cohoks in one hit.
Use Turrets Against Boss Salmonids
| Boss Salmonids Weak to Cannons | ||
|---|---|---|
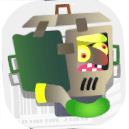
 Steelhead Steelhead
|
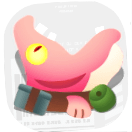
 Stinger Stinger
|
 Flyfish Flyfish
|
 Big Shot Big Shot
|
 Drizzler Drizzler
|
|
Players on Turret Duty can help defeat the above Boss Salmonids as the cannons can make short work of them. A well-aimed shot from the Cannon, for example, will instantly splat a Steelhead if you target their head!
Keep in mind that for the Flyfish, you still need to wait for it to open its missile hatches to defeat it.
Watch Out for Flyfish and Maws
Watch out for the Flyfish's Tenta Missiles or Maws as they can target players on Cannons. Your perspective changes when getting on the Cannon so it's not often obvious that a Maws is already under the Turret ready to swallow you.
If you notice a Flyfish start firing its missiles or Maws get too close, jump out of the Cannon to evade their attack!
Prioritize Boss Salmonids Immune to Cannons
| Boss Salmonids Fought on Foot | ||
|---|---|---|
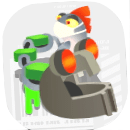 Steel Eel Steel Eel |
 Scrapper Scrapper |
 Maws Maws |
 Flipper Flopper Flipper Flopper |
 Slammin' Lid Slammin' Lid |
|
Certain Boss Salmonids are better fought on foot and are the focus of the players on Egg retrieval duty. Maws, in particular, is very difficult to fight on Cannon and it's possible for it to splat players on the cannons if they go under the turret.
Splatoon 3 Related Guides
All Known Occurrences (Special Waves)
List of Known Occurrences
 Water Levels Water Levels |
 Rush Rush |
 Fog Fog |
 The Griller The Griller |
 Cohok Charge Cohok Charge |
 Goldie Seeking Goldie Seeking |
 The Mothership The Mothership |
 Mudmouth Eruption Mudmouth Eruption |
 Giant Tornado Giant Tornado |
Author

Cohok Charge Mechanics and How to Beat
Rankings
- We could not find the message board you were looking for.
Gaming News


![Monster Hunter Stories 3 Review [First Impressions] | Simply Rejuvenating](https://img.game8.co/4438641/2a31b7702bd70e78ec8efd24661dacda.jpeg/thumb)
![The Seven Deadly Sins: Origin [First Impressions] | A Promising Start](https://img.game8.co/4440581/584e0bfb87908f12c4eab6e846eb1afd.png/thumb)

Popular Games

Genshin Impact Walkthrough & Guides Wiki
Umamusume: Pretty Derby Walkthrough & Guides Wiki
Pokemon Pokopia Walkthrough & Guides Wiki
Honkai: Star Rail Walkthrough & Guides Wiki
Monster Hunter Stories 3: Twisted Reflection Walkthrough & Guides Wiki
Arknights: Endfield Walkthrough & Guides Wiki
Wuthering Waves Walkthrough & Guides Wiki
Zenless Zone Zero Walkthrough & Guides Wiki
Pokemon TCG Pocket (PTCGP) Strategies & Guides Wiki
Monster Hunter Wilds Walkthrough & Guides Wiki


Recommended Games
Diablo 4: Vessel of Hatred Walkthrough & Guides Wiki
Cyberpunk 2077: Ultimate Edition Walkthrough & Guides Wiki
Fire Emblem Heroes (FEH) Walkthrough & Guides Wiki
Yu-Gi-Oh! Master Duel Walkthrough & Guides Wiki
Super Smash Bros. Ultimate Walkthrough & Guides Wiki
Pokemon Brilliant Diamond and Shining Pearl (BDSP) Walkthrough & Guides Wiki
Elden Ring Shadow of the Erdtree Walkthrough & Guides Wiki
Monster Hunter World Walkthrough & Guides Wiki
The Legend of Zelda: Tears of the Kingdom Walkthrough & Guides Wiki
Persona 3 Reload Walkthrough & Guides Wiki


All rights reserved
© Nintendo
The copyrights of videos of games used in our content and other intellectual property rights belong to the provider of the game.
The contents we provide on this site were created personally by members of the Game8 editorial department.
We refuse the right to reuse or repost content taken without our permission such as data or images to other sites.