Shadow-Cursed Lands: Ruined Battlefield and Last Light Inn Maps and Points of Interest
★ All Updates for Patch 5
☆ Beginner Guides for All Starter Players
★ Simple Character Creation Guide for beginners
☆ A Full Guide to Multiclassing
★ All Side Quests and Event Points
☆ All Races and Subraces
In Baldur's Gate 3 (BG3), the Shadow-Cursed Lands is the region where you'll start the game's Act 2, and is the path you need to take to reach the Moonrise Towers. Read on to view the maps of the Ruined Battlefield and Last Light Inn, and to find out all the locations and other points of interest in the Shadow-Cursed Lands region.
List of Contents
Shadow-Cursed Lands Maps
| Ruined Battlefield | Last Light Inn |
| Last Light Inn Cellar | Grymforge Elevator Basement |
Ruined Battlefield Map
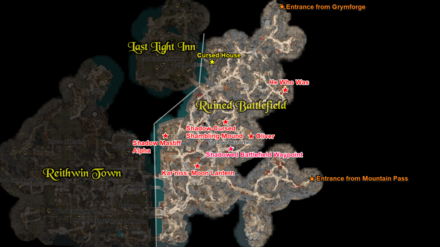
The Ruined Battlefield is the area in the Shadow-Cursed Lands that you'll arrive in first, whether you enter from the Grymforge or the Mountain Pass.
The Shadow Curse is active in this area; you'll need to protect your characters with a light source, like equipping a torch, to keep them from being damaged by the curse.
How to Get to the Shadow-Cursed Lands
Last Light Inn Map
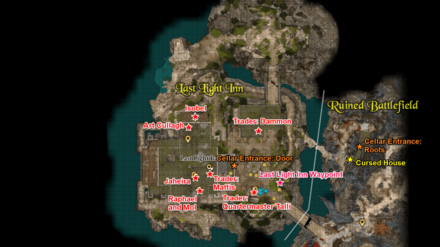
Northeast of the Ruined Battlefield area, you'll find the Last Light Inn, an area covered by a barrier. If you saved the tieflings in the Emerald Grove, you'll find many of them taking refuge here.
How to Get to Last Light Inn
Last Light Inn Cellar Map
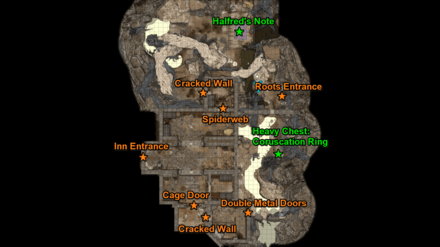
Beneath the Last Light Inn, you'll find a cellar basement. By going through various gates, cracked walls, and other obstacles, you'll find a secret area for Selûne involving the Investigate the Selûnite Resistance side quest.
How to Get to the Last Light Inn Basement
Grymforge Elevator Basement Map
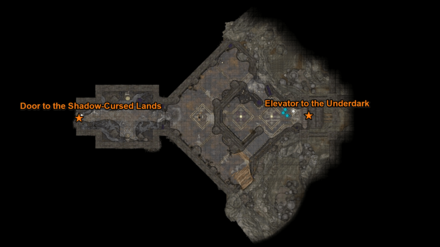
If you enter through the Grymforge elevator, there's a small area, the Grymforge basement, that you have to go through before you reach the Shadow-Cursed Lands. There are a few valuables to be looted in this area.
Ruined Battlefield Points of Interest
| Ruined Battlefield Points of Interest |
|---|
|
|
Shadowed Battlefield Waypoint
| Shadowed Battlefield Waypoint |
|---|
 |
| Coordinates: (46, 19) |
The waypoint to this area, the Shadowed Battlefield Waypoint, is located in the middle of the map. You can get to it by going southwest of the Grymforge entrance and northwest of the Mountain Pass entrance.
Entrances
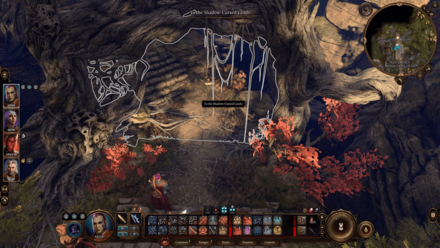
Mountain Pass Passage
| Mountain Pass Passage |
|---|
 |
| Coordinates: (-142, -128) |
One of the entrances to the Shadow-Cursed Lands is the Mountain Pass. The entrance is located by going west in the Rosymorn Monastery Trail.
Mountain Pass Maps and Points of Interest
Grymforge Elevator
| Grymforge Elevator |
|---|
 |
| Coordinates: (-600, 381) |
The other entrance to the Shadow-Cursed Lands is the Grymforge in the Underdark. The Elevator to the Shadow-Cursed Lands is located east from the Grymforge's waypoint, located behind the Wrought-Iron Gate.
Grymforge Maps and Points of Interest
Beings of Interest
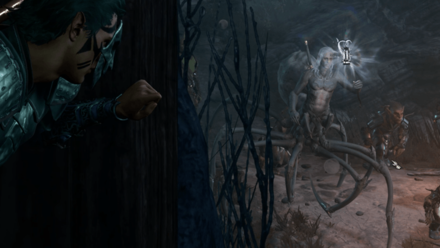
Kar'niss
| Kar'niss |
|---|
 |
| Coordinates: (-8, -19) |
Kar'niss is the holder of the Moon Lantern, an extremely important item that you need to traverse the areas in the Underdark where the Shadow Curse is stronger.
There are a couple of ways to encounter him: either from ambushing him with the Harpers you encounter in the northern part of the Ruined Battlefield, or passing off as a True Soul and playing the Spider's Lyre to summon and journey with him.
If you got the Moon Lantern from him, you'll find that there's a pixie trapped inside. You can choose to keep her imprisoned or free her, but it's better to free her since you'll get the Filigreed Feywild Bell, an item that grants Pixie's Blessing to your party when used, which has the same effect as being in the light of the Moon Lantern. This allows you to not have to hold the Moon Lantern all the time.
How to Beat Kar'niss
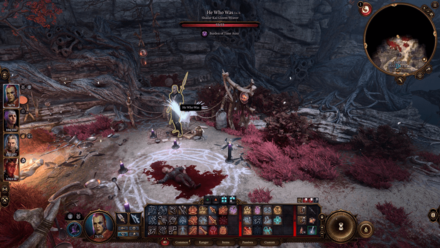
He Who Was
| He Who Was |
|---|
 |
| Coordinates: (126, 105) |
He Who Was is located far east of the Last Light Inn, in the location marked Camp in the Shadow-Cursed Lands in the map. He gives the Punish the Wicked side quest, which might allow you to receive the Raven Gloves at the end, if you succeed.
Help He Who Was: Punish the Wicked
Oliver
| Oliver |
|---|
 |
| Coordinates: (80, 36) |
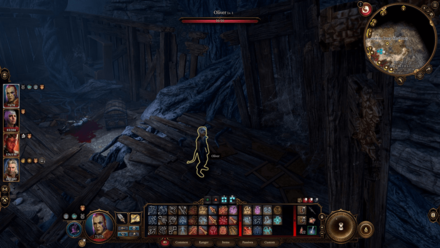
Oliver is a tiefling child you'll find in the location marked House in Deep Shadows in the map; this house is located very near the Shadowed Battlefield waypoint, to the east.
You'll be able to play Hide and Seek with him. If you beat him and his family in the games, you'll get the Ring of Shadows item from him.
This isn't his only point in the game, though; he also happens to be an important being to the Lift the Shadow Curse quest. At some point during that quest, you'll need to reunite Thaniel with his missing half; this happens to be Oliver.
Shadow-Cursed Shambling Mound
| Shadow-Cursed Shambling Mound |
|---|
 |
| Coordinates: (33, 58) |
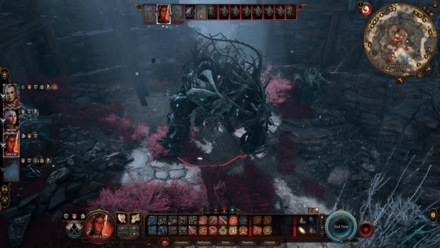
North of the Shadowed Battlefield Waypoint, you'll encounter the extremely powerful boss, the Shadow-Cursed Shambling Mound, and a few other shadow creatures.
It drops an Ironwood Club on defeat, a weak uncommon weapon that is barely worth it, so don't feel pressured of missing out on anything if you decided to skip fighting it.
Shadow Mastiff Alpha
| Shadow Mastiff Alpha |
|---|
 |
| Coordinates: (-51, 35) |
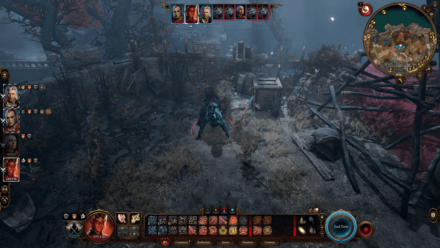
The Shadow Mastiff Alpha is a powerful boss enemy located west of the Shadowed Battlefield Waypoint. You won't encounter it immediately; you'll need to snuff out all the white torches in the area first to summon it and its allies.
You can loot the Shadow-Cloaked Ring from the alpha when you defeat it.
How to Get Shadow-Cloaked Ring
Last Light Inn Points of Interest
| Last Light Inn Points of Interest |
|---|
|
|
Last Light Inn Waypoint
| Last Light Inn Waypoint |
|---|
 |
| Coordinates: (-17, 134) |
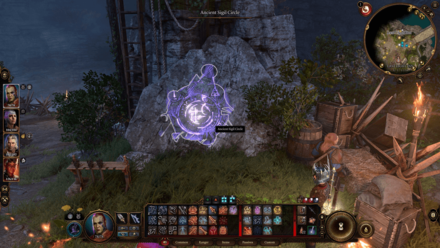
The Last Light Inn has a waypoint located at the east part of the area. You'll find it immediately upon entering the barrier to the inn.
Door to Cellar
| Door to Cellar |
|---|
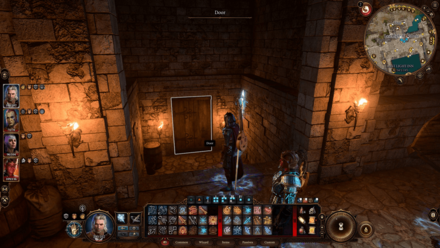 |
| Coordinates: (-54, 145) |
The Last Light Inn has a cellar area beneath it. You can find the entrance to it by finding the door in the lower floors of the inn.
Cursed House
| Cursed House |
|---|
 |
| Coordinates: (28, 157) |
Just outside the inn's barrier, exiting from the northern bridge, you'll find a house. The Shadow Curse here is much stronger than normal, and you won't be able to go in with just a torch. You'll need the Moon Lantern or the Pixie's Blessing to get inside.
Roots to Cellar
| Roots to Cellar |
|---|
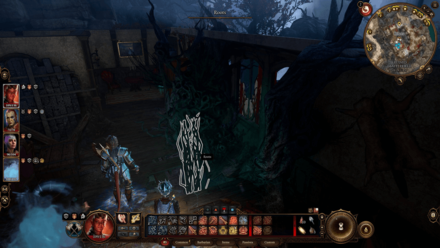 |
| Coordinates: (28, 157) |
Inside the Cursed House, you'll find some Roots that goes down to another area. This area is the Cellar area underneath the inn; this entrance allows you to bypass some obstacles that you'll encounter if you went through the inn entrance instead.
People of Interest
Jaheira
| Jaheira |
|---|
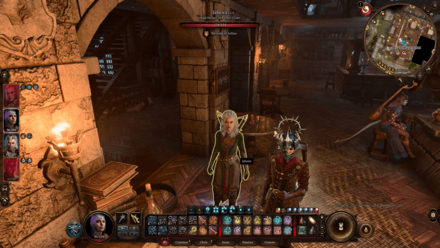 |
| Coordinates: (-64, 139) |
Jaheira acts as the leader of the residents of the Inn when you arrive there. She also happens to be a potential companion, so it is in your best interests to choose favorable choices and keep her alive if you want to recruit her eventually.
How to Recruit Jaheria
Isobel
| Isobel |
|---|
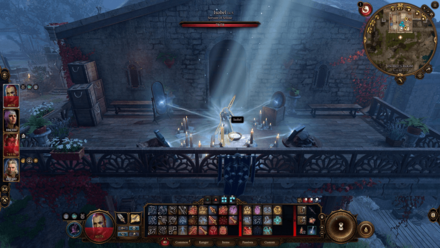 |
| Coordinates: (-63, 174) |
Isobel is the person maintaining the barrier in the inn, who you'll find upstairs in the location named Isobel's Room. Talk to Jaheira first, who'll then order you to talk to Isobel to get the divine protection.
After talking to Isobel, Fist Marcus will arrive in the inn and attempt to kidnap Isobel. You'll have to decide whether to fight him or allow Isobel to be kidnapped.
Choosing the latter will have you kill everyone else in the inn, including the traders and characters that might have ongoing questlines, such as Dammon. Jaheira will not be recruitable if you choose this decision. Make sure to finish everything else to do in the inn first before talking to Isobel if you choose this decision.
Isobel Quest Guide
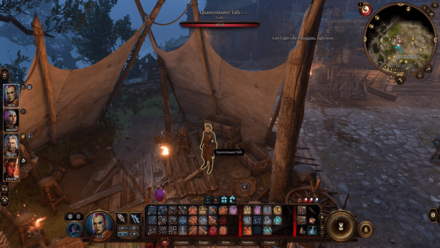
Quartermaster Talli
| Quartermaster Talli |
|---|
 |
| Coordinates: (-32, 131) |
Quartermaster Talli is a trader in the inn, located outside near the south bridge entrance. She'll have a couple of equipment with Very Rare rarity in stock.
Dammon
| Dammon |
|---|
 |
| Coordinates: (-28, 164) |
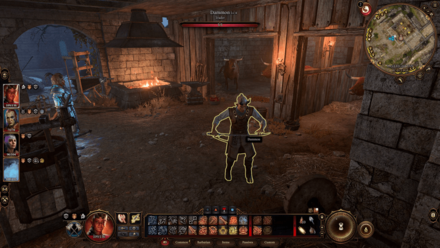
If you have kept Dammon alive in Act 1, you'll find him next here in the stables. He's an important person in Kar'lach's personal questline, and will install the second upgrade to Karlach's engine if you give him another Infernal Iron.
Just like in Act 1, he will also be available for trade, having some rare equipment in stock.
The Strange Ox that you might have encountered in the Emerald Grove in Act 1 will also be near him.
Karlach Companion Guide
Mattis
| Mattis |
|---|
 |
| Coordinates: (-55, 142) |
Mattis, the tiefling child that acts as a trader in the Emerald Grove in Act 1, will also be present here, inside the first floor of the inn. She'll have better items in stock.
You can also manage to get the Tower-Shaped Key from her by passing the checks to deceive or persuade her into giving it to you. You can buy it from her, but she'll have it priced outrageously at 2000 Gold. This key opens a locked door in Reithwin Town, located southwest of the Ruined Battlefield.
Art Cullagh
| Art Cullagh |
|---|
 |
| Coordinates: (-64, 167) |
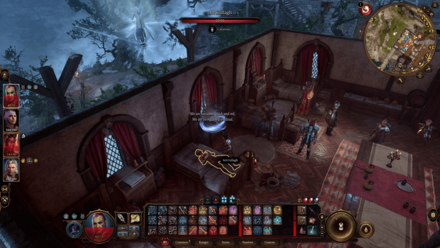
Art Cullagh is a comatose man you'll find in the infirmary area of the inn. You'll get the Wake Up Art Cullagh side quest upon talking to his caretaker, and waking him up is a necessary step in the Lift the Shadow Curse quest.
To wake him up, you'll need to play the Battered Lute when near him, which can be looted after defeating Malus Thorm in Reithwin Town.
Raphael and Mol
| Raphael and Mol |
|---|
 |
| Coordinates: (-62, 132) |
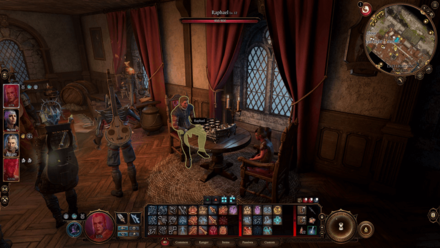
You'll find Mol, the leader of the tiefling kids from the Emerald Grove, in the inn. She's playing chess with the demon Raphael, who you'll have encountered in Act 1. You can choose to help her in the game if you want, earning an Inspiration Point for characters with the Sage background.
When you talk to Isobel, Mol will get kidnapped in the cutscene. You'll still encounter her and Raphael later on in the game.
Last Light Inn Cellar Points of Interest
| Last Light Inn Points of Interest |
|---|
|
|
Heavy Chest: Coruscation Ring
| Heavy Chest: Coruscation Ring |
|---|
 |
| Coordinates: (46, -735) |
In the eastern part of the cellar area, inside a Heavy Chest, you'll find the uncommon Coruscation Ring. This is a useful item to have in the Shadow-Cursed Lands, since it lights up any enemy that you hit with your attacks.
How to Get Coruscation Ring
Halfred's Note
| Halfred's Note |
|---|
 |
| Coordinates: (37, -695) |
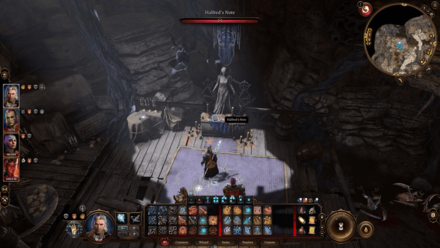
In the northeast part of the area, you'll encounter a bunch of Meenlock enemies. Defeat them to pass through and reach the Altar of Selûne.
Below the altar, you'll find Halfred's Note; reading this note either starts or progresses the Investigate the Selûnite Resistance side quest.
Investigate the Selûnite Resistance
Baldur's Gate 3 Related Guides
Faerûn All Locations
| Prologue Locations | |
|---|---|
| Nautiloid | |
| Act 1 Locations | |
| Wilderness | Chapel Ruins |
| Emerald Grove | Owlbear Nest |
| Blighted Village | Whispering Depths |
| Putrid Bog (Sunlit Wetlands) | Overgrown Tunnel |
| The Risen Road | Zhentarim Basement |
| Goblin Camp | Mountain Pass: Rosymorn Monastery |
| Creche Y'llek | Underdark |
| Arcane Tower | Grymforge |
| Act 2 Locations | |
| Shadow-Cursed Lands | Reithwin Town |
Comment
Author
Shadow-Cursed Lands: Ruined Battlefield and Last Light Inn Maps and Points of Interest
Rankings
Gaming News
Popular Games

Genshin Impact Walkthrough & Guides Wiki

Honkai: Star Rail Walkthrough & Guides Wiki

Arknights: Endfield Walkthrough & Guides Wiki

Umamusume: Pretty Derby Walkthrough & Guides Wiki

Wuthering Waves Walkthrough & Guides Wiki

Pokemon TCG Pocket (PTCGP) Strategies & Guides Wiki

Abyss Walkthrough & Guides Wiki

Zenless Zone Zero Walkthrough & Guides Wiki

Digimon Story: Time Stranger Walkthrough & Guides Wiki

Clair Obscur: Expedition 33 Walkthrough & Guides Wiki
Recommended Games

Fire Emblem Heroes (FEH) Walkthrough & Guides Wiki

Pokemon Brilliant Diamond and Shining Pearl (BDSP) Walkthrough & Guides Wiki

Diablo 4: Vessel of Hatred Walkthrough & Guides Wiki

Super Smash Bros. Ultimate Walkthrough & Guides Wiki

Yu-Gi-Oh! Master Duel Walkthrough & Guides Wiki

Elden Ring Shadow of the Erdtree Walkthrough & Guides Wiki

Monster Hunter World Walkthrough & Guides Wiki

The Legend of Zelda: Tears of the Kingdom Walkthrough & Guides Wiki

Persona 3 Reload Walkthrough & Guides Wiki

Cyberpunk 2077: Ultimate Edition Walkthrough & Guides Wiki
All rights reserved
© 2023 Larian Studios. All rights reserved. Larian Studios is a registered trademark of arrakis nv, affiliate of Larian Studios Games ltd. All company names, brand names, trademarks and logos are the property of their respective owners. © 2020 Wizards of the coast. All rights reserved. Wizards of the coast, Baldur’s Gate, Dungeons & Dragons, D&D, and their respective logos. Are registered trademarks of wizards of the coast LLC
The copyrights of videos of games used in our content and other intellectual property rights belong to the provider of the game.
The contents we provide on this site were created personally by members of the Game8 editorial department.
We refuse the right to reuse or repost content taken without our permission such as data or images to other sites.


