Creche Y'llek Maps and Points of Interest
★ All Updates for Patch 5
☆ Beginner Guides for All Starter Players
★ Simple Character Creation Guide for beginners
☆ A Full Guide to Multiclassing
★ All Side Quests and Event Points
☆ All Races and Subraces
In Baldur's Gate (BG3), Creche Y'llek is an underground area home to githyankis, and is one of the places that you can attempt to remove the tadpole in your head. Read on to view the maps of Creche Y'llek, and to find out all the locations and other points of interest in the area.
List of Contents
Creche Y'llek Maps
| Creche Y'llek Main Map | |
| Secret Chamber | Astral Plane |
Creche Y'llek Main Map
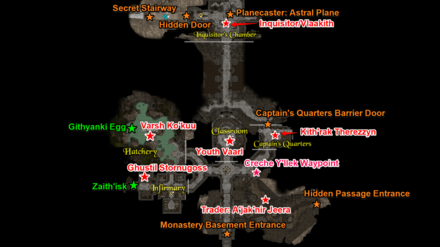
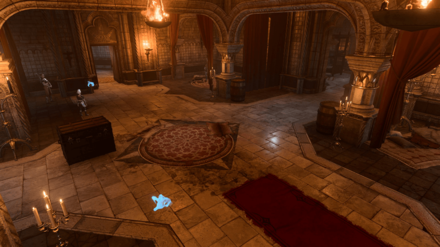
This map covers the whole main map of Creche Y'llek, excluding those in separate map areas. This area can be accessed either from the main entrance in the Rosymorn Monastery basement, or the secret entrance south of the monastery.
Secret Chamber Map
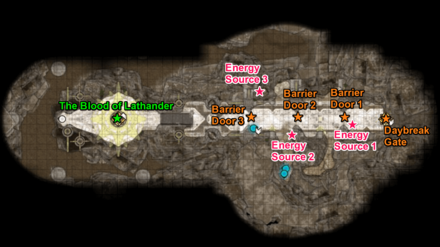
This map shows the Secret Chamber, accessible from the Inquisitor's Chamber. Here, you'll find the legendary weapon, The Blood of Lathander.
Astral Plane Map
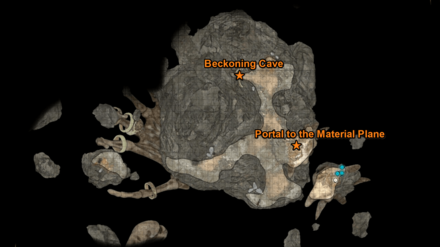
This map shows the Astral Plane, accessible from the Inquisitor's Chamber by agreeing to kill your dream visitor when confronted by Vlaakith.
Creche Y'llek Locations
| Infirmary | Hatchery |
| Classroom | Captain's Quarters |
| Inquisitor's Chamber | Secret Chamber |
| Astral Plane | |
Infirmary
| Infirmary |
|---|
 |
| Coordinates: (1320, -809) |
Located west of the creche, the Infirmary is the main area that you need to go to, to finish the Find the Githyanki Creche subquest of the Find the Cure quest.
In the back room where the Zaith'isk is, there are three Mind Flayer Parasite Specimens that you can loot located in different desks.
Where to Find the Githyanki Crèche
Hatchery
| Hatchery |
|---|
 |
| Coordinates: (1320, -781) |
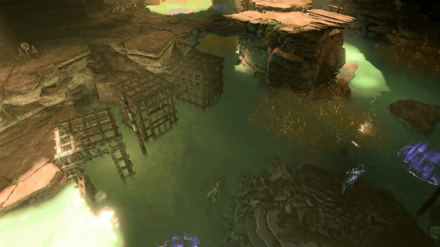
The Hatchery is the location of the Githyanki Egg, which is what you need for the Steal a Githyanki Egg quest. You can steal it, kill the githyanki there, or persuade the caretaker to give the egg to you.
Steal a Githyanki Egg Side Quest
Classroom
| Classroom |
|---|
 |
| Coordinates: (1358, -753) |
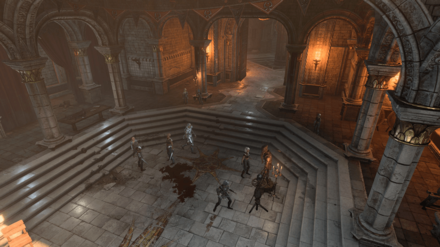
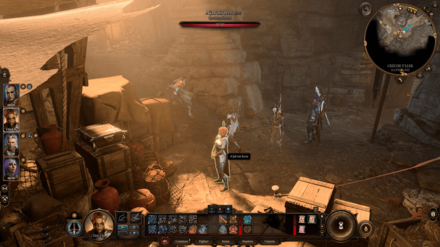
The Classroom is located in the middle of the creche, full of githyanki students. Upon entering, you'll get a cutscene where you can attempt to save or let die a githyanki youth being scolded by his instructor.
Captain's Quarters
| Captain's Quarters |
|---|
 |
| Coordinates: (1393, -775) |
Located east of the creche, the Captain's Quarters is where you'll find the captain of the githyanki, Kith'rak Therezzyn. There's a barrier here that you'll only be able to open by giving what Therezzyn wants, or stealing or looting the key from her.
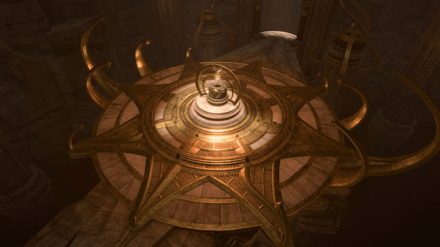
Inquisitor's Chamber
| Inquisitor's Chamber |
|---|
 |
| Coordinates: (1359, -685) |
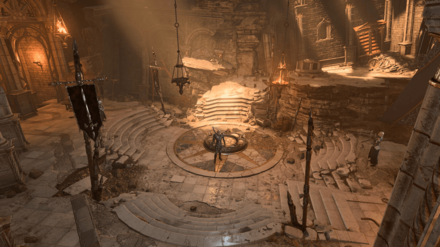
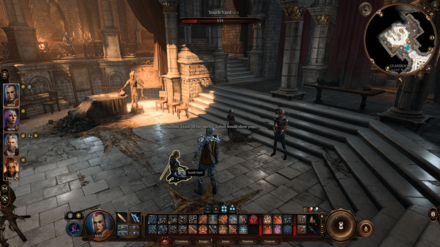
Deep inside the creche, behind the barrier in the Captain's Quarters, you'll find the Inquisitor's Chamber. Here, you'll find Ch'r'ai W'wargaz, the Githyanki Inquisitor, who'll then allow you to speak with Vlaakith, the Githyanki Queen.
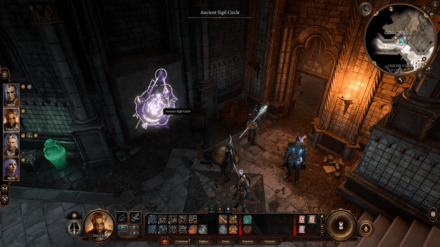
In this chamber, you'll find the entrance to the Secret Chamber, and you'll also be able to access the Astral Plane by picking the correct choices in the conversation with Vlaakith.
There are also a lot of chest and other containers in this chamber; you'll find a lot of uncommon and rare equipment and other valuables here. Make sure to check all the containers in this area!
Secret Chamber
| Secret Chamber |
|---|
 |
| Coordinates: (1324, -660) |
The Secret Chamber is a hidden room inside the Inquisitor's Chamber. You'll find the Blood of Lathander here.
How to Get the Blood of Lathander
Astral Plane
| Astral Plane |
|---|
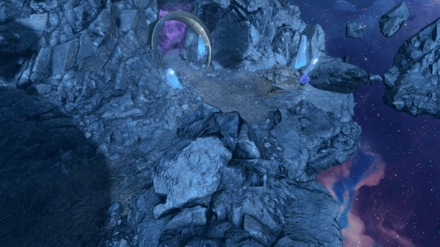 |
| Coordinates: (1777, 353) |
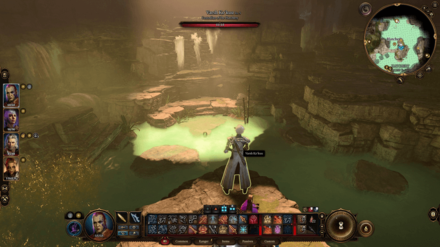
The Astral Plane is where you'll find your dream visitor; to reach this area, you need to agree to kill them when talking to Vlaakith.
Creche Y'llek Points of Interest
| Creche Y'llek Points of Interest |
|---|
|
|
Creche Y'llek Waypoint
| Creche Y'llek Waypoint |
|---|
 |
| Coordinates: (1380, -797) |
The Creche Y'llek Waypoint is located near the middle of the creche area, in the hallway between the Classroom and the Captain's Quarters.
Zaith'isk
| Zaith'isk |
|---|
 |
| Coordinates: (1279, -807) |
The Zaith'isk is the device that you (or Lae'zel) has to enter to finish the Find the Githyanki Creche subquest of the Find the Cure quest. It is located in the back room of the Infirmary.
To use the zaith'isk, yo need to talk to the healer nearby, Ghustil Stornugoss. Using the Zaith'isk will allow you to potentially get a permanent buff or debuff to your character (even if Lae'zel was the one you chose to go into the device), depending on if you pass or fail the checks.
Githyanki Egg
| Githyanki Egg |
|---|
 |
| Coordinates: (1276, -760) |
The Githyanki Egg is located in the acid pools of the Hatchery. You'll have to convince the caretaker, Varsh Ko'kuu, to give it to you, or else you'll have to fight and kill him.
The pools of acid might be dangerous, but the Varsh Ko'kuu's Boots will allow you to walk to the egg safely.
Steal a Githyanki Egg Side Quest
Entrances
Monastery Basement Entrance
| Monastery Basement Entrance |
|---|
 |
| Coordinates: (73, 87) |
This is the main entrance of the creche, located deep inside the Rosymorn Monastery basement. The way down towards this entrance is near the other side of the Rosymorn Monastery Doors.
Hidden Passage Entrance
| Hidden Passage Entrance |
|---|
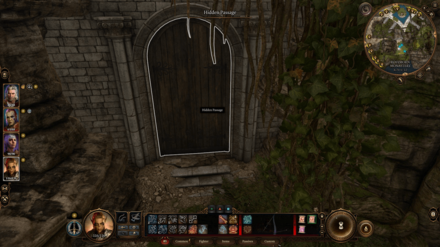 |
| Coordinates: (70, -12) |
This hidden passage is an alternate entrance to the creche, and is located south of the Rosymorn Monastery; look for cliffs and vines to descend into to reach this entrance. This entrance is locked and you'll have to lockpick it to enter.
Captain's Quarters Barrier Door
| Captain's Quarters Barrier Door |
|---|
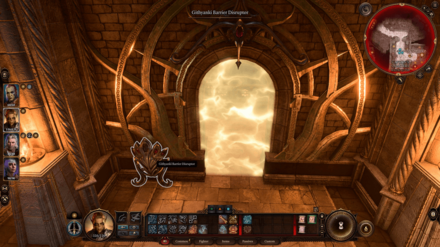 |
| Coordinates: (1392, -754) |
In the Captain's Quarters, there's a door with a magical barrier. To open it, you need to either talk to Captain Therezzyn in the same room, or take the Gith Shard from her.
In the conversation with Captain Therezzyn, you have to give the Mysterious Artefact that Shadowheart has; she'll open the door after the conversation. Alternatively, you can steal or loot the Gith Shard from her. Then, on the Githyanki Barrier Disruptor beside the door, put the Gith Shard on the slot to open it.
The passage behind this door leads to the Inquisitor's Chamber area.
Hidden Door: Secret Stairway
| Hidden Door: Secret Stairway |
|---|
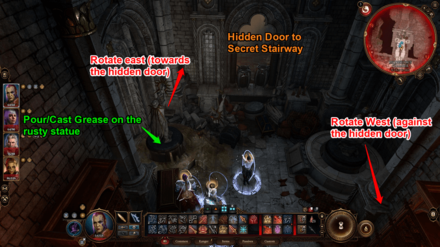 |
| Coordinates: (1329, -659) |
This secret stairway is located behind a hidden door in the west side of the Inquisitor's Chamber. This hidden door can be opened by moving the statues beside it.
While the right statue can be rotated with an Athletics check, the left statue can't because it's rusty. Loosen it by throwing a Grease Bottle on it, or other similar actions.
If you read the plaques, there's a hint on which direction the statues should be facing. The left, rusty statue should be facing west (towards the hidden door's wall), while the right statue should be facing east (against the wall).
People of Interest
Kith'rak Therezzyn
| Kith'rak Therezzyn |
|---|
 |
| Coordinates: (1408, -766) |
Captain is the captain of the githyanki of Creche Y'llek, located inside the Captain's Quarters. In the conversation with her, you can give her Shadowheart's Mysterious Artefact for her to open the barrier door in the room. Don't worry, the artefact will come back to you; this decision will earn the disapproval of some of your companions though.
You can also pickpocket or loot the Gith Shard from her, which opens the barrier door if you place the shard in the disruptor slot beside it.
Ch'rai W'wargaz, Inquisitor of Vlaakith
| Ch'rai W'wargaz |
|---|
 |
| Coordinates: (1359, -662) |
Chr'rai W'wargaz is the Inquisitor of Vlaakith, located deep in the creche inside the Inquisitor's Chambers.
Talking with him and providing the Mysterious Artefact will allow you to talk to Vlaakith herself.
Choosing the correct dialogue choices with Vlaakith will transport you to the Astral Plane area.
A'jak'nir Jeera
| A'jak'nir Jeera |
|---|
 |
| Coordinates: (1393, -822) |
A'jak'nir Jeera is the quartermistress of the creche, located in the southeastern room. She is available for trading until she turns hostile against you. She has some items with the Very Rare rarity for sale, some of which she might drop if you defeat her.
Varsh Ko'kuu
| Varsh Ko'kuu |
|---|
 |
| Coordinates: (1288, -760) |
Varsh Ko'kuu is the caretaker of the Githyanki Egg, and is located in the Hatchery. You can convince him to allow you to take the egg by passing checks; he'll give you the Varsh Ko'kuu's Boots after the conversation, which gives you resistance to Acid damage. You can also loot this equipment from him if you defeat him.
How to Get Varsh Ko'kuu's Boots
Youth Varrl
| Youth Varrl |
|---|
 |
| Coordinates: (1357, -771) |
Upon entering the Classroom area, you'll find Youth Varrl about to be killed. He has the Orpheus, Prince of the Comet, Part Two: Sacrifice slate in his possession, which you can read to progress the Discover the History of Prince Orpheus quest.
To get the slate, you can either kill him or let him die; you can also rescue him then convince him by passing checks to give the slate to you. Looting him when he dies won't anger the githyanki nearby.
Secret Chamber Points of Interest
| Secret Chamber Points of Interest |
|---|
|
|
The Blood of Lathander
| The Blood of Lathander |
|---|
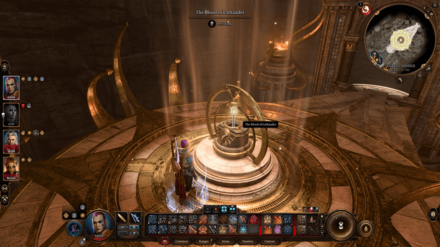 |
| Coordinates: (1067, -782) |
The Blood of Lathander is the legendary weapon hidden inside the Secret Chamber. You need to get through three Barrier Doors before you can reach this.
It's recommended to have found the Dawnmaster's Crest first back in the Rosymorn Monastery, which you'll have to put in the Crest Panel below the weapon. If you take the weapon without slotting in the crest, you'll have four turns to escape the creche before you die.
How to Get the Blood of Lathander
Barrier Doors
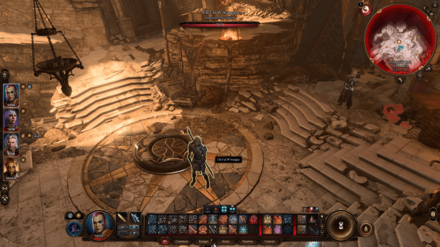
Barrier Door 1
| Barrier Door 1 |
|---|
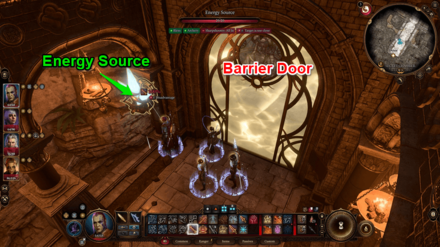 |
| Coordinates: (1134, -783) |
All barrier doors in the Secret Chamber can be disabled by destroying their respective Energy Sources. For the first barrier door, it can be disabled by shooting the Energy Source located just right beside it.
Barrier Door 2
| Barrier Door 2 |
|---|
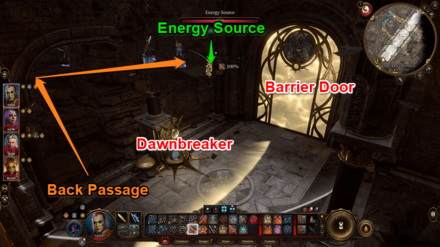 |
| Coordinates: (1128, -781) |
The second barrier door can be disabled by going to the passage beside the Dawnbreaker trap. The energy source is just beside and behind the door.
Note that there's actually no need to disable this door; you can already access the next area just by going around the door.
Make sure not to go in front of the Dawnbreaker trap without disarming it, as it'll likely push you or your party members to their death.
Barrier Door 3
| Barrier Door 3 |
|---|
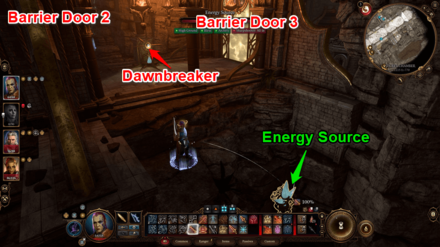 |
| Coordinates: (1115, -770) |
The third barrier door can be disabled by shooting the Energy Source deep down in the crevice beside the door.
Make sure not to go in front of the Dawnbreaker trap without disarming it, as it'll likely push you or your party members to their death.
Astral Plane Points of Interest
Beckoning Cave
| Beckoning Cave |
|---|
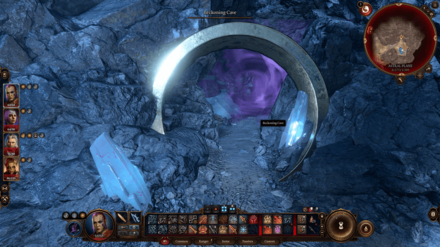 |
| Coordinates: (1771, 349) |
The only point of interest in the Astral Plane is the Beckoning Cave. Upon being summoned into the Astral Plane, you'll find this cave just to your right. Here, you'll find your dream visitor and will have to decide if you kill them or not.
Don't rush into going here though; there are a lot of lootables around the Astral Plane area.
Baldur's Gate 3 Related Guides
Faerûn All Locations
| Prologue Locations | |
|---|---|
| Nautiloid | |
| Act 1 Locations | |
| Wilderness | Chapel Ruins |
| Emerald Grove | Owlbear Nest |
| Blighted Village | Whispering Depths |
| Putrid Bog (Sunlit Wetlands) | Overgrown Tunnel |
| The Risen Road | Zhentarim Basement |
| Goblin Camp | Mountain Pass: Rosymorn Monastery |
| Creche Y'llek | Underdark |
| Arcane Tower | Grymforge |
| Act 2 Locations | |
| Shadow-Cursed Lands | Reithwin Town |
Comment
Author
Creche Y'llek Maps and Points of Interest
Rankings
- We could not find the message board you were looking for.
Gaming News


Popular Games

Genshin Impact Walkthrough & Guides Wiki
Honkai: Star Rail Walkthrough & Guides Wiki
Arknights: Endfield Walkthrough & Guides Wiki
Umamusume: Pretty Derby Walkthrough & Guides Wiki
Wuthering Waves Walkthrough & Guides Wiki
Pokemon TCG Pocket (PTCGP) Strategies & Guides Wiki
Abyss Walkthrough & Guides Wiki
Zenless Zone Zero Walkthrough & Guides Wiki
Digimon Story: Time Stranger Walkthrough & Guides Wiki
Clair Obscur: Expedition 33 Walkthrough & Guides Wiki


Recommended Games
Fire Emblem Heroes (FEH) Walkthrough & Guides Wiki
Pokemon Brilliant Diamond and Shining Pearl (BDSP) Walkthrough & Guides Wiki
Diablo 4: Vessel of Hatred Walkthrough & Guides Wiki
Super Smash Bros. Ultimate Walkthrough & Guides Wiki
Yu-Gi-Oh! Master Duel Walkthrough & Guides Wiki
Elden Ring Shadow of the Erdtree Walkthrough & Guides Wiki
Monster Hunter World Walkthrough & Guides Wiki
The Legend of Zelda: Tears of the Kingdom Walkthrough & Guides Wiki
Persona 3 Reload Walkthrough & Guides Wiki
Cyberpunk 2077: Ultimate Edition Walkthrough & Guides Wiki


All rights reserved
© 2023 Larian Studios. All rights reserved. Larian Studios is a registered trademark of arrakis nv, affiliate of Larian Studios Games ltd. All company names, brand names, trademarks and logos are the property of their respective owners. © 2020 Wizards of the coast. All rights reserved. Wizards of the coast, Baldur’s Gate, Dungeons & Dragons, D&D, and their respective logos. Are registered trademarks of wizards of the coast LLC
The copyrights of videos of games used in our content and other intellectual property rights belong to the provider of the game.
The contents we provide on this site were created personally by members of the Game8 editorial department.
We refuse the right to reuse or repost content taken without our permission such as data or images to other sites.