Mountain Pass: Rosymorn Monastery Maps and Points of Interest
★ All Updates for Patch 5
☆ Beginner Guides for All Starter Players
★ Simple Character Creation Guide for beginners
☆ A Full Guide to Multiclassing
★ All Side Quests and Event Points
☆ All Races and Subraces

The Mountain Pass consists of the Rosymorn Monastery and Rosymorn Monastery Trail, and contains the Githyanki Creche as well as the passage to the Moonrise Towers. Read on to view the maps of the Rosymorn Monastery and the Trail, and to find out all the locations and other points of interest in the Mountain Pass region.
List of Contents
Mountain Pass Maps
| Mountain Pass | Rosymorn Monastery Trail |
| Rosymorn Monastery | |
The Mountain Pass is divided into the Rosymorn Monastery Trail and the Rosymorn Monastery itself. There is also a tiny part of the Mountain Pass in a separate region, located beside Waukeen's Rest in the Risen Road.
Mountain Pass Map
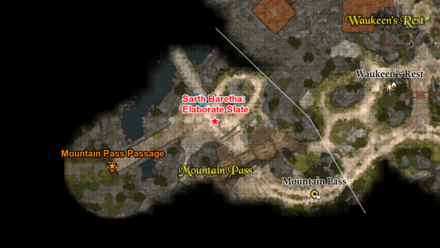
A small part of the Mountain Pass can be found in the same region map as the Wilderness area, west of Waukeen's Rest. Here, you'll find the githyanki soldiers blocking the way to the Mountain Pass region.
Rosymorn Monastery Trail
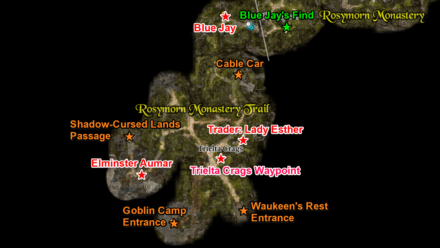
Upon entering the region from either the Goblin Camp or near Waukeen's Rest, you'll end up in the Rosymorn Monastery Trail.
This area contains the entrance to the Shadow-Cursed Lands, which if entered, will begin the Act 2 of the game.
Rosymorn Monastery
The Rosymorn Monastery is located northeast of the trail, and contains the entrance to Crèche Y'llek, the githyanki creche that Lae'zel wants to go to as part of the Find a Cure quest.
This place is a ruins, and you'll have to locate alternate entrances, jump across gaps, and destroy barriers to navigate this place.
Where to Find the Githyanki Crèche
Mountain Pass Points of Interest
Sarth Baretha: Elaborate Slate
| Sarth Baretha: Elaborate Slate |
|---|
 |
| Coordinates: (-140, 559) |
The only point of interest in the tiny part of the Mountain Pass is the squad of githyanki soldiers blocking the way, led by Kith'rak Voss. To get the item of interest from them, the Elaborate Slate, you'll have to fight them. Act hostile in the conversation with Voss, or just instantly attack without talking.
Don't worry about Voss and his dragon, since they will flee the scene if you choose to attack. The squad left will be led by Sarth Baretha instead.
You can loot Sarth Baretha for the Elaborate Slate, which turns into the Githyanki Map if you have Lae'zel in your party. This progresses Lae'zel's quest and reveals the creche's location in the Mountain Pass.
Rosymorn Monastery Trail Points of Interest
| Rosymorn Monastery Trail Points of Interest |
|---|
|
|
Trielta Crags Waypoint
| Trielta Crags Waypoint |
|---|
 |
| Coordinates: (-63, -146) |
The Trielta Crags Waypoint is the waypoint for the Rosymorn Monastery Trail area, located not far from the entrance to the area.
Shadow-Cursed Lands Passage
| Shadow-Cursed Lands Passage |
|---|
 |
| Coordinates: (-142, -128) |
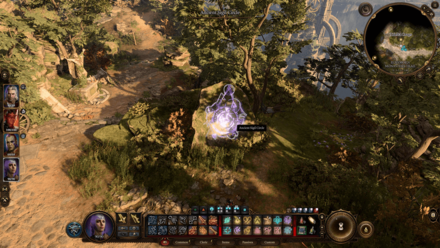
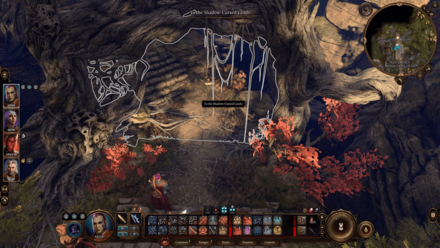
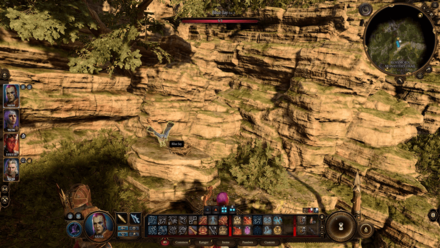
West of the Rosymorn Monastery Trail, you'll find the passage to the Shadow-Cursed Lands.
Note that entering the passage will start the game's Act 2, which is to infiltrate the Moonrise Towers. Make sure to finish your quests in Act 1 first, since a lot of them will fail if not finished upon entering this passage!
How to Get to the Shadow-Cursed Lands
Cable Car
| Cable Car |
|---|
 |
| Coordinates: (-43, -81) |
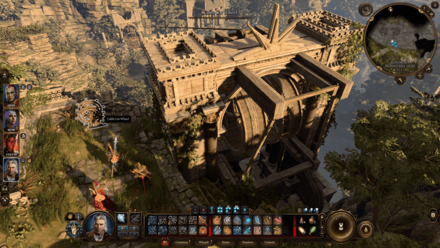
The Cable Car serves as a quick way to travel between the Trail and the Monastery area. You'll need a pass a Strength Check when you first use the mechanism.
Beings of Interest
Lady Esther
| Lady Esther |
|---|
 |
| Coordinates: (-43, -129) |
Lady Esther is a trader, and is also the giver of the Steal a Githyanki Egg quest. Once you give her the Githyanki Egg, which you'll find inside the creche in the Rosymorn Monastery, she'll no longer be available for trading.
You can pass a Persuasion check to get your reward immediately, not have to deal with stealing the egg, and have her available for trading.
Steal a Githyanki Egg Side Quest
Elminster Aumar
| Elminster Aumar |
|---|
 |
| Coordinates: (-133, -164) |
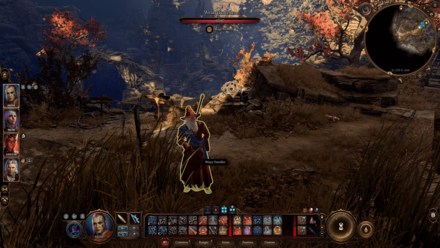
Before you reach the passage to the Shadow-Cursed Lands, you'll encounter Elminster Aumar by the trail, appearing as the Weary Traveller if he hasn't introduced himself yet. He is an important person in Gale's companion quest.
Blue Jay
| Blue Jay |
|---|
 |
| Coordinates: (-57,-19) |
At the north part of the Trail area, you'll find a Blue Jay in its nest. If you have a character that can Speak With Animals, you can talk to the bird and be given a task to drive off some eagles, which are located at the top of the Rosymorn Monastery.
Upon driving off the eagles, the Blue Jay will point out the location of a treasure, which will be marked in your map as the Blue Jay's Find.
Rosymorn Monastery Points of Interest
| Rosymorn Monastery Points of Interest |
|---|
|
|
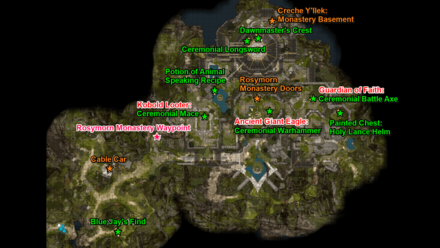
Rosymorn Monastery Waypoint
| Rosymorn Monastery Waypoint |
|---|
 |
| Coordinates: (18, 22) |
The Rosymorn Monastery Waypoint is located west of the monastery, near the cable car.
Entrances
Creche Y'llek: Monastery Basement
| Creche Y'llek: Monastery Basement |
|---|
 |
| Coordinates: (73, 86) |
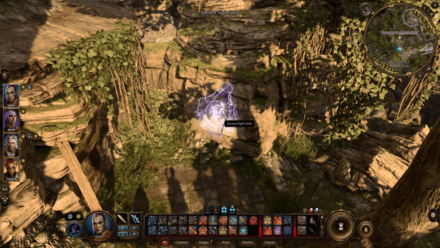
The entrance to the Creche Y'llek is located deep under the Monastery; you'll find it as the Monastery Basement. Explore the monastery and look for areas to descend into; you'll find this door at the lowest level of the monastery, northeast of the map.
Where to Find the Githyanki Crèche
Rosymorn Monastery Doors
| Rosymorn Monastery Doors |
|---|
 |
| Coordinates: (74, 46) |
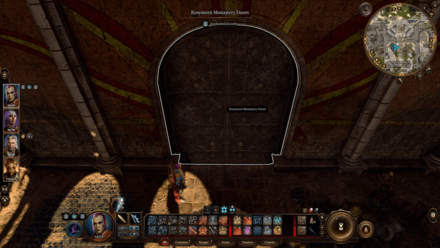
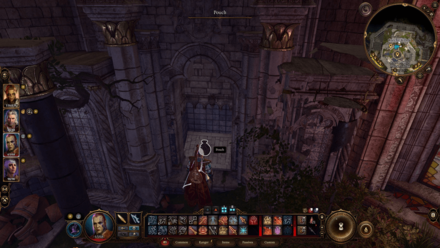
You'll encounter the Rosymorn Monastery Doors upon entering the monastery, near where the cutscene with the githyanki occurs. You can't lockpick this locked door; you'll have to go around and look for another path.
To open the door, go to the other side and activate the lever beside the door.
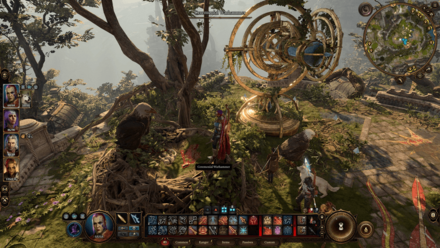
Stained Glass Puzzle: Ceremonial Weapons
| Stained Glass Puzzle |
|---|
 |
| Coordinates: (75, 74) |
In the middle of the monastery, you'll find a room with a Stained Glass Window on the floor. This is a puzzle, where you need to collect four different types of weapons and put them in the correct pedestals (you'll know if the crystals on the pedestal glow).
Examine the stained glass window to find out which weapon goes into which pedestal, then examine the plaques in the pedestals to find out which is which.
Note that while it seems like you need to collect the Ceremonial Weapons throughout the monastery, you don't actually need to, and can actually use any non-ceremonial weapons instead! For example, instead of finding the Ceremonial Mace, you can just get a regular Rusty Mace and put it in the correct pedestal; it will still work!
We'll still list the Ceremonial Weapons here, though, in case you want to find the weapons needed, or if you want these weapons for yourself.
Dawnmaster's Crest
| Dawnmaster's Crest |
|---|
 |
| Coordinates: (75, 83) |
The Dawnmaster's Crest is the reward for completing the puzzle; it will appear in the stained glass room after you put the correct weapons in each pedestal. You'll need this item for the Find the Blood of Lathander side quest.
How to Get the Blood of Lathander
Ceremonial Longsword
| Ceremonial Longsword |
|---|
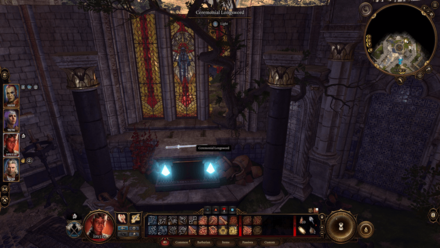 |
| Coordinates: (71, 77) |
The Ceremonial Longsword is in the stained glass room; you'll find it already placed on its correct pedestal since the crystals are already glowing. There's no need to take it or move it somewhere else.
How to Get Ceremonial Longsword
Kobold Looter: Ceremonial Mace
| Kobold Looter: Ceremonial Mace |
|---|
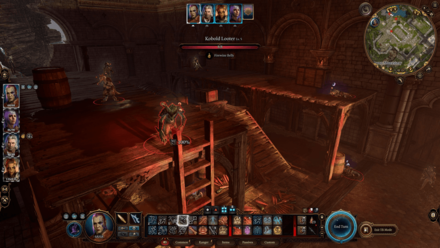 |
| Coordinates: (40, 29) |
The Ceremonial Mace is held by a Kobold Looter in the room full of drunk kobolds in the monastery. This kobold has green skin and is by the western part of the room, beside a ladder.
How to Get Ceremonial Mace
Guardian of Faith: Ceremonial Battleaxe
| Guardian of Faith: Ceremonial Battleaxe |
|---|
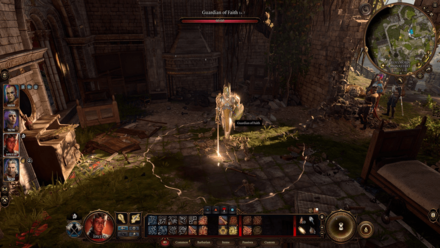 |
| Coordinates: (103, 46) |
The Ceremonial Battleaxe is just beside the Guardian of Faith, an immobile enemy that will become hostile when you walk inside the circle around it, or touch the Battleaxe.
How to Get Ceremonial Battleaxe
Ancient Giant Eagle: Ceremonial Warhammer
| Ancient Giant Eagle: Ceremonial Warhammer |
|---|
 |
| Coordinates: (78, 41) |
The Ceremonial Warhammer is inside the nest of the Ancient Giant Eagle, located at the top of the monastery. The eagles will attack you if they see you taking the weapon, even if you have calmed the Ancient Giant Eagle by speaking to it and passing the persuasion check.
This eagle is also the one that the Blue Jay in the Rosymorn Monastery Trail is referring to. If you defeat the eagles, the Blue Jay will appear and will tell you the location of the treasure it knows of, the Blue Jay's Find.
Valuables
Painted Chest: Holy Lance Helm
| Painted Chest: Holy Lance Helm |
|---|
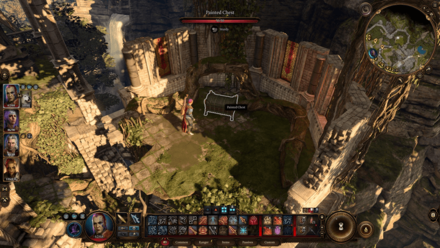 |
| Coordinates: (119, 35) |
The uncommon Holy Lance Helm equipment can be found inside a Painted Chest, located at the eastmost side of the monastery and can be reached by jumping across the monastery rooftops.
Potion of Animal Speaking Recipe
| Potion of Animal Speaking Recipe |
|---|
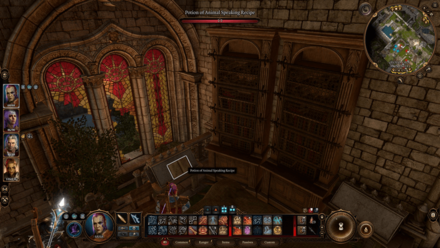 |
| Coordinates: (52, 50) |
The Potion of Animal Speaking Recipe can be found in a room around the west of the monastery, near the waypoint. This recipe allows you to craft the Potion of Animal Speaking in your Alchemy tab.
Potion of Animal Speaking Item Guide
Blue Jay's Find
| Blue Jay's Find |
|---|
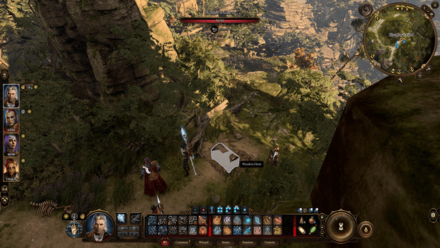 |
| Coordinates: (-6, -28) |
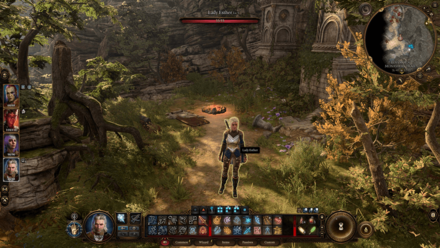
The Blue Jay's Find will be marked in the map after you fulfilled the Blue Jay's quest to defeat the eagles at the top of the Monastery. When you go there, you'll find a mound with a chest inside. Theres a tiny amount of gold and a few valuables in the chest.
Note that you don't need to fulfill the quest to get this treasure; you can simply go to the location, southwest of the monastery, and dig it up with a Shovel.
Baldur's Gate 3 Related Guides
Faerûn All Locations
| Prologue Locations | |
|---|---|
| Nautiloid | |
| Act 1 Locations | |
| Wilderness | Chapel Ruins |
| Emerald Grove | Owlbear Nest |
| Blighted Village | Whispering Depths |
| Putrid Bog (Sunlit Wetlands) | Overgrown Tunnel |
| The Risen Road | Zhentarim Basement |
| Goblin Camp | Mountain Pass: Rosymorn Monastery |
| Creche Y'llek | Underdark |
| Arcane Tower | Grymforge |
| Act 2 Locations | |
| Shadow-Cursed Lands | Reithwin Town |
Comment
Author

Mountain Pass: Rosymorn Monastery Maps and Points of Interest
Rankings
Gaming News


Popular Games

Genshin Impact Walkthrough & Guides Wiki
Honkai: Star Rail Walkthrough & Guides Wiki
Arknights: Endfield Walkthrough & Guides Wiki
Umamusume: Pretty Derby Walkthrough & Guides Wiki
Wuthering Waves Walkthrough & Guides Wiki
Pokemon TCG Pocket (PTCGP) Strategies & Guides Wiki
Abyss Walkthrough & Guides Wiki
Zenless Zone Zero Walkthrough & Guides Wiki
Digimon Story: Time Stranger Walkthrough & Guides Wiki
Clair Obscur: Expedition 33 Walkthrough & Guides Wiki


Recommended Games
Fire Emblem Heroes (FEH) Walkthrough & Guides Wiki
Pokemon Brilliant Diamond and Shining Pearl (BDSP) Walkthrough & Guides Wiki
Diablo 4: Vessel of Hatred Walkthrough & Guides Wiki
Super Smash Bros. Ultimate Walkthrough & Guides Wiki
Yu-Gi-Oh! Master Duel Walkthrough & Guides Wiki
Elden Ring Shadow of the Erdtree Walkthrough & Guides Wiki
Monster Hunter World Walkthrough & Guides Wiki
The Legend of Zelda: Tears of the Kingdom Walkthrough & Guides Wiki
Persona 3 Reload Walkthrough & Guides Wiki
Cyberpunk 2077: Ultimate Edition Walkthrough & Guides Wiki


All rights reserved
© 2023 Larian Studios. All rights reserved. Larian Studios is a registered trademark of arrakis nv, affiliate of Larian Studios Games ltd. All company names, brand names, trademarks and logos are the property of their respective owners. © 2020 Wizards of the coast. All rights reserved. Wizards of the coast, Baldur’s Gate, Dungeons & Dragons, D&D, and their respective logos. Are registered trademarks of wizards of the coast LLC
The copyrights of videos of games used in our content and other intellectual property rights belong to the provider of the game.
The contents we provide on this site were created personally by members of the Game8 editorial department.
We refuse the right to reuse or repost content taken without our permission such as data or images to other sites.