Rescue the Grand Duke Walkthrough
★ All Updates for Patch 5
☆ Beginner Guides for All Starter Players
★ Simple Character Creation Guide for beginners
☆ A Full Guide to Multiclassing
★ All Side Quests and Event Points
☆ All Races and Subraces
Rescue the Grand Duke is a side quest in Baldur's Gate 3 (BG), spanning across all three Acts. Read on for quest details, how to start and complete the quest, and where to find the duke!
List of Contents
Rescue the Grand Duke Quest Details
| Journal Entry | |
|---|---|
| Rescue the Grand Duke | |
| Rewards | The Sparky Points / The Joltshooter / The Spellsparkler The Legend of Ansur (Book) |
| Recommended Level | Level 4 and up |
| Location | |
| Wakueen's Rest, The Risen Road | |
How to Find Rescue the Grand Duke Quest
Go to Waukeen's Rest and Help the Flaming Fists
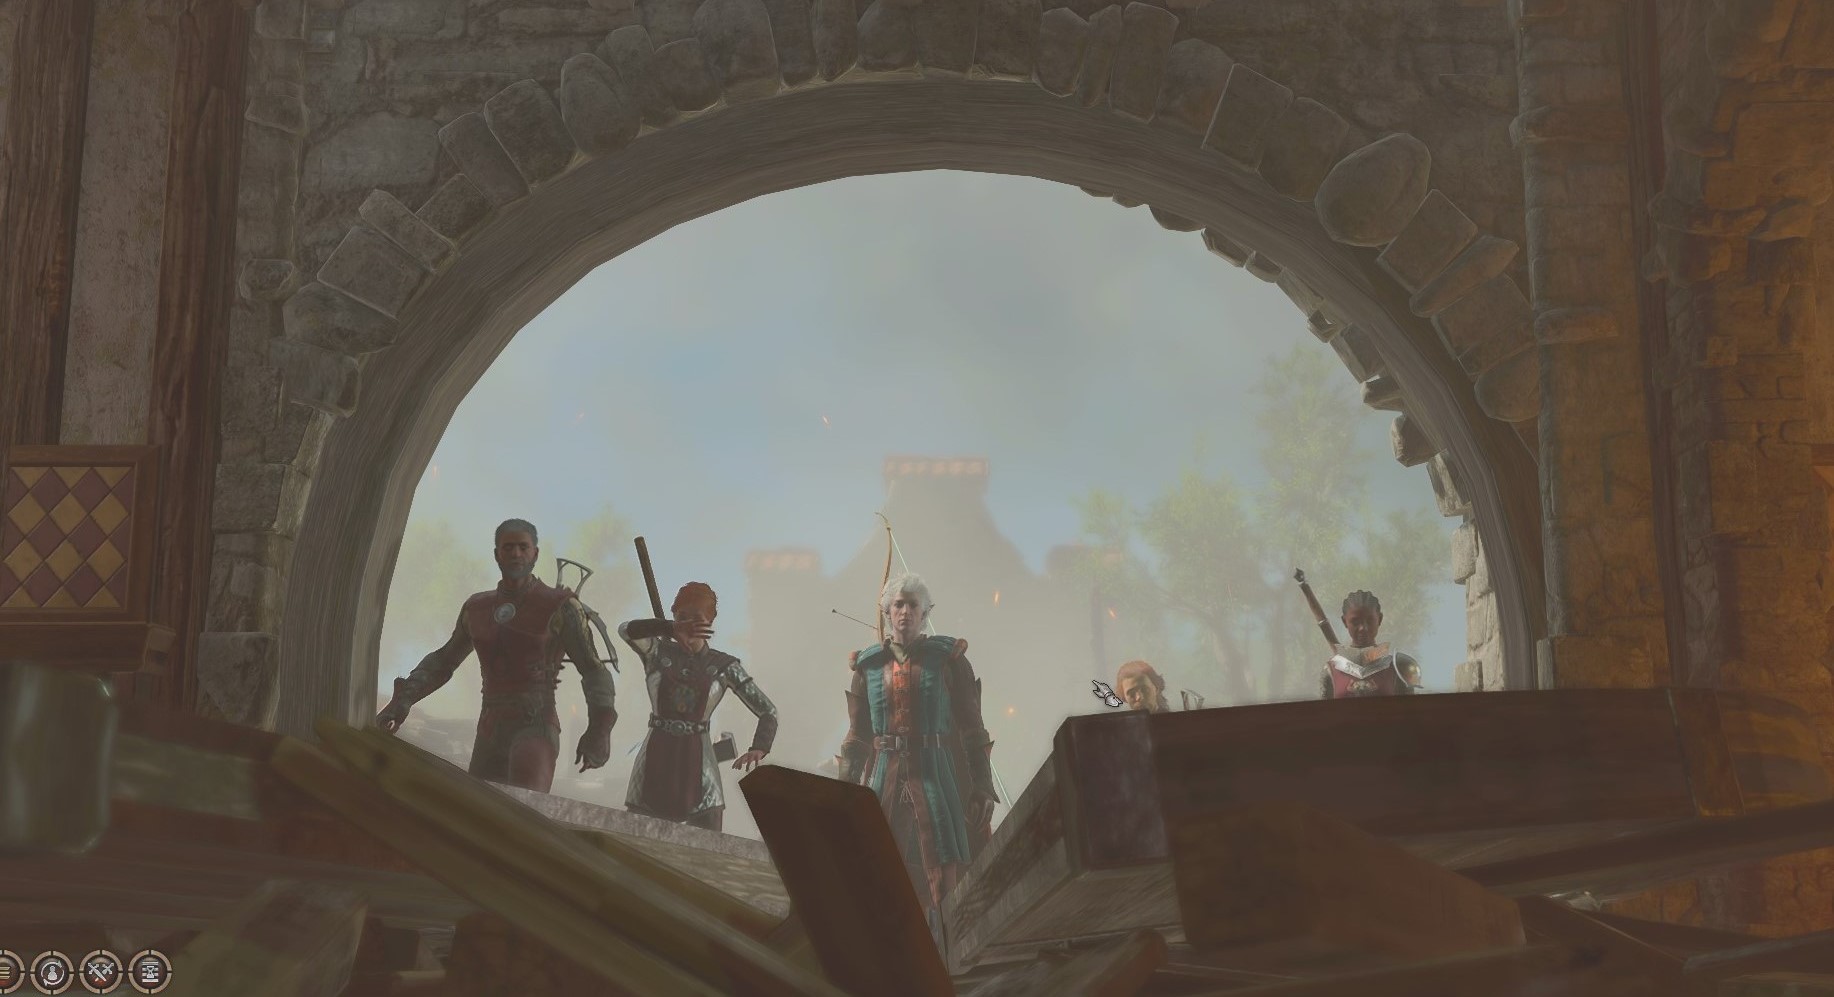
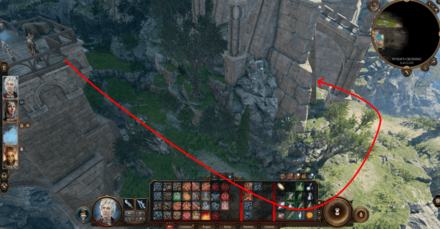
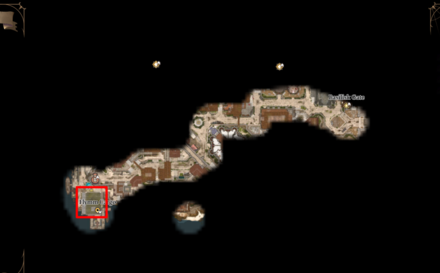
You can find this quest in Waukeen's Rest, northern part of the map. You can get there quickly by going northwest from Druid's Grove. You should see several flaming fist recruits and a burning villa when you get there.
How to Complete Rescue the Grand Duke Quest
| Rescue the Grand Duke Objectives | |
|---|---|
| 1 | |
| 2 | |
| 3 | |
| 4 | |
| 5 | |
| 6 | |
| 7 | |
| 8 | |
| 9 | |
| 10 | |
| 11 | |
| 12 | |
| 13 | |
| 14 | |
| 15 | |
| 16 | |
| 17 | |
| 18 | |
| 19 | |
| 20 | |
| 21 | |
| 22 | |
| 23 | |
| 24 |
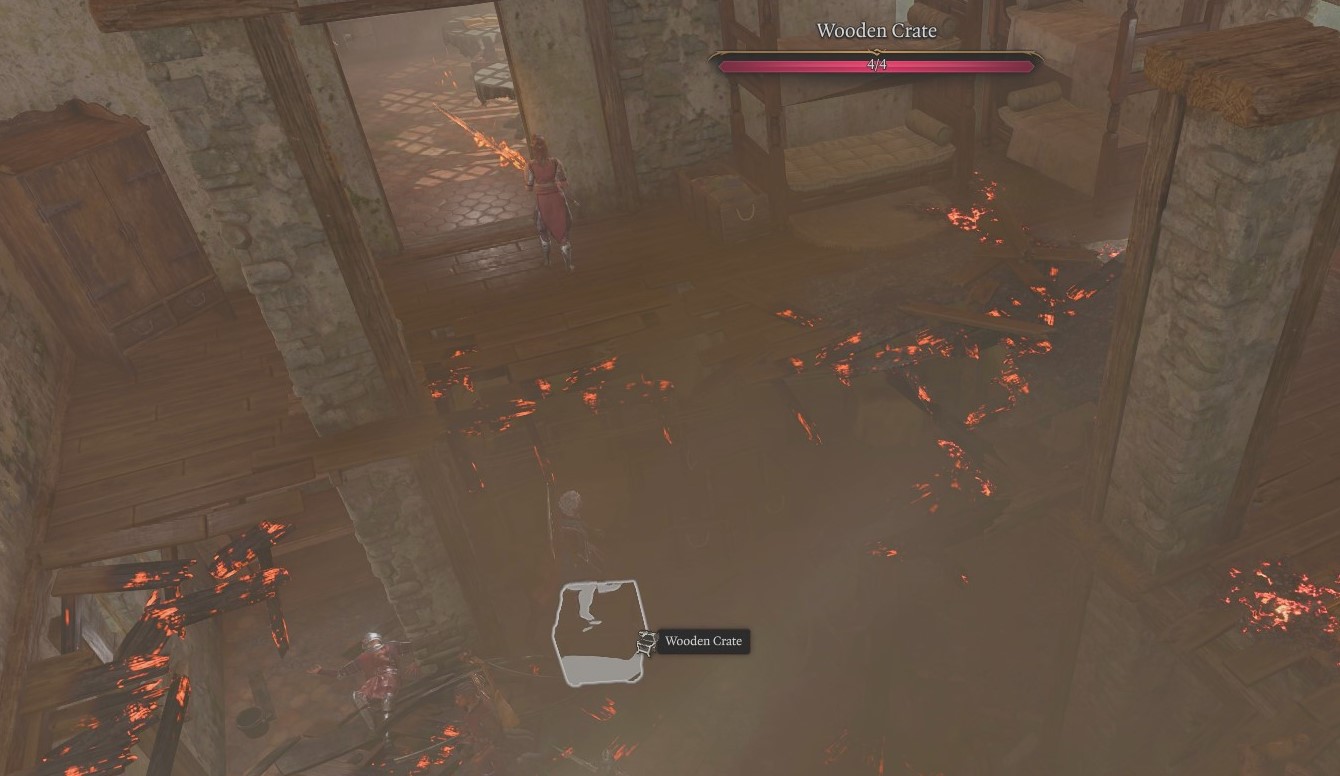
Help the Flaming Fist Recruits Open the Door
When you get to Waukeen's Rest, head inside the villa and help the flaming fist recruits open the door. You can do it by doing a Strength check (DC10) or ask Wyll to do it.
If you fail the Strength check, you won't be able to ask Wyll to do it or help with the push in anyway. However, you can still destroy the door by manually attacking it. Just be careful not to hit the units trying to open the door, or they'll become hostile.
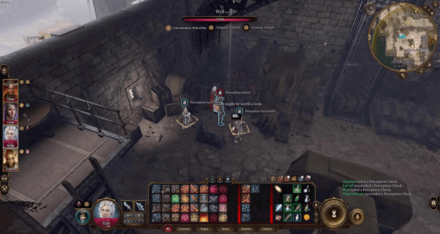
Rescue Counsellor Florrick
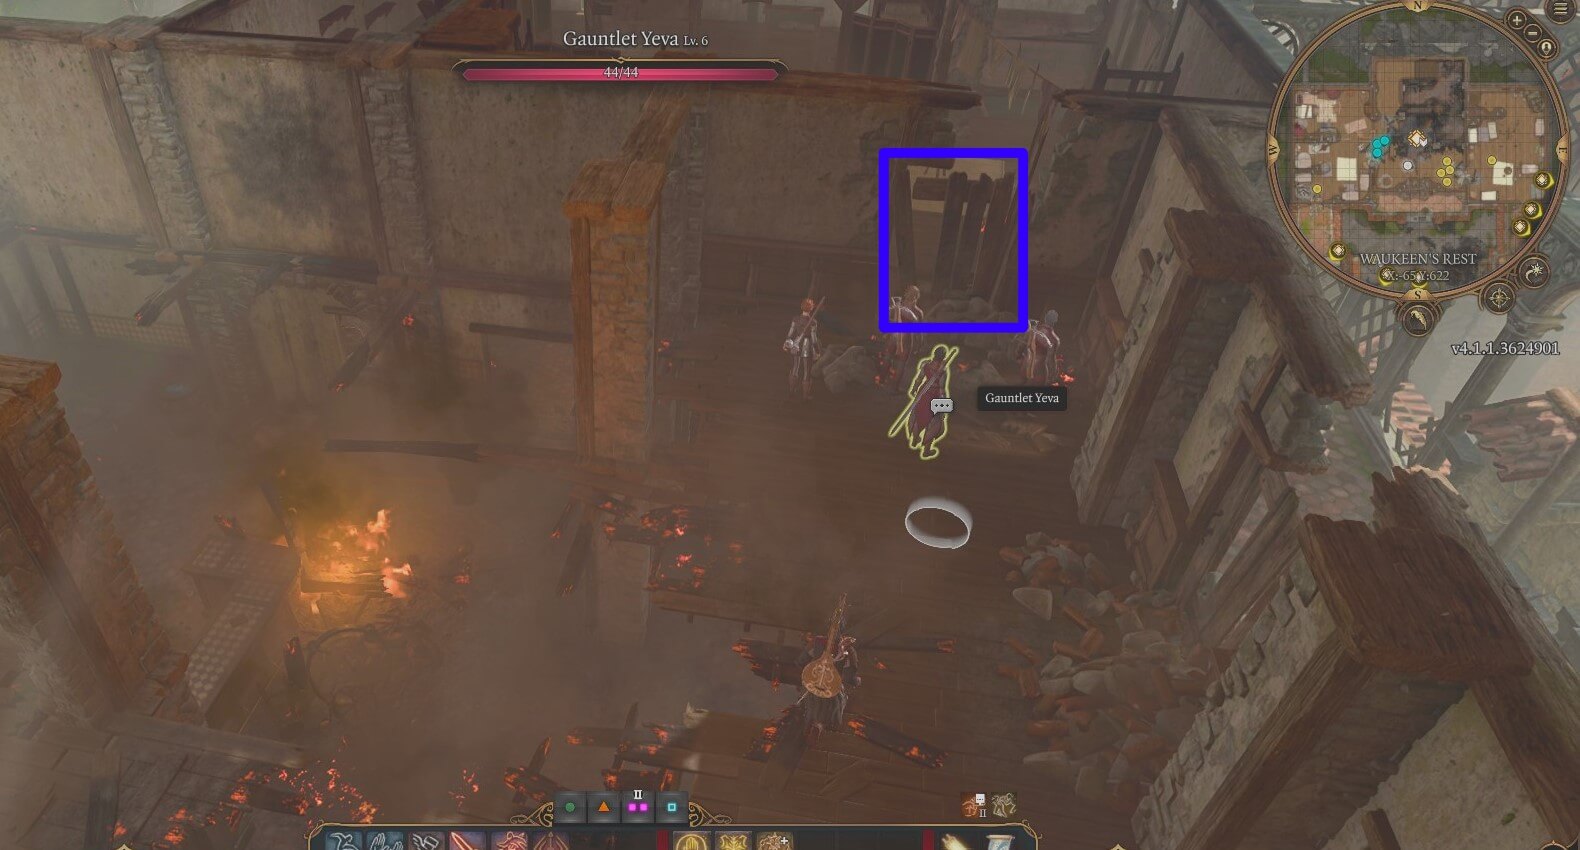
Go to the second floor and destroy the broken door to Counsellor Florrick's room. You should be able to see the room, as the flaming fist recruits from earlier are facing it. Do not open or destroy other doors on the second floor, as it will cause an explosion, damaging your party and killing the trapped man inside.
You can ignore the man on the other room for now, as it is unrelated to this quest. It will be a separate quest named Rescue the Trapped Man.
(Alternative) Use the Other House on the Right to Get Inside
You can use the house on the right to get inside as an alternative method. Destroy the barrel blocking the way first, so your team can get in.
Jump from the first floor to the second floor once inside to get to the counsellor's room. If your party members can't reach it, drag the boxes and use them as a stepping platform to reach the second floor.
Go to Consellor Florrick's door and do a Strength check (DC10) to destroy it. If you fail, strike it manually, and it will eventually break down.
Speak with Counsellor Florrick
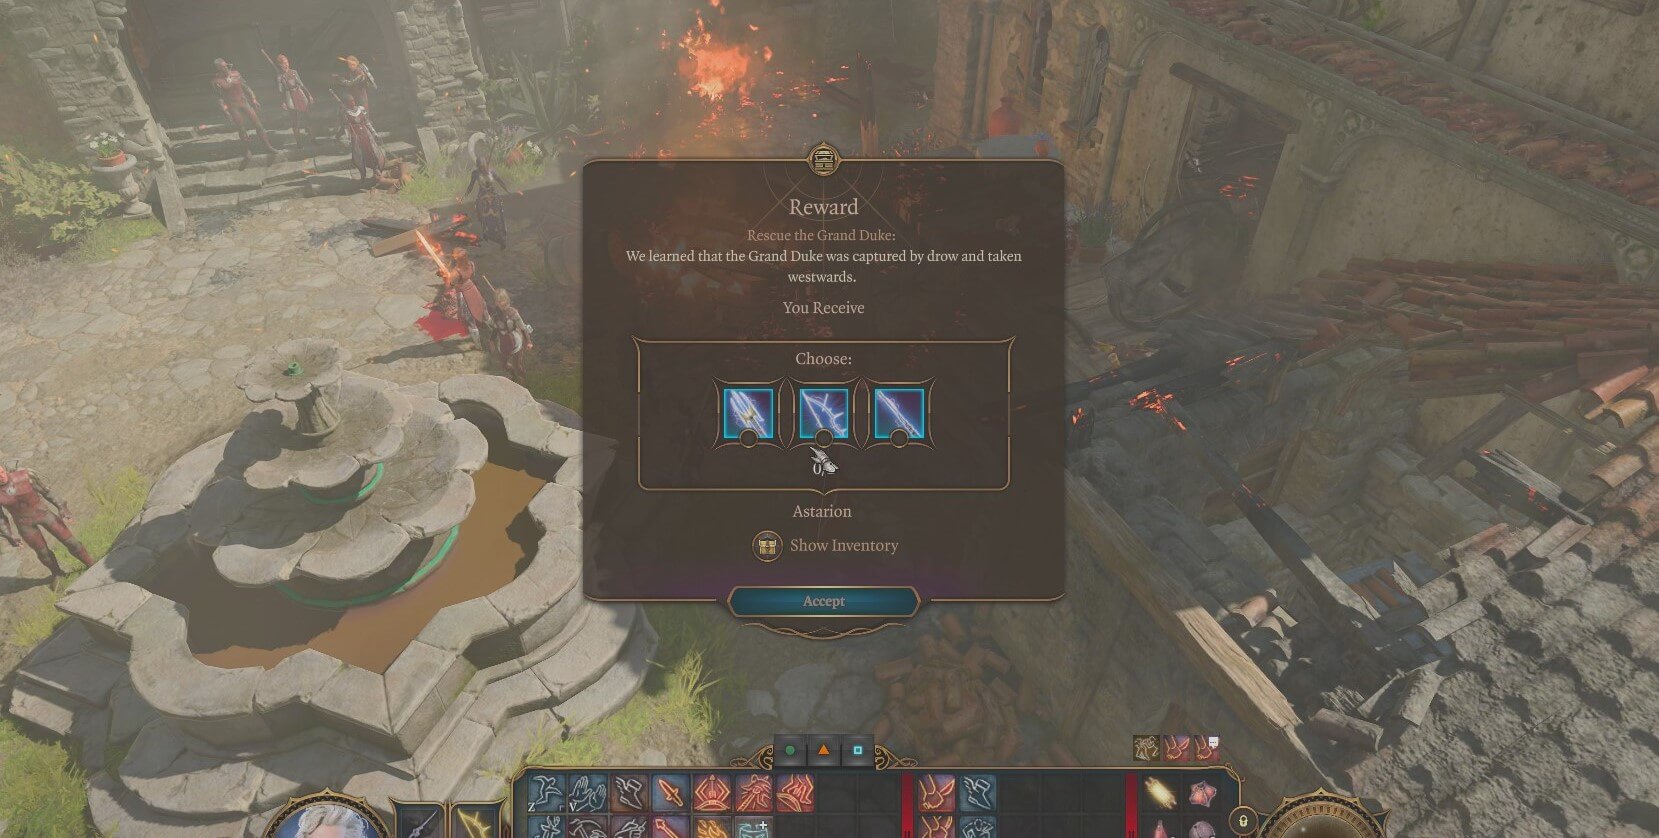
Once everyone is outside, talk to Counsellor Florrick and learn more about the situation. She will inform you that the Duke, Ulder Ravengard, was taken by the Drow to the west. However, she doesn't know the exact location of it. You can refuse to do the quest any longer, but you won't be able to see it in the Journal for a while.
You will also receive a reward from Counsellor Florrick after the conversation. You can choose one of the Rare weapons, The Sparky Points, The Joltshooter, or The Spellsparkler.
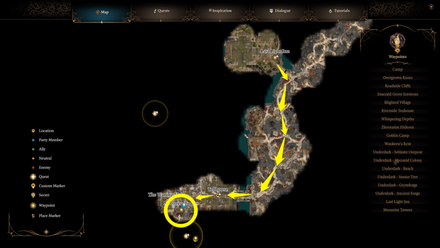
Go to the Goblin Camp and into the Shattered Sanctum
Head to the Goblin Camp and enter the Shattered Sanctum to progress on this quest. You can persuade, intimidate, fight, or decept your way inside, but it's best if to avoid fighting to get in faster.
Once inside, look for the two Goblins that are torturing a human. You can find them in a room, east of the temple. Talk to them and they will give you the a clue where to find the Duke, which is in Moonrise Towers.
Head to Last Light Inn
The Duke might be in the Moonrise Towers, according to the Goblins. It's best to go to Last Light Inn first, as there are people there that can help you proceed to Moonrise Towers. You can also meet Counsellor Florrick there and get an update on this quest.
There are two ways to get to Last Light Inn, through the Underdark or the Mountain Pass. It's best to take the Underdark route, as you will meet a group of Harpers that can help you reach Last Light Inn.
How to Get to Last Light Inn via Underdark
- Go to the Underdark. There are multiple ways to reach the Underdark, but you can choose whatever is close or easier.
- Head to the Beach or Decrepit Village and meet Gehk. Kill him or find the missing Boots of Speed he's looking for. It is tied to the Duergar Intruders Quest.
- Travel to Grymforge using Gehk's boat. You will encounter a patrol boat on the way, but you can deceive them (Deception Check DC15) or tell them you have the boots to get to Grymforge without fighting them.
- Head east to access the elevator. It will lead you to the surface and meet Elminster Aumar, an acquaintance of Gale. You can ignore or entertain him, then use the door to get to the Shadow-Cursed Lands.
- Go southwest until you meet the group of Harpers. Help them and follow them afterward to Last Light Inn.
- Talk your way in through Skill Checks and avoid fighting once you reach Last Light Inn. Fighting them will force you to battle all the residents inside, and closing off any other opportunities to trade, do other side quests, update on this quest, and a safe area you can run to in the Shadow-Cursed Lands.
Obtain Moon Lantern or Filigreed Feywild Bell
Counsellor Florrick also believes the Duke is currently at Moonrise Towers. You can get there by going south of Last Light Inn.
Before going there, get a Moon Lantern from Kar'niss' lantern or free the Pixie and get the Filigreed Feywild Bell. You can do this if you deceive Kar'niss to drop it or fight him and loot it from his body. Attacking and defeating him will be easier if you join the Harpers in their ambush.
The Moon Lantern or Pixie's Filigreed Feywild Bell will help you pass through the thicker shadow curse emanating around Moonrise Towers.
How to Join the Harpers
- Help the Harpers on the way when you take the Underdark route. Follow them and expose Marcus as a traitor once you reach Last Light Inn. It will help you later with protecting Isobel (Seek from Protection from the Shadow Curse Quest).
- Destroy all the Crawling Hands and then follow Jaheira inside the house to talk to her. You can speak with her however you like, as it won't affect the outcome. The only thing that you should not do is attack her.
- Head upstairs and talk to Isobel to get the blessing that will help fight off the weaker curse around the Shadow-Cursed Lands. Marcus will come back with reinforcements after that and try to abduct Isobel. Refuse his offer and kill them all while protecting Isobel. The Harpers will succumb to the curse if Isobel dies, and you won't be able to join them later.
- After saving Isobel and killing Marcus, go to the entrance and join the Harpers in the ambush.
Enter the Mausoleum
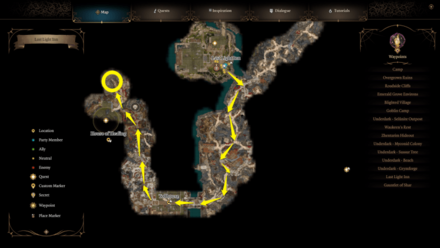
Proceed to Thorm Mausoleum, north of Moonrise Towers and futher north of House of Healing. You will meet Raphael there and ask you to do something about Yurgir. It is a separate, but necessary quest as you will need to obtain the Umbral Gem in his possession.
You don't have to go inside the Moonrise Towers if you want to progress on this quest, unless you want to save Minthara from dying and recruit her.
Solve the Mausoleum Puzzles
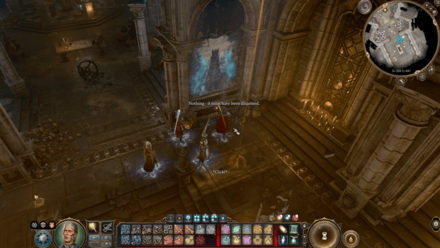
Solving the puzzles inside will let you further inside the mausoleum. Complete them first before you can search the mausoleum and do all the quests inside!
Mausoleum Painting Puzzle
| Button Order |
1. Moonrise Towers 2. Grief 3. General |
|---|
Press the buttons under each painting in the correct order to unlock the door to the next area. You can follow the order above to solve the puzzle!
Mausoleum Light Puzzle
You can solve the light puzzle by turning off all the lights, and you can do that by pulling the levers around the area. Turning off the lights will reveal a path where you can pass through and reach the console at the center.
Complete the Kill Raphael's Old Enemy Quest
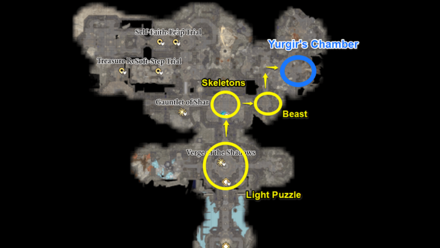
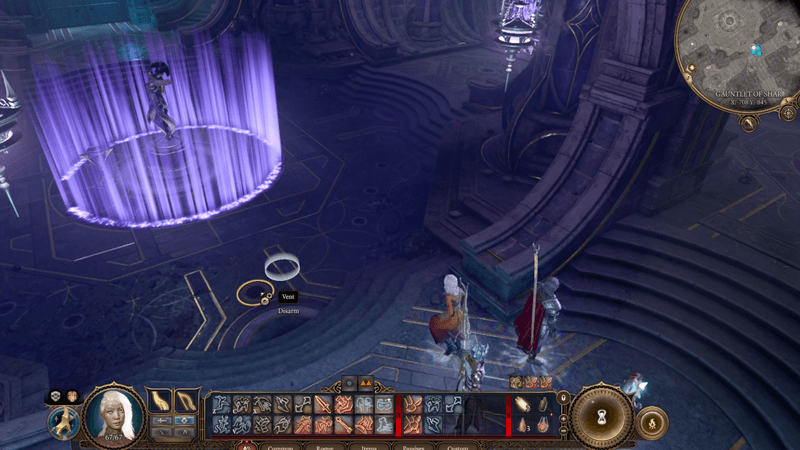
After solving all the puzzles, head further inside and finish the Kill Raphael's Old Enemy quest. You can do it by helping Yurgir with his contract or by killing him. Grab the Umbral Gem after that and start doing the Gauntlet of Shar trials to get more Umbral Gems.
Those Umbral Gems are needed to access the lowest part of the mausoleum and unlock the entrance to Shadowfell.
Kill Raphael's Old Enemy: How to Kill Yurgir (Orthon)
Complete the Find the Nightsong Quest
| Quests | |
|---|---|
| Find the Nightsong | Gauntlet of Shar Trials |
Complete all the trials in the Gauntlet of Shar quest to get the remaining Umbral Gems and progress in the Find the Nightsong quest. It will lead you to Shadowfell where you can find the Nightsong, a person named Dame Aylin. She's the reason why Ketheric is invulnerable to all attacks.
You can free Dame Aylin and have her help with the upcoming fight against Ketheric. However, you need to defeat Balthazar first to make it happen.
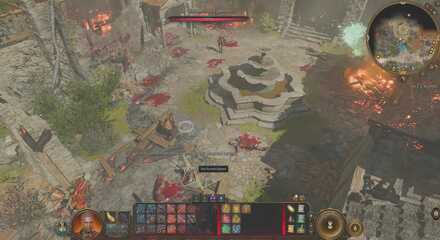
Assault Moonrise Tower

After freeing the Nightsong, go to Moonrise Towers and start the assault. It will be an all out war against the cult, so try to preserve your resources to survive and reach Ketheric.
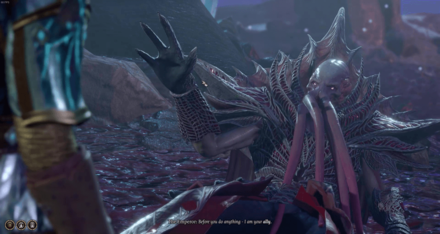
Head to the top of the tower to see Ketheric. Fight him for a bit until you reduce at least 30% to 40% of his HP. He will escape to the Mind Flayer Colony after losing that much HP, dragging Aylin with him to regain his power.
Follow and Defeat Ketheric Thorm
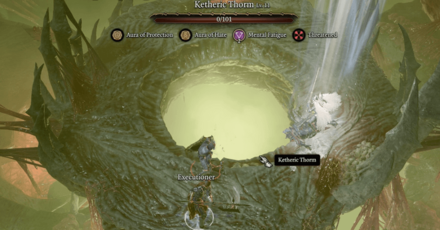
Follow Ketheric Thorm down the Mind Flayer Colony by jumping down the Hollow Tower. Use the elevator (marked on the map) to go down and find Ketheric with his companions. You will also see the Duke there getting infected and eventually gets taken to Baldur's Gate.
Defeat Ketheric Thorm in a two-phase battle and follow his companions to Baldur's Gate to rescue the Duke.
How to Beat Ketheric Thorm
- Sneak on the left side and go up the platform to the Necromites. It will give you a high-ground advantage against Ketheric and his lackeys. Do this slowly so Ketheric won't spot you before you get there!
- Use one character to get to the opposite side on Aylin's location. It is so you can free her to help and remove Ketheric's invulnerability. It's best if you have a Misty Step Scroll or Spell or anything similar that will teleport you to her side in an instant.
- Launch a surprise attack on the Necromites to start the battle. Try to lure all the enemies and reduce their numbers before helping Aylin to preserve her HP. You will need her to stay alive during and after the fight.
- Focus your attack on the Mind Flayer once it gets close enough. It is the most dangerous enemy in the first phase, as it has a devastating AoE Mind Control blast that can damage and stun your party.
- Put your attention on the Intellect Devourers next. If they get to your position, Shove them and make them fall into the chasm or inflict fall damage if they hit the ground.
- You can free Aylin now and start attacking Ketheric. Provide healing to Aylin before defeating Ketheric, as you won't be able to heal her during the second phase because of the Bone-Chilling debuff.
- Ketheric will transform into a large skeleton in the second phase. It is the best time to use all of your powerful spells or skills to defeat him fast. However, try not to use AoE attacks, as you might hit Aylin and other characters nearby!
Go to Baldur's Gate
You can get to Baldur's Gate by passing through the Road to Baldur's Gate waypoint in the western part of the Shadow-Cursed Lands. Note that going to Baldur's Gate will end most of the quests in Act 1 and Act 2, as it will be the start of Act 3. Try to finish them first and get their rewards before heading to Act 3!
Go to Astral Plane
You will end up in your camp once you set out to go to Baldur's Gate and will be ambushed by a group of Githyanki warriors once you go to bed. The power holding back the parasite in your head will also start to crumble actively due to the Githyanki attacking your "Guardian".
Go to Astral Plane to stop the parasite from taking your body and transforming into a Mind Flayer. You only need one character to get to Astral Plane, so dedicate only one of your characters to enter the portal and let the others deal with the Githyanki enemies.
Help the Emperor
The Emperor (or the Guardian) is currently holding back the Githyanki warriors as they want the Prince of Githyanki, Orpheus. He holds the key to prevent the parasite from taking over your body. Help the Emperor, and fight off the Githyanki warriors to finally reach Baldur's Gate.
Do not choose to fight the Emperor, as it will lead to game over; you will either become a Mind Flayer or end up getting killed by him.
Pass through the Checkpoint
Enter Rivington and head to Wyrm's Rock Fortress by passing through the South Span Checkpoint. It's best to avoid talking to guards at the checkpoint, as it will lead to them taking you to prison or forcing a fight.
You can pass through them without talking by transforming into a critter or anything similar. Unlock the South Span of Wyrm's Crossing waypoint once inside, and then use your characters outside to fast-travel there and bypass the checkpoint without talking to the guards.
Enter Wyrm's Rock Fortress
There are two ways to get to Wyrm's Rock Fortress. One is to talk to the guards near the bridge, and the other is through the Wyrm's Rock Prison. Both paths will eventually lead to the Wyrm's Rock Fortress.
How to Enter through the Bridge
Talk to the guard, Blaze Elin, to get options on how to enter the fortress. You can deceive her or persuade her (both have DC30) to lower the bridge and get access to the fortress.
You can also bribe her by paying 20,000 Gold, but it's better not to choose this as you will need more gold later on to replenish items or get new and better equipment.
How to Enter through the Prison
- Jump down or teleport on the right below the bridge. Make sure you use a Feather Fall Spell or Scroll when jumping to avoid receiving damage.
- Go to the right side of the fortress near the pillar. Save your game here before proceeding so you can try again if you fail a passive Perception Check after this part.
- Pass a passive Perception Check near the crack to see the entrance to the prison. Go inside, and you'll see a Sturdy Wall on the other side.
- Destroy the wall using blunt weapons or explosives. Head inside once the wall is gone.
- Lockpick the door to open it (DC15). Follow the path until you reach the large door. Make sure to hide to avoid the guards in the area.
- If the guards see you sneaking around, deceive them (DC25) to wander freely around the prison.
- Lockpick the large door to get to the fortress.
(Optional) Attend Gortash's Ceremony and Talk to Mizora

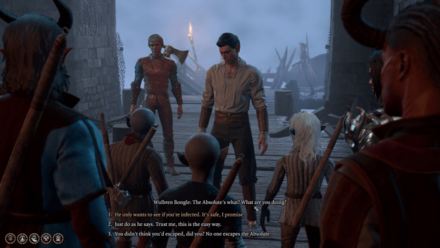
You can attend Gortash's Ceremony and talk to Mizora afterward to get an update on the quest. Mizora knows the Duke's location, and it is in the Iron Throne. Talking to Mizora will eventually lead you to a choice to break Wyll's pact or approve of it.
Breaking Wyll's pact will cause Mizora not to help you with the Duke and even try to kill him later on as you try to save him. Letting Wyll accept the pact will cause him to become a subordinate to Mizora permanently in exchange for knowing his father's location.
Choosing any of the options won't affect the Duke being alive or not; it's only a matter of submitting to Mizora's devil talks or not.
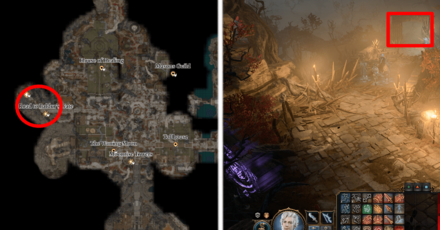
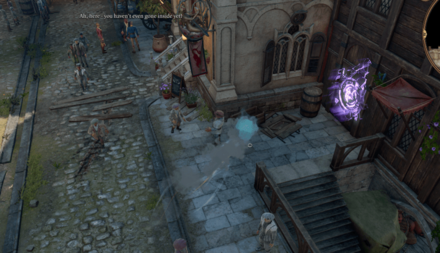
Enter the Lower City
Head to the Lower City and go to the Flymm Cargo near the port. You can find it in the southwest part of the Lower City. If you accept the pact, the location of the Flymm Cargo will be marked on your map.
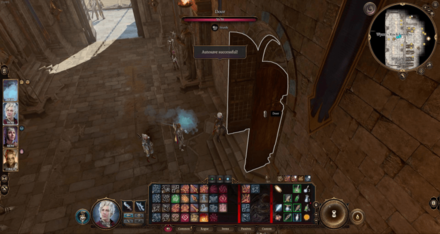
Go Inside the Flymm Cargo and Defeat the Monsters

The Flymm Cargo has two entrances, one on the side and one at the back. You need to pick the lock (DC20) to open both doors.
It's best to use the back door to avoid alerting the monsters inside and gain the advantage once you initiate the fight. You can get to the back door if you climb the roof and jump down to the door. Kill all the monsters once inside to make the area safe and search it freely.
Head to the Basement and Speak with Redhammer
There's a basement entrance inside the Flymm Cargo. Move over the wooden crates to the side on the first floor to see it. It will be highlighted if your characters pass the passive Perception Check.
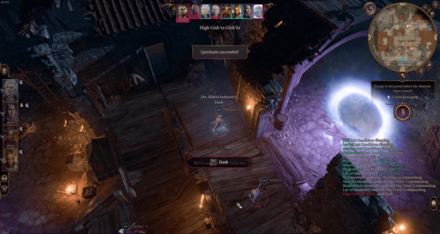
Enter the basement and pass through the doors until you meet Redhammer the Deviser. Talk to him and let him take you to the Iron Throne through several Skill Checks. Alternatively, you can just kill him and use the submarine to get there.
Killing Redhammer is part of another quest called Avenge the Drowned. Doing so will save you some time once you get it!
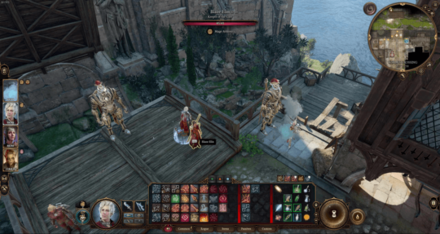
Go to the Iron Throne

Enter the submarine and go to the Iron Throne. A hologram of Gortash will appear as you go and will try to convince you to go back. Defy his order and enter the Iron Throne, but he will make it explode after a short while. Save the Duke before your time runs out!
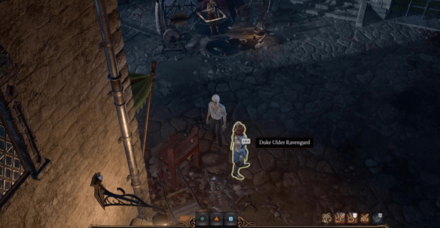
Save the Duke
You can find the Duke on the east side of the Iron Throne, guarded by two Sahuagin Hunters. Free the Duke as you fight them off to save turns. If you rejected Mizora's deal for Wyll before or go straight to Iron Throne without talking to her, she will show up and summon exploding spiders after the Duke is out of his cell.
Bring a healer next to him to ensure he won't die during the escape! You can use Potion of Speed, Dash, Misty Step, or any similar items or spells as well to save the Duke fast.
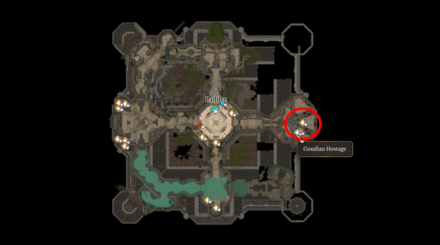
(Optional) Save the Gondian Prisoners
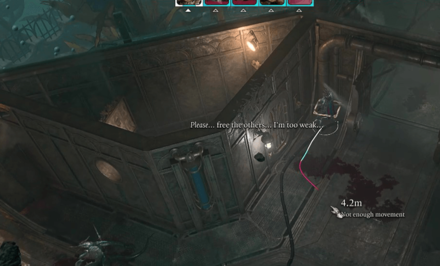
You can also save other prisoners and help them board the submarine. It is part of the Save the Gondians quest. They can help you later on a different quest, so it's best if you can save the majority of them.
It will be easier to save all of them if you set the Difficulty to Explorer Difficulty before entering the Iron Throne, as it will give you 8 turns instead of 6 turns in Balanced and Tactician Difficulty.
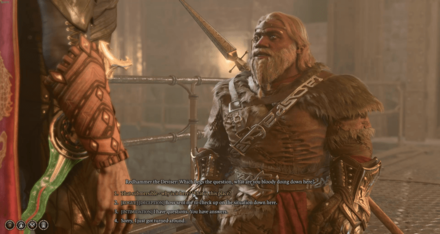
Speak with Duke Ravengard in the Camp
After saving the Duke in the Iron Throne, meet him in the camp and talk to him. He won't be giving any rewards, but he will give you information about a Bronze Dragon that can help you in the final stretch of Act 3. You can find the dragon to help you or settle everything with your own team.
Rescue the Grand Duke Rewards
Choose One from the Rare (Blue) Weapons
| Weapon Rewards | ||
|---|---|---|
| The Sparky Points | The Joltshooter | The Spellsparkler |
You can choose one of these Rare Weapons after saving Counsellor Florrick from the fire at the start of the quest in Act 1. You can only select one, so choose wisely!
Information about the Bronze Dragon
You will get information about the Bronze Dragon residing under the City after saving Duke Ravengard and completing this quest. It is part of Wyll's The Blade of Frontiers companion quest, but it will affect the main story later on in the game!
Baldur's Gate 3 Related Guides
Prologue Side Quests
| All Prologue Side Quests | |
|---|---|
| How to Free the Intellect Devourer | How to Free Shadowheart |
Act 1 Side Quests
Druid's Grove Quests
The Risen Road Quests
| The Risen Road Quests | |
|---|---|
| Find the Missing Shipment | How to Rescue the Grand Duke |
| Rescue the Trapped Man | How to Free Oskar Fevras |
Blighted Village Quests
Goblin Camp Quests
| Goblin Camp Quests | |
|---|---|
| How to Get Volo's Ersatz Eye | Defiled Temple Puzzle |
| Find the Nightsong | Ask the Goblin Priestess for Help |
Nautiloid Crash Region Quests
Underdark Quests
Mountain Pass Quests
| Mountain Pass Quests | ||
|---|---|---|
| Steal a Githyanki Egg | How to Beat Gremishkas | How to Access Guardian of Faith Room |
| Dawnmaster Puzzle Guide | Where to Find the Githyanki Creche | - |
This section is currently under construction. Check back later for updates!
Act 2 Side Quests
Last Light Inn Quests
Gauntlet of Shar Quests
| Gauntlet of Shar Quests | |
|---|---|
| Gauntlet of Shar: All Trials and Umbral Gems | Kill Raphael's Old Enemy |
Mind Flayer Colony Quests
| Mind Flayer Colony Quests |
|---|
| How to Solve the Necrotic Laboratory |
Act 3 Side Quests
Rivington Quests
| Rivington Quests | ||
|---|---|---|
| Investigate the Suspicious Toys | Solve the Open Hand Temple Murders | Find the Missing Letters |
| How to Get to Wyrm's Rock Fortress | How to Find Dribbles the Clown | - |
Lower City Quests
| Lower City Quests | ||
|---|---|---|
| How to Get to the House of Hope | How to Get to Cazador's Palace | Rescue Orin's Victim |
| Aid the Underduke | How to Get to the House of Grief | Investigate the Murders |
Comment
Author

Rescue the Grand Duke Walkthrough
Rankings
- We could not find the message board you were looking for.
Gaming News
![Neverness to Everness (NTE) Review [Beta Co-Ex Test] | Rolling the Dice on Something Special](https://img.game8.co/4414628/dd3192c8f1f074ea788451a11eb862a7.jpeg/show)


Popular Games

Genshin Impact Walkthrough & Guides Wiki
Honkai: Star Rail Walkthrough & Guides Wiki
Arknights: Endfield Walkthrough & Guides Wiki
Umamusume: Pretty Derby Walkthrough & Guides Wiki
Wuthering Waves Walkthrough & Guides Wiki
Pokemon TCG Pocket (PTCGP) Strategies & Guides Wiki
Abyss Walkthrough & Guides Wiki
Zenless Zone Zero Walkthrough & Guides Wiki
Digimon Story: Time Stranger Walkthrough & Guides Wiki
Clair Obscur: Expedition 33 Walkthrough & Guides Wiki


Recommended Games
Fire Emblem Heroes (FEH) Walkthrough & Guides Wiki
Pokemon Brilliant Diamond and Shining Pearl (BDSP) Walkthrough & Guides Wiki
Diablo 4: Vessel of Hatred Walkthrough & Guides Wiki
Super Smash Bros. Ultimate Walkthrough & Guides Wiki
Yu-Gi-Oh! Master Duel Walkthrough & Guides Wiki
Elden Ring Shadow of the Erdtree Walkthrough & Guides Wiki
Monster Hunter World Walkthrough & Guides Wiki
The Legend of Zelda: Tears of the Kingdom Walkthrough & Guides Wiki
Persona 3 Reload Walkthrough & Guides Wiki
Cyberpunk 2077: Ultimate Edition Walkthrough & Guides Wiki


All rights reserved
© 2023 Larian Studios. All rights reserved. Larian Studios is a registered trademark of arrakis nv, affiliate of Larian Studios Games ltd. All company names, brand names, trademarks and logos are the property of their respective owners. © 2020 Wizards of the coast. All rights reserved. Wizards of the coast, Baldur’s Gate, Dungeons & Dragons, D&D, and their respective logos. Are registered trademarks of wizards of the coast LLC
The copyrights of videos of games used in our content and other intellectual property rights belong to the provider of the game.
The contents we provide on this site were created personally by members of the Game8 editorial department.
We refuse the right to reuse or repost content taken without our permission such as data or images to other sites.