Rescue All Castaways Guide - All Castaway Locations
❀ Pikmin 4 is out! Get a headstart by following these tips!
❀ Get more Pikmin by getting all the onion types!
❀ New and returning bosses are back in the Piklopedia!
❀ Brave the Trial of the Sage Leaf to get more onions!
❀ Make Oatchi stronger by upgrading his skills!
Rescue All Castaways is a Main Mission in Pikmin 4 given by Shepherd. Read on for a detailed walkthrough of Rescue All Castaways including the locations of all castaways and leaflings, how to unlock it, as well as other tips on how to complete this Main Mission!
List of Contents
How to Unlock Rescue All Castaways
Rescue a Civilian Castaway
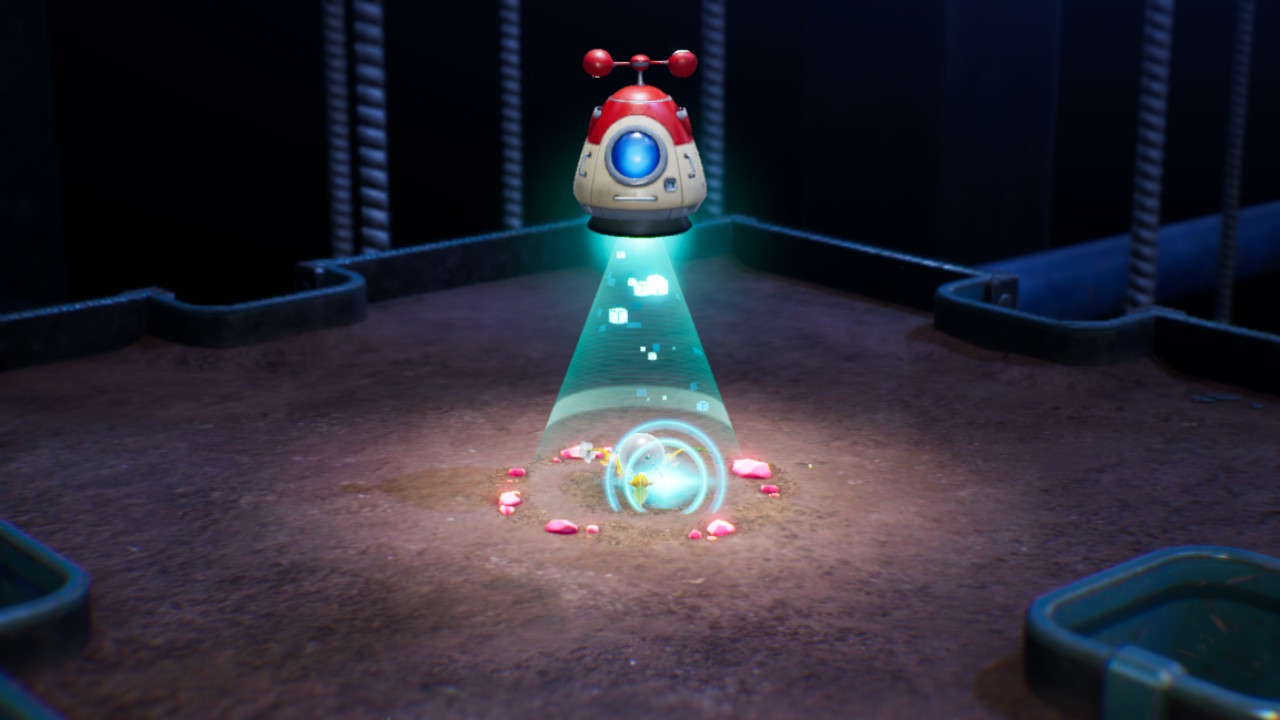
Rescue All Castaways is unlocked the first time you find a civilian castaway, regardless of their location.
How to Complete Rescue All Castaways
Rescue All 43 Civilian Castaways
Castaways (those without names and faces until rescued) aren't tied to a location, but instead to a specific order. For example, Russ (a Rescue Corps Officer) will always be your first castaway rescue then Schnauz (a civilian castaway) second regardless of where you actually found them.
There are 47 Castaways to be searched and rescued, but only 43 Castaways are counted for this main mission as the other 4 are members of the Rescue Corps, which will progress the Rescue the Rescue Corps main mission instead.
Leaflings found in Dandori Battles and Challenges are also castaways, but will only count after being cured using the glow sap obtained from Night Expeditions.
All Castaway Locations
Sun-Speckled Terrace Castaways
| # | Castaway Location |
|---|---|
| 1 | 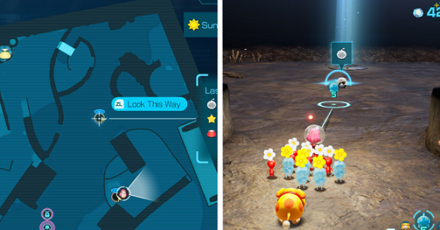 Enlarge EnlargeLast-Frost Cavern - Sublevel 1 Next to the cave exit, past the hydro jellies. |
| 2 |  Enlarge EnlargeIndustrial Maze - Sublevel 2 On a floating platform near the second base. You'll need Yellow Pikmin to reach this castaway, |
| 3 | 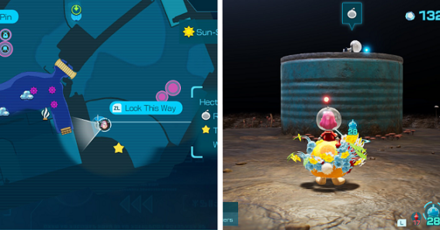 Enlarge EnlargeHectic Hollows - Sublevel 2 On top of a half-buried can. You'll need to use Rush with Oatchi to knock them down before you can pick them up with your Pikmin. |
| 4 | 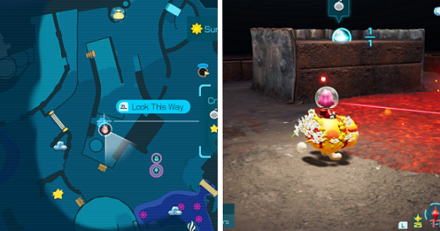 Enlarge EnlargeCrackling Cauldron - Sublevel 2 On a higher platform blocked by a sizzling floor. Extinguish the sizzling floor with Red Pikmin first before lobbing Yellow Pikmin to get the castaway. |
| 5 | 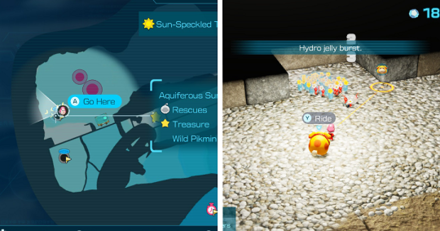 Enlarge EnlargeAquiferous Summit - Sublevel 2 Hidden under a hydro jelly next to the cave exit. |
| 6 | 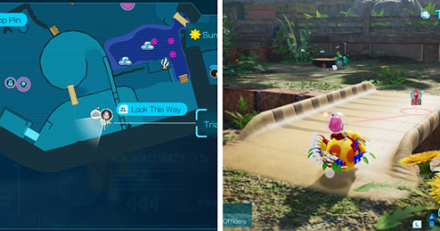 Enlarge EnlargeTrial Run East of the third base, Meandering Slope. You'll have to complete the clay bridge and win the Dandori Battle ahead to rescue the castaway. |
| 7 | 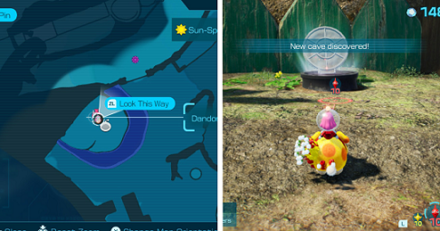 Enlarge EnlargeDandori Day Care North of the third base, Meandering Slope. Freeze the water with Ice Pikmin first, then jump onto the land to reach the Dandori Challenge. |
Sun-Speckled Terrace Area Guide
Blossoming Arcadia Castaways
| # | Castaway Location |
|---|---|
| 8 | 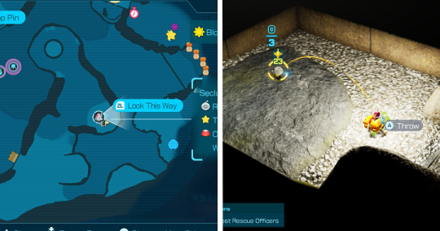 Enlarge EnlargeSecluded Courtyard - Sublevel 2 Inside the northern room in sublevel 2. The entrance to this room as well as the castaway themself is guarded by Anode Dweevils, so be careful! |
| 9 | 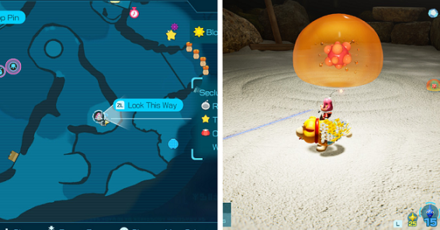 Enlarge EnlargeSecluded Courtyard - Sublevel 4 At the final sublevel of the cave. You'll have to defeat the Foolix first to make it release the castaway. |
| 10 | 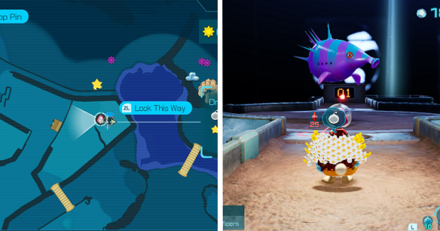 Enlarge EnlargeDrafty Gallery - Sublevel 4 At the final sublevel of the cave. You'll have to defeat the Puffy Blowhog first to make it release the castaway. |
| 11 | 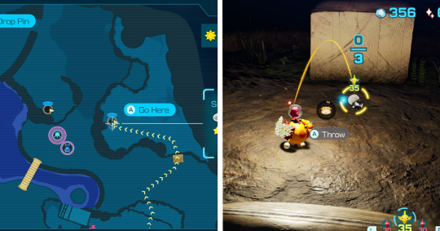 Enlarge EnlargeSightless Passage - Sublevel 1 On a block near the hole to the lower sublevel. You'll have to knock them down with Rush before you can pick them up. |
| 12 | 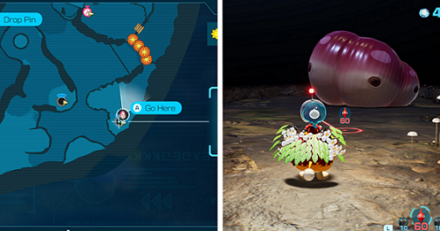 Enlarge EnlargeKingdom of Beasts - Sublevel 3 Defeat the Empress Bulblax to find the castaway. |
| 13 | 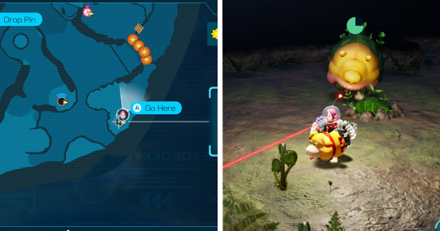 Enlarge EnlargeKingdom of Beasts - Sublevel 6 Defeat the two Emperor Bulblax to recover the castaway. |
| 14 | 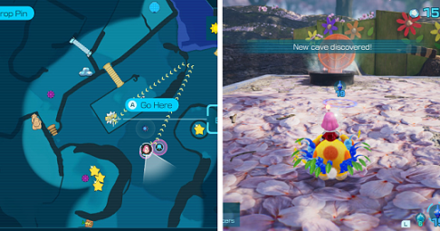 Enlarge EnlargeBattle in a Box North of the first base, Fragrant Ravine. Go around the platform using the path near the base until you reach the slope leading to the battle. |
| 15 | 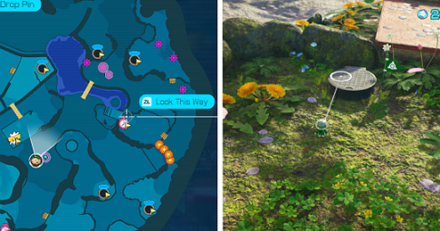 Enlarge EnlargeHotshock Canyon South of the third base. You need to complete the dirt all east of the entrance to reach this challenge. |
| 16 | 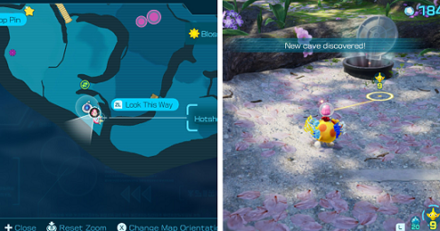 Enlarge EnlargeRockaway Cellars Southwest of the first base and southeast of the second base. You need 3 Bomb Rocks to destroy the reinforced wall and reach the challenge. |
Serene Shores Castaways
| # | Castaway Location |
|---|---|
| 17 | 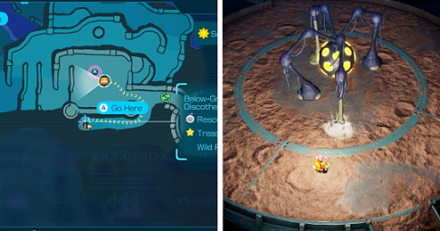 Enlarge EnlargeBelow-Grade Discotheque - Sublevel 5 Defeat the Groovy Long Legs in this floor to lower the gate ahead to the exit. The castaway is right next to the fan. |
| 18 | 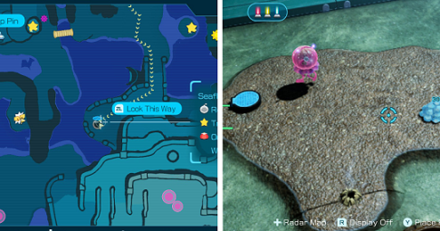 Enlarge EnlargeSeafloor Resort - Sublevel 2 Defeat the Greater Spotted Jellyfloat near the hole that leads to the lower level to release the captive castaway. |
| 19 | 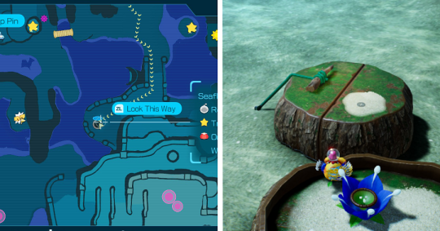 Enlarge EnlargeSeafloor Resort - Sublevel 4 After defeating the Masterhop at the final sublevel, head past the lowered gate and throw Blue Pikmin at the platform near the Candyop Bud to pull the castaway up. |
| 20 |  Enlarge EnlargeSubzero Sauna - Sublevel 2 Inside the southwest room. You'll have to dissipate the cold air and lower the iron fences first before you can bring the castaway back to the S.S. Beagle. |
| 21 | 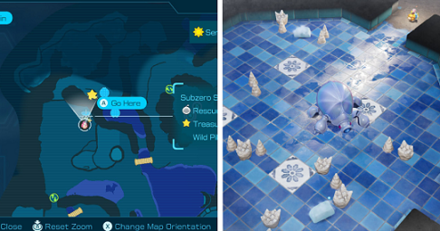 Enlarge EnlargeSubzero Sauna - Sublevel 3 Defeat the Arctic Cannon Beetle to release the captive castaway. |
| 22 | 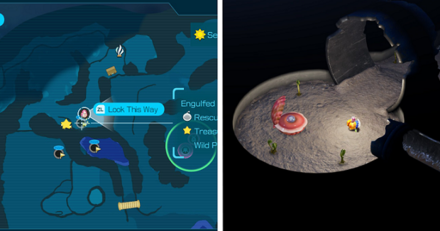 Enlarge EnlargeEngulfed Castle - Sublevel 2 On a Pearly Clamclamp west of the map. The room can be reached through the long pipe blocked by mushrooms. |
| 23 | 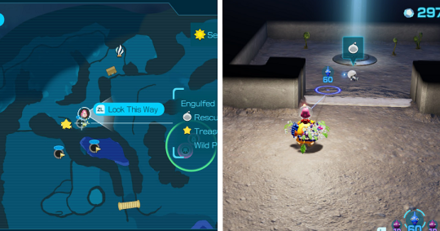 Enlarge EnlargeEngulfed Castle - Sublevel 5 After defeating the Waterwraith at the final sublevel, check behind the lowered gate where the exit is to find the castaway. |
| 24 | 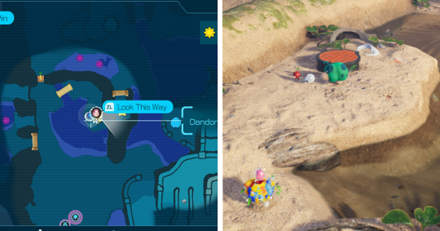 Enlarge EnlargeDandori Castle North of the first base. You can either complete the clay bridge nearby or swim directly to the cave entrance to reach it. |
| 25 | 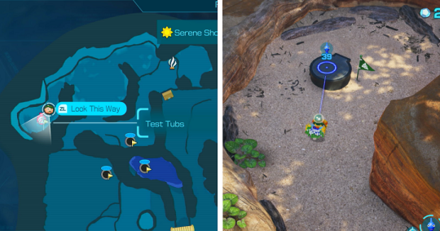 Enlarge EnlargeTest Tubs Northwest corner of the map. You need to pass through Engulfed Castle to reach this area. |
| 26 | 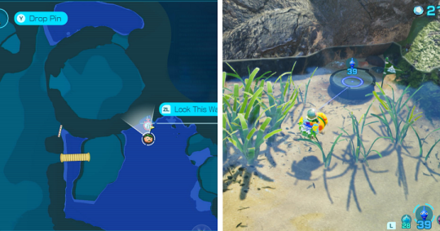 Enlarge EnlargeIce-Cross Course Submerged in the east side of the map, near the second base. |
Hero's Hideaway Castaways
| # | Castaway Location |
|---|---|
| 27 | 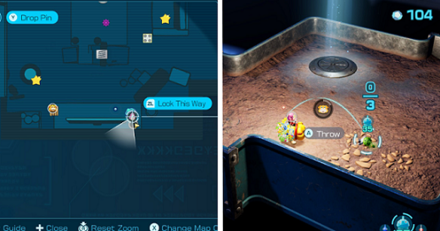 Enlarge EnlargeDoppelganger's Den - Sublevel 4 After defeating the Gildemander in the final sublevel, head to the exit to find the castaway next to it. |
| 28 | 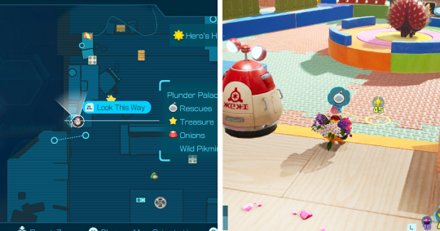 Enlarge EnlargePlunder Palace - Sublevel 3 Defeat the Porquillion at this sublevel to rescue the castaway. |
| 29 | 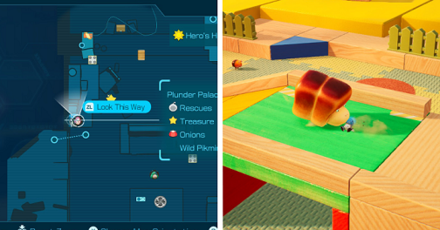 Enlarge EnlargePlunder Palace - Sublevel 5 You'll find this leafling being dragged around by a Giant Breadbug. You can defeat it first by repeatedly throwing Pikmin on top of it or send in Oatchi and some Purple Pikmin to contest for the castaway. |
| 30 | 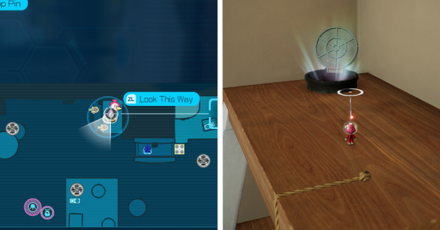 Enlarge EnlargeHefty Haulway On a rack that you can reach via fans starting from the central table. |
| 31 | 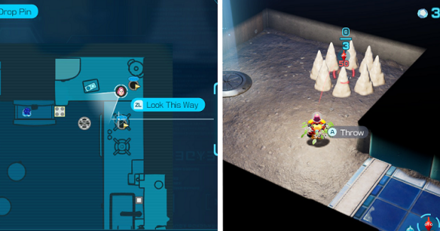 Enlarge EnlargeFrozen Inferno - Sublevel 4 After defeating the Snowfake Fluttertail, check the unlocked room and destroy the stalagmites for the leafling. |
Giant's Hearth Castaways
| # | Castaway Location |
|---|---|
| 32 | 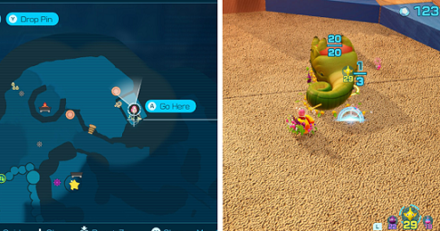 Enlarge EnlargeDream Home - Sublevel 1 Defeat the Mammoth Snootwhacker in this sublevel to rescue the castaway. |
| 33 | 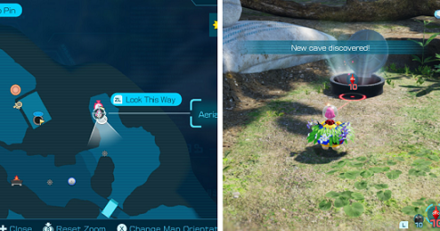 Enlarge EnlargeAerial Incinerator Northeast of the second base, past the bridge |
| 34 | 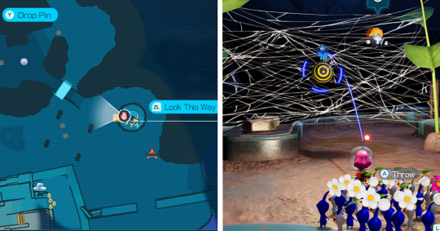 Enlarge EnlargeUltimate Testing Range - Sublevel 3 Stuck on an Arachnode's web |
| 35 | 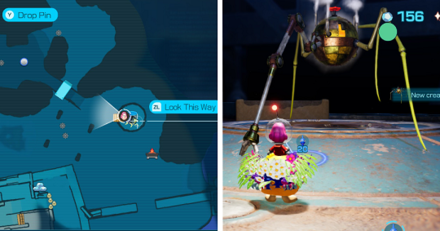 Enlarge EnlargeUltimate Testing Range - Sublevel 5 Defeat the Man-at-Legs in this sublevel to rescue the castaway. |
| 36 |  Enlarge EnlargeHot Sandy Duel East of the third base, past the bonfire altar |
| 37 |  Enlarge EnlargeStrategic Freezeway West of the third base. You need to go around the hearth and climb to the top to reach this challenge. |
| 38 | 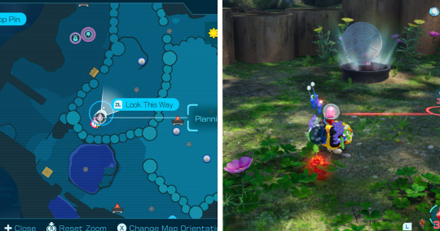 Enlarge EnlargePlanning Pools East of the first base, behind some bundles of straws |
| 39 | 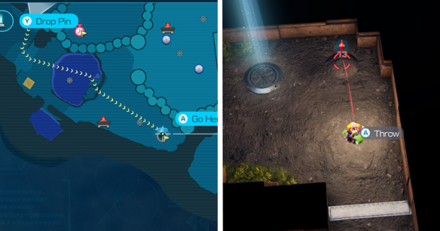 Enlarge EnlargeCradle of the Beast - Sublevel 3 Defeat the Empress Bulblax here to open the gate leading to the exit. The castaway is buried in a mound on the same room. |
Primordial Thicket Castaways
| # | Castaway Location |
|---|---|
| 40 | 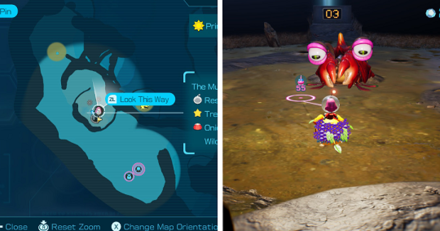 Enlarge EnlargeThe Mud Pit - Sublevel 3 Defeat the Bug-Eyed Crawmad and the two Hermit Crawmad in this sublevel to rescue the castaway. |
| 41 | 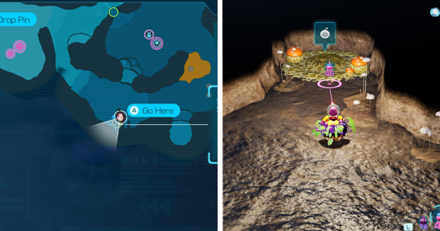 Enlarge EnlargeSubterranean Swarm - Sublevel 3 Defeat the Horned Cannon Beetle in this room and remove the sticky mold past it to find the castaway. |
| 42 | 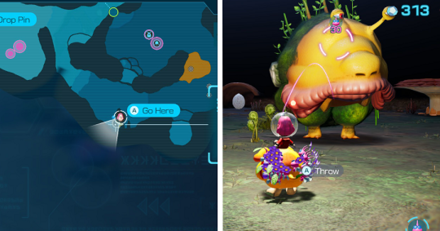 Enlarge EnlargeSubterranean Swarm - Sublevel 5 Defeat the Sovereign Bulblax in the final sublevel to rescue the castaway. |
| 43 | 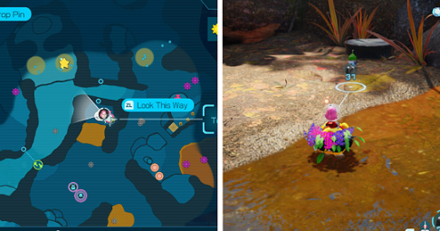 Enlarge EnlargeToggle Training Directly north of the second base, across the muddy path |
| 44 | 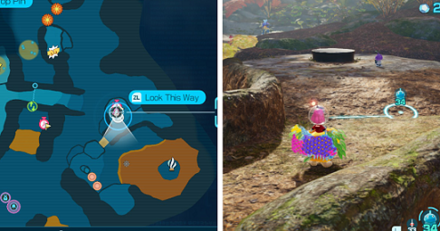 Enlarge EnlargeCliff-Hanger's Hold Southeast corner of the map. You need to freeze the muddy pond first to reach the air current that will launch you to this platform. |
| 45 | 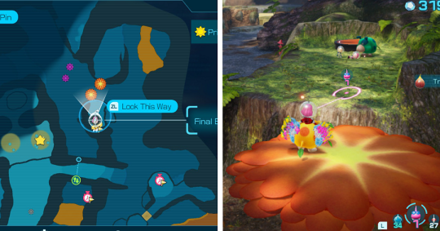 Enlarge EnlargeFinal Battle North of the second base. You need to open the walkable mushrooms with Rush first to reach this Dandori Battle |
| 46 | 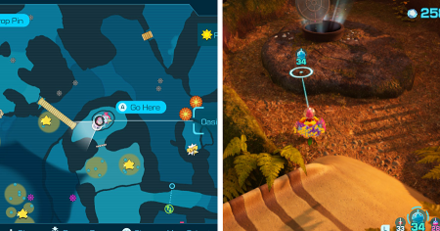 Enlarge EnlargeOasis of Order Southeast of the third base. You must complete the long clay bridge first to reach this challenge |
| 47 | 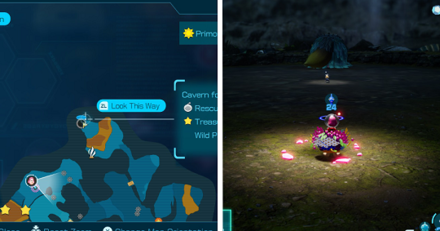 Enlarge EnlargeCavern for a King - Sublevel 20 Defeat the final boss, Ancient Sirehound, to rescue Louie. |
Rescue All Castaways Mission Unlockables and Rewards
Unlock More Side Missions
The real reward for this main mission is the friends that you made along the way, literally!
Most of the castaways you rescue will give you Side Missions that will, in turn, give you Raw Materials and special items as rewards! You can then use this on building structures or on Gear and Items in the Russ' Lab.
These Side Missions will also guide your progress towards 100% completion.
Pikmin 4 Related Guides

List of All Main Missions
| All Main Mission Walkthrough Guides | |
|---|---|
| Rescue the Rescue Corps | Secure Energy Source |
| Rescue Olimar | Rescue All Castaways |
| Cure Oatchi | Investigate the Planet |
Comment
Author

Rescue All Castaways Guide - All Castaway Locations
Rankings
- We could not find the message board you were looking for.
Gaming News
![Animal Crossing: New Horizons Review [Switch 2] | Needlessly Crossing Over to a New Generation](https://img.game8.co/4391759/47d0408b0b8a892e453a0b90f54beb8a.png/show)


Popular Games

Genshin Impact Walkthrough & Guides Wiki
Honkai: Star Rail Walkthrough & Guides Wiki
Arknights: Endfield Walkthrough & Guides Wiki
Umamusume: Pretty Derby Walkthrough & Guides Wiki
Wuthering Waves Walkthrough & Guides Wiki
Pokemon TCG Pocket (PTCGP) Strategies & Guides Wiki
Abyss Walkthrough & Guides Wiki
Zenless Zone Zero Walkthrough & Guides Wiki
Digimon Story: Time Stranger Walkthrough & Guides Wiki
Clair Obscur: Expedition 33 Walkthrough & Guides Wiki


Recommended Games
Fire Emblem Heroes (FEH) Walkthrough & Guides Wiki
Pokemon Brilliant Diamond and Shining Pearl (BDSP) Walkthrough & Guides Wiki
Diablo 4: Vessel of Hatred Walkthrough & Guides Wiki
Super Smash Bros. Ultimate Walkthrough & Guides Wiki
Yu-Gi-Oh! Master Duel Walkthrough & Guides Wiki
Elden Ring Shadow of the Erdtree Walkthrough & Guides Wiki
Monster Hunter World Walkthrough & Guides Wiki
The Legend of Zelda: Tears of the Kingdom Walkthrough & Guides Wiki
Persona 3 Reload Walkthrough & Guides Wiki
Cyberpunk 2077: Ultimate Edition Walkthrough & Guides Wiki


All rights reserved
© Nintendo.
The copyrights of videos of games used in our content and other intellectual property rights belong to the provider of the game.
The contents we provide on this site were created personally by members of the Game8 editorial department.
We refuse the right to reuse or repost content taken without our permission such as data or images to other sites.