This survey will take about 1 minute.
Your answers will help us to improve our website.
Pikmin 4
Secure Energy Source Main Mission Guide
❀ Pikmin 4 is out! Get a headstart by following these tips!
❀ Get more Pikmin by getting all the onion types!
❀ New and returning bosses are back in the Piklopedia!
❀ Brave the Trial of the Sage Leaf to get more onions!
❀ Make Oatchi stronger by upgrading his skills!
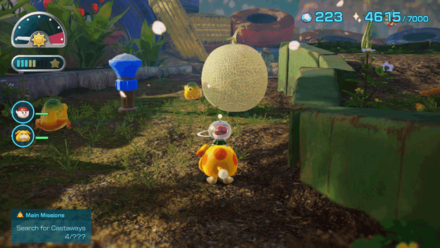
Secure Energy Source is a Main Mission in Pikmin 4 given by Shepherd. Read on for a detailed walkthrough of Secure Energy Source, how to unlock it, as well as other tips and strategies on how to complete this Main Mission!
How to Unlock Secure Energy Source
Find the S.S. Shepherd
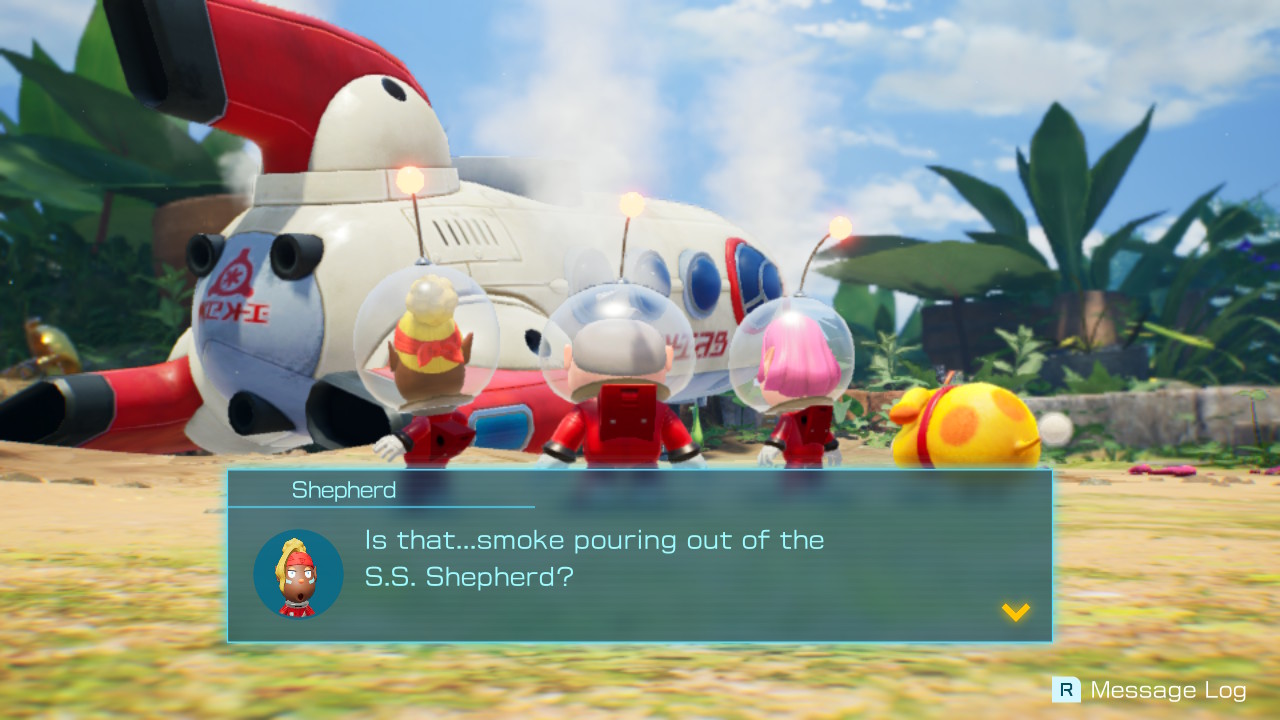
Secure Energy Source is automatically unlocked by finding the S.S. Shepherd in the Rescue Command Post and discovering Sparklium.
How to Complete Secure Energy Source
Mission Objectives
| # | Secure Energy Source Objectives |
|---|---|
| 1 | Collect 300 Sparklium |
| 2 | Collect 1,500 Sparklium |
| 3 | Collect 4,000 Sparklium |
| 4 | Collect 7,000 Sparklium |
Collect 300 Sparklium
| Requirement | Unlocks |
|---|---|
| 300 | Sun-Speckled Terrace |
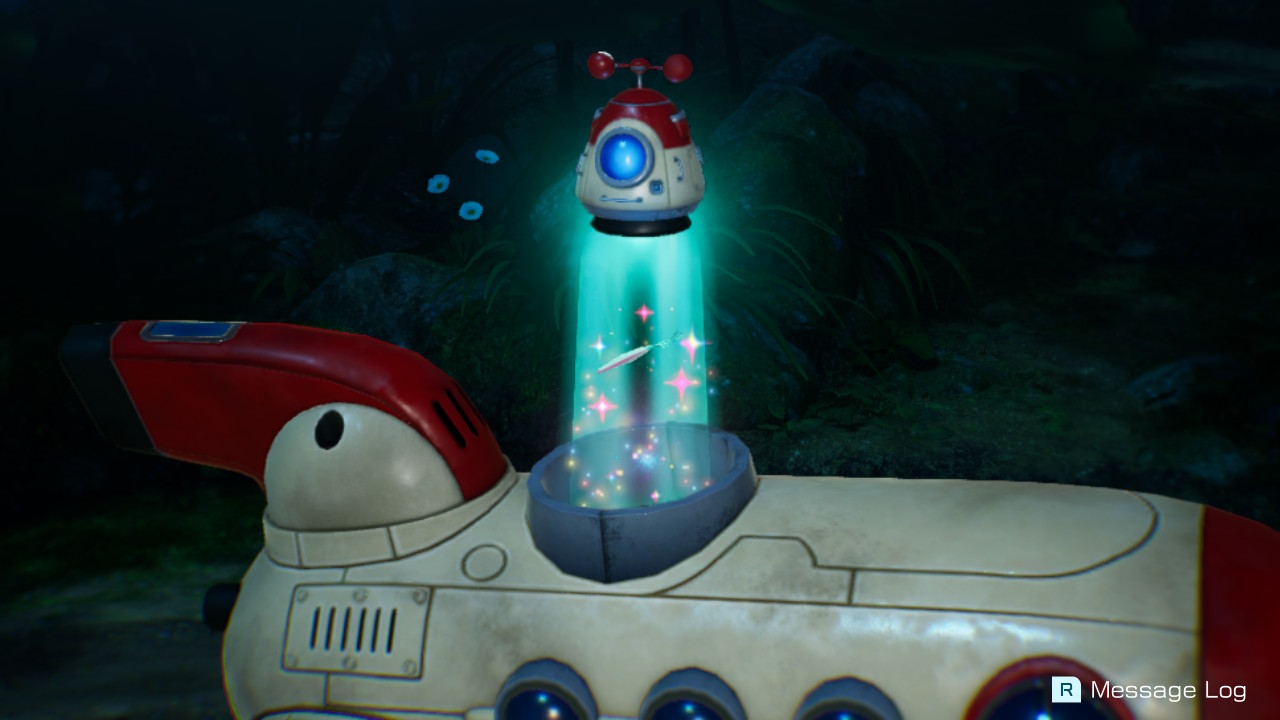
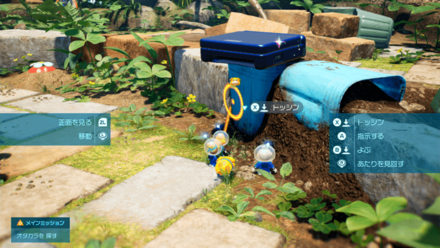
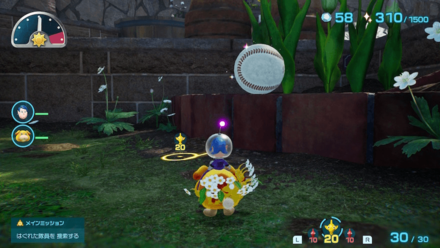
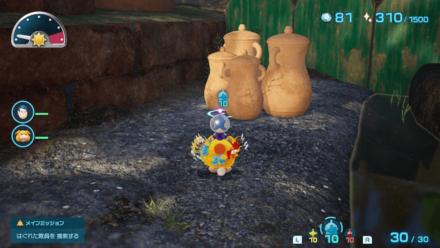
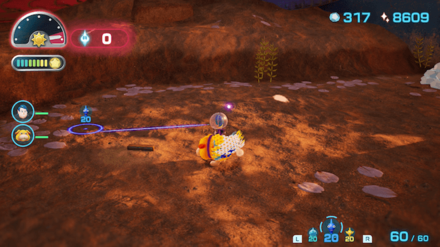
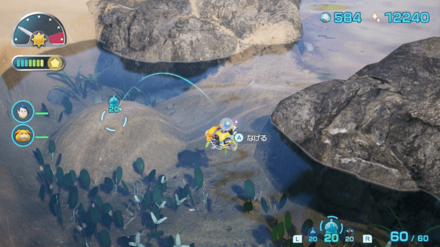
Upon unlocking this main mission, you will be required to collect 300 units of Sparklium. Sparklium can be obtained from defeated enemies but you can get much much more from Treasures. Explore the Rescue Command Post and retrieve every Treasure you can find!
The required number of Sparklium will be enough to restart the S.S. Shepherd and discover the Sun-Speckled Terrace!
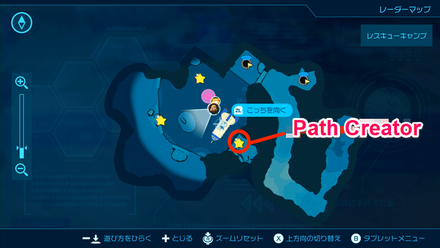
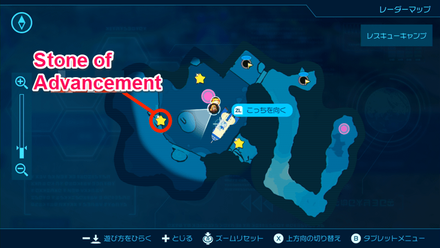
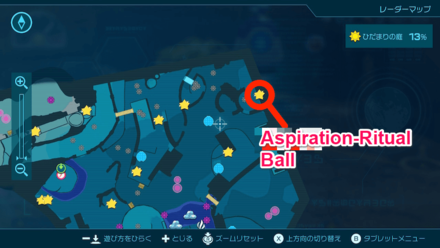
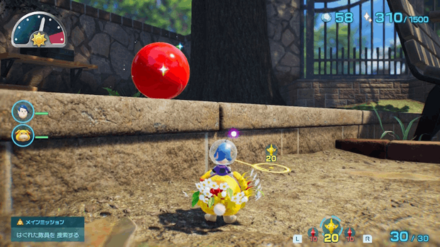
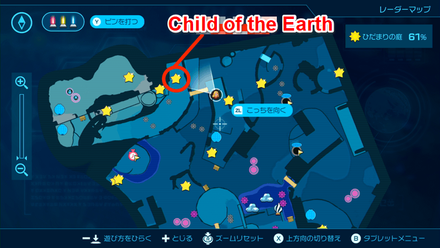
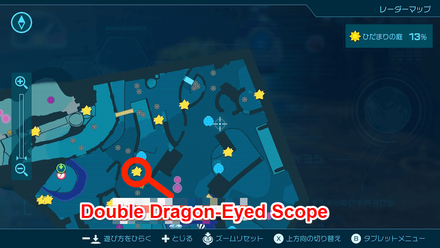
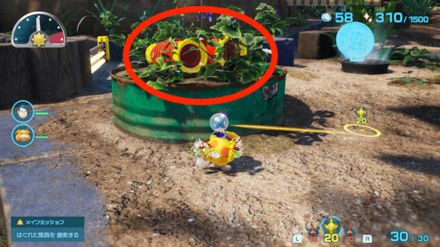
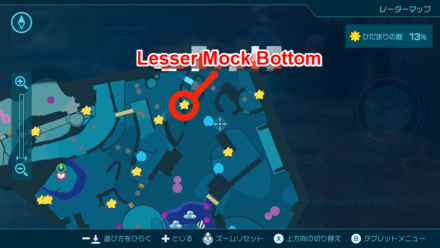
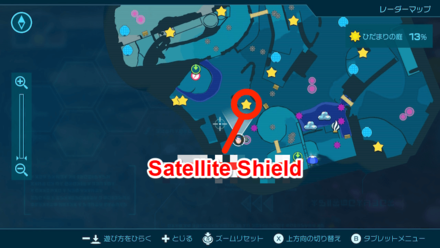
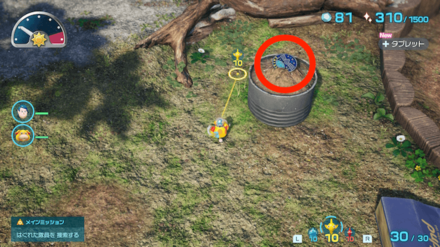
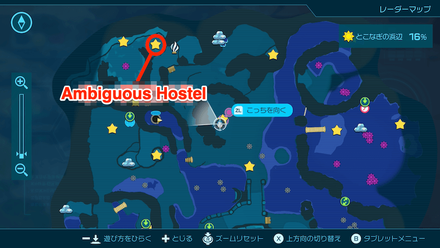
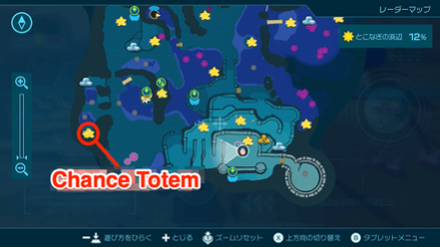
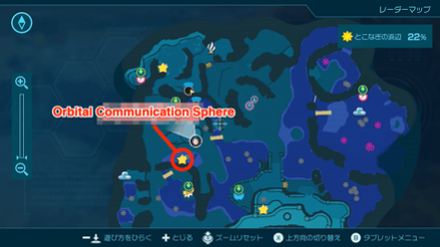
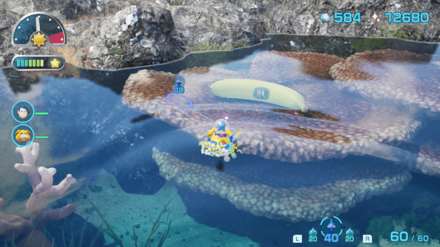
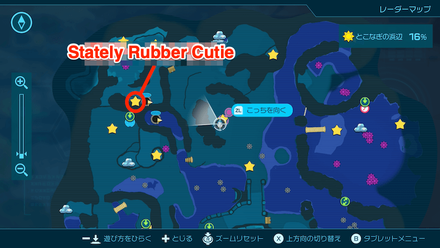
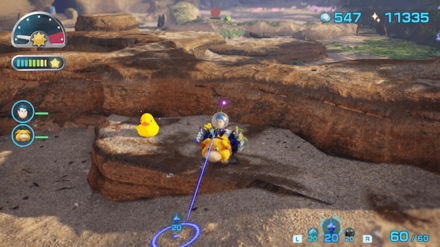
Rescue Command Post Treasures
| Treasure | Map Location | Overworld Location |
|---|---|---|
|
Sparklium: 50 |
 Enlarge Enlarge |
 Enlarge Enlarge |
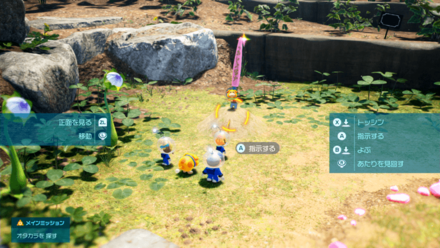
| Command the Pikmin to dig up the ground. | ||
|
Sparklium: 100 |
 Enlarge Enlarge |
 Enlarge Enlarge |
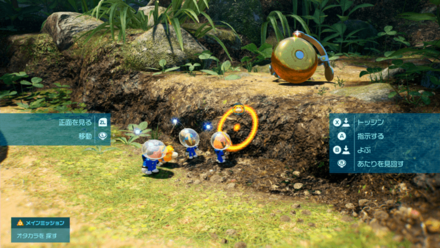
| Throw the Pikmin on the high ground. | ||
|
Sparklium: 150 |
 Enlarge Enlarge |
 Enlarge Enlarge |
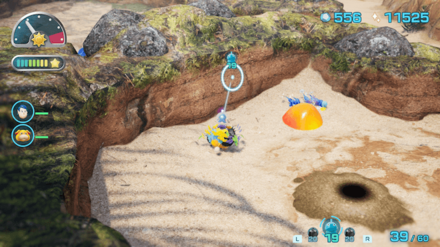
| Use Oatchi's rush ability to drop the treasure on the ground. | ||
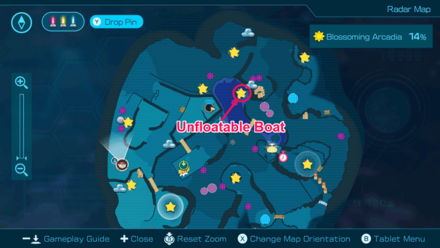
Collect 1,500 Sparklium

| Requirement | Unlocks |
|---|---|
| 1,500 | Blossoming Arcadia |
No more Treasures in sight. Let's hop on to the next area!
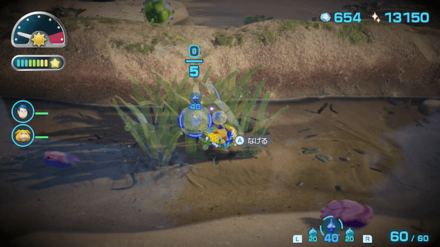
You now need to accumulate 1,500 Sparklium to reach the new goal, so you'll have to find 1,200 more units. The next area is much bigger than Rescue Command Post and contains more Caves where you can also find Treasures and new Pikmin types!
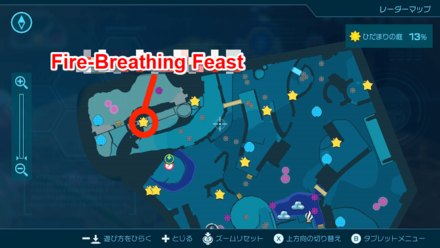
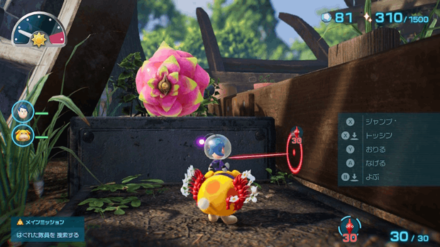
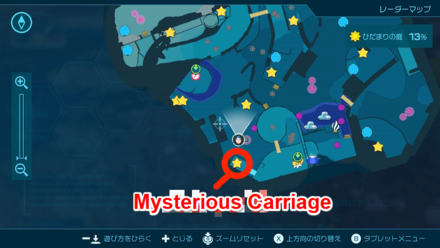
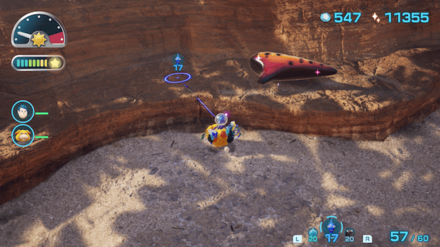
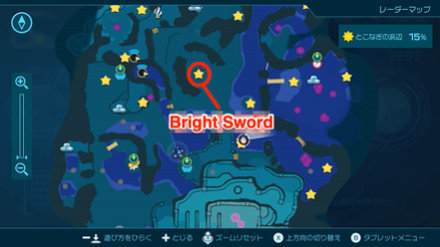
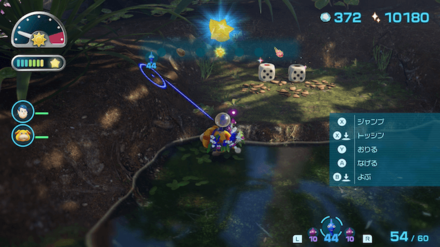
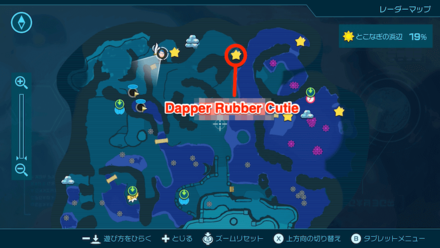
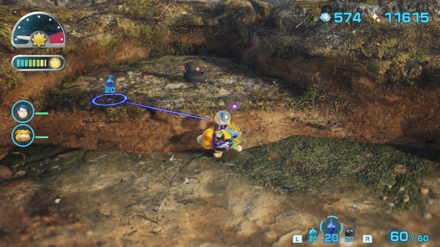
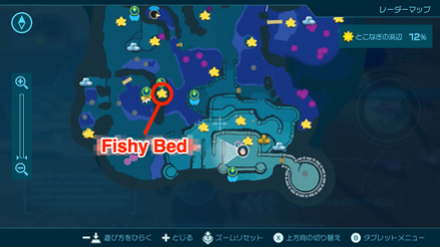
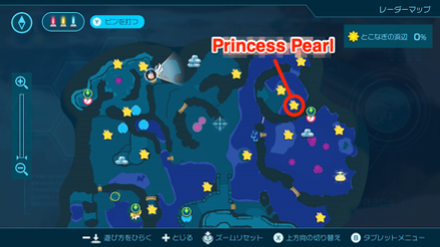
Sun-Speckled Terrace Treasures
| Treasure | Map Location | Overworld Location |
|---|---|---|
|
Sparklium: 80 |
 Enlarge Enlarge |
 Enlarge Enlarge |
| Use Yellow Pikmin to reach the treasure and drag it back to the base. | ||
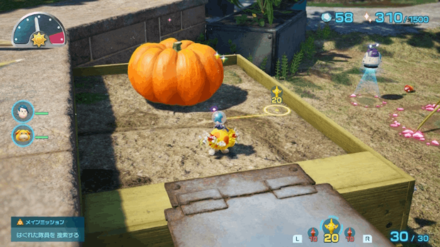
|
Sparklium: 50 |
 Enlarge Enlarge |
 Enlarge Enlarge |
| Command Oatchi to sniff out the treasure to find its exact spot then command him to dig up the potato. | ||
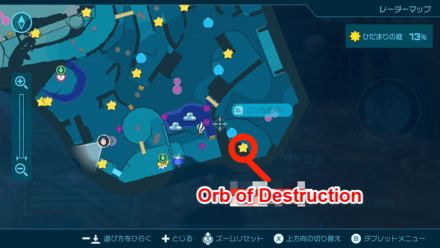
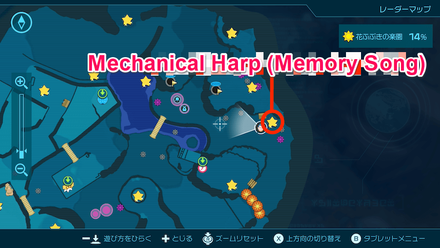
|
Sparklium: 180 |
 Enlarge Enlarge |
 Enlarge Enlarge |
| Throw 12 Pikmin over on the binoculars to pick it up. | ||
|
Sparklium: 170 |
 Enlarge Enlarge |
 Enlarge Enlarge |
| Head to the northwest side of the map and throw Pikmin toward the treasure. | ||
|
Sparklium: 40 |
 Enlarge Enlarge |
 Enlarge Enlarge |
| Use Oatchi's rush ability to drop the treasure on the ground. | ||
|
Sparklium: 150 |
 Enlarge Enlarge |
 Enlarge Enlarge |
| Obtain 10 Yellow Pikmin and lower the bridge on the southwestern side of the map. | ||
|
Sparklium: 150 |
 Enlarge Enlarge |
 Enlarge Enlarge |
| Ride Oatchi and jump on the ledge to reach the treasure. Throw Yellow Pikmin to have them pick it up and send it to the base. | ||
|
Sparklium: 10 |
 Enlarge Enlarge |
 Enlarge Enlarge |
| Use Oatchi's rush ability to break the pots to obtain two pieces of the Perforated Raft. | ||
|
Sparklium: 40 |
 Enlarge Enlarge |
 Enlarge Enlarge |
| Throw Yellow Pikmin on top of the can to dig the treasure. | ||
|
Sparklium: 30 |
 Enlarge Enlarge |
 Enlarge Enlarge |
| Head to the northwestern side of the map and throw Pikmin on the flower pot to dig up the treasure. | ||
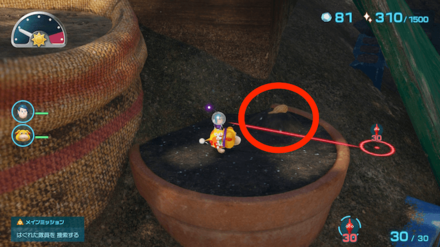
|
Sparklium: 70 |
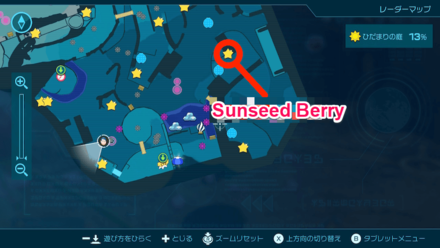 Enlarge Enlarge |
 Enlarge Enlarge |
| Throw Pikmin towards the Sunseed Berry to pick it up from the high ledge. | ||
|
Sparklium: 40 |
 Enlarge Enlarge |
 Enlarge Enlarge |
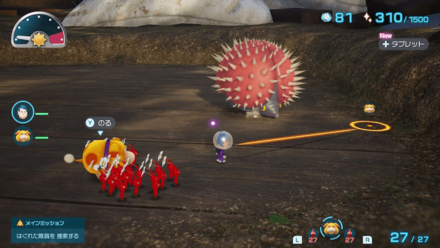
| Defeat the enemy with spikes and it will drop the treasure as a reward. | ||
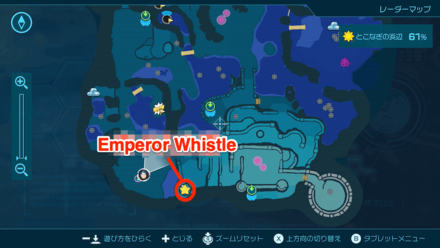
|
Sparklium: 110 |
 Enlarge Enlarge |
 Enlarge Enlarge |
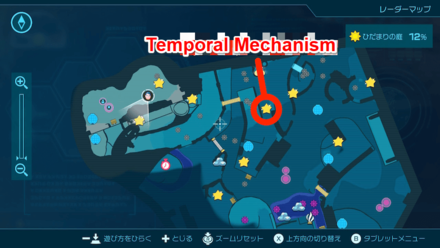
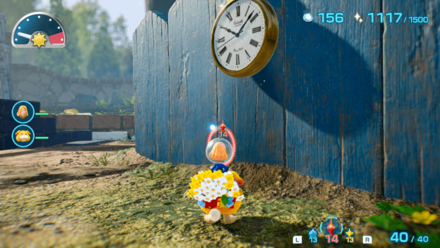
| Use Oatchi's rush ability towards the blue wall to drop the watch on the ground. | ||
Sun-Speckled Terrace 100% Guide
Collect 4,000 Sparklium
| Requirement | Unlocks |
|---|---|
| 4,000 | Serene Shores |
If you decided to 100% Sun-Speckled Terrace, you'd have around 3,500 units of Sparklium in stock. Just a few more until you reach the next goal!
Get the remaining Sparklium you need by exploring the new area, Blossoming Arcadia.
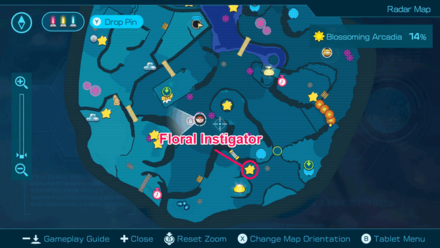
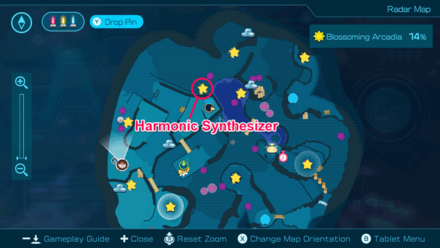
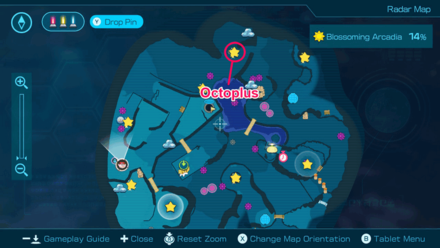
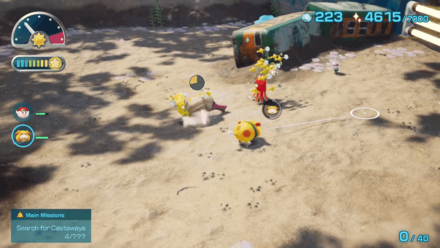
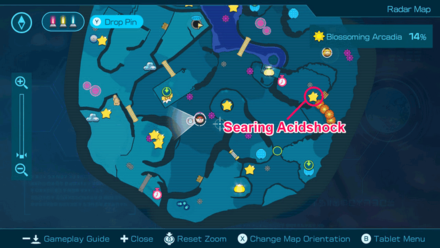
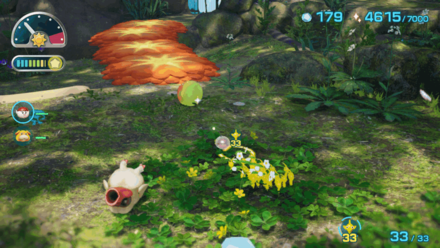
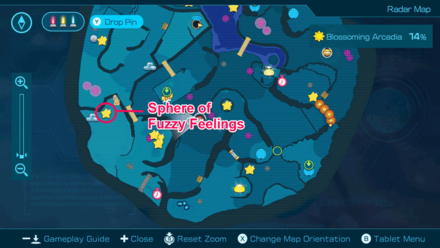
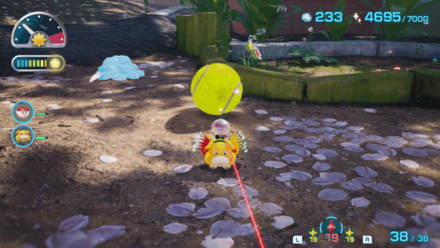
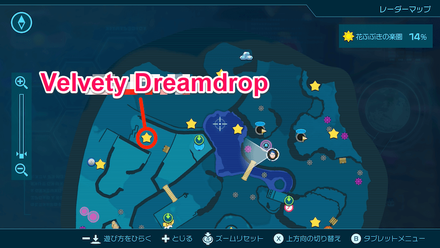
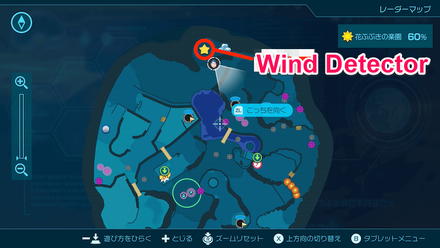
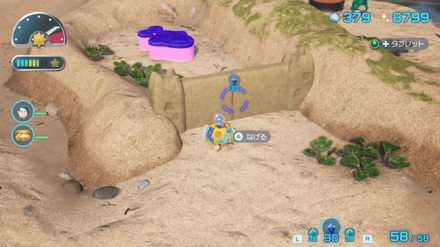
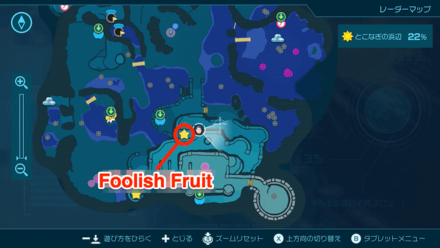
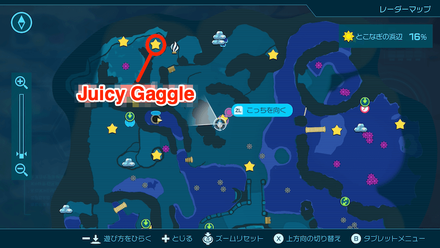
Blossoming Arcadia Treasures
| Treasure | Map Location | Overworld Location |
|---|---|---|
|
Sparklium: 80 |
 Enlarge Enlarge |
 Enlarge Enlarge |
| Defeat the boss and it will drop the treasure. | ||
|
Sparklium: 20 |
 Enlarge Enlarge |
 Enlarge Enlarge |
| Defeat the enemy and the treasure will appear. | ||
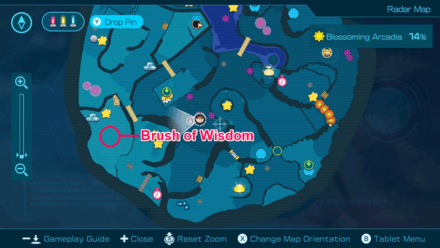
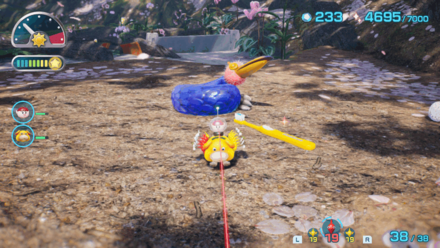
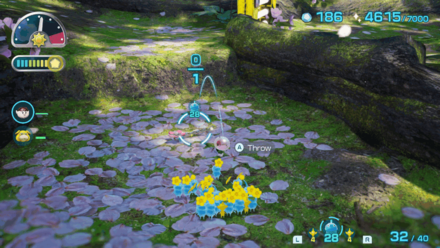
|
Sparklium: 80 |
 Enlarge Enlarge |
 Enlarge Enlarge |
| Throw Yellow Pikmin on the high ground. | ||
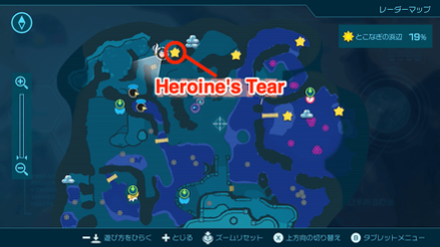
|
Sparklium: 20 |
 Enlarge Enlarge |
 Enlarge Enlarge |
| Pick up the treasure on the ground full of pink petals. | ||
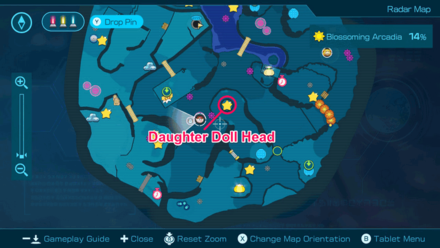
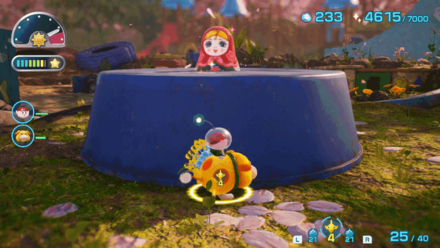
|
Sparklium: 110 |
 Enlarge Enlarge |
 Enlarge Enlarge |
| Pick it up from the ground. | ||
|
Sparklium: 150 |
 Enlarge Enlarge |
 Enlarge Enlarge |
| Throw Yellow Pikmin to reach the treasure. | ||
|
Sparklium: 80 |
 Enlarge Enlarge |
 Enlarge Enlarge |
| Dig it up using Pikmin or Oatchi. | ||
|
Sparklium: 40 |
 Enlarge Enlarge |
 Enlarge Enlarge |
| Defeat the enemy and the treasure will appear. | ||
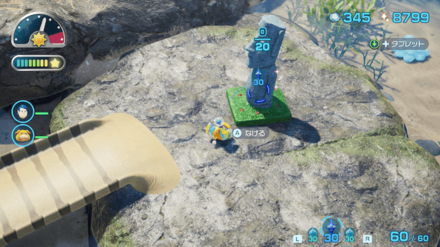
|
Sparklium: 50 |
 Enlarge Enlarge |
 Enlarge Enlarge |
| Complete the wall using Raw Materials, climb up, and collect the treasure. | ||
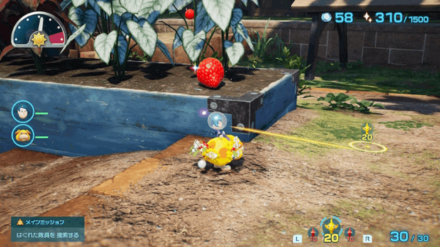
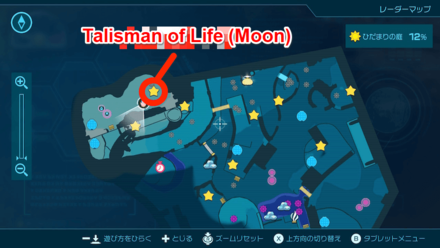
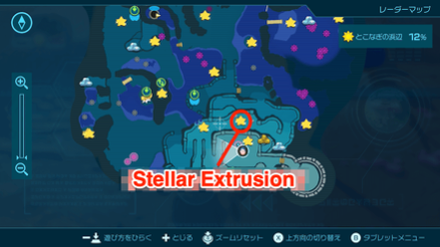
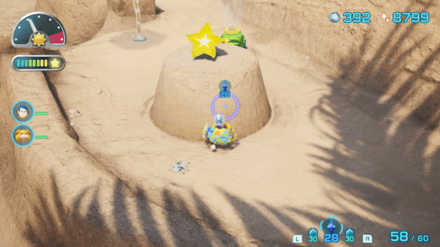
|
Sparklium: 180 |
 Enlarge Enlarge |
 Enlarge Enlarge |
| Defeat the Mamuta and the treasure will appear. | ||
|
Sparklium: 100 |
 Enlarge Enlarge |
 Enlarge Enlarge |
| Dig it up using Pikmin or Oatchi. | ||
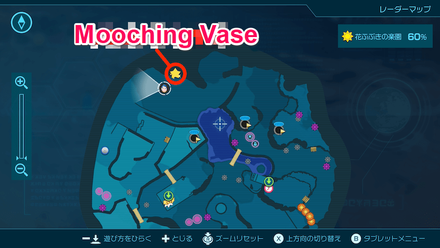
|
Sparklium: 20 |
 Enlarge Enlarge |
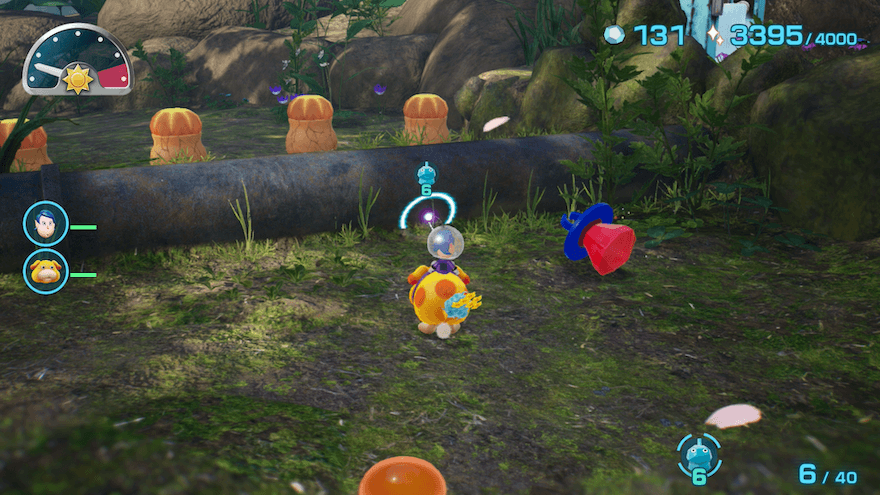 |
| Pick up the treasure beside the metal pipe. | ||
|
Sparklium: 40 |
 Enlarge Enlarge |
 Enlarge Enlarge |
| Pick up the treasure beside the Pellet Posy. | ||
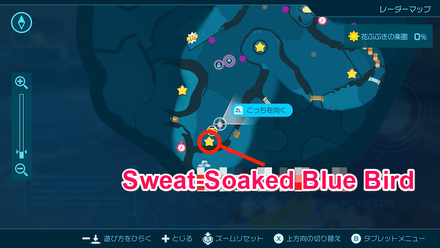
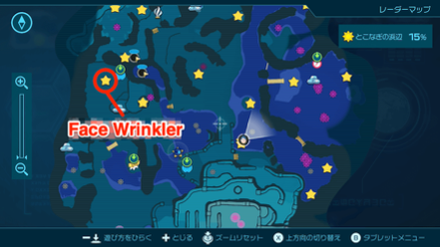
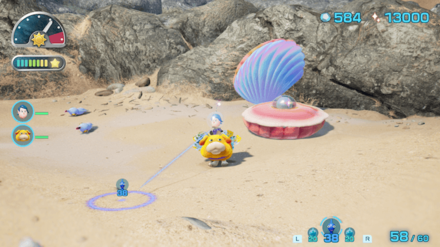
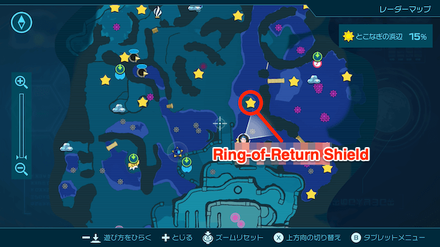
|
Sparklium: 180 |
 Enlarge Enlarge |
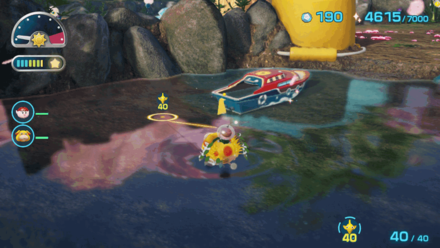 Enlarge Enlarge |
| Use Blue Pikmin to collect the treasure. | ||
|
Sparklium: 40 |
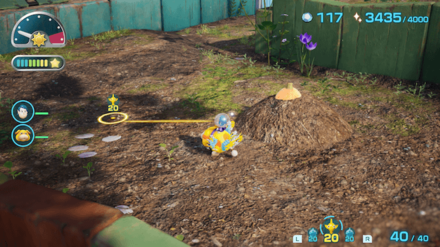 Enlarge Enlarge |
 Enlarge Enlarge |
| Use Yellow Pikmin to dig it up from the ground. | ||
|
Sparklium: 200 |
 Enlarge Enlarge |
 Enlarge Enlarge |
| Use 50 Pikmin to carry it to the base. | ||
|
Sparklium: 110 |
 Enlarge Enlarge |
 Enlarge Enlarge |
| Dig it up using PIkmin or Oatchi. | ||
Collect 7,000 Sparklium

| Requirement | Unlocks |
|---|---|
| 7,000 | Mission Clear! |
Reaching the previous goal will unlock Serene Shores for more treasures and castaways! The new 7,000 Sparklium goal can be reached with the first two areas alone if you aim for 100% exploration.
Once you meet the required number of Sparklium units, the S.S. Shepherd will be completely restored and the mission cleared!
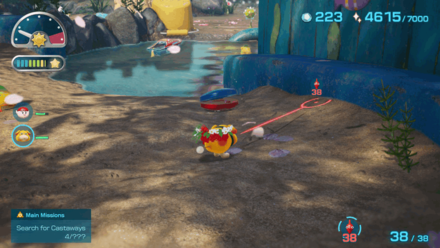
However, you'll need to rescue the Rescue Corps pilot first by following the Rescue the Rescue Corps main mission before it flies again.
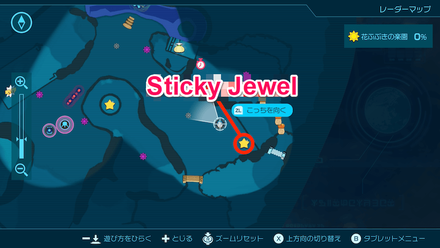
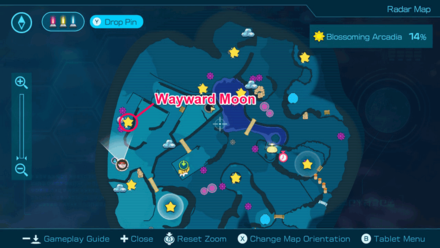
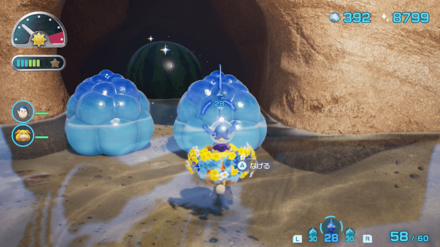
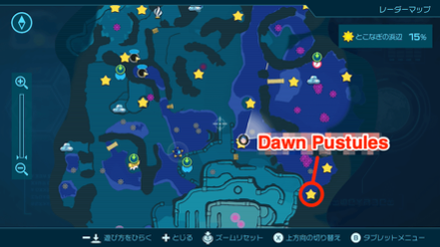
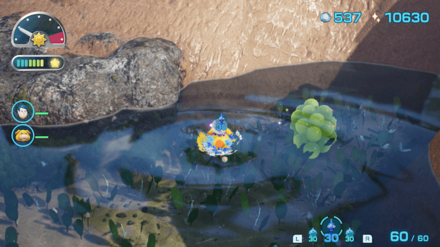
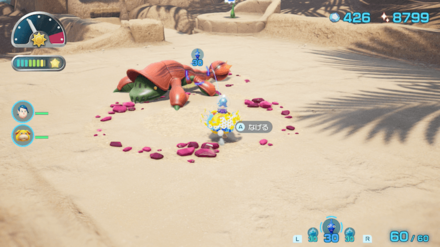
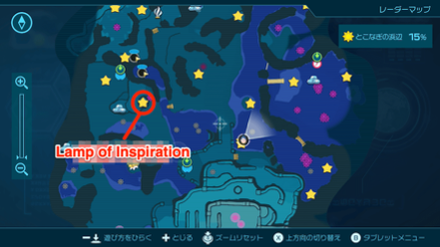
Serene Shores Treasures
| Treasure | Map Location | Overworld Location |
|---|---|---|
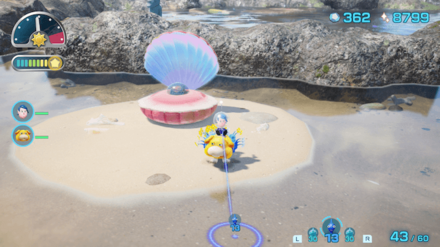
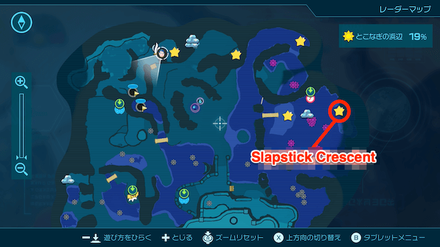
|
Sparklium: 150 |
 Enlarge Enlarge |
 Enlarge Enlarge |
| Throw Pikmin to reach and collect the treasure. | ||
|
Sparklium: 5 |
 Enlarge Enlarge |
 Enlarge Enlarge |
| Dig the sand to get the treasure. | ||
|
Sparklium: 20 |
 Enlarge Enlarge |
 Enlarge Enlarge |
| Throw Blue Pikmin to collect it. | ||
|
Sparklium: 200 |
 Enlarge Enlarge |
 Enlarge Enlarge |
| Destroy the two Hydro Jellies and use Pikmin and Oatchi to carry the treasure as you'll be needing power of 100 Pikmin. | ||
|
Sparklium: 100 |
 Enlarge Enlarge |
 Enlarge Enlarge |
| Use Blue Pikmin to reach it. | ||
|
Sparklium: 110 |
 Enlarge Enlarge |
 Enlarge Enlarge |
| Use Blue Pikmin to collect the treasure. | ||
|
Sparklium: 80 |
 Enlarge Enlarge |
 Enlarge Enlarge |
| Throw Yellow Pikmin to dig up the treasure and carry it back. | ||
|
Sparklium: 50 |
 Enlarge Enlarge |
 Enlarge Enlarge |
| Defeat an enemy in the west part of the map to obtain the treasure. | ||
|
Sparklium: 80 |
 Enlarge Enlarge |
 Enlarge Enlarge |
| Defeat the enemy for it to drop the treasure. | ||
|
Sparklium: 110 |
 Enlarge Enlarge |
 Enlarge Enlarge |
| Break a sandy wall near the middle of the map to get to the treasure. | ||
|
Sparklium: 80 |
 Enlarge Enlarge |
 Enlarge Enlarge |
| Dig it up using Pikmin or Oatchi. | ||
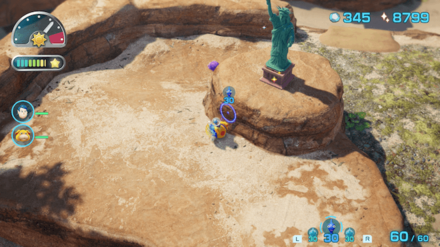
|
Sparklium: 450 |
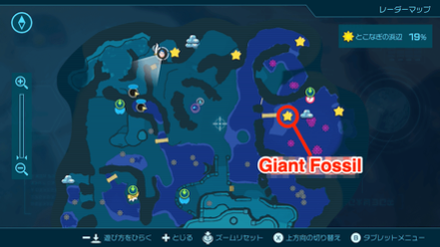 Enlarge Enlarge |
 Enlarge Enlarge |
| Order Pikmin to carry the treasure after repairing the bridge. | ||
|
Sparklium: 90 |
 Enlarge Enlarge |
 Enlarge Enlarge |
| Break the rock blocking the airstream then jump on it. You can dig up the treasure after getting to the higher ground. | ||
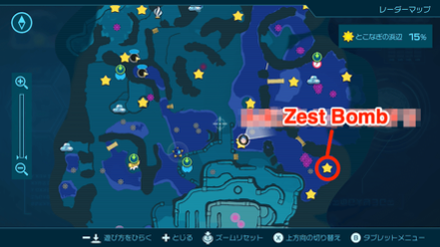
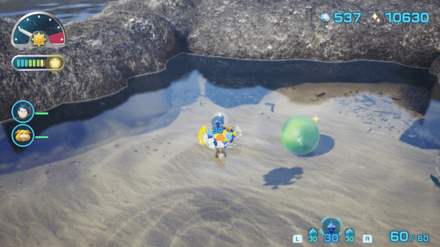
|
Sparklium: 20 |
 Enlarge Enlarge |
 Enlarge Enlarge |
| Defeat the enemy to collect the treasure. | ||
|
Sparklium: 300 |
 Enlarge Enlarge |
 Enlarge Enlarge |
| Throw Yellow Pikmin to reach it. | ||
|
Sparklium: 90 |
 Enlarge Enlarge |
 Enlarge Enlarge |
| Can be found near the center close to the potted plants and where there are Blue Pikmin nearby. | ||
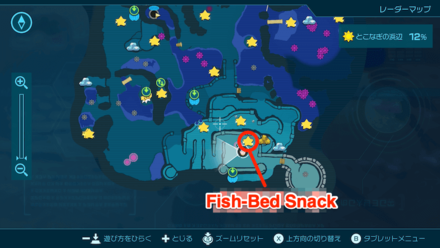
|
Sparklium: 40 |
 Enlarge Enlarge |
 Enlarge Enlarge |
| Use Pikmin to pull the fishing rod and the treasure will appear. | ||
|
Sparklium: 400 |
 Enlarge Enlarge |
 Enlarge Enlarge |
| Use Blue Pikmin to dig it up from sand underwater. | ||
|
Sparklium: 40 |
 Enlarge Enlarge |
 Enlarge Enlarge |
| Find a hole east of the map then have Oatchi Dig for the treasure. | ||
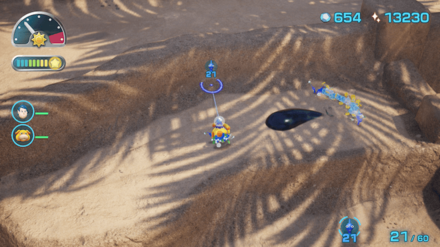
|
Sparklium: 150 |
 Enlarge Enlarge |
 Enlarge Enlarge |
| Throw Pikmin on the clam to get the treasure. | ||
|
Sparklium: 40 |
 Enlarge Enlarge |
 Enlarge Enlarge |
| Defeat the Pearly Clamclamp to collect the treasure. | ||
|
Sparklium: 120 |
 Enlarge Enlarge |
 Enlarge Enlarge |
| Use Blue Pikmin to retrieve it. | ||
|
Sparklium: 20 |
 Enlarge Enlarge |
 Enlarge Enlarge |
| Use Blue Pikmin to collect it from the grass. In the afternoon, you can pick it up from the ground. | ||
|
Sparklium: 20 |
 Enlarge Enlarge |
 Enlarge Enlarge |
| Pick it up from the ground. | ||
|
Sparklium: 40 |
 Enlarge Enlarge |
 Enlarge Enlarge |
| Clear the area of hazards and enemies then throw Yellow Pikmin on the high ground. | ||
|
Sparklium: 60 |
 Enlarge Enlarge |
 Enlarge Enlarge |
| It is located in the southwest part of the map. Use the Blue Pikmin to pick up the treasure. | ||
Secure Energy Source Mission Unlockables and Rewards
Unlock New Areas
| Sparklium | Unlockables |
|---|---|
| 300 | 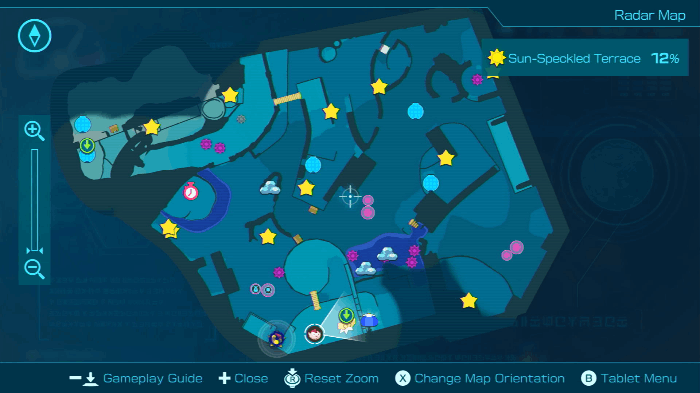 Sun-Speckled Terrace Sun-Speckled Terrace |
| 1,500 | 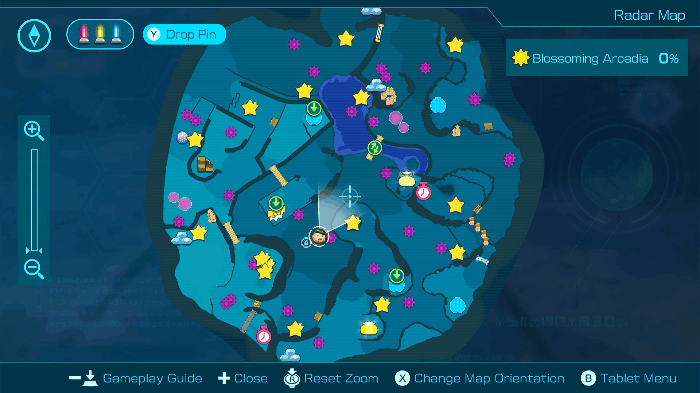 Blossoming Arcadia Blossoming Arcadia |
| 4,000 | 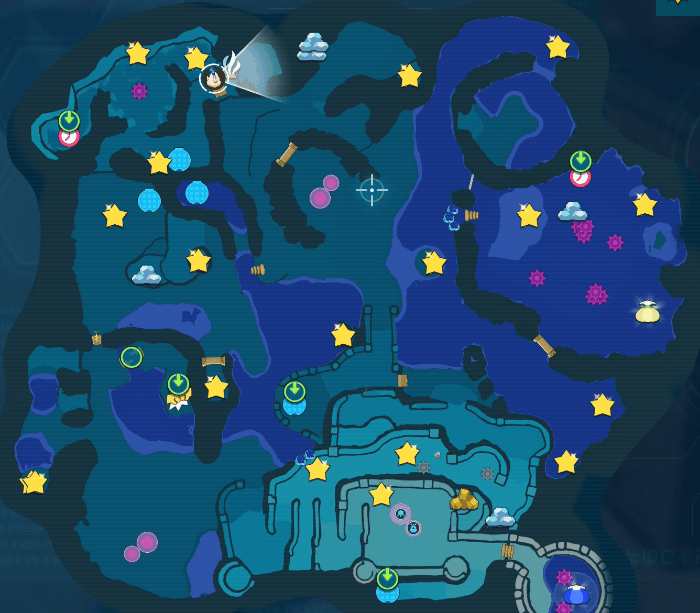 Serene Shores Serene Shores |
| 7,000 | Mission Clear! |
Gathering Sparklium until you meet the current requirement in the mission unlocks new areas to explore!
You'll get Sparklium for every defeated enemy you bring back to the S.S. Beagle, but the fastest way to obtain them is by collecting Treasures you find in surface and cave areas!
Unlock the Hero's Hideaway

Completing Secure Energy Source and Rescue the Rescue Corps (for Bernard) will unlock the fourth area, Hero's Hideaway! Explore this area to continue your search for Captain Olimar.
Pikmin 4 Related Guides

List of All Main Missions
| All Main Mission Walkthrough Guides | |
|---|---|
| Rescue the Rescue Corps | Secure Energy Source |
| Rescue Olimar | Rescue All Castaways |
| Cure Oatchi | Investigate the Planet |
Comment
Author

Secure Energy Source Main Mission Guide
Please participate in our site
improvement survey
03/2026
improvement survey
03/2026
Would you assist in
improving Game8's site?
improving Game8's site?

×
We are listening to our users' valuable opinions and discussing how to act on them.
The information collected through this survey will be used for the purpose of improving our services. In addition, the information will only be disclosed a part of a statistic in a format that will not allow identification of personal information.
Begin Survey
Not Now
×
Please rate each item regarding Game8.co's Advertisements.
Amount of Ads
Very Dissatisfied
Somewhat Dissatisfied
Fine
Somewhat Satisfied
Highly Satisfied
Placement of Ads
Timing of Ad Display
Ad Loading Speed
Safeness of Ads
Content of Ads
×
Please rate each item regarding Game8.co's Quality of Articles.
Amount of information
Very Dissatisfied
Somewhat Dissatisfied
Fine
Somewhat Satisfied
Highly Satisfied
Frequency of updates
Speed of new information
Accuracy of articles
Understandibility of articles
Readability of sentences
×
Please rate each item regarding Game8.co's Usability of the Site.
Ease of finding information
Very Dissatisfied
Somewhat Dissatisfied
Fine
Somewhat Satisfied
Highly Satisfied
Loading Speed
Use of Color
Font Size
Visibility of Images
Easy to Understand Layout
×
Please rate each item regarding Game8.co's Message Boards, Comments.
Ease of Writing
Very Dissatisfied
Somewhat Dissatisfied
Fine
Somewhat Satisfied
Highly Satisfied
Readability
Ease in Finding Information
Comment Quality
Comment Quantity
Admin Response
×
Please rate each item regarding Game8.co's Site's new design.
Please rate our site's new design
Very Dissatisfied
Somewhat Dissatisfied
Fine
Somewhat Satisfied
Highly Satisfied
Do you think that the website's design change makes the site easier to use?
Has the new design made it easier for you to find information on the site?
Has the new design improved the overall visual appeal of the site?
How would you rate your overall satisfaction with the new design of the site?
×
How likely are you to recommend Game8 to someone you know?
Very Unlikely
0
1
2
3
4
5
6
7
8
9
10
Very Likely
If you have other opinions regarding potential improvement to the website, please share them with us. We would appreciate your honest opinion.
Note: This is a free response section, so you can proceed without entering anything.
Note: Please be sure not to enter any kind of personal information into your response.
Note: Please be sure not to enter any kind of personal information into your response.
×
Thank You
×
Thank you for participating in our survey! Your answers will help us to improve the quality of our website and services.
We hope you continue to make use of Game8.
We hope you continue to make use of Game8.
Close
Rankings
- We could not find the message board you were looking for.
Gaming News


![Slay the Spire 2 Review [Early Access] | Still the Deckbuilder to Beat](https://img.game8.co/4433115/44e19e1fb0b4755466b9e516ec7ffb1e.png/thumb)

![Marathon Review [First Impressions] | Playing The Long Game](https://img.game8.co/4435736/b9b1ec1e9219416dfc2599f85295d6ef.png/thumb)
Popular Games

Genshin Impact Walkthrough & Guides Wiki
Honkai: Star Rail Walkthrough & Guides Wiki
Umamusume: Pretty Derby Walkthrough & Guides Wiki
Pokemon Pokopia Walkthrough & Guides Wiki
Resident Evil Requiem (RE9) Walkthrough & Guides Wiki
Monster Hunter Wilds Walkthrough & Guides Wiki
Wuthering Waves Walkthrough & Guides Wiki
Arknights: Endfield Walkthrough & Guides Wiki
Pokemon FireRed and LeafGreen (FRLG) Walkthrough & Guides Wiki
Pokemon TCG Pocket (PTCGP) Strategies & Guides Wiki


Recommended Games
Fire Emblem Heroes (FEH) Walkthrough & Guides Wiki
Diablo 4: Vessel of Hatred Walkthrough & Guides Wiki
Yu-Gi-Oh! Master Duel Walkthrough & Guides Wiki
Super Smash Bros. Ultimate Walkthrough & Guides Wiki
Pokemon Brilliant Diamond and Shining Pearl (BDSP) Walkthrough & Guides Wiki
Elden Ring Shadow of the Erdtree Walkthrough & Guides Wiki
Monster Hunter World Walkthrough & Guides Wiki
The Legend of Zelda: Tears of the Kingdom Walkthrough & Guides Wiki
Persona 3 Reload Walkthrough & Guides Wiki
Cyberpunk 2077: Ultimate Edition Walkthrough & Guides Wiki


All rights reserved
© Nintendo.
The copyrights of videos of games used in our content and other intellectual property rights belong to the provider of the game.
The contents we provide on this site were created personally by members of the Game8 editorial department.
We refuse the right to reuse or repost content taken without our permission such as data or images to other sites.