Drafty Gallery Treasures, Castaway, and Onion Locations
❀ Pikmin 4 is out! Get a headstart by following these tips!
❀ Get more Pikmin by getting all the onion types!
❀ New and returning bosses are back in the Piklopedia!
❀ Brave the Trial of the Sage Leaf to get more onions!
❀ Make Oatchi stronger by upgrading his skills!
Drafty Gallery in Pikmin 4 is a cave that can be found in Blossoming Arcadia. See all treasures, bosses, enemies, castaways, and onion locations in Drafty Gallery. The guide below also has its map, a section on how to reach it and tips and strategies on how to complete it 100%.
List of Contents
Drafty Gallery Map and Overview
Map
| Map Location | 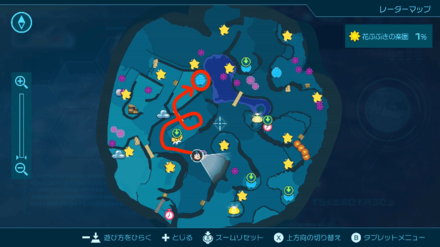 |
|---|---|
| Overworld Location | 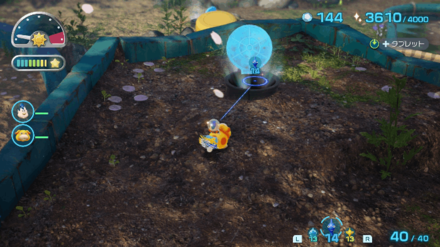 |
Overview
| Location | Blossoming Arcadia | ||
|---|---|---|---|
| Castaways | 1 | ||
| Treasures | 10 | ||
| Onions | 0 | ||
| Pikmin | Ice Pikmin | ||
How to Reach Drafty Gallery
Cross the Bridge Near the Dandori Battle
The Drafty Gallery can be reached by crossing the bridge north of the base. The bridge is nearby the Dandori Battle cave.
Drafty Gallery Bosses and Enemies
Bosses
|
|
The Puffy Blowhog floats in the air, so you will need to throw your Pikmin at it to drag it to the ground. Once it falls to the ground, use Oatchi's Rush or your Charging Horn to deal damage.
The Puffy Blowhog blows a gust of wind as its attack that can push away your Pikmin. If this happens, there is a chance that you may lose your Pikmin if they fall off the arena.
Enemies
|
|
|
Drafty Gallery Treasure Locations
Sublevel 1
| Jump to a Sublevel | |
|---|---|
| Sublevel 1 | Sublevel 2 |
| Sublevel 3 | Sublevel 4 |
| Drafty Gallery Sublevel 1 Map | ||
|---|---|---|
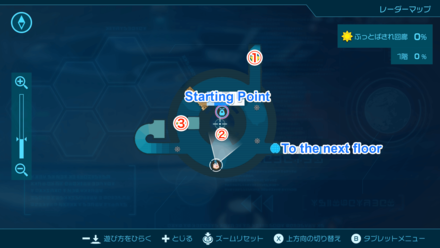 |
||
| All Treasures | ||
| 1 |
Sparklium: 50 |
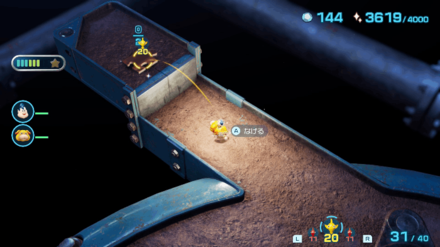 Use Yellow Pikmin to reach the treasure. |
| 2 |
Sparklium: 130 |
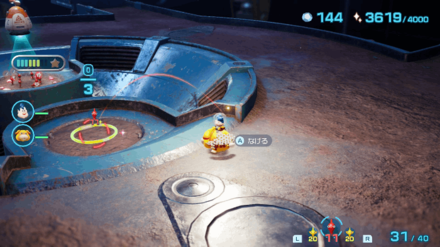 Pick it up from the ground. |
| 3 |
Sparklium: 70 |
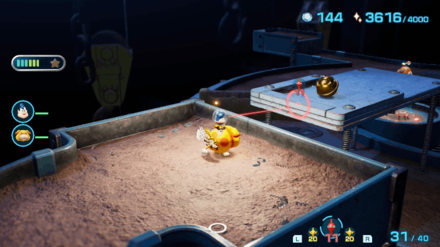 Climb up the hill and use Yellow Pikmin to reach the high ground and carry the treasure. |
1. & 3. Use Yellow Pikmin to Pick Up the Two Treasures
The two treasures, Memory Fragment (Top...Probably?) and Spouse Alert, are located on high platforms. Use Yellow Pikmin to reach the platform to transport them to the base.
Sublevel 2
| Jump to a Sublevel | |
|---|---|
| Sublevel 1 | Sublevel 2 |
| Sublevel 3 | Sublevel 4 |
| Drafty Gallery Sublevel 2 Map | ||
|---|---|---|
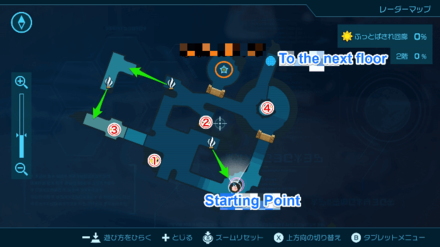 |
||
| All Treasures | ||
| 1 |
Sparklium: 150 |
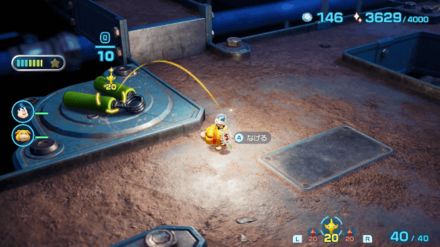 Throw Pikmin over the treasure to pick it up. |
| 2 |
Sparklium: 5 |
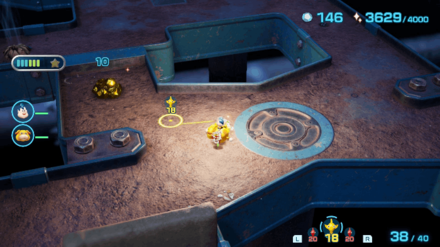 Pick up the 10 pieces from the ground. |
| 3 |
Sparklium: 110 |
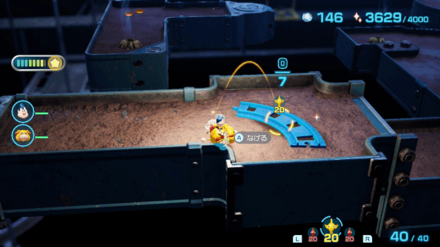 Ride the wind spout to reach the opposite path where the treasure is located. |
| 4 |
Sparklium: 110 |
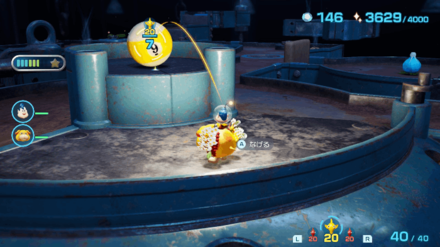 Throw the Pikmin towards the treasure to pick it up. |
3. Ride the Wind Spout to Reach the Opposite Area
You can ride the wind spout at the upper-left corner of the map to reach the opposite path and transport the Back-at-the-Beginning Track.
Sublevel 3
| Jump to a Sublevel | |
|---|---|
| Sublevel 1 | Sublevel 2 |
| Sublevel 3 | Sublevel 4 |
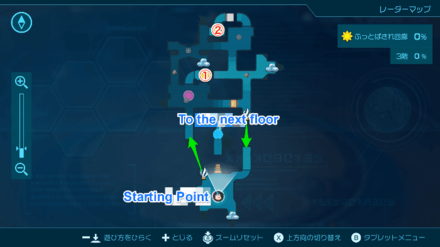
| Drafty Gallery Sublevel 3 Map | ||
|---|---|---|
 |
||
| All Treasures | ||
| 1 |
Sparklium: 120 |
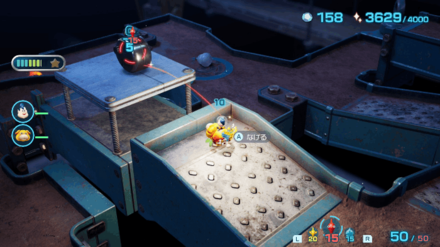 Climb up the hill to reach a high ground and throw the Pikmin toward the treasure. |
| 2 |
Sparklium: 110 |
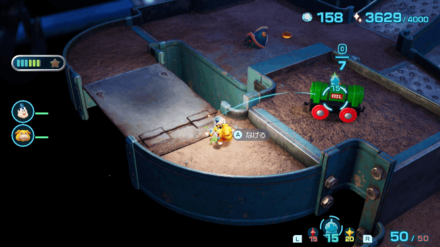 Use 20 Pikmin to take down the bridge and make a path leading to the treasure. |
1. Use Yellow Pikmin to Pick Up the Internal-Clock Measurer
Throw Yellow Pikmin over to the opposite platform where the Internal-Clock Measurer is located.
Sublevel 4
| Jump to a Sublevel | |
|---|---|
| Sublevel 1 | Sublevel 2 |
| Sublevel 3 | Sublevel 4 |
| Drafty Gallery Sublevel 4 Map | ||
|---|---|---|
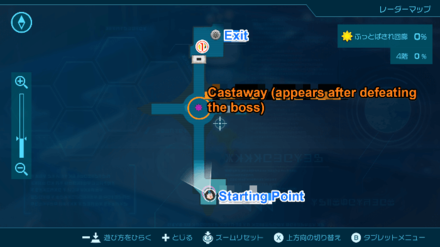 |
||
| All Treasures | ||
| 1 |
Sparklium: 110 |
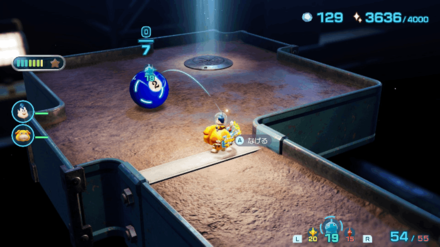 Defeat the Puffy Blowhog boss for the treasure to spawn. |
1. Defeat Puffy Blowhog for the Treasure to Appear
The Sphere of Family only appears when you defeat the boss on the 4th sublevel, Puffy Blowhog.
Drafty Gallery Castaway Locations
Defeat the Puffy Blowhog at Sublevel 4
The castaway will spawn on the 4th floor of Drafty Gallery once you defeat the boss, Puffy Blowhog.
Drafty Gallery Onion Locations
No Onions
There are no onions in this cave.
No Flarlics
There are no flarlics in this cave.
Drafty Gallery Tips and Strategies
| Drafty Gallery Tips and Strategies |
|---|
Use Red Pikmin to Destroy Flaming Rocks
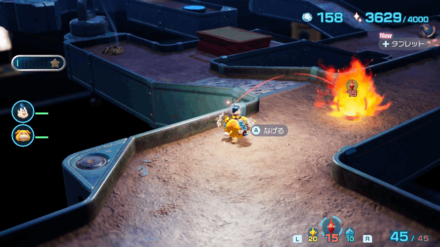
There is a stone in one of the areas where it will burst into flames if you get close. You can use Red Pikmin to destroy this so it will no longer emit fire.
Pikmin 4 Related Guides

List of All Cave Locations and Maps
All Rescue Command Post Caves
| Rescue Command Post Cave |
|---|
| Burrow of Beginnings |
All Sun-Speckled Terrace Caves
| Sun-Speckled Terrace Caves | |
|---|---|
| Last-Frost Cavern | Hectic Hollows |
| Crackling Cauldron | Industrial Maze |
| Aquiferous Summit | - |
All Blossoming Arcadia Caves
| Blossoming Arcadia Caves | |
|---|---|
| Secluded Courtyard | Drafty Gallery |
| Sightless Passage | Kingdom of Beasts |
All Serene Shores Caves
| Serene Shores Caves | |
|---|---|
| Subzero Sauna | Seafloor Resort |
| Below-Grade Discotheque | Engulfed Castle |
All Hero's Hideaway Caves
| Hero's Hideaway Caves | |
|---|---|
| Plunder Palace | Doppelganger's Den |
| Frozen Inferno | - |
All Giant's Hearth Caves
| Giant's Hearth Caves | |
|---|---|
| Dream Home | Ultimate Testing Range |
| Cradle of the Beast | - |
All Primordial Thicket Caves
| Primordial Thicket Caves | |
|---|---|
| Subterranean Swarm | The Mud Pit |
| Cavern for a King | - |
Comment
Author
Drafty Gallery Treasures, Castaway, and Onion Locations
improvement survey
03/2026
improving Game8's site?

Your answers will help us to improve our website.
Note: Please be sure not to enter any kind of personal information into your response.

We hope you continue to make use of Game8.
Rankings
- We could not find the message board you were looking for.
Gaming News
Popular Games

Genshin Impact Walkthrough & Guides Wiki

Honkai: Star Rail Walkthrough & Guides Wiki

Umamusume: Pretty Derby Walkthrough & Guides Wiki

Pokemon Pokopia Walkthrough & Guides Wiki

Resident Evil Requiem (RE9) Walkthrough & Guides Wiki

Monster Hunter Wilds Walkthrough & Guides Wiki

Wuthering Waves Walkthrough & Guides Wiki

Arknights: Endfield Walkthrough & Guides Wiki

Pokemon FireRed and LeafGreen (FRLG) Walkthrough & Guides Wiki

Pokemon TCG Pocket (PTCGP) Strategies & Guides Wiki
Recommended Games

Fire Emblem Heroes (FEH) Walkthrough & Guides Wiki

Diablo 4: Vessel of Hatred Walkthrough & Guides Wiki

Yu-Gi-Oh! Master Duel Walkthrough & Guides Wiki

Super Smash Bros. Ultimate Walkthrough & Guides Wiki

Pokemon Brilliant Diamond and Shining Pearl (BDSP) Walkthrough & Guides Wiki

Elden Ring Shadow of the Erdtree Walkthrough & Guides Wiki

Monster Hunter World Walkthrough & Guides Wiki

The Legend of Zelda: Tears of the Kingdom Walkthrough & Guides Wiki

Persona 3 Reload Walkthrough & Guides Wiki

Cyberpunk 2077: Ultimate Edition Walkthrough & Guides Wiki
All rights reserved
© Nintendo.
The copyrights of videos of games used in our content and other intellectual property rights belong to the provider of the game.
The contents we provide on this site were created personally by members of the Game8 editorial department.
We refuse the right to reuse or repost content taken without our permission such as data or images to other sites.




![Slay the Spire 2 Review [Early Access] | Still the Deckbuilder to Beat](https://img.game8.co/4433115/44e19e1fb0b4755466b9e516ec7ffb1e.png/thumb)

![Marathon Review [First Impressions] | Playing The Long Game](https://img.game8.co/4435736/b9b1ec1e9219416dfc2599f85295d6ef.png/thumb)


