Blighted Village Maps and Points of Interest
★ All Updates for Patch 5
☆ Beginner Guides for All Starter Players
★ Simple Character Creation Guide for beginners
☆ A Full Guide to Multiclassing
★ All Side Quests and Event Points
☆ All Races and Subraces

In Baldur's Gate 3 (BG3), the Blighted Village is a gated area home to goblins and other monsters and can be accessed from the Wilderness Forest area. Read on to view the Blighted Village Maps and to find out all the points of interest in this area.
List of Contents
Blighted Village Maps
| Main Map | Cellar |
| Blacksmith's Forge | Windmill Basement |
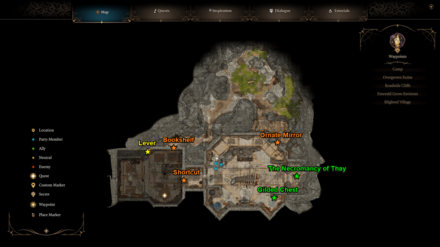
Blighted Village Main Map

This main map is connected to the open area of the map, through the Forest area in the Wilderness. When you first arrive here, there will be goblins guarding the area who'll instantly be hostile against you.
How to Beat the Goblins in Blighted Village
Cellar Map
This cellar is located beneath the apothecary house located near the Blighted Village Waypoint. There are a bunch of enemies, locked doors, and treasures inside this area.
Blacksmith's Forge Map
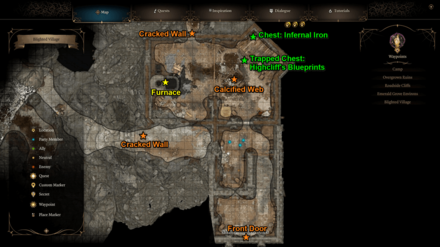
The blacksmith's building is located north of the waypoint. This area contains the Furnace that you can use to forge a Masterwork Weapon.
There's a couple of secret ways inside this area to the Whispering Depths, which leads to one of the entrances to the Underdark.
How to Finish the Masterwork Weapon
Windmill Basement Map
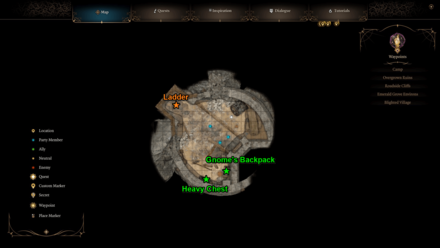
This is a tiny area located beneath the windmill, northwest of the village. There are a few items of value lootable inside.
Blighted Village Points of Interest
| Blighted Village Main Map Points of Interest |
|---|
|
・Well
|
Blighted Village Waypoint
| Blighted Village Waypoint |
|---|
 |
| Coordinates: (32, 391) |
The Blighted Village Waypoint is located inside the village, near the eastern entrance.
Entrances
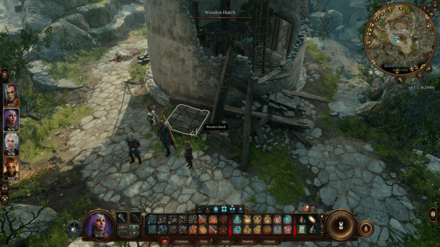
Cellar Hatch
| Cellar Hatch |
|---|
 |
| Coordinates: (32, 379) |
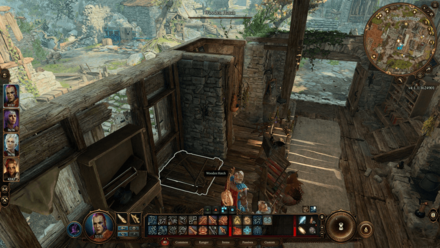
The entrance to the Cellar is a Wooden Hatch located behind the counter of the apothecary's building.
Well
| Well |
|---|
 |
| Coordinates: (24, 401) |
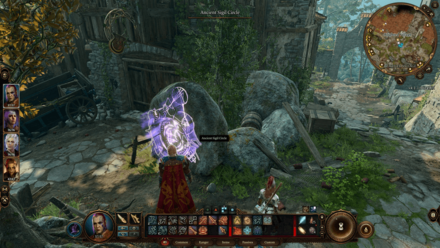
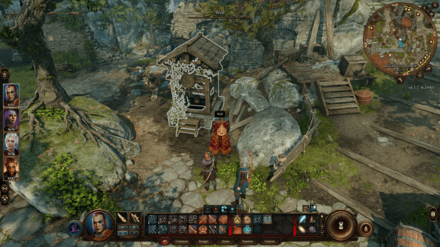
You'll find a well at the middle of the village. When you examine it, you'll find out that it's a passage to an underground area, the Whispering Depths, which is one of the paths to reach the Underdark.
Blacksmith's Forge Door
| Blacksmith Basement Door |
|---|
 |
| Coordinates: (46, 407) |
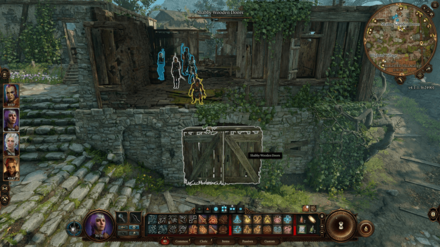
In the lower floor of the building north of the waypoint, you'll find the locked Shabby Wooden Doors. You can lockpick it to get in, but you can also find this door's key, the Rusted Key, located in the upper floor of the same building.
Calcified Web
| Calcified Web |
|---|
 |
| Coordinates: (46, 424) |
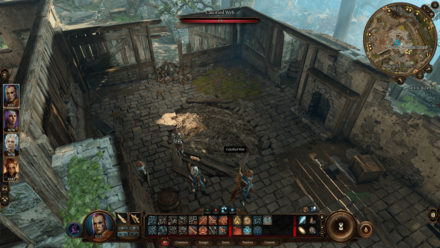
In the upper floor of the blacksmith's building, you'll find this Calcified Web covering a hole on the floor. Destroy the web to reveal the hole that you can jump into to get to the basement.
Windmill Hatch
| Windmill Hatch |
|---|
 |
| Coordinates: (-15, 432) |
In the northwest part of the village, you'll find a windmill. Behind this windmill, you'll spot a Wooden Hatch; enter it to get to the basement of the windmill.
Inside, you'll find the backpack of the gnome tied up by the goblins (you don't need to rescue him to get the backpack).
Valuables
Lump's War Horn
| Lump's War Horn |
|---|
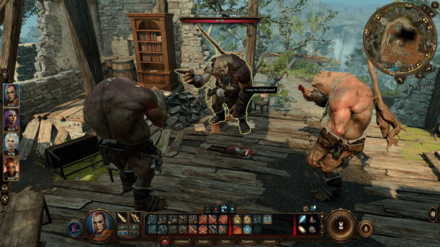 |
| Coordinates: (5, 366) |
In the house southwest of the village, you'll find a bunch of ogres led by Lump the Enlightened. Choose the correct dialogue choices and successfully roll the checks to get the unique Lump's War Horn item, which you can use to summon Lump's group of ogres in battle.
Moss-Covered Chest
| Moss-Covered Chest |
|---|
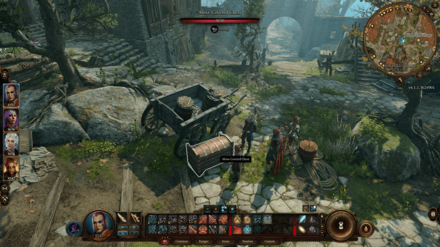 |
| Coordinates: (30, 403) |
You'll find the locked Moss-Covered Chest in the middle of the village. Lockpick it, or find the Moss-Covered Key from one of the goblins in the village, to get some gold and a rare item.
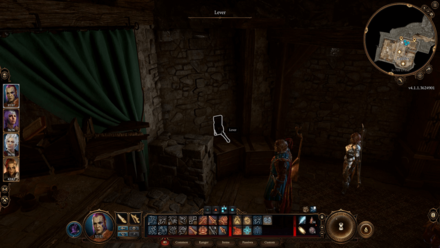
Windmill Levers
| Windmill Levers |
|---|
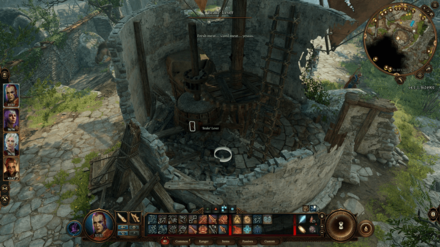 |
| Coordinates: (-10, 426) |
If you got near the windmill, you'll encounter the gnome tied to the windmill, being harassed by goblins. If you wish to rescue him, you need to find the Brake Lever inside the windmill building.
You'll find two levers; if you want to stop the windmill, trigger the Brake Lever, not the other one. If you trigger the Release Brake Lever, the windmill will instead go faster, killing the gnome.
Rescue the Gnome: How to Stop the Windmill
Blighted Village Sub-Areas Points of Interest
| Blighted Village Sub-Areas Points of Interest |
|---|
|
|
Cellar Points of Interest
Bookshelf Lever
| Bookshelf Lever |
|---|
 |
| Coordinates: (-646, -362) |
This room has a secret passage behind one of the bookshelves; to move this bookshelf, look for the lever at the north part of the room, hidden behind some crates (you'll notice it with a perception check).
Clear the crates and pull the lever to move the bookshelf located at the northeast part of the room.
Ornate Mirror
| Ornate Mirror |
|---|
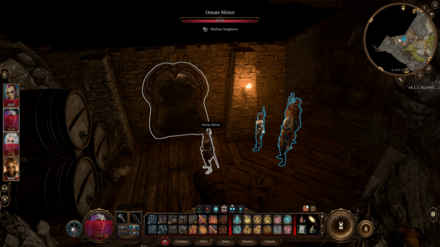 |
| Coordinates: (-654, -345) |
Proceed through the path behind the bookshelf until you reach the Ornate Mirror. Choose the correct dialogue options or succeed your rolls to get the mirror out of the way, revealing a room behind it.
The Necromancy of Thay
| The Necromancy of Thay |
|---|
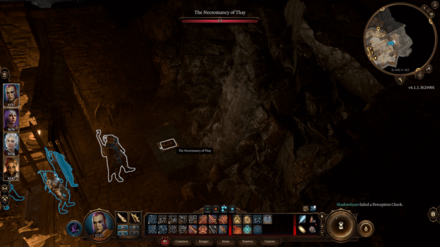 |
| Coordinates: (-646, -362) |
The Necromancy of Thay is a powerful artefact located at the end of the Cellar: past the Ornate Mirror and behind the Rusted Iron Gate.
The Rusted Iron Gate can be lockpicked or opened with the Rusted Key, located at the shelves in the west end of the room.
Note that the Necromancy of Thay is trapped; disarm the traps surrounding it first before opening or taking it.
How to Open the Necromancy of Thay
Gilded Chest
| Gilded Chest |
|---|
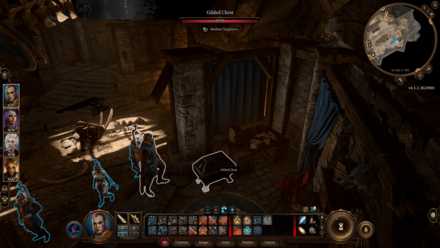 |
| Coordinates: (-657, -371) |
At the end room of a cellar, there's a Gilded Chest with some rare loot inside.
Blacksmith's Forge Points of Interest
Melting Furnace
| Melting Furnace |
|---|
 |
| Coordinates: (-451, -377) |
Inside this building, you'll find the Melting Furnace, which can be used to forge weapons.
Whispering Depths Cracked Wall (North)
| Cracked Wall (North) |
|---|
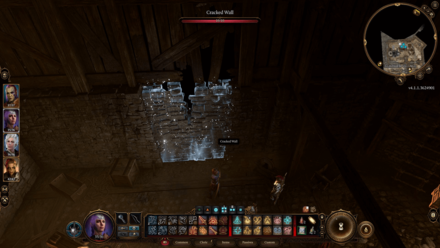 |
| Coordinates: (-445, -368) |
Near the furnace, if you pass the perception check, you'll find this Cracked Wall. Destroying it reveals a path to the Whispering Depths.
Whispering Depths Cracked Wall (West)
| Cracked Wall (West) |
|---|
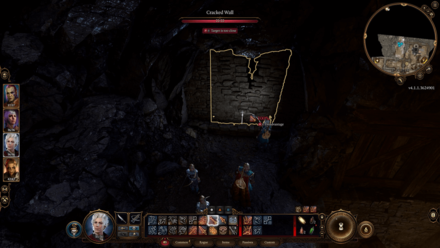 |
| Coordinates: (-464, -388) |
To the south of the furnace, you'll find a higher floor. Jump towards it by going over the crates nearby or using a jump boost spell. On this higher floor, you'll find another destructible Cracked Wall that leads to the Whispering Depths as well.
Whispering Depths Wooden Chest: Highcliff's Blueprints
| Wooden Chest: Highcliff's Blueprints |
|---|
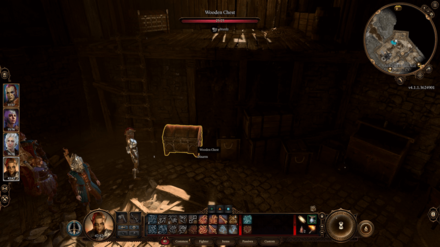 |
| Coordinates: (-438, -376) |
In the basement, you'll find a Wooden Chest near the bottom of a ladder. If you pass the check, you'll realize it's trapped.
Disarm the chest and open it to reveal Highcliff's Blueprints, a unique item that when read, will start the Finish the Masterwork Weapon quest.
How to Finish the Masterwork Weapon
Wooden Chest: Infernal Iron
| Wooden Chest: Infernal Iron |
|---|
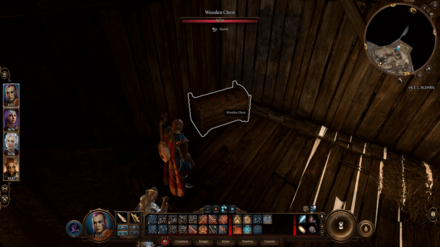 |
| Coordinates: (-434, -368) |
Climb the ladder to reveal another Wooden Chest; lockpick this chest to gain the loot inside, which contains an Infernal Iron and a weapon inside.
Windmill Basement Points of Interest
Barcus Wroot's Backpack
| Gnome's Backpack |
|---|
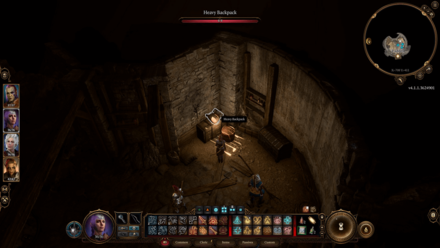 |
| Coordinates: (-712, -413) |
The gnome being harassed by goblins, Barcus Wroot, will mention his backpack as a reward if you can find it. It is located in the basement in the Windmill; there's some decent loot inside.
You don't need to rescue the gnome to loot this backpack.
Heavy Chest
| Heavy Chest |
|---|
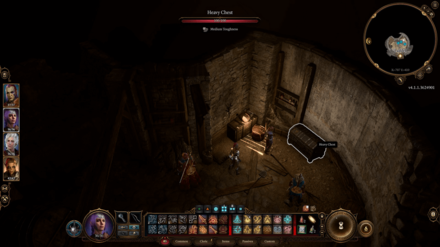 |
| Coordinates: (-712, -413) |
Inside the same basement, you'll find the Heavy Chest, which has a rare item inside.
Baldur's Gate 3 Related Guides
Faerûn All Locations
| Prologue Locations | |
|---|---|
| Nautiloid | |
| Act 1 Locations | |
| Wilderness | Chapel Ruins |
| Emerald Grove | Owlbear Nest |
| Blighted Village | Whispering Depths |
| Putrid Bog (Sunlit Wetlands) | Overgrown Tunnel |
| The Risen Road | Zhentarim Basement |
| Goblin Camp | Mountain Pass: Rosymorn Monastery |
| Creche Y'llek | Underdark |
| Arcane Tower | Grymforge |
| Act 2 Locations | |
| Shadow-Cursed Lands | Reithwin Town |
Comment
Author

Blighted Village Maps and Points of Interest
Rankings
Gaming News
![Neverness to Everness (NTE) Review [Beta Co-Ex Test] | Rolling the Dice on Something Special](https://img.game8.co/4414628/dd3192c8f1f074ea788451a11eb862a7.jpeg/show)


Popular Games

Genshin Impact Walkthrough & Guides Wiki
Honkai: Star Rail Walkthrough & Guides Wiki
Arknights: Endfield Walkthrough & Guides Wiki
Umamusume: Pretty Derby Walkthrough & Guides Wiki
Wuthering Waves Walkthrough & Guides Wiki
Pokemon TCG Pocket (PTCGP) Strategies & Guides Wiki
Abyss Walkthrough & Guides Wiki
Zenless Zone Zero Walkthrough & Guides Wiki
Digimon Story: Time Stranger Walkthrough & Guides Wiki
Clair Obscur: Expedition 33 Walkthrough & Guides Wiki


Recommended Games
Fire Emblem Heroes (FEH) Walkthrough & Guides Wiki
Pokemon Brilliant Diamond and Shining Pearl (BDSP) Walkthrough & Guides Wiki
Diablo 4: Vessel of Hatred Walkthrough & Guides Wiki
Super Smash Bros. Ultimate Walkthrough & Guides Wiki
Yu-Gi-Oh! Master Duel Walkthrough & Guides Wiki
Elden Ring Shadow of the Erdtree Walkthrough & Guides Wiki
Monster Hunter World Walkthrough & Guides Wiki
The Legend of Zelda: Tears of the Kingdom Walkthrough & Guides Wiki
Persona 3 Reload Walkthrough & Guides Wiki
Cyberpunk 2077: Ultimate Edition Walkthrough & Guides Wiki


All rights reserved
© 2023 Larian Studios. All rights reserved. Larian Studios is a registered trademark of arrakis nv, affiliate of Larian Studios Games ltd. All company names, brand names, trademarks and logos are the property of their respective owners. © 2020 Wizards of the coast. All rights reserved. Wizards of the coast, Baldur’s Gate, Dungeons & Dragons, D&D, and their respective logos. Are registered trademarks of wizards of the coast LLC
The copyrights of videos of games used in our content and other intellectual property rights belong to the provider of the game.
The contents we provide on this site were created personally by members of the Game8 editorial department.
We refuse the right to reuse or repost content taken without our permission such as data or images to other sites.