Lae'zel Companion Guide: Romance, Builds, and Approval
★ All Updates for Patch 5
☆ Beginner Guides for All Starter Players
★ Simple Character Creation Guide for beginners
☆ A Full Guide to Multiclassing
★ All Side Quests and Event Points
☆ All Races and Subraces
Lae'zel is a companion and a playable Origin character in Baldur's Gate 3 (BG3). Check out our guide to learn more about Lae'zel, including her location and how to recruit her, her related companion quest, romance and approval options, and best builds!
List of Contents
Lae'zel Profile
Lae'zel's Companion Info
| Lae'zel Overview | |
|---|---|
 |
|
| Class | Fighter |
| Background | Soldier |
| Race | Githyanki |
Lae'zel's Ability Scores
| STR | DEX | CON | INT | WIS | CHA |
|---|---|---|---|---|---|
| 17 | 13 | 14 | 11 | 12 | 8 |
As a Fighter with a high starting Strength ability score, Lae'zel will mostly excel in melee combat. Make sure to prioritize raising her Strength ability score to maximize her potential as melee powerhouse while progressing the game.
Laezel's Skill Proficiencies
- Athletics (Strength)
- Acrobatics (Dexterity)
- Intimidation (Charisma)
- Survival (Wisdom)
Laezel's Equipment Proficiencies
- Armor - Light Armor, Medium Armor, Heavy Armor, Shields
- Simple Weapons - All Simple Weapons
- Martial Weapons - All Martial Weapons
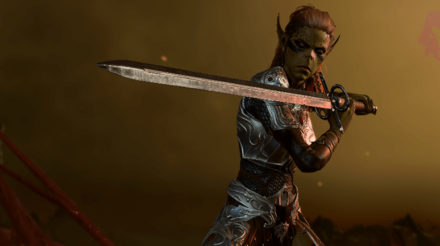
Who is Lae'zel?

A fierce warrior by the standards of her race, Lae'zel is faced with the likelihood of turning into the monster she devoted her whole life of defeating, a mind flayer. She now faces a path that will test her strength and determination to not just prove herself to Queen Vlaakith but to rejoin her people.
How to Recruit Lae'zel
Meet Lae'zel on the Nautiloid
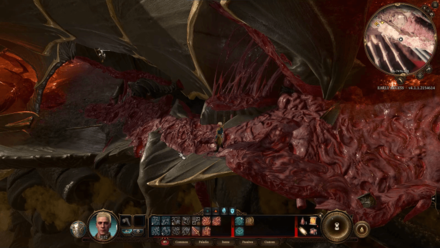
During the Prologue quest Escape the Nautiloid, you will run into Lae'zel on the path aboard the Nautiloid where she will drop down from a ledge and start a dialogue with you.
Take note that Lae'zel along with any other characters recruited during the Prologue will be separated from your party after escaping the Nautiloid.
Revive Lae'zel if She Dies on the Nautiloid
If Lae'zel is killed before escaping the Nautiloid, you can find her body on the beach after the crash. Use a Scroll of Revivify to recruit her again. This will also prevent her from being captured by the Tieflings.
Free Lae'zel from the Tieflings

After escaping the Nautiloid, you can recruit Lae'zel once again by freeing her from some Tieflings that have trapped her in a cage. You have the choice of attacking the Tieflings or doing spell checks to save Lae'zel.
At this point a dialogue will take place and you can choose to recruit Lae'zel to your party. Should you choose not to recruit her, she will be waiting at your camp.
Lae'zel Will Free Herself if Left Imprisoned
If you failed to save her from the Tieflings, she'll have no choice but to free herself and kill her captors. You'll have another chance to recruit her later on during the confrontation with the Githyanki Patrol. If you still don't permit her to join, she'll wait for you in the Trielta Crags, giving you one last chance to recruit her.
Lae'zel Companion Quest
 Heads up! Heads up! |
Spoilers ahead for majority of BG3's main story beats. Proceed at your own risk, adventurer. You have been warned! |
|---|
The Githyanki Warrior Walkthrough

The Githyanki Warrior focuses mainly on helping Lae'zel reach the Githyanki Crèche to find a cure for the mind flayer infection. This quest also branches to the Find the Githyanki Crèche and Discover Artefact's Secret Side Quests which you'll get to complete as you progress.
Help her navigate the following objectives to progress and complete her companion quest.
- Interrogate Zorru in Druid's Grove
- Find the Githyanki Near Waukeen's Rest
- Travel to the Mountain Pass
- Find the Githyanki Crèche
- Help Lae'zel Find the Tadpole Purification Device
- Use the Zaith'isk in the Infirmary
- Meet with the Inquisitor
- Speak with Vlaakith
- Investigate the Astral Prism
- Escape the Githyanki Crèche
- Meet Kith'rak Voss in Camp
Interrogate Zorru in Druid's Grove
Once you arrive at the Druid's Grove, a passing tiefling child named Zakki will mention that another person named Zorru has seen other Githyanki. Follow her and interrogate Zorru, who will reveal that he encountered a Githyanki patrol in the mountain pass on the road to Baldur's Gate.
After interrogating Zorru, he will note the location of the mountain pass where he saw the Githyanki patrol.
Find the Githyanki Near Waukeen's Rest

Head northeast of Emerald Grove to reach Waukeen's Rest. Follow the path on the left to find a bridge guarded by a tiefling named Ellyka is who will confront you if you pass directly on top of the bridge, telling you that a Githyanki patrol is close by. You can tell her that you're not familiar with the Githyanki patrol, which will cause her to leave peacefully. Otherwise, she will attack you. You can also ignore her by taking the road below instead.
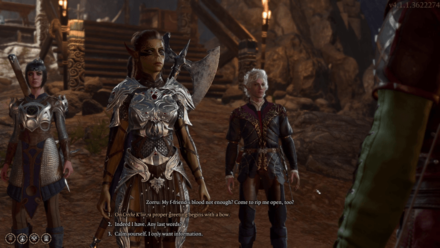
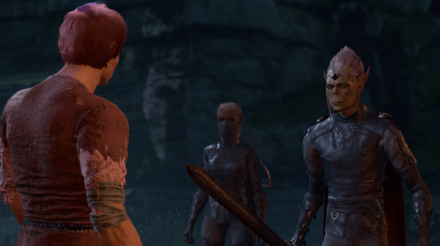
On the otherside of the bridge, a Githyanki warrior named Kith'rak Voss will call you over. He will share the meaning of Lae'zel's name, and ask you regarding a Githyanki weapon aboard a Nautiloid ship which is the artefact that Shadowheart is carrying.
Should You Reveal or Hide the Artefact?

If you decide to deceive Kith'rak with a Deception check, he will leave peacefully but a further Perception check will have Lae'zel note that he is lying. This dialogue doesn't reveal the location of the Crèche.
If you choose to either attack or produce the artefact, they will attack you, with the latter accusing you of stealing the artefact. Additionally, saying that you seek purification reveals that there is no cure and will force you in combat with the patrol.
Kill the patrol and loot the body of Sarth Baretha to obtain the Elaborate Slate.
Activate the Slate

If you managed to kill Sarth Baretha, activate the Elaborate Slate to reveal the location of a Githyanki refuge within a temple at the Mountain Pass.
The slate also reveals that the artefact that Shadowheart has is of great importance to the Queen.
Travel to the Mountain Pass
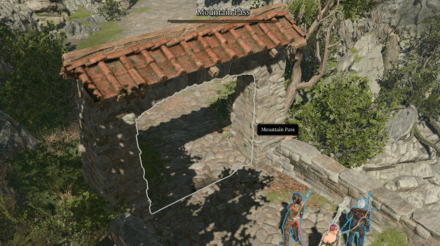
After confronting the Githyanki Patrols, take the road to the left to reach the Mountain Pass. As this is a new region, entering it will force all other events in the Emerald Grove and Goblin Camp to end. Make sure to finish all prior quests first before venturing to this new region.
Find the Githyanki Crèche
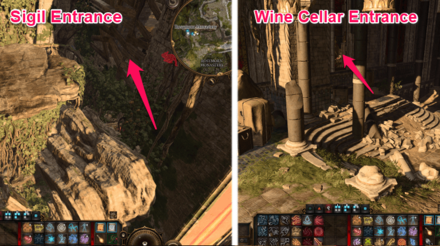
Head to the Rosymorn Monastery. The Crèche Y'llek is located inside the monastery which you can enter through the broken wall inside the wine cellar or by breaking the barricade on the top right area of the sigil.
Whichever path you decide to take, you'll find yourself in a battle against either Kobolds or Gremishkas.
Help Lae'zel Find the Tadpole Purification Device

After finding the Githyanki Crèche, the guards will tell you to go to infirmary to get checked. You can find it by entering the room, left side of the Githyanki painting. Once inside, proceed to the room in the middle to see Ghustil Stornugoss.
Use the Zaith'isk in the Infirmary

Ghustil advises the group to use the Zaith'isk, a Githyanki purification device designed to extract mind flayer parasites from infected brains. Both Lae'zel and your character can use this as it will eventually break after.
Also, it recommended to pass the Deception check after the failed procedure. Otherwise, Ghustil will lock you inside and any attempt to leave will turn everyone hostile. If you do find yourself in this position, it's best to just fast travel to get away instead.
Who Should Use the Zaith'Isk?
As mentioned above, both you and Lae'zel can use the Zaith'isk. If you choose to use your character, you'll need to convince Lae'zel first by passing a Persuasion check. If you lose and still force yourself to go first, Lae'zel and Ghutsil will fight you.
If you choose to let Lae'zel use the device, you can either convince her to endure the pain and continue or stop the procedure early. However, the difficulty check of these options are very high, making it almost impossible to win unless you roll a Critical Success.
Additionally, if your character fails to get out of the device on time, you will receive -2 on your primary ability score. If Lae'zel fails to get out, she also gets a -2 penalty but on her Charm, Constitution and Intelligence scores instead. These penalties are permanent, so make sure to save before attempting to use it. You can also prevent this by simply getting out of the device before the Dream Visitor interferes.
Meet with the Inquisitor
Lae'zel is convinced that the device was sabotaged by a certain traitor and plans to report the incident to the Inquisitor. To find him, take the path to the left from the sigil circle. Kith'rak Therezzyn will be guarding this area, but you can simply show her the artefact to pass.
Should You Return the Artefact?
It is recommended to surrender the artefact to Ch'r'ai W'wargaz the first time you talk to him. This will help you understand Lae'zel position better and know the true intentions of the Githyankis later on. This also buys you more time before the fight that happens later on.
If you refuse to surrender the artefact, the Inquisitor will fight you for it. Once defeated, Vlaakith will still appear and even applaud you for being stronger than Ch'r'ai. She still will give you access to the Astral Prism and talk to the Dream Visitor.
Speak with Vlaakith

After meeting or defeating Ch'r'ai W'wargaz, surrender the artefact to summon the Goddess Vlaakith. It is recommended to obey her orders to avoid further troubles. She'll instruct you to kill the person trapped inside the artefact which is your Dream Visitor.
If you try to question her abilities, Vlaakith will punish your blasphemous tongue, forcing the game to end.
Lae'zel will also leave your party temporarily if you chose to disobey Vlaakith. She'll only rejoin once you're inside the Astral Prism.
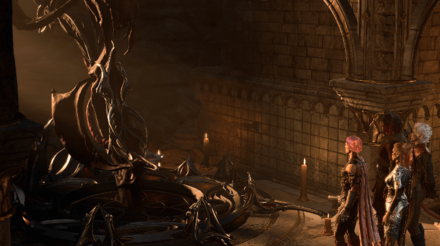
Investigate the Astral Prism

Interact with the Planecaster to access the Astral Prism. Once inside, enter the Beckoning Cave and speak with your disappointed Dream Visitor.
Should You Fight the Dream Visitor?

Fighting your Dream Visitor will always result in defeat. It will also make them trust you less for failing their test. It is best to talk to them and hear their side instead. This will maintain the current trust level you have with them and get the information you need to push forward.
Escape the Githyanki Creche

After speaking with the Dream Visitor, talk to Lae'zel and tell her about Vlaakith's deception. She will refuse to believe it and will even try to read through your mind as you speak. Regardless of the outcome, she will demand to head back to the Crèche to confront the inquisitor about the information you told her.
As you return to the real world, Ch'r'ai W'wargaz orders the guards to kill Lae'zel. He reveals that the Goddess instructed him to do so and a fight will begin immediately.
Use the Sigil to Prevent Further Battles
Since Crèche Y'llek registers as a dangerous area in your map, you cannot use fast travel and enter the camp after the fight. You will have to make your way to the sigil to escape the Crèche after the fight. Leaving from the main gate will force you to fight more Githyanki soldiers along the way.
Meet Kith'rak Voss in Camp
Kith'rak Voss will visit you on your next Long Rest after escaping the crèche. He offers to aid the group and wishes to bring Vlaakith to her demise. Although Lae'zel still remains faithful to her queen, you can convince her to side with the truth by reminding her about the Zaith'isk, earning you an approval point during the process.
As Kith'rak Voss leaves, he gives the team a Qua'nith Psionic Detector and asks Lae'zel to meet him at Sharess's Caress in Baldur's Gate.
This section is currently under construction. Check back later, as we'll add more info for the Companion Quest!.
Lae'zel Romance and Approval Guide
Increase Lae'zel's Approval by Being Trusting and Pragmatic
Lae'zel likes it best when you trust her instincts and decisions. Always pick dialogue options that support her actions and try not to pick anything that challenges her pride. If possible, go for options that glorifies her violent tendencies as well.
Additionally, Lae'zel is also proud of her Githyanki roots, so showing interest about her background will earn you her approval.
Actions that Give Approval
- Approves if you take a swing at Aradin after the first Goblin fight.
- Approves if you bring her along to find Zorru in the Druid Grove.
- Approves if you manage to get an answer out of Zorru about the Githyanki Patrol.
- Approves if you manage to persuade Kagha to release Arabella.
- Approves if you swear to take the Wyvern Poison from Nettie before turning.
- Approves if you tell Wyll that Karlach is not a devil.
- Approves if you tell Torturer Spike you're taking over the torture.
- Approves if you push the Corsair Greymon off Gekh's raft in the Ebonlake.
- Approves if you persuade her to drop her knife when you first experience the dream sequence with the Guardian.
- Approves if you call Raphael mad when he offers a deal.
- Approves if you pass a DC 10 Persuasion Check to tell her to calm down after being assaulted by the Githyanki Patrol.
- Approves if you deceive the Hag into giving you Mayrina and the +1 Ability.
- Approves if you persuad the Youth Varrl to part with his book on Orpheus.
- Approves if you asked about the Hatchery.
- Approves if you let her speak to the Githyanki Guards upon entering the Crèche Y'llek
- Approves if you let her speak to Ghutsil Stornugoss on your behalf.
- Approves if you applaud her for killing four of her classmates during the conversation about the classroom.
- Approves if you choose to follow the doctor's instructions when using the Zaith'isk.
- Approves if you let her get on the Zaith'isk first.
- Approves if you encourage her to endure the pain when she uses the Zaith'isk.
- Approves if you show Kith'rak Therezzyn the artefact with no hesitation.
- Approves if you give Ch'r'ai W'wargaz the artefact.
- Approves if you remind her about the Zaith'isk when confronting the Inquisitor.
- Approves if you respect and obey Vlaakith.
- Approves if you remind her about the Zaith'isk. when talking to Kith'rak Voss.
- Approves if you tell Isobel that Marcus is trying to kidnap her.
- Approves if you Persuade Gerringoth Thorm to die.
- Approves if you manage to convince Malus Thorm to be the test subject of the sisters.
- Approves if you have drinks with Thisobald Thorm.
- Approves if you pass the Charisma checks with Thisobald Thorm.
- Approves if you manage to persuade Balthazar into giving you the bell for the golem.
- Approves if you tell Yenna that you should go and find guards to help her out with her missing mother.
- Approves if you give Yenna some coin.
- Approves if you manage to discern the reason for her uneasiness after she renounces Vlaakith.
- Approves if you tell Blaze Elin that you need to head into the Lower City by order of Inspector Valeria.
Actions that Give Disapproval
- Disapproves if you tell her to stand down when interrogating Zorru.
- Disapproves if you leave Selune's Gilded Chest alone in the Owlbear Cave.
- Disapproves if you manage to convince the Owlbear to leave you be.
- Disapproves if you buy Oskar Fevras from Brem.
- Disapproves if you offer to bring Mayrina home.after saving her
- Disapproves if you speak on her behalf during her confrontation with Kith'rak Voss.
- Disapproves if you show uncertainties about the Zaith'isk.
- Disapproves if you try to force yourself to use the Zaith'isk.
- Disapproves if you refuse to respect Vlaakith properly.
- Disapproves if you fail the DC 18 Persuasion Check when talking about the tadpole's power.
- Disapproves if you admire His Majesty the cat in the Last Light Inn.
- Disapproves if you use the console to free Zevlor and the Mind Flayers.
- Disapproves if you consume or purge the Waking Mind inside the Necrotic Laboratory.
- Disapproves if you tell Gyldro Angleron the Smith (Orin in disguise) that you could never turn your weapon against someone you care about.
- Disapproves if you intimidate Angry Mar'hyah when she threatens to take Scratch away from you.
This list is currently being updated! Stay tuned as we furnish both lists with more entries as we progress through the game.
Lae'zel Builds
Best Subclass for Lae'zel
Battle Master for a Balanced Fighter Gameplay
Battle Master on Lae'zel will allow her to be a more flexible or damage-oriented fighter. It gives her versatility as a unit that can provide support to your other companions without compromising her offenses. You can also balance things out by mixing mobility and damage passives for her in the game!
Battle Master Subclass Guide and Build
Eldritch Knight for a Spellcasting Fighter
Eldritch Knight is also doable for Lae'zel, making her a fighter with spellcasting abilities. She can provide magic damage or buffs on the party if you give this subclass to her. With this class, she'll also learn mobility spells as well that allows her teleport and expand her jumping range without taking damage.
However, it's best to choose the buffs instead of the magic damage, so she can hit harder or tank harder than she normally would.
Eldritch Knight Subclass Guide and Build
Best Equipment for Lae'zel
- Armor: Medium Armor and Heavy Armor
- Weapons: Two-Handed Melee weapons, like a Greatsword, Maul, or Greatclub. Heavy Crossbows or Long Bows for ranged attacks.
Baldur's Gate 3 Related Guides

List of All Origin Characters
| Character Guide | |||||||||||
|---|---|---|---|---|---|---|---|---|---|---|---|
| Romance Guide | |||||||||||
 Astarion Astarion |
 Dark Urge Dark Urge |
 Gale Gale |
 Lae'zel Lae'zel |
||||||||
 Karlach Karlach |
 Shadowheart Shadowheart |
 Wyll Wyll |
|||||||||
List of All Non-Origin Characters
| Character Guide | |
|---|---|
 Halsin Halsin |
 Minthara Minthara |
 Jaheira Jaheira |
 Minsc Minsc |
Author

Lae'zel Companion Guide: Romance, Builds, and Approval
Rankings
- We could not find the message board you were looking for.
Gaming News


Popular Games

Genshin Impact Walkthrough & Guides Wiki
Honkai: Star Rail Walkthrough & Guides Wiki
Arknights: Endfield Walkthrough & Guides Wiki
Umamusume: Pretty Derby Walkthrough & Guides Wiki
Wuthering Waves Walkthrough & Guides Wiki
Pokemon TCG Pocket (PTCGP) Strategies & Guides Wiki
Abyss Walkthrough & Guides Wiki
Zenless Zone Zero Walkthrough & Guides Wiki
Digimon Story: Time Stranger Walkthrough & Guides Wiki
Clair Obscur: Expedition 33 Walkthrough & Guides Wiki


Recommended Games
Fire Emblem Heroes (FEH) Walkthrough & Guides Wiki
Pokemon Brilliant Diamond and Shining Pearl (BDSP) Walkthrough & Guides Wiki
Diablo 4: Vessel of Hatred Walkthrough & Guides Wiki
Super Smash Bros. Ultimate Walkthrough & Guides Wiki
Yu-Gi-Oh! Master Duel Walkthrough & Guides Wiki
Elden Ring Shadow of the Erdtree Walkthrough & Guides Wiki
Monster Hunter World Walkthrough & Guides Wiki
The Legend of Zelda: Tears of the Kingdom Walkthrough & Guides Wiki
Persona 3 Reload Walkthrough & Guides Wiki
Cyberpunk 2077: Ultimate Edition Walkthrough & Guides Wiki


All rights reserved
© 2023 Larian Studios. All rights reserved. Larian Studios is a registered trademark of arrakis nv, affiliate of Larian Studios Games ltd. All company names, brand names, trademarks and logos are the property of their respective owners. © 2020 Wizards of the coast. All rights reserved. Wizards of the coast, Baldur’s Gate, Dungeons & Dragons, D&D, and their respective logos. Are registered trademarks of wizards of the coast LLC
The copyrights of videos of games used in our content and other intellectual property rights belong to the provider of the game.
The contents we provide on this site were created personally by members of the Game8 editorial department.
We refuse the right to reuse or repost content taken without our permission such as data or images to other sites.
Message Board