This survey will take about 1 minute.
Your answers will help us to improve our website.
FF7 Remake
Boss Fight Guide & List of All Bosses (Normal & Hard Mode)
This page contains Boss Battle strategies and data for the game FF7 Remake. To find out how to beat Bosses on both Normal or Hard Mode, or to find out the stats and weaknesses of each Boss, look no further.
List of Contents
How to Beat Every Major Story Boss
| All Major Story Bosses (Jump to a Section!) |
||
|---|---|---|
| Scorpion Sentinel | Roche | Crab Warden |
| Airbuster | Reno | Rude |
| Hell House | Abzu | Ghoul |
| Eligor | Failed Experiment | Reno and Rude |
| Abzu & Abzu Shoats | The Valkyrie | Specimen H0512 |
| Jenova Dreamweaver | Rufus | The Arsenal |
| Motor Ball | Whisper Harbinger | Sephiroth |
Chapter 1: Scorpion Sentinel
| Scorpion Sentinel | |
|---|---|
 |
|
| Location | Weaknesses |
| Mako Reactor | Thunder |
How to Beat Scopion Sentinel - Key Points
- Prioritize using Barret's Thunder
- Attack from behind with Cloud when the barrier is up
- Use Potions when HP is low
Hard Mode Video Guide included!
How to Beat Scorpion Sentinel | Boss Guide
Chapter 4: Roche
| Roche | |
|---|---|
 |
|
| Location | Weaknesses |
| Upper Sector 7 | Fire |
How to Beat Roche - Key Points
- Use Fire magic
- Aim for counters
Hard Mode Video Guide included!
How to Beat Roche | Boss Guide
Chapter 5: Crab Warden
| Crab Warden | |
|---|---|
 |
|
| Location | Weaknesses |
| Corkscrew Tunnel | Thunder |
How to Beat Crab Warden - Key Points
- Use to Thunder
- Stagger it by crippling its Legs
- Don't stand on the rails
- Expose the Pilot by taking out the Guns
Hard Mode Video Guide included!
How to Beat Crab Warden | Boss Guide
Chapter 7: Airbuster
| Airbuster | |
|---|---|
 |
|
| Location | Weaknesses |
| Mako Reactor 5 | Thunder |
How to Beat Airbuster - Key Points
- Weak to Thunder
- Switch to Barret when it's far away
- Avoid the Lightning Mines and Tankbuster
- Use Limit Breaks and Summons when it's close
Hard Mode Video Guide included!
How to Beat Airbuster | Boss Guide
Chapter 8: Reno
| Reno | |
|---|---|

|
|
| Location | Weaknesses |
| Sector 5 Slums | None |
How to Beat Reno - Key Points
- No elemental weaknesses
- Guard can be effective
- Take out the EM Mines
Hard Mode Video Guide included!
Chapter 8: Rude
| Rude | |
|---|---|
 |
|
| Location | Weaknesses |
| Sector 5 Slums | Wind |
How to Beat Rude - Key Points
- Weak to Wind
- Won't attack Aerith
- Dodge instead of Guarding
- Aim for Stagger to get in physical damage
Hard Mode Video Guide included!
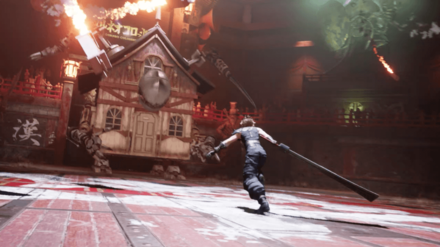
Chapter 9: Hell House
| Hell House | |
|---|---|
 |
|
| Location | Weaknesses |
| Corneo's Colesseum | Magic* |
*: Weakness depends on what element Hell House is.
How to Beat Hell House - Key Points
- Weakness changes with Barrier Shift
- Bring all types of Element Magic
- Attack the Arms during God House Mode
- Magic is most effective
Hard Mode Video Guide included!
How to Beat Hell House in the Colosseum | Boss Guide
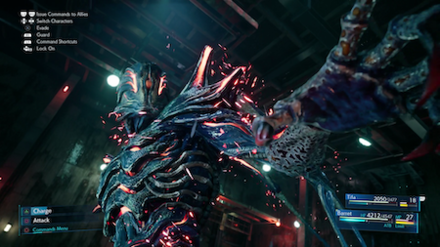
Chapter 10: Abzu
| Abzu | |
|---|---|
 |
|
| Location | Weaknesses |
| Sewer System | Fire |
How to Beat Abzu - Key Points
- Weak against Fire
- Use Guard to survive the heavy physical damage
- Horns turn red when Enrage is used
- Stay away from the puddles on the ground
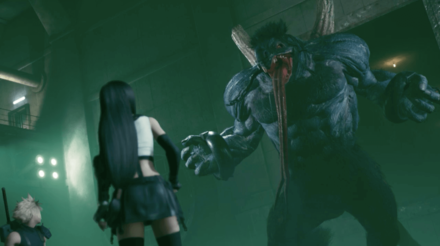
Chapter 11: Ghoul
| Ghoul | |
|---|---|
 |
|
| Location | Weaknesses |
| Maintenance Facility | Fire |
How to Beat the Ghoul - Key Points
- Weak against Fire
- Hit it with physical attacks while blue, magic when red
- Stay away from the blue flames
- Avoid it when it uses Telekenesis
How to Beat the Ghoul | Boss Guide
Chapter 11: Eligor
| Eligor | |
|---|---|
|
|
| Location | Weaknesses |
| Train Graveyard | Ice, Wind |
How to Beat Eligor - Key Points
- Weak against Ice, wind while in the sky
- Don't target its wheels until phase 3
- Hide behind the container during Javelin Bolts
- Get close and dodge Sweeping Gaze
How to Beat Eligor | Boss Guide
Chapter 12: Reno and Rude
| Reno and Rude | |
|---|---|

|
|
| Where They Appear | Weaknesses |
| Sector 7 Pillar | Reno: None Rude: Wind, Poison |
How to Beat Reno and Rude - Key Points
- Don't get greedy and guard when you can
- Stay healed up to survive their Turks Combo
- Break out party members from Reno's Pyramid
How to Beat Reno and Rude | Boss Guide
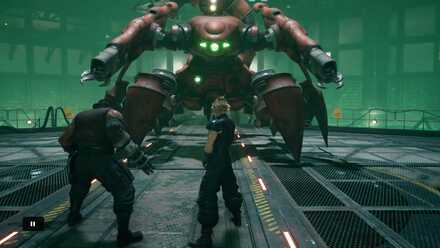
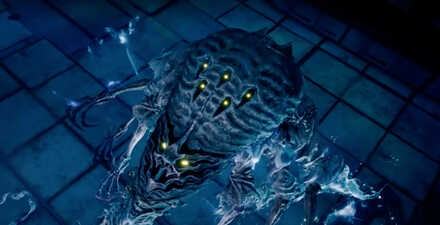
Chapter 13: Failed Experiment
| Failed Experiment | |
|---|---|
|
|
| Where It Appears | Weaknesses |
| Shinra Underground Test Site | Reno: None Rude: Wind, Poison |
How to Beat Failed Experiment - Key Points
- Shoot at its appendages with Barret
- When it's Staggered, attack with Tifa to lay on the hurt
- Use Shiva to deal huge Ice damage
How to Beat Failed Experiment | Boss Guide
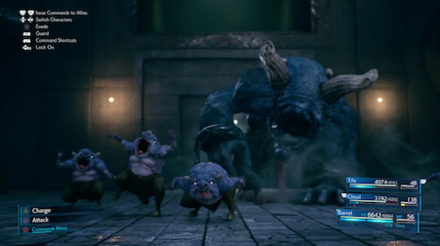
Chapter 14: Abzu & Abzu Shoats
| Abzu & Abzu Shoats | |
|---|---|
|
|
| Where they Appear | Weaknesses |
| Sewer System | Fire |
How to Beat Abzu & Abzu Shoats - Key Points
- Still weak against Fire
- Disable its Tail to limit its attack range
- Take out the Abzu Shoats from Phase 2
- Avoid the drains when it's preparing Backwater Deluge
How to Beat Abzu (2nd Fight) | Boss Guide
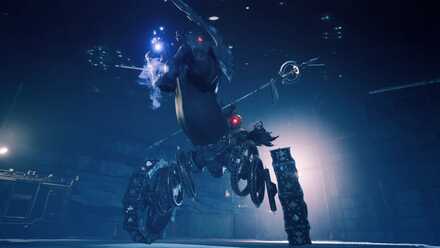
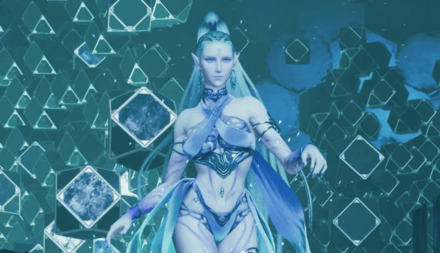
Chapter 15: The Valkyrie
| The Valkyrie | |
|---|---|
|
|
| Location | Weaknesses |
| Collapsed Highway | Thunder |
How to Beat The Valkyrie - Key Points
- Hide behind the wall to avoid its bullets and rockets
- Equip Elemental Materia + Lightning Materia to Barret to deal consistent damage
- Dodge out of the way of its laser
How to Beat The Valkyrie | Boss Guide
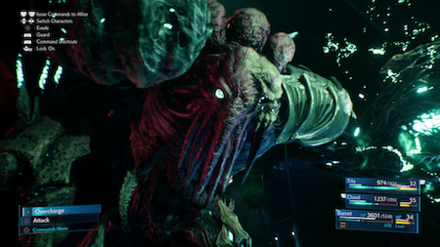
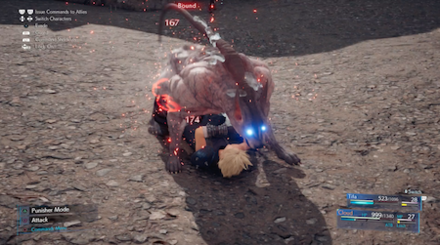
Chapter 16: Specimen H0512
| Specimen H0512 | |
|---|---|
|
|
| Location | Weaknesses |
| Hojo's Laboratory | None |
How to Beat Specimen H0512 - Key Points
- Use Punisher Mode to counter its melee attacks
- Cripple its claws to render it unable to attack
- Silence the H0512-OPTs that fight alongside it
How to Beat Specimen H0512 | Boss Guide
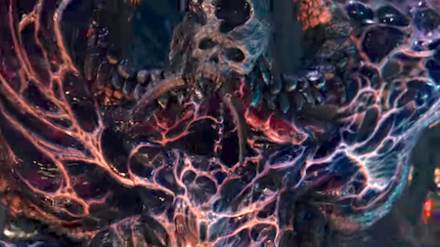
Chapter 17: Jenova Dreamweaver
| Jenova Dreamweaver | |
|---|---|
|
|
| Location | Weaknesses |
| President Shinra's Office | None |
How to Beat Jenova Dreamweaver - Key Points
- Avoid Magic attacks and focus on Physical attacks
- Cripple its tentacles and Silence it to disable it
- Use Tifa to knock out the Phase 2 & 3 Tentacles fast
How to Beat Jenova Dreamweaver | Boss Guide
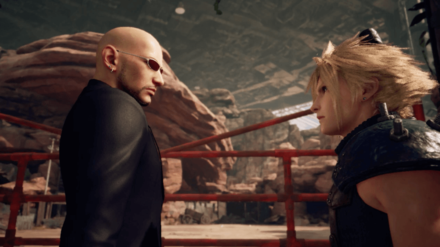
Chapter 17: Rufus
| Rufus | |
|---|---|

|
|
| Where he Appears | Weaknesses |
| Outside President Shinra's Office | None |
How to Beat Rufus - Key Points
- Avoid using offensive Magic against Rufus
- Equip Cloud with the Twin Stinger and use Counterstance to handle Darkstar's Abilities
- Cast Haste to increase your chances to use Counterstance
- In Phase 3, wait for him to Reload and then hit hard
How to Beat Rufus | Boss Guide
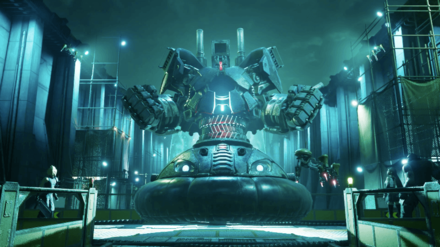
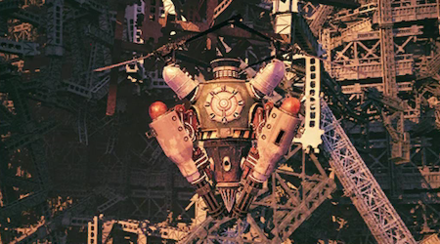
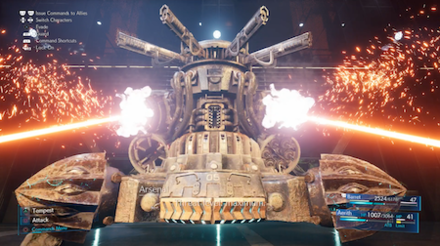
Chapter 17: The Arsenal
| The Arsenal | |
|---|---|
|
|
| Where he Appears | Weaknesses |
| 58th Floor - Skyview Atrium | Fire, Ice, Lightning, Wind |
How to Beat The Arsenal - Key Points
- Take out its Drones first
- From Phase 2 on, watch its Defense Protocols to see what element it resists
- Hide behind pillars to avoid gunfire
- Focus your attacks on The Arsenal directly after defeating the Drones
How to Beat The Arsenal | Boss Guide
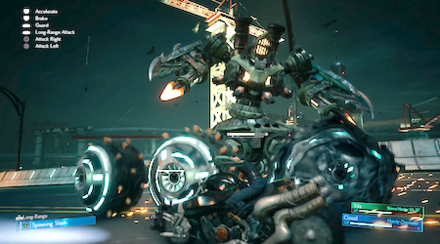
Chapter 18: Motor Ball
| Motor Ball | |
|---|---|
|
|
| Where he Appears | Weaknesses |
| Midgar Expressway | None |
How to Beat Motor Ball - Key Points
- Knock out each of its wheels to make it vulnerable
- Brake when it prepares an attack
- Hug the sides to avoid its electric bombs
How to Beat Motor Ball | Boss Guide
Chapter 18: Whisper Harbinger
| Whisper Harbinger | |
|---|---|

|
|
| Where he Appears | Weaknesses |
| End of the Road | None |
How to Beat Whisper Harbinger - Key Points
- Don't spend your powerful attacks until after Whisper Harbinger uses Intercession
- When the smaller Whispers are staggered, hammer away
- Deal enough damage when the smaller Whispers are Staggered to continue the fight
How to Beat Whisper Harbinger | Boss Guide
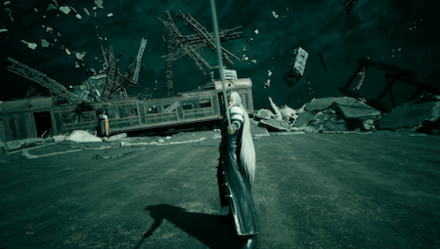
Chapter 18: Sephiroth
| Sephiroth | |
|---|---|
|
|
| Where he Appears | Weaknesses |
| End of the Road | None |
How to Beat Sephiroth - Key Points
- Don't use an Elemental Materia
- Use Support Magic on Cloud
- Hit him repeatedly when his Focus Gauge is high
- Use Counterstance to reflect his blows
How to Beat Sephiroth | Boss Guide
How to Beat Every VR Mission Boss
Check out our complete Shinra Combat Simulator Guides for in-depth strategy guides to each Shinra Combat Simulator battle!
| All VR Mission Bosses (Jump to a Section!) |
||
|---|---|---|
| Shiva | Fat Chocobo | Leviathan |
| Bahamut | Pride and Joy Prototype | - |
Chapter 8: Shiva
| Shiva | |
|---|---|
 |
|
| Location | Weaknesses |
| VR Mission | Fire |
How to Beat Shiva - Key Points
- Weak to Fire
- Summon Ifrit as soon as possible
- Bring Aerith
How to Beat Shiva | Boss Guide
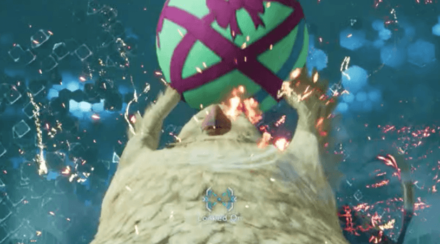
Chapter 9: Fat Chocobo
| Fat Chocobo | |
|---|---|
 |
|
| Location | Weaknesses |
| VR Mission | None |
How to Beat Fat Chocobo - Key Points
- Moogles can't be attacked
- Keep the number of enemies low
- Keep attacking to Pressure and Stagger it
- Heal before it uses Kerplunk
How to Beat Fat Chocobo | Boss Guide
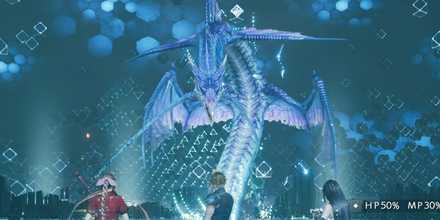
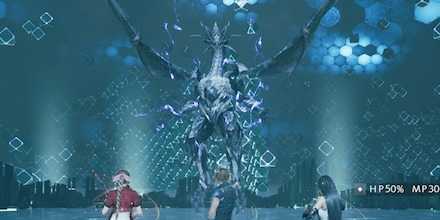
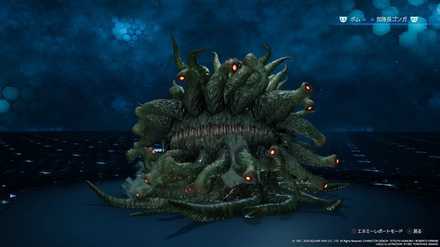
Chapter 13: Leviathan
| Leviathan | |
|---|---|
|
|
| Location | Weaknesses |
| VR Mission | Thunder |
How to Beat Leviathan - Key Points
- Stay close to Leviathan to avoid Briny Bellow
- Heal when Tidal Wave is coming
- Use Magnify Materia + Healing Materia to heal multiple party members at once
- Switch to Barret after Tidal Roar to shoot it out of the sky
How to Beat Leviathan | Boss Guide
Secret Boss: Bahamut
| Bahamut | |
|---|---|
|
|
| Location | Weaknesses |
| VR Mission | None |
How to Beat Bahamut - Key Points
- Use Barret, Cloud and Aerith
- Give Revival Earrings to Cloud and Barret
- Give Healing Materia with Arise to Barret
- Designate Aerith as the healer with Magnify Materia + Healing Materia
- Attach plenty of HP Up and MP Up Materia
- Go all-out with Abilities and Limit Breaks during the Countdown
How to Beat Bahamut | Boss Guide
Superboss: Pride and Joy Prototype
| Pride and Joy Prototype | |
|---|---|

|
|
| Location | Weaknesses |
| Shinra Combat Simulator (Hard Mode only) | Lightning |
How to Beat Pride and Joy Prototype - Key Points
- Use Cloud, Tifa and Aerith, using Cloud as the main attacker
- Take advantage of Twin Stinger's Counterstance Ability
- Stay behind it and attack from the rear
- Dodge to the side to avoid its Beam Cannon attack
- Equip 2 characters with Revive Materia
How to Beat Pride and Joy Prototype | Boss Guide
How to Beat Every Story Sub-Boss
| All Story Sub-Bosses (Jump to a Section!) |
||
|---|---|---|
| The Huntsman | The Hoodlums | Enigmatic Spectre |
| M.O.T.H. Unit | Brain Pod | Swordipede |
Chapter 2: The Huntsman
| The Huntsman | |
|---|---|
 |
|
| Location | Weaknesses |
| Upper Sector 8 | Fire |
How to Beat The Huntsman - Key Points
- Kill off the other enemies first
- Use Fire to Stagger him
- Use Punisher mode and Guard
Hard Mode Video Guide included!
How to Beat The Huntsman | Boss Guide
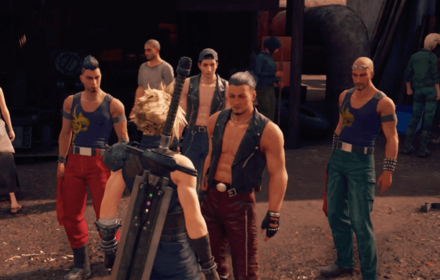
Chapter 3: The Hoodlums
| The Huntsman | |
|---|---|
 |
|
| Location | Weaknesses |
| Sector 7 Slums | Fire |
How to Beat The Hoodlums | Boss Guide
How to Beat the Hoodlums - Key Points
- Use Operator mode
- All are Weak to Fire
- Focus on one at a time
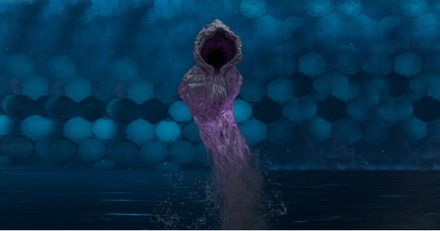
Chapters 4 & 12: Enigmatic Spectre
| Enigmatic Spectre | |
|---|---|
 |
|
| Location | Weaknesses |
| Sector 7 Slums | None |
How to Beat the Enigmatic Spectre
- Hit the Mysterious Spectres with magic
- Stagger the Enigmatic Spectre when it's vulnerable
How to Beat the Enigmatic Spectre | Boss Guide
Chapter 17: M.O.T.H. Unit
| M.O.T.H. Unit | |
|---|---|

|
|
| Location | Weaknesses |
| The Drum - 1st Ward | Lightning, Wind |
How to Beat M.O.T.H. Unit - Key Points
- Block its attacks instead of dodging
- Save your most powerful attacks until it uses Ultrahigh Voltage
How to Beat M.O.T.H. Unit | Boss Fight Guide
Chapter 17: Brain Pod
| Brain Pod | |
|---|---|
|
|
| Location | Weaknesses |
| The Drum - 2nd Ward | Lightning |
How to Beat Brain Pod - Key Points
- Prepare against Stop and Poison
- Use area attacks like Magnified Thundaga or Deadly Dodge
How to Beat Brain Pod | Boss Guide
Chapter 17: Swordipede
| Swordipede | |
|---|---|

|
|
| Location | Weaknesses |
| The Drum - 4th Ward | None |
How to Beat Swordipede - Key Points
- Focus on using long-ranged attackers on both phases (Barret and Aerith)
- Remove auto-lock during Energy Volley
- Pay attention to the Saw-Toothed Spin's attack pattern
How to Beat Swordipede | Boss Guide
How to Beat Every Monster Variant & Optional Sub-Boss
| All Monster Variants and Optional Sub-Bosses (Jump to a Section!) |
||
|---|---|---|
| Doomrat | Wrath Hound | Cerulean Drake |
| Hedgehog Pie King | Mark II Monodrive | Venomantis |
| Chromogger | Rust Drake | Tonberry |
| Trypapolis | Type-0 Behemoth | Malboro |
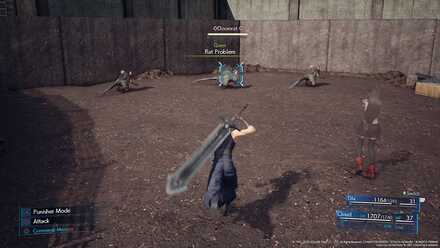
Chapter 3: Doomrat
| Doomrat | |
|---|---|
|
|
| Location | Weaknesses |
| Residential Area | Ice |
How to Beat Doomrat - Key Points
- Equip Ice Materia
- Use Triple Slash frequently
How to Beat Doomrat | Boss Guide
Chapter 3: Wrath Hound
| Wrath Hound | |
|---|---|
|
|
| Location | Weaknesses |
| Scrap Boulevard | Ice |
How to Beat Wrath Hound - Key Points
- Equip Ice Materia
- Use Punisher Mode's Auto-Counter
- Aim to Stagger it, then unleash the fury
How to Beat Wrath Hound | Boss Guide
Chapter 3: Cerulean Drake
| Cerulean Drake | |
|---|---|
 |
|
| Location | Weaknesses |
| Abandoned Factory | Wind |
How to Beat Cerulean Drake - Key Points
- Equip Wind Materia
- Stay away from Icy Aura
How to Beat Cerulean Drake | Boss Guide
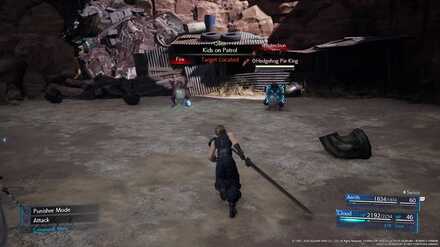
Chapter 8: Hedgehog Pie King
| Hedgehog Pie King | |
|---|---|
 |
|
| Location | Weaknesses |
| Toad Marsh | Ice |
How to Beat Hedgehog Pie King - Key Points
- Weak to Ice
- Focus on defeating unbuffed Hedgehog Pies
How to Beat Hedgehog Pie King | Boss Fight Guide
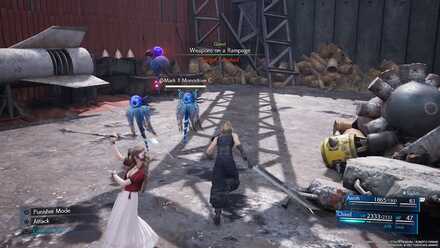
Chapter 8: Mark II Monodrive
| Mark II Monodrive | |
|---|---|
 |
|
| Location | Weaknesses |
| Scarpyard Back Alley, Twilight Valley | Wind |
How to Beat Mark II Monodrive - Key Points
- Weak to Wind
- Break their barriers
- Block their attacks instead of dodging
How to Beat Mark II Monodrive | Boss Fight Guide
Chapter 8: Venomantis
| Venomantis | |
|---|---|
 |
|
| Location | Weaknesses |
| Sector 5 Slums Graveyard | Ice |
How to Beat Venomantis - Key Points
- Weak to Ice
- Avoid the webs
- Prepare for Poison debuffs
How to Beat Venomantis | Boss Fight Guide
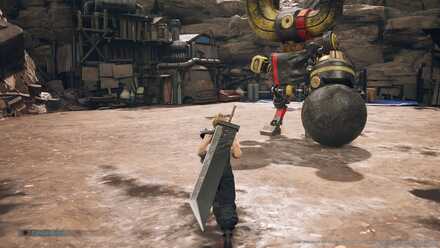
Chapter 8: Chromogger
| Chromogger | |
|---|---|
 |
|
| Location | Weaknesses |
| Lookout Point | Lightning |
How to Beat Chromogger - Key Points
- Weak to Lightning
- Avoid the red and blue fumes
- Hit its wrecking ball with magic
How to Beat Chromogger | Boss Fight Guide
Chapter 14: Rust Drake
| Rust Drake | |
|---|---|

|
|
| Location | Weaknesses |
| Sector 5 Slums | Ice, Wind |
How to Beat Rust Drake - Key Points
- Do not cast attack spells while it is enveloped in darkness
- Interrupt it while it is casting Gravity
- Use magnified healing
How to Beat Rust Drake | Boss Guide
Chapter 14: Tonberry
| Tonberry | |
|---|---|

|
|
| Location | Weaknesses |
| Sector 5 Slums | None |
How to Beat Tonberry - Key Points
- Use Warding Materia + Subversion Materia to prevent Instant Death
- Pressure it to prevent it from moving
- Equip Revival Earings and Revival Materia to keep your party afloat
- Cast Slow to limit its movement speed
How to Beat Tonberry | Boss Guide
Chapter 14: Trypapolis
| Trypapolis | |
|---|---|

|
|
| Location | Weaknesses |
| Collapsed Expressway - Old Bypass | None |
How to Beat Trypapolis - Key Points
- Avoid attacking it when it uses Dance, or it will create a clone
- Focus on one at a time to Stagger them and take them out
- They resist Physical and Magic attacks, so use Poison to deal consistent damage
- Use Silence to prevent them from using Aeroga
How to Beat Trypapolis | Boss Guide
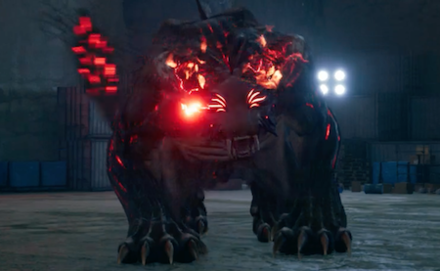
Chapter 14: Type-0 Behemoth
| Type-0 Behemoth | |
|---|---|
|
|
| Location | Weaknesses |
| Underground Lab | None |
How to Beat Type-0 Behemoth - Key Points
- Don't use offensive Magic until the Horn is defeated
- Use Poison to deal consistent damage
- Attack from the Rear to stagger its Upper and Lower body first
- After it's staggered, the Horn will be vulnerable
How to Beat Type-0 Behemoth | Boss Guide
Chapter 17: Malboro
| Malboro | |
|---|---|
|
|
| Location | Weaknesses |
| Shinra Combat Simulator | None |
How to Beat Malboro - Key Points
- Use Esuna to protect from Status Ailments
- Stay away when it uses Bad Breath
- Target its mouth when it opens to stagger it
How to Beat Malboro | Boss Guide
Intergrade Boss Battles
Ramuh
| Ramuh | |
|---|---|

|
|
| Location | Weaknesses |
| VR Mission | Wind |
How to Beat Ramuh - Key Points
- Fight him when Sonon joins your party
- Use Wind to Stagger
- Destroy his lightning orbs to pressure him
How to Beat Ramuh | Boss Guide
Levrikon
| Levrikon | |
|---|---|

|
|
| Location | Weaknesses |
| Sector 7 Slums | Ice, Fire |
How to Beat Levrikon - Key Points
- Weak to Ice and Fire
- Avoid its Brutalize attack
- Take turns attacking when it is holding a rock
How to Beat Levrikon | Boss Guide
Gigantipede
| Gigantipede | |
|---|---|
 |
|
| Location | Weaknesses |
| Main Pillar Maintenance Facility | Lightning |
How to Beat Gigantipede
- Use lightning-based Ninjutsu and spells and target its tail
- Destory the Containment Drones
- Use physical attacks on its head
- Summon Ramuh to deal heavy lightning damage
- Hard Mode Tip - Recommended Materia: HP Up, Healing, Revival, Chakra, Prayer, MP Up, Steadfast Block, ATB Stagger, and Synergy.
- Hard Mode Tip - Containment Drones: Containment Drones are now protected by Shield or Protect on Hard Mode.
How to Beat Gigantipede | Boss Guide
Scarlet
| Scarlet and the Crimson Mare | |
|---|---|
 |
|
| Location | Weaknesses |
| Heavy Weapons Platform Testing | Fire |
How to Defeat Scarlet and the Crimson Mare
- Use fire-based Ninjutsu and spells.
- Target the Makocannons to disable them.
- Keep a distance when it uses the Claymore.
- Hard Mode Tip - Recommended Materia: HP Up, Healing, Revival, Chakra, Prayer, MP Up, Steadfast Block, ATB Stagger, and Synergy.
- Hard Mode Tip - New Attacks: The Crimson Mare has 2 attacks exclusive to hard mode: Makocannon Fusillade (block then dodge) and Fulgent Blade (dodge).
Projector
| Projector | |
|---|---|

|
|
| Location | Weaknesses |
| Combat Simulator Prototype | - |
How to Defeat the Projector
- Defeat the Diabolic Creation
- Focus on the Diabolic Creation's Arm
- Bring antidotes
- When you get an opening hit the Projector with everything you have.
- Hard Mode Tip - Conserve MP: This boss comes directly before the final boss, and on hard mode you will need the MP against Nero. If you need to heal, it's best to use Chakra or Prayer to conserve MP.
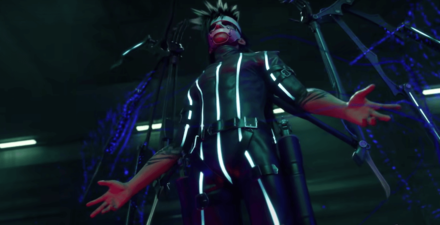
Nero
| Nero | |
|---|---|
 |
|
| Location | Weaknesses |
| Beyond the Combat Simulator Prototype | - |
How to Defeat Nero
- Pressure Nero by staying aggressive and using synergized attacks
- Avoid the Darkness or Use Regen
- Aim for his wings in the final phase to stagger him
- Summon Ramuh to deal high amounts of damage
- Hard Mode Tip - Recommended Materia: HP Up, Healing, Revival, Chakra, Prayer, MP Up, Steadfast Block, ATB Stagger, and Synergy.
- Hard Mode Tip - MP: At this point you will likely be running low on MP, so be mindful of MP management when fighting Nero.
Weiss the Immaculate
| Weiss | |
|---|---|

|
|
| Location | Weaknesses |
| Shinra Combat Simulator on Hard mode after clearing INTERmission | - |
- Recommended Party: Cloud, Aerith, Tifa. Use Tifa for phsyical damage and mobility, and use Cloud and Aerith as mages primarily.
- Dual Katana Phase: Only hit Weiss after dodging his attacks. Using -ga level magic (ex: Thundaga) is effective in this phase.
- Gun Phase: Physical attacks are only effective when Weiss is staggered. Dodge his Debilitation ability to avoid gettting silenenced. Hit him hard with magic.
- Dual Saber Phase: Use physical attacks since magic is ineffective in this phase. Weiss heals when he hits you with his sabers, so focus on dodging and striking back.
- Race against Immaculate End: After a certain point, Weiss will use the Immaculate End ability, dealing 9999 damage to all party members. Equip Revival Earrings/Superstar Belt or use the Reprieve weapon skill to survive this attack.
Pride and Joy Mk 0.5
| Pride and Joy Mk 0.5 | |
|---|---|

|
|
| Location | Weaknesses |
| Shinra Combat Simulator on Hard mode after clearing INTERmission | Lightning |
- Battle 1 - Bahamut and Ifrit: Halfway through the first battle Bahamut will summon Ifrit. Link Fire and Elemental Materia on your armor to minimize damage from Ifrit and focus on Bahamut.
- Battle 2 - Ramuh: Ramuh is weak to Wind, so hit him hard with Synergized Windstorm when staggered to take him down.
- Battle 3 - Pride and Joy Mk 0.5 - Use Lightning Ninjutsu and Thundaga. Summon Ramuh to deal heavy damage. Keep HP above 6000 and use Brumal Form to avoid its Beam Cannon.
How to Beat Pride and Joy Mk 0.5
All Boss Battles
Major Story Bosses
| All Major Story Bosses | |
|---|---|
| Chapter 1 | Scorpion Sentinel |
| Chapter 4 | Roche |
| Chapter 5 | Crab Warden |
| Chapter 7 | Airbuster |
| Chapter 8 | Reno Rude |
| Chapter 9 | Hell House |
| Chapter 10 | Abzu |
| Chapter 11 | Ghoul Eligor |
| Chapter 13 | Failed Experiment |
| Chapter 14 | Abzu (2nd Fight) |
| Chapter 15 | The Valkyrie |
| Chapter 16 | Specimen H0512 |
| Chapter 17 | Jenova Dreamweaver Rufus The Arsenal |
| Chapter 18 | Motor Ball Whisper Harbinger Sephiroth |
VR Mission Bosses
| All VR Mission Bosses | |
|---|---|
| Chapter 8 | Shiva |
| Chapter 9 | Fat Chocobo |
| Chapter 13 | Leviathan |
| Secret Boss | Bahamut |
| Superboss | Pride and Joy Prototype |
Story Sub-Bosses
| All Story Sub-Bosses | |
|---|---|
| Chapter 2 | The Huntsman |
| Chapter 3 | The Hoodlums |
| Chapter 4 | Enigmatic Spectre |
| Chapter 12 | Enigmatic Spectre |
| Chapter 17 | M.O.T.H. Unit Brain Pod Swordipede |
Monster Variants & Optional Sub-Bosses
| All Monster Variants & Optional Sub-Bosses | |
|---|---|
| Chapter 3 | Doomrat Cerulean Drake Wrath Hound |
| Chapter 8 | Hedgehog Pie King Mark II Monodrive Venomantis Chromogger |
| Chapter 14 | Rust Drake Tonberry Trypapolis Type-0 Behemoth |
| Chapter 17 | Malboro |
Intergrade Boss Battles
| Intergrade and INTERmission Bosses | |
|---|---|
| Chapter 1 | Levrikon Gigantipede |
| Chapter 2 | Scarlet & The Crimson Mare Projector Nero the Sable |
| Optional | Ramuh Weiss the Immaculate Pride and Joy Mk. 0.5 (Top Secrets) |
Related Links
Author

Boss Fight Guide & List of All Bosses (Normal & Hard Mode)
Please participate in our site
improvement survey
03/2026
improvement survey
03/2026
Would you assist in
improving Game8's site?
improving Game8's site?

×
We are listening to our users' valuable opinions and discussing how to act on them.
The information collected through this survey will be used for the purpose of improving our services. In addition, the information will only be disclosed a part of a statistic in a format that will not allow identification of personal information.
Begin Survey
Not Now
×
Please rate each item regarding Game8.co's Advertisements.
Amount of Ads
Very Dissatisfied
Somewhat Dissatisfied
Fine
Somewhat Satisfied
Highly Satisfied
Placement of Ads
Timing of Ad Display
Ad Loading Speed
Safeness of Ads
Content of Ads
×
Please rate each item regarding Game8.co's Quality of Articles.
Amount of information
Very Dissatisfied
Somewhat Dissatisfied
Fine
Somewhat Satisfied
Highly Satisfied
Frequency of updates
Speed of new information
Accuracy of articles
Understandibility of articles
Readability of sentences
×
Please rate each item regarding Game8.co's Usability of the Site.
Ease of finding information
Very Dissatisfied
Somewhat Dissatisfied
Fine
Somewhat Satisfied
Highly Satisfied
Loading Speed
Use of Color
Font Size
Visibility of Images
Easy to Understand Layout
×
Please rate each item regarding Game8.co's Message Boards, Comments.
Ease of Writing
Very Dissatisfied
Somewhat Dissatisfied
Fine
Somewhat Satisfied
Highly Satisfied
Readability
Ease in Finding Information
Comment Quality
Comment Quantity
Admin Response
×
Please rate each item regarding Game8.co's Site's new design.
Please rate our site's new design
Very Dissatisfied
Somewhat Dissatisfied
Fine
Somewhat Satisfied
Highly Satisfied
Do you think that the website's design change makes the site easier to use?
Has the new design made it easier for you to find information on the site?
Has the new design improved the overall visual appeal of the site?
How would you rate your overall satisfaction with the new design of the site?
×
How likely are you to recommend Game8 to someone you know?
Very Unlikely
0
1
2
3
4
5
6
7
8
9
10
Very Likely
If you have other opinions regarding potential improvement to the website, please share them with us. We would appreciate your honest opinion.
Note: This is a free response section, so you can proceed without entering anything.
Note: Please be sure not to enter any kind of personal information into your response.
Note: Please be sure not to enter any kind of personal information into your response.
×
Thank You
×
Thank you for participating in our survey! Your answers will help us to improve the quality of our website and services.
We hope you continue to make use of Game8.
We hope you continue to make use of Game8.
Close
Rankings
- We could not find the message board you were looking for.
Gaming News


![Everwind Review [Early Access] | The Shaky First Step to A Very Long Journey](https://img.game8.co/4440226/ab079b1153298a042633dd1ef51e878e.png/thumb)

![Monster Hunter Stories 3 Review [First Impressions] | Simply Rejuvenating](https://img.game8.co/4438641/2a31b7702bd70e78ec8efd24661dacda.jpeg/thumb)
Popular Games

Genshin Impact Walkthrough & Guides Wiki
Honkai: Star Rail Walkthrough & Guides Wiki
Umamusume: Pretty Derby Walkthrough & Guides Wiki
Pokemon Pokopia Walkthrough & Guides Wiki
Resident Evil Requiem (RE9) Walkthrough & Guides Wiki
Monster Hunter Wilds Walkthrough & Guides Wiki
Wuthering Waves Walkthrough & Guides Wiki
Arknights: Endfield Walkthrough & Guides Wiki
Pokemon FireRed and LeafGreen (FRLG) Walkthrough & Guides Wiki
Pokemon TCG Pocket (PTCGP) Strategies & Guides Wiki


Recommended Games
Diablo 4: Vessel of Hatred Walkthrough & Guides Wiki
Fire Emblem Heroes (FEH) Walkthrough & Guides Wiki
Yu-Gi-Oh! Master Duel Walkthrough & Guides Wiki
Super Smash Bros. Ultimate Walkthrough & Guides Wiki
Pokemon Brilliant Diamond and Shining Pearl (BDSP) Walkthrough & Guides Wiki
Elden Ring Shadow of the Erdtree Walkthrough & Guides Wiki
Monster Hunter World Walkthrough & Guides Wiki
The Legend of Zelda: Tears of the Kingdom Walkthrough & Guides Wiki
Persona 3 Reload Walkthrough & Guides Wiki
Cyberpunk 2077: Ultimate Edition Walkthrough & Guides Wiki


All rights reserved
© SQUARE ENIX CO., LTD. All Rights Reserved.
CHARACTER DESIGN:TETSUYA NOMURA/ROBERTO FERRARI
The copyrights of videos of games used in our content and other intellectual property rights belong to the provider of the game.
The contents we provide on this site were created personally by members of the Game8 editorial department.
We refuse the right to reuse or repost content taken without our permission such as data or images to other sites.
Yes!!! Every Boss Battle I need in one guide!!