How to Beat Whisper Harbinger | Boss Fight Guide (Normal & Hard Mode)
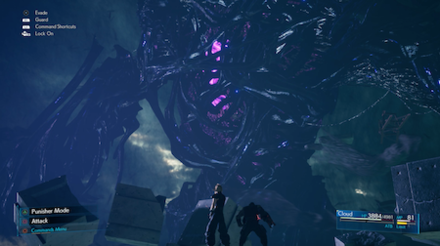
This is a guide to beating the Boss Whisper Harbinger in the game Final Fantasy 7 Remake (FF7R). This article explains Whisper Harbinger's attack patterns, weaknesses, and tips and strategies for defeating them on both Normal and Hard Mode.
List of Contents
Whisper Harbinger Stats and Information
Whisper Harbinger
Basic Information
| Whisper Harbinger | ||
|---|---|---|

|
Species | Movement | Type |
| Unreadable | Grounded | Boss |
Description
An accretion of Whispers, the so-called arbiters of fate. The creatures appear when someone tries to alter destiny's course. They are connected to all the threads of time and space that shape the planet's fate.
Assess (Tips)
Unable to read.
Whisper Harbinger Stats
| Easy | Normal | Hard | |
|---|---|---|---|
| HP | 77484 | 140880 | 188640 |
| Attack | 408 | 621 | |
| Magic Attack | 368 | 558 | |
| Defense | 294 | 401 | |
| Magic Defense | 298 | 406 | |
Whisper Harbinger Weaknesses & Resistances
| Weakness / Status Ailments | - | |
|---|---|---|
| Lesser Resistances | - | |
| Greater Resistances | - | |
| Immunities | Fire, Ice, Lightning, Wind, Posion, Silence, Sleep, Slow, Silence, Berserk, Physical, Magic, Fixed Damage, Proportional Damage | |
| Absorbed Elements | - | |
Stagger Rates
| ×No effect | ×No effect | ×No effect | ×No effect |
| - | |||
| ×No effect | ×No effect | ×No effect | - |
Stagger Length
| Stagger Length | 15 seconds |
|---|
Whisper Rubrum
Basic Information
| Whisper Rubrum | ||
|---|---|---|

|
Species | Movement | Type |
| Unreadable | Grounded | Mini-Boss |
Description
An entity from a future timeline that has manifested in the present day. It fights with a sword to protect the future that gave shape to it.
Assess (Tips)
Unable to read.
Whisper Rubrum Stats
| Easy | Normal | Hard | |
|---|---|---|---|
| HP | 7264 | 13208 | 17685 |
| Attack | 231 | 342 | |
| Magic Attack | 214 | 315 | |
| Defense | 242 | 329 | |
| Magic Defense | 242 | 329 | |
Whisper Rubrum Weaknesses & Resistances
| Weakness / Status Ailments | - | |
|---|---|---|
| Lesser Resistances | Silence | |
| Greater Resistances | Fixed Damage, Proportional Damage | |
| Immunities | Poison, Sleep, Slow, Stop, Berserk | |
| Absorbed Elements | Fire | |
Stagger Rates
| ×No effect | ×No effect | ×No effect | ×No effect |
| - | |||
| ×No effect | ×No effect | ×No effect | - |
Stagger Length
| Stagger Length | 15 seconds |
|---|
Whisper Rubrum Weaknesses and Obtainable Items
Whisper Viridi
Basic Information
| Whisper Viridi | ||
|---|---|---|

|
Species | Movement | Type |
| Unreadable | Grounded | Mini-Boss |
Description
An entity from a future timeline that has manifested in the present day. It fights barehanded to protect the future that gave shape to it.
Assess (Tips)
Unable to read.
Whisper Viridi Stats
| Easy | Normal | Hard | |
|---|---|---|---|
| HP | 7264 | 13208 | 17685 |
| Attack | 222 | 328 | |
| Magic Attack | 222 | 328 | |
| Defense | 248 | 337 | |
| Magic Defense | 230 | 312 | |
Whisper Viridi Weaknesses & Resistances
| Weakness / Status Ailments | - | |
|---|---|---|
| Lesser Resistances | Silence | |
| Greater Resistances | Fixed Damage, Proportional Damage | |
| Immunities | Poison, Sleep, Slow, Stop, Berserk | |
| Absorbed Elements | Lightning | |
Stagger Rates
| ×No effect | ×No effect | ×No effect | ×No effect |
| - | |||
| ×No effect | ×No effect | ×No effect | - |
Stagger Length
| Stagger Length | 15 seconds |
|---|
Whisper Viridi Weaknesses and Obtainable Items
Whisper Croceo
Basic Information
| Whisper Croceo | ||
|---|---|---|

|
Species | Movement | Type |
| Unreadable | Grounded | Mini-Boss |
Description
An entity from a future timeline that has manifested in the present day. It fights with guns to protect the future that gave shape to it.
Assess (Tips)
Unable to read.
Whisper Croceo Stats
| Easy | Normal | Hard | |
|---|---|---|---|
| HP | 7264 | 13208 | 17685 |
| Attack | 214 | 315 | |
| Magic Attack | 231 | 342 | |
| Defense | 230 | 312 | |
| Magic Defense | 248 | 337 | |
Whisper Croceo Weaknesses & Resistances
| Weakness / Status Ailments | - | |
|---|---|---|
| Lesser Resistances | Silence | |
| Greater Resistances | Fixed Damage, Proportional Damage | |
| Immunities | Poison, Sleep, Slow, Stop, Berserk | |
| Absorbed Elements | Wind | |
Stagger Rates
| ×No effect | ×No effect | ×No effect | ×No effect |
| - | |||
| ×No effect | ×No effect | ×No effect | - |
Stagger Length
| Stagger Length | 15 seconds |
|---|
Whisper Croceo Weaknesses and Obtainable Items
Whisper Bahamut
Basic Information
| Whisper Bahamut | ||
|---|---|---|

|
Species | Movement | Type |
| Unreadable | Grounded | Boss |
Description
Bahamut, as formed by the coalescence of three Whispers: Whisper Rubrum, Whisper Viridi, and Whisper Croceo.
Assess (Tips)
Unable to read.
Whisper Bahamut Stats
| Easy | Normal | Hard | |
|---|---|---|---|
| HP | 9686 | 17610 | 23580 |
| Attack | 222 | 328 | |
| Magic Attack | 222 | 328 | |
| Defense | 251 | 342 | |
| Magic Defense | 251 | 342 | |
Whisper Bahamut Weaknesses & Resistances
| Weakness / Status Ailments | - | |
|---|---|---|
| Lesser Resistances | Silence | |
| Greater Resistances | Fixed Damage, Proportional Damage | |
| Immunities | Poison, Silence, Sleep, Slow, Stop, Berserk | |
| Absorbed Elements | - | |
Stagger Rates
| ×1 | ×1 | ×0.5 | ×1 |
| - | |||
| ×1 | ×1 | ×1 | - |
Stagger Length
| Stagger Length | 15 seconds |
|---|
Whisper Bahamut Weaknesses and Obtainable Items
Rewards
| Easy/Normal | Hard | |
|---|---|---|
| Gil | 1450 | 2250 |
| AP | 10 | 30 |
| Exp | 4350 | 13500 |
| Items Dropped | - | |
| Rare Items Dropped | - | |
| Steal | - | |
Learnable Enemy Skills
No Enemy Skills can be learned from Whisper Harbinger.
Whisper Harbinger Boss Fight Guide
For the majority of this fight, you'll see Whisper Harbinger in the distance, but it won't participate heavily in the battle. Instead, you'll be up against three smaller Whispers – Whisper Rubrum, Whisper Viridi, and Whisper Croceo.
Whisper Harbinger Abilities and Attack Patterns
| Name | Element | Blockable? | Knockdown? | Status |
|---|---|---|---|---|
|
|
- | No | Yes | - |
| Gathers up debris in one hand and throws them at targets. | ||||
|
|
|
Yes | Yes | - |
| 5 spots on its body turn red and shoot fire balls at the battlefield. | ||||
|
|
|
Yes | Yes | - |
| Lightning strikes various areas on the battlefield. | ||||
|
|
- | No | Yes | - |
| Causes a gust of wind to blow across the arena. This attack cannot reduce HP below 1. | ||||
|
|
- | No | Yes | - |
| While swinging its left hand down the ground around the battlefield breaks. This attack cannot reduce HP below 1. | ||||
*Status Effects and Ailments Guide
Whisper Rubrum Abilities and Attack Patterns
| Name | Element | Blockable? | Knockdown? | Status |
|---|---|---|---|---|
|
|
- | Yes | No | - |
| Raises its sword above its head and releases a shockwave. Will repeat once more while tempered. | ||||
|
|
- | Yes | No | - |
| Chases a target, swinging its sword 3 times. Will swing 5 times while tempered. | ||||
|
|
- | Yes | No | - |
| Does a sweeping attack that knocks over its target. | ||||
|
|
|
Yes | Yes | - |
| Casts Firaga on a target. | ||||
|
Temper
|
- | - | Yes | - |
| Powers up its attacks. | ||||
|
|
- | Yes | Yes | - |
| Spins around with its sword charging at each party member once. | ||||
|
|
- | Yes | Yes | - |
| Swings its sword wildly at a target 4 times. | ||||
|
|
- | Yes | Yes | - |
| Stabs at a target with its sword. | ||||
*Status Effects and Ailments Guide
Whisper Viridi Abilities and Attack Patterns
| Name | Element | Blockable? | Knockdown? | Status |
|---|---|---|---|---|
|
|
- | Yes | No | - |
| Attacks a target with its fists. | ||||
|
|
- | Yes | No | - |
| Causes explosions on the ground near its target. When Tempered, the explosions will be imbued with lightning. | ||||
|
|
- | Yes | Yes | - |
| Lights up the ground at its target's feet and causes it to explode. When Tempered, the explosions will be imbued with lightning. | ||||
|
|
- | Yes | Yes | - |
| Punches out with its right fist. When Tempered, the attack will be imbued with lightning. | ||||
|
|
- | Yes | Yes | - |
| Does an uppercut attack that launches its target into the air. | ||||
|
|
- | No | Yes | - |
| Appears behind a target and hits them from behind. | ||||
|
|
|
Yes | No | - |
| Casts Thundaga on a target. | ||||
|
Temper
|
- | - | - | - |
| Powers up its attacks. | ||||
*Status Effects and Ailments Guide
Whisper Croceo Abilities and Attack Patterns
| Name | Element | Blockable? | Knockdown? | Status |
|---|---|---|---|---|
|
|
- | Yes | No | - |
| Shoots at a target 3 times (5 times on Hard mode) with one of its arms. | ||||
|
|
- | Yes | No | - |
| Fires 8 to 12 shots at a target with both of its arms. | ||||
|
|
- | Yes | Yes | - |
| Sends beams of light shooting out of its arms forwards or in opposite directions | ||||
|
|
- | Yes | No | - |
| Sends beams of light shooting out of its arms and proceeds to spin in a circle. | ||||
|
|
- | Yes | Yes | - |
| Fires a shot from both of its arms that homes in on a target and explodes | ||||
|
|
|
Yes | No | - |
| Casts Aeroga on a target | ||||
|
Temper
|
- | - | - | - |
| Powers up its attacks. | ||||
|
|
- | Yes | Yes | - |
| Charges a shot in its left arm for 1 second before releasing an orb of energy that chases a target. Explodes on contact. | ||||
*Status Effects and Ailments Guide
Whisper Bahamut Abilities and Attack Patterns
| Name | Element | Blockable? | Knockdown? | Status |
|---|---|---|---|---|
|
|
- | Yes | Yes | - |
| Swipes at a target with its claws from left to right. | ||||
|
|
- | Yes | Yes | - |
| Spins at a target 1 to 2 times. | ||||
|
|
- | Yes | No | - |
| Scratches the ground with its right claw sending 4 shockwaves out in front of it. | ||||
|
|
- | No | Yes | - |
| Summons orbs of energy in each claw and hurls them. The orbs home in on targets and burst into flames on contact. | ||||
|
|
- | Yes | Yes | - |
| Grabs a target with its claws, binding it for 5 seconds. If Whisper Bahamut takes 1000 or more damage during this it will release the target. | ||||
|
|
- | Yes | Yes |
|
| Breathes flames from left to right. | ||||
|
|
- | Yes | No | - |
| Shoots 16 orbs from its mouth 3 times. Some will go in random directions while others will chase allies. | ||||
|
|
- | No | Yes | - |
| Charges energy for 1 second and shoots an orb of energy into the ground, causing a large explosion. | ||||
|
|
- | Yes | Yes | - |
| Roars and chases a target, slashing with its claws 8 times. | ||||
|
|
- | No | No |
|
| A beam of energy comes out of Whisper Bahamut's eyes. Removes buffs and causes Stop. | ||||
*Status Effects and Ailments Guide
Best Characters for This Boss
Available Characters
Phases 1 & 2
 Cloud Cloud
|
 Barret Barret
|
 Tifa Tifa
|
Phase 3
 Cloud Cloud
|
 Tifa Tifa
|
 Aerith Aerith
|
Recommended Characters
Unlike the next battle against Sephiroth, in which Cloud and two random party members will appear in the battle, this match against the Whispers will be limited to Cloud, Barret and Tifa for most of the battle. In the last phase, Barret will be switched out with Aerith.
They'll be split up at various points throughout the battle, so make sure each character has at least some Healing and Support Magic to help Cloud when Aerith isn't around.
Whisper Harbinger Attack Phases
Phase 1
| Phase Point Summary | |
|---|---|
| 1 | You'll use Cloud, Barret and Tifa to fight Whisper Rubrum, Whisper Viridi, and Whisper Croceo. Although Whisper Harbinger will be in the distance, he is immune to attacks. |
| 2 | After some time has passed, Whisper Harbinger will use Correction and banish all participants except Cloud. |
| 3 | Continue up the pipe to the right of the stage to reach the next area. Tifa, Barret and the other Whispers will return and the battle will continue. |
| 4 | After some time has passed, Whisper Harbinger will use Intercession and banish the other three Whispers. Continue along the path to the left to reach the next area. |
Phase 2
| Phase Point Summary | |
|---|---|
| 1 | You'll use Cloud, Barret and Tifa to fight Whisper Rubrum solo. It'll start using new, more powerful Abilities in this Phase, and its health meter will be completely filled. |
| 2 | When Whisper Rubrum's health bar is depleted, it will automatically be Staggered. Whisper Harbinger will start taking damage each time you attack Whisper Rubrum. Continue attacking Whisper Rubrum until it is defeated.Watch out: If you don't deal enough damage to Whisper Rubrum, its health meter will replenish by half, or completely refill on Hard Mode, and you'll have to repeat this section. |
| 3 | After a cutscene, Tifa will be banished, and you'll have to fight Whisper Croceo and Whisper Viridi with Cloud and Barret, with Red XIII accompanying you. |
| 4 | Repeat the same process as with Whisper Rubrum for Whisper Croceo and Whisper Viridi. |
Phase 3
| Phase Point Summary | |
|---|---|
| 1 | All three small Whispers will return with full HP. Barret and Red XIII with run off to attack Whisper Harbinger directly, while you'll fight the three smaller Whispers with Cloud, Aerith and Tifa. |
| 2 | After a set amount of time has passed, the three Whispers will combine and form Whisper Bahamut. |
| 3 | After defeating Whisper Bahamut, the three Whispers will split apart and return to their previously held HP amounts. |
| 4 | Defeat each of the Whispers one by one and attack them while Staggered to damage Whisper Harbinger, like in Phase 2, until all three are defeated. |
| 5 | In the finale, simply attack the Whisper Harbinger as its giant body moves overhead. It really doesn't pose any threat. After you've attacked it enough, the battle will end. |
Tips & Strategies for Beating Whisper Harbinger
| ★ Strategy Checklist ★ (Click to jump) |
||
|---|---|---|
|
|
Don't Waste Your Attacks in Phase 1
In the first part of the battle, when you're fighting each of the three smaller Whispers before Whisper Harbinger uses Intercession, there's actually no point to fighting back at all.
In this phase, you'll move to two separate areas to battle, during which Whisper Harbinger will use Correction and Intercession to move the battle to the next area. But after Intercession is used, you'll fight the three smaller Whispers again with fully regenerated health bars. This means that no matter how much damage you deal in Phase 1, it will be completely reset at the start of Phase 2.
Save your ATB and Limit Gauges
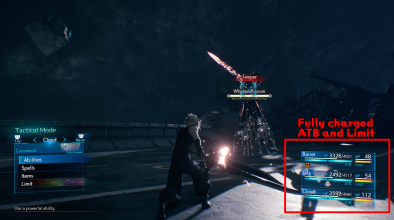
After testing out going through Phase 1 without using any attacks, all characters' gauges were fully maxed out.
To handle this harsh reality, focus on blocking and avoiding damage throughout Phase 1, and don't spend your precious MP here. Although the Whispers' damage will reset, your characters' ATB Gauges and Limit Gauges will not, so if you've saved these up throughout Phase 1, you'll be able to unleash a wave of damage at the onset of Phase 2.
Counter Whisper Rubrum's Attacks
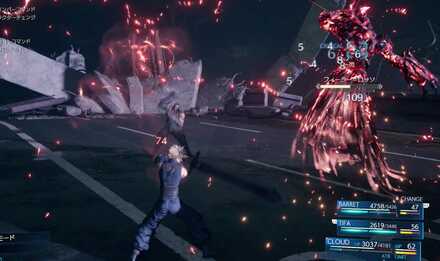
Whisper Rubrum will come at you with a variety of sword-based attacks, allowing Cloud to take advantage of his Punisher Mode's auto-counter or the Twin Stinger's Counterstance ability to do a good amount of damage.
Take Down Whisper Viridi From Afar
Whisper Viridi's attacks are all close ranged and can stun your party leaving you open to attacks from the rest. To quickly take Viridi down, hit it with any magic but lightning or swap to Barret for long-range attacks.
Finish Off Croceo First
Whisper Croceo's attacks are all gun-baed, meaning it can attack anyone in your party from a distance. Target Croceo first with your strongest abilities to remove this nuisance from the battlefield.
Go All Out When a Smaller Whisper is Staggered
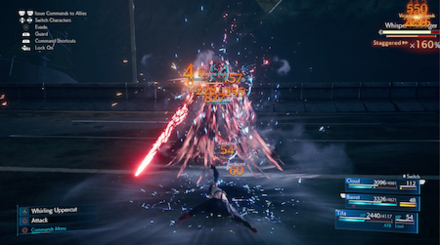
Tifa's Starshower cleaning a staggered Whisper Rubrum's clock.
When one of the smaller Whispers' HP runs out, they will be temporarily Staggered. This is your chance to deal vicarious damage to Whisper Harbinger. The more damage you deal to the Staggered Whisper, the more damage Whisper Harbinger will take.
If you don't manage to do enough damage to the Staggered Whisper, they'll regain half of their HP, or all of it on Hard Mode. This will force you to continue the sequence again until you've dealt enough damage to continue to the next Phase.
Hit Whisper Bahamut with Magic
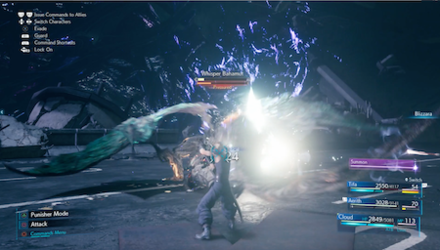
Aerith casting Blizzara on a pressured Whisper Bahamut.
Whisper Bahamut will fly around quickly and stay out of range of most melee attacks. It will also use powerful attacks like Megaflare which will deal big damage to your whole party, so you'll want to finish off this phase of the battle as quickly as possible.
Now that you have Aerith back in your party, use her high Magic Attack with a level 3 Spell like Blizzaga to take down Whisper Bahamut before he does too much damage.
Avoid casting Spells with Absorbed Elements

Here, Whisper Rubrum heals 2241 HP after being hit with Firaga.
Each of the three smaller Whispers Absorbs an Element, matching the type of Magic they use. This means that attacking the Whisper with this Element of Magic with restore their HP instead of decreasing it. Fortunately, this doesn't apply to Elemental Materia – however, it will reduce the damage dealt in your next battle, so we advise removing any Elemental Materia anyway before starting this series of battles.
Whispers and the elements they absorb
| Whisper | Absorbed Element |
|---|---|
| Whisper Rubrum | Fire |
| Whisper Viridi | Lightning |
| Whisper Croceo | Wind |
As Ice is the only Magic not Absorbed by any Whisper, it's a good idea to simply avoid other elements and place Ice Materia on all your characters before the fight.
Whisper Harbinger: Hard Mode Guide
| ★ Strategy Checklist ★ (Click to jump) |
||
|---|---|---|
|
|
Temper in the First Phase
On Normal Mode, the Whispers would wait until phase 2 to use Temper and power up, but on Hard Mode they will do this from the beginning, immediately increasing their damage output. Link a Healing materia with Magnify or equip Prayer to keep up.
Viridi's lightning attacks will also become more annoying so linking Elemental with Lightning on your party's armor will help mitigate this damage.
Hit Bahamut With -ga Level Magic
Like on Normal, Whisper Bahamut is more susceptible to magic attacks. Using Cloud as your tank, keep Bahamut's attention while you target him with Tifa and Aerith's strongest magic.
Boss Fight Related Articles
Major Story Bosses
| All Major Story Bosses | |
|---|---|
| Chapter 1 | Scorpion Sentinel |
| Chapter 4 | Roche |
| Chapter 5 | Crab Warden |
| Chapter 7 | Airbuster |
| Chapter 8 | Reno Rude |
| Chapter 9 | Hell House |
| Chapter 10 | Abzu |
| Chapter 11 | Ghoul Eligor |
| Chapter 13 | Failed Experiment |
| Chapter 14 | Abzu (2nd Fight) |
| Chapter 15 | The Valkyrie |
| Chapter 16 | Specimen H0512 |
| Chapter 17 | Jenova Dreamweaver Rufus The Arsenal |
| Chapter 18 | Motor Ball Whisper Harbinger Sephiroth |
VR Mission Bosses
| All VR Mission Bosses | |
|---|---|
| Chapter 8 | Shiva |
| Chapter 9 | Fat Chocobo |
| Chapter 13 | Leviathan |
| Secret Boss | Bahamut |
| Superboss | Pride and Joy Prototype |
Story Sub-Bosses
| All Story Sub-Bosses | |
|---|---|
| Chapter 2 | The Huntsman |
| Chapter 3 | The Hoodlums |
| Chapter 4 | Enigmatic Spectre |
| Chapter 12 | Enigmatic Spectre |
| Chapter 17 | M.O.T.H. Unit Brain Pod Swordipede |
Monster Variants & Optional Sub-Bosses
| All Monster Variants & Optional Sub-Bosses | |
|---|---|
| Chapter 3 | Doomrat Cerulean Drake Wrath Hound |
| Chapter 8 | Hedgehog Pie King Mark II Monodrive Venomantis Chromogger |
| Chapter 14 | Rust Drake Tonberry Trypapolis Type-0 Behemoth |
| Chapter 17 | Malboro |
Comment
I mean... was there any doubt that you would fight him?
Author
How to Beat Whisper Harbinger | Boss Fight Guide (Normal & Hard Mode)
improvement survey
03/2026
improving Game8's site?

Your answers will help us to improve our website.
Note: Please be sure not to enter any kind of personal information into your response.

We hope you continue to make use of Game8.
Rankings
- We could not find the message board you were looking for.
Gaming News
Popular Games

Genshin Impact Walkthrough & Guides Wiki

Honkai: Star Rail Walkthrough & Guides Wiki

Umamusume: Pretty Derby Walkthrough & Guides Wiki

Pokemon Pokopia Walkthrough & Guides Wiki

Resident Evil Requiem (RE9) Walkthrough & Guides Wiki

Monster Hunter Wilds Walkthrough & Guides Wiki

Wuthering Waves Walkthrough & Guides Wiki

Arknights: Endfield Walkthrough & Guides Wiki

Pokemon FireRed and LeafGreen (FRLG) Walkthrough & Guides Wiki

Pokemon TCG Pocket (PTCGP) Strategies & Guides Wiki
Recommended Games

Diablo 4: Vessel of Hatred Walkthrough & Guides Wiki

Cyberpunk 2077: Ultimate Edition Walkthrough & Guides Wiki

Fire Emblem Heroes (FEH) Walkthrough & Guides Wiki

Yu-Gi-Oh! Master Duel Walkthrough & Guides Wiki

Super Smash Bros. Ultimate Walkthrough & Guides Wiki

Pokemon Brilliant Diamond and Shining Pearl (BDSP) Walkthrough & Guides Wiki

Elden Ring Shadow of the Erdtree Walkthrough & Guides Wiki

Monster Hunter World Walkthrough & Guides Wiki

The Legend of Zelda: Tears of the Kingdom Walkthrough & Guides Wiki

Persona 3 Reload Walkthrough & Guides Wiki
All rights reserved
© SQUARE ENIX CO., LTD. All Rights Reserved.
CHARACTER DESIGN:TETSUYA NOMURA/ROBERTO FERRARI
The copyrights of videos of games used in our content and other intellectual property rights belong to the provider of the game.
The contents we provide on this site were created personally by members of the Game8 editorial department.
We refuse the right to reuse or repost content taken without our permission such as data or images to other sites.


![Monster Hunter Stories 3 Review [First Impressions] | Simply Rejuvenating](https://img.game8.co/4438641/2a31b7702bd70e78ec8efd24661dacda.jpeg/thumb)


Wish there was a checkpoint before Bahamut as when on hard you have to start right back at the beginning:(