How to Beat Bahamut | Boss Fight Guide
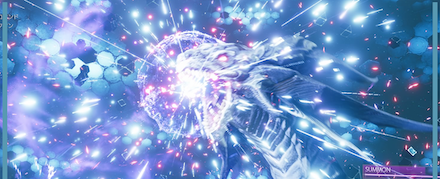
This is a guide to beating the Boss Bahamut in the game Final Fantasy 7 Remake (FF7R). This article explains Bahamut's attack patterns, weaknesses, and tips and strategies for defeating them.
List of Contents
Bahamut Stats and Information
Basic Information
| Bahamut | ||
|---|---|---|
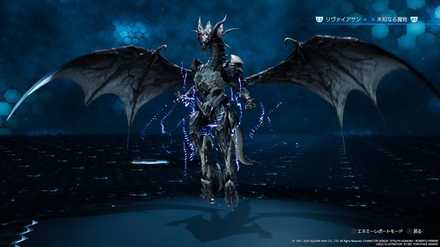
|
Species | Movement | Type |
| Unreadable | Grounded | Boss |
Description
A legendary summon recreated in virtual reality. It is the manifestation of a dragon king revered by the original stewards of the planet. According to oral tradition, there are many Bahamuts, each with their own powers and forms.
Assess (Tips)
Tactical data not available.
Bahamut Stats
| Easy | Normal | Hard | |
|---|---|---|---|
| HP | 48937 | 88976 | 66732 |
| Attack | 328 | 328 | |
| Magic Attack | 328 | 328 | |
| Defense | 342 | 342 | |
| Magic Defense | 342 | 342 | |
Bahamut Weaknesses & Resistances
| Weakness / Status Ailments | - | |
|---|---|---|
| Lesser Resistances | - | |
| Greater Resistances | Fixed Damage, Proportional Damage | |
| Immunities | Poison, Silence, Sleep, Slow, Stop, Berserk | |
| Absorbed Elements | ||
Stagger Rates
| ×1 | ×1 | ×1 | ×1 |
| - | |||
| ×1 | ×1 | ×1 | - |
Stagger Length
| Stagger Length | 10 seconds |
|---|
Appears after completing Battle Intel #1-19
After you've completed all 19 Battle Intel reports for Chadley, you'll unlock Bahamut from his VR Missions menu. If you're stuck on a few, check out our Battle Intel guides to learn how to complete each of the 19 Battle Intel reports!
List of Battle Intel Reports and Rewards
Get the Bahamut Summon Materia as a Reward
After you've defeated Bahamut, Chadley will give you the Bahamut Summon Materia, the strongest Summon Materia in the game. If you're trying to 100% the game, or just want an edge against some of the endgame bosses, you don't want to miss this one!
Bahamut Boss Fight Guide
Bahamut Abilities and Attack Patterns
| Name | Element | Blockable? | Knockdown? | Status |
|---|---|---|---|---|
|
|
- | Yes | Yes | - |
| Swipes at a target with its claws from left to right. | ||||
|
|
- | Yes | Yes | - |
| Spins at a target 1 to 2 times. | ||||
|
|
- | Yes | No | - |
| Scratches the ground with its right claw sending 4 shockwaves out in front of it. | ||||
|
|
- | No | Yes | - |
| Summons orbs of energy in each claw and hurls them. The orbs home in on targets and burst into flames on contact. | ||||
|
|
- | Yes | Yes | - |
| Grabs a target with its claws, binding it for 5 seconds. If Whisper Bahamut takes 1000 or more damage during this it will release the target. | ||||
|
|
- | No | Yes | - |
| Roars and lets out a burst of energy, surrounding itself in a purple aura that causes damage over time when close. | ||||
|
|
- | No | Yes | - |
| Roars and lets out a burst of energy, surrounding itself in a pink aura that causes damage over time when close. | ||||
|
|
- | Yes | Yes | - |
| Roars and chases a target, slashing with its claws 8 times. | ||||
|
|
- | No | No |
|
| A beam of energy comes out of Whisper Bahamut's eyes. Removes buffs and causes Stop. | ||||
|
|
- | Yes | Yes | - |
| Soars high into the sky and dives back down towards the ground, releasing an explosion when it hits. | ||||
|
|
- | Yes | Yes |
|
| Breathes flames from left to right. | ||||
|
|
- | Yes | No | - |
| Shoots 16 orbs from its mouth 3 times. Some will go in random directions while others will chase allies. | ||||
|
|
- | No | Yes | - |
| Charges energy for 1 second and shoots an orb of energy into the ground, causing a large explosion. | ||||
*Status Effects and Ailments Guide
Change characters for Umbral Strikes

When Bahamut uses Umbral Strikes, change to a different character right away. Since Umbral Strikes is an unavoidable attack, don't waste time trying to handle it – just eat the attack and let another character continue attacking and get ready to heal the damaged character.
Handle Divebomb with Counterstance

The grandiose Divebomb attack is a chance for Cloud to use Twin Stinger's Ability, Counterstance. Other Abilities like Claw Swipe, Flare Breath, and standard attacks can also be countered in this way, making this an effective technique for handle Bahamut as a whole.
Use Revival Earrings to bounce back from Megaflare

Bahamut's strongest attack, Megaflare, will almost certainly wipe out most of your party. It's best to accept this and handle it with Auto-Life techinques like the Revival Earrings, which will automatically cast Revive on a character after they are defeated, then break.
Revival Earrings Effect and Stats
Tips & Strategies for Beating Bahamut
| ★ Strategy Checklist ★ (Click to jump) |
||
|---|---|---|
|
|
Designate a Healer with Magnify + Healing Materia

Use the Magnify Materia together with a Healing Materia to allow a specific character to keep the party alive throughout the battle. Bahamut will emit a purple aura which deals continuous damage to anything around it for the majority of the battle. Using Magnify + Regen will allow your characters to zero out this damage to hit Bahamut with melee attacks.
How to Get the Magnify Materia
Cast Haste to increase ATB

With the Time Materia, you can cast Haste to increase your party's ATB Gauge. This will allow Cloud to use the Counterstrike effect repeatedly and get as much damage on Bahamut as possible. It's a good idea to use this together with Steadfast Block Materia to decrease the damage each time Cloud takes a hit, to let him continue this process without getting knocked out.
Other ATB boosting techniques, like the ATB Boost Materia, ATB Stagger Materia, and ATB Assist Materia will also help Cloud fill his ATB Gauge as possible.
Use Counterstance to aim for a counterattack
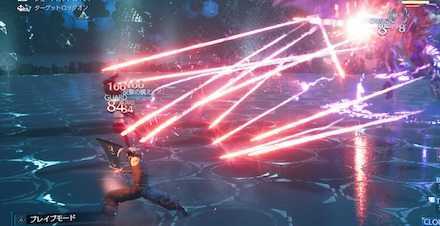
Bahamut attacks continually and viciously throughout the fight, and simply slashing at him will just get you knocked back. Use Twin Stinger's Counterstance Ability to counter its attacks and deal damage without having to go on the offensive.
Bide your time and wait for an opening
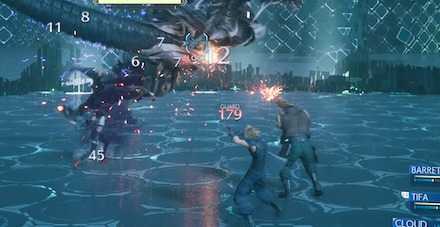
Most of the time, there won't be an easy opening to get hits in. While using Counterstance as described above, play defensively while waiting for your chance to strike. Hold R1 to block throughout the fight, and you'll deal more damage in the end.
When the Countdown starts, attack with all your might

When Bahamut begins preparing its Countdown, it's your chance to unleash your pent-up rage. Use all the Abilities and Limit Breaks you have. If you deal enough damage to it, you will be able to stop Bahamut from using Megaflare.
If you fail to stop the countdown, your entire party will suffer over 8,000 damage on Normal difficulty from the powerful Megaflare attack.
Bahamut: Hard Mode Guide
Watch Out for Ifrit
Different from the VR Mission version of Bahamut, when its HP drops to 50% it will summon Ifrit to fight alongside it. Fighting both at the same time can prove difficult, so use your strongest abilities or a Limit Break to quickly dispose of Ifrit.
Boss Fight Related Articles
Major Story Bosses
| All Major Story Bosses | |
|---|---|
| Chapter 1 | Scorpion Sentinel |
| Chapter 4 | Roche |
| Chapter 5 | Crab Warden |
| Chapter 7 | Airbuster |
| Chapter 8 | Reno Rude |
| Chapter 9 | Hell House |
| Chapter 10 | Abzu |
| Chapter 11 | Ghoul Eligor |
| Chapter 13 | Failed Experiment |
| Chapter 14 | Abzu (2nd Fight) |
| Chapter 15 | The Valkyrie |
| Chapter 16 | Specimen H0512 |
| Chapter 17 | Jenova Dreamweaver Rufus The Arsenal |
| Chapter 18 | Motor Ball Whisper Harbinger Sephiroth |
VR Mission Bosses
| All VR Mission Bosses | |
|---|---|
| Chapter 8 | Shiva |
| Chapter 9 | Fat Chocobo |
| Chapter 13 | Leviathan |
| Secret Boss | Bahamut |
| Superboss | Pride and Joy Prototype |
Story Sub-Bosses
| All Story Sub-Bosses | |
|---|---|
| Chapter 2 | The Huntsman |
| Chapter 3 | The Hoodlums |
| Chapter 4 | Enigmatic Spectre |
| Chapter 12 | Enigmatic Spectre |
| Chapter 17 | M.O.T.H. Unit Brain Pod Swordipede |
Monster Variants & Optional Sub-Bosses
| All Monster Variants & Optional Sub-Bosses | |
|---|---|
| Chapter 3 | Doomrat Cerulean Drake Wrath Hound |
| Chapter 8 | Hedgehog Pie King Mark II Monodrive Venomantis Chromogger |
| Chapter 14 | Rust Drake Tonberry Trypapolis Type-0 Behemoth |
| Chapter 17 | Malboro |
Comment
First- This douche likes doing tons of DOT dmg via wide AOEs, offsetting this is actually pretty easy with spirit syphon and algid aura while deadly dodging (link enmySkl-HPabsorb, DD-HPabsorb) and if u have regen up your going to be restoring HP not losing. Second- it is absolutely crucial that you have Mward since this will even cut megaflare dmg by 1/2. Alongside most of its other attacks as they're magical Last but not least- Make the most of counters, specifically Counterstance. Victorious
Author
How to Beat Bahamut | Boss Fight Guide
improvement survey
03/2026
improving Game8's site?

Your answers will help us to improve our website.
Note: Please be sure not to enter any kind of personal information into your response.

We hope you continue to make use of Game8.
Rankings
- We could not find the message board you were looking for.
Gaming News
Popular Games

Genshin Impact Walkthrough & Guides Wiki

Honkai: Star Rail Walkthrough & Guides Wiki

Umamusume: Pretty Derby Walkthrough & Guides Wiki

Pokemon Pokopia Walkthrough & Guides Wiki

Resident Evil Requiem (RE9) Walkthrough & Guides Wiki

Monster Hunter Wilds Walkthrough & Guides Wiki

Wuthering Waves Walkthrough & Guides Wiki

Arknights: Endfield Walkthrough & Guides Wiki

Pokemon FireRed and LeafGreen (FRLG) Walkthrough & Guides Wiki

Pokemon TCG Pocket (PTCGP) Strategies & Guides Wiki
Recommended Games

Diablo 4: Vessel of Hatred Walkthrough & Guides Wiki

Cyberpunk 2077: Ultimate Edition Walkthrough & Guides Wiki

Fire Emblem Heroes (FEH) Walkthrough & Guides Wiki

Yu-Gi-Oh! Master Duel Walkthrough & Guides Wiki

Super Smash Bros. Ultimate Walkthrough & Guides Wiki

Pokemon Brilliant Diamond and Shining Pearl (BDSP) Walkthrough & Guides Wiki

Elden Ring Shadow of the Erdtree Walkthrough & Guides Wiki

Monster Hunter World Walkthrough & Guides Wiki

The Legend of Zelda: Tears of the Kingdom Walkthrough & Guides Wiki

Persona 3 Reload Walkthrough & Guides Wiki
All rights reserved
© SQUARE ENIX CO., LTD. All Rights Reserved.
CHARACTER DESIGN:TETSUYA NOMURA/ROBERTO FERRARI
The copyrights of videos of games used in our content and other intellectual property rights belong to the provider of the game.
The contents we provide on this site were created personally by members of the Game8 editorial department.
We refuse the right to reuse or repost content taken without our permission such as data or images to other sites.


![Monster Hunter Stories 3 Review [First Impressions] | Simply Rejuvenating](https://img.game8.co/4438641/2a31b7702bd70e78ec8efd24661dacda.jpeg/thumb)


One more thing to mention. Make sure you don’t get caught by the Megaflare at the same time the Ifrit is active. No way to survive that. For me it was easier to not damage him to 50% before the first flare. Survive it with manawall + magnify. Heal up then deal with Ifrit. Summoning Shiva to help bring him Dow quick was also nice.