This survey will take about 1 minute.
Your answers will help us to improve our website.
FF7 Remake
Story Walkthrough and List of Chapters
This is a complete guide to the story walkthrough for the game FF7 Remake. Whether you're stuck getting through the story, or you want to play without missing any important Items, these guides have it all for first-time and veteran players alike.
List of Contents
List of Chapters
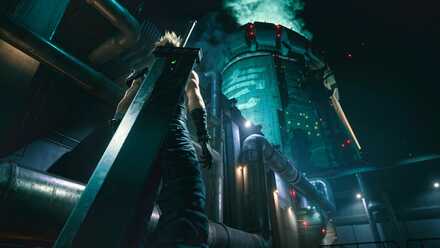
| Chapter 1 | The Destruction of Mako Reactor 1 |
|---|---|
| Chapter 2 | Fateful Encounters |
| Chapter 3 | Home Sweet Slum |
| Chapter 4 | Mad Dash |
| Chapter 5 | Dogged Pursuit |
| Chapter 6 | Light the Way |
| Chapter 7 | A Trap is Sprung |
| Chapter 8 | Budding Bodyguard |
| Chapter 9 | The Town That Never Sleeps |
| Chapter 10 | Rough Waters |
| Chapter 11 | Haunted |
| Chapter 12 | Fight for Survival |
| Chapter 13 | A Broken World |
| Chapter 14 | In Search of Hope |
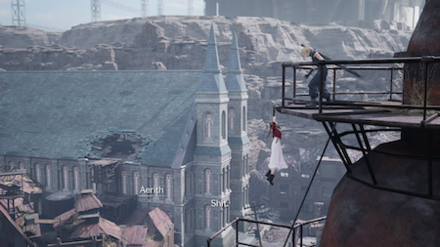
| Chapter 15 | The Day Midgar Stood Still |
| Chapter 16 | The Belly of the Beast |
| Chapter 17 | Deliverance from Chaos |
| Chapter 18 | Destiny's Crossroads |
| INTERmission Chapters | |
|---|---|
| Chapter 1 | Wutai's Finest |
| Chapter 2 | Covert Ops |
Story Walkthrough (Overview)
Chapter 1: The Destruction of Mako Reactor 1 Story Guide & Walkthrough
| No. | Title | Description |
|---|---|---|
| 1 | Enter the Reactor Grounds | With the gate unlocked, it is time to head for Mako Reactor 1 itself. |
| 2 | Infiltrate the Reactor | With Cloud's help, the group avoids the security and successfully infiltrates the reactor. |
| 2-1 | Follow Barret | With Cloud behind them, the members of Avalanche pass through the wire fence and push deeper into the facility. |
| 3 | Breach Security | With the passcode acquired earlier, the group opens the door and proceeds further into the facility. |
| 4 | Reach Mako Storage | Fighting through the security net, the group reaches the heart of the facility. |
| 4-1 | Follow Jessie | The group follows Jessie through the security system. They continue to press on. |
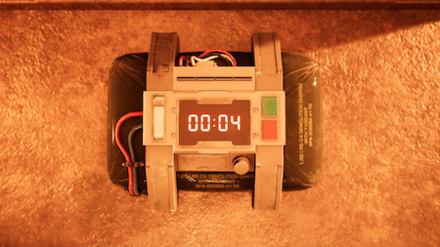
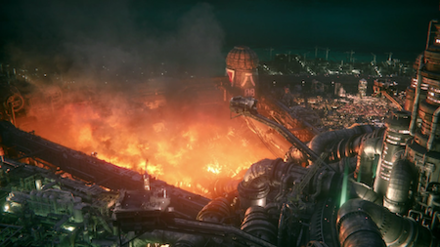
| 5 | Set the Charge | A Scorpion Sentinel ambushes Cloud and Barret after the bomb is set. The defeated robot short-circuits and starts destroying the reactor. |
| 6 | Escape from the Reactor | Cloud and Barret make it out of the reactor, but are not yet in the clear. |
| 6-1 | Rendezvous with Barret | Successfully reunited, Cloud and Barret work together to escape from the reactor facility. |
| 7 | Sprint to Safety | Avalanche has successfully taken out the mako reactor. Now it is time for phase two of the plan–the getaway. |
Chapter 1: The Destruction of Mako Reactor 1 Story Guide & Walkthrough
Chapter 2: Fateful Encounters Story Guide & Walkthrough
| No. | Title | Description |
|---|---|---|
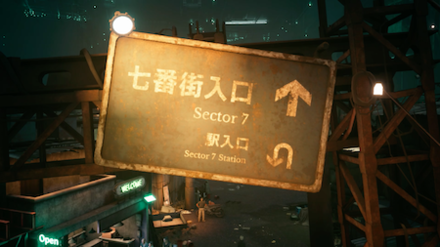
| 1 | Use the Escape Route | The group has followed the escape route to Sector 8. In order to board their train home discreetly, they must go their separate ways. |
| 2 | Reach the Sector 8 Station | Just before Cloud reaches the station, the expressway collapses and blocks his path. In the fires of the wreckage, he has a vision of an old nemesis. |
| 3 | Follow Him | Cloud's mind is sent into a frenzy after catching up to this figure from his past. After the man disappears and Cloud's head stops aching, he makes for the station once again. |
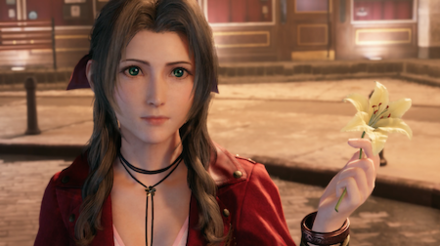
| 4 | Taking a Detour | The figure from Cloud's past appears before him and the flower peddler. Before he knows what's happening though, Cloud is spotted by Public Security forces. |
| 5 | Evade Pursuers | Cloud fights off Shinra reinforcements at the fountain plaza. Now he has to get past the security perimeter around the station and find an escape route. |
| 6 | Flight through the City | Cloud avoids the station and makes a detour through the residential area. However, Shinra security is posted all throughout Sector 8, making things difficult. |
| 6-1 | Climb to the Roof | Fighting off the Shinra pursuit, Cloud flees to the roof of a nearby building. |
| 7 | Break the Blockade | Cloud is trapped by a succession of Public Security squads. In the nick of time, Cloud boards the last train out of Sector 8. |
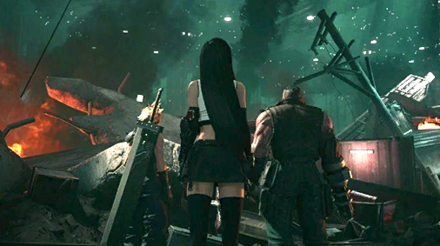
| 8 | Last Train | Civilian passengers are angry about the destruction caused by the reactor explosion. Uncertain and unsure about what they have done, the members of Avalanche ride the last train down to the Sector 7 slums. |
Chapter 2: Fateful Encounters Story Guide & Walkthrough
Chapter 3: Home Sweet Slum
| No. | Title | Description |
|---|---|---|
| 1 | Return to Base | Tifa, a childhood friend of Cloud, uses her connections to get him an apartment. After promising to help her with collections tomorrow, Cloud hits the sack. |
| 2 | Noisy Neighbors | Awoken in the middle of the night, Cloud goes to room 203, where he again has a vision of Sephiroth. He eventually returns to his room, still reeling from the hallucinations as he awaits the dawn. |
| 3 | Life in the Slums | Cloud has been contracted by Biggs to exterminate some monsters, so he goes with Tifa to Scrap Boulevard. |
| 4 | A Job for the Neighborhood Watch | Cloud has cleared the monsters from Scrap Boulevard and is starting to make a name for himself in the slums. |
| 5 | Problem Solving | Thanks in part to Tifa, the local population is starting to recognize Cloud's name. |
| 5-1 | A Job Well Done | Johnny is arrested on suspicion of stealing blasting powder. Tifa worries that his loose lips will lead security forces to Avalanche, and decides to rescue him. Cloud accompanies her in the endeavor. |
| 6 | Shinra Reacts | Having rescued Johnny, Cloud and Tifa head back to Seventh Heaven. Before Cloud can collect his payment, Barret holds an impromptu strategy meeting with the other Avalanche members. Left all by himself, Cloud kills time at the bar. |
| 6-1 | Talking Strategy | Avalanche decides that their next mission will not include Cloud. After collecting his pay, Cloud leaves the bar, only to spot suspicious men stationed in front of it. |
| 7 | Ominous Shadows | Cloud has chased off the men who were looking for information about Barret. When Cloud returns to Stargazer Heights, he finds Jessie waiting for him with a new job request. |
| 8 | The Jessie Job | It is not clear exactly what Jessie wants, but the pay is good, so Cloud decides to accept the job and head for the Sector 7 plate. |
| ★ | Alone at Last | Cloud gets Tifa to smile, leading even Marle to accept that he may be something special. |
★This objective is labeled as a Discovery. It's unlocked after finishing all six of the Odd Jobs in this chapter.
Chapter 3: Home Sweet Slum Story Guide & Walkthrough
Chapter 4: Mad Dash
| No. | Title | Description |
|---|---|---|
| 1 | Motor Chase | The group shakes off both Public Security and a SOLDIER before reaching the depot. Dismounting from their bikes, they head into Sector 7. |
| 2 | To Sector 7 | The four enter the employee housing district–where Jessie was born and raised–while the residents there settle in for the night. |
| 3 | Homecoming | The group arrives at Jessie's house. Jessie tells Cloud to wait outside. |
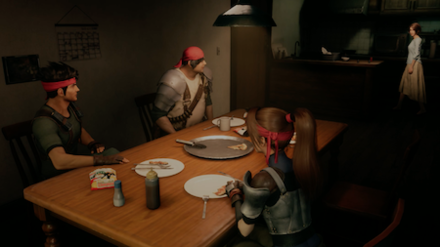
| 4 | The Jessie Job | With the ID badge Jessie asked for in hand, Cloud leaves the house while the Avalanche members make merry in the kitchen. |
| 5 | Sector 7-6 Annex Infiltration | An attack on the guard room has the three on alert, but does not deter them from sneaking into the 7-6 Annex. Once in, Jessie gives the signal and the diversionary operation begins. |
| 6 | A Little Diversion | Avalanche HQ operatives storm the scene, as they were coincidentally launching an assault of the 7-6 Annex at the same time. Amidst the chaos that ensues, Cloud and Biggs escape the annex. |
| 7 | Rendezvous at the Empty Lot | The group meets up at the empty lot. The mission is a success, and now it is time to head back to the Sector 7 slums. |
| 8 | Return to the Slums | Thanks to Jessie, the group finds parachutes for their escape and–after some initial trepidation–jumps off the edge of the plate. |
| 9 | To Wedge's Place | After seeing Wedge home, Cloud heads to Jessie's place to collect his reward. |
| 10 | Remaining Payment | Cloud receives his reward from Jessie. Confused by Jessie's earnest invitation, he leaves Jessie's place. |
| 11 | Slum Wisdom | Cloud is late, and Tifa is waiting for him when he returns to Stargazer Heights. They have a heart-to-heart and clear the air between them before turning in for the night. |
| 12 | Sudden Attack | Jessie has been injured in the attack by unknown assailants, meaning Barret has no choice but to ask Cloud to participate in the next mission. |
| 13 | A New Operation | Cloud, Tifa, and Barret all board the train and head for Mako Reactor 5, determined to make this second bombing mission a success. |
Chapter 4: Mad Dash Story Guide & Walkthrough
Chapter 5: Dogged Pursuit
| No. | Title | Description |
|---|---|---|
| 1 | All Aboard for Sector 4 | Some time into the ride, an unscheduled ID scan sweeps the train. |
| 2 | Separate Ways | The ID scan detects an anomaly and the passenger car they're in is sealed off. The team is forced to change their plan. |
| 3 | Looking for a Friend | Having reunited after their dramatic leap from the train, the three regroup at a nearby rail map to discuss their next steps. |
| 4 | Get Your Bearings | Barret decides to switch to plan E. The team will follow the Mako Reactor 5 line through the corkscrew tunnel, guided by the signs another Avalanche cell left. |
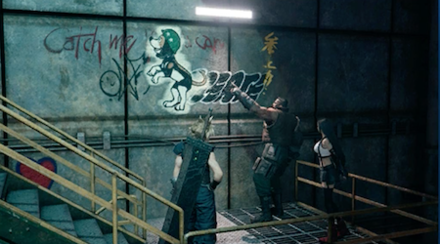
| 5 | Find Stamp | Following the Stamp graffiti, the team arrives at the train yard. They must drive off security and find a way to get past the locked gate. |
| 5-1 | The Nose Knows | The team has found Avalanche's graffiti. Now they just have to follow Stamp's nose. |
| 5-2 | Check the Route | As there is a hidden passageway leading to the reactor from the train yard, the three set out to look for it. |
| 5-3 | Train Yard Security | The security officers guarding the train yard have been defeated, but the gate to the train yard is locked. |
| 6 | Secret Passageway | The three dispatch the Crab Warden that was apparently station in the train yard. At last, they can take the secret passageway. |
| 6-1 | Stairway Detour | The team climbs the stairs next to the train yard and finds another way in. Now they head for the secret passageway in the train yard. |
| 11 | Slum Wisdom | Avoiding Shinra security, the team leaves the corkscrew tunnel behind. Following the route to Mako Reactor 5, they move into the plate's interior. |
| 12 | Sudden Attack | Jessie has been injured in the attack by unknown assailants, meaning Barret has no choice but to ask Cloud to participate in the next mission. |
| 13 | A New Operation | Cloud, Tifa, and Barret all board the train and head for Mako Reactor 5, determined to make this second bombing mission a success. |
Chapter 5: Dogged Pursuit Story Guide & Walkthrough
Chapter 6: Light the Way
| No. | Title | Description |
|---|---|---|
| 1 | Head for Section G | The facilities inside the plate are not operating properly due to a lack of power. The team kills the lights to secure the emergency power supply. This allows them to open the Section G gate and keep moving forward. |
| 1-1 | Head to the Control Room | The team confirms that there is not enough electricity, and so they set out to secure an emergency power supply. |
| 1-2 | Secure a Power Source | The team turns off the sun lamp, thus triggering the emergency power supply. The gate now has enough power to operate. |
| 2 | Head for Section H | The team uses the pipe in front of the ventilation fans to reach Section H. There they find the cargo platform leading to Mako Reactor 5. |
| 2-1 | The Way to Section H | The team finds a pipe on the wall that leads to Section H. They have found a way through. |
| 3 | Power for the Platform | The team kills the lights and returns to the cargo platform. Now it is time to rendezvous with Biggs. |
| 3-1 | One Sun Lamp Down | The team has diverted power from one of the lights to the surrounding area. With this, the security system comes online. |
| 3-2 | Console Online | The terminal to operate the platforms is working. Activate it and keep forging ahead. |
| 3-3 | Two Sun Lamps Down | The team has diverted power from another sun lamp. The small platform now has power. |
| 3-4 | Three Sun Lamps Down | The team has diverted power from three sun lamps. The cargo platform now has enough power to operate. |
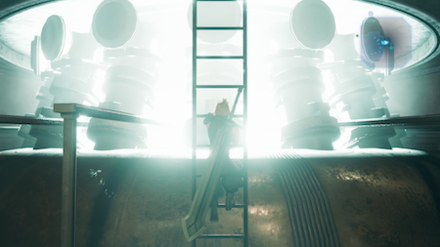
| 4 | To the Cargo Platform | Using the cargo platform, the team makes it to the rendezvous with Biggs. They take the grappling guns they will need to escape the facility, then head for the Mako Reactor 5 interior. |
| ★ | Collapsed Passageway | The team detours around the collapsed passageway and recovers the materia in Section H-07. |
★This objective is labeled as a Discovery. It's unlocked after obtaining the Elemental Materia in the Sun Lamp 3 area.
Chapter 6: Light the Way Story Guide & Walkthrough
Chapter 7: A Trap is Sprung
| No. | Title | Description |
|---|---|---|
| 1 | Reach Mako Storage | Security is light as the group reaches mako storage. They plant the remote-controlled bomb on the reactor core and head for the exit. |
| 1-1 | Down the Pipe | The team slides down the pipe and finds themselves inside the armory. |
| 2 | Escape from the Reactor | Heidegger has sprung his trap, and the team's escape route has been cut off. Now they need to find a way to avoid being publicly executed. |
| 3 | Sentenced to Death | Despite Cloud and the others' best efforts to stop it, the still-incomplete airbuster is deployed. The three decide to face their problem head-on, and make for the front gate. |
| 3-1 | Monitor Data | It looks like the airbuster parts are still in transit. Divert the various components and weaken the machine. |
| 3-2 | Status of the Airbuster | The party checks on the airbuster's status and works out a plan for the coming battle. |
| 4 | Storm the Gates | Cloud is separated from the other two during the airbuster fight. Caught up in the reactor's collapse, Cloud falls to the undercity. |
| 4-1 | Disable the Emergency Lock | The lock is disabled and the door leading to the front gate is open. | ★ | Waste Recovery | They disable delta-level security and recover the diverted items. |
★This objective is labeled as a Discovery. It's unlocked after opening the Waste Management room by completing the Lock mini-game.
Chapter 7: A Trap is Sprung Story Guide & Walkthrough
Chapter 8: Budding Bodyguard
| No. | Title | Description |
|---|---|---|
| 1 | Second Chance Meeting | Cloud becomes Aerith's bodyguard and fends off the Turk who attacks them. As he's about to finish him off, the ghostly beings from Sector 8 appear before them. |
| 2 | Escape from the Church | The Turk withdraws from the church, and the strange beings disappear. Puzzled but determined to keep moving, Cloud and Aerith make their way outside through the attic. |
| 2-1 | Rescue Aerith | Cloud and Aerith find each other, and together, they head for the attic. |
| 2-2 | To the Attic | They reach the attic and head toward the exit to escape the Turk. |
| 3 | Head for the Station | Cloud and Aerith arrive at the Sector 5 station. The trains aren't moving due to the destruction of the reactor. |
| 4 | The Station | Cloud and Aerith spot another Turk. To avoid him, they take a detour and make for the Sector 5 slums. |
| 5 | Through the Backstreets | The two arrive in the Sector 5 slums to see residents gathered by the monitor located in the middle of the town. |
| 5-1 | Avoid the Turk | Cloud and Aerith make their way through the scrapyard, dealing with any fiends that appear. |
| 5-2 | Around the Gate | Cloud opens the gate from the other side, allowing Aerith to follow him through the backstreets. |
| 6 | Sector 5 Slums Monitor | Cloud watches the news segment and learns that the members of Avalanche are safe. Relieved, he and Aerith continue through the slums. |
| 7 | To Aerith's House | Cloud takes Aerith home. Once there, Aerith insists on going with him to Sector 7. |
| 8 | Leaf House Delivery | Oates finds Aerith and asks for her help. Cloud and Aerith follow him to the secret hideout. |
| 9 | Danger in the Hideout | Cloud defeats the monsters and rescues the children, who stare at him in awe. They all return to the secret hideout together. |
| 10 | Escort the Children | A man in a black robe wanders into the hideout. As he grabs Cloud's arm, Cloud is plagued with visions and mutters that Sephiroth is alive–a statement that Aerith barely acknowledges. |
| 11 | Requests for the Mercenary | Rude ambushes the two on the way to Aerith's house, but Cloud drives him away. Upon returning, Cloud speaks with Aerith's mother, Elmyra, who does not take too kindly to him. Cloud has been asked to leave town after nightfall without Aerith. |
| 12 | The Price of Strength | Aerith ambushes Cloud at the edge of town, intimating she wants to spend more time together. As she walks on ahead toward the Sector 7 slums, Cloud feels his heart skip a beat. |
Chapter 8: Budding Bodyguard Story Guide & Walkthrough
Chapter 9: The Town That Never Sleeps
| No. | Title | Description |
|---|---|---|
| 1 | Tour Guide | As they make their way through Sector 6, Aerith guides Cloud toward a shortcut to Sector 7. |
| 2 | Take the Shortcut | The road isn't all quite there, but the two do their best to find a way.. |
| 2-1 | Beyond the Ladder | Cloud maneuvers Aerith onto the ledge using the arm. There, she lowers a ladder for him, and they continue their way down the road. |
| 2-2 | Working Together | They use another arm and work together to make their way down the road. |
| 3 | Beyond the Dead End | Cloud and Aerith finally reach the exit of the so-called shortcut. Their time together will soon be over. |
| 3-1 | Working Together Again | Cloud maneuvers the pair of arms and forges a path forward. The two find themselves more in sync the more time they spend together. |
| 4 | Saying Goodbye | Cloud parts with Aerith and is ready to head back to Sector 7 when Tifa rides by in a chocobo carriage. Worried, Aerith urges him to chase after her. |
| 5 | Chasing Tifa | According to Chocobo Sam, Tifa's headed to an audition at Corneo's mansion. Cloud and Aerith make their way to Wall Market to find her. |
| 6 | To Corneo's Mansion | A letter of recommendation from one of three trusted individuals is needed to get into Corneo's mansion. Cloud and Aerith have no choice but to find members of the Trio. |
| 7 | The Trio | Getting a letter doesn't prove to be easy, but Cloud and Aerith need one if they want to see Tifa again. |
| 7-1 | Sam | Sam has already chosen Tifa for the audition. Cloud and Aerith will have to ask another member of the Trio. |
| 7-2 | Andrea Rhodea | Andrea doesn't see anyone without an appointment. Cloud and Aerith will have to ask another member of the Trio. |
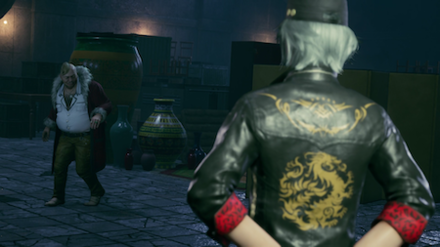
| 7-3 | Madam M | To get her cooperation, Madam M needs to be shown some good faith. |
| 8 | Madam M's Desire | Madam M promises to grant Cloud and Aerith a letter if they win the colosseum tournament. |
| 9 | Underground Colosseum | Cloud and Aerith win the Corneo Cup and are granted a letter from Madam M as promised. |
| 10 | Parting Ways | As Cloud returns to the parlor to fetch Aerith, he's approached by a panic-stricken Johnny. |
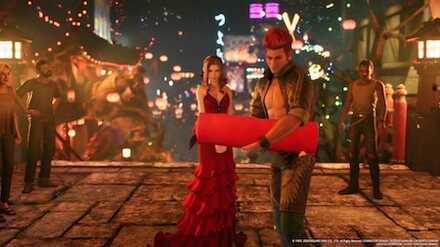
| 11 | Aerith's Plan | Cloud takes part in the Honeybee Inn show and receives a letter from Andrea, as the plan to save Tifa comes together. |
| 12 | The Audition | Cloud and Aerith gain access to Corneo's mansion and find Tifa. After a thorough audition, Corneo chooses Cloud to be his new bride. |
| 13 | Showdown with Corneo | Corneo informs them about Shinra's plan to blow up the pillar–an event that would be catastrophic for the residents of the Sector 7 undercity. The three threaten him for details, but he sends them falling through a trapdoor down into the sewers beneath the mansion. |
Chapter 9: The Town That Never Sleeps Story Guide & Walkthrough
Chapter 10: Rough Waters
| No. | Title | Description |
|---|---|---|
| 1 | Escape to the Surface | In a stroke of luck, Abzu's rampage has cleared the way forward. The group follows the aqueduct toward the Sector 7 slums. |
| 2 | Follow the Waterway | The group arrives at the trunk line that marks the boundary between Sectors 6 and 7. They look for a way to get across to the Sector 7 side. |
| 2-1 | Find the Skeleton Key | The group gets the power working and opens the sluice gate. Theey find the skeleton key that Avalanche had hidden in advance. |
| 3 | Crossing the Trunk Line | Helping each other out of trouble, the group manages to cross the trunk line and reach the door to the Sector 7 slums. |
| 3-1 | Crossing the Sluice Gate | The group uses the sluice gate as a bridge to cross the sewer line |
| 4 | To the Sector 7 Slums | The three find their way to a water storage tank underneath the Sector 7 slums. Nearby, they can see a ladder leading to the surface. |
| 5 | To the Surface | Just before the exit, the group is assailed by a group of sahagin. Working together, they fend off the beasts and hurry toward the surface. |
| 5-1 | Operating the Pump | Tifa and Aerith work the pump and clear the wastewater pipe blockage. |
| ★ | On the Other Side | The team recovers the materia by taking a detour through the tunnels. |
★This objective is labeled as a Discovery. It's unlocked after going an alternate path in Aqueduct 2 to get a Warding Materia.
Chapter 10: Rough Waters Story Guide & Walkthrough
Chapter 11: Haunted
| No. | Title | Description |
|---|---|---|
| 1 | A Train Wreck | Guided by someone or something, the group arrives at the maintenance facility. Though unnerved by the strange things they see, they head inside. |
| 1-1 | Toward the Light | Tifa tells the others about the rumors she has heard regarding this place as they follow the dim light through the gloom. |
| 1-2 | Someone's There | The party cannot shake the feeling that someone else is in the graveyard. Cautiously, they move forward. |
| 2 | Pass Through the Maintenance Facility | Although the party was not able to tell what the ghosts wanted, they do make it out of the maintenance facility. Hopefully it will not take much longer to reunite with the others in Sector 7. |
| 2-1 | All Aboard for the Graveyard | They make their way into the train car and head further inside to look for an exit. |
| 2-2 | Shadow in the Control Room | The three use the control room terminal to restore power to the crane. |
| 2-3 | Crane Game | The party uses the crane to link the train cars. |
| 2-4 | Head for the Exit | The party makes its way through the connected train cars and heads for the exit. |
| 3 | Back Amongst Friends | The three are finally back in the Sector 7 slums. Shinra choppers circle the support pillar, and the sound of gunfire rings out. There's not a moment to spare. |
| 3-1 | Blocked Road | The intercepted radio message is confirmation that Shinra's plan is real. But first, they must leave the graveyard. |
| 3-2 | Clear the Way | The party moves the cars and secures a way out of the graveyard, hoping they are not too late. |
Chapter 11: Haunted Story Guide & Walkthrough
Chapter 12: Fight for Survival
| No. | Title | Description |
|---|---|---|
| 1 | Head for the Pillar | The three fight off the mysterious fiends and arrive at the pillar. Leaving the injured Wedge with Aerith and Tifa, Cloud hurries towarrd the support pillar alone. |
| 2 | Link Up with Avalanche | A seriously injured Biggs urges Cloud to help his friends. As he hurrries upward, he's spotted by a Turks' chopper. |
| 3 | Evacuation Orders | The fight is intensifying, and Tifa runs to assist Cloud. Down on the surface, Wedge secures an evacuation route forr the civilians and Aerith makes for Seventh Heaven to save Marlene. |
| 4 | Saving Marlene | Aerith has found Marlene. But when the pair try to leave, a Shinra chopper lands in front of Seventh Heaven and blocks their escape. To save Marlene, Aerith decides to make a deal with Tseng. |
| 4-1 | The Rescue | Aerith delivers Betty to safety and takes off toward Seventh Heaven. |
| 5 | To the Top | Cloud and Jessie climb the pillar, determined to save the slums below. But just as they are about to reach the top, howeverr, they lose Jessie right before their eyes. Biting back her grief, Tifa silently vows to stop Shinra's diabolical plot. |
| 6 | Showdown | Cloud and Avalanche have failed to stop the plate separation, and the Sector 7 section plummets to the ground. Furious that they were unable to stop Shinra, the group finds a cable in the nick of time that they use to escape back down to the surface. |
Chapter 12: Fight for Survival Story Guide & Walkthrough
Chapter 13: A Broken World
| No. | Title | Description |
|---|---|---|
| 1 | Through the Rubble | Cloud tells the stricken Barret that Marlene is safe. Revitalized by Aerith's gift of hope, they continue on. |
| 2 | Words of Hope | To protect Marlene, Aerith agreed to go with the Shinra agents. At Elmyra's urging, the party decides to wait for her return. In the meantime, they head to the Sector 7 slums to check on their friends. |
| 3 | Checking on Friends | The group is back at the gate near the Sector 7 slums. Fearful of what they are about to find, they head into the sector via the underground passage. |
| 3-1 | Onward to Sector 7 | Cloud and the others leave Sector 5 and arrive at the collapsed road. The gate to the Sector 7 slums is up ahead. |
| 4 | Crawling to the Surface | They crawl through the underground passage and clamber up to the surface in the Sector 7 slums. Beyond the curling black smoke is empty sky, where the plate once was. |
| 5 | Home Is Where the Heart Is | Led by Wedge's cat, who they find amongst the ruins of Seventh Heaven, Cloud and his companions arrive at a strange underground facility. They spot Wedge on the ground and rush toward him, but the facility collapses around them and they fall deeper into the depths. |
| 6 | In Solitude | Now that Barret has joined up with Tifa, they hurry back to where they last saw Wedge. |
| 6-1 | Reunite with Tifa | The bugaboo nest is successfully destroyed. Now Barret must join Tifa in slaying the remaining bugaboo. |
| 7 | Finding Wedge | The party manages to defeat the mysterious monsters and rescue Wedge from the underground facility. Relieved, they hurry out of there. |
| 7-1 | Beyond the Fracture | On the other side of a facility wall, they find traces of human experimentation. However, they're forced out by mysterious spectres lurking in the darkness. |
| 8 | Return | They manage to save Wedge, but were unable to do anything for Biggs and Jessie. Weighed down by the responsibility and guilt, Barret pushes on through the wreckage and rubble. |
Chapter 13: A Broken World Story Guide & Walkthrough
Chapter 14: In Search of Hope
| No. | Title | Description |
|---|---|---|
| 1 | Resolve | The group convinces Elmyra to let them go after Aerith, though breaking into the Shinra Building will be no easy task. |
| 2 | Intel Gathering | The Avalanche team agrees to help Leslie in exchange for information about how to get topside. Still wary of Leslie, the party heads into the sewers. |
| 3 | Through the Underground Waterway | The team detours around the collapsed rubble and arrives at the trunk line. Corneo's hideout is near. |
| 4 | The Hideout | In front of the hideout, an Abzu shoat steals what Leslie says is the key to the door. Cloud, Barret, and Tifa chase after tiny creature. |
| 5 | Recovering the Key | The party defeats the Abzu shoat and recovers the stolen item, which leads Leslie to tell them about his past and his true intentions. With renewed resolve, the three head back to Corneo's hideout. |
| 6 | Fateful Decisions | Cloud and the others have defeated Corneo's pet Abzu, but Corneo has slipped away during the commotion. |
| 7 | For the Reunion | Leslie gives them grappling guns, and they wish each other luck in reuniting with their respective loved ones. Leslie walks off, and the three prepare to climb the wall. |
| 8 | Over the Wall | Cloud and the others get over the wall and start climbing the Sector 7 plate. The Shinra Building is so far above that they still cannot see it. |
Chapter 14: In Search of Hope Story Guide & Walkthrough
Chapter 15: The Day Midgar Stood Still
| No. | Title | Description |
|---|---|---|
| 1 | A Broken City | People's cries echo throughout the ruined town. Ignoring the citizen's words of caution, they head toward the debris. |
| 2 | The Climb | Using the grappling gun, the three make their way up. However, the area is crawling with Shinra troopers looking for Avalanche. |
| 3 | Hiding in Plain Sight | They cut through the patrolling Shinra units and reach a towering building. |
| 4 | The Path to Greater Heights | The team continue their way up, but the Valkyrie appears and stands in their way. |
| 4-1 | The Crumbling Building | Infiltrate the building. Continue along the only path that leads topside. |
| 5 | Flight of the Valkyrie | They escape the Valkyrie, but not Shinra is alerted to their presence. |
| 5-1 | To the Stairs | Cut through the gunfire and escape to the stairs. |
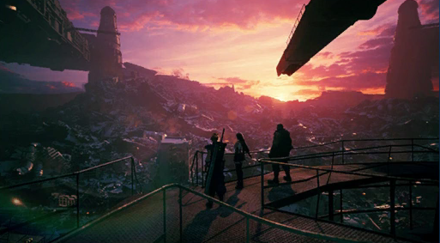
| 6 | In Hot Pursuit | They manage to escape the troopers and stop to take in the destruction of Sector 7 as the sun sets over the horizon. |
| 7 | To the Top of the Plate | After defeating the Valkyrie, the party arrives topside. The three steel themselves for infiltrating the Shinra Building and rescuing Aerith. |
Chapter 15: The Day Midgar Stood Still Story Guide & Walkthrough
Chapter 16: The Belly of the Beast
| No. | Title | Description |
|---|---|---|
| 1 | Infiltration | The team is able to sneak into the Shinra Building on a service truck, but is caught by the security guards stationed in the garage. They're forced to fight their way through. |
| 2 | Bust Out of the Garage | After dispensing with the security detail and leaving the parking garage behind, the three arrive at the building's empty entrance. |
| 3 | Shinra Building Intel | They need a keycard to advance through the building. Tifa offers to break into the reception desk by jumping across the light fixtures. |
| 4 | Acquiring the Keycard | Tifa acquires the keycard. To free Aerith on the 65th floor, they head first to the 59th floor. |
| 5 | Reach for the Skyview Hall | With the keycard updated, they now have access to the 63rd floor. |
| 5-1 | Use the Elevator | They arrive on the 59th floor, where they search for a way up to the 65th floor. |
| 5-2 | Use the Emergency Stairwell | They use the elevator to reach the 59th floor. |
| 6 | Playing the Tourist | After watching an unsettling movie, they're stopped by a mysterious man who claims to be working with the mayor. |
| 7 | A Helping Hand | The mayor's collaborator has supplied them with another keycard. To find out where Aerith is being held, they head for the 64th floor to spy on the executives' board meeting. |
| 8 | Reconnaissance | They discover that Professor Hojo is holding Aerith captive. Follow Hojo and free Aerith. |
| 9 | Operation: Save Aerith | The three reunite with Aerith, but a vision calling from within the facility assails Cloud, who falls unconscious. |
Chapter 16: The Belly of the Beast Story Guide & Walkthrough
Chapter 17: Deliverance from Chaos

| No. | Title | Description |
|---|---|---|
| 1 | A Way Out | Jenova, a mysterious life-form, is kept deep within the Shinra Building. As the party approaches the creature, they are intercepted by Sephiroth, who sends Cloud hurtling to the lower levels. |
| 2 | Find the Others | Someone has stolen Jenova. They follow an ominous-looking trail to the elevator, which they use to get up to the roof. |
At this point, the party will be split up into two groups.
Cloud
| No. | Title | Description |
|---|---|---|
| 2-1 | Find Barret | Cloud and Red XIII reunite with Barret, and the trio searches for Tifa and Aerith. |
| 2-2 | Use the Central Terminal | The door to the 3rd ward is now unlocked, allowing Tifa and Aerith to explore the area. |
| 2-3 | 2nd Ward | Cloud and the others finish exploring the 2nd ward, but are unable to find a way back to the upper level. |
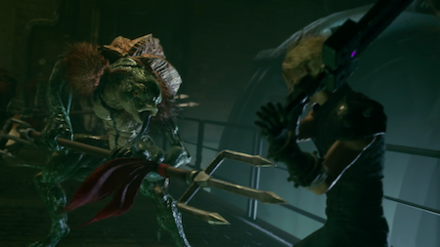
| 2-4 | 4th Ward | They defeat the swordipede, thus stopping Hojo's interference. |
| 2-5 | Rescuing Red XIII | Cloud informs Aerith and Tifa that Red XIII is in trouble. The two rush to his aid. |
Tifa
| No. | Title | Description |
|---|---|---|
| 2-1 | Research the 3rd Ward | Aerith and Tifa finish exploring the 3rd ward, but are unable to find a way back to the upper level. |
| 2-2 | Rescuing Red XIII | Tifa and Aerith fight their way through Hojo's experiments and reunite with Red XIII. |
| 2-3 | To the Central Terminal | The 4th ward is now unlocked. Leave it to Cloud and Barret to explore the area. |
| 2-4 | A Way Up | Hojo's "trial" now concluded, he reactivates the elevator. Tifa, Aerith, and Red XIII board the lift and make for the upper level. |
| 2-5 | Source of the Sound | After defeating Hojo's experiments, they're all back together and ready to head to the roof. |
Back Together
| No. | Title | Description |
|---|---|---|
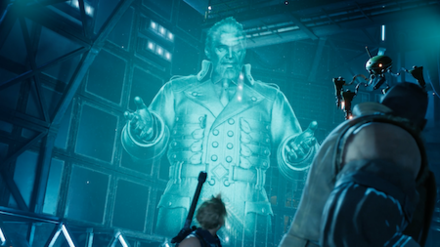
| 3 | The Ominous Trail | They arrive at the president's office and watch as President Shinra is murdered. Sephiroth reclaims Jenova and disappears into the skies above the Shinra Building. |
| 4 | The Showdown | Cloud faces off against Rufus Shinra, who escapes by helicopter. Cloud is blown off the helipad, but is saved by Tifa. |
| 5 | The Great Escape | Barret and the others escape the Arsenal and reach the building's entrance, only to be caught by Heidegger. However, just when it seems all is lost, the roar of an engine rips through the air. |
Chapter 17: Deliverance from Chaos Story Guide & Walkthrough
Chapter 18: Destiny's Crossroads
| No. | Title | Description |
|---|---|---|
| 1 | Flying Through the Night | The party reaches the end of the highway and discovers Sephiroth waiting for them. |
| 2 | The Turning Point | In the world beyond, Sephiroth shows Cloud a vision of the planet seven seconds before its demise. Having strayed from the course destiny set for them, they strike out on a path toward an unknown future. |
Chapter 18: Destiny's Crossroads Story Guide & Walkthrough
Intergrade Story Walkthrough
Chapter 1: Wutai's Finest

| No. | Title | Description |
|---|---|---|
| 1 | First Challenge | Follow the Moogle posters to find the Avalanche member in the Moogle hat. |
| 2 | Power...Down? | Make your way through the Abandoned Warehouse. |
| 3 | Don't Fear, Yuffie's Here | Rescue the robed man. |
| 4 | Esteemed Avalanche Colleagues | Meet with the other Avalanche members and talk to each of them. |
| 5 | Scout out Sector 7 | Meet with Old Snapper, check out the Shinra Combat Simulator, and explore the Sector 7 Slums. |
| 8 | The Handoff | Follow Nayo and fight Corneo's Lackeys for your Interplate ID cards |
| 9 | Back to Base | Head back to Avalanche's Base |
| 10 | Change of Plans | Follow Nayo after she gets a message from Zhijie. |
| 11 | After Him | Follow Zhijie and the Security Officers into the Shipping Facility. |
| 12 | Tracking Zhijie | Pursue Zhijie and try to save him from the Security Officers. |
| 13 | Main Pillar Maintenance | Use your shuriken to hit switches and wall running skills to proceed through the area. |
| 14 | Save Zhijie | Rescue Zhijie and defeat the Gigantipede. |
| 15 | Shinra Building or Bust | When you are fully ready, take the train and head to the Shinra Building. |
Intergrade Chapter 1: Wutai's Finest Story Guide & Walkthrough
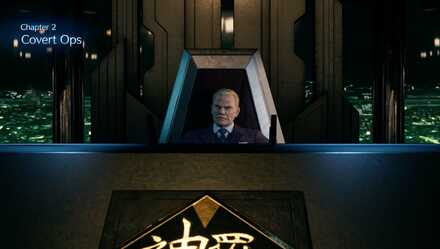
Chapter 2: Covert Ops
| No. | Title | Description |
|---|---|---|
| 1 | Scarlet's Trap | Make your way through the Advanced Weaponry division of Shinra. |
| 2 | The Hunt Continues | Continue searching for the Ultimate Materia in the Advanced Weaponry division of Shinra. |
| 3 | The Invitation | Scarlet invites you to play with some of her machines. |
| 4 | A New Threat | Nero has been awakened and is ready for a hunt. | 5 | Escape | Escape from Shinra headquarters. |
| 6 | Dread | Battle against Nero. |
Intergrade Chapter 2: Covert Ops Story Guide & Walkthrough
Related Links
Author

Story Walkthrough and List of Chapters
Please participate in our site
improvement survey
03/2026
improvement survey
03/2026
Would you assist in
improving Game8's site?
improving Game8's site?

×
We are listening to our users' valuable opinions and discussing how to act on them.
The information collected through this survey will be used for the purpose of improving our services. In addition, the information will only be disclosed a part of a statistic in a format that will not allow identification of personal information.
Begin Survey
Not Now
×
Please rate each item regarding Game8.co's Advertisements.
Amount of Ads
Very Dissatisfied
Somewhat Dissatisfied
Fine
Somewhat Satisfied
Highly Satisfied
Placement of Ads
Timing of Ad Display
Ad Loading Speed
Safeness of Ads
Content of Ads
×
Please rate each item regarding Game8.co's Quality of Articles.
Amount of information
Very Dissatisfied
Somewhat Dissatisfied
Fine
Somewhat Satisfied
Highly Satisfied
Frequency of updates
Speed of new information
Accuracy of articles
Understandibility of articles
Readability of sentences
×
Please rate each item regarding Game8.co's Usability of the Site.
Ease of finding information
Very Dissatisfied
Somewhat Dissatisfied
Fine
Somewhat Satisfied
Highly Satisfied
Loading Speed
Use of Color
Font Size
Visibility of Images
Easy to Understand Layout
×
Please rate each item regarding Game8.co's Message Boards, Comments.
Ease of Writing
Very Dissatisfied
Somewhat Dissatisfied
Fine
Somewhat Satisfied
Highly Satisfied
Readability
Ease in Finding Information
Comment Quality
Comment Quantity
Admin Response
×
Please rate each item regarding Game8.co's Site's new design.
Please rate our site's new design
Very Dissatisfied
Somewhat Dissatisfied
Fine
Somewhat Satisfied
Highly Satisfied
Do you think that the website's design change makes the site easier to use?
Has the new design made it easier for you to find information on the site?
Has the new design improved the overall visual appeal of the site?
How would you rate your overall satisfaction with the new design of the site?
×
How likely are you to recommend Game8 to someone you know?
Very Unlikely
0
1
2
3
4
5
6
7
8
9
10
Very Likely
If you have other opinions regarding potential improvement to the website, please share them with us. We would appreciate your honest opinion.
Note: This is a free response section, so you can proceed without entering anything.
Note: Please be sure not to enter any kind of personal information into your response.
Note: Please be sure not to enter any kind of personal information into your response.
×
Thank You
×
Thank you for participating in our survey! Your answers will help us to improve the quality of our website and services.
We hope you continue to make use of Game8.
We hope you continue to make use of Game8.
Close
Rankings
- We could not find the message board you were looking for.
Gaming News


![Monster Hunter Stories 3 Review [First Impressions] | Simply Rejuvenating](https://img.game8.co/4438641/2a31b7702bd70e78ec8efd24661dacda.jpeg/thumb)
Popular Games

Genshin Impact Walkthrough & Guides Wiki
Honkai: Star Rail Walkthrough & Guides Wiki
Umamusume: Pretty Derby Walkthrough & Guides Wiki
Pokemon Pokopia Walkthrough & Guides Wiki
Resident Evil Requiem (RE9) Walkthrough & Guides Wiki
Monster Hunter Wilds Walkthrough & Guides Wiki
Wuthering Waves Walkthrough & Guides Wiki
Arknights: Endfield Walkthrough & Guides Wiki
Pokemon FireRed and LeafGreen (FRLG) Walkthrough & Guides Wiki
Pokemon TCG Pocket (PTCGP) Strategies & Guides Wiki


Recommended Games
Diablo 4: Vessel of Hatred Walkthrough & Guides Wiki
Cyberpunk 2077: Ultimate Edition Walkthrough & Guides Wiki
Fire Emblem Heroes (FEH) Walkthrough & Guides Wiki
Yu-Gi-Oh! Master Duel Walkthrough & Guides Wiki
Super Smash Bros. Ultimate Walkthrough & Guides Wiki
Pokemon Brilliant Diamond and Shining Pearl (BDSP) Walkthrough & Guides Wiki
Elden Ring Shadow of the Erdtree Walkthrough & Guides Wiki
Monster Hunter World Walkthrough & Guides Wiki
The Legend of Zelda: Tears of the Kingdom Walkthrough & Guides Wiki
Persona 3 Reload Walkthrough & Guides Wiki


All rights reserved
© SQUARE ENIX CO., LTD. All Rights Reserved.
CHARACTER DESIGN:TETSUYA NOMURA/ROBERTO FERRARI
The copyrights of videos of games used in our content and other intellectual property rights belong to the provider of the game.
The contents we provide on this site were created personally by members of the Game8 editorial department.
We refuse the right to reuse or repost content taken without our permission such as data or images to other sites.
Looking forward to following this walk-through. i cannot wait for FF7 remake release!