How to Beat Pride and Joy Prototype | Super Boss Fight Guide

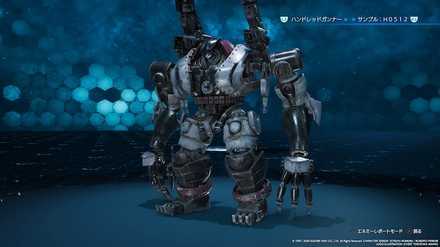
This is a guide to beating the Super Boss Pride and Joy Prototype in the game Final Fantasy 7 Remake (FF7R). This article explains how to unlock this Secret Super Boss, Pride and Joy Prototype's attack patterns, weaknesses, and tips and strategies for defeating them.
List of Contents
Pride and Joy Prototype Stats and Information
Basic Information
| Pride and Joy Prototype | ||
|---|---|---|

|
Species | Movement | Type |
| Mechanical | Grounded | Boss |
Description
Large-scale robotic weapon. Development was discontinued because it was deemed too dangerous. Charley used the project data to recreate a prototype within virtual reality.
Assess (Tips)
Tactical data not available.
Pride and Joy Prototype Stats
| Easy | Normal | Hard | |
|---|---|---|---|
| HP | Currently Unknown | Currently Unknown | Currently Unknown |
| Attack | Currently Unknown | Currently Unknown | |
| Magic Attack | Currently Unknown | Currently Unknown | |
| Defense | Currently Unknown | Currently Unknown | |
| Magic Defense | Currently Unknown | Currently Unknown | |
Pride and Joy Prototype Weaknesses & Resistances
| Weakness / Status Ailments | Lightning | |
|---|---|---|
| Lesser Resistances | Fire, Fixed Damage | |
| Greater Resistances | Wind | |
| Immunities | Poison, Silence, Sleep, Slow, Stop, Berserk, Fixed Damage | |
| Absorbed Elements | - | |
Stagger Rates
| ×1 | ×1 | ×1 | ×1 |
| - | |||
| ×1 | ×1 | ×1 | - |
Stagger Length
| Stagger Length | 10 seconds |
|---|
Rewards
| Easy/Normal | Hard | |
|---|---|---|
| Gil | ||
| AP | ||
| Exp | ||
| Items Dropped | - | |
| Rare Items Dropped | - | |
| Steal | - | |
Abilities
| Name | Element | Blockable? | Knockdown? | Status |
|---|---|---|---|---|
|
|
- | Yes | No | - |
| Fires with the machine guns under its arms. | ||||
|
|
|
Yes | No | - |
| Sprays fire from its knees for 1 second. | ||||
|
|
|
Yes | Yes | - |
| Crouches down and blasts fire out of its ankles. | ||||
|
|
- | Yes | Yes | - |
| Charges forward and stomps with its right foot. | ||||
|
|
- | No | Yes | - |
| Puts its hands together and topples over, crushing anyone within range. | ||||
|
|
- | No | Yes | - |
| Charges energy for 3 seconds then releases it from the cannons on its shoulders. Will also use while jumping backwards. | ||||
|
|
- | Yes | No | - |
| Jumps to the side or behind, damaging anyone in its path. | ||||
|
|
- | No | Yes | - |
| Grabs a target with its right hand (anyone else who comes in contact with its hand will also take damage) and smash them against the ground for 30 seconds. Before it smashes its target, it will proceed to do other actions as usual, and if 8% of its arms max HP is dealt in damage it will squeeze its target. If this is done 3 times, its arms HP reaches 0, or one of its legs' HP reaches 0 and it falls over, it will release its target. | ||||
|
|
|
No | No | - |
| Shoots napalm from its left arm that explode and create puddles of fire that stay on the field for 30 seconds. | ||||
|
|
|
Yes | No |
Stun (8 sec)
|
| Unleashes a beam of electricity from its left hand and sweeps it from left to right. | ||||
|
|
- | No | No | See Below* |
| Shoots lasers that go in 3 directions from the core on its chest. Depending on the color of the laser, it will inflict a different status ailment. | ||||
|
|
- | No | No |
Stun (8 sec)
|
| Gathers light into the core on its chest and releases a fan shaped wave of energy. | ||||
*Status Effects and Ailments Guide
Pink Laser:
Where to Find Pride and Joy Prototype
The Final Opponent in the Battle Simulator
On the 64th Floor of the Shinra Building in Chapter 16, you'll gain access to a Shinra Battle Simulator. After completing all the other matches in both the Battle Simulator and the Corneo Colosseum, and completing all the Battle Intel missions, you'll be matched up against the opponent Top Secrets. However, this opponent will only appear when the difficulty is set to Hard. On top of that, you'll have to defeat the 4 Summon bosses in a row before you're even allowed to fight it, making this battle extremely difficult to access.
| Opponents in “Top Secrets” Match | |
|---|---|
| 1 | Shiva |
| 2 | Fat Chocobo |
| 3 | Leviathan |
| 4 | Bahamut |
| 5 | Pride and Joy Prototype |
How to Beat Three-Person Team Vs. Top Secrets
Requirements to Battle Pride and Joy Prototype
| Requirements Checklist |
|---|
Before getting ready to go up against Pride and Joy Prototype, make sure you've accomplished each of these goals first. The Battle Intel missions in particular will take some time to complete, so check out our individual guides to learn how to accomplish each of the required tasks.
List of Battle Intel Reports and Rewards
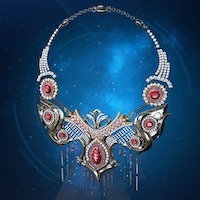
The Reward is the Best Accessory in the Game
 Gotterdammerung Gotterdammerung
|
Effect: At the start of any battle, your Limit Gauge will be automatically filled. Your Limit Gauge will increase automatically throughout the battle. |
|---|
After you've defeaten all five opponents of the Top Secrets match, you'll receive what is beyond a doubt the best accessory in the game, Gotterdammerung. This Accessory will gradually fill the Limit Gauge during battles, ensure that you will be able to use Limit Breaks consistently throughout every fight, making it unrivaled in its allure. Despite the painstaking process to obtain it, we can honestly say that Gotterdammerung is worth the struggle.
Best Characters, Equipment and Materia for This Boss
Available Characters
 Cloud Cloud
|
 Barret Barret
|
 Tifa Tifa
|
 Aerith Aerith
|
It's possible to use any set of 3 characters in this battle, but we recommend using Cloud, Tifa and Aerith.
Recommended Characters
 Cloud Cloud |
Role: Attacker & Tank Weapon: Hardedge Armor: Cog Bangle Accessory: Supernatural Wristguards |
|---|---|
 Tifa Tifa |
Role: Pinch Hitter Weapon: Metal Knuckles Armor: Cog Bangle Accessory: Champion Belt |
 Aerith Aerith |
Role: Red Mage Weapon: Mythril Rod Armor: Cog Bangle Accessory: Revival Earrings |
Use Cloud's Counterstance to make him a pseudo-tank
Insetad of simply boosting his defensive stats and HP, Cloud's defensive capabilites can be increased with the Counterstance Ability, which lets him deal damage back when he takes a hit from an enemy. Enemies will tend to target the character who is currently being controlled, so you'll be using Cloud for most of the battles to field and counter attacks.
Aerith: First a healer, second an attacker
With Aerith's already high Magic Attack stacked with Mythril Rod, she's great to use for both healing and offensive Spells. Have her hold the Revival Earrings as a last resort for when your whole party is hit with a powerful attack.
Best Materia for Cloud
| Weapon (6 Slots) | ||
|---|---|---|
| Armor (3 Slots) | ||
| Summon | ||
Best Materia for Tifa
| Weapon (6 Slots) | ||
|---|---|---|
| Armor (3 Slots) | ||
| Summon | ||
Best Materia for Aerith
| Weapon (6 Slots) | ||
|---|---|---|
| Armor (3 Slots) | ||
| Summon | ||
Tips & Strategies for Beating Pride and Joy Prototype
| ★ Strategy Checklist ★ (Click to jump) |
||
|---|---|---|
|
|
Go around it and attack from behind

Almost all of Pride and Joy Prototype's attacks hit directly in front of it. If you're able to sneak behind it, you'll be able to attack it almost without resistance. Its movements speed and turning speed are extremely slow, so you'll be able to keep this up by simply continuing to attack for a while.
When it raises its arms, run away

When Pride and Joy Prototype raises its arms, it will attack the whole area surrounding itself, so you won't be safe behind it. It's best to dodge out of the way when you see its arms raise, and move back after. That said, the attack it executes doesn't deal a huge amount of damage, so simply blocking and absorbing the blow is another viable option.
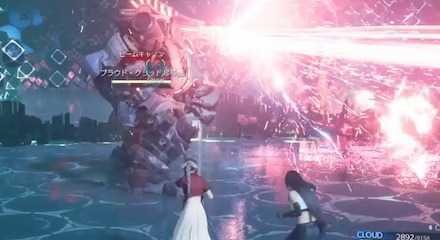
Move to the side and away from its Beam Cannon

Its Beam Cannon attack will deal as much as 6,000 damage even when Blocked, so be sure to move away to the side and avoid this attack instead. Moving to the side should be enough to get you out of the way of the blast, but because it will take a long time preparing the attack, take the opportunity to move behind it and continue attacking.
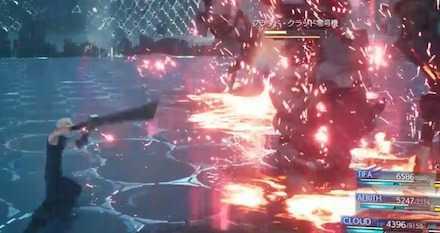
Don't try to fight when the flames come out

Pride and Joy Prototpye will cover the floor with a red aura and cause flames to burst up from the floor. Moving onto these flames will deal about 800 damage a second, and will eat up your character's HP in a flash. When this occurs, instead of using melee attacks, fall back and attack with Lightning Magic instead.
Keep two characters ready to use Revive

Even your characters who are keeping their distance and healing can suffer a fatal blow from Pride and Joy Prototype without warning. Be sure to have two characters who are ready to cast Revive, so that you can always bring your healer back into the battle. Pride and Joy Prototype can grab one of your characters and deal a near-unescapable 9,999 damage to them, resulting in instant death. If you've got another character who can Revive them, it will make that much difference for staying in the fight.
Boss Fight Related Articles
Major Story Bosses
| All Major Story Bosses | |
|---|---|
| Chapter 1 | Scorpion Sentinel |
| Chapter 4 | Roche |
| Chapter 5 | Crab Warden |
| Chapter 7 | Airbuster |
| Chapter 8 | Reno Rude |
| Chapter 9 | Hell House |
| Chapter 10 | Abzu |
| Chapter 11 | Ghoul Eligor |
| Chapter 13 | Failed Experiment |
| Chapter 14 | Abzu (2nd Fight) |
| Chapter 15 | The Valkyrie |
| Chapter 16 | Specimen H0512 |
| Chapter 17 | Jenova Dreamweaver Rufus The Arsenal |
| Chapter 18 | Motor Ball Whisper Harbinger Sephiroth |
VR Mission Bosses
| All VR Mission Bosses | |
|---|---|
| Chapter 8 | Shiva |
| Chapter 9 | Fat Chocobo |
| Chapter 13 | Leviathan |
| Secret Boss | Bahamut |
| Superboss | Pride and Joy Prototype |
Story Sub-Bosses
| All Story Sub-Bosses | |
|---|---|
| Chapter 2 | The Huntsman |
| Chapter 3 | The Hoodlums |
| Chapter 4 | Enigmatic Spectre |
| Chapter 12 | Enigmatic Spectre |
| Chapter 17 | M.O.T.H. Unit Brain Pod Swordipede |
Monster Variants & Optional Sub-Bosses
| All Monster Variants & Optional Sub-Bosses | |
|---|---|
| Chapter 3 | Doomrat Cerulean Drake Wrath Hound |
| Chapter 8 | Hedgehog Pie King Mark II Monodrive Venomantis Chromogger |
| Chapter 14 | Rust Drake Tonberry Trypapolis Type-0 Behemoth |
| Chapter 17 | Malboro |
Comment
I bet the creators did play the game, skill master makes only sense if you use refocus, coz the 3 different atb actions should not interrupted by an simple attack and since you cannot have 3 atb charges without refocus, sometimes I wonder who makes those guides
Author
How to Beat Pride and Joy Prototype | Super Boss Fight Guide
improvement survey
03/2026
improving Game8's site?

Your answers will help us to improve our website.
Note: Please be sure not to enter any kind of personal information into your response.

We hope you continue to make use of Game8.
Rankings
- We could not find the message board you were looking for.
Gaming News
Popular Games

Genshin Impact Walkthrough & Guides Wiki

Honkai: Star Rail Walkthrough & Guides Wiki

Umamusume: Pretty Derby Walkthrough & Guides Wiki

Pokemon Pokopia Walkthrough & Guides Wiki

Resident Evil Requiem (RE9) Walkthrough & Guides Wiki

Monster Hunter Wilds Walkthrough & Guides Wiki

Wuthering Waves Walkthrough & Guides Wiki

Arknights: Endfield Walkthrough & Guides Wiki

Pokemon FireRed and LeafGreen (FRLG) Walkthrough & Guides Wiki

Pokemon TCG Pocket (PTCGP) Strategies & Guides Wiki
Recommended Games

Diablo 4: Vessel of Hatred Walkthrough & Guides Wiki

Fire Emblem Heroes (FEH) Walkthrough & Guides Wiki

Yu-Gi-Oh! Master Duel Walkthrough & Guides Wiki

Super Smash Bros. Ultimate Walkthrough & Guides Wiki

Pokemon Brilliant Diamond and Shining Pearl (BDSP) Walkthrough & Guides Wiki

Elden Ring Shadow of the Erdtree Walkthrough & Guides Wiki

Monster Hunter World Walkthrough & Guides Wiki

The Legend of Zelda: Tears of the Kingdom Walkthrough & Guides Wiki

Persona 3 Reload Walkthrough & Guides Wiki

Cyberpunk 2077: Ultimate Edition Walkthrough & Guides Wiki
All rights reserved
© SQUARE ENIX CO., LTD. All Rights Reserved.
CHARACTER DESIGN:TETSUYA NOMURA/ROBERTO FERRARI
The copyrights of videos of games used in our content and other intellectual property rights belong to the provider of the game.
The contents we provide on this site were created personally by members of the Game8 editorial department.
We refuse the right to reuse or repost content taken without our permission such as data or images to other sites.


Pride and Joy has been assessed! Hp 82530