This survey will take about 1 minute.
Your answers will help us to improve our website.
FF7 Remake
Chapter 9: The Town That Never Sleeps Story Guide & Walkthrough | Wall Market Guide
This is a guide and walkthrough to Chapter 9: The Town That Never Sleeps, a story chapter in the game Final Fantasy 7 Remake (FF7R). Read on to learn locations of items, rewards for completing this chapter, as well as useful tips and strategies for getting through Wall Market and this part of the story.
| Previous Chapter | Budding Bodyguard |
|---|---|
| Current Chapter | The Town That Never Sleeps |
| Next Chapter | Rough Waters |
List of Contents
- List of Main Scenario Objectives
- Chapter 9: The Town That Never Sleeps Walkthrough
- Sector 5 Slums
- Sector 6 Slums - Collapsed Expressway (Section 1)
- Sector 6 Slums - Collapsed Expressway (Section 2)
- Sector 6 Slums - Evergreen Park
- Wall Market
- The Colosseum
- Wall Market (Part 2)
- The Honeybee Inn
- Don Corneo's Mansion
- Maps and Obtainable Items
- Maps
- Obtainable Items
- Shops & Vending Machines
- Tips and Strategies
- Boss Strategy Guide
- Hell House
- Optional: Fat Chocobo
- Story Walkthrough Related Links
List of Main Scenario Objectives
| No. | Title | Description |
|---|---|---|
| 1 | Tour Guide | As they make their way through Sector 6, Aerith guides Cloud toward a shortcut to Sector 7. |
| 2 | Take the Shortcut | The road isn't all quite there, but the two do their best to find a way.. |
| 2-1 | Beyond the Ladder | Cloud maneuvers Aerith onto the ledge using the arm. There, she lowers a ladder for him, and they continue their way down the road. |
| 2-2 | Working Together | They use another arm and work together to make their way down the road. |
| 3 | Beyond the Dead End | Cloud and Aerith finally reach the exit of the so-called shortcut. Their time together will soon be over. |
| 3-1 | Working Together Again | Cloud maneuvers the pair of arms and forges a path forward. The two find themselves more in sync the more time they spend together. |
| 4 | Saying Goodbye | Cloud parts with Aerith and is ready to head back to Sector 7 when Tifa rides by in a chocobo carriage. Worried, Aerith urges him to chase after her. |
| 5 | Chasing Tifa | According to Chocobo Sam, Tifa's headed to an audition at Corneo's mansion. Cloud and Aerith make their way to Wall Market to find her. |
| 6 | To Corneo's Mansion | A letter of recommendation from one of three trusted individuals is needed to get into Corneo's mansion. Cloud and Aerith have no choice but to find members of the Trio. |
| 7 | The Trio | Getting a letter doesn't prove to be easy, but Cloud and Aerith need one if they want to see Tifa again. |
| 7-1 | Sam | Sam has already chosen Tifa for the audition. Cloud and Aerith will have to ask another member of the Trio. |
| 7-2 | Andrea Rhodea | Andrea doesn't see anyone without an appointment. Cloud and Aerith will have to ask another member of the Trio. |
| 7-3 | Madam M | To get her cooperation, Madam M needs to be shown some good faith. |
| 8 | Madam M's Desire | Madam M promises to grant Cloud and Aerith a letter if they win the colosseum tournament. |
| 9 | Underground Colosseum | Cloud and Aerith win the Corneo Cup and are granted a letter from Madam M as promised. |
| 10 | Parting Ways | As Cloud returns to the parlor to fetch Aerith, he's approached by a panic-stricken Johnny. |
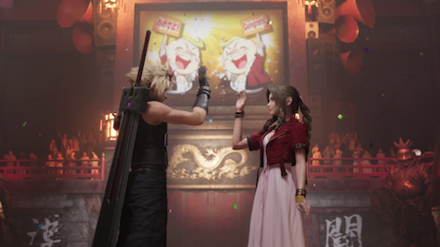
| 11 | Aerith's Plan | Cloud takes part in the Honeybee Inn show and receives a letter from Andrea, as the plan to save Tifa comes together. |
| 12 | The Audition | Cloud and Aerith gain access to Corneo's mansion and find Tifa. After a thorough audition, Corneo chooses Cloud to be his new bride. |
| 13 | Showdown with Corneo | Corneo informs them about Shinra's plan to blow up the pillar–an event that would be catastrophic for the residents of the Sector 7 undercity. The three threaten him for details, but he sends them falling through a trapdoor down into the sewers beneath the mansion. |
Chapter 9: The Town That Never Sleeps Walkthrough
Sector 5 Slums
| Objectives | |
|---|---|
| 1 | Continue ahead along the path. |
| 2 | After the cutscene, follow Aerith through the tunnel. Step on the arrow pad to go under the rubble. |
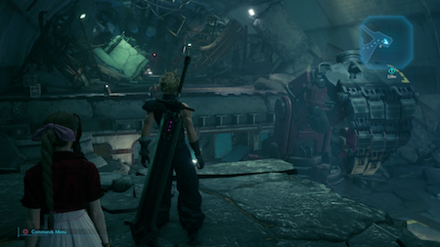
Sector 6 Slums - Collapsed Expressway (Section 1)
| Objectives | |
|---|---|
| 1 | At the entrance, you'll fight a Terpsicolt. |
| 2 | Climb the ladder. Fight the Lesser Drake at the top. |
| 3 | Walk onto the platform ahead to the left. |
 From the platform, turn left again back toward the wall. There will be a small tunnel with a chest containing a Moogle Medal.
 |
|
| 4 | Climb down the ladder. Go to the console in the middle of the floor to activate the Robot Arm. |
| 5 | Press the circle button to allow Aerith to hop on. Then, move the hand to the left and over the next platform to allow Aerith to jump off. |
| 6 | Climb up the ladder that Aerith lowered. Ahead, battle the Sweeper Prototype. Use Thundara to take it down easily. |
| 7 | Go down the ladder ahead and continue. |
 To the left of the ladder, you can find a chest with 2 Hi-Potions.
 |
|
| 8 | Stand on the arrow pad to the far left to squeeze through the wooden door. |
| 9 | Ahead, climb the ladder to your right. You'll fight two Terpsicolts. Take the path to the right around the rubble, then to the right again. |
 Follow the path left and back and descend into a small tunnel to find a chest with 1,000 Gil.
 |
|
 Take the path straight ahead through the tunnel to find a chest on the left with a Mega-Potion. However, if you go this way, when you come back, you'll have to fight two Smoggers.
 |
|
| 10 | You'll find another console. Control the robot arm to grab the container. |
| 11 | After Aerith goes down, move the container to the yellow square on the right. Then, offer Aerith a ride. Lift her all the way up to the far platform. Carry her to the lower platform on the right to get a Binding Materia. |
| 12 | Turn right and around the corner to find a ladder. Go down. If you go left up the path, you'll find a rest area. |
| 13 | Walk across the narrow planks until you reach a door. Go through it. |
Sector 6 Slums - Collapsed Expressway (Section 2)

| Objectives | |
|---|---|
| 1 | You'll fight with Beck, Butch and Burke. Don't get too close – they can steal your Gil! |
| 2 | Continue ahead and duck under the rubble. |
| 3 | Continue through the tunnel until you reach a ladder. Climb up. |
| 4 | You'll encounter two Bandits and a Sweeper Prototype. |
| 5 | At the end, you'll find a Console. Maneuver the Robot Arms. With the first arm, pick up the container and place it on the middle yellow square. With the other arm, place the other container on top of the first container. If you move a container to the far yellow square and place Aerith on top, she can get a Magnify Materia. |
| 6 | Use the first Robot Arm to place Aerith on top of the stacked containers. With the second Robot Arm, pick her up and take her to the far platform. Climb up the ladder she lowers to you. |
| 7 | Climb up the ladder against the wall and continue down the path. You'll encounter four Bandits. |
| 8 | Squeeze through the door and continue down the path. Hold the triangle button to give Aerith a high-five. |
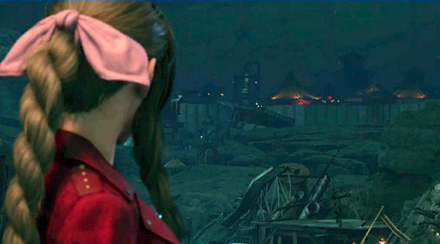
Sector 6 Slums - Evergreen Park
| Objectives | |
|---|---|
| 1 | After the cutscene, follow Aerith to the tunnel and talk to her. Say Yes. to returning to Sector 7 Slums. She'll leave the party for just a moment. |
 From the start, go left to the back corner to find a small cave with a chest containing an Ether.
 |
|
| 2 | A cutscene will begin and Aerith will rejoin the party. Go ahead on the path. |
| 3 | Talk to Chocobo Sam. Your description of Tifa will have an effect on the Chapter 9 Odd Jobs route. How Should You Respond to Sam? |
| 4 | Continue along the path into town. |
 Before you enter Wall Market, check the upper rightmost part of the area for a chest containing a Phoenix Down. Before you enter Wall Market, check the upper rightmost part of the area for a chest containing a Phoenix Down. |
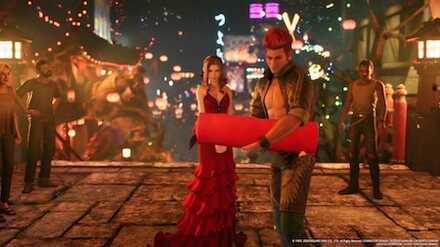
Wall Market

Check out our full Wall Market area guide to learn everything there is to do in this sprawling city of the night!
| Objectives | |
|---|---|
| 1 | Find Don Corneo's mansion on the south side of the map. Aerith will make a comment that you've found your man when you get there. The barker outside the hotel near the entrance of Wall Market will trigger a dialogue if you go near him that can affect the Chapter 9 Odd Jobs route.What Should You Say to the Hotel Employee? (Chapter 9) |
 Go outside Wall Market through the north exit and continue onward until you reach a fork. Go left and into a hole of an abandoned building where you can get a Star Pendant from a chest. Go outside Wall Market through the north exit and continue onward until you reach a fork. Go left and into a hole of an abandoned building where you can get a Star Pendant from a chest. |
|
 Go up the two sets of stairs on the building behind Chadley and get the Elixir at the top floor. Go up the two sets of stairs on the building behind Chadley and get the Elixir at the top floor. |
|
 A Barrier Materia can be found at the end of an alley on the left part of Wall Market. A Barrier Materia can be found at the end of an alley on the left part of Wall Market. |
|
 Go inside the rest spot then to the first room to your left to find a chest containing a bottle of Adrenaline. Go inside the rest spot then to the first room to your left to find a chest containing a bottle of Adrenaline. |
|
 Continue walking south from the Jukebox and open the chest at the top for a vial of Celeris. Continue walking south from the Jukebox and open the chest at the top for a vial of Celeris. |
|
 Go to the gym and open the chest inside the bathroom to obtain a Headband. Go to the gym and open the chest inside the bathroom to obtain a Headband. |
|
 Upon arriving at Don Corneo's mansion, go left immediately to get an Ether at the end of the alley. Upon arriving at Don Corneo's mansion, go left immediately to get an Ether at the end of the alley. |
|
| 2 | At the gates, hold the triangle button to push open the door. Talk to Leslie inside. |
| 3 | Go back out the gates. The three people you need to meet will be represented on the Map by diamonds. The left diamond is Andrea; the middle diamond is Madam M; the right diamond is Chocobo Sam. You'll need to meet Chocobo Sam and go to the Honeybee Inn first before going to meet Madam M. You can do these two in either order. |
 You can obtain 1,200 Gil in a chest down the alley near the item shop. You can obtain 1,200 Gil in a chest down the alley near the item shop. |
|

|
|
| 4 | Find Chocobo Sam on the map. He'll flip a coin, but no matter what you say, you'll be wrong, so you'll have to search for the other two. Your choice will still affect the Chapter 9 Odd Jobs routen:Heads or Tails:(/games/FF7-Remake/archives/286672):] |
| Find the Honeybee Inn on the map. After going inside, a cutscene will begin. You'll be sent away. | |
| 5 | Find Madam M on the map. After you go in, you'll have to choose a massage to pay for. The course that you choose will have an effect on the Chapter 9 Odd Jobs route. Which Hand Massage Course Should You Choose? |
| 6 | When Madam M comes back, talk to her again, and she'll agree to help you. You will give Aerith feedback on her outfit and your response will have an effect on the Chapter 9 Odd Jobs route. How to Answer How is Aerith's Outfit? |
| 7 | You'll get a Tournament Entry Form. Follow the Map to the colosseum. |
The Colosseum
| Objectives | |
|---|---|
| 1 | Talk to the man to the left of the elevator. Then, head into the elevator. The first room that you will see once outside the elevator will give you access to a rest area and a vending machine. |
| 2 | Talk to Johnny on the second room on your left. Whether you drink the mystery drink on the table or not will have an effect on the Chapter 9 Odd Jobs route. Should You Taste the Mystery Drink? |
| 3 | Talk to the Gatekeeper at the end and say Yes. to participate in the first round. |
| 4 | You'll fight the Beastmaster first. He'll come together with two Bloodhounds. |
| 5 | Go back to the waiting room, and after the announcement, talk to the man at the end and say Yes. to participate in the second round. |
| 6 | You'll fight Beck, Burke and Butch, together with five Corneo Lackeys. Mow through them. |
| 7 | Go back to the waiting room, and after the announcement, talk to the Gatekeeper at the end and say Yes. to participate in the final round. |
| 8 | You'll be up against a Sweeper and a Cutter. Take them down with Thundara. |
| 9 | After the last fight, another fight will be announced in the cutscene. So you'll have to do one more fight. Go back to the waiting room, and after the announcement, talk to the man at the end and say Yes. to participate in the final round. |
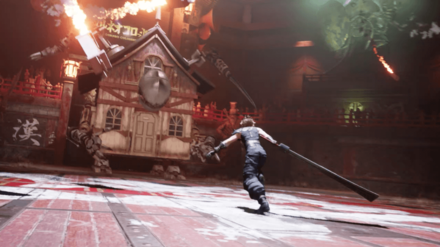
| Boss 10 |
You'll fight the Hell House, the real boss of this segment. You'll get a Fuzzy Wuzzy for defeating it. How to Beat Hell House |
| 11 | After the fight, talk to the Gatekeeper in the entrance room. You'll unlock access to enter Corneo Cups at the Colosseum. Corneo Colosseum Rewards and Battle Challenges |
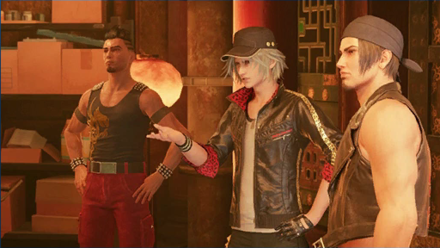
Wall Market (Part 2)
| Objectives | |
|---|---|
| 1 | Head back to Madam M's shop. Say Yes. to have Aerith get changed. Aerith will leave the party. You'll get access to new optional Side Quests. Depending on how you completed the chapter up to this point, you'll do Side Quests for either Madam M or Chocobo Sam. Chapter 9 Side Quests |
| 2 | Go back to Madam M's to check on Aerith and Johnny will show up. When you proceed past this point, you won't be able to complete any more Side Quests. |
| 4 | Follow Johnny along the path up to Don Corneo's Mansion. Hold triangle to push open the door. |
| 5 | Talk to Leslie and he'll turn you away. Leave and a cutscene will begin. You'll get Madam M's Endorsement. |
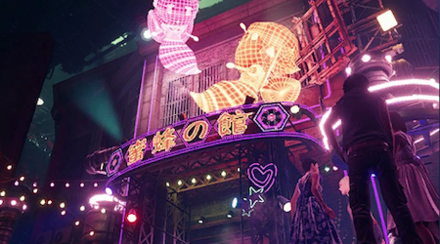
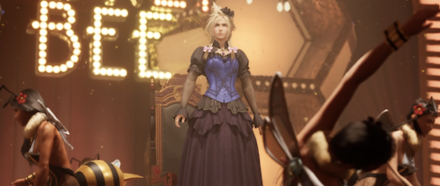
The Honeybee Inn
| Objectives | |
|---|---|
| 1 | Follow Aerith down the road to the Honeybee Inn. |
| 2 | Walk through the indicated double doors. Talk to the Honeygirls on the right and say Yes. to head to the stage. |
 You can obtain a Sedative inside the room to the left of the double doors. You can obtain a Sedative inside the room to the left of the double doors. |
|
| 3 | You'll start the practice for the dance minigame. Time button presses to the movements of the lights on screen for a total of 10 presses. If you get a perfect score during the practice, you'll obtain “Let the Battles Begin -REMAKE-”. |
| 4 | After you've finished practicing, you'll pass through the doors and a cutscene will begin. At the end, you'll start the real dance, with a total of 28 presses. How to Get a Dance Off Perfect Score You'll receive Andrea's Earrings. If you do well enough, you'll receive the Dancing Queen trophy. |
Don Corneo's Mansion

| Objectives | |
|---|---|
| 1 | After the show, you'll be controlling Aerith. Wait until Cloud gets to the door, then talk to him twice. You'll get Andrea's Endorsement. |
| 2 | You'll be controlling Cloud again. Go back to Don Corneo's Mansion and talk to Leslie. You'll be able to get in. |
| 3 | Go up to the second floor and through two sets of double doors. A cutscene will begin, and Tifa will join your party. |
| 4 | Wait until an announcement plays over the loudspeaker. Head out the door and up the stairs. Interact with the door at the end. |
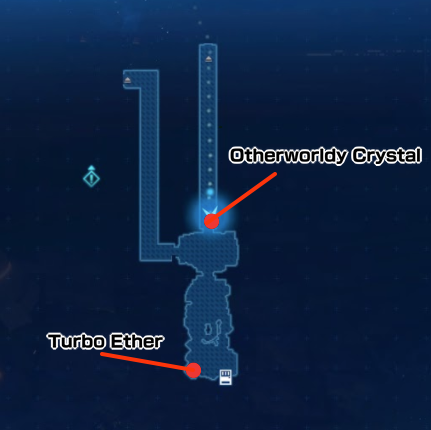
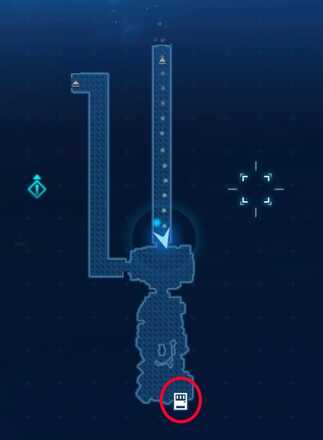
 Open the chest in the back corner to get a Turbo Ether. You can also buy CD #11: Don of the Slums from the Vending Machine here.
 |
|
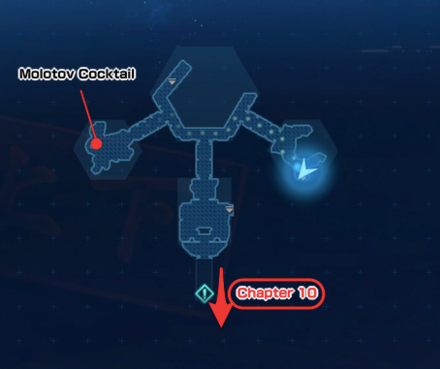
| 5 | After the cutscene, Cloud will leave the party. You'll control Aerith. |
 Open the chest on the left side of the room to get a Molotov Cocktail. Open the chest on the left side of the room to get a Molotov Cocktail. |
|
 Enter the furthest door from where you started then interact with the carpet in front of the book shelf. You'll open a secret door leading to a chest containing an Otherworldly Crystal. Enter the furthest door from where you started then interact with the carpet in front of the book shelf. You'll open a secret door leading to a chest containing an Otherworldly Crystal. |
|
| 6 | Leave the room and go to the middle room on the upper floor. You'll fight two Corneo Lackeys inside. Continue ahead into the Don's room. |
 If you go downstairs after leaving the first room, you'll fight 3 Corneo Lackeys. On the far side of the room, you can step on an arrow pad to squeeze through some shelves, and find a chest with a Fury Ring. If you go downstairs after leaving the first room, you'll fight 3 Corneo Lackeys. On the far side of the room, you can step on an arrow pad to squeeze through some shelves, and find a chest with a Fury Ring. |
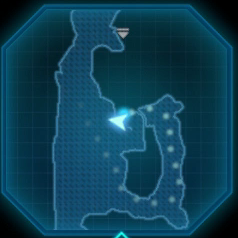
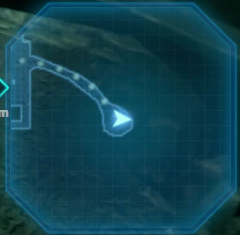
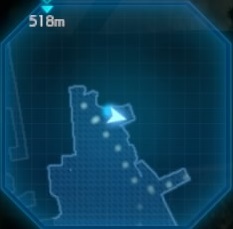
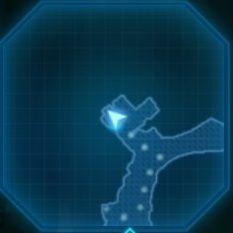
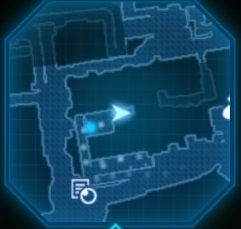
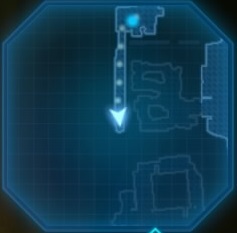
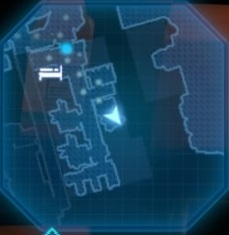
Maps and Obtainable Items
Maps
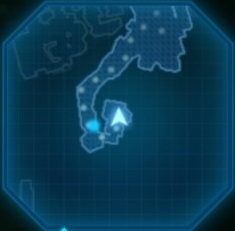
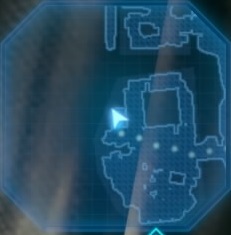
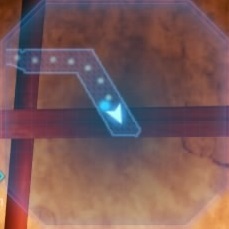
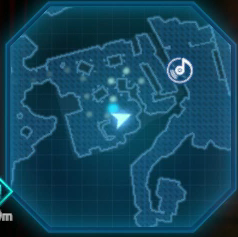
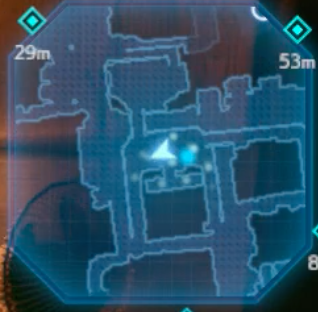
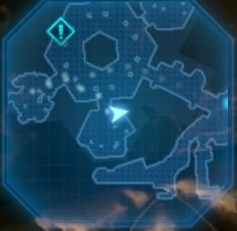
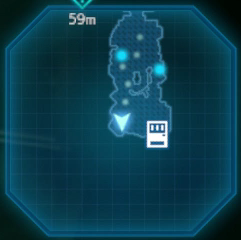
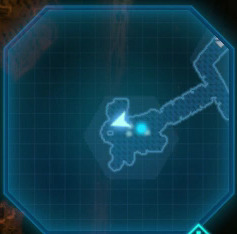
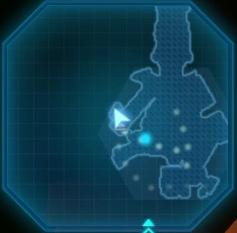
Sector 6 Slums
| Other Maps | |
|---|---|
 |
 |
 |
 |
Obtainable Items
This section excludes Items which are available as rewards from Odd Jobs.
| Sector 6 Slums - Collapsed Expressway | ||
|---|---|---|
| Moogle Medal x1 | Hi-Potion x2 | Mega-Potion x1 |
| Binding Materia x1 | Magnify Materia x1 | - |
| Sector 6 Slums - Evergreen Park | ||
| Ether x1 | - | - |
| Wall Market | ||
| Star Pendant | Elixir x1 | Barrier Materia |
| Adrenaline x1 | Celeris x1 | Headband |
| Ether x1 | Under the Rotting Pizza | The Midgar Blues |
| Farm Boy | Fuzzy Wuzzy x1 | Andrea's Earrings |
| Sam's Coin | Tournament Entry Form | Madam M's Requests |
| Madam M's Endorsement | Sedative x1 | Andrea's Endorsement |
| Phoenix Down x1 | - | - |
| Don Corneo's Mansion | ||
| Turbo Ether x1 | Molotov Cocktail x1 | Otherworldly Crystal x1 |
| Fury Ring x1 | - | - |
Shops & Vending Machines
Vending Machine - Collapsed Expressway - Large Cave-In
| Items | Price |
|---|---|
| 22. Cosmo Canyon (Stock: 1) | 50 Gil |
| Potion | 50 Gil |
| Hi-Potion | 300 Gil |
| Ether | 500 Gil |
| Phoenix Down | 300 Gil |
| Antidote | 80 Gil |
| Echo Mist | 100 Gil |
| Smelling Salts | 80 Gil |
| Weapons / Armor | Price |
|---|---|
| Leather Bracer | 1600 Gil |
| Mesmeric Armlet | 1600 Gil |
| Titanium Bangle | 2000 Gil |
| Caliginous Bracelet | 3200 Gil |
| Accessories | Price |
|---|---|
| Power Wristguards | 800 Gil |
| Bulletproof Vest | 800 Gil |
| Earrings | 800 Gil |
| Talisman | 800 Gil |
| Materia | Price |
|---|---|
| Healing Materia | 600 Gil |
| Cleansing Materia | 1500 Gil |
| Revival Materia | 3000 Gil |
| Fire Materia | 500 Gil |
| Ice Materia | 500 Gil |
| Lightning Materia | 500 Gil |
| Poison Materia | 1500 Gil |
| Barrier Materia | 1500 Gil |
| HP Up Materia | 2000 Gil |
| MP Up Materia | 2000 Gil |
| Deadly Dodge Materia | 600 Gil |
Item Shop - Wall Market
| Items | Price |
|---|---|
| 10. Honeybee Inn (Stock: 1) | 50 Gil |
| Potion | 50 Gil |
| Hi-Potion | 300 Gil |
| Ether | 500 Gil |
| Phoenix Down | 300 Gil |
| Antidote | 80 Gil |
| Echo Mist | 100 Gil |
| Smelling Salts | 80 Gil |
Materia Shop - Wall Market
| Materia | Price |
|---|---|
| Healing Materia | 600 Gil |
| Cleansing Materia | 1500 Gil |
| Revival Materia | 3000 Gil |
| Fire Materia | 500 Gil |
| Ice Materia | 500 Gil |
| Lightning Materia | 500 Gil |
| Poison Materia | 1500 Gil |
| Barrier Materia | 1500 Gil |
| Binding Materia | 3000 Gil |
| HP Up Materia | 2000 Gil |
| MP Up Materia | 2000 Gil |
| Deadly Dodge Materia | 600 Gil |
Weapons Store - Wall Market
| Weapons / Armor | Price |
|---|---|
| Hardedge (Stock: 1) | 2000 Gil |
| Titanium Bangle | 2000 Gil |
| Caliginous Bracelet | 3200 Gil |
| Studded Bracer | 3200 Gil |
| Mythril Armlet | 3200 Gil |
| Accessories | Price |
|---|---|
| Power Wristguards | 800 Gil |
| Bulletproof Vest | 800 Gil |
| Earrings | 800 Gil |
| Talisman | 800 Gil |
| Supernatural Wristguards | 5000 Gil |
| Survival Vest | 5000 Gil |
| Platinum Earrings | 5000 Gil |
| Timeworn Talisman | 5000 Gil |
| Star Pendant | 1500 Gil |
| Headband | 1500 Gil |
| Revival Earrings | 500 Gil |
Vending Machine - Underground Arena
| Items | Price |
|---|---|
| Potion | 50 Gil |
| Hi-Potion | 300 Gil |
| Mega-Potion (Stock: 1) | 300 Gil |
| Ether | 500 Gil |
| Ether (Stock: 1) | 100 Gil |
| Phoenix Down | 300 Gil |
| Phoenix Down (Stock: 1) | 100 Gil |
| Antidote | 80 Gil |
| Echo Mist | 100 Gil |
| Smelling Salts | 80 Gil |
| Weapons / Armor | Price |
|---|---|
| Titanium Bangle | 2000 Gil |
| Caliginous Bracelet | 3200 Gil |
| Studded Bracer | 3200 Gil |
| Mythril Armlet | 3200 Gil |
| Accessories | Price |
|---|---|
| Power Wristguards | 800 Gil |
| Bulletproof Vest | 800 Gil |
| Earrings | 800 Gil |
| Talisman | 800 Gil |
| Supernatural Wristguards | 5000 Gil |
| Survival Vest | 5000 Gil |
| Platinum Earrings | 5000 Gil |
| Timeworn Talisman | 5000 Gil |
| Star Pendant | 1500 Gil |
| Headband | 1500 Gil |
| Revival Earrings | 500 Gil |
| Materia | Price |
|---|---|
| Healing Materia | 600 Gil |
| Cleansing Materia | 1500 Gil |
| Revival Materia | 3000 Gil |
| Fire Materia | 500 Gil |
| Ice Materia | 500 Gil |
| Lightning Materia | 500 Gil |
| Poison Materia | 1500 Gil |
| Barrier Materia | 1500 Gil |
| Binding Materia | 3000 Gil |
| HP Up Materia | 2000 Gil |
| MP Up Materia | 2000 Gil |
| Deadly Dodge Materia | 600 Gil |
Souvenir Shop - Wall Market
| Items | Price |
|---|---|
| Fuzzy Wuzzy | 200 Gil |
| Mr. Cuddlesworth | 500 Gil |
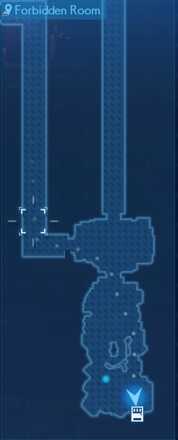
Don's Vending Machine - Forbidden Room
 |
 |
| Items | Price |
|---|---|
| 11. Don of the Slums (Stock: 1) | 50 Gil |
| Potion | 50 Gil |
| Hi-Potion | 300 Gil |
| Mega-Potion (Stock: 3) | 300 Gil |
| Ether | 500 Gil |
| Ether (Stock: 1) | 100 Gil |
| Phoenix Down | 300 Gil |
| Phoenix Down (Stock: 1) | 100 Gil |
| Antidote | 80 Gil |
| Echo Mist | 100 Gil |
| Smelling Salts | 80 Gil |
| Weapons / Armor | Price |
|---|---|
| Titanium Bangle | 2000 Gil |
| Caliginous Bracelet | 3200 Gil |
| Studded Bracer | 3200 Gil |
| Mythril Armlet | 3200 Gil |
| Accessories | Price |
|---|---|
| Power Wristguards | 800 Gil |
| Bulletproof Vest | 800 Gil |
| Earrings | 800 Gil |
| Talisman | 800 Gil |
| Supernatural Wristguards | 5000 Gil |
| Survival Vest | 5000 Gil |
| Platinum Earrings | 5000 Gil |
| Timeworn Talisman | 5000 Gil |
| Star Pendant | 1500 Gil |
| Headband | 1500 Gil |
| Revival Earrings | 500 Gil |
| Materia | Price |
|---|---|
| Healing Materia | 600 Gil |
| Cleansing Materia | 1500 Gil |
| Revival Materia | 3000 Gil |
| Fire Materia | 500 Gil |
| Ice Materia | 500 Gil |
| Lightning Materia | 500 Gil |
| Poison Materia | 1500 Gil |
| Barrier Materia | 1500 Gil |
| Binding Materia | 3000 Gil |
| HP Up Materia | 2000 Gil |
| MP Up Materia | 2000 Gil |
| Deadly Dodge Materia | 600 Gil |
Tips and Strategies
Odd Jobs

In Chapters 3, 8, 9, and 14, the player will have access to a set of Odd Job sidequests for that chapter. After you continue to a certain point in each chapter, you won't be able to complete any of the Odd Jobs any more. That said, the game will notify you at this point, so there's no worry of missing your chance on accident.
Unlock a Different Dress for Cloud later in Chapter 9
Unlike the conditions for Tifa and Aerith, which depend on completing every Odd Job in Chapters 3, and a greater number of Odd Jobs in Chapter 8, respectively, Cloud's dress choice will depend on which Odd Job you choose to complete in Chapter 9. As you will be unable to complete every Odd Job this time around, choose the jobs you complete wisely to avoid blocking your chances of getting the dress you want for Cloud.
Dress Types and Choices
| Dress Type | How to Unlock |
|---|---|
| Black Dress | ・Go back to Madam M's Parlor before clearing all of the Chapter 9 Odd Jobs. |
| White Dress | ・Clear all of the Odd Jobs on Madam M's Route (Burning Thighs, The Price of Thievery, and Shear's Counterattack) |
| Blue Dress | ・Clear all of the Odd Jobs on Sam's Route (Burning Thighs, The Party Never Stops, and A Dynamite Body) |
Check out our complete guide to learn how to get the alternate dress choices for Tifa and Aerith as well.
Guides for each Chapter 9 Side Quest (Odd Job)
Check out our individual guides below to learn how to finish each Odd Job in Chapter 9!
| Quest | Reward | |
|---|---|---|
| 1 |  Burning Thighs Burning Thighs |
Unlock the Squats Minigame |
| 2A |  The Party Never Stops The Party Never Stops |
Turbo Ether |
| 3A | 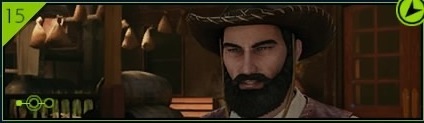 A Dynamite Body A Dynamite Body |
Arcane Scepter |
| 2B |  The Price of Thievery The Price of Thievery |
Real calling card Turbo Ether |
| 3B |  Shear's Counterattack Shear's Counterattack |
Arcane Scepter |
The route that you will take depends on the choices that you have picked until you return to Madam M to have Aerith changed.
See the link below for a complete guide on the Chapter 9 Odd Jobs!
Chapter 9 Side Quests (Odd Jobs)
The Colosseum Battles
Beastmaster
The first opponent in the Colosseum, he'll drink a beverage near the end to prevent his Stagger gauge from increasing. Save your strongest attacks to hit him hard after this.
Beck, Burke and Butch
This fight is a breeze, but watch out for your Gil getting stolen. Try to keep your distance, or the Corneo Lackeys may pickpocket you for as much as 500 gil.
Boss Strategy Guide
Hell House
| Hell House | |
|---|---|
 |
|
| Where it Appears | Weaknesses |
| Corneo's Colesseum | Magic* |
*: Weakness depends on what element Hell House is.
How to Defeat Hell House - Key Points
- Weakness changes with Barrier Shift
- Bring all types of Element Magic
- Attack the Arms during God House Mode
- Magic is most effective
How to Beat Hell House in the Colosseum
Optional: Fat Chocobo
| Fat Chocobo | |
|---|---|
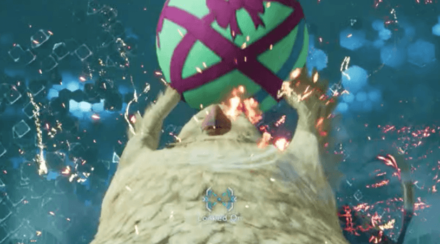 |
How to Defeat Fat Chocobo - Key Points
- Moogles can't be attacked
- Keep the number of enemies low
- Keep attacking to Pressure and Stagger it
- Heal before it uses Kerplunk
Story Walkthrough Related Links
| Chapter 1 | The Destruction of Mako Reactor 1 |
|---|---|
| Chapter 2 | Fateful Encounters |
| Chapter 3 | Home Sweet Slum |
| Chapter 4 | Mad Dash |
| Chapter 5 | Dogged Pursuit |
| Chapter 6 | Light the Way |
| Chapter 7 | A Trap is Sprung |
| Chapter 8 | Budding Bodyguard |
| Chapter 9 | The Town That Never Sleeps |
| Chapter 10 | Rough Waters |
| Chapter 11 | Haunted |
| Chapter 12 | Fight for Survival |
| Chapter 13 | A Broken World |
| Chapter 14 | In Search of Hope |
| Chapter 15 | The Day Midgar Stood Still |
| Chapter 16 | The Belly of the Beast |
| Chapter 17 | Deliverance from Chaos |
| Chapter 18 | Destiny's Crossroads |
| INTERmission Chapters | |
|---|---|
| Chapter 1 | Wutai's Finest |
| Chapter 2 | Covert Ops |
Author

Chapter 9: The Town That Never Sleeps Story Guide & Walkthrough | Wall Market Guide
Please participate in our site
improvement survey
03/2026
improvement survey
03/2026
Would you assist in
improving Game8's site?
improving Game8's site?

×
We are listening to our users' valuable opinions and discussing how to act on them.
The information collected through this survey will be used for the purpose of improving our services. In addition, the information will only be disclosed a part of a statistic in a format that will not allow identification of personal information.
Begin Survey
Not Now
×
Please rate each item regarding Game8.co's Advertisements.
Amount of Ads
Very Dissatisfied
Somewhat Dissatisfied
Fine
Somewhat Satisfied
Highly Satisfied
Placement of Ads
Timing of Ad Display
Ad Loading Speed
Safeness of Ads
Content of Ads
×
Please rate each item regarding Game8.co's Quality of Articles.
Amount of information
Very Dissatisfied
Somewhat Dissatisfied
Fine
Somewhat Satisfied
Highly Satisfied
Frequency of updates
Speed of new information
Accuracy of articles
Understandibility of articles
Readability of sentences
×
Please rate each item regarding Game8.co's Usability of the Site.
Ease of finding information
Very Dissatisfied
Somewhat Dissatisfied
Fine
Somewhat Satisfied
Highly Satisfied
Loading Speed
Use of Color
Font Size
Visibility of Images
Easy to Understand Layout
×
Please rate each item regarding Game8.co's Message Boards, Comments.
Ease of Writing
Very Dissatisfied
Somewhat Dissatisfied
Fine
Somewhat Satisfied
Highly Satisfied
Readability
Ease in Finding Information
Comment Quality
Comment Quantity
Admin Response
×
Please rate each item regarding Game8.co's Site's new design.
Please rate our site's new design
Very Dissatisfied
Somewhat Dissatisfied
Fine
Somewhat Satisfied
Highly Satisfied
Do you think that the website's design change makes the site easier to use?
Has the new design made it easier for you to find information on the site?
Has the new design improved the overall visual appeal of the site?
How would you rate your overall satisfaction with the new design of the site?
×
How likely are you to recommend Game8 to someone you know?
Very Unlikely
0
1
2
3
4
5
6
7
8
9
10
Very Likely
If you have other opinions regarding potential improvement to the website, please share them with us. We would appreciate your honest opinion.
Note: This is a free response section, so you can proceed without entering anything.
Note: Please be sure not to enter any kind of personal information into your response.
Note: Please be sure not to enter any kind of personal information into your response.
×
Thank You
×
Thank you for participating in our survey! Your answers will help us to improve the quality of our website and services.
We hope you continue to make use of Game8.
We hope you continue to make use of Game8.
Close
Rankings
- We could not find the message board you were looking for.
Gaming News


Popular Games

Genshin Impact Walkthrough & Guides Wiki
Honkai: Star Rail Walkthrough & Guides Wiki
Umamusume: Pretty Derby Walkthrough & Guides Wiki
Pokemon Pokopia Walkthrough & Guides Wiki
Resident Evil Requiem (RE9) Walkthrough & Guides Wiki
Monster Hunter Wilds Walkthrough & Guides Wiki
Wuthering Waves Walkthrough & Guides Wiki
Arknights: Endfield Walkthrough & Guides Wiki
Pokemon FireRed and LeafGreen (FRLG) Walkthrough & Guides Wiki
Pokemon TCG Pocket (PTCGP) Strategies & Guides Wiki


Recommended Games
Diablo 4: Vessel of Hatred Walkthrough & Guides Wiki
Fire Emblem Heroes (FEH) Walkthrough & Guides Wiki
Yu-Gi-Oh! Master Duel Walkthrough & Guides Wiki
Super Smash Bros. Ultimate Walkthrough & Guides Wiki
Pokemon Brilliant Diamond and Shining Pearl (BDSP) Walkthrough & Guides Wiki
Elden Ring Shadow of the Erdtree Walkthrough & Guides Wiki
Monster Hunter World Walkthrough & Guides Wiki
The Legend of Zelda: Tears of the Kingdom Walkthrough & Guides Wiki
Persona 3 Reload Walkthrough & Guides Wiki
Cyberpunk 2077: Ultimate Edition Walkthrough & Guides Wiki


All rights reserved
© SQUARE ENIX CO., LTD. All Rights Reserved.
CHARACTER DESIGN:TETSUYA NOMURA/ROBERTO FERRARI
The copyrights of videos of games used in our content and other intellectual property rights belong to the provider of the game.
The contents we provide on this site were created personally by members of the Game8 editorial department.
We refuse the right to reuse or repost content taken without our permission such as data or images to other sites.
This is the best guide out there ☺️