How to Beat Fat Chocobo | Boss Fight Guide

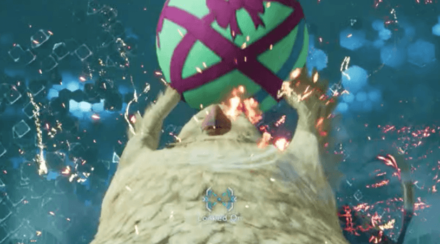
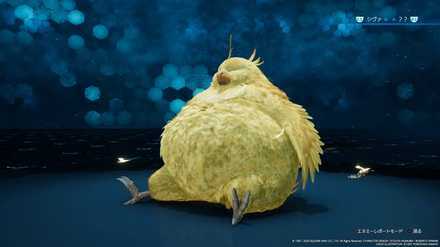
This is a guide to beating the Boss Fat Chocobo in the game Final Fantasy 7 Remake. This article explains Fat Chocobo's attack patterns, weaknesses, and tips and strategies for defeating it.
List of Contents
Fat Chocobo Stats and Information
Basic Information
| Fat Chocobo | ||
|---|---|---|

|
Species | Movement | Type |
| Unreadable | Grounded | Boss |
Description
A pleasingly plump summon recreated in virtual reality. It is the manifestation of the legendary chocobo, a symbol of fertility and good fortune. Fat chocobos appear in many a beloved fairy tale.
Assess (Tips)
Tactical data not available.
Fat Chocobo Stats
| Easy | Normal | Hard | |
|---|---|---|---|
| HP | 26070~46063 | 47400~83750 | 117900 |
| Attack | 125~209 | 328 | |
| Magic Attack | 125~209 | 328 | |
| Defense | 59~103 | 148 | |
| Magic Defense | 59~103 | 148 | |
Fat Chocobo Weaknesses & Resistances
| Weakness / Status Ailments | - | |
|---|---|---|
| Lesser Resistances | Physical | |
| Greater Resistances | Fixed Damage, Proportional Damage | |
| Immunities | Poison, Silence, Sleep, Slow, Stop, Berserk | |
| Absorbed Elements | - | |
Stagger Rates
| ×0.5 | ×0.25 | ×1.5 | ×1 |
| - | |||
| ×1 | ×1 | ×1 | - |
Stagger Length
| Stagger Length | 20 seconds |
|---|
Clear Battle Intel Reports 1-9 to Fight it
You can challenge Fat Chocobo after you clear 1 to 9 of Chadley's Battle Intel Reports.
Once of those include defeating Shiva, so fight her first if you haven't already.
Get the Fat Chocobo Materia
Once you defeat the Fat Chocobo's Battle Simulation, you'll get the Fat Chocobo Materia and become able to summon it.
The summon Materia can only be obtained this way, so we recommend doing this challenge early if you're up for it!
Fat Chocobo Level Increases by Chapter
| Chapter | Level |
|---|---|
| Chapter 8 | Level16 |
| Chapter 9 | Level 18 |
| Chapter 13 Chapter 14 |
Level 25 |
| Chapter 16 | Level 30 |
| Post Game | Level 32 |
Rewards
| Easy/Normal | Hard | |
|---|---|---|
| Gil | 0 | 0 |
| AP | 10 | 30 |
| Exp | 0 | 0 |
| Items Dropped | - | |
| Rare Items Dropped | - | |
| Steal | - | |
Learnable Enemy Skills
No Enemy Skills can be learned from Fat Chocobo.
Fat Chocobo Boss Fight Guide
Fat Chocobo Abilities and Attack Patterns
| Name | Element | Blockable? | Knockdown? | Status |
|---|---|---|---|---|
|
|
- | Yes | Yes | - |
| Throws a variety of items at a target. | ||||
|
|
- | Yes | Yes | - |
| Flutters into the air slightly and smashes back down. | ||||
|
|
- | Yes | Yes | - |
| Flutters into the air slightly and smashes back down, causing a large shockwave. | ||||
|
|
- | Yes | Yes | - |
| Rolls forward and smashes its wings into the ground. | ||||
|
|
- | Yes | Yes | - |
| Rolls forward and smashes its wings into the ground, causing a large shockwave. | ||||
|
|
- | Yes | Yes | - |
| Rolls in forwards or backwards. Rolling backwards does less damage. | ||||
|
|
- | Yes | Yes | - |
| Turns onto its side and rolls across the arena at high speed followed by bouncing 3 times on party members. | ||||
|
|
- | Yes | Yes | - |
| Throw a large bomb (2-3 at low HP) onto the arena that explodes after 4 seconds. | ||||
|
|
- | No | Yes | - |
| Lifts itself up into the air and crashes back down, causing an arena-wide shockwave. | ||||
|
Ruby Light (Carbuncle)
|
- | - | - |
|
| Casts Barrier on all party members. | ||||
|
|
- | - | - | - |
| Casts Choco Cure on all party members. | ||||
*Status Effects and Ailments Guide
Moogle Attack Pattern
| Name | Description |
|---|---|
| Fingers crossed, kupo! | Throws a pink bomb that summons a random monster ・Tonberry ・Carbuncle ・Bomb ・Cactaur ・Baby Chocobo |
Best Characters for This Boss\
Available Characters
 Cloud Cloud
|
 Aerith Aerith
|
Fat Chocobo is first encountered in Chapter 9. During this chapter, Cloud and Aerith are available.
Best Equipment for Characters
 Cloud Cloud |
Role: Attacker Weapon: Hardedge Armor: Caliginous Bracelet Accessory: Power Wristguards |
|---|---|
 Aerith Aerith |
Role: Mage Weapon: Silver Staff Armor: Caliginous Bracelet Accessory: Bulletproof Vest |
Best Materia for Cloud
| Weapon (3 Slots) | |
|---|---|
| Armor (3 Slots) | |
| Summon | |
At this point, you probably have unlocked Regen already, so cast it immediately at the beginning of the battle. Since it is magnified, both Cloud and Aerith will be given the Regen buff. Use Cure when you need more healing and Barrier on your active character. Triple Slash the minions that the moogles will summon to quickly remove them since they may cause you problems if left unnoticed. Have 2 ATB bars ready before staggering Fat Chocobo so you can maximize the damage of Infinity's End.
Best Materia for Aerith
| Weapon (3 Slots) | |
|---|---|
| Armor (3 Slots) | |
| Summon | |
Since Fat Chocobo has lesser resistance to physical attacks, have Aerith spam Thunder (or higher) until she runs out of MP, since this is the only spell equipped on her. You can also switch the Lightning materia with Fire, Ice, or Wind. Be sure to have reserve ATB charges for Pray.
Fat Chocobo Attack Phases
Phase 1
| Phase Point Summary | |
|---|---|
| 1 | Moogles will summon random monsters |
| 2 | Fat Chocobo will use all attacks but Kweh kweh!, Wark wark and Kerplunk |
Phase 2
| Phase Point Summary | |
|---|---|
| 1 | Starts when Fat Chocobo uses Kweh kweh! |
| 2 | The amount of bombs thrown by Bombs Away increase to 3 |
| 3 | Fat Chocobo will become pressured and easy to Stagger |
| 4 | It will speed up for a while after Kweh kweh! |
| 5 | At around 10% HP it will use Kerplunk |
Tips & Strategies for Beating Fat Chocobo
| ★ Strategy Checklist ★ (Click to jump) |
||
|---|---|---|
|
|
You Can't Attack the Moogles

Moogles will be flying around in the Fat Chocobo fight but you can't target or attack them. They'll assist the Fat Chocobo by summoning random monsters with their Fingers crossed, kupo! ability.
Don't Forget the Summoned Monsters

You'll be wiped out before you know it if the monsters summoned by the Moogles become too many, so try to deal with them little by little and keep their numbers down.
If there are only one or two, you can leave it to your party members to deal with it, but if there are 3 more more you'll want to focus on them yourself until you've defeated enough.
Stick to the Middle

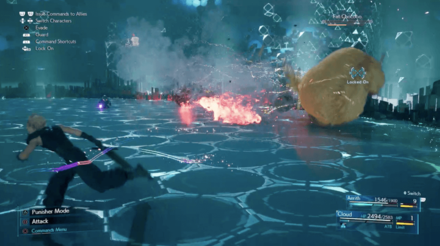
In the fight against Fat Chocobo, try not to stay away from the walls as much as possible. If you're near the wall, the Chocobo's Roly-Poly attack will hit you multiple times, dealing dangerous amounts of damage.
If you stay in the middle of the map, you should only get hit once and shouldn't have to worry too much about your HP.
Attack Relentlessly

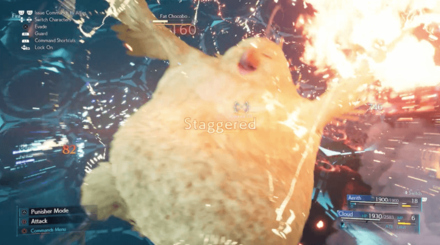
Fat Chocobo will get Pressured easily, so we recommend going at it full power. If you can get in Focused thrusts or Braver in after a normal attack combo, it should become pressured, so don't hold back.
Chance to Stagger it after Kweh kweh!

After going Kweh kweh!, the Chocobo will become Pressured and greatly speed up. It will roll around on the ground quickly and then jump around at the end.
Since it also becomes Pressured, it's a great chance to Stagger it. Especially Focused Thrust should work well, so get in there and give it all you've got!
Heal Immediately when you see Kweh...

When the Fat Chocobo says Kweh..., after you've got it down to 25% HP, you'll get hit by its Ultimate attack, Kerplunk. On Normal it dealt more than 3000 damage, so immediately heal up when you see it.
Fat Chocobo: Hard Mode Guide
Use Triple Slash to Take Out Adds
When the Moogle begins to summon other enemies, have Cloud use Triple Slash to take them out quickly and get back to hurting Fat Chocobo. When only a few are on the battelfield things won't be too bad, but if left alone they will increase and may cause your demise.
Boss Fight Related Articles
Major Story Bosses
| All Major Story Bosses | |
|---|---|
| Chapter 1 | Scorpion Sentinel |
| Chapter 4 | Roche |
| Chapter 5 | Crab Warden |
| Chapter 7 | Airbuster |
| Chapter 8 | Reno Rude |
| Chapter 9 | Hell House |
| Chapter 10 | Abzu |
| Chapter 11 | Ghoul Eligor |
| Chapter 13 | Failed Experiment |
| Chapter 14 | Abzu (2nd Fight) |
| Chapter 15 | The Valkyrie |
| Chapter 16 | Specimen H0512 |
| Chapter 17 | Jenova Dreamweaver Rufus The Arsenal |
| Chapter 18 | Motor Ball Whisper Harbinger Sephiroth |
VR Mission Bosses
| All VR Mission Bosses | |
|---|---|
| Chapter 8 | Shiva |
| Chapter 9 | Fat Chocobo |
| Chapter 13 | Leviathan |
| Secret Boss | Bahamut |
| Superboss | Pride and Joy Prototype |
Story Sub-Bosses
| All Story Sub-Bosses | |
|---|---|
| Chapter 2 | The Huntsman |
| Chapter 3 | The Hoodlums |
| Chapter 4 | Enigmatic Spectre |
| Chapter 12 | Enigmatic Spectre |
| Chapter 17 | M.O.T.H. Unit Brain Pod Swordipede |
Monster Variants & Optional Sub-Bosses
| All Monster Variants & Optional Sub-Bosses | |
|---|---|
| Chapter 3 | Doomrat Cerulean Drake Wrath Hound |
| Chapter 8 | Hedgehog Pie King Mark II Monodrive Venomantis Chromogger |
| Chapter 14 | Rust Drake Tonberry Trypapolis Type-0 Behemoth |
| Chapter 17 | Malboro |
Comment
what's your recommended character level before challenging the fat chocobo? so it's most powerful attack, Kerplunk can deal 3k damage.. shouldn't I have high HP, aside from having a tight defense?
Author
How to Beat Fat Chocobo | Boss Fight Guide
Rankings
Gaming News
Popular Games

Genshin Impact Walkthrough & Guides Wiki

Umamusume: Pretty Derby Walkthrough & Guides Wiki

Crimson Desert Walkthrough & Guides Wiki

Monster Hunter Stories 3: Twisted Reflection Walkthrough & Guides Wiki

Honkai: Star Rail Walkthrough & Guides Wiki

Pokemon Pokopia Walkthrough & Guides Wiki

The Seven Deadly Sins: Origin Walkthrough & Guides Wiki

Wuthering Waves Walkthrough & Guides Wiki

Zenless Zone Zero Walkthrough & Guides Wiki

Arknights: Endfield Walkthrough & Guides Wiki
Recommended Games

Fire Emblem Heroes (FEH) Walkthrough & Guides Wiki

Diablo 4: Vessel of Hatred Walkthrough & Guides Wiki

Cyberpunk 2077: Ultimate Edition Walkthrough & Guides Wiki

Yu-Gi-Oh! Master Duel Walkthrough & Guides Wiki

Super Smash Bros. Ultimate Walkthrough & Guides Wiki

Pokemon Brilliant Diamond and Shining Pearl (BDSP) Walkthrough & Guides Wiki

Elden Ring Shadow of the Erdtree Walkthrough & Guides Wiki

Monster Hunter World Walkthrough & Guides Wiki

The Legend of Zelda: Tears of the Kingdom Walkthrough & Guides Wiki

Persona 3 Reload Walkthrough & Guides Wiki
All rights reserved
© SQUARE ENIX CO., LTD. All Rights Reserved.
CHARACTER DESIGN:TETSUYA NOMURA/ROBERTO FERRARI
The copyrights of videos of games used in our content and other intellectual property rights belong to the provider of the game.
The contents we provide on this site were created personally by members of the Game8 editorial department.
We refuse the right to reuse or repost content taken without our permission such as data or images to other sites.


How about equipping hp up materias?