How to Beat Jenova Dreamweaver | Boss Fight Guide (Normal & Hard)

This is a guide to beating the Boss Jenova Dreamweaver in the game Final Fantasy 7 Remake (FF7R). This article explains Jenova Dreamweaver's attack patterns, weaknesses, and tips and strategies for defeating them on both Normal & Hard Mode.
List of Contents
Jenova Dreamweaver Stats and Information
Basic Information
| Jenova Dreamweaver | ||
|---|---|---|

|
Species | Movement | Type |
| Unreadable | Grounded | Boss |
Description
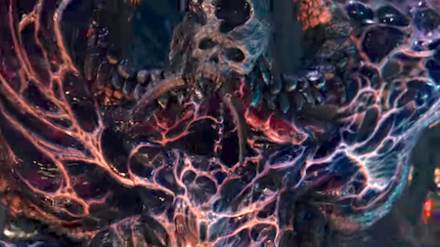
A top secret Shinra experimental speciment. Information on it is scarce, but it is believed to induce hallucinations.
Assess (Tips)
Once its health falls below a certain level, its stagger gauge cannot be filled.
Jenova Dreamweaver Stats
| Easy | Normal | Hard | |
|---|---|---|---|
| HP | 43085 | 78336 | 113184 |
| Attack | 198 | 328 | |
| Magic Attack | 198 | 328 | |
| Defense | 233 | 342 | |
| Magic Defense | 233 | 342 | |
Jenova Dreamweaver Weaknesses & Resistances
| Weakness / Status Ailments | - | |
|---|---|---|
| Lesser Resistances | Sleep, Magic | |
| Greater Resistances | - | |
| Immunities | Slow, Stop, Proportional Damage | |
| Absorbed Elements | - | |
Stagger Rates
| ×1 | ×1 | ×1 | ×1 |
| - | |||
| ×1 | ×1 | ×1 | - |
Stagger Length
| Stagger Length | 10 seconds |
|---|
Rewards
| Easy/Normal | Hard | |
|---|---|---|
| Gil | 1300 | 2250 |
| AP | 10 | 30 |
| Exp | 1300 | 4500 |
| Items Dropped | Astral Cuff (100%) | |
| Rare Items Dropped | - | |
| Steal | - | |
Learnable Enemy Skills
No Enemy Skills can be learned from Jenova Dreamweaver.
Jenova Dreamweaver Boss Fight Guide
Jenova Dreamweaver Abilities and Attack Patterns
| Name | Element | Blockable? | Knockdown? | Status |
|---|---|---|---|---|
|
|
- | No | No |
|
| Creates black pools on the ground that follow the party and cause Stop if touched. | ||||
|
|
|
Yes | No | - |
| Casts Fira. | ||||
|
|
|
Yes | No | - |
| Casts Aero. | ||||
|
|
- | Yes | No |
|
| Casts Bio. | ||||
|
|
- | Yes | No | - |
| Hits a target with her tail. | ||||
|
|
- | Yes | No | - |
| Swings her tentacles around at targets. | ||||
|
|
- | No | Yes | - |
| Grabs an ally with one of her tentacles, binding them, and constricts them absorbing their HP. Once Jenova has healed 1% of her max HP (2% on Hard mode), she will throw them to the ground. Will release her target if 1% of her max HP is dealt in damage, hit with 2 abilities, or hit by a Limit Break. | ||||
|
|
- | Yes | No | - |
| Sends a projectile from above her head that will chase down its target. | ||||
|
|
- | Yes | Yes | - |
| Smoke will appear from under Jenova followed by a shockwave that knocks anyone close away. | ||||
|
|
- | No | No | - |
| Screams and creates gusts of wind around her. | ||||
|
Reconstitution
|
- | - | - | - |
| Regrows her tentacles. | ||||
|
Rejection
|
- | - | - | |
| Casts Reflect on herself. | ||||
|
Resolution
|
- | - | - |
|
| Casts Shield on herself. | ||||
|
|
- | Yes | Yes | - |
| Creates a large beam of light that crashes down in a large area. Often comes after using Rejection. | ||||
|
Thanatos Denied
|
- | - | - | - |
| Covers herself with her tentacles, protecting her from all damage. | ||||
|
Dreams of Quietude
|
- | - | - | - |
| Has a tentacle use Quietude. | ||||
|
Dreams of Flame
|
- | - | - | - |
| Has a tentacle cast Fira. | ||||
|
Dreams of Vengeance
|
- | - | - | - |
| Has a tentacle use Vengeance. | ||||
|
|
|
Yes | No | - |
| Casts Firaga | ||||
|
|
|
Yes | No | - |
| Casts Aeroga | ||||
|
|
- | Yes | No |
|
| Casts Bioga. | ||||
|
|
- | No | No |
|
| Casts Barrier on herself and her tentacles. | ||||
|
|
- | No | No |
|
| Casts Manaward on herself and her tentacles | ||||
|
|
- | Yes | Yes | - |
| Charges for 1 second and releases a black beam at a target. | ||||
|
|
- | Yes | No |
|
| Shoots red orbs that home in on targets causing Silence if touched. | ||||
|
|
- | No | No | - |
| Makes MP draining rain pour down on the battlefield. If Jenova is hit by the rain, she will recover HP. | ||||
*Status Effects and Ailments Guide
Best Characters for This Boss
Available Characters
 Cloud Cloud
|
 Tifa Tifa
|
 Aerith Aerith
|
Recommended Characters
Tifa is invaluable for this fight due to her ability to dish out repeated attacks. Her flurries of hits will allow her to take down Tentacles quickly, and she can stack up high damage fast on Jenova as well, both with her standard attacks and Abilities. Using Rise and Fall can take out the tentacles faster and easier. This becomes available by increasing your chi level using Unbridled Strength or Concentration upgrades from her weapons. It would also be an advantage if you unlocked Unbridled Strength upgrades which increase her damage output while this ability is active.
Aerith, on the other hand, plays a reduced role in this battle due to Jenova's resistance to Magic and tendency to set up Reflect on itself. Prepare Aerith with useful support Materia like Healing Materia, Time Materia, and Binding Materia to put her MP to good use.
Jenova Dreamweaver Attack Phases
Phase 1
| Phase Point Summary | |
|---|---|
| 1 | Appears with Left and Right Tentacles active. It does not move, but will use all its Abilties and Magic and attacks with its tentacles. |
Phase 2
| Phase Point Summary | |
|---|---|
| 1 | Jenova will summon a group of 21 Tentacles out of the floor. It will become immune to all attacks until these Tentacles are defeated. |
Phase 3
| Phase Point Summary | |
|---|---|
| 1 | The Tentacles will spawn out of the floor again, and Jenova will become immune to attacks until they are defeated. |
Hit the Tentacles when they appear
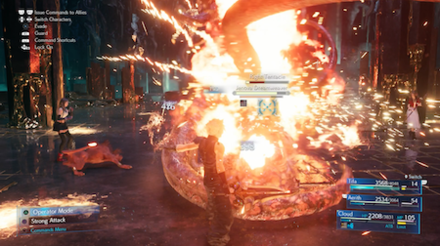
When Jenova Dreamweaver summons the tentacles, it will be immune to all other damage. Don't waste your attacks on it – wipe out all the tentacles first, and it will be vulnerable again.
Tips & Strategies for Beating Jenova Dreamweaver
| ★ Strategy Checklist ★ (Click to jump) |
||
|---|---|---|
|
|
Avoid Magic Attacks

Fira dealing only 398 damage.
Jenova Dreamweaver has a Lesser Resistance to Magic attacks. Even if you use powerful Spells like Firaga and Thundaga, you're unlikely to crack 1,000 damage with one attack. Stick to using melee attacks to deal damage, and save your MP for Healing spells and Support Magic like Haste and Silence, or for using Magic attacks when it has a Barrier up.
Check its Shield and Reflect

Jenova Dreamweaver will use Abilities to increase its Physical Defense and Magic Defense, but it won't have both up at a time. When it boosts its Magic Defense, keep on hammering away with melee attacks, and when it boosts its Physical Defense, either switch to Magic Attacks or pull back and play defensively.
Cripple the Left and Right Tentacles, and Silence the Body

Jenova Dreamweaver uses a combination of Abilities, Spells, and physical attacks with its Left and Right Tentacles. If you manage to both cripple the Left and Right Tentacles and to Silence it simultaneously, Jenova will be left largely unable to attack. At this point, you'll be able to unleash a flurry of melee attacks on it without having to worry about getting knocked away by the Tentacles. Crippling the Tentacles will also allow you to more quickly stagger Jenova.
Tentacles are Weak to Physical attacks

Each time Jenova summons Tentacles out of the floor, you'll have to handle them first before you can go back to fighting it. The Tentacles will take extra damage from physical attacks, and because Tifa can dish out attacks quickly, it's best to switch her in to handle the tentacles.
Alternately, using a Summon with an attack which can hit multiple targets at once can get rid of all the tentacles in a flash.
Don't Stand in the Black Puddles
Throughout the fight your characters will be chased by black puddles that Jenova summons. If you stand in these you will be immediately inflicted with Stop for a period of time, making you unable to do anything. Avoid them as much as possible.
Stay Away When it Uses Rejection
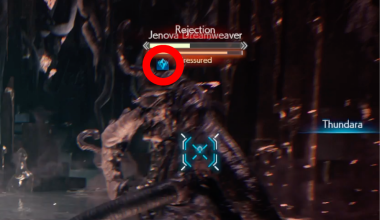
Starting in Phase 2, Jenova will occasionally cast Rejection, casting Reflect on itself and unleashing a laser attack that can deal around 2200 damage on normal mode. When you see Rejection pop up above Jenova's head, avoid her until the cast is complete.
Jenova Dreamweaver: Hard Mode Guide
| ★ Strategy Checklist ★ (Click to jump) |
||
|---|---|---|
|
|
Avoid the Black Rain
Getting hit by the black rain will drain your MP. As you cannot restore MP with items on Hard Mode, getting hit by this too much will make your next fight with Rufus more difficult, so do your best to avoid it.
Keep Away When Jenova is Pressured
 Enlarge Enlarge |
→ |  Enlarge Enlarge |
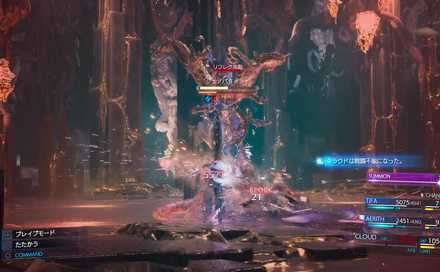
When Jenova Dreamweaver goes into the pressured status, there are times when it will use Rejection. Rejection was hard hitting on Normal Mode so it goes without saying you should avoid this on Hard as well. If you see it begin to prepare this attack, get back!
Boss Fight Related Articles
Major Story Bosses
| All Major Story Bosses | |
|---|---|
| Chapter 1 | Scorpion Sentinel |
| Chapter 4 | Roche |
| Chapter 5 | Crab Warden |
| Chapter 7 | Airbuster |
| Chapter 8 | Reno Rude |
| Chapter 9 | Hell House |
| Chapter 10 | Abzu |
| Chapter 11 | Ghoul Eligor |
| Chapter 13 | Failed Experiment |
| Chapter 14 | Abzu (2nd Fight) |
| Chapter 15 | The Valkyrie |
| Chapter 16 | Specimen H0512 |
| Chapter 17 | Jenova Dreamweaver Rufus The Arsenal |
| Chapter 18 | Motor Ball Whisper Harbinger Sephiroth |
VR Mission Bosses
| All VR Mission Bosses | |
|---|---|
| Chapter 8 | Shiva |
| Chapter 9 | Fat Chocobo |
| Chapter 13 | Leviathan |
| Secret Boss | Bahamut |
| Superboss | Pride and Joy Prototype |
Story Sub-Bosses
| All Story Sub-Bosses | |
|---|---|
| Chapter 2 | The Huntsman |
| Chapter 3 | The Hoodlums |
| Chapter 4 | Enigmatic Spectre |
| Chapter 12 | Enigmatic Spectre |
| Chapter 17 | M.O.T.H. Unit Brain Pod Swordipede |
Monster Variants & Optional Sub-Bosses
| All Monster Variants & Optional Sub-Bosses | |
|---|---|
| Chapter 3 | Doomrat Cerulean Drake Wrath Hound |
| Chapter 8 | Hedgehog Pie King Mark II Monodrive Venomantis Chromogger |
| Chapter 14 | Rust Drake Tonberry Trypapolis Type-0 Behemoth |
| Chapter 17 | Malboro |
Author
How to Beat Jenova Dreamweaver | Boss Fight Guide (Normal & Hard)
improvement survey
03/2026
improving Game8's site?

Your answers will help us to improve our website.
Note: Please be sure not to enter any kind of personal information into your response.

We hope you continue to make use of Game8.
Rankings
- We could not find the message board you were looking for.
Gaming News
Popular Games

Genshin Impact Walkthrough & Guides Wiki

Honkai: Star Rail Walkthrough & Guides Wiki

Umamusume: Pretty Derby Walkthrough & Guides Wiki

Pokemon Pokopia Walkthrough & Guides Wiki

Resident Evil Requiem (RE9) Walkthrough & Guides Wiki

Monster Hunter Wilds Walkthrough & Guides Wiki

Wuthering Waves Walkthrough & Guides Wiki

Arknights: Endfield Walkthrough & Guides Wiki

Pokemon FireRed and LeafGreen (FRLG) Walkthrough & Guides Wiki

Pokemon TCG Pocket (PTCGP) Strategies & Guides Wiki
Recommended Games

Diablo 4: Vessel of Hatred Walkthrough & Guides Wiki

Fire Emblem Heroes (FEH) Walkthrough & Guides Wiki

Yu-Gi-Oh! Master Duel Walkthrough & Guides Wiki

Super Smash Bros. Ultimate Walkthrough & Guides Wiki

Pokemon Brilliant Diamond and Shining Pearl (BDSP) Walkthrough & Guides Wiki

Elden Ring Shadow of the Erdtree Walkthrough & Guides Wiki

Monster Hunter World Walkthrough & Guides Wiki

The Legend of Zelda: Tears of the Kingdom Walkthrough & Guides Wiki

Persona 3 Reload Walkthrough & Guides Wiki

Cyberpunk 2077: Ultimate Edition Walkthrough & Guides Wiki
All rights reserved
© SQUARE ENIX CO., LTD. All Rights Reserved.
CHARACTER DESIGN:TETSUYA NOMURA/ROBERTO FERRARI
The copyrights of videos of games used in our content and other intellectual property rights belong to the provider of the game.
The contents we provide on this site were created personally by members of the Game8 editorial department.
We refuse the right to reuse or repost content taken without our permission such as data or images to other sites.


![Everwind Review [Early Access] | The Shaky First Step to A Very Long Journey](https://img.game8.co/4440226/ab079b1153298a042633dd1ef51e878e.png/thumb)

![Monster Hunter Stories 3 Review [First Impressions] | Simply Rejuvenating](https://img.game8.co/4438641/2a31b7702bd70e78ec8efd24661dacda.jpeg/thumb)


