This survey will take about 1 minute.
Your answers will help us to improve our website.
FF7 Remake
Hard Mode Guide and Best Hard Mode Builds
This is a complete guide to beating Hard Mode in the game Final Fantasy 7 Remake (FF7R). Read on for our best Hard Mode Builds, including what Materia are best to use in Hard Mode, what Equipment and Materia are recommended, and how to handle running out of MP.
| Hard Mode Guides | ||
|---|---|---|
| FF7 Remake | Intergrade | MP Recovery |
List of Contents
Hard Mode Differences
Unlocked after completing the main story once, Hard Mode has several key differences from the other difficulty modes, in addition to boosted stats and new Abilities for monsters and Bosses.
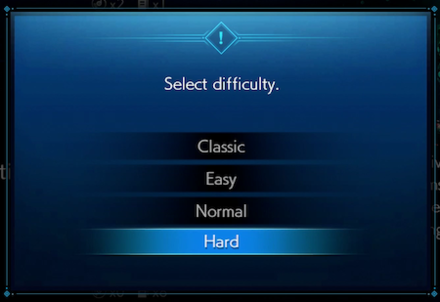
- You cannot change the difficulty setting from the System Menu. To change the difficulty, you will need to use Chapter Select and go to the start of a Chapter with a different difficulty setting.
- In Hard Mode, you can't use items at all. If you open the Commands Menu and hover over "Items", you'll see a notification that items cannot be used.
- When using a bench at a rest area, your HP will be restored, but not your MP.
- You'll receive Manuscripts for defeating most Bosses, as well as sub-bosses found within Side Quests.
- New matches will be available in the Shinra Combat Simulator in Chapter 17.
Hard Mode Guide (Story Walkthrough)
| ★Strategy Checklist★ (Click to jump) |
||
|---|---|---|
|
|
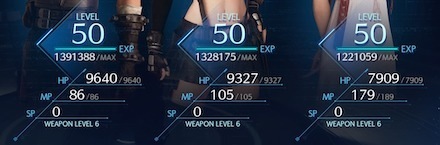
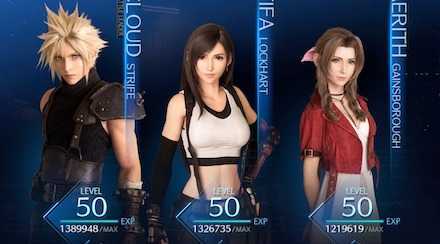
Level Up and Max Out Your Materia First

After raising your characters up to Level 50 and maxing out their Materia, you're ready to take on Hard Mode. The enemies in Hard Mode are extremely difficult, and there are few methods to restore your MP. Instead of rushing into the fight, it's a good idea to max out your characters' Levels and Materia ahead of time, and although it might seem like a chore, this will actually save you time in the long run.
Best Grinding Spots to Reach Level 50
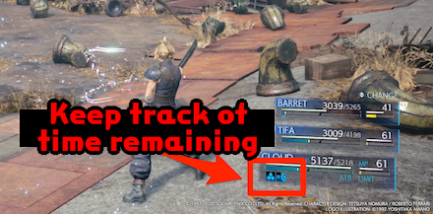
Keep track of your MP during each Chapter
The two main restrictions of Hard Mode both clamp down hard on your MP. In addition to items being disabled, benches now only restore HP, and have no effect on MP.
You'll need to watch your characters' MP carefully throughout each chapter, avoiding expensive offensive Magic and saving your MP for essential situations and important boss fights.
How to Recover MP in Hard Mode
Run away from all non-required fights
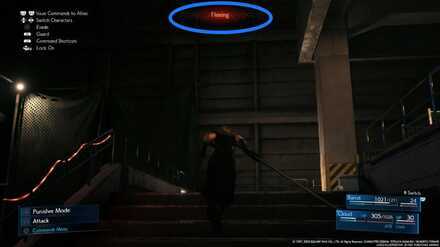
Continue running away until this notice appears.
If there's any fight you can avoid, you should avoid it. As you won't be able to restore your MP after battles, you'll end up gradually wasting it fighting minor enemies, and won't have enough left to defeat the Bosses, which are much more difficult than their Normal Mode versions. Don't fight unless you absolutely need to.
Restore HP without using MP via Chakra and Prayer
| Restores 40% of lost HP; the higher your HP is, the more effective it is. | |
| Allows you to restore HP to the entire party, depending on your Magic Attack; can heal as much as 4000 HP to all party members |
These Materia will allow you to restore HP without wasting your precious MP. Place Chakra on the characters you frequently control, as they tend to take more damage and will need to heal themselves more often. Place Prayer on your character with the highest Magic Attack, as this will yield the highest HP recovery.
How to Recover MP in Hard Mode
Use Benches as often as possible

Instead of rushing to recover your HP with Magic after a tough fight, first check to see if there are any Benches in the area. Although these Benches won't restore your MP, they'll fully restore your party's HP at no cost, which can be a literal lifesaver.
Hard Mode Guide (Boss Fights)
| ★Strategy Checklist★ (Click to jump) |
||
|---|---|---|
|
|
Match your Elemental Materia with the foe's weakness
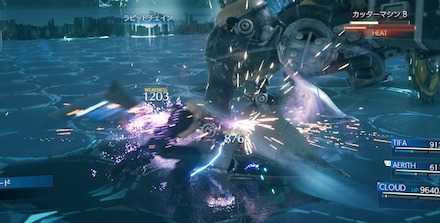
Use the linked Materia slot on your Weapon to hold an Elemental Materia together with the Magic Materia matching the Boss's weakness. Almost all of the Bosses in the main story will have a weakness, so simply by changing out which Magic Materia you equip, you can deal extra damage to almost every Boss.
List of All Bosses and their Weaknesses
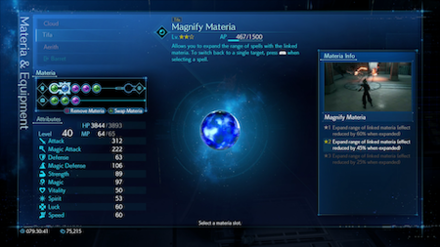
Use Magnify Materia + Healing Materia to heal your team efficiently
As opponents' attacks will deal more damage on Hard Mode, you'll need to heal your team often despite your limited MP. When you do use MP to heal your team, make sure you do so as efficiently as possible by attaching Magnify Materia to your Healing Materia, so that you can heal your whole party at once.
It's also best to specify a single healer with high Magic Attack, predominantly Aerith in the chapters she appears. Stacking her with Magic Up Materia before healing will make sure she can heal as much HP as possible.
Play defensively and block often
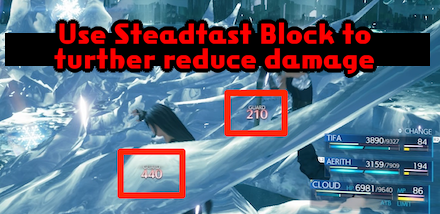
Instead of forcing your way through with attacks, you'll want to conserve your HP as much as possible on Hard mode. Hold R1 frequently to block your opponents' attacks and wait for the right timing to strike. Cloud's Ability Counterstance has the potential to both reduce the damage he takes while dealing damage to opponents, and will become indispensible throughout Hard Mode.
Raise your characters' HP and MP with HP Up and MP Up Materia
There's a limit to how high HP and MP can go just from leveling. To maximize your characters' HP and MP stats, you'll need to use HP Up Materia and MP Up Materia. Bosses have higher HP than normal on Hard Mode, so if you don't have enough HP and MP to take them out, your MP will likely run out, preventing you from bringing the fight to a conclusion effectively.
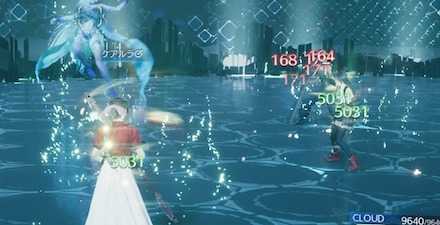
Keep Haste and Manawall up throughout the fight
As Boss fights will tend to drag on longer in Hard Mode, you'll want to set yourself up effectively for a long-term battle. From the outset, set up Haste and Manawall, and keep them up throughout the battle. This will exhaust your MP if you cast them on your entire party, so it's best to stick to keeping them up on your primary controlled character, as enemies tend to focus their attacks on the character you're controlling. Keep a close eye on your MP and try to keep these spells up while balancing them with other key Magic.
How to Prepare for Hard Mode
| ★Strategy Checklist★ (Click to jump) |
||
|---|---|---|
|
|
Level Up All Characters to Level 50
If your characters are too weak to handle the tougher enemies and Bosses in Hard Mode, you'll end up running out of Magic and having to start over partway through the chapter. Instead of rushing headfirst into Hard Mode after beating the game once, it's better to spend time leveling up first and get ready before starting on your toughest challenge yet.
Get All the Best Materia
Arranging your Materia loadouts with the best combinations is one of the most important strategic aspects in FF7 Remake. Useful Support Materia like Magnify and Elemental will allow you to make the most of other Materia. As some of these Materia are only found in specific locations, be sure to use Chapter Select to go back and collect them before challenging Hard Mode.
Learn All the Best Abilities
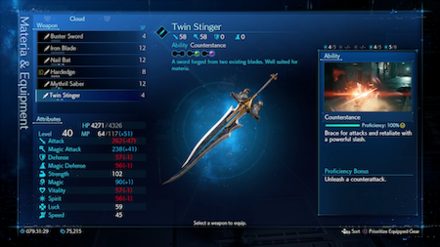
When getting a weapon's Proficiency to 100%, you'll learn its Ability to use even when it's not equipped. You should unlock as many of these as possible before starting Hard Mode, so that you'll be able to effectively pick the best Ability to handle each situation. At the very least, you should unlock Triple Slash for Cloud via Iron Blade, Counterstance for Cloud via Twin Stinger, Overpower for Tifa via Metal Knuckles, and Focused Shot for Barret via Gatling Gun.
Weapon Upgrade Guide | How to Learn Weapon Abilities
Get the Gotterdammerung Beforehand
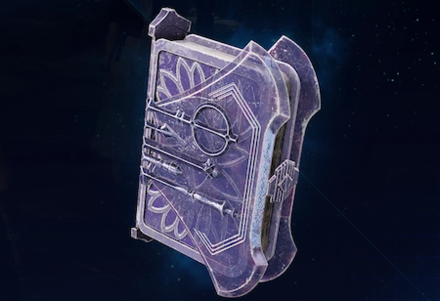
 Gotterdammerung Gotterdammerung |
Effect The Limit Gauge will be completely filled at the start of each battle. During battle, the Limit Gauge will gradually fill on its own. |
|---|
By defeating Pride and Joy Prototype, you will receive Gotterdammerung, undoubtedly the best Accessory in the game. Having this Accessory before you start will make Hard Mode significantly easier to tackle. In order to receive it, you'll need to win against all four Summon bosses in a row, concluding with Pride and Joy Prototype, so this is no easy feat – be sure to get started well before you plan to take on Hard Mode.
How to Beat Pride and Joy Prototype
Best Hard Mode Builds
| Jump to a Character | |
|---|---|
 Cloud Cloud |
 Barret Barret |
 Tifa Tifa |
 Aerith Aerith |
Best Equipment and Materia for Cloud
| Equipment | ||
|---|---|---|
 Hardedge Hardedge
|
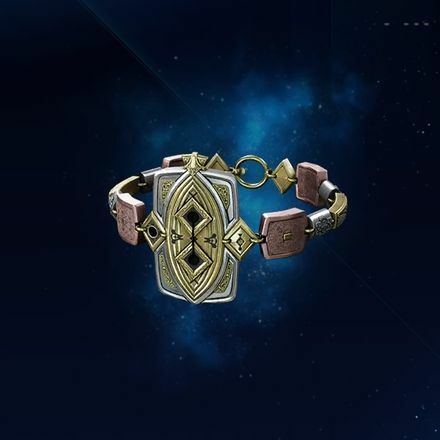
 Chain Bangle Chain Bangle
|
 Champion Belt Champion Belt
|
| Weapon (6 Slots) | ||
| Armor (4 Slots) | ||
| - | - | |
| Summon | ||
Cloud appears in almost every battle in the game, so he'll need Materia which is flexible for a variety of situations. First Strike is used to give him a free ATB charge at the start of battle, which he can lead into Triple Slash to end many fights without taking any damage. If you choose to place Gotterdammerung on him, you can start off battles with Cross-Slash and finish off an even wider range of enemies before they have a chance to make a move.
Other Useful Materia
| Materia | Reason |
|---|---|
| Allows HP regeneration without using MP. Useful on Cloud as the controlled character tends to take more damage. | |
| Allows you to see weaknesses during battle. | |
| Pairs well with Gotterdammerung to use at the start of fights; great against Bosses | |
| Useful against easily Staggered opponents; allows the use of Infinity's End and other useful attacks directly after Staggering a foe |
Best Equipment and Materia for Barret
| Equipment | ||
|---|---|---|
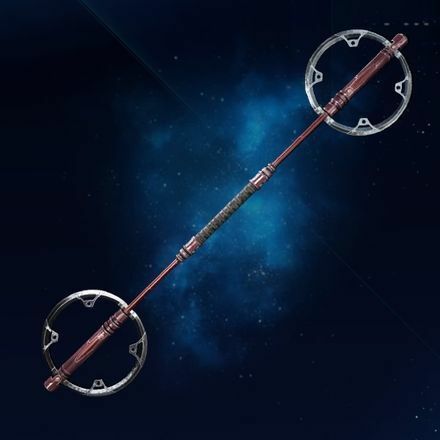
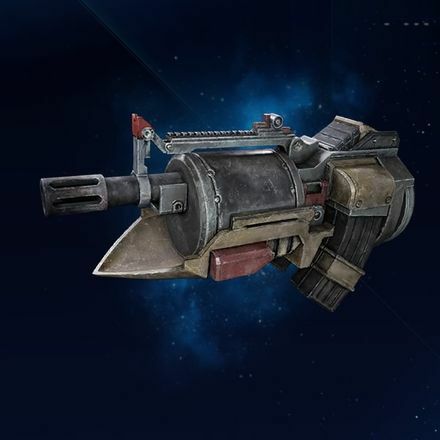 Light Machine Gun Light Machine Gun |
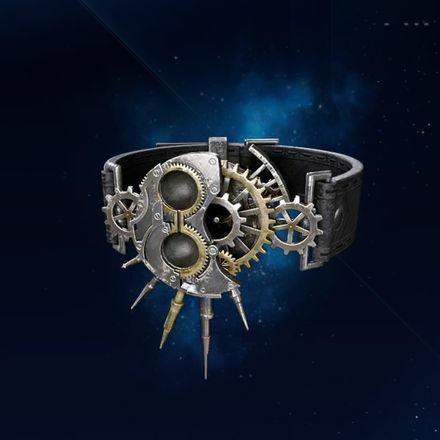 Cog Bangle Cog Bangle |
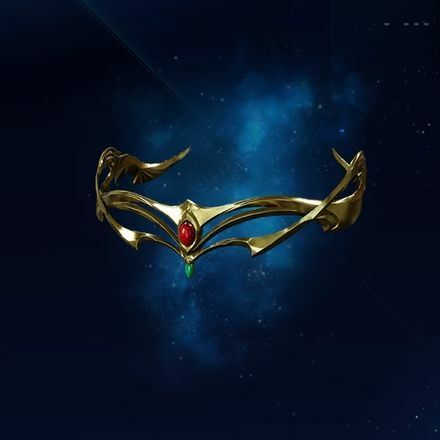 Circlet Circlet
|
| Weapon (6 Slots) | ||
| Armor (3 Slots) | ||
| Summon | ||
As a back-row hitter, Barret works best firing at foes from a distance and healing other party members. We've given him the same Materia set as Aerith, as there are very few points in the story where Barret and Aerith are together in the party at the same time. This allows each to fill the same vital role when the other character is missing from the party.
Other Useful Materia
| Materia | Reason |
|---|---|
| For attacking; switch with other offensive Magic to match with enemies' weaknesses | |
| Great way to reduce damage; can be useful for Side Quest sub-bosses as well | |
| Useful for setting up Haste on your controlled character | |
| Recover HP to your full party without using MP; recommended for when you're running out of MP |
Best Equipment and Materia for Tifa
| Equipment | ||
|---|---|---|
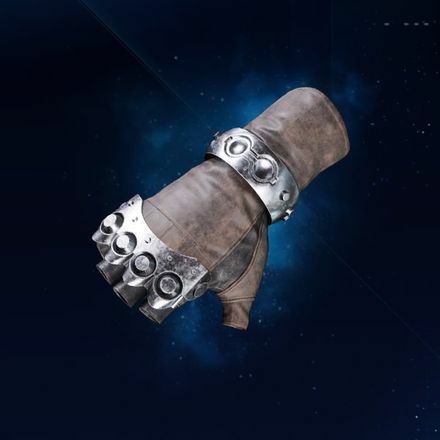 Metal Knuckles Metal Knuckles
|
 Supreme Bracer Supreme Bracer
|
Champion Belt |
| Weapon (6 Slots) | ||
| Armor (3 Slots) | ||
| Summon | ||
Tifa will be on the front lines of battles while simultaneously supporting her teammates with this set. For players who control Tifa often, they'll want to arrange their Materia more similarly to Cloud's suggestions.
Other Useful Materia
| Materia | Reason |
|---|---|
| Great way to reduce damage; can be useful for Side Quest sub-bosses as well | |
| Restore HP without consuming MP; recommended for if you control Tifa often | |
| Helps fill up your ATB Gauge; recommended for if you control Tifa often | |
| Helps fill up your teammates' ATB Gauges; recommended for if you control Tifa often | |
| Helps fill up your ATB Gauge and reduce damage; can be useful for Side Quest sub-bosses as well |
Best Equipment and Materia for Aerith
| Equipment | ||
|---|---|---|
 Mythril Rod Mythril Rod |
Cog Bangle |
Circlet |
| Weapon (6 Slots) | ||
| Armor (3 Slots) | ||
| Summon | ||
As a back-row hitter, Aerith works best launching attacks from a distance and healing other party members. We've given her the same Materia set as Barret, as there are very few points in the story where Barret and Aerith are together in the party at the same time. This allows each to fill the same vital role when the other character is missing from the party.
Other Useful Materia
| Materia | Reason |
|---|---|
| For attacking; switch with other offensive Magic to match with enemies' weaknesses | |
| Has a wide attack range; great for hitting aerial opponents who are hard to hit with melee attacks | |
| Great way to reduce damage; can be useful for Side Quest sub-bosses as well | |
| Useful for setting up Haste on your controlled character | |
| Recover HP to your full party without using MP; recommended for when you're running out of MP | |
| Allows a bit more breathing room in battle; useful for bosses which can deal a lot of damage in one attack |
Why Play Hard Mode?
Get Manuscripts Exclusive to Hard Mode
Many of the 14 Manuscripts available to each character are only available on Hard Mode. By defeating bosses and completing Side Quests in Hard Mode, you can obtain several Manuscripts in each chapter and max out your characters' SP, allowing them to unlock all of their available Weapon Upgrades.
Obtain a Trophy
When you complete all the Chapters on Hard Mode, you'll unlock the Hardened Veteran Trophy, one of the most difficult-to-obtain Trophies in the game.
Related Links
Comment
10  Anonymous almost 6 years
It's really easier than it seems if you are prepared. The hardest is the battle with Bahamut and Ifrit. Pride and Joy is easier if you stay behind it and revive the person grabbed every time. I got it on my first try hardly surviving and I did it a second time with the accessory because I forgot to assess Ifrit. Now I got all enemies assessed in the bestiary. If you get the accessory, the chapter on hard mode are much easier. Chapters 8 and up is where it gets tougher.
Author

Hard Mode Guide and Best Hard Mode Builds
Please participate in our site
improvement survey
03/2026
improvement survey
03/2026
Would you assist in
improving Game8's site?
improving Game8's site?

×
We are listening to our users' valuable opinions and discussing how to act on them.
The information collected through this survey will be used for the purpose of improving our services. In addition, the information will only be disclosed a part of a statistic in a format that will not allow identification of personal information.
Begin Survey
Not Now
×
Please rate each item regarding Game8.co's Advertisements.
Amount of Ads
Very Dissatisfied
Somewhat Dissatisfied
Fine
Somewhat Satisfied
Highly Satisfied
Placement of Ads
Timing of Ad Display
Ad Loading Speed
Safeness of Ads
Content of Ads
×
Please rate each item regarding Game8.co's Quality of Articles.
Amount of information
Very Dissatisfied
Somewhat Dissatisfied
Fine
Somewhat Satisfied
Highly Satisfied
Frequency of updates
Speed of new information
Accuracy of articles
Understandibility of articles
Readability of sentences
×
Please rate each item regarding Game8.co's Usability of the Site.
Ease of finding information
Very Dissatisfied
Somewhat Dissatisfied
Fine
Somewhat Satisfied
Highly Satisfied
Loading Speed
Use of Color
Font Size
Visibility of Images
Easy to Understand Layout
×
Please rate each item regarding Game8.co's Message Boards, Comments.
Ease of Writing
Very Dissatisfied
Somewhat Dissatisfied
Fine
Somewhat Satisfied
Highly Satisfied
Readability
Ease in Finding Information
Comment Quality
Comment Quantity
Admin Response
×
Please rate each item regarding Game8.co's Site's new design.
Please rate our site's new design
Very Dissatisfied
Somewhat Dissatisfied
Fine
Somewhat Satisfied
Highly Satisfied
Do you think that the website's design change makes the site easier to use?
Has the new design made it easier for you to find information on the site?
Has the new design improved the overall visual appeal of the site?
How would you rate your overall satisfaction with the new design of the site?
×
How likely are you to recommend Game8 to someone you know?
Very Unlikely
0
1
2
3
4
5
6
7
8
9
10
Very Likely
If you have other opinions regarding potential improvement to the website, please share them with us. We would appreciate your honest opinion.
Note: This is a free response section, so you can proceed without entering anything.
Note: Please be sure not to enter any kind of personal information into your response.
Note: Please be sure not to enter any kind of personal information into your response.
×
Thank You
×
Thank you for participating in our survey! Your answers will help us to improve the quality of our website and services.
We hope you continue to make use of Game8.
We hope you continue to make use of Game8.
Close
Rankings
- We could not find the message board you were looking for.
Gaming News


![Monster Hunter Stories 3 Review [First Impressions] | Simply Rejuvenating](https://img.game8.co/4438641/2a31b7702bd70e78ec8efd24661dacda.jpeg/thumb)
Popular Games

Genshin Impact Walkthrough & Guides Wiki
Honkai: Star Rail Walkthrough & Guides Wiki
Umamusume: Pretty Derby Walkthrough & Guides Wiki
Pokemon Pokopia Walkthrough & Guides Wiki
Resident Evil Requiem (RE9) Walkthrough & Guides Wiki
Monster Hunter Wilds Walkthrough & Guides Wiki
Wuthering Waves Walkthrough & Guides Wiki
Arknights: Endfield Walkthrough & Guides Wiki
Pokemon FireRed and LeafGreen (FRLG) Walkthrough & Guides Wiki
Pokemon TCG Pocket (PTCGP) Strategies & Guides Wiki


Recommended Games
Diablo 4: Vessel of Hatred Walkthrough & Guides Wiki
Cyberpunk 2077: Ultimate Edition Walkthrough & Guides Wiki
Fire Emblem Heroes (FEH) Walkthrough & Guides Wiki
Yu-Gi-Oh! Master Duel Walkthrough & Guides Wiki
Super Smash Bros. Ultimate Walkthrough & Guides Wiki
Pokemon Brilliant Diamond and Shining Pearl (BDSP) Walkthrough & Guides Wiki
Elden Ring Shadow of the Erdtree Walkthrough & Guides Wiki
Monster Hunter World Walkthrough & Guides Wiki
The Legend of Zelda: Tears of the Kingdom Walkthrough & Guides Wiki
Persona 3 Reload Walkthrough & Guides Wiki


All rights reserved
© SQUARE ENIX CO., LTD. All Rights Reserved.
CHARACTER DESIGN:TETSUYA NOMURA/ROBERTO FERRARI
The copyrights of videos of games used in our content and other intellectual property rights belong to the provider of the game.
The contents we provide on this site were created personally by members of the Game8 editorial department.
We refuse the right to reuse or repost content taken without our permission such as data or images to other sites.
While I want to address several of these builds with different suggestions, I'll start by saying the Chain Bangle gives me (as Cloud) 4 slots instead of 3. I figure this would be the best place to start for suggestions to edit the guide.