How to Beat The Arsenal | Boss Fight Guide (Normal & Hard)

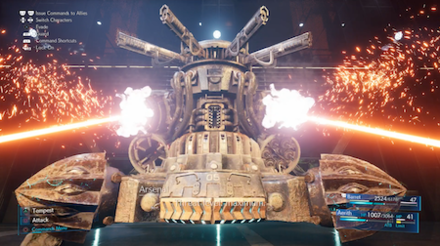
This is a guide to beating the Boss The Arsenal in the game Final Fantasy 7 Remake (FF7R). This article explains The Arsenal's attack patterns, weaknesses, and tips and strategies for defeating them on both Normal and Hard Mode.
List of Contents
The Arsenal Stats and Information
Basic Information
| The Arsenal | ||
|---|---|---|

|
Species | Movement | Type |
| Mechanical | Grounded | Boss |
Description
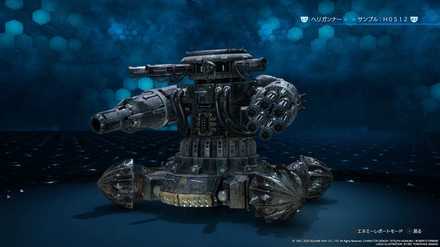
An autonomous mobile weapons platform manufactured by Shinra's Advanced Weaponry Division. It is armed with an extremely powerful cannon on its right arm and rotary cannons on its left. Equipped with cutting-edge combat AI, it calculates the most efficient method of annihilating its targets based on the situation.
Assess (Tips)
While it runs an elemental defense protocol, attacks of those element have only a slight effect on the stagger gauge. Its stagger gauge is not affected at all when its barrier is online.
The Arsenal Stats
| Easy | Normal | Hard | |
|---|---|---|---|
| HP | 47573 | 86496 | 124974 |
| Attack | 297 | 508 | |
| Magic Attack | 297 | 508 | |
| Defense | 145 | 212 | |
| Magic Defense | 197 | 288 | |
The Arsenal Weaknesses & Resistances
| Weakness / Status Ailments | Fire, Ice, Lightning, Wind | |
|---|---|---|
| Lesser Resistances | Stop | |
| Greater Resistances | - | |
| Immunities | Poison, Silence, Sleep, Slow, Berserk, Proportional Damage | |
| Absorbed Elements | - | |
Stagger Rates
| ×1 | ×1 | ×1 | ×1 |
| - | |||
| ×1 | ×1 | ×1 | - |
Stagger Length
| Stagger Length | 11 seconds |
|---|
Rewards
| Easy/Normal | Hard | |
|---|---|---|
| Gil | 1300 | 2250 |
| AP | 10 | 30 |
| Exp | 1300 | 4500 |
| Items Dropped | - | |
| Rare Items Dropped | - | |
| Steal | - | |
Learnable Enemy Skills
No Enemy Skills can be learned from The Arsenal.
The Arsenal Boss Fight Guide
The Arsenal Abilities and Attack Patterns
| Name | Element | Blockable? | Knockdown? | Status |
|---|---|---|---|---|
|
|
- | Yes | No | - |
| Rapid fires its gun arm. | ||||
|
|
- | Yes | No | - |
| Shoots with its gun arm at a nearby target. | ||||
|
|
- | No | Yes | - |
| Charges its cannon arm for 5 seconds and fires at a target. If its weak point takes 1500 damage or is hit by Focus Shot, Maximum Fury, or Overcharge, the attack will be stopped. | ||||
|
|
- | Yes | No | - |
| Charges its frontal cannon for 5 seconds before releasing a wave of purple homing lasers. Can be stopped the same way as Primary Fire. | ||||
|
|
- | No | No |
Stun (5 sec)
|
| Releases charges of electricity along the floor in 5 directions that Stun if hit by. | ||||
|
|
- | No | Yes | - |
| A blue disc shaped light will follow targets around and create a field of electricity that persists for 10 seconds. | ||||
|
|
- | Yes | Yes | - |
| Charges in one direction towards a target. | ||||
|
|
- | No | Yes | - |
| Stronger version of Primary Fire that charges for 2 seconds. On Hard mode, actions to stop this ability must be performed twice. | ||||
|
|
- | Yes | No | - |
| Stronger version of Homing Laser that charges for 7 seconds. On Hard mode, actions to stop this ability must be performed twice. | ||||
|
|
- | No | Yes | - |
| Unleashes red lasers from each of its arms, creating walls of fire that persist for 20 seconds. | ||||
|
|
- | No | Yes | - |
| Charges the cannon on it stomach for 12 seconds before releasing a laser that can one-hit kill a target. Dealing 2000 damage (3000 on Hard mode) to its weak point will prevent it from going off. | ||||
|
|
- | No | Yes | - |
| Charges the cannon on its stomach for 45 seconds before releasing a last-ditch effort attack that will wipe the party. | ||||
|
Physical Defense Protocol
|
- | - | - | - |
| Gains Resistance to Physical attacks. | ||||
|
Lightning Defense Protocol
|
- | - | - | - |
| Gains Resistance to Lightning attacks. | ||||
|
Fire Defense Protocol
|
- | - | - | - |
| Gains Resistance to Fire attacks. | ||||
|
Wind Defense Protocol
|
- | - | - | - |
| Gains Resistance to Wind attacks. | ||||
|
Ice Defense Protocol
|
- | - | - | - |
| Gains Resistance to Ice attacks. | ||||
*Status Effects and Ailments Guide
Best Characters for This Boss
Available Characters
 Barret Barret
|
 Aerith Aerith
|
Recommended Characters
You're going to want to be on the offensive for most of this battle, so Barret is your best choice to keep the damage coming with his fast attack rate. Equip Barret with an Elemental Materia + Fire, Ice, Thunder, or Wind to hit its weak points.
Aerith's no slouch either – if you've got Magic at Level 3, like Firaga or Thundaga, switch to Aerith every time her ATB Gauge fills to use one of these attacks and deal heavy damage. If you want to nuke The Arsenal harder, cast Arcane Ward to Aerith first before casting your highest damaging elemental spell.
When The Arsenal uses a Defense Protocol and one of your members starts dealing reduced damage, switch characters right away and start using a different element to keep the damage coming.
The Arsenal Attack Phases
Phase 1
| Phase Point Summary | |
|---|---|
| 1 | The Arsenal will appear along with three Barrier Drones. It will stay in position. After the first attack against one of the Barrier Drones, the Arsenal will put up a shield and become immune to attacks. |
In Phase 1, Take Out the Drones

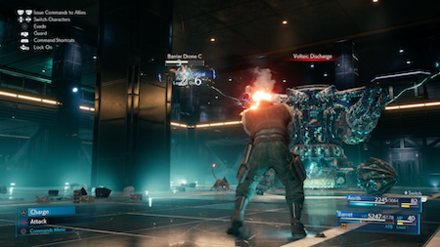
In the first Phase of the battle, you won't be able to attack The Arsenal directly. Take out its Drones first to release the Barrier and continue to Phase 2.
Phase 2
| Phase Point Summary | |
|---|---|
| 1 | You'll go toe-to-toe with the Arsenal. It will start moving around, and its Left and Right Front Wheels and Back Wheels will become targets. |
Phase 3
| Phase Point Summary | |
|---|---|
| 1 | The Arsenal's Main Cannon will appear as an additional target. |
Tips & Strategies for Beating The Arsenal
| ★ Strategy Checklist ★ (Click to jump) |
||
|---|---|---|
|
|
Use Elemental Damage

The Chocobo & Moogle Materia's final attack, Stampede, has a Wind element and was able to deal a whopping 9999 damage.
Unlike many other bosses with no weak element, The Arsenal itself is weak to all four elements. Although you won't be able to attack it directly until Phase 2, be sure to equip Barret with an Elemental Materia plus one of the offensive Magic Materia, and use Aerith when her ATB Gauge fills to keep the offensive Magic flowing.
Keep in mind that The Arsenal can use Damage Protocols to protect itself from certain elements. It can only do this for one element at a time, so simply switch to a different Spell, or switch characters to the one which can continue to do damage to its remaining weak points.
Hide Behind the Pillars

If this attack, Cry Havoc, hit one of your party members, they'll take 9999 damage and be instantly KO'd.
The pillars will be your rock-solid support for this battle. Make sure that you're taking cover behind pillars for the majority of the battle, especially during Phase 1 of the fight, as almost all of The Arsenal's attacks can be blocked completely. After each attack has ended, simply peek out from behind the pillar to unleash a volley of bullets or an offensive Spell. As both of your characters are ranged attackers, there's no need to get particularly close.
Watch out for its attack Homing Lasers, which can hit your party even from behind the pillars; even still, you'll be far better off than standing out in the open. Its other charged laser attack has a long pre-attack animation, and you should be able to dodge out of the way easily.
As the battle continues, The Arsenal will destroy the pillars one by one, but only at the very end of the battle will you be left with no pillars to protect you.
Target its Weak Points
Whenever the Arsenal brings up its right arm to charge Primary Fire or charges up Homing Laser, a weak point appears. Hit the Main or Laser Cannons with your strongest lightning magic or Barret's Focused Shot to stop the attack and leave the Arsenal open for easier staggering.
Check its Defense Protocol

The Arsenal using Physical Defense Protocol, changing its color to Yellow. This grants it Resistance to Physical damage.
Starting in Phase 2, The Arsenal will begin to use Defense Protocol Abilities. These Abilities will add a Resistance to one of the four elements, or to Physical attacks as a whole. You can check which Defense Protocol it is using by watching the color of the tubes surrounding its body. For example, The Arsenal's color will change to Yellow for Physical Defense Protocol, Blue for Lightning Defense Protocol, and White for Ice Defense Protocol.
The Arsenal can only use one Defense Protocol at a time. So when its Defense Protocol matches the element of your Weapon or Magic, switch to a different element for your attacks or to the other character to ensure that you can keep hitting for maximum damage.
Focus your Energy on The Arsenal
It's highly possible to defeat The Arsenal without taking out any of its Wheels. And even if one of its Wheels is crippled, it doesn't seem to affect The Arsenal's Focus Gauge, and also does not hurt its capability to use movement-based Abilities like Charge. As such, it doesn't seem to be highly advantageous to target any of the alternate targets after Phase 1.
Instead of spreading your damage thin across the multiple targets, simply aim true at The Arsenal and keep the hurt coming.
The Arsenal: Hard Mode Guide
The Arsenal may be weak to Lightning, however there are times when its weaknesses change and not having the rest of the elements at your disposal on Hard Mode can make things more difficult than they need to be. To be fully prepared for this fight, equip the remaining elemental magic materia on Aerith to cover all your bases.
Boss Fight Related Articles
Major Story Bosses
| All Major Story Bosses | |
|---|---|
| Chapter 1 | Scorpion Sentinel |
| Chapter 4 | Roche |
| Chapter 5 | Crab Warden |
| Chapter 7 | Airbuster |
| Chapter 8 | Reno Rude |
| Chapter 9 | Hell House |
| Chapter 10 | Abzu |
| Chapter 11 | Ghoul Eligor |
| Chapter 13 | Failed Experiment |
| Chapter 14 | Abzu (2nd Fight) |
| Chapter 15 | The Valkyrie |
| Chapter 16 | Specimen H0512 |
| Chapter 17 | Jenova Dreamweaver Rufus The Arsenal |
| Chapter 18 | Motor Ball Whisper Harbinger Sephiroth |
VR Mission Bosses
| All VR Mission Bosses | |
|---|---|
| Chapter 8 | Shiva |
| Chapter 9 | Fat Chocobo |
| Chapter 13 | Leviathan |
| Secret Boss | Bahamut |
| Superboss | Pride and Joy Prototype |
Story Sub-Bosses
| All Story Sub-Bosses | |
|---|---|
| Chapter 2 | The Huntsman |
| Chapter 3 | The Hoodlums |
| Chapter 4 | Enigmatic Spectre |
| Chapter 12 | Enigmatic Spectre |
| Chapter 17 | M.O.T.H. Unit Brain Pod Swordipede |
Monster Variants & Optional Sub-Bosses
| All Monster Variants & Optional Sub-Bosses | |
|---|---|
| Chapter 3 | Doomrat Cerulean Drake Wrath Hound |
| Chapter 8 | Hedgehog Pie King Mark II Monodrive Venomantis Chromogger |
| Chapter 14 | Rust Drake Tonberry Trypapolis Type-0 Behemoth |
| Chapter 17 | Malboro |
Comment
If you have access to that accessory then you wouldn't have problem with this boss.
Author
How to Beat The Arsenal | Boss Fight Guide (Normal & Hard)
improvement survey
03/2026
improving Game8's site?

Your answers will help us to improve our website.
Note: Please be sure not to enter any kind of personal information into your response.

We hope you continue to make use of Game8.
Rankings
- We could not find the message board you were looking for.
Gaming News
Popular Games

Genshin Impact Walkthrough & Guides Wiki

Honkai: Star Rail Walkthrough & Guides Wiki

Umamusume: Pretty Derby Walkthrough & Guides Wiki

Pokemon Pokopia Walkthrough & Guides Wiki

Resident Evil Requiem (RE9) Walkthrough & Guides Wiki

Monster Hunter Wilds Walkthrough & Guides Wiki

Wuthering Waves Walkthrough & Guides Wiki

Arknights: Endfield Walkthrough & Guides Wiki

Pokemon FireRed and LeafGreen (FRLG) Walkthrough & Guides Wiki

Pokemon TCG Pocket (PTCGP) Strategies & Guides Wiki
Recommended Games

Diablo 4: Vessel of Hatred Walkthrough & Guides Wiki

Fire Emblem Heroes (FEH) Walkthrough & Guides Wiki

Yu-Gi-Oh! Master Duel Walkthrough & Guides Wiki

Super Smash Bros. Ultimate Walkthrough & Guides Wiki

Pokemon Brilliant Diamond and Shining Pearl (BDSP) Walkthrough & Guides Wiki

Elden Ring Shadow of the Erdtree Walkthrough & Guides Wiki

Monster Hunter World Walkthrough & Guides Wiki

The Legend of Zelda: Tears of the Kingdom Walkthrough & Guides Wiki

Persona 3 Reload Walkthrough & Guides Wiki

Cyberpunk 2077: Ultimate Edition Walkthrough & Guides Wiki
All rights reserved
© SQUARE ENIX CO., LTD. All Rights Reserved.
CHARACTER DESIGN:TETSUYA NOMURA/ROBERTO FERRARI
The copyrights of videos of games used in our content and other intellectual property rights belong to the provider of the game.
The contents we provide on this site were created personally by members of the Game8 editorial department.
We refuse the right to reuse or repost content taken without our permission such as data or images to other sites.


![Everwind Review [Early Access] | The Shaky First Step to A Very Long Journey](https://img.game8.co/4440226/ab079b1153298a042633dd1ef51e878e.png/thumb)

![Monster Hunter Stories 3 Review [First Impressions] | Simply Rejuvenating](https://img.game8.co/4438641/2a31b7702bd70e78ec8efd24661dacda.jpeg/thumb)


I gave the Gotterdammerung to Aerith and spammed her Planet Protection limit break. Negates almost all of The Arsenal's damage, except homing missiles. Just baited his Primary Fire and went to down on his cannon with magic.